We have reached the end of our series on deploying to OCI using the Hackathon Starter Kit.
For this last article, we will see how to deploy an application using Helidon (Java), the MySQL REST Service, and OCI GenAI with Lanchain4J.
We use Helidon because it’s a cool, open-source framework developed by Oracle. It’s lightweight and fast. The latest version, 4.3.0, includes AI-related features such as LangChain4j, which allows us to integrate AI capabilities into our application via OCI AI Services.
Prerequisities
The first thing we need to do is verify that we have all the required Java and Maven versions: Java 21 and the corresponding Maven version.
We also need our OCI config file to access the AI Services.
We need the Sakila sample database.
And finally, we need the code of our application, which is available on GitHub: helidon-mrs-ai.
Java 21 and Maven
We check on our compute instance what is installed, we can refer to part 3 of the series:
[opc@webserver ~]$ java -version
openjdk version "17.0.17" 2025-10-21 LTS
OpenJDK Runtime Environment (Red_Hat-17.0.17.0.10-1.0.1) (build 17.0.17+10-LTS)
OpenJDK 64-Bit Server VM (Red_Hat-17.0.17.0.10-1.0.1) (build 17.0.17+10-LTS, mixed mode, sharing)
For Helidon 4.3.0, we need Java 21, so as we see in part 3, we need to change the default Java to 21:
[opc@webserver ~]$ sudo update-alternatives --config java

There are 2 programs which provide 'java'.

  Selection    Command
-----------------------------------------------
*+ 1           java-17-openjdk.aarch64 (/usr/lib/jvm/java-17-openjdk-17.0.17.0.10-1.0.1.el9.aarch64/bin/java)
   2           java-21-openjdk.aarch64 (/usr/lib/jvm/java-21-openjdk-21.0.9.0.10-1.0.1.el9.aarch64/bin/java)

Enter to keep the current selection[+], or type selection number: 2

[opc@webserver ~]$ java -version
openjdk version "21.0.9" 2025-10-21 LTS
OpenJDK Runtime Environment (Red_Hat-21.0.9.0.10-1.0.1) (build 21.0.9+10-LTS)
OpenJDK 64-Bit Server VM (Red_Hat-21.0.9.0.10-1.0.1) (build 21.0.9+10-LTS, mixed mode, sharing)
Now, let’s verify the Maven version:
[opc@webserver ~]$ mvn -version
Apache Maven 3.6.3 (Red Hat 3.6.3-22)
Maven home: /usr/share/maven
Java version: 17.0.17, vendor: Red Hat, Inc., runtime: /usr/lib/jvm/java-17-openjdk-17.0.17.0.10-1.0.1.el9.aarch64
Default locale: en_US, platform encoding: UTF-8
OS name: "linux", version: "6.12.0-105.51.5.el9uek.aarch64", arch: "aarch64", family: "unix"
This is not the one we need; we have to install it:
[opc@webserver ~]$ sudo dnf install maven-openjdk21
....
[opc@webserver ~]$ mvn -version
Apache Maven 3.6.3 (Red Hat 3.6.3-22)
Maven home: /usr/share/maven
Java version: 21.0.9, vendor: Red Hat, Inc., runtime: /usr/lib/jvm/java-21-openjdk-21.0.9.0.10-1.0.1.el9.aarch64
Default locale: en_US, platform encoding: UTF-8
OS name: "linux", version: "6.12.0-105.51.5.el9uek.aarch64", arch: "aarch64", family: "unix
Perfect, this is what we need; we can proceed to the next step.
OCI Config
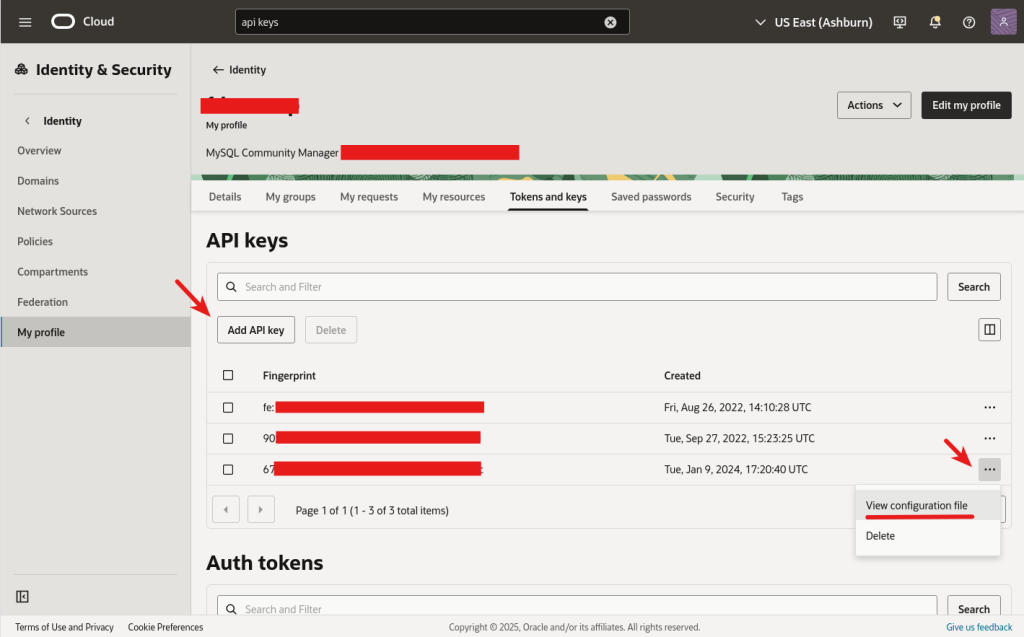
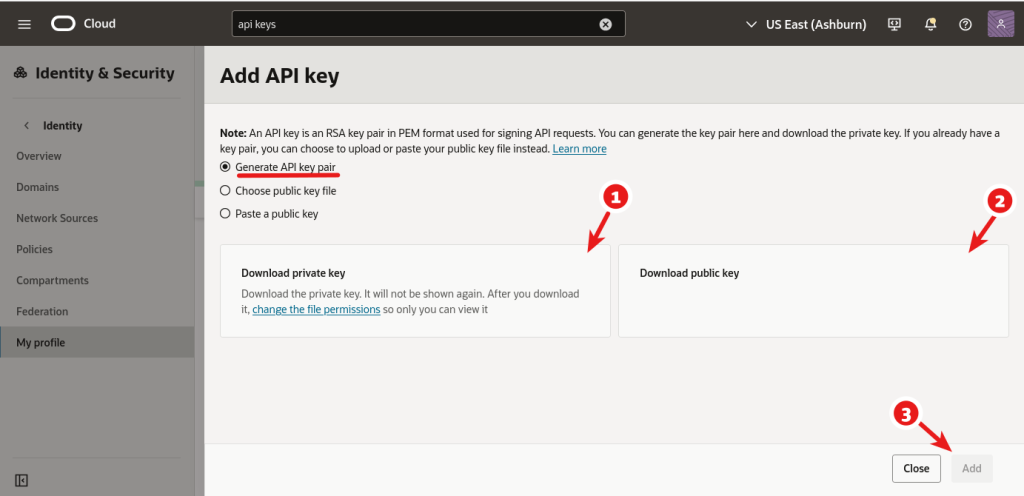
To access the Gen AI Services on OCI, we need to provide some information to enable access. The easiest way is to generate an OCI config file.
You need to use the OCI Console and use an existing or create a new API Key:
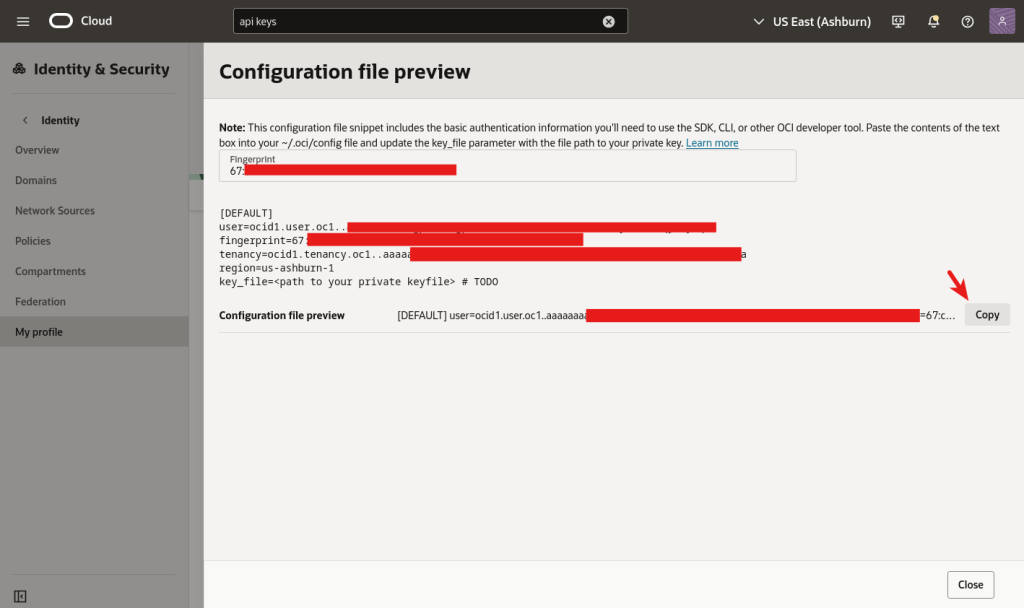
Now, we need to copy the private key to our compute instance (using ssh, see part 2), and on the compute instance, we create the folder ~/.oci, and we create the file config in which we paste the configuration:
[laptop]$ scp -i key.pem <API_PRIVATE_KEY> opc@<webserver_public_ip>:
[laptop]$ ssh -i key.pem opc@<webserver_public_ip>

[opc@webserver ~]$ mkdir ~/.oci
[opc@webserver ~]$ vi ~/.oci/config

[opc@webserver ~]$ chmod 600 <API_PRIVATE_KEY>
Don’t forget to update the key_file entry in the .oci/config file to match the API_PRIVATE_KEY path, such as/home/opc/my_priv.pem.
Sakila Database
We will use the Sakila database in our application. This is how to install it:
[opc@webserver ~]$ wget https://downloads.mysql.com/docs/sakila-db.tar.gz
[opc@webserver ~]$ tar zxvf sakila-db.tar.gz
[opc@webserver ~]$ mysqlsh admin@<mysql_heatwave_ip>

 SQL > source 'sakila-db/sakila-schema.sql'
 SQL > source 'sakila-db/sakila-data.sql'
Installing the code
Finally, we will deploy the code to our compute instance. We need to first install git:
[opc@webserver ~]$ sudo dnf install git -yAnd we fetch the code:
[opc@webserver ~]$ git clone https://github.com/lefred/helidon-mrs-ai.gitThe Database
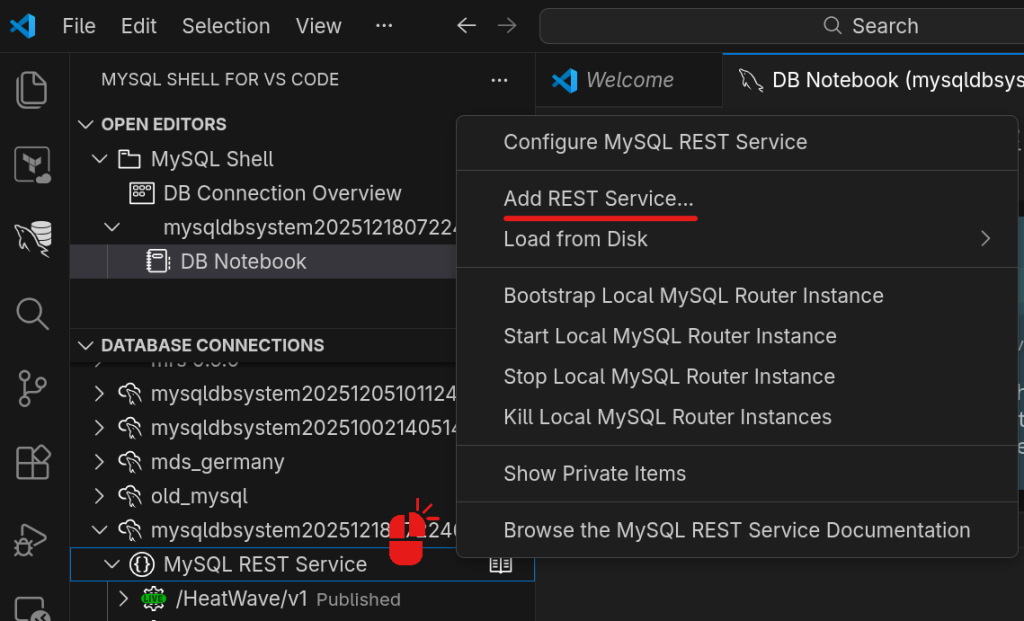
Now we need to add the Sakila schema to the REST Service (see part 8) and create a new table that will store our users’ credentials:
SQL > use sakila;
SQL> CREATE TABLE `users` (
`user_id` int unsigned NOT NULL AUTO_INCREMENT,
`firstname` varchar(30) DEFAULT NULL,
`lastname` varchar(30) DEFAULT NULL,
`username` varchar(30) DEFAULT NULL,
`email` varchar(50) DEFAULT NULL,
`password_hash` varchar(60) DEFAULT NULL,
`updated_at` timestamp NOT NULL DEFAULT CURRENT_TIMESTAMP
ON UPDATE CURRENT_TIMESTAMP,
PRIMARY KEY (`user_id`)
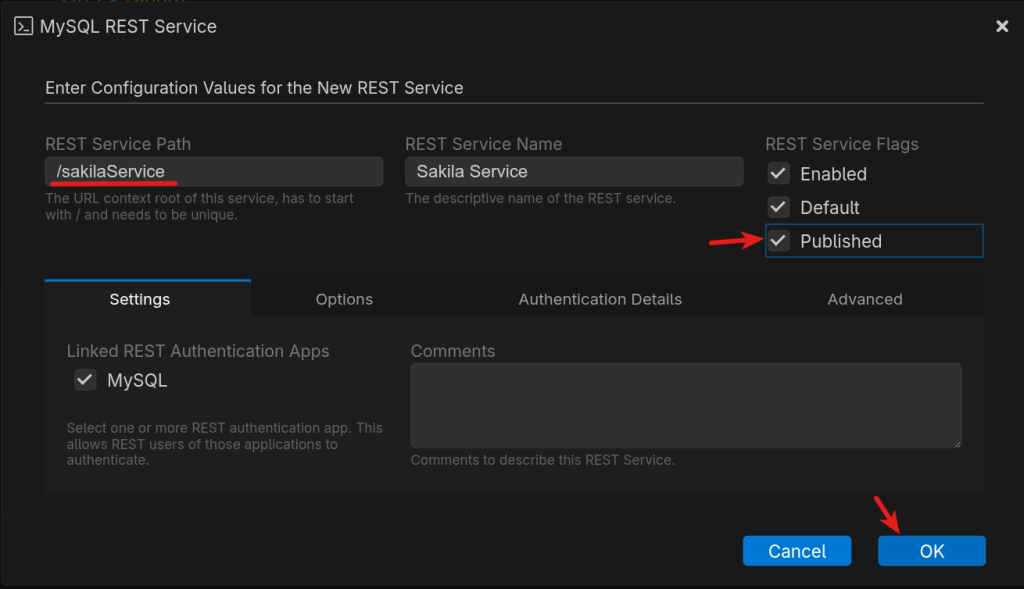
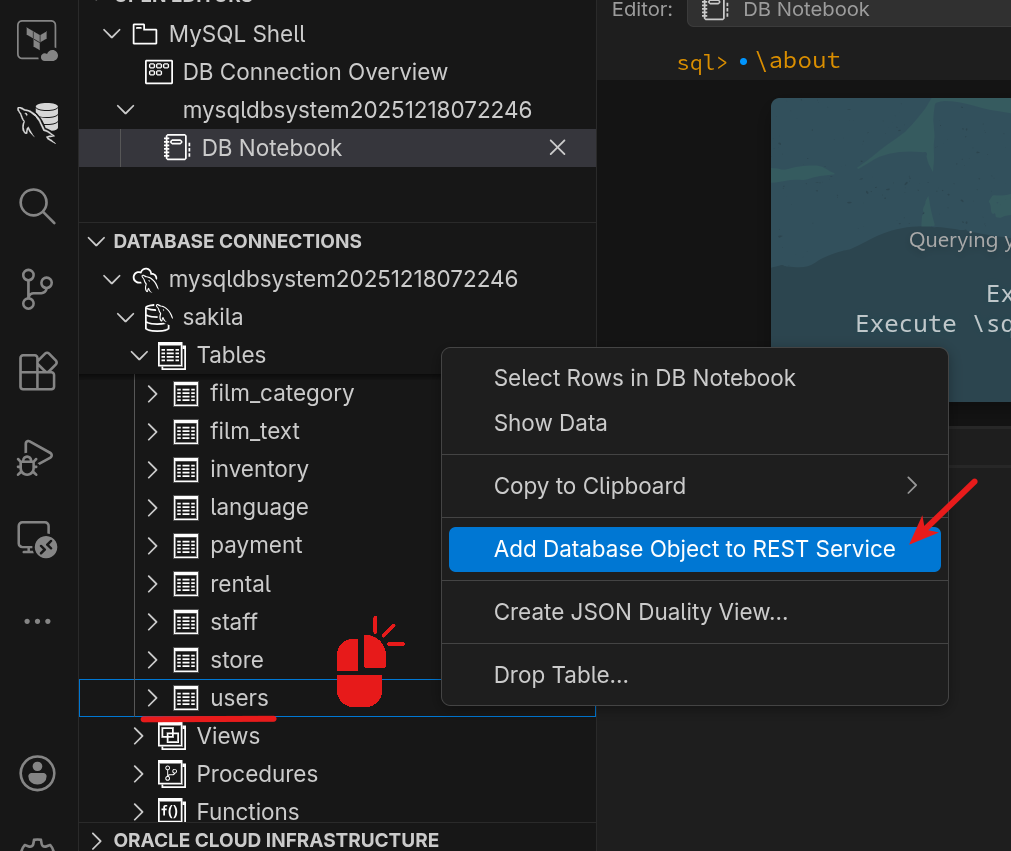
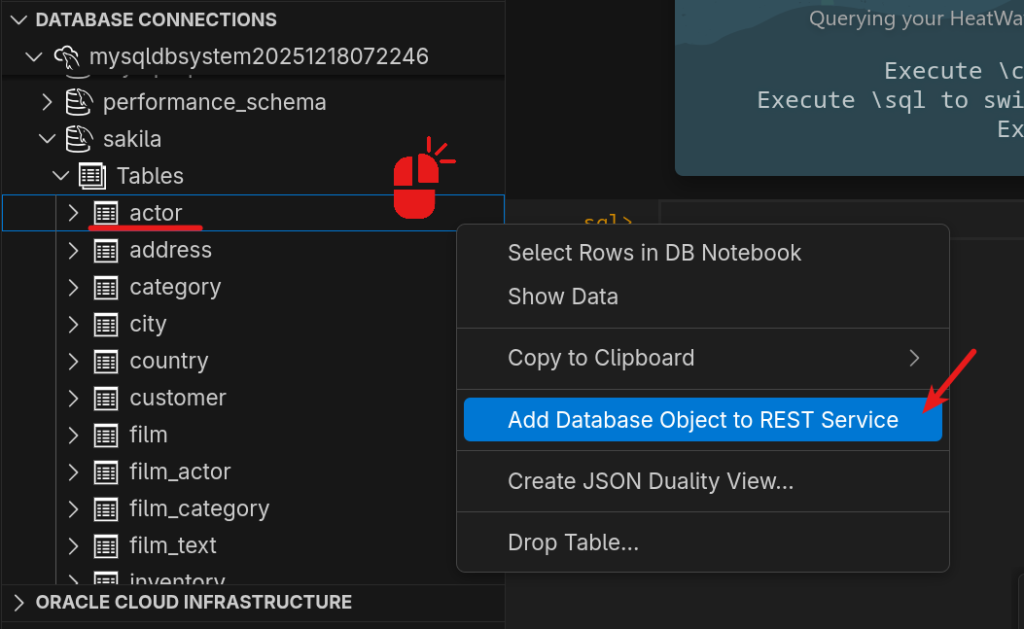
) ENGINE=InnoDB DEFAULT CHARSET=utf8mb4 COLLATE=utf8mb4_0900_ai_ciWe create a new service, and we add the new users and the actor table into it:

And for the actor table, we also allow DML (INSERT, UPDATE, DELETE), and we select several extra links to other tables, such as the films, the language, and the category:
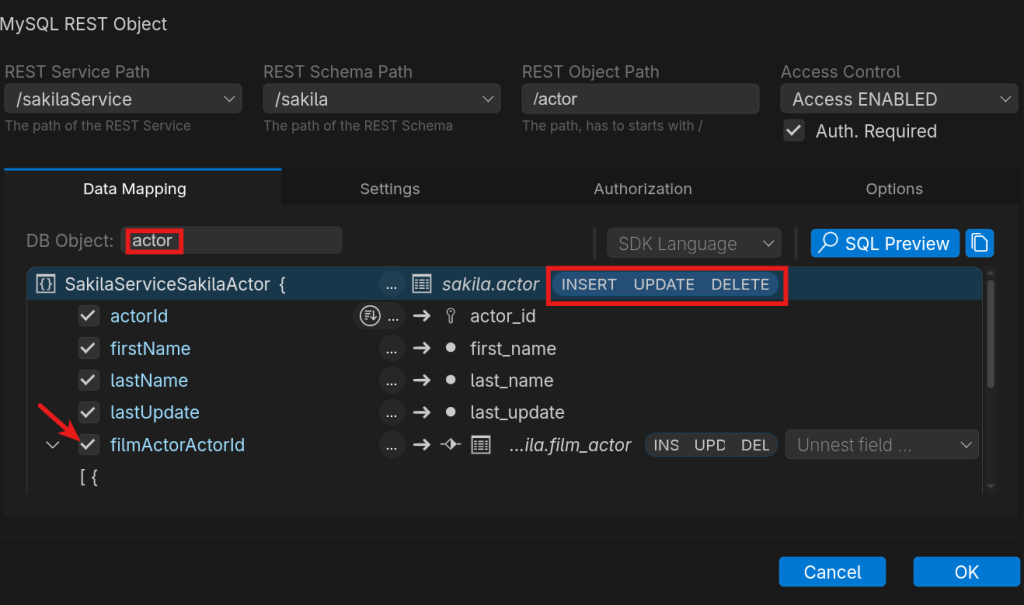
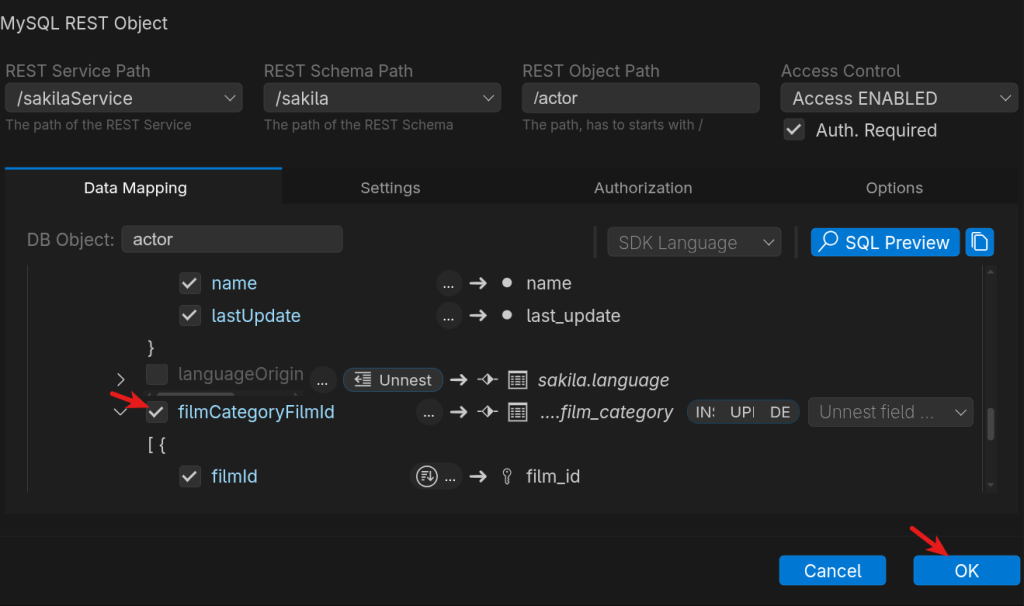
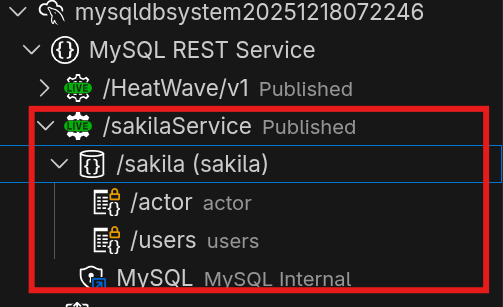
And then, all is ready for the REST Service:
Configuring the app
Now, we will configure the application before building it. In the helidon-mrs-ai/src/main/resources/ directory, there is a template (application.yaml.template) we will use:
[opc@webserver ~]$ cd helidon-mrs-ai/src/main/resources
[opc@webserver resources]$ cp application.yaml.template application.yaml
We will now modify the content of the application.yaml file with the correct information related to our environment.
In the mrs section, the URL must match the MySQL HeatWave DB System’s IP and the service path we created. In my case it should be:
mrs:
  url: "https://10.0.1.74/sakilaService"
For the langchain4j entries, please pay attention to your region and compartment-id. You can find this information in the OCI Console in the Analytics & AI section. See part 6 in the view code of the chat example.
Don’t forget to use a model that is also available in your region.
You may have noticed in the configuration file that port 8080 will be used; you then need to allow connections to it from the Internet:
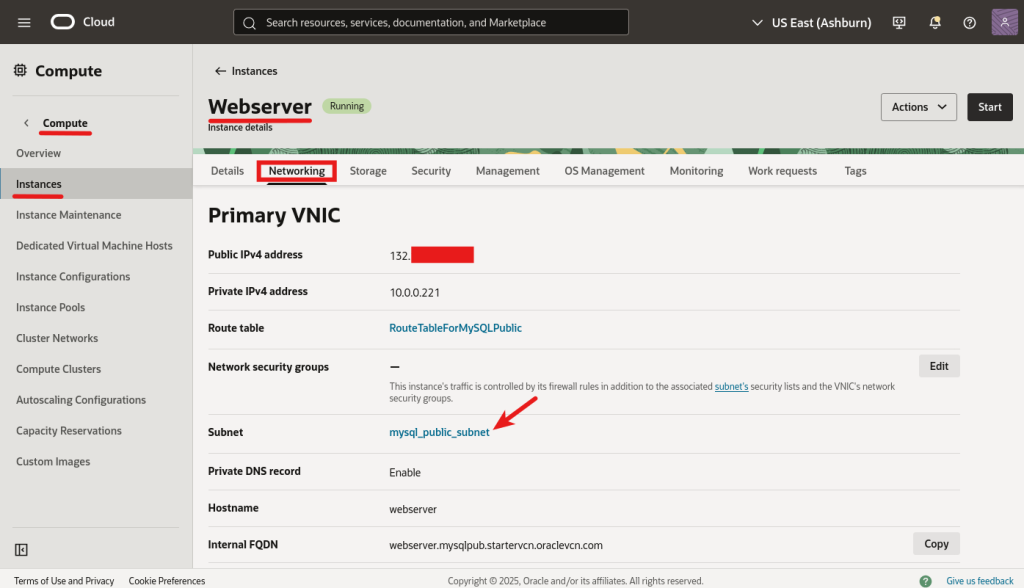
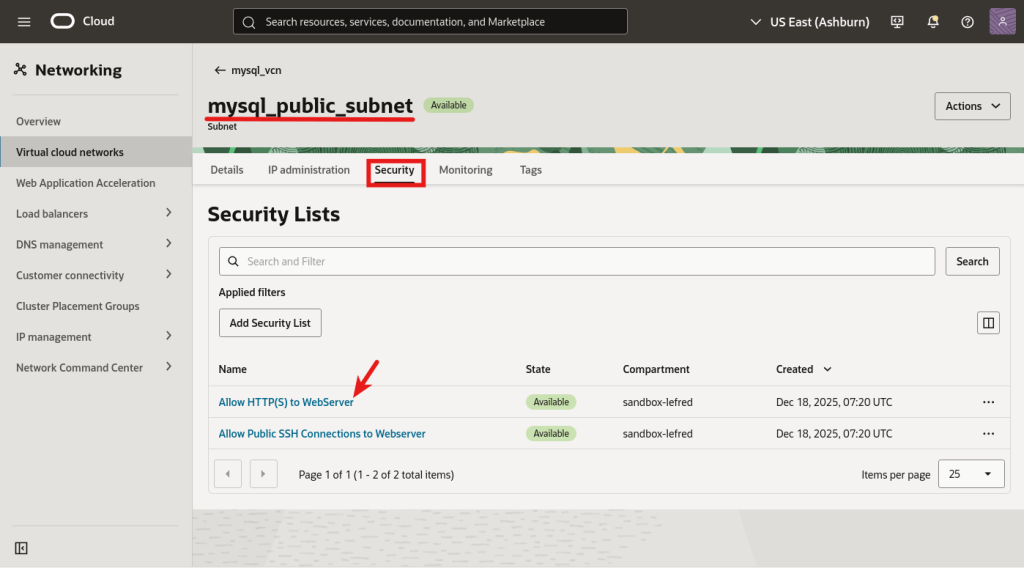
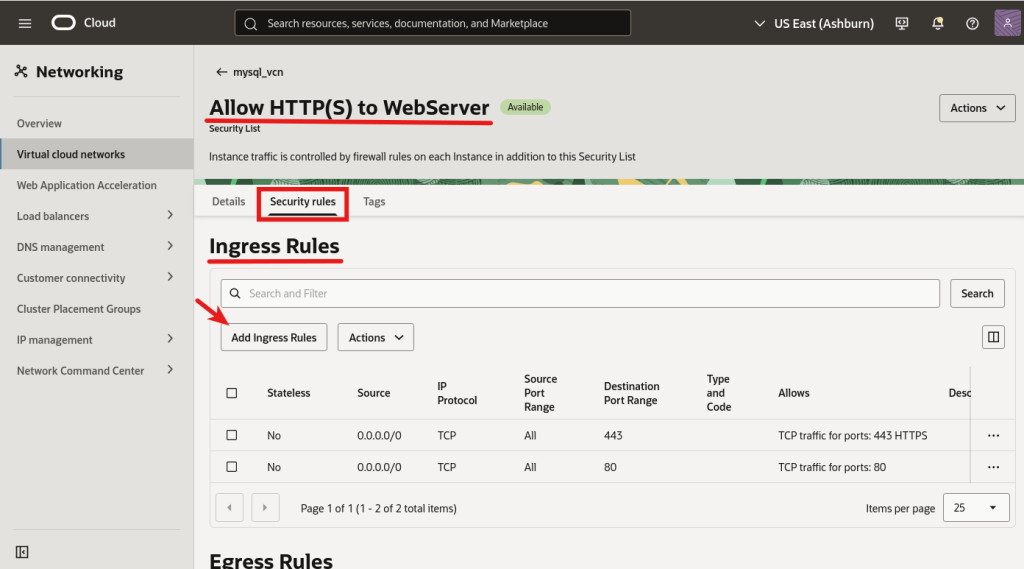
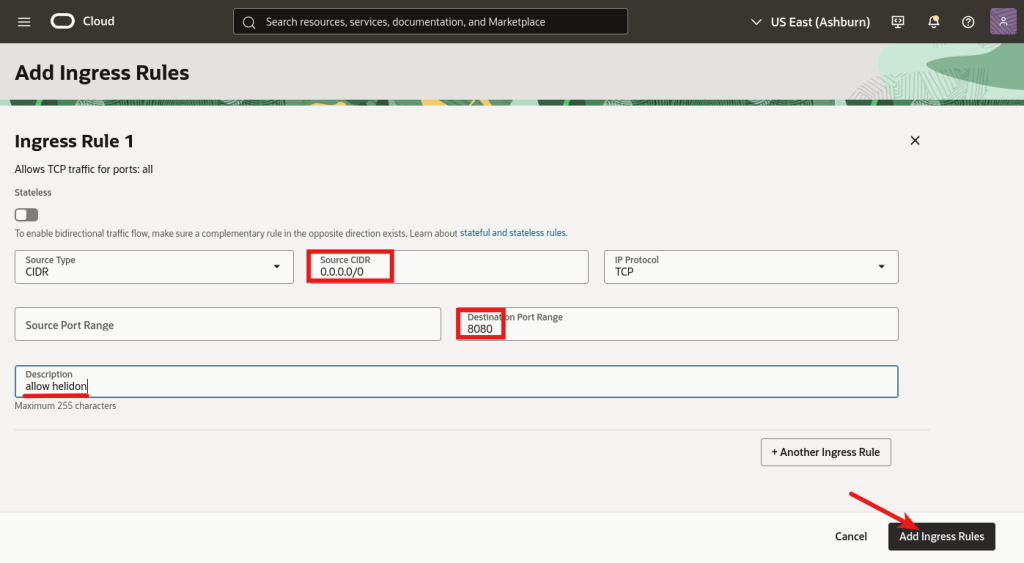
We have allowed access in OCI, now we also will enable access into the compute instance’s local firewall:
[opc@webserver ~]$ sudo firewall-cmd --zone=public --permanent --add-port=8080/tcp
success
[opc@webserver ~]$ sudo firewall-cmd --reload
success
Helidon
Now we are ready to deploy our Helidon application:
[opc@webserver ~]$ cd ~/helidon-mrs-ai/
[opc@webserver helidon-mrs-ai]$ mvn clean install -DskipTests package
Once built, we can run it:
[opc@webserver helidon-mrs-ai]$ java -jar target/helidon-mrs-ai.jarWe can access the public IP of our webserver (the compute instance) on a browser using port 8080:
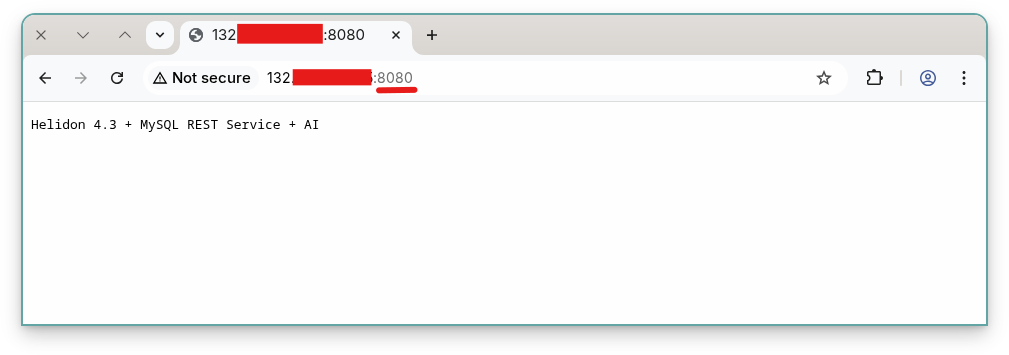
As you may remember, we created a user table to store our users; we still need to make one user. To know its hash password, we need to generate it. We have an endpoint that will generate such a hash: _debug/hash?pwd=<the password>:
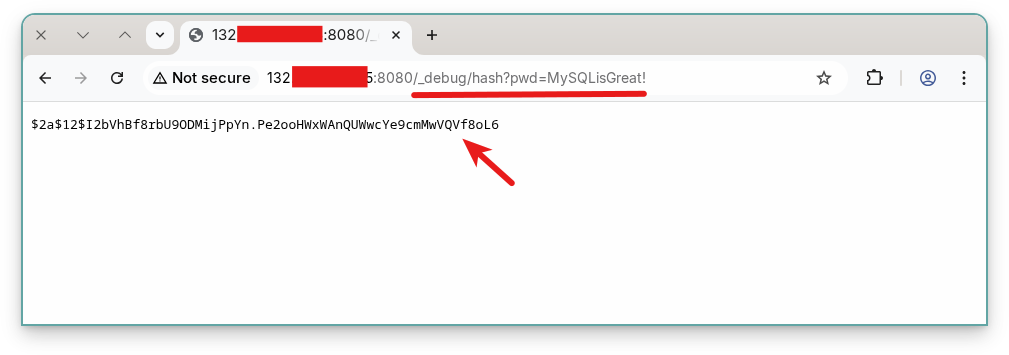
We use that hash while creating our user:
SQL > use sakila
SQL > users (firstname, username, password_hash)
      values ('lefred', 'fred',
      '$2a$12$I2bVhBf8rbU9ODMijPpYn.Pe2ooHWxWAnQUWwcYe9cmMwVQVf8oL6')
We can now access the /ui endpoint that will redirect us to the login page:
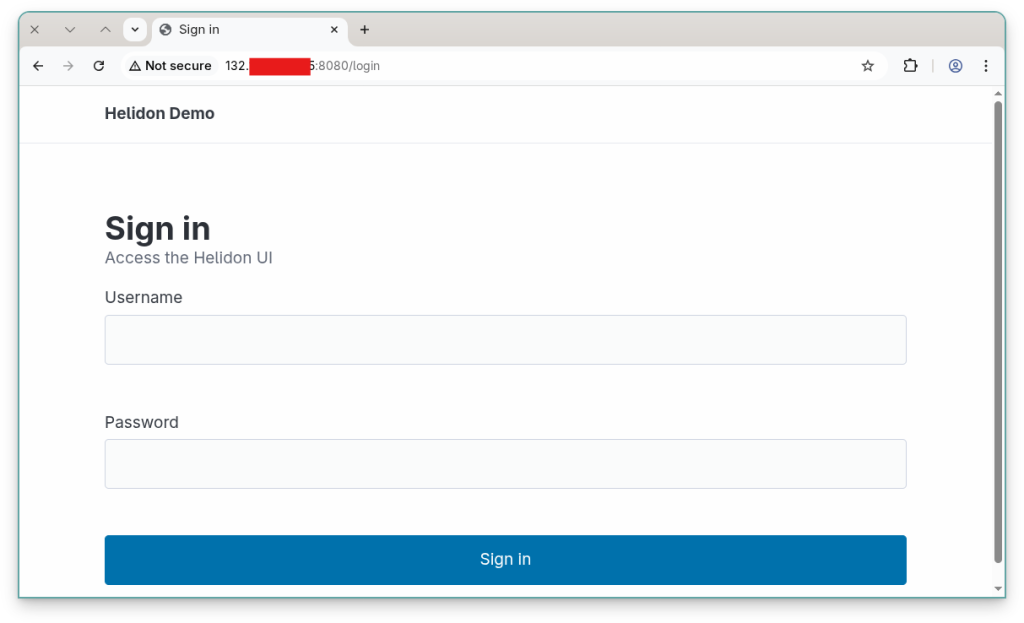
And when successfully logged, we can access the application:
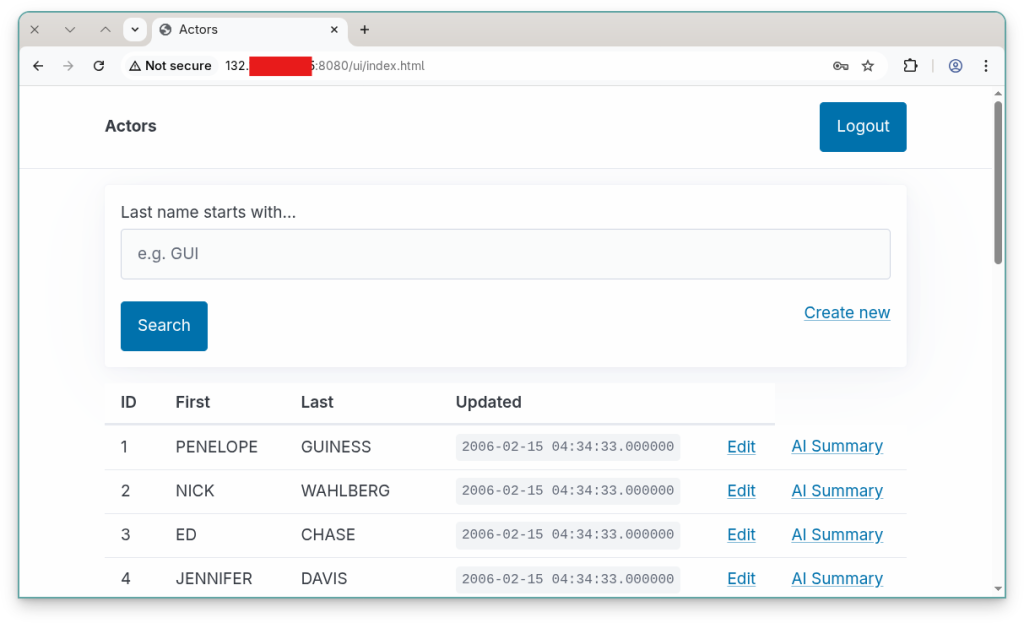
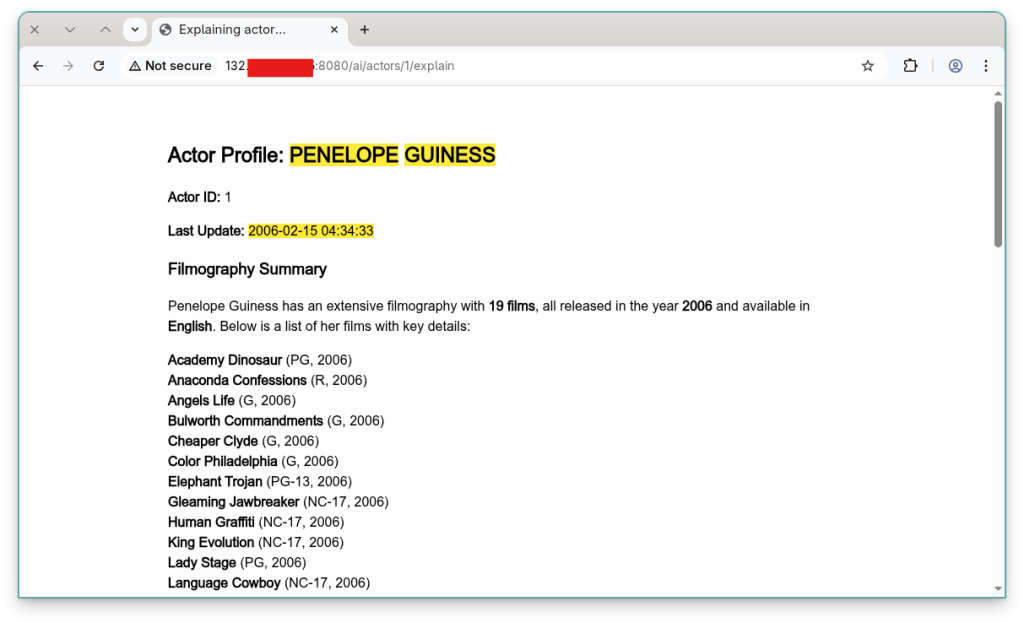
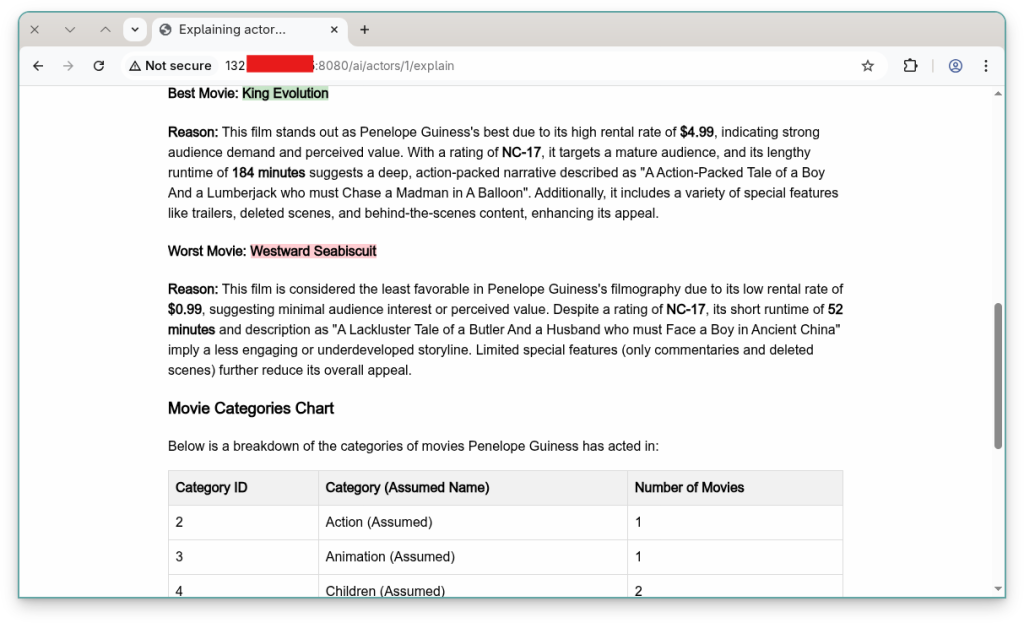
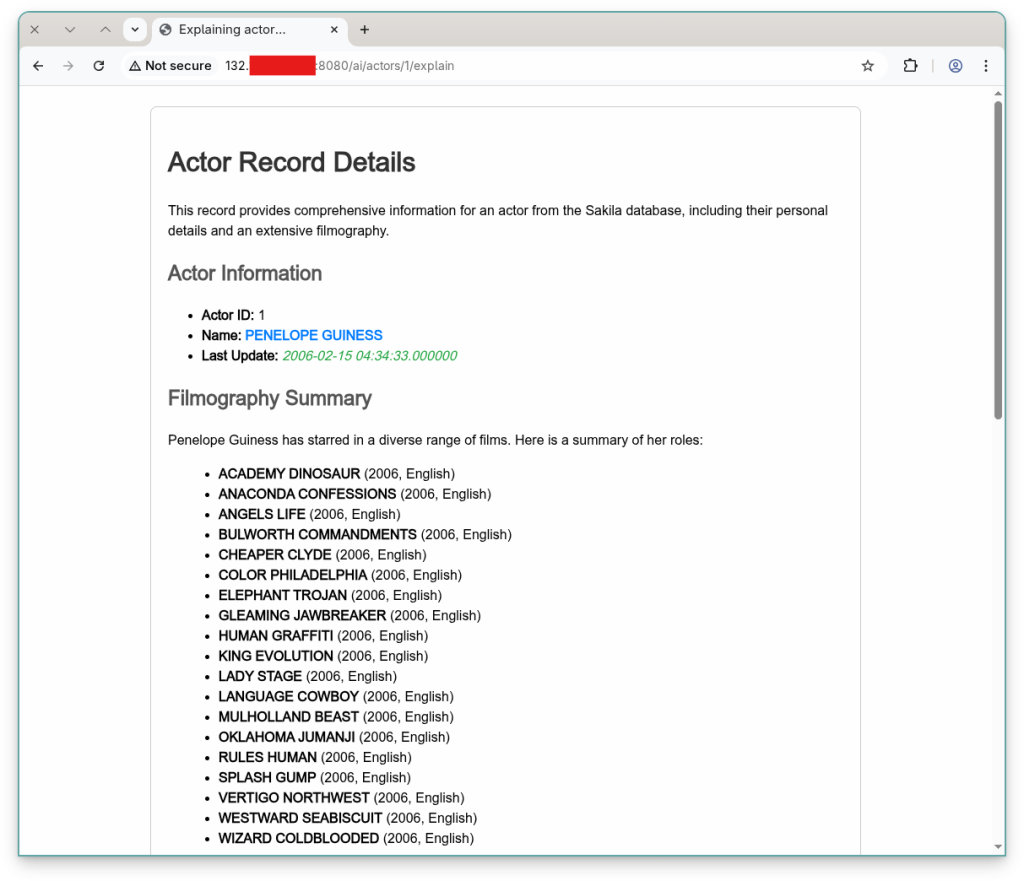
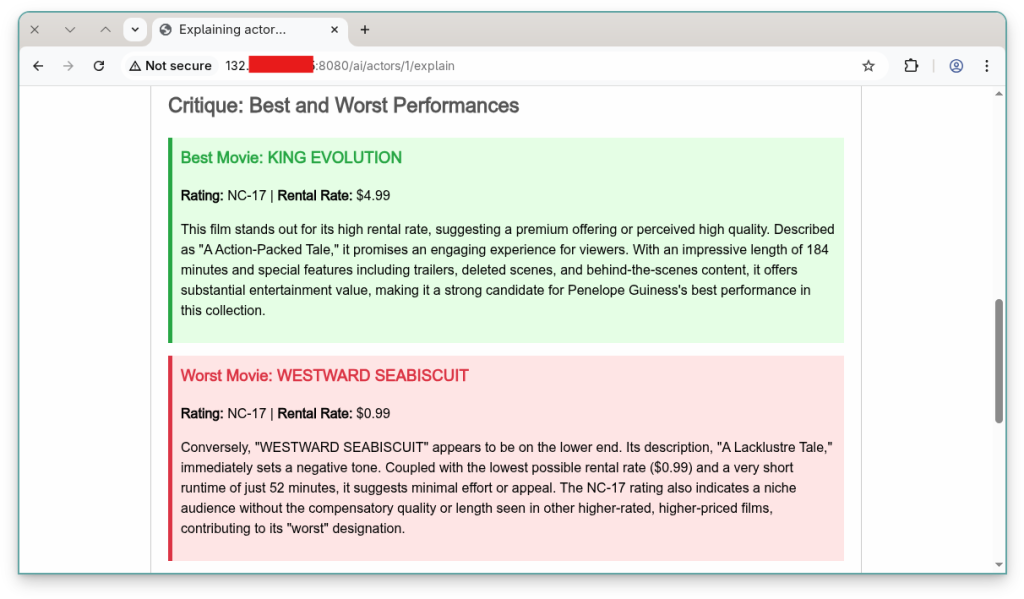
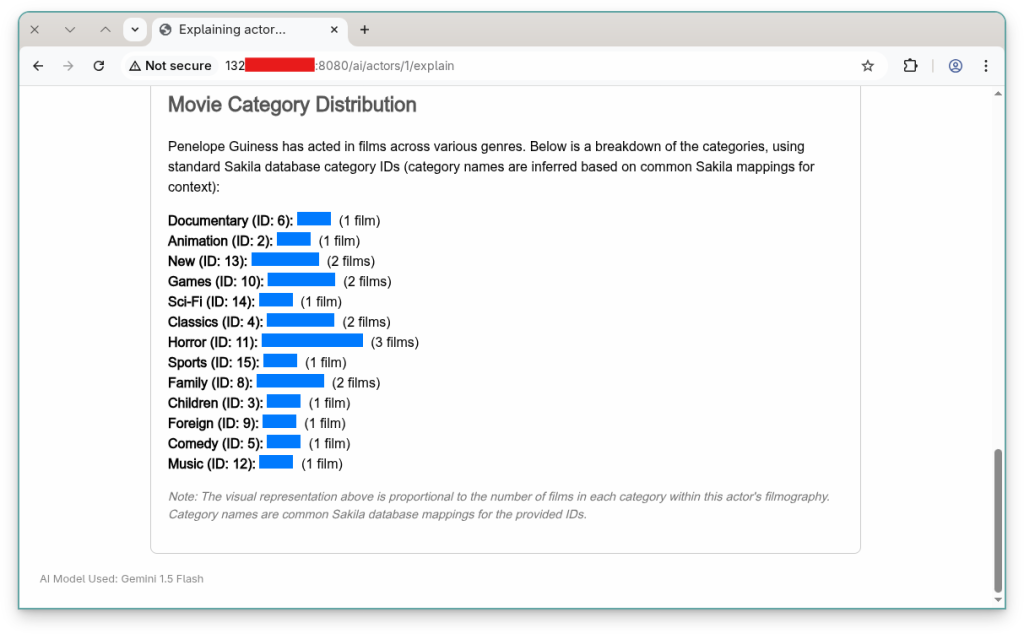
If we select the AI Summary for one actor, we will get a summary generated by the model we configured. The following example was generated using xai.grok-3:

The following summary was generated using google.gemini-2.5-flash:
Conclusion
This last step wraps up the whole “Deploying on OCI with the starter kit” journey by putting all the building blocks together: a Helidon (Java) application running on a compute instance, a MySQL HeatWave database exposed through the MySQL REST Service, and OCI GenAI consumed via LangChain4j to add an AI-powered summary feature.
We saw how to deploy and start writing an application in OCI and benefit from the power of the available LLM models.
I hope you enjoyed the journey and that you are ready to start writing your own app… happy coding!
- https://blogs.oracle.com/mysql/deploying-on-oci-using-the-starter-kit-part-1
- https://blogs.oracle.com/mysql/deploying-on-oci-with-the-starter-kit-part-2
- https://blogs.oracle.com/mysql/deploying-on-oci-with-the-starter-kit-part-3-applications
- https://blogs.oracle.com/mysql/deploying-on-oci-with-the-starter-kit-part-4-connecting-to-the-database
- https://blogs.oracle.com/mysql/deploying-on-oci-with-the-starter-kit-part-5-connecting-to-the-database-ii
- https://blogs.oracle.com/mysql/deploying-on-oci-with-the-starter-kit-part-6-genai
- https://blogs.oracle.com/mysql/deploying-on-oci-with-the-starter-kit-part-7-genai-in-heatwave
- https://blogs.oracle.com/mysql/deploying-on-oci-with-the-starter-kit-part-8-using-mysql-rest-service
- https://blogs.oracle.com/mysql/deploying-on-oci-with-the-starter-kit-part-9-deploying-a-full-app