The starter kit deploys a MySQL HeatWave DB System on OCI (see previous posts [1],[2],[3],[4],[5],[6],[7]) and enables the MySQL REST Service automatically:
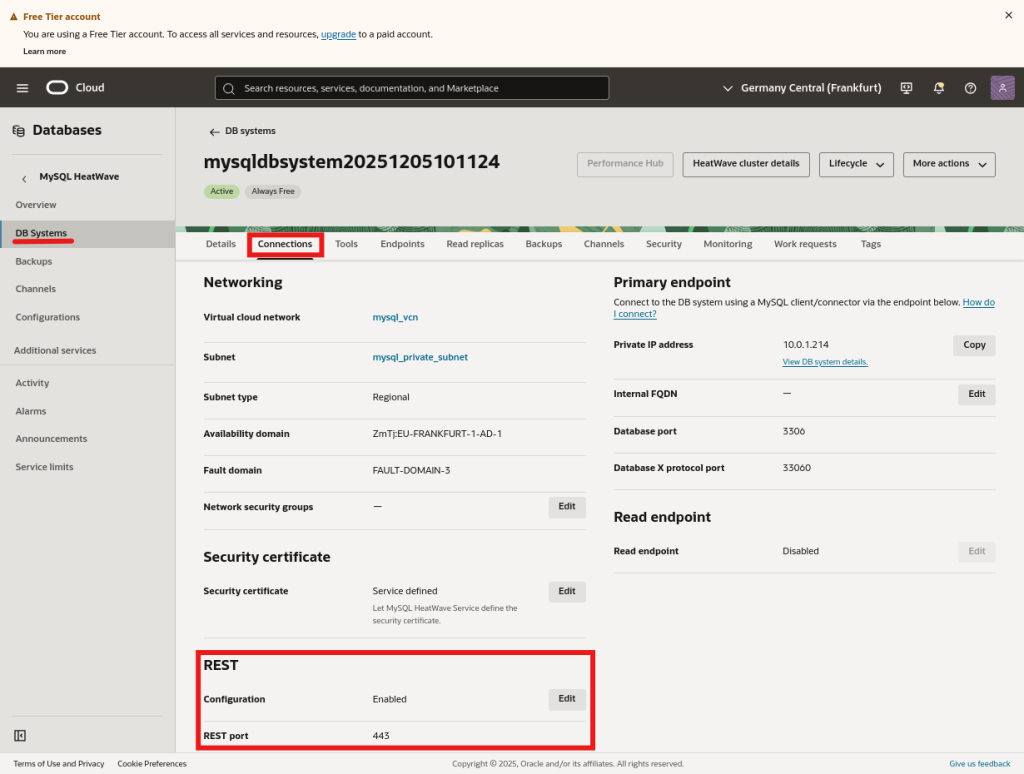
The REST Service enables us to provide access to data without requiring SQL. It also provides access to some Gen AI functionalities available in MySQL HeatWave.
Adding data to MRS using Visual Studio Code
To be able to use the MRS functionalities available in MySQL Shell for Visual Studio Code, we need to grant some privileges to our admin user:
sql> GRANT 'mysql_rest_service_admin' TO 'admin'@'%';
sql> SET DEFAULT ROLE ALL TO 'admin'@'%';
It’s recommended to close the connection and reconnect for immediate grants.
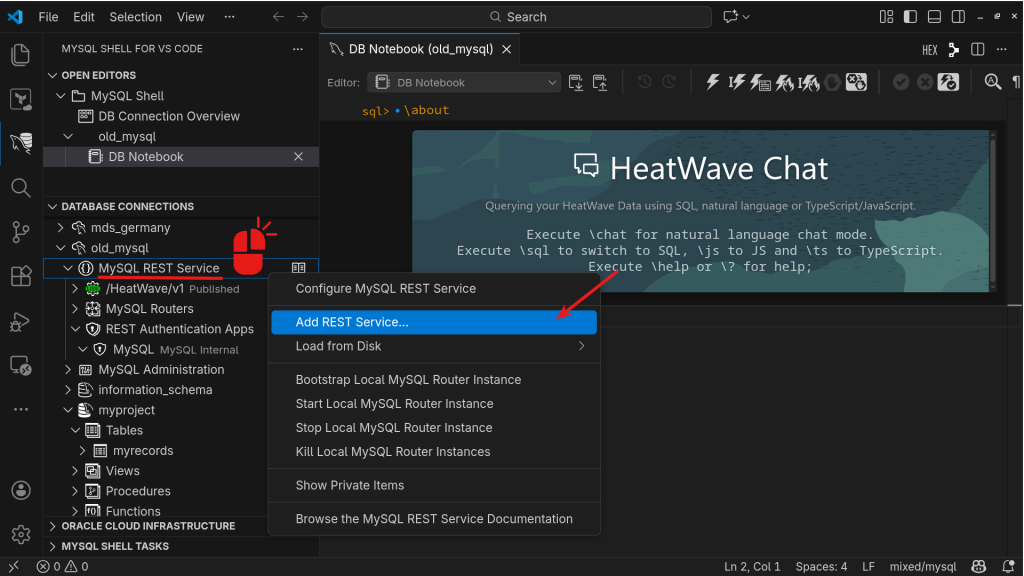
We will use MySQL Shell for Visual Studio Code to create a new table and provide access to it using MRS.
sql> create database myproject;
sql> use myproject
sql> create table myrecords (id int unsigned auto_increment primary key,
                   name varchar(20),
                   inserted timestamp default current_timestamp);
sql> insert into myrecords (name) values ('Scott'), ('Miguel'), ('Fred');
First, we need to create a new REST Service. There is already one, but it’s dedicated to HeatWave:
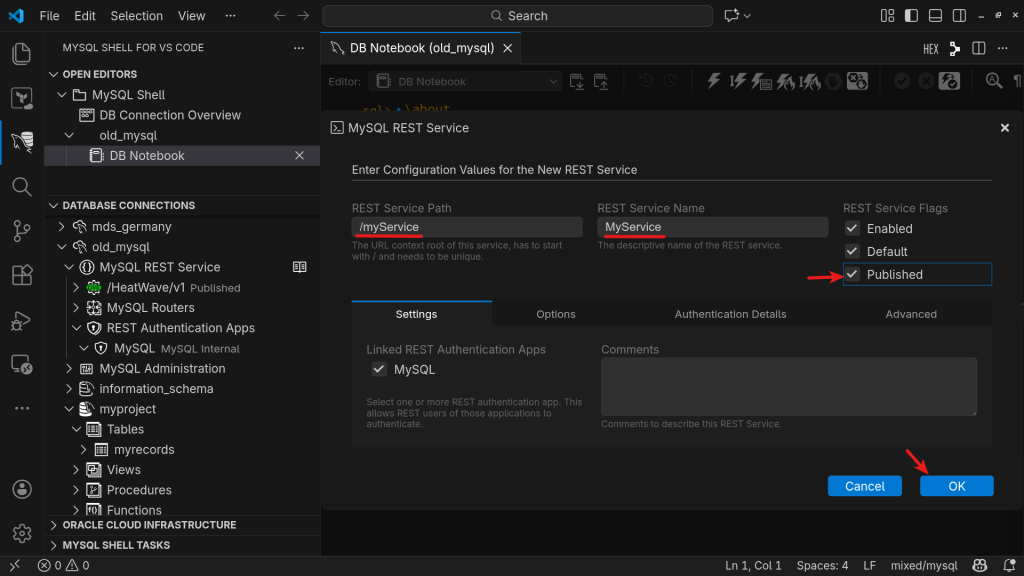
We call our service “MyService” and it’s accessible using the path /myService:
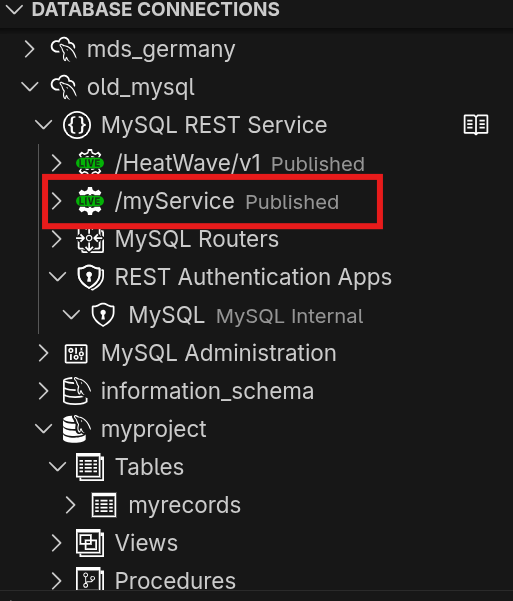
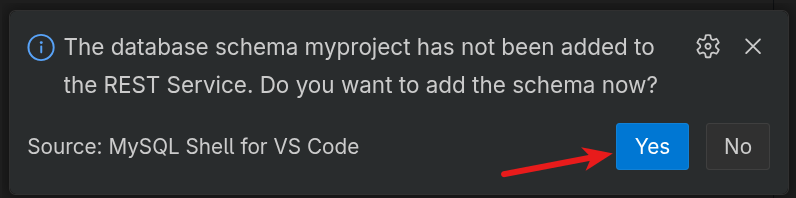
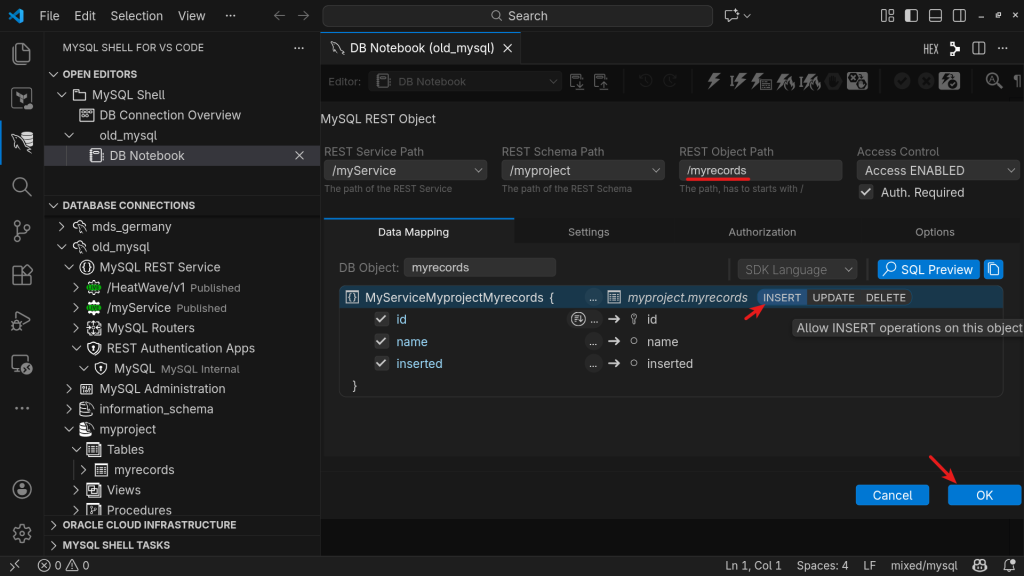
Then we need to add the schema and the table to the service:

Since the schema hasn’t been added to the service (we used a shortcut), MySQL Shell asks whether we want to add it. We say “yes”:
We also need to create a user to access our service. The MySQL App is enabled by default.
sql> create user myrest identified by 'myrestPassw0rd!';Accessing data using curl
In our compute instance, we can try to access our REST service using curl.
We need first to create a cookie (the most straightforward method with curl):
$ curl -c cookie.txt -k  -X POST  -H "Content-Type: application/json" \
   -d '{"username": "myrest",
        "password": "myrestPassw0rd!",
        "sessionType": "cookie",
        "authApp": "MySQL" }' \
  https://10.0.1.57/myService/authentication/login
{}
$ curl -s -b cookie.txt -k -X GET  https://10.0.1.57/myService/myproject/myrecords | jq
{
  "items": [
    {
      "id": 1,
      "name": "Scott",
      "links": [
        {
          "rel": "self",
          "href": "/myService/myproject/myrecords/1"
        }
      ],
      "inserted": "2025-09-25 09:52:39.000000",
      "_metadata": {
        "etag": "C1D669130D63FD76C50E617DFA2A1A982DBCFC2B38A7D4E213BD2C8872580A6D"
      }
    },
    {
      "id": 2,
      "name": "Fred",
      "links": [
        {
          "rel": "self",
          "href": "/myService/myproject/myrecords/2"
        }
      ],
      "inserted": "2025-09-25 09:52:39.000000",
      "_metadata": {
        "etag": "3E8174FCE3DBB38F0FA331E36460F9299C950522809213CC41A7AF954D0E83C4"
      }
    },
    {
      "id": 3,
      "name": "Miguel",
      "links": [
        {
          "rel": "self",
          "href": "/myService/myproject/myrecords/3"
        }
      ],
      "inserted": "2025-09-25 09:52:39.000000",
      "_metadata": {
        "etag": "6519AE07EC7874D08071BD5F52209202EDECEE040FF00EDC314C0401CA51E729"
      }
    }
  ],
  "limit": 25,
  "offset": 0,
  "hasMore": false,
  "count": 3,
  "links": [
    {
      "rel": "self",
      "href": "/myService/myproject/myrecords/"
    }
  ]
}
We can also specify a single record:
$ curl -s -b cookie.txt -k -X GET \
  https://10.0.1.57/myService/myproject/myrecords/2 | jq
{
  "id": 2,
  "name": "Fred",
  "links": [
    {
      "rel": "self",
      "href": "/myService/myproject/myrecords/2"
    }
  ],
  "inserted": "2025-09-25 09:52:39.000000",
  "_metadata": {
    "etag": "3E8174FCE3DBB38F0FA331E36460F9299C950522809213CC41A7AF954D0E83C4"
  }
}
Check the video to see the different steps in action:
Using the Client SDK
We can also use the SDK, which is very simple.
We start by downloading the SDK of our service:
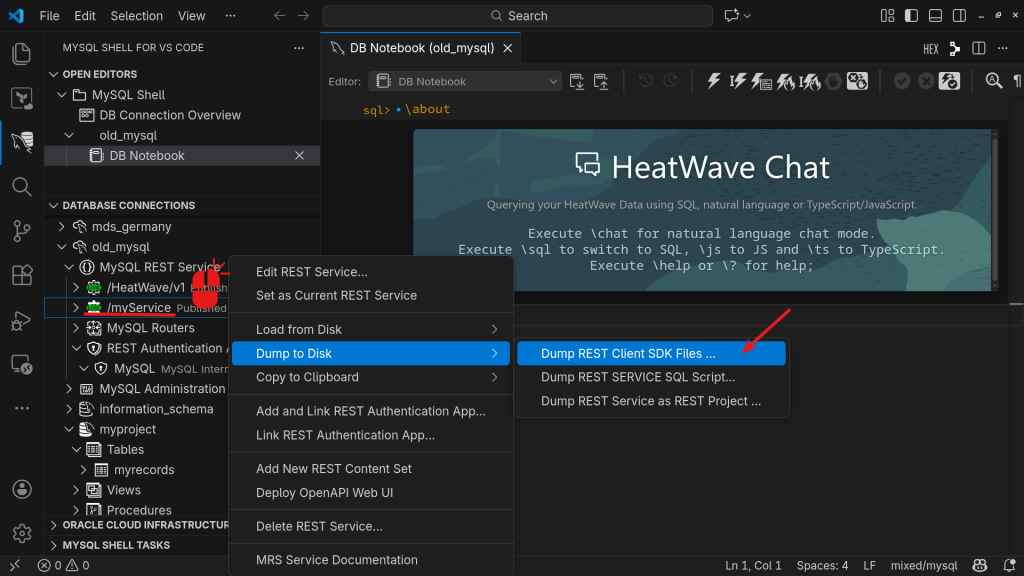
I need to use the Private IP of the MySQL HeatWave instance and select Python language for the SDK:
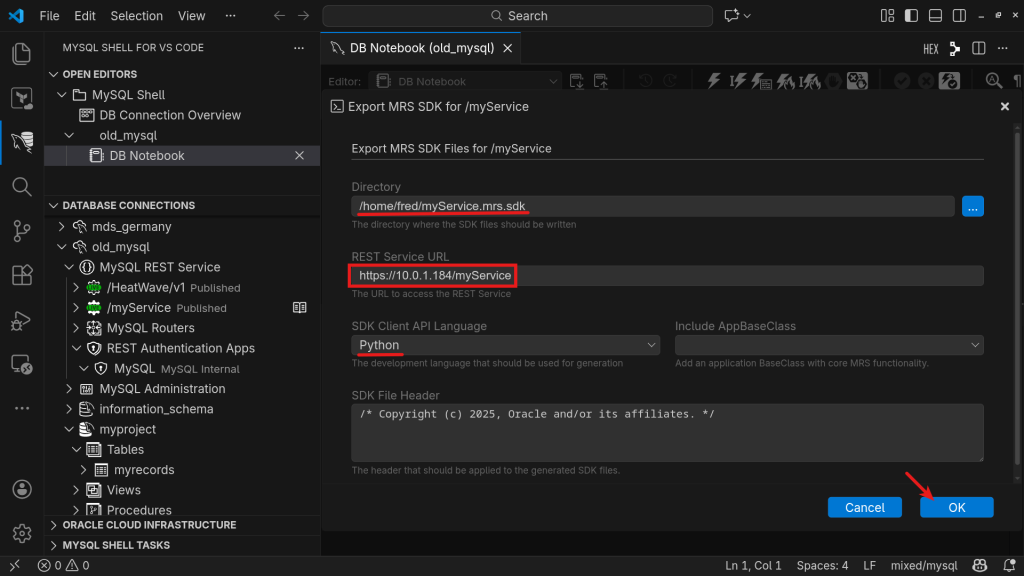

We copy that downloaded folder to our compute instance, and we need to rename it as sdk:
[laptop]$ scp -r -i key.pem -r myService.mrs.sdk opc@<public_ip_compute>:

[compute]$ mkdir myproject
[compute]$ mv myService.mrs.sdk myproject/sdk
[compute]$ cd myproject
We can now create our Python application:
from sdk.my_service import *

my_service = MyService(verify_tls_cert=False)

async def main():
    await my_service.authenticate(
            username = "myrest",
            password = "myrestPassw0rd!",
            app = "MySQL",
            )
    records = await my_service.myproject.myrecords.find()
    for record in records:
        print(record.name)

    await my_service.myproject.myrecords.create(data={"name": "Lenka"})

asyncio.run(main())
And we can execute it:
[opc@webserver myproject]$ python3.12 project.py
Scott
Fred
Miguel
Check the video to see how to use the SDK:
More Info about MRS
- https://dev.mysql.com/doc/dev/mysql-rest-service/latest/sdk.html
- https://dev.mysql.com/doc/dev/mysql-rest-service/latest/quickstart.html
Conclusion
With the MySQL REST Service deployed by the starter kit, you’ve seen how easy it is to expose data from MySQL HeatWave without writing a single line of SQL in your application. Starting from a simple table in your database, you granted the proper privileges, published the schema to MRS, and accessed it securely over HTTPS – first with plain curl, then with a generated Python SDK.
This approach gives you a clean, modern API layer on top of your database: perfect for hackathons, quick prototypes, and microservices that need to consume MySQL data or call GenAI features with minimal boilerplate. From here, you can extend the same pattern to more complex schemas, add authentication and authorization rules, or generate SDKs in other languages so every part of your stack can speak REST to MySQL HeatWave.