
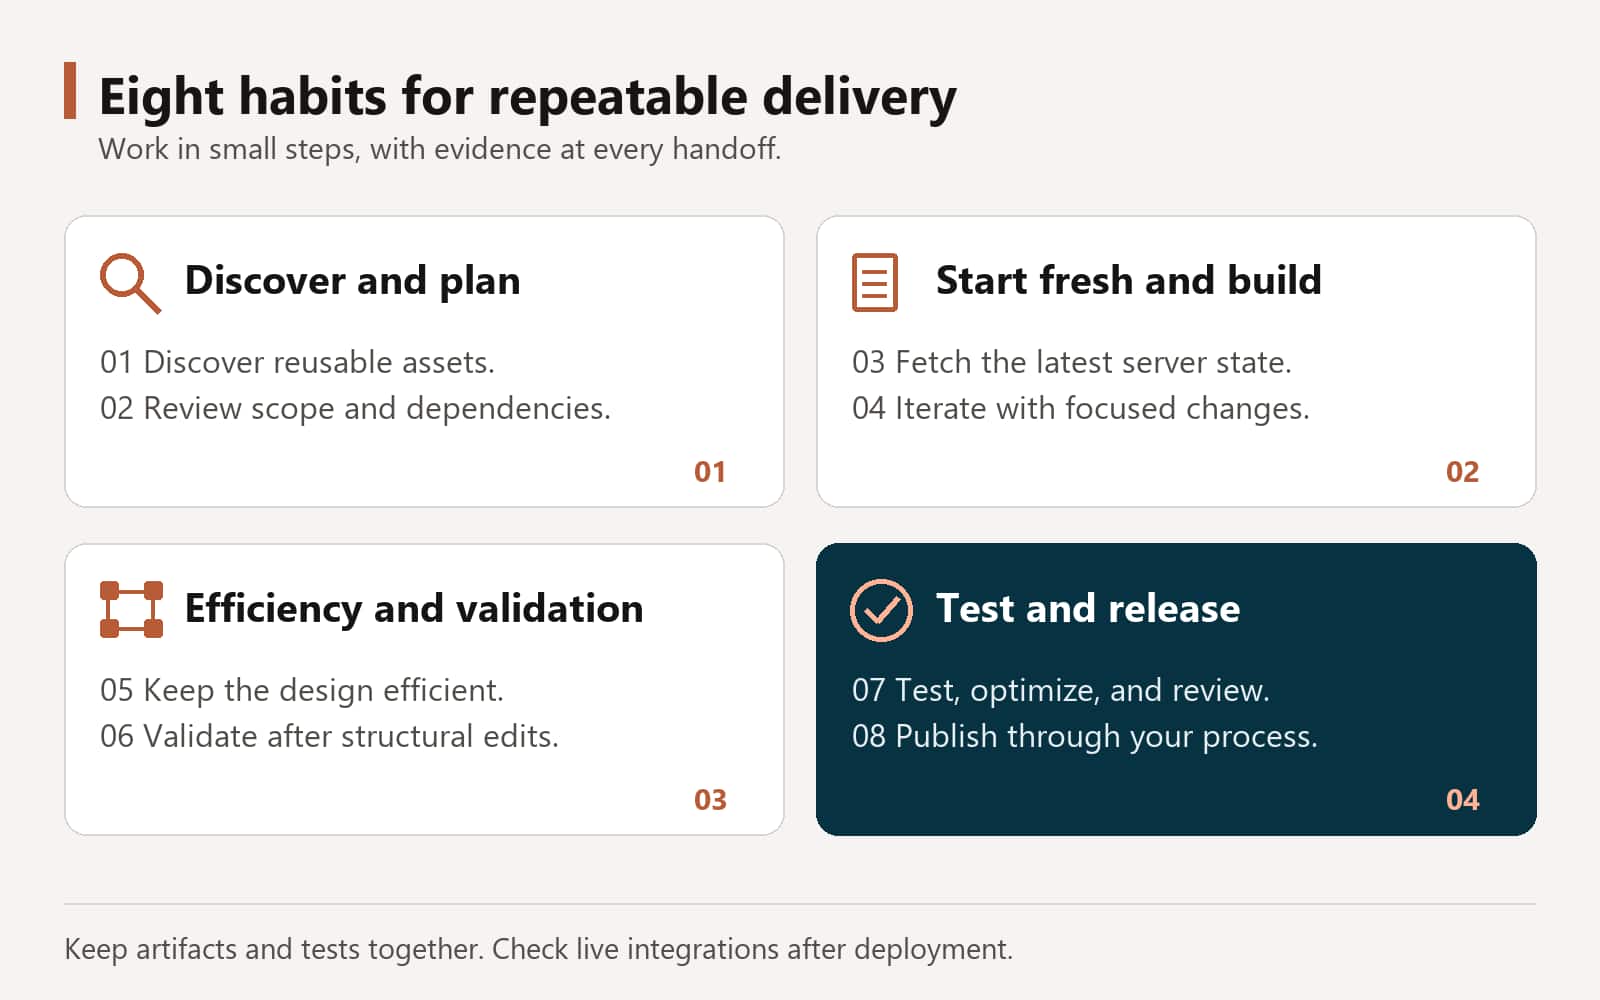
Building reliable agents with the CLI comes down to a disciplined, repeatable flow: discover the need, review the plan, then build, validate, test, and publish. Here’s what good looks like at each stage, with a request you can use.
1Discover before you build
Do
- Describe the business outcome, not the implementation.
- Let the assistant find what already exists: Business Objects, workflow agents, worker agents, connector tools, knowledge sources, and external APIs.
- Put OpenAPI describe files for the Fusion resources you need in the project root.
Validate what it finds
- Access and permissions
- Sample data quality: the asset really returns the data you need
- Tool availability
- Required operations and expected outputs
Try it: Discover
I want managers to see which team members have overdue goals. Find the existing Business Objects, workflow agents, and tools that could provide this, show me a sample of the data each one returns, and tell me what’s missing. Don’t build anything yet.
2Review the plan before building
Complex changes deserve a design review before implementation. Ask for the plan, read it, adjust it, then approve.
Scope
What will change, and which artifacts.
Dependencies
The Business Objects, agents, tools, and knowledge sources it relies on.
Approach
Workflow design, node sequence, data flow, and what runs in parallel.
Validation plan
Test scenarios and expected outputs.
Before you approve, confirm the scope is right, the dependencies are available, the design is sound, the risks are understood, and the test approach is enough.
Try it: Ask for the plan first
Before you build anything, show me your plan: what you’ll change, which artifacts, the dependencies, the node sequence and data flow, what runs in parallel, and the test scenarios with expected outputs. Wait for my approval.
3Start from the latest server state
Do
- Pull the latest DRAFT at the start of a session
- Check you’re working from the server-backed version
- Sync before editing
Avoid
- Working from a stale local copy
- Overwriting a teammate’s work
- Building on an outdated workflow
Try it: Sync before editing
Pull the latest DRAFT of position_to_job_requisition.wf from the server. If my local copy is different, show me what changed before replacing anything.
4Build and iterate locally
Experiment safely on your machine: build workflows, refine prompts, configure tools, and validate as you go. Push to the server only when the workflow is complete, validation passes, and testing succeeds.
- One change per request. Smaller requests mean smaller diffs and clearer test results.
- State the rules it can’t guess: which ID to use, what never to create, which node does a calculation.
- Scope data to the signed-in user. Never hard-code people or IDs.
5Design efficient workflows
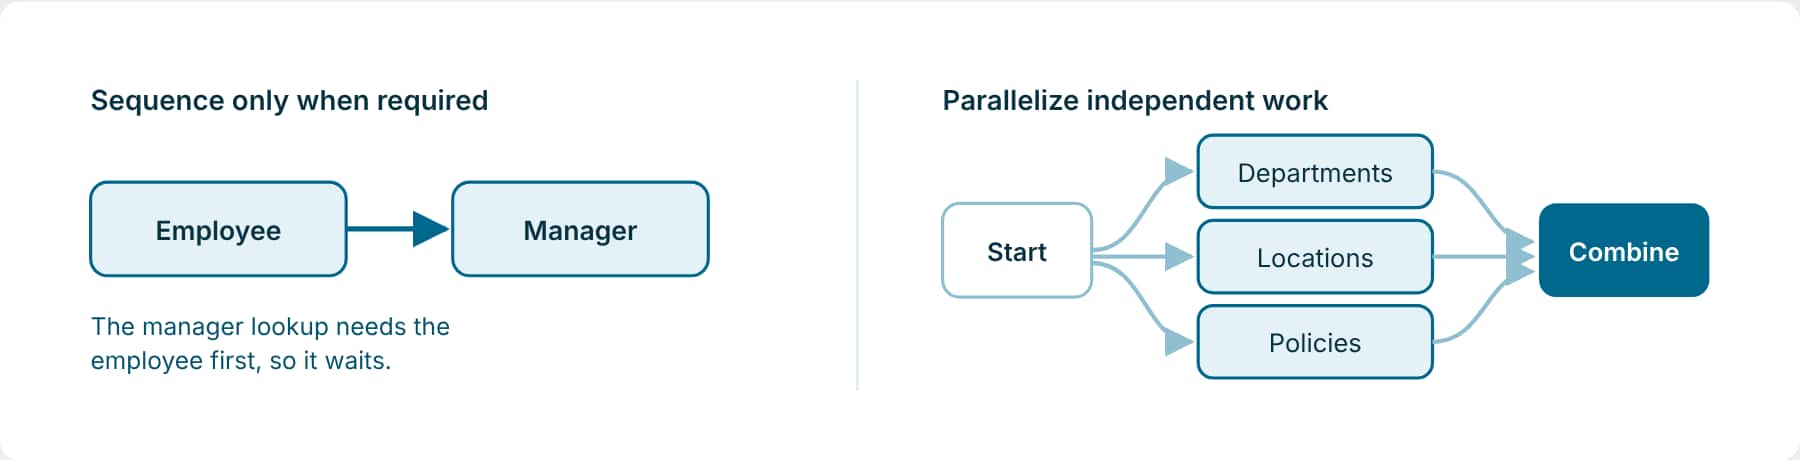
Build workflows that minimize latency and unnecessary dependencies. Run steps in sequence only when one needs the other’s result; fetch independent data in parallel.
Try it: Ask for an efficient design
Fetch the employee’s department, location, and applicable policies in parallel, since none of them depends on the others. Only look up the manager after the employee record is returned.
6Validate continuously
The assistant revalidates whenever the workflow’s structure changes: node order, control flow, inputs and outputs, Business Object wiring, tool configuration, or branching logic. You don’t need to ask, but you should read the result.
7Test and optimize before you publish
- Let the tests run and read Validation and Insights: failures, pending judgments, and report links, not just the pass count.
- Try it with real questions and review the outputs yourself.
- Run a model sweep to find lighter models that keep quality on the same tests.
- Review the diff: artifact codes unchanged, nothing unexpected touched.
Try it: Before publishing
Before I publish position_to_job_requisition.wf: confirm validation passes, show me the latest Validation and Insights, run the model optimization sweep, and summarize everything that changed since the last saved DRAFT.
8Publish through your process
- Save the DRAFT deliberately, once the change is complete, validated, and tested.
- Publish workflows in AI Agent Studio or through CI/CD. They’re never published from the CLI.
- Commit artifacts and their tests together. Keep
env.properties,test-reports/, and.debug/out of Git. - Check the target environment after deploying. Replayed tests prove logic; a live run proves the integrations.
The recommended usage flow, end to end
The recommended flow for the AI Studio CLI, from opening a project to releasing a change. Each step points back to the blog that covers it.
- Open your project in VS Code with your coding assistant (Setup blogs)
- Work from the project root folder (Part 2)
- Set up a new project only when you’re starting from an empty folder (Setup blogs)
- Configure the environment and sign in (Setup blogs)
- Let the assistant look at your project and files before it changes anything (Part 4)
- Confirm real data sources before building Business Object or other data-dependent behavior (Parts 6 and 8)
- Validate after every change; the assistant does this on its own (Parts 4 and 6)
- Let the workflow test sync run after material workflow changes; it starts automatically (Part 10)
- Let the app test sync run after material app changes, when the app has top-level agent containers (Part 10)
- Review diffs and test reports (Part 4)
- Save, publish, unpublish, or delete remote state only through your approved release path or an explicit request (Part 11)
Previous: Run, Debug, and Release | Next: AI Studio CLI Reference: Requests, Commands, and Troubleshooting
Back to the Learning Path for Fusion AI Agent Studio CLI