Accessibility Policy
Skip to content
Oracle
The WebLogic Server Blog
Search
Exit Search Field
Clear Search Field
Menu
Blogs Home
RSS
The WebLogic Server Blog
Follow:
RSS
Facebook
Twitter
LinkedIn
YouTube
Instagram
4
The Future of WebLogic Server and Coherence: Jakarta EE 11, JDK 25, ...
Monica Riccelli
3 minute read
Take Action Today: Protect Your Oracle Fusion Middleware Against ...
Sam Farsad
1 minute read
Announcing WebLogic Server Certification with Oracle AI Database 26ai
Monica Riccelli
2 minute read
Announcing WebLogic Kubernetes Toolkit UI V2.0.0
Monica Riccelli
2 minute read
Search Oracle Blogs
Search this site
Type your search term and press Enter.
Receive the latest blog updates
Subscribe to Oracle Connect email updates
Recent Posts
Introducing WebLogic Remote Console 3.0.1
Monica Riccelli
3 minute read
Run WebLogic Server on OKE and pay as you go
Roberto Sanchez Herrera
9 minute read
Announcing the Oracle WebLogic Migration Tool
Adrian Padilla Duarte
2 minute read
Running Spring 6 applications within WebLogic Server 15.1.1
Ryan Eberhard
3 minute read
WebLogic Server for OCI Now Supports WebLogic 15.1.1
Adrian Padilla Duarte
2 minute read
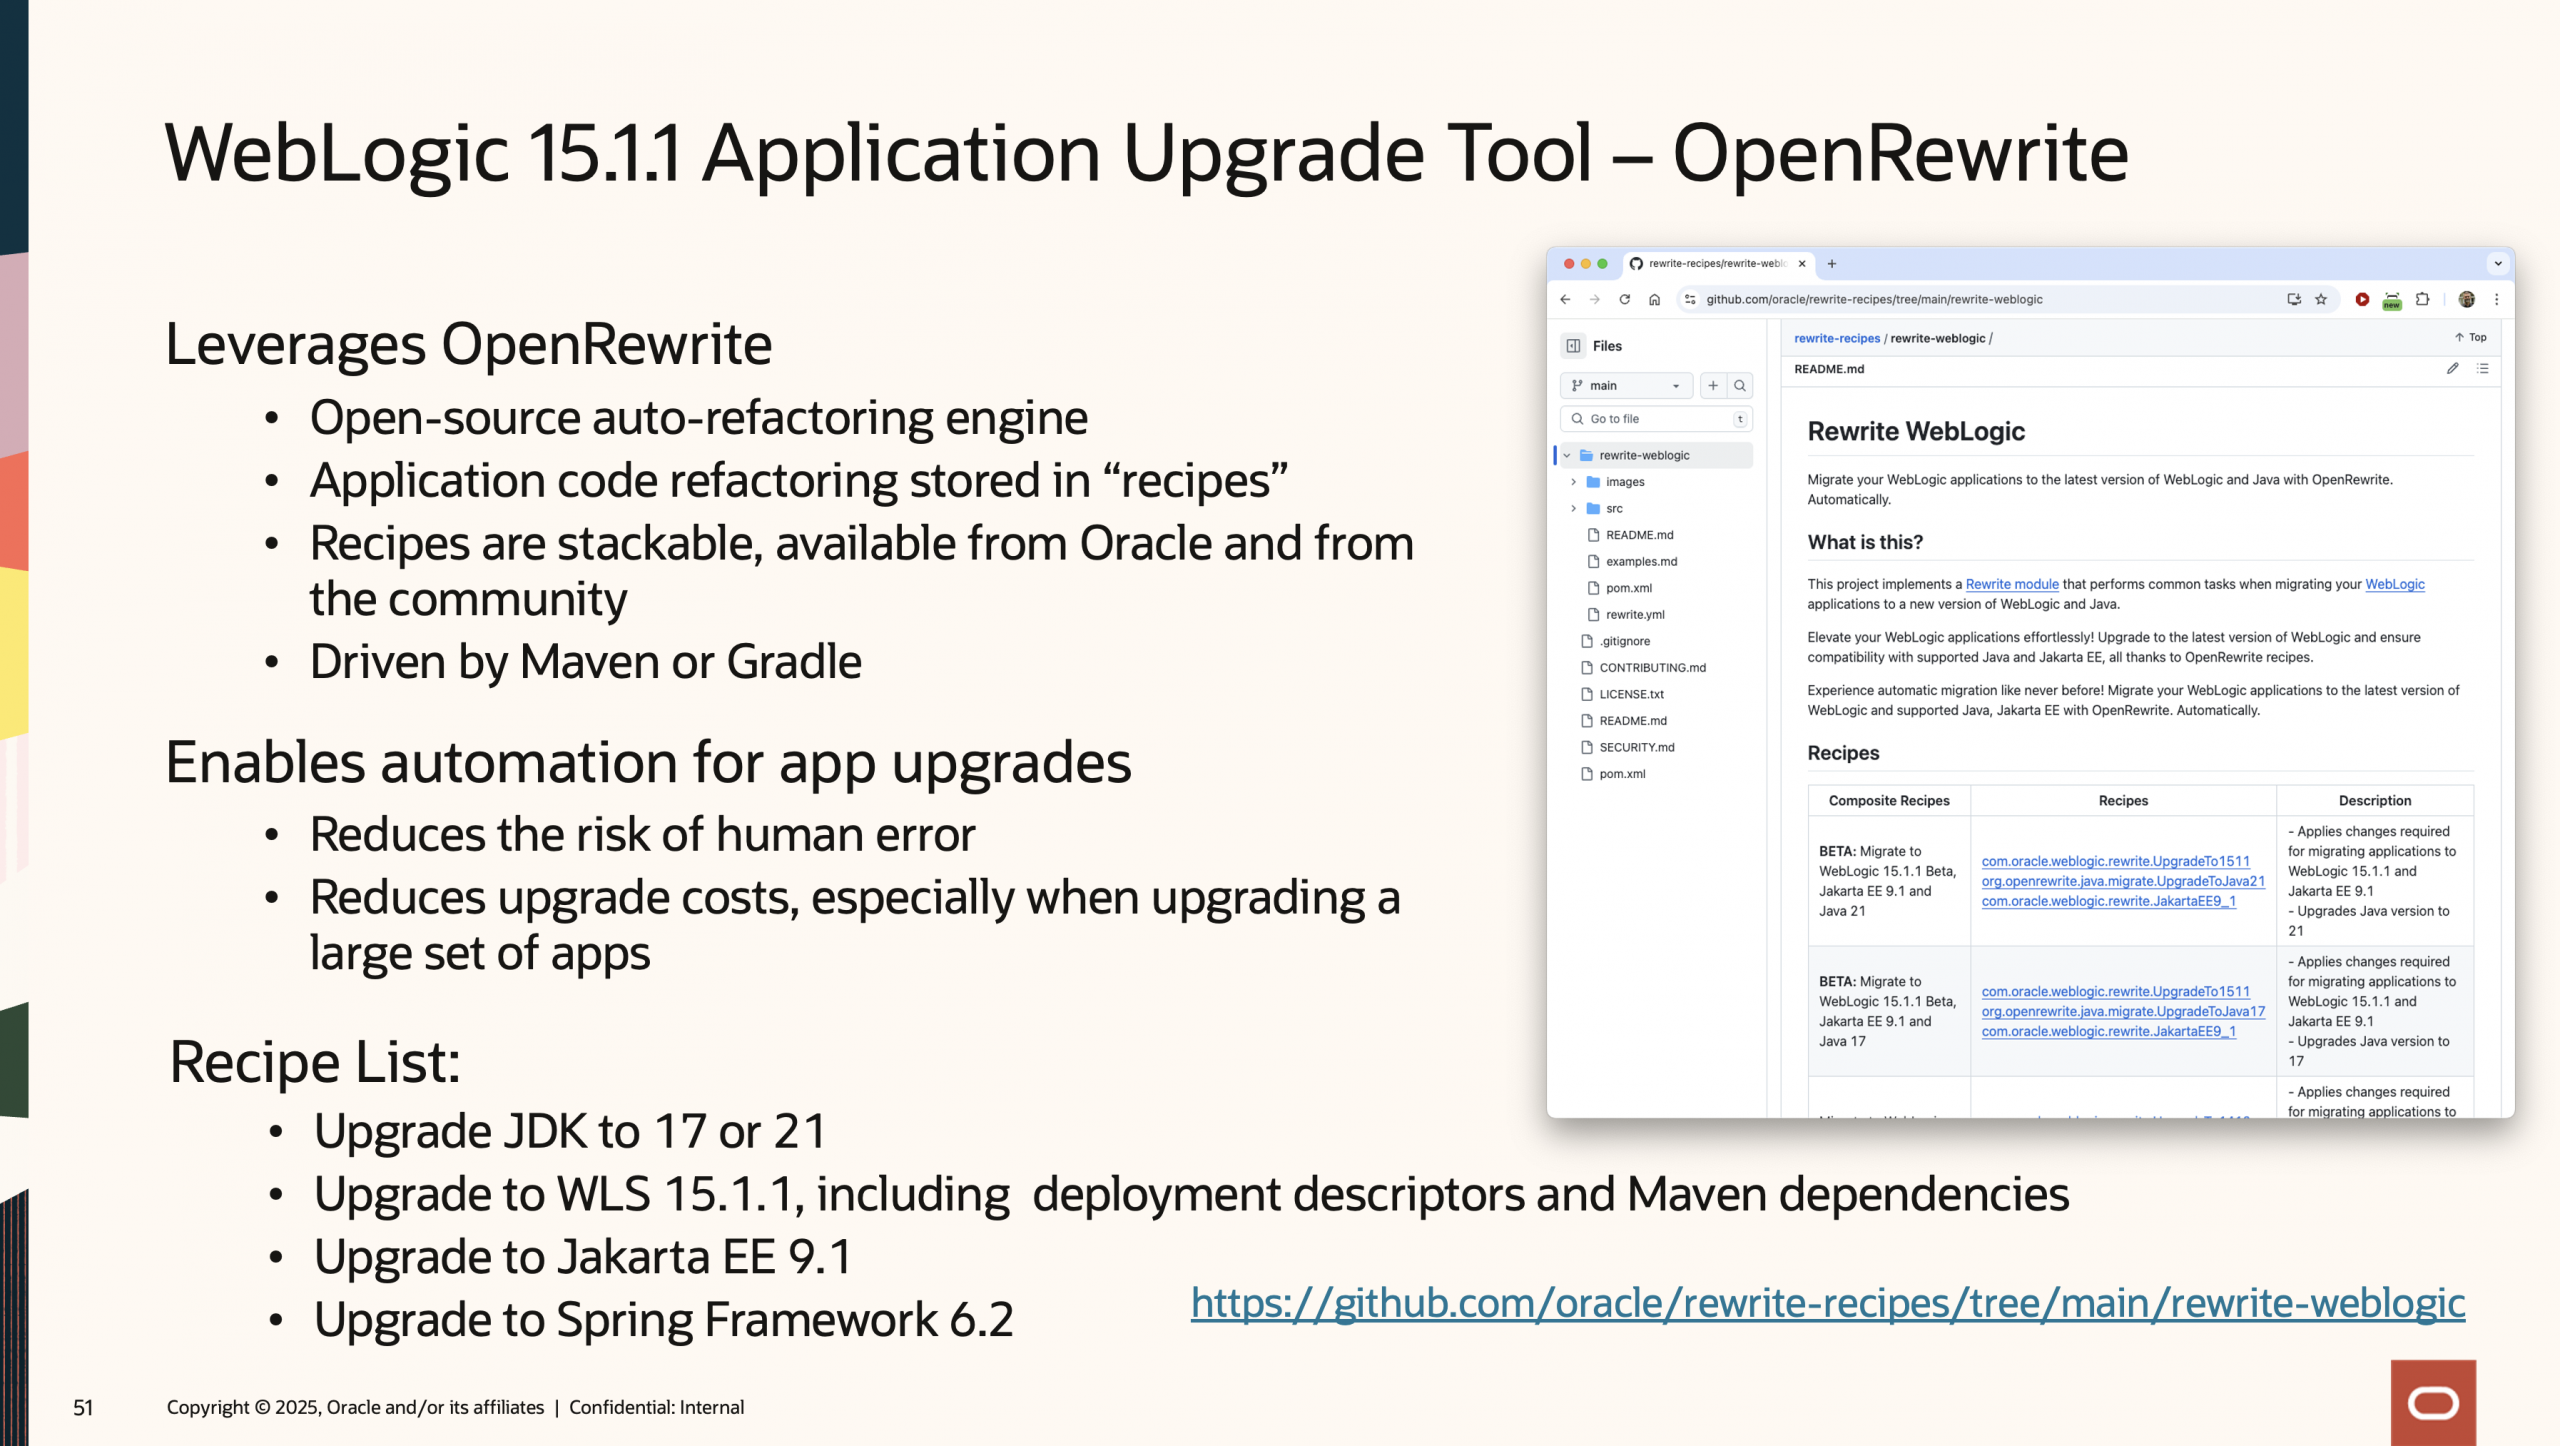
Automated Applications Upgrades for your Oracle WebLogic Server 15.1.1
Sid Joshi
4 minute read
Announcing Oracle WebLogic Server and Coherence 15.1.1
Monica Riccelli
5 minute read
Get Ready for the Future at AI World Las Vegas: Explore WebLogic ...
Maciej Gruszka
4 minute read
Automated Hybrid Disaster Recovery setup for Oracle WebLogic domains
Fermin Castro
7 minute read
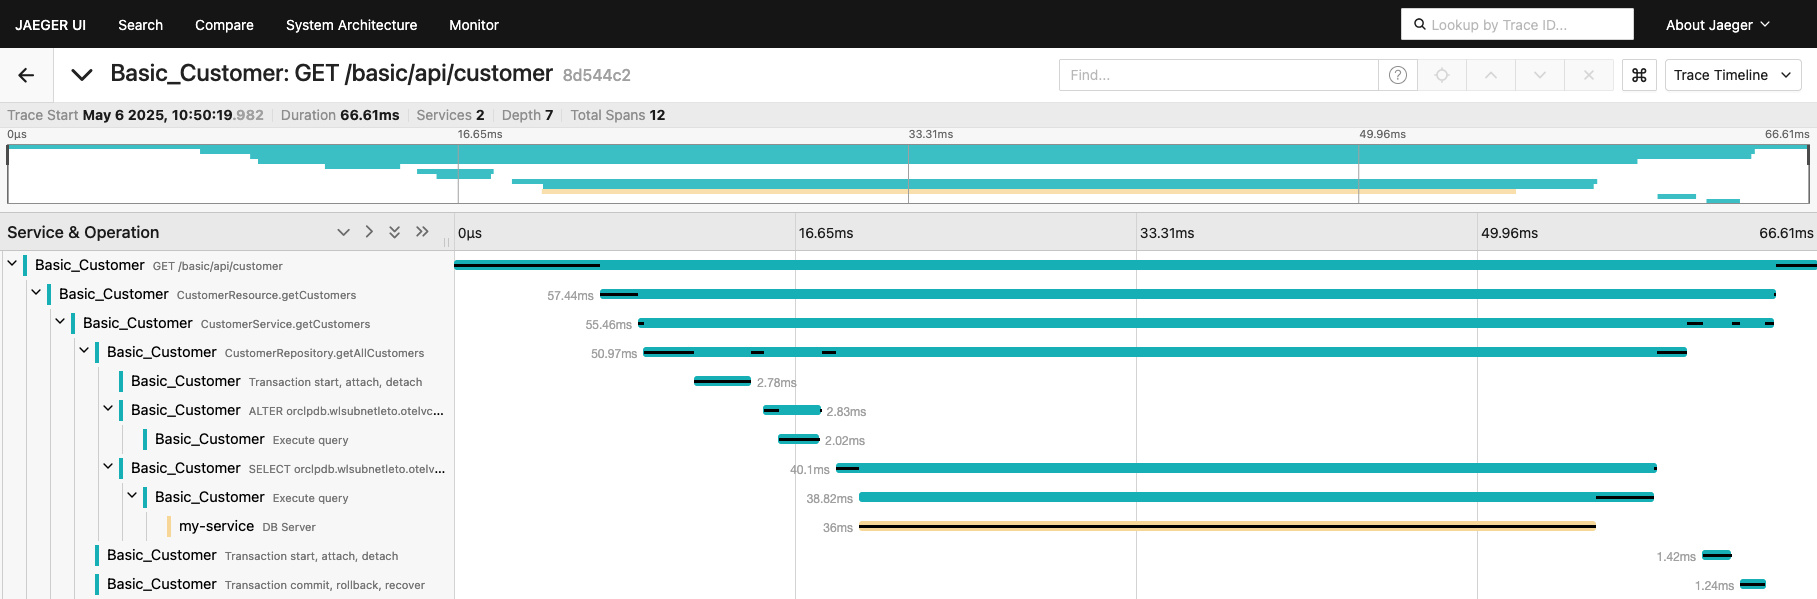
Observability and Monitoring of WebLogic Server with OpenTelemetry
Sherwood Zern
10 minute read
Automated Upgrades for your Oracle WebLogic Server 14.1.2 Applications
David Cabelus
4 minute read
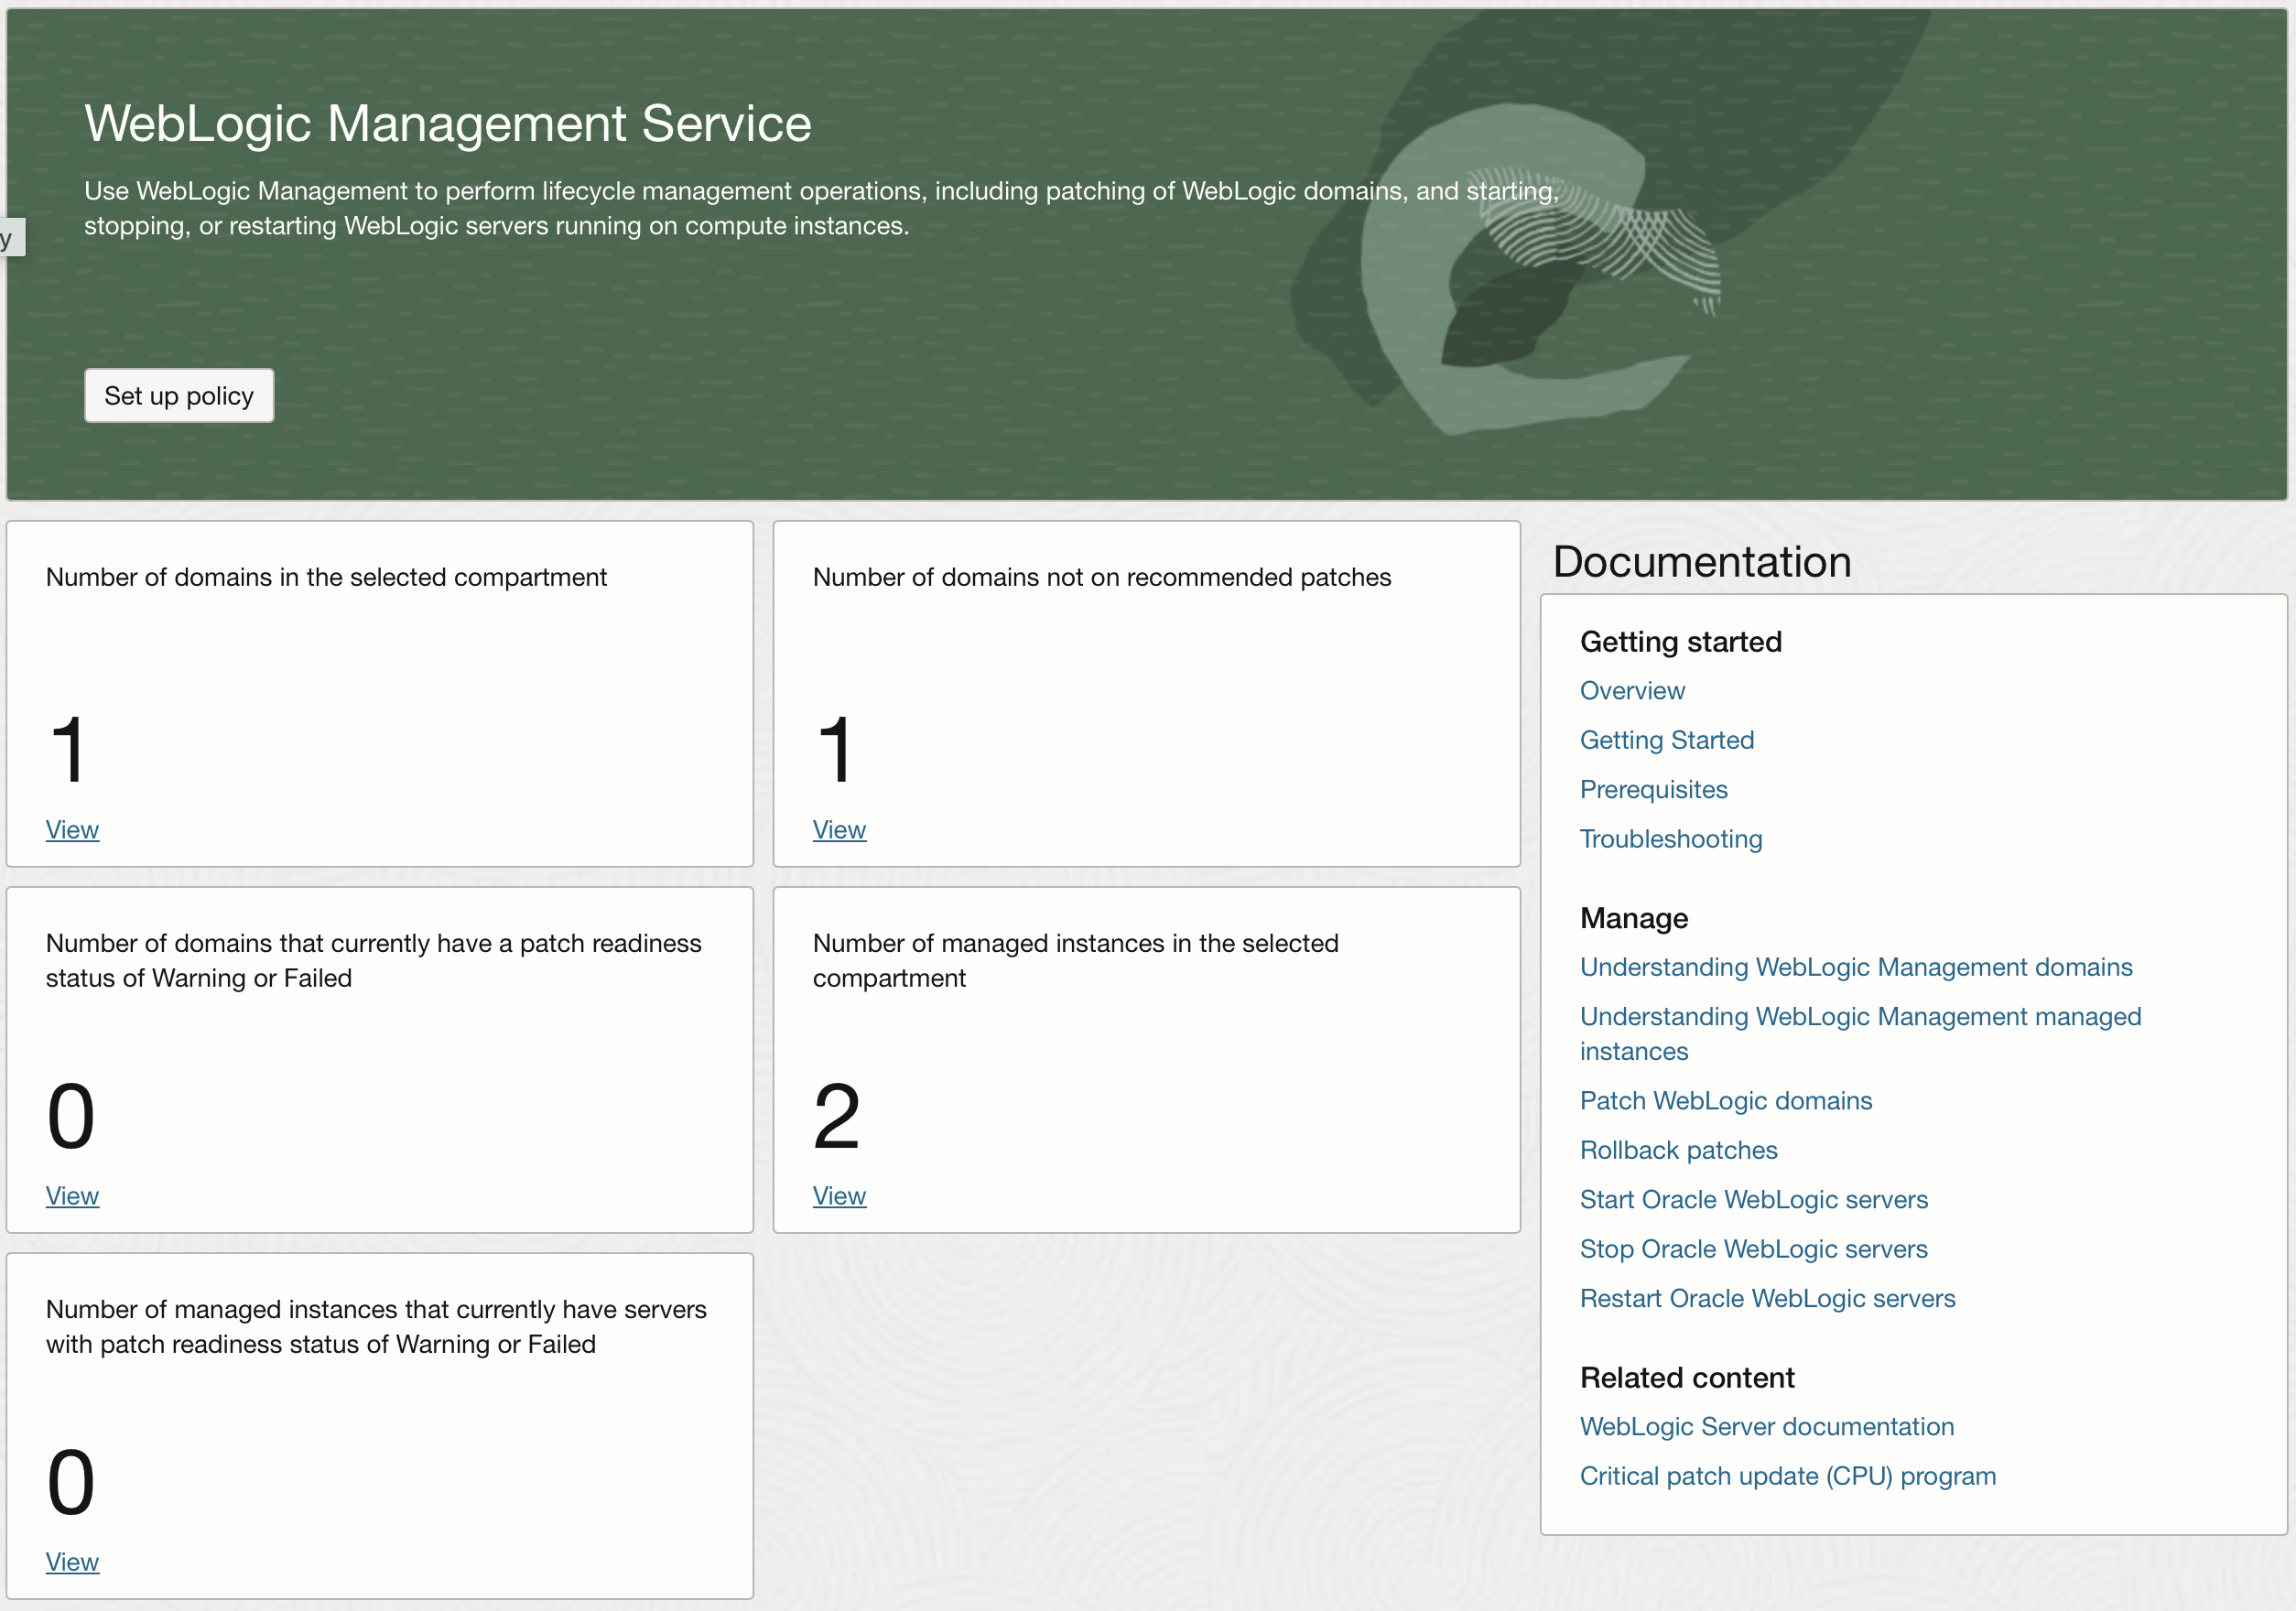
Applying WebLogic Server Patch Set Updates with WebLogic Management ...
Kwan Wan
9 minute read
View more
Receive the latest blog updates
Subscribe to Oracle Connect email updates
Resources for
About
Careers
Developers
Investors
Partners
Startups
Why Oracle
Analyst Reports
Best CRM
Cloud Economics
Corporate Responsibility
Security Practices
Learn
What is Customer Service?
What is ERP?
What is Marketing Automation?
What is Procurement?
What is Talent Management?
What is VM?
What's New
Try Oracle Cloud Free Tier
Oracle Sustainability
Oracle COVID-19 Response
Oracle and SailGP
Oracle and Premier League
Oracle and Red Bull Racing Honda
Contact Us
US Sales 1.800.633.0738
How can we help?
Subscribe to Oracle Content
Try Oracle Cloud Free Tier
Events
News
© 2026 Oracle
Privacy
/
Do Not Sell My Info
Ad Choices
Careers