Introduction
This blog shows you how to install TimesTen XE on a Linux x8664 bare metal or virtual machine.
How to install TimesTen XE on Windows WSL is covered in this blog.
Installing TimesTen XE should be simple and fast. Any installation complexity is due to the post install Linux configuration tasks.
TimesTen Linux Platforms

TimesTen XE is certified on the following linux platforms:
- Oracle Linux 7.4+ and 8.2+
- Red Hat Enterprise Linux 7.4+ and 8.2+
- SUSE Linux Enterprise Server 12 sp5 and 15 sp3
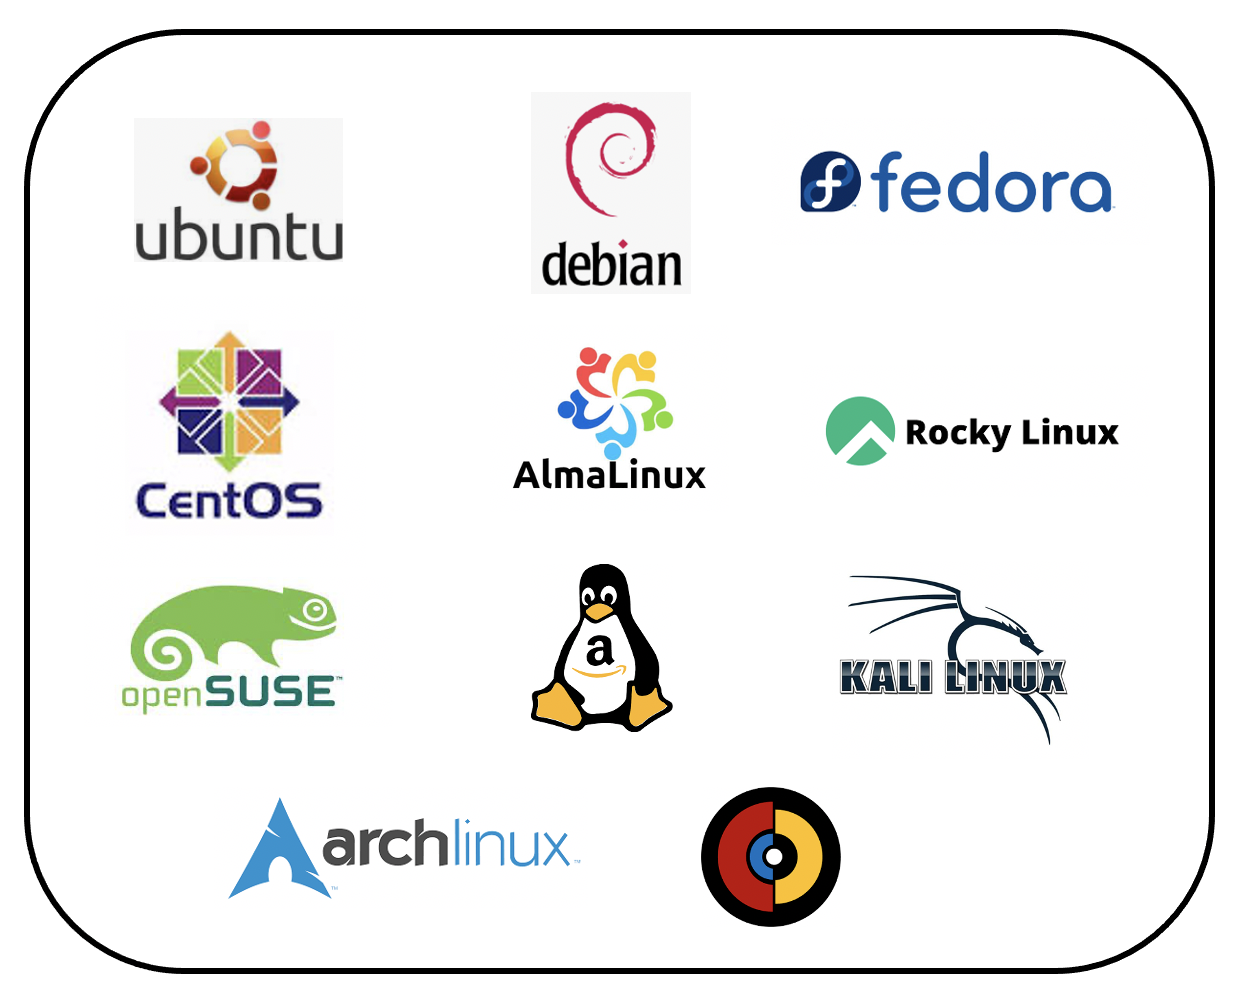
TimesTen XE has also been tested on:
- Ubuntu 16.04, 18.04, 20.04, 21.10 and 22.04
- Debian 9, 10 and 11 (Stable and Testing)
- openSUSE Leap 42.2 and 15.3
- openSUSE Tumbleweed
- CentOS 7 and 8 Stream
- Kali Linux 2019.2
- Amazon Linux 2
- Fedora Cloud 35
- Rocky Linux 8
- Alma Linux 8
- AOSC OS
- Arch Linux
TimesTen XE C runtime library
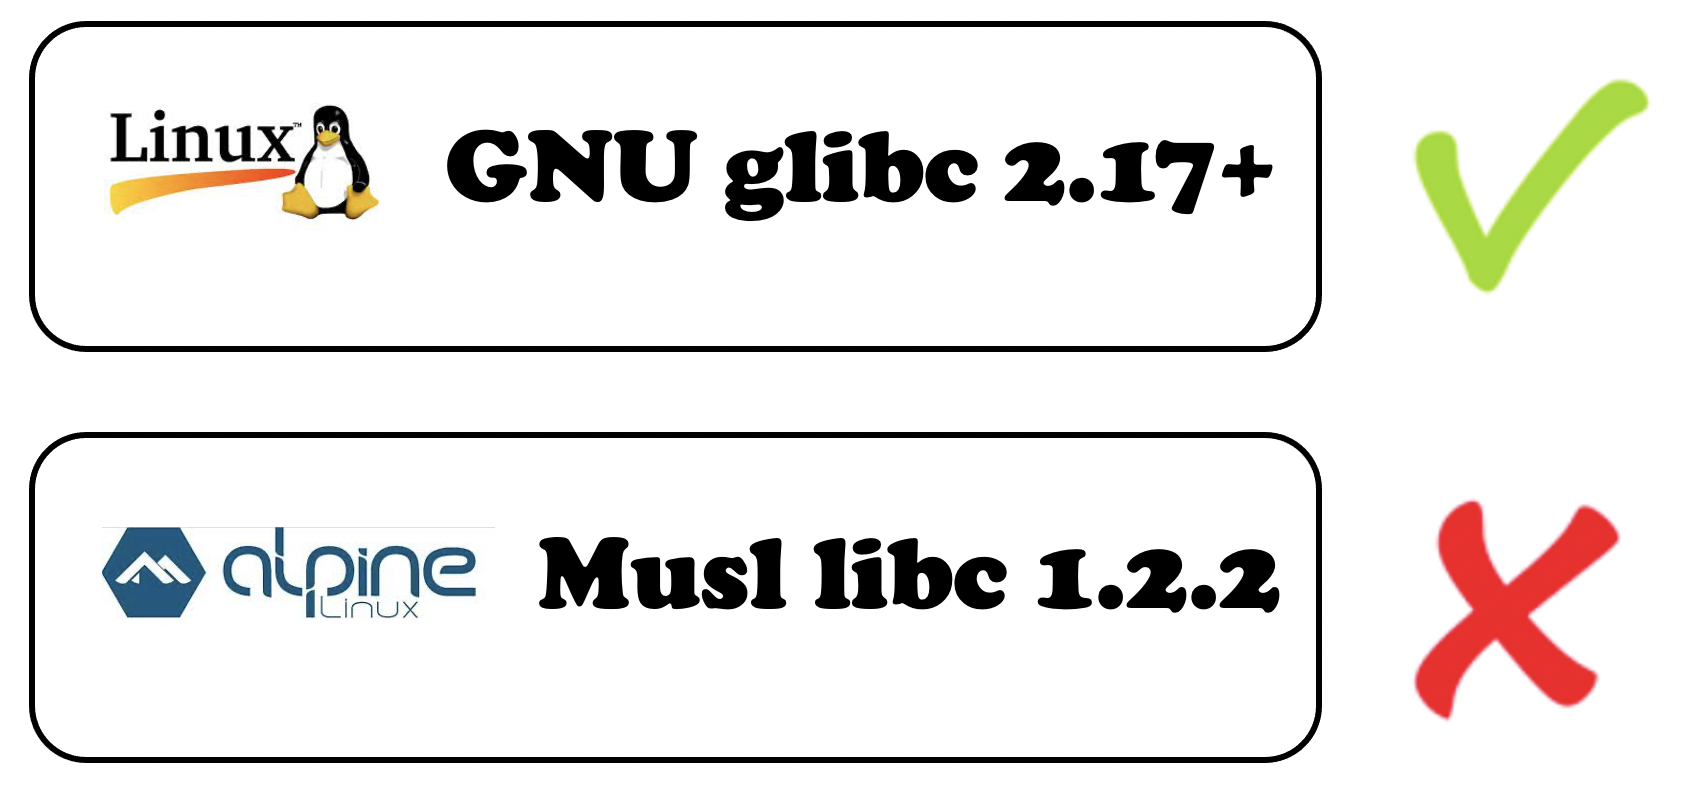
TimesTen depends on GNU glibc and will not work on Musl libc. As Alpine Linux uses libc rarther than glibc, TimesTen XE will not work on Alpine Linux.
TimesTen XE should work on any Linux x8664 with GNU glibc 2.17+
Install tasks
- Download TimesTen XE
- Unzip the distribution
- Run ttInstallationCheck
- Create an instance via ttInstanceCreate
- Post install Linux configuration tasks
Installation and Instance Creation Commands
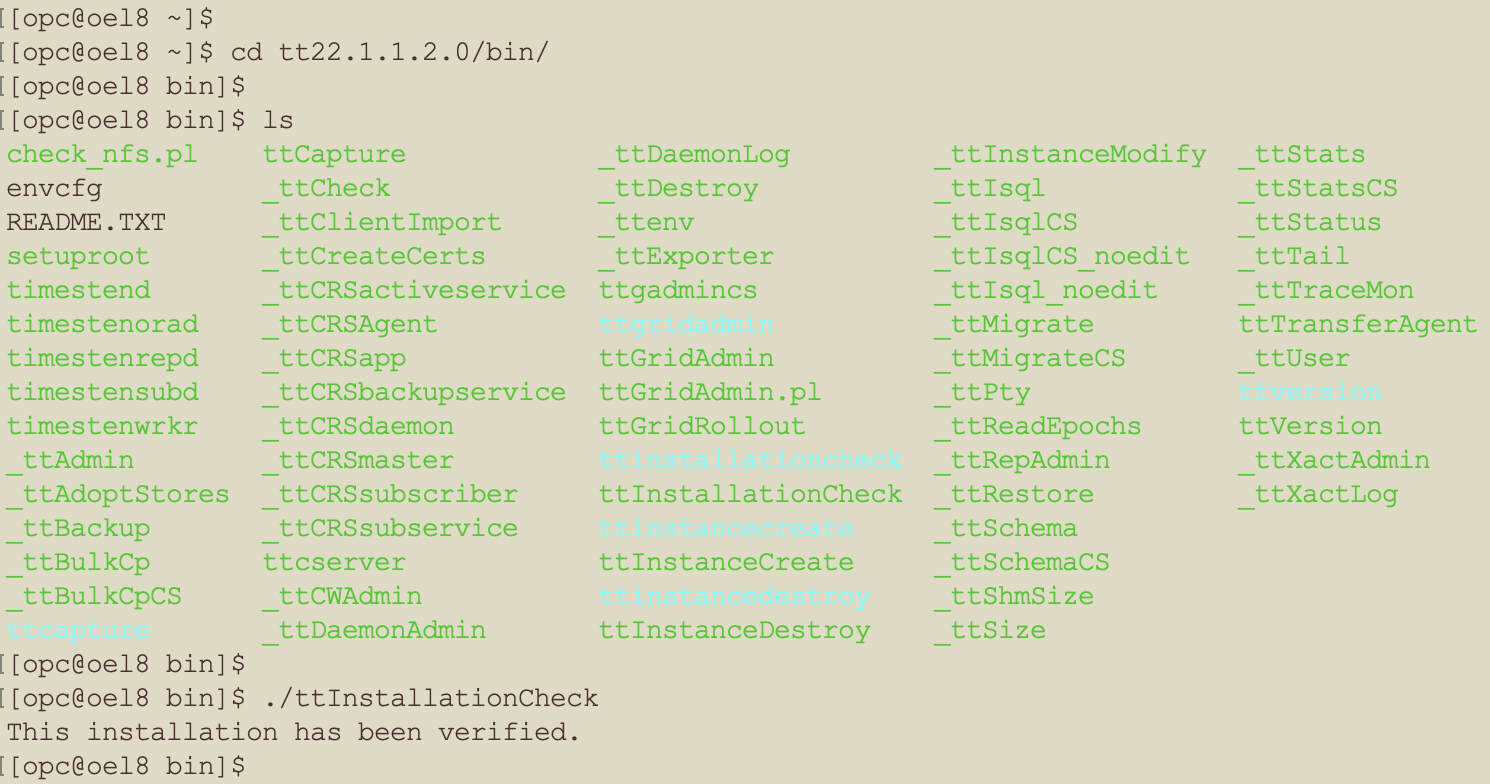
cd /home/opc/tt22.1.1.2.0/bin
./ttInstallationCheck
./ttInstanceCreate
Thats all there is to it. Creating the installation and an instance should take less than two minutes.
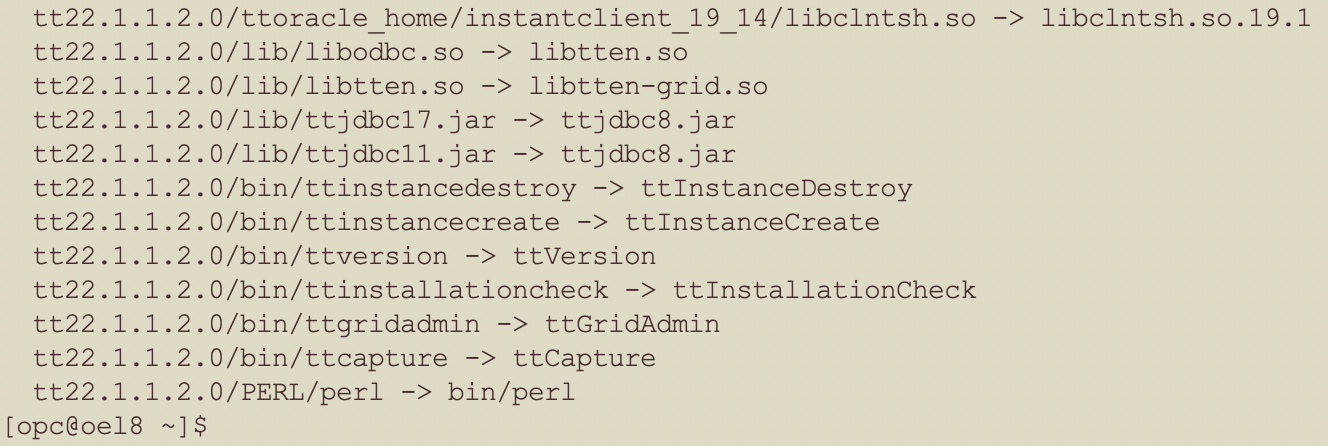
Example Installation
In this example, for simplicity, the TimesTen XE media is unzipped in the user’s home directory [/home/opc].

The unzip output is long, so most of it is skipped.
The next step is to verify that the installation is valid via running ttInstallationCheck.
If the installation cannot be verified then TimesTen XE will not work. Download the TimesTen XE zip file again if ttInstallationCheck failed.
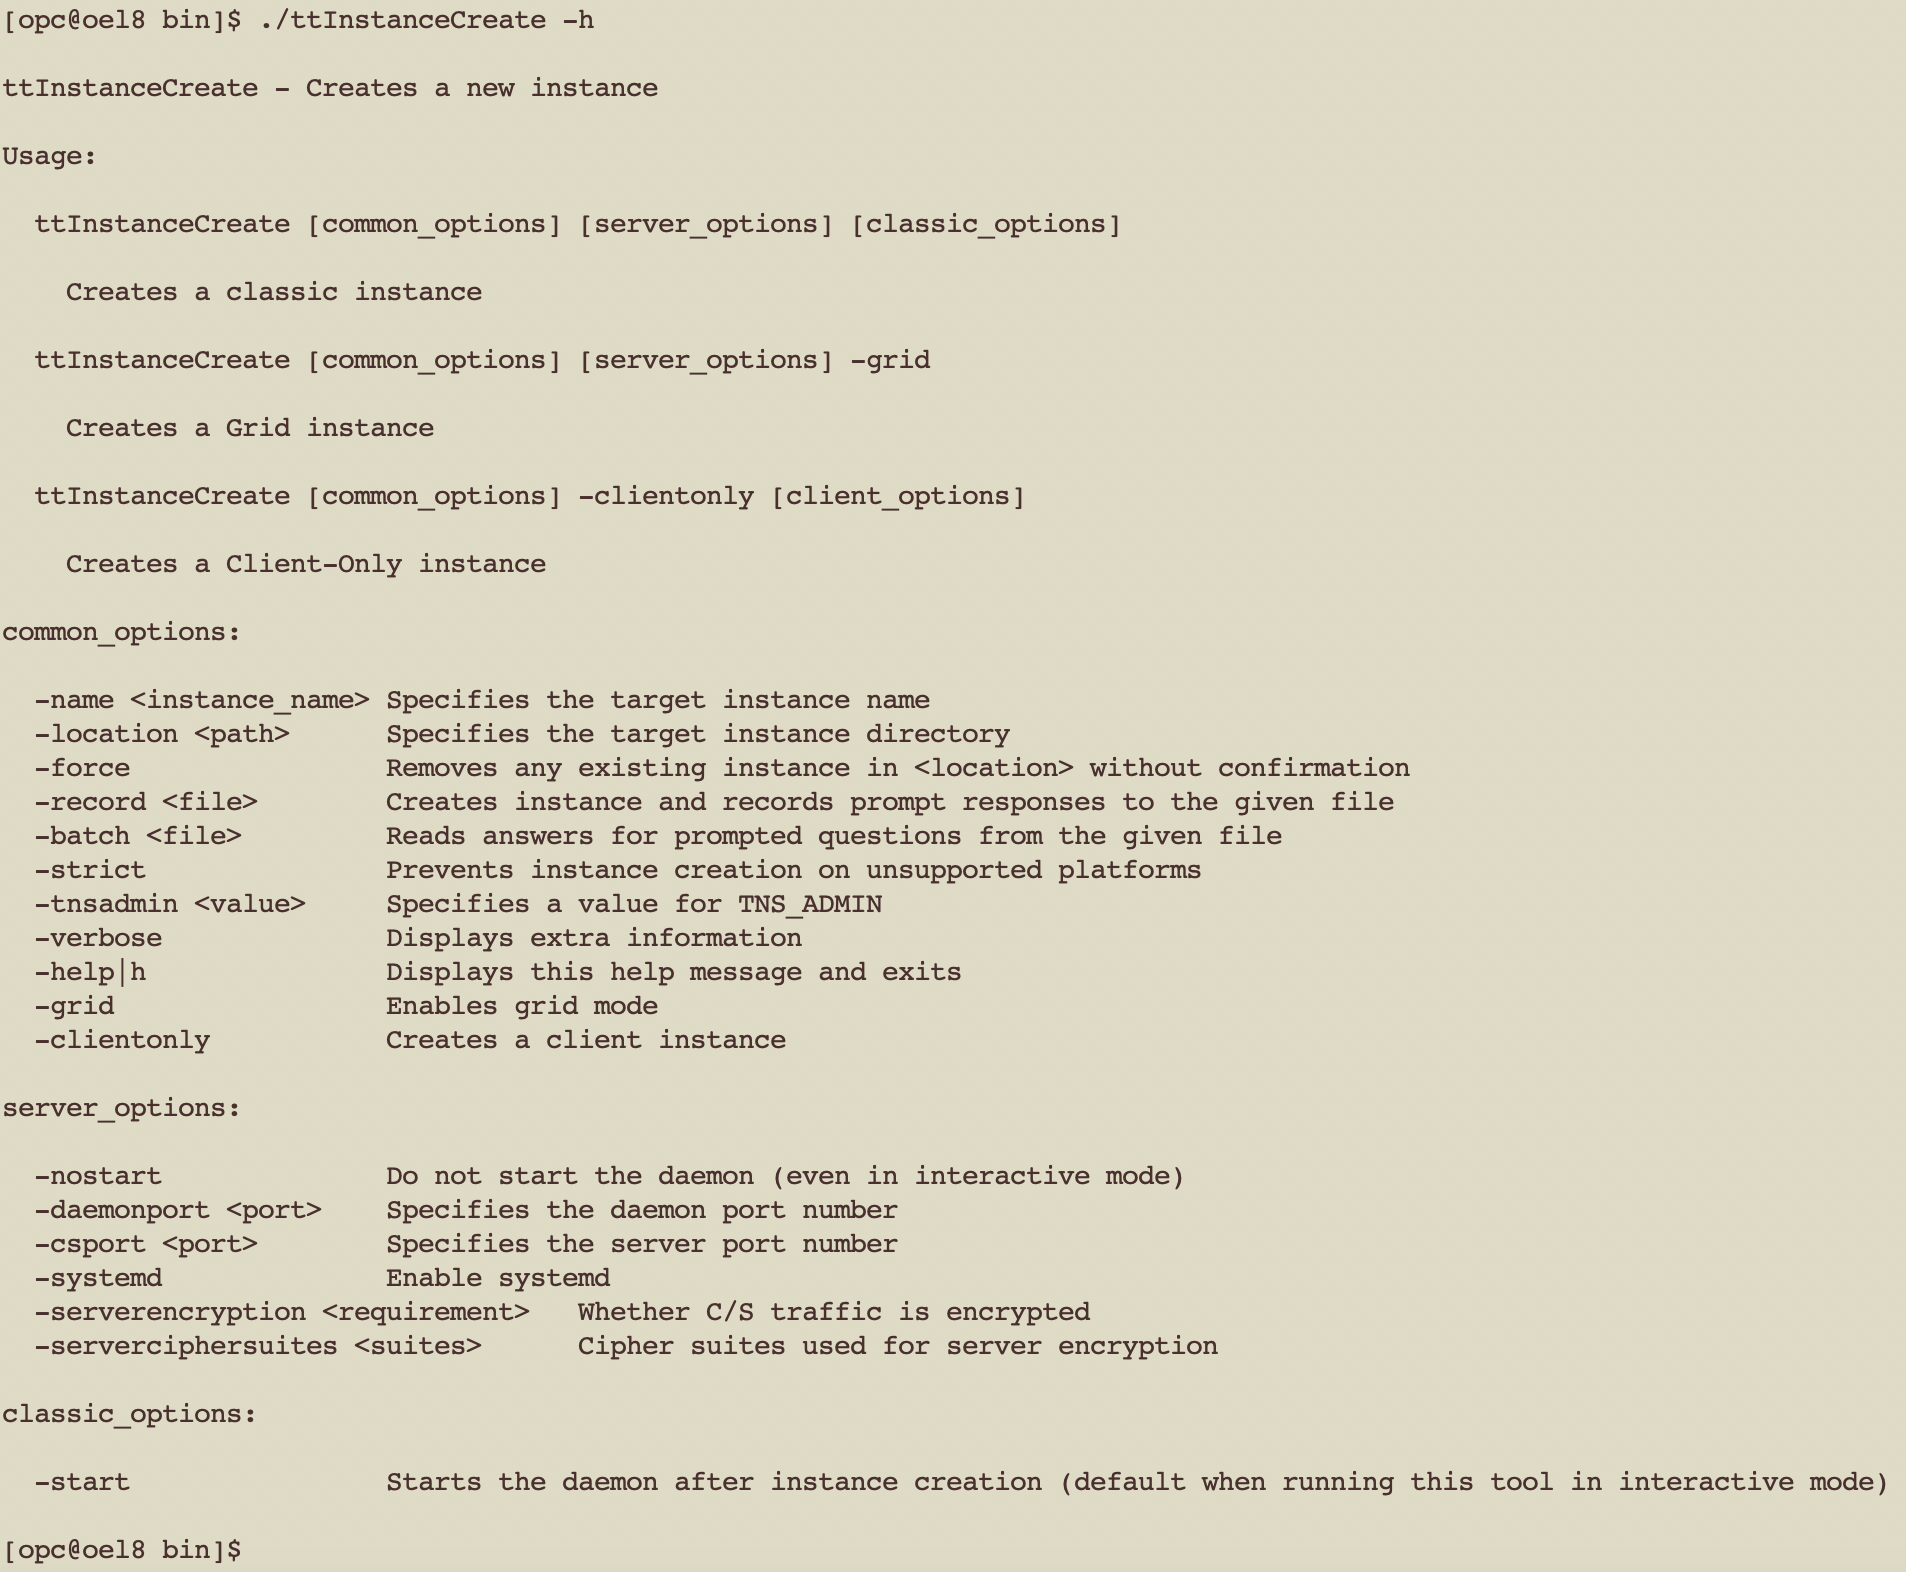
Given an installation, next you want to create an instance via ttInstanceCreate.

- The instance name was xe
- The instance was created in the users home directory
- The default TCP ports were used
- The TNS_ADMIN was not set
- Systemd was not choosen to manage TimesTen XE
- The TimesTen daemon was started automatically
In this example, ttInstanceCreate was run in the interactive mode so you were prompted for choices.
It is easier to script ttInstanceCreate by using parameters. eg
Now that a TimesTen XE instance has been created, you want to set the Linux shell environment variables via ttenv.sh or ttenv.csh.
You need to go to the new instance bin directory, eg /home/opc/xe/bin
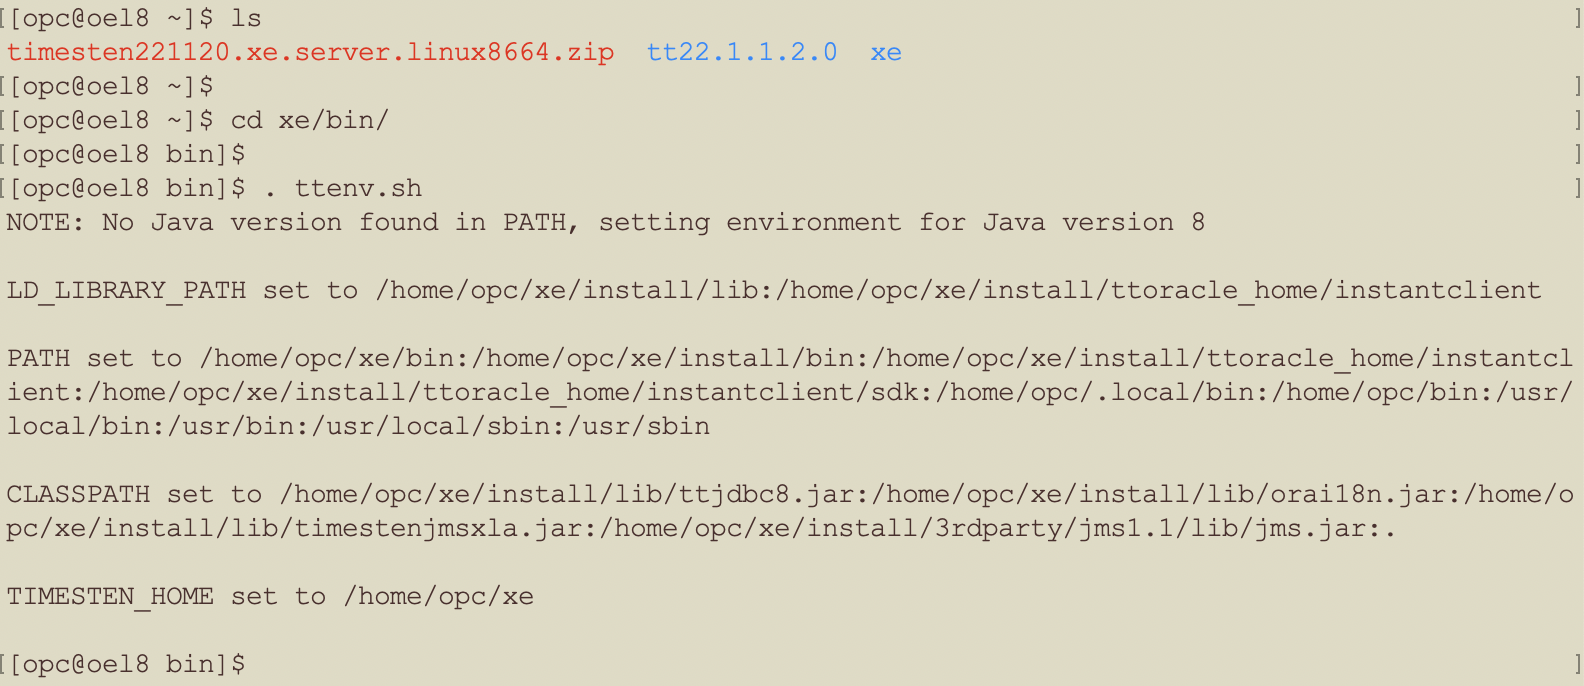
Now that the TimesTen environment is set, you can run TimesTen utilities like ttVersion & ttStatus.
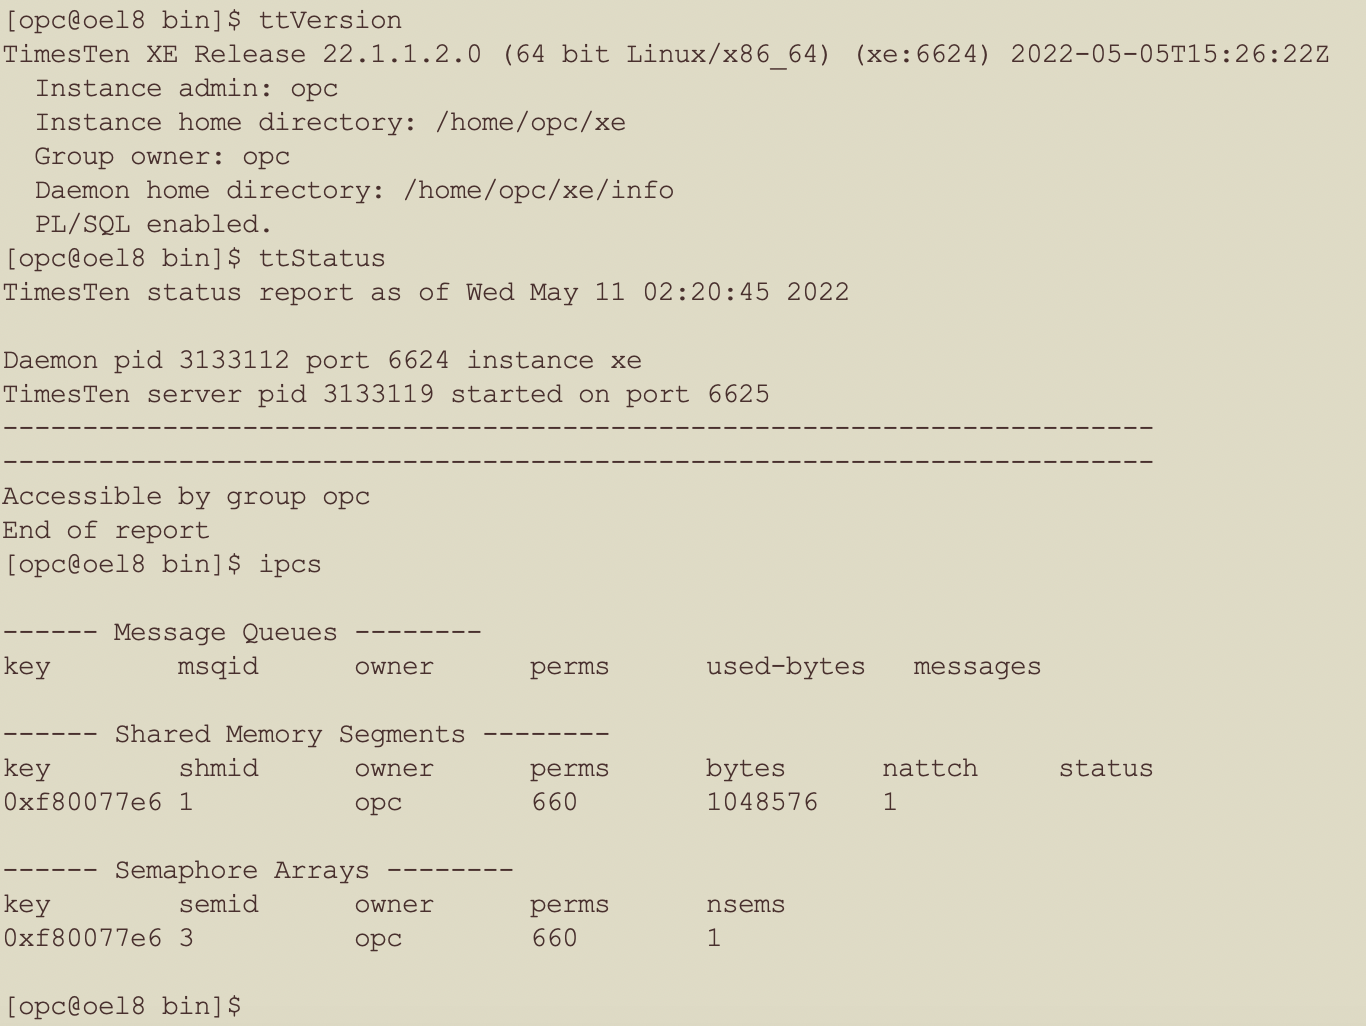
- You can verify the version of TimesTen via the ttVersion utility and check the status via the ttStatus utility
- The version is 22.1.1.2.0 TimesTen XE
- ttStatus showed that the TimesTen daemon and server were running and using their default TCP ports [6624 & 6625]
- When the TimesTen XE instance is created, it starts the TimesTen daemon
- As shown by ipcs, the TimesTen daemon is using a small amount of shared memory
- When you create a TimesTen database, it will create a separate, larger shared memory segment for the database to store data
You next need to do the post install tasks before you create a TimesTen XE database.
Post install Linux configuration tasks
- Add dependent OS libraries
- Configure Linux kernel parameters
Add dependent OS libraries
libnsl and ncurses
Oracle TimesTen XE ships with the Oracle 19c Instant Client. The Instant Client depends on a Linux network library called libnsl.so.1
The ttIsql utility depends on the ncurses library for screen navigation.
libnsl.so.1 and ncurses usually ship with Oracle Linux 7, Red Hat Enterprise Linux 7, SuSE 12, CentOS 7 and Ubuntu 18.04.
Oracle Linux 8, Red Hat Enterprise Linux 8, SuSE 15, CentOS 8 and Ubuntu 20.04 tend not to ship libnsl.so.1 nor ncurses so you usually need to add those libraries. eg
On Oracle Linux 8, Red Hat Enterprise Linux 8 and CentOS 8:
s
On SuSE Linux Enterprise Server 15:
On Ubuntu 20.04:
Configure Linux Kernel Paramaters
Configuring the Linux kernel parameters can enable better performance, larger databases and more connections for TimesTen XE.
Some background on the Linux kernel parameters that can benefit TimesTen:
- shared memory
- TimesTen XE uses shared memory for things like tables, indexes, the log buffer, PLSQL and client/server database connections
- The shmmax and shmall parameters will determine how large the Linux shared memory segments can be
- The shmmni parameter will determine the total number of shared memory segments
- huge pages
- In Linux, all memory accesses are by page. For memory intensive applications like an in-memory database, minimizing the number of TLB cache misses will tend to give the best performance. Using huge pages will reduce the number of TLB cache misses
- TimesTen XE will work without configuring huge pages and some organizations do not permit huge pages for Kubernetes
- Always try to use huge pages as the default Linux x8864 4 KB pages can sometimes significantly reduce performance
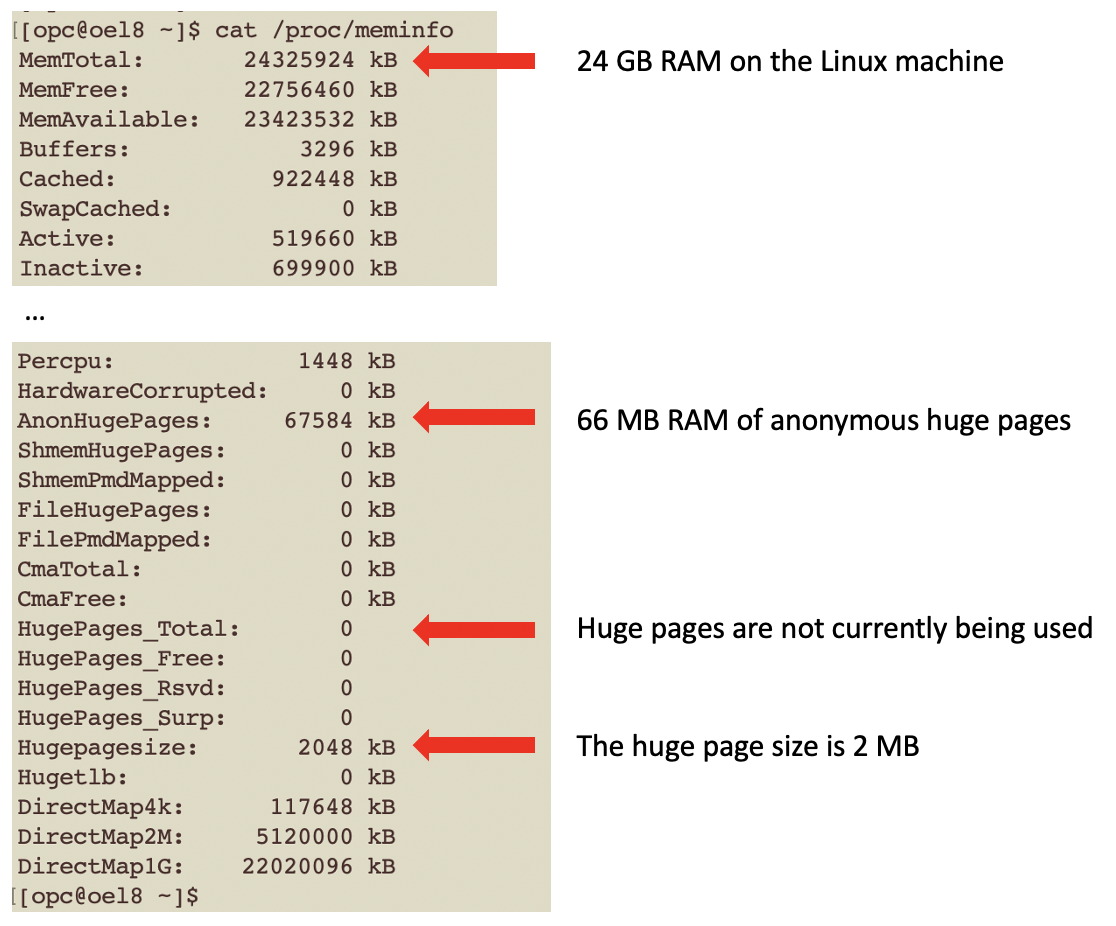
- You need to have sufficient RAM for huge pages to be allocated
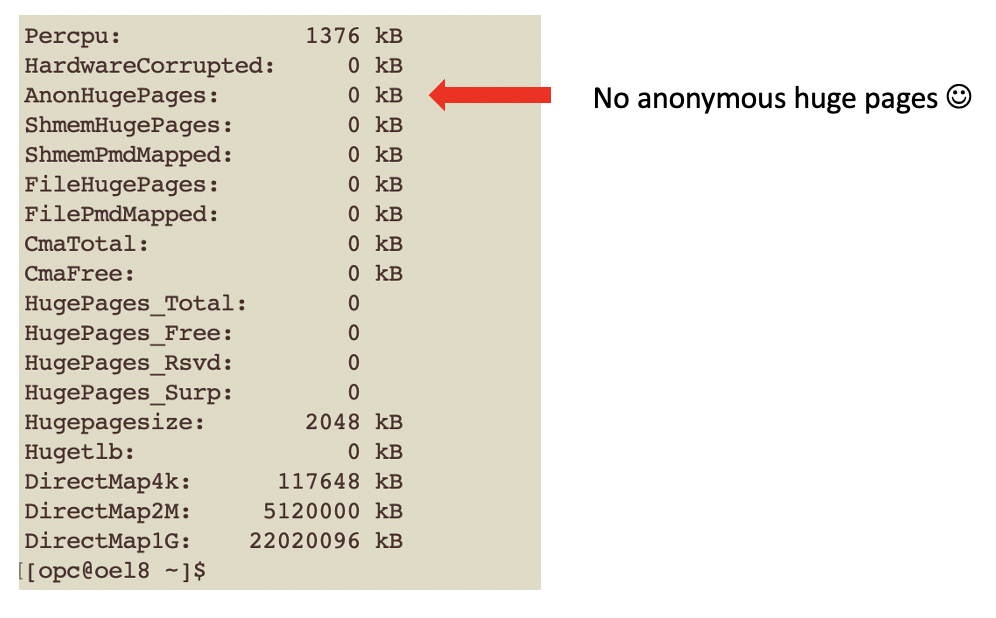
- AnonHugePages tend to hurt TimesTen XE performance so they should be turned off if possible
- memory lock
- Linux uses paging to make best use of memory for all [generic/unknown] workloads
- TimesTen can see a substantial performance benefit from having its shared memory pages locked
- Locking pages means that those pages cannot be paged or swapped to disk
- Huge pages in shared memory are automatically locked and will not be paged or swapped
- 4 KB pages in shared memory are able to be paged or swapped
- Paging requires disk IO. You want TimesTen XE to go at memory speed and not be limited by disk IO
- You do not want paging to occur for shared memory pages used by TimesTen XE
- You never want swapping to occur on a machine with TimesTen XE
- If you do not use huge pages, then you can use Linux memlock to lock pages owned by the TimesTen Linux user up to a maximum size
- sempahores
- TimesTen XE uses semaphores for things like database connections. If you want lots of connections, then you will likely need to configure semaphores.
- networking
- To handle possible Timesten XE Client/Server connection storms, you can configure the following:
- net.ipv4.tcp_max_syn_backlog
- net.core.somaxconn
- net.core.netdev_max_backlog
- To handle possible Timesten XE Client/Server connection storms, you can configure the following:
- virtual memory
- The following virtual memory paging parameters affect both the Oracle and TimesTen databases on Linux:
- vm.swappiness
- vm.dirty_ratio
- vm.dirty_background_ratio
- The following virtual memory paging parameters affect both the Oracle and TimesTen databases on Linux:
Example Linux kernel paramaters for TimesTen XE
This example is for a Linux x8864 machine with 2 MB page size, 16 GB of user data, 24 GB RAM and at least 10K database connections.
20 GB of shared memory will be allocated:
- 16 GB will be for PermSize [tables and indexes]
- 16 GB is the max permSize for TimesTen XE
- 1 GB will be for the log buffer
- 3 GB will be for tempSize, PLSQL and client/server database connections
This leaves 4 GB of RAM for the Linux kernel and applications.
First, stop the TimesTen daemon. You will restart the daemon once the post install steps are complete.
ttDaemonAdmin -stop
Next, check the current memory usage.
You want to remove the pesky anonymous huge pages by creating a systemd service to disable them during machine startup and reboot.
Description=Disable THP
DefaultDependencies=no
After=sysinit.target local-fs.target
Type=oneshot
ExecStart=/bin/sh -c ‘echo never | tee /sys/kernel/mm/transparent_hugepage/enabled > /dev/null’
WantedBy=basic.target
Save and exit file /etc/systemd/system/disable-thp.service
Next, you need to start the service and reboot the Linux machine.
sudo systemctl start disable-thp.service
reboot
After the reboot:
Next, modify /etc/systcl.conf to add the following changes:
# VM paging config for Oracle and TimesTen databases
vm.swappiness = 10
vm.dirty_ratio = 20
vm.dirty_background_ratio = 10
#
# [shared] Memory configuration
# 10K * 2MB HP = 20 GB Huge pages
vm.nr_hugepages=10000
vm.hugetlb_shm_group=1000
kernel.sem = 53000 1024000000 5000 32000
kernel.shmmni=32768
kernel.shmall = 18446744073692774399
kernel.shmmax = 18446744073692774399
kernel.shmmni = 32768
#
# Networking configuration
net.ipv4.tcp_max_syn_backlog = 300000
net.core.somaxconn = 300000
net.core.netdev_max_backlog = 300000
fs.file-max = 6815744
It matters if the kernel.sem values are too smal, but it does not matter if they are too large.
Next, persist the kernel changes. You may need to reboot the Linux machine if it is low on memory to enable the huge pages to be allocated.
cat /proc/meminfo
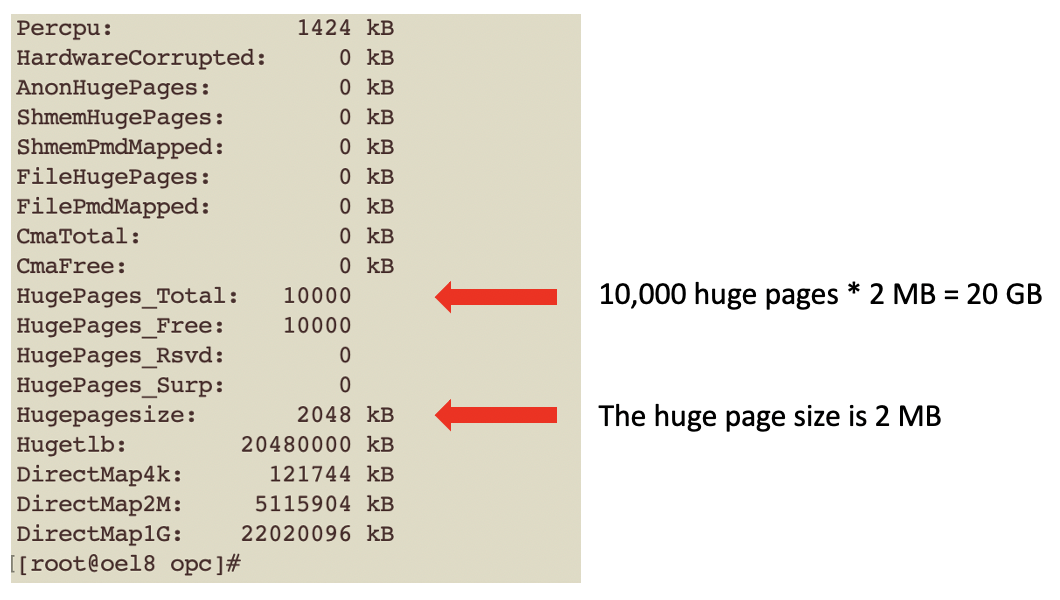
Now 10,000 huge pages [each of size 2 MB] have been allocated, giving 20 GB of huge pages for TimesTen XE.
Next, modify /etc/security/limits.conf to add the following changes to enable many client/server connections and [if you are not using huge pages] to lock the 4 KB pages into memory.
opc hard nofile 262144
opc soft nproc 33000
opc hard nproc 33000
opc hard memlock unlimited
opc soft memlock unlimited
You will need to logout of the Linux session and login again for the limits.conf changes to take effect.
You could have done all of the above by doing a series of configurations and one reboot, but I did the steps sequentially to make it clearer.
Finally, start the TimesTen daemon.
ttStatus
You are now ready to create a database in TimesTen XE.
Learn more about TimesTen XE:
- Oracle TimesTen XE Home Page
- Oracle TimesTen XE Download
- Oracle TimesTen XE Docker Container
- Oracle TimesTen Classic Home Page
- Oracle TimesTen Scaleout Home Page
- Oracle TimesTen VM with Hands On Labs
- Oracle TimesTen Documentation
More TimesTen XE Blogs
- An introduction to TimesTen XE
- How fast is TimesTen XE
- How to create a database on TimesTen XE
- TimesTen XE SQL
- TimesTen XE SQL Profiles
- Using TimesTen XE on WSL
- Using client/server without config files on TimesTen XE
- Using client/server with config files on TimesTen XE
Disclaimer: These are my personal thoughts and do not represent Oracle’s official viewpoint in any way, shape, or form.