Accessibility Policy
Skip to content
Oracle
Data Integration
Search
Exit Search Field
Clear Search Field
Menu
CATEGORIES
Technical Solutions
Use Cases
Blogs Home
RSS
Data Integration
Follow:
RSS
Facebook
Twitter
LinkedIn
YouTube
Instagram
4
Announcing Oracle GoldenGate 26ai smarter automation, broader ...
Alex Lima
7 minute read
Top 7 GoldenGate Announcements at AI World 2025
Jeff Pollock
13 minute read
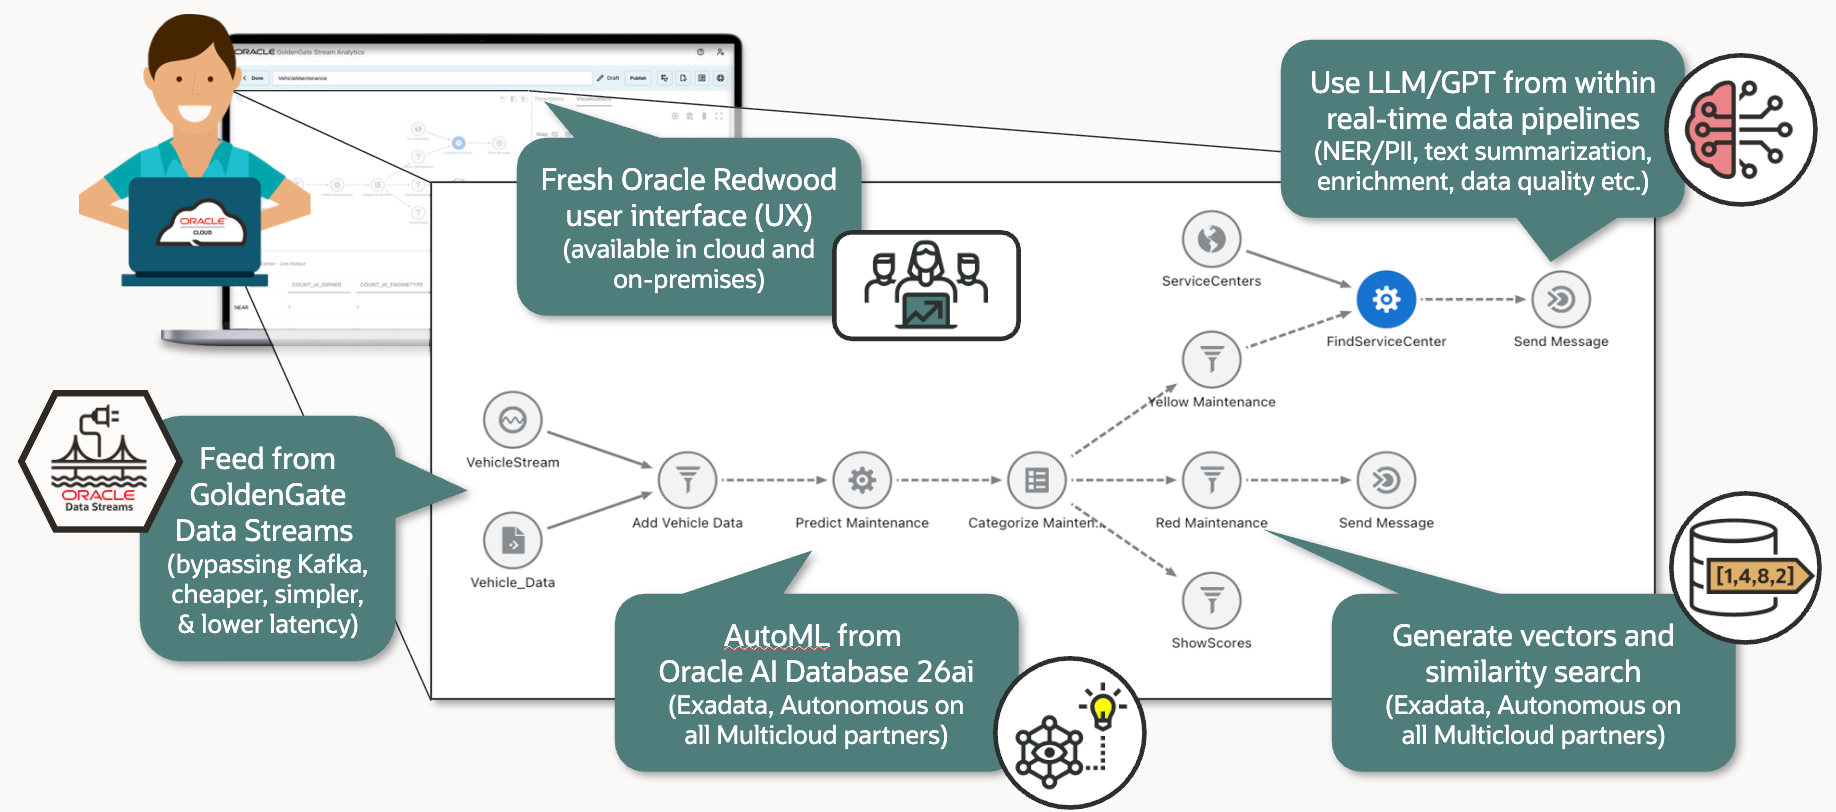
GoldenGate Stream Analytics 26ai – Bringing GenAI, Vectors and AutoML ...
Alex Kotopoulis
3 minute read
Risks of using Binary Log Readers with Oracle Database
Nick Wagner
Jeff Pollock
4 minute read
Search Oracle Blogs
Search this site
Type your search term and press Enter.
Receive the latest blog updates
Subscribe to Oracle Connect email updates
Recent Posts
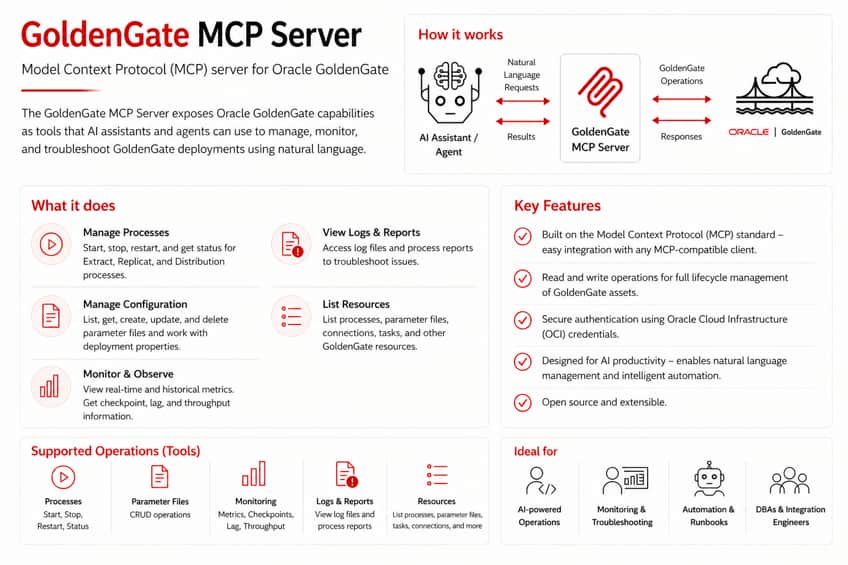
Enabling Agent-driven Operations in Oracle GoldenGate with MCP: An ...
Julien TESTUT
5 minute read
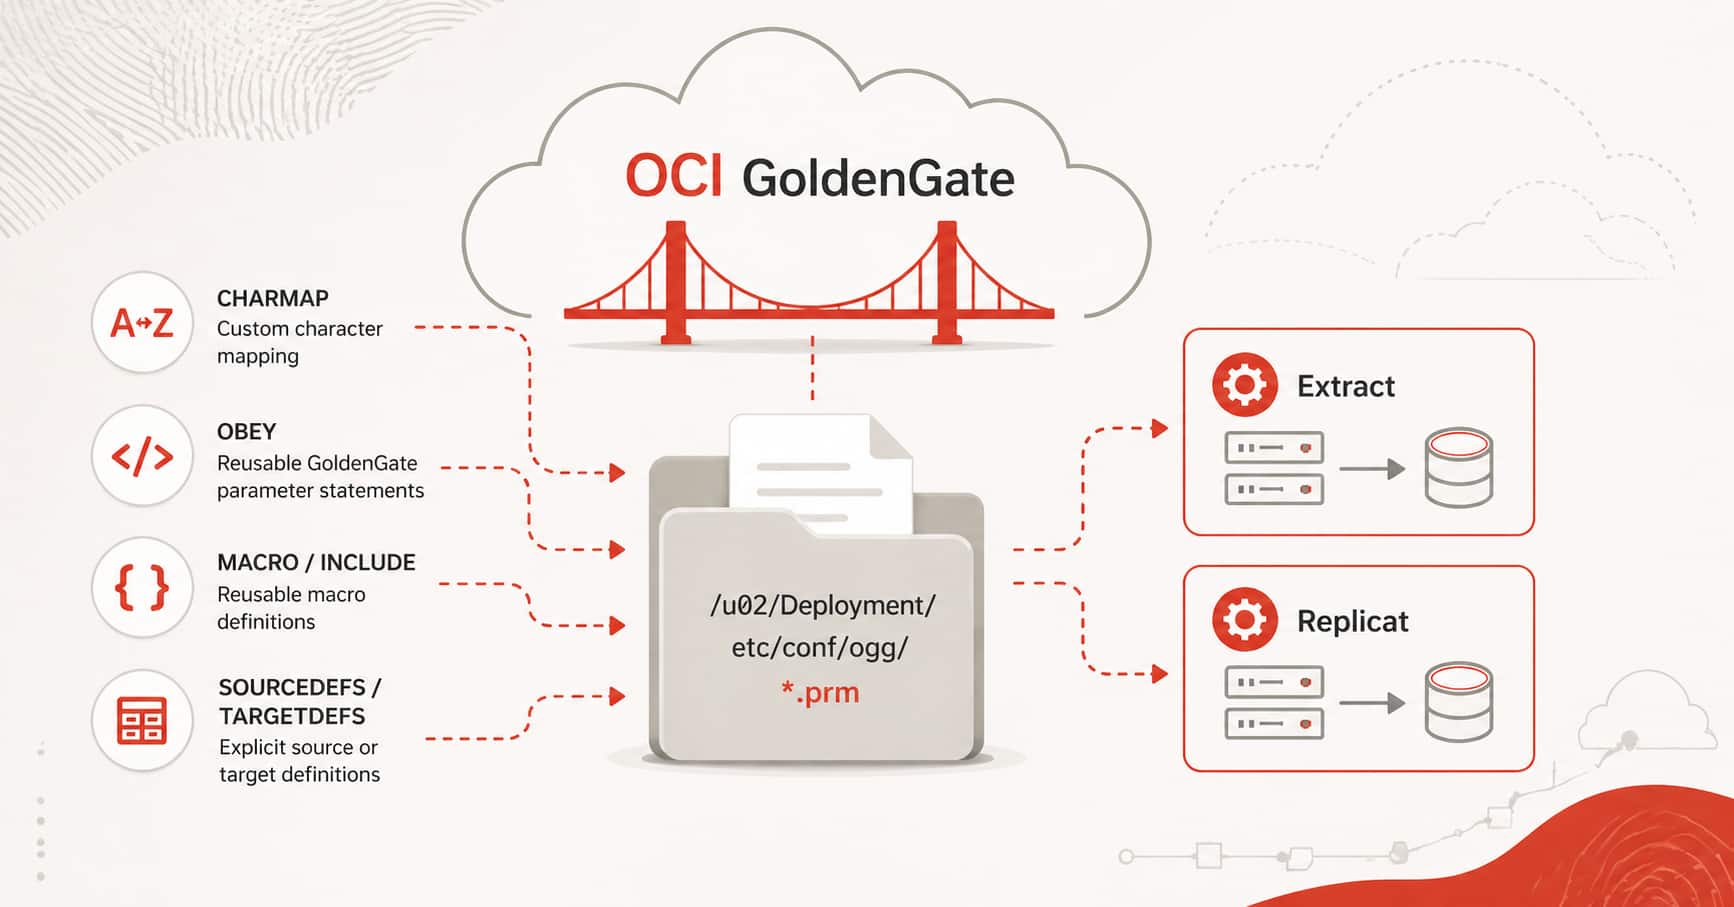
Using CHARMAP, OBEY, and Other Files in OCI GoldenGate
Julien TESTUT
3 minute read
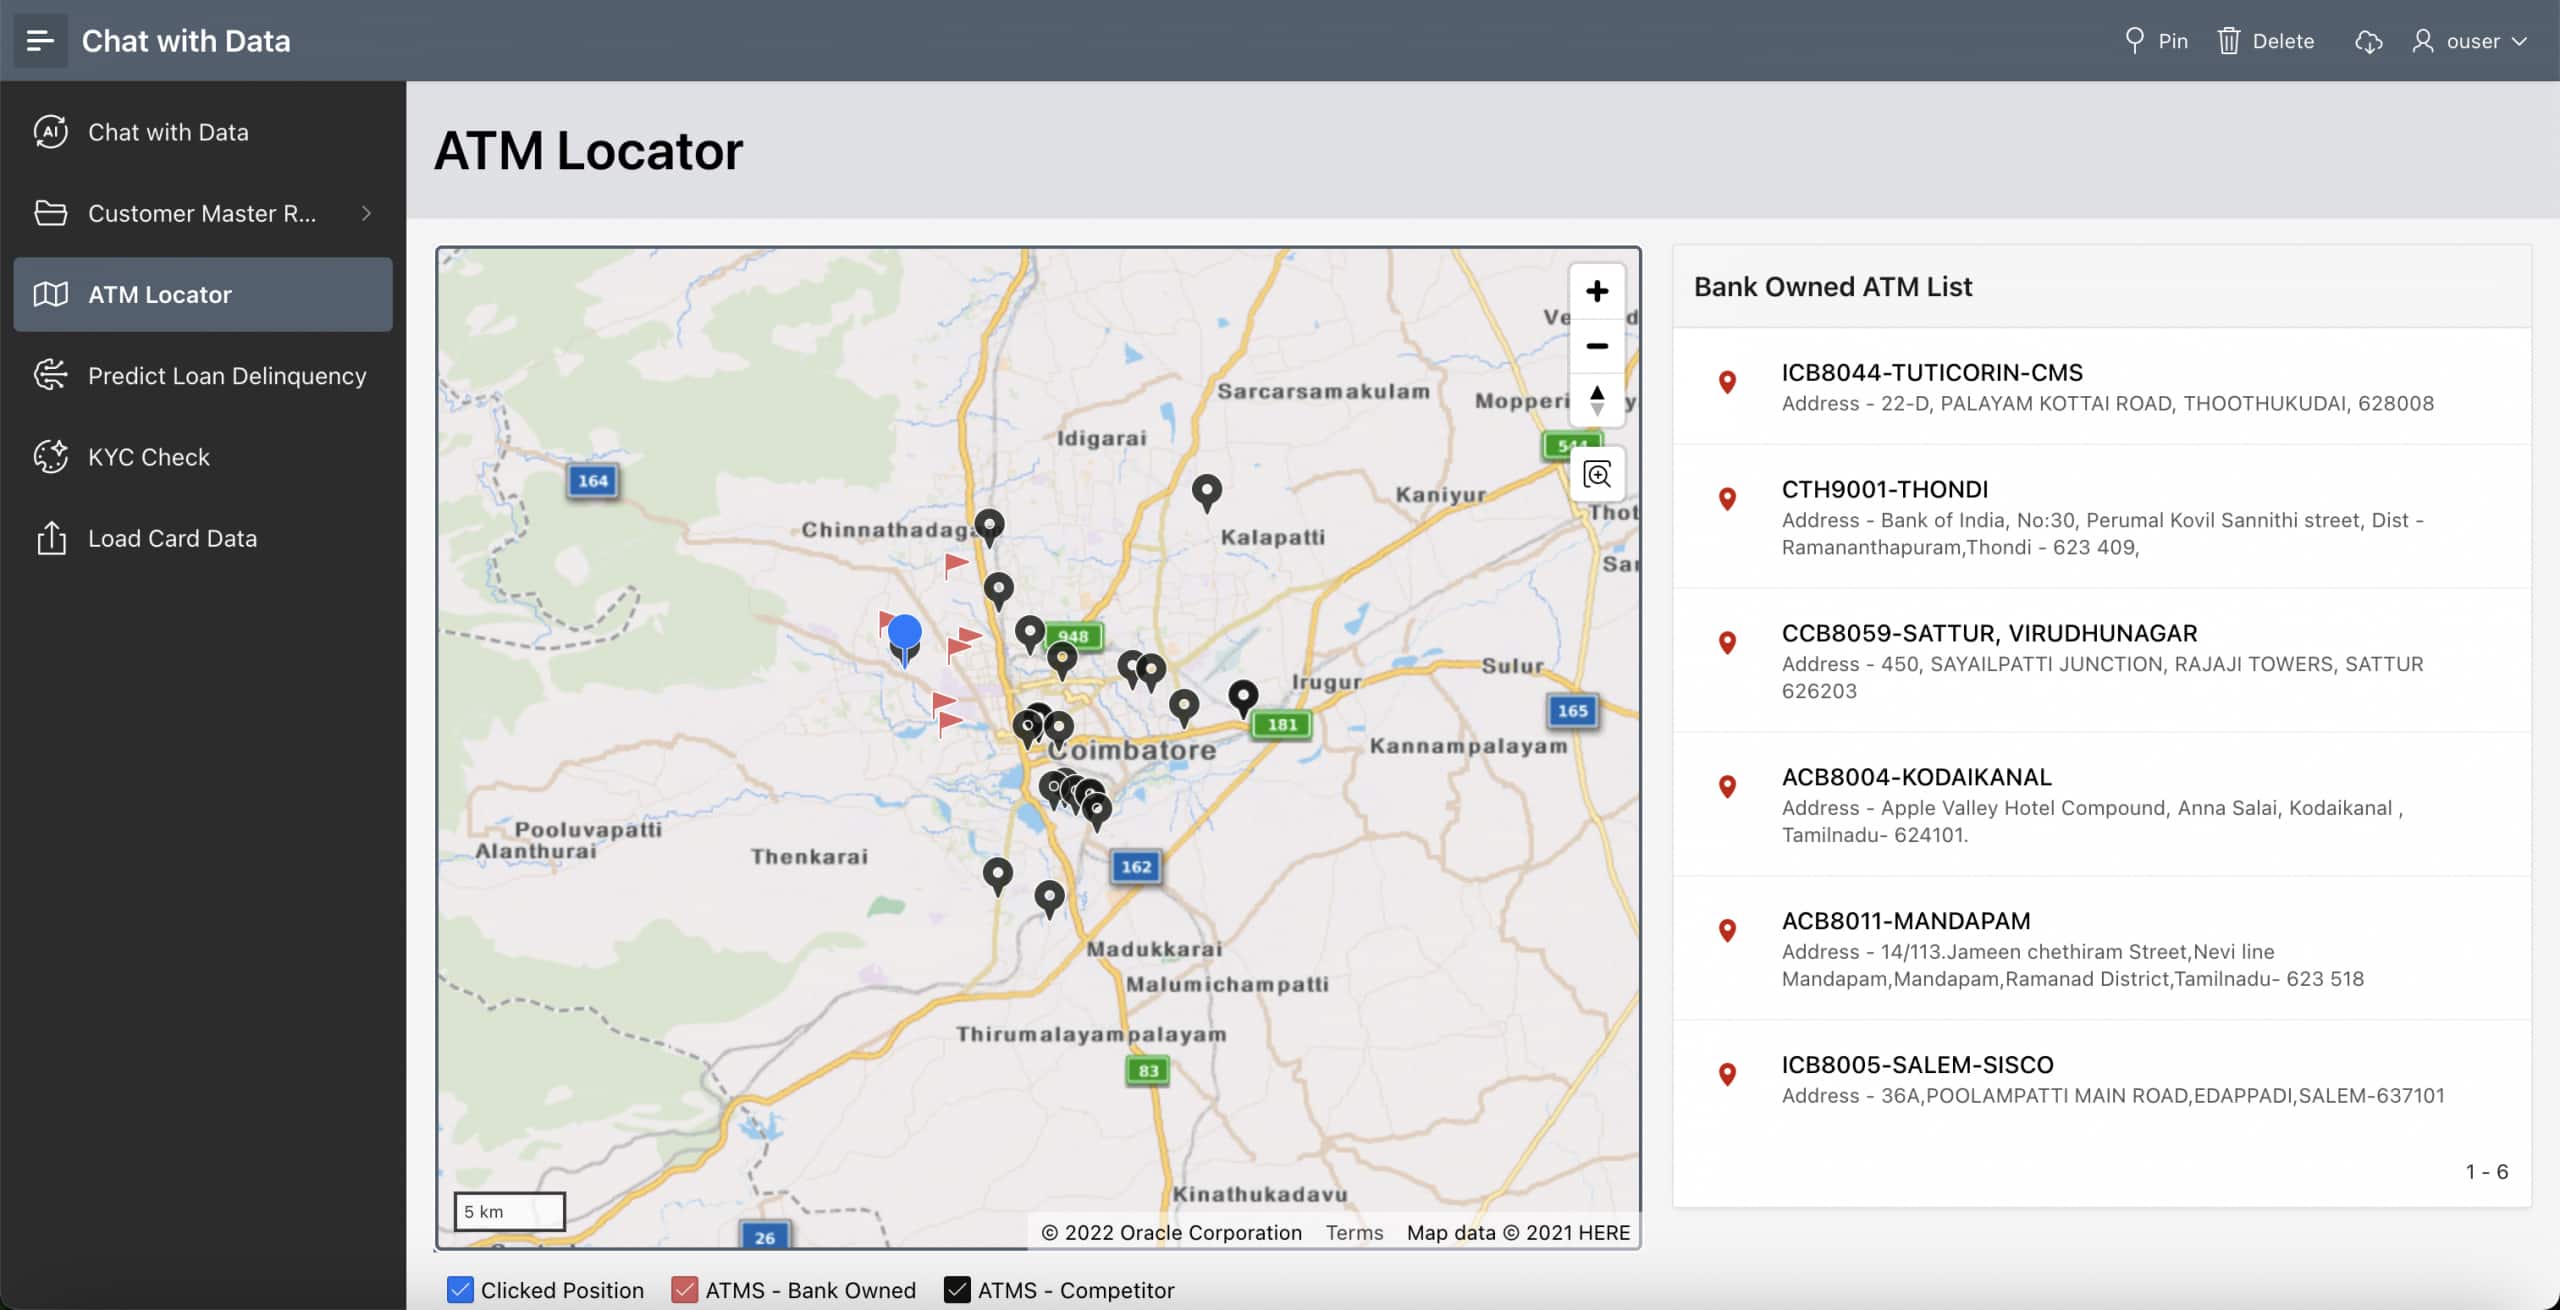
Building a Spatial Data Pipeline with Oracle Autonomous AI Lakehouse ...
Sathya Prakash Velmurugan
4 minute read
OCI GoldenGate Adds Real-Time CDC for EDB Postgres, YugabyteDB, and ...
Julien TESTUT
3 minute read
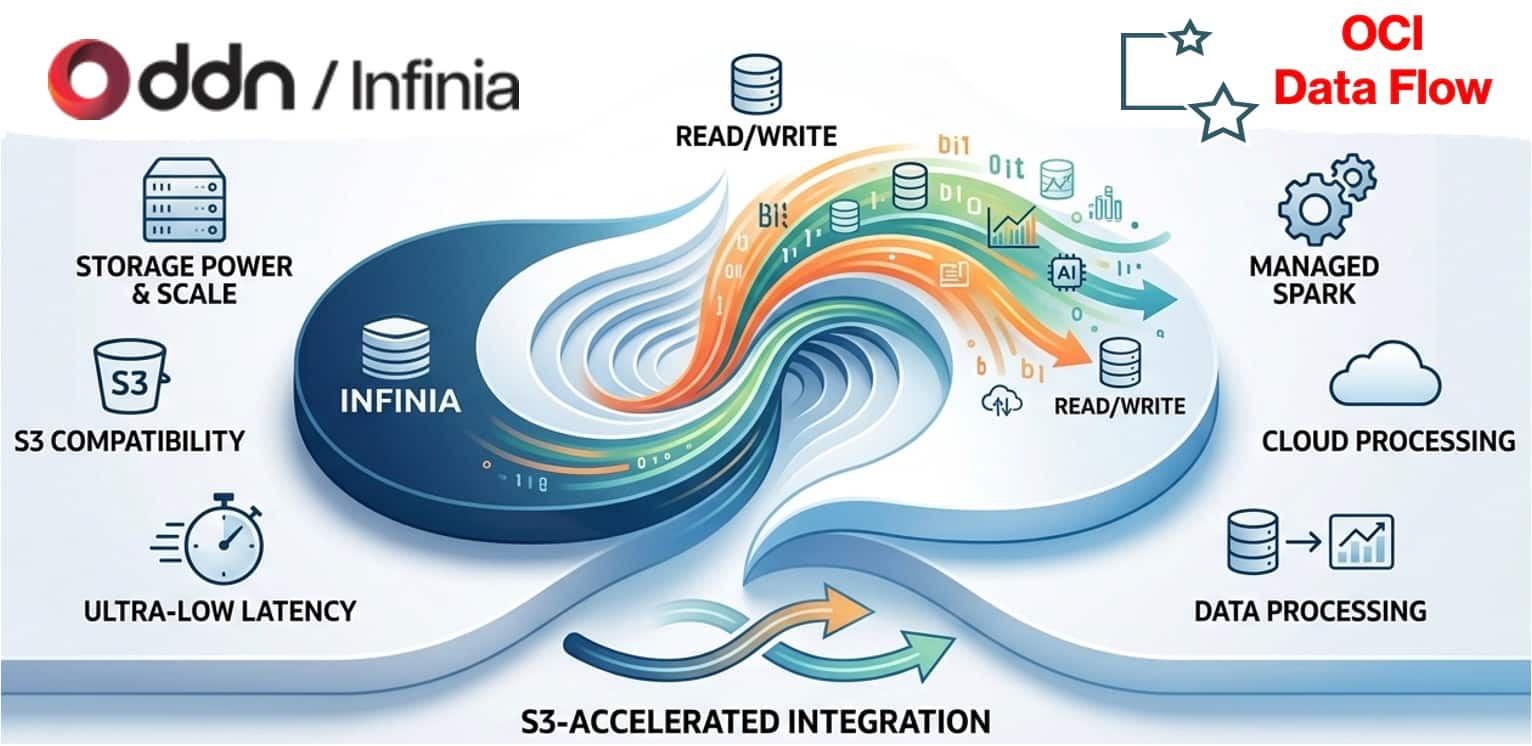
OCI Data Flow integration with DDN Infinia
Mario Miola
7 minute read
Scaling GoldenGate SOURCEISTABLE Initial Load Extracts
Nick Wagner
6 minute read
AIDP Private Workspace connectivity to Oracle Databases
Mario Miola
14 minute read
Real-Time Data Replication to Oracle AI Data Platform Using OCI ...
Massimo Dalla Rovere
11 minute read
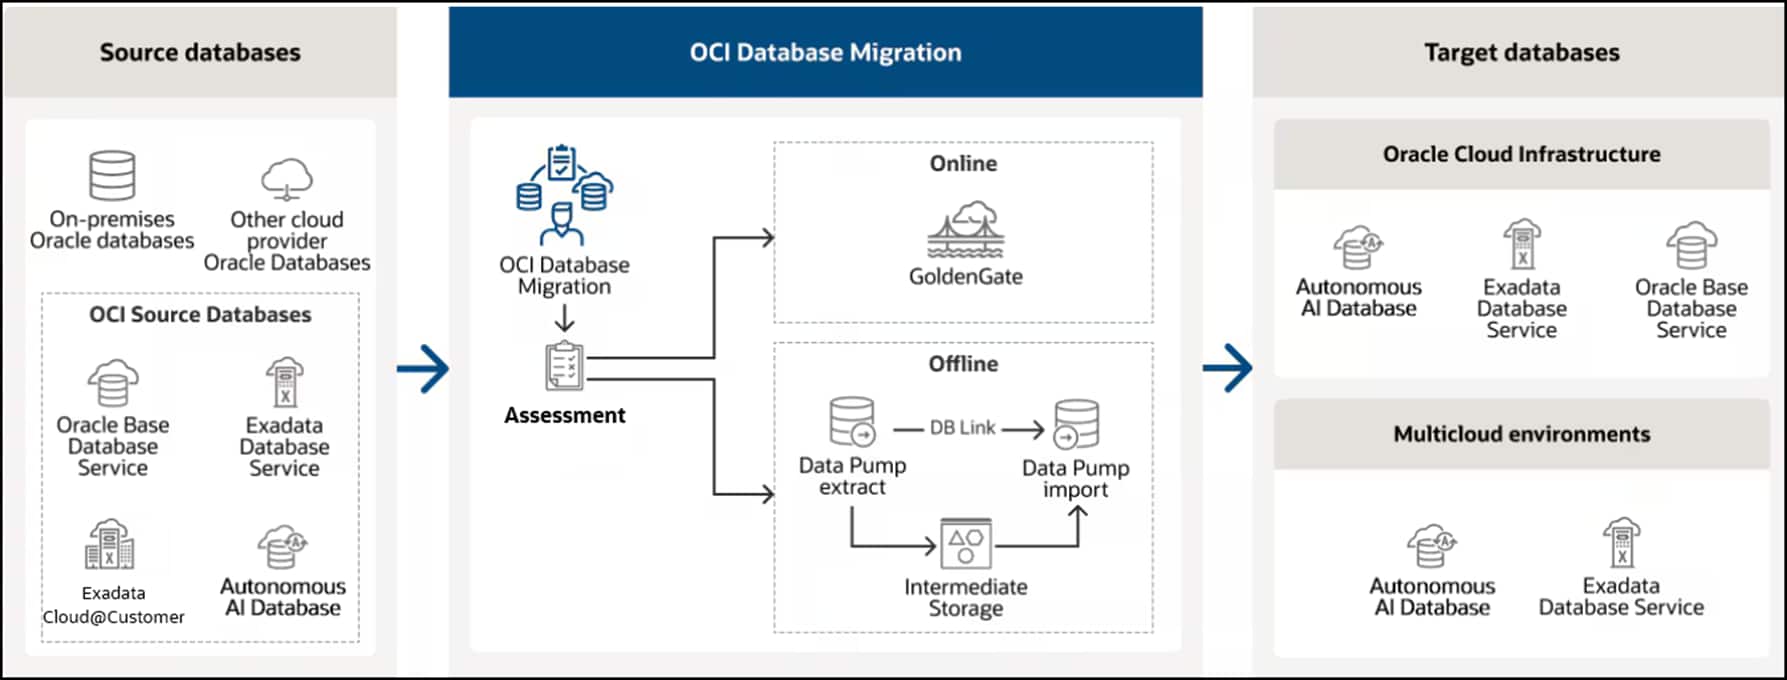
Announcing OCI DMS Assessment : Simplifying Your Database Migration ...
Jorge Martinez
2 minute read
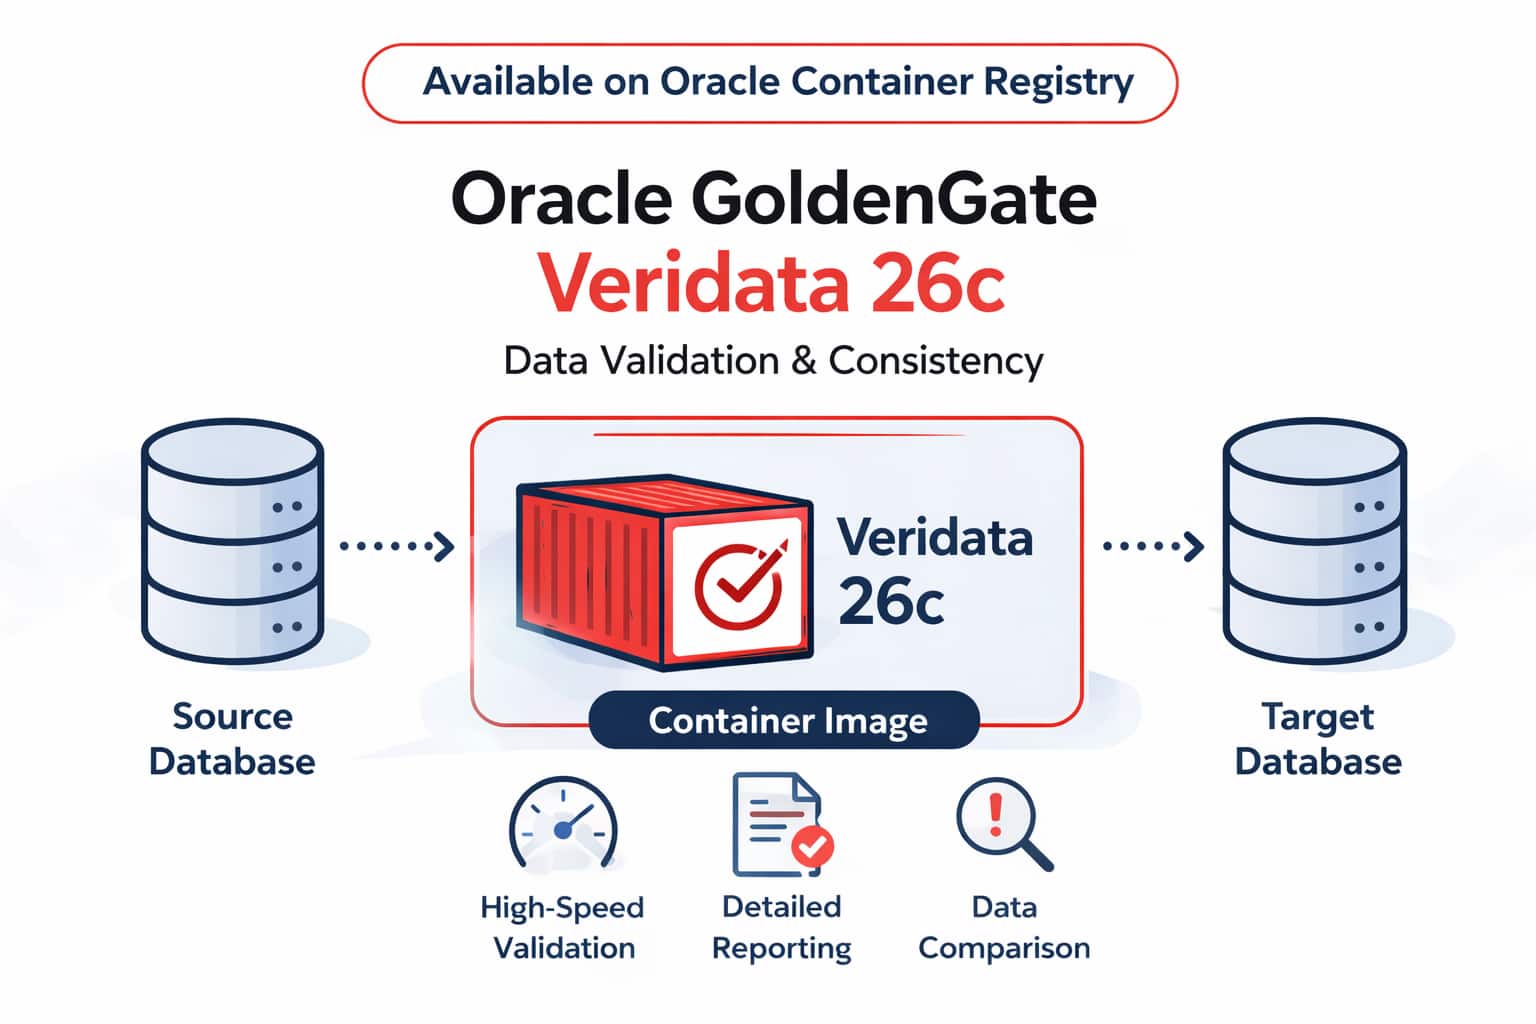
Announcing Oracle GoldenGate Veridata 26c on Oracle Container Registry
Alex Lima
3 minute read
Oracle GoldenGate Stream Analytics 26ai Now Available in OCI ...
Alex Kotopoulis
4 minute read
Apache Iceberg on OCI Object Storage with GoldenGate for DAA 26ai
Carmelo Millan Rosales
9 minute read
View more
Receive the latest blog updates
Subscribe to Oracle Connect email updates
Resources for
About
Careers
Developers
Investors
Partners
Startups
Why Oracle
Analyst Reports
Best CRM
Cloud Economics
Corporate Responsibility
Security Practices
Learn
What is Customer Service?
What is ERP?
What is Marketing Automation?
What is Procurement?
What is Talent Management?
What is VM?
What's New
Try Oracle Cloud Free Tier
Oracle Sustainability
Oracle COVID-19 Response
Oracle and SailGP
Oracle and Premier League
Oracle and Red Bull Racing Honda
Contact Us
US Sales 1.800.633.0738
How can we help?
Subscribe to Oracle Content
Try Oracle Cloud Free Tier
Events
News
© 2026 Oracle
Privacy
/
Do Not Sell My Info
Ad Choices
Careers