There are several OCI tools in place for securely accessing compute resources located in a VCN’s private subnet. One that is very efficient is the OCI Bastion service, which is a managed service by Oracle Cloud Infrastructure. Another very secure, faster and efficient way is using the Oracle Cloud Shell.
The Oracle Cloud Shell is a web browser-based terminal in the OCI Console that provides access to a Linux shell, with a pre-authenticated OCI Command Line Interface (CLI). It now includes a new feature enhancement, which is Network Private Access. This new feature allows you to specify the VCN and Private subnet where the resources are located, creating an endpoint in the subnet. This endpoint is governed by the rules in the subnet’s Security List(s). Additionally you can specify a Network Security Group.
There is one restriction; this feature is supported only in the tenancy’s home region. However, with Regular Remote Peering connections you can extend the accessibility to other regions.
To demonstrate how Private Network Access works we will create a VCN, a Private Subnet, a Compute Instance, and we will launch Cloud Shell.
Create a VCN and Private Subnet
- Login to your OCI account
- Make sure you are in your home region (Top Right)
- Click on the main menu (Top Left)
- Select Networking, Click on Virtual Cloud Networks
- Under List Scope, select your preferred compartment
- Click Create VCN
- Name: DemoVNC_1
- IPv4 CIDR Block: 10.0.0.0/16
- Leave everything else as is.
- Click the Create VCN button
- Your VCN will open
- Click Create Subnet
- Name: DemoPrivateSubnet_1
- In IPv4 CIDR Block enter 10.0.0.0/24
- For Subnet Access select Private
- Leave everything else as is.
- Click the Create Subnet button
Create a Compute Instance
- Click on the main menu (Top Left)
- Select Compute, Click on Instances
- Under List Scope, select the same compartment as above
- Click Create Instance
- Leave all default values as they are and scroll down to Networking
- Make sure that you select DemoVCN_1 and DemoPrivateSubnet_1
- Click Show advanced options
- In Private IPv4 address enter 10.0.0.173
- Scroll down to SSH Keys
- Click the Save Private Key button (this will download the private key to your workstation)
- Click the Create button
- In your workstation, open the private key you downloaded with an editor (like Notepad, or Notepad++)
- Select all the content and copy it to memory
Launch Cloud Shell and configure the Private Network Access
- In the top right, click on the Developer Tools icon, select Cloud Shell (it might take two minutes to launch)
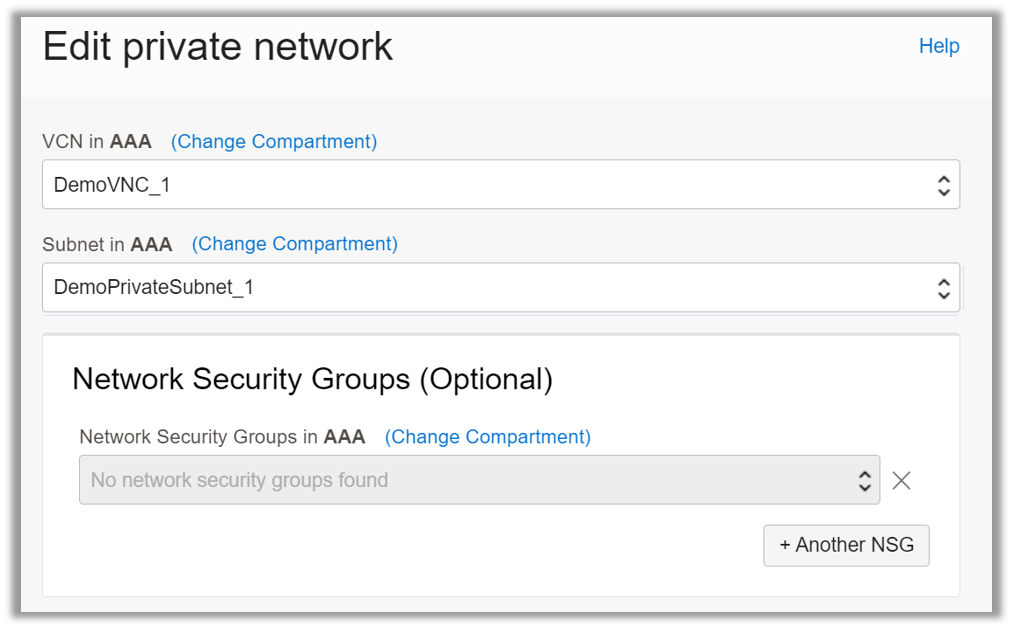
- In the Cloud Shell menu, Network:Public select Private Network Setup
- Select VCN DemoVNC_1
- Select Subnet DemoPrivateSubnet_1
- Click the Connect to this Network button (it might take two minutes to launch)
- In the Cloud Shell command line, type the following command: vi ocikey (This will open the vi editor for a file named ocikey).
- Type i (Insert mode in vi)
- Paste the content of the Private Key file you have in memory
- Press the <esc> key in your keyboard (For exiting insert mode)
- Press the : key
- Type wq! and hit the <enter> key (this saves your file and exits vi)
- Type the following command: chmod 400 ocikey (this hardens the ocikey permissions)
Now you are ready to access your Compute Instance using its private IP address
Connect to your Compute Instance
- Type: ssh –i ocikey opc@10.0.0.173
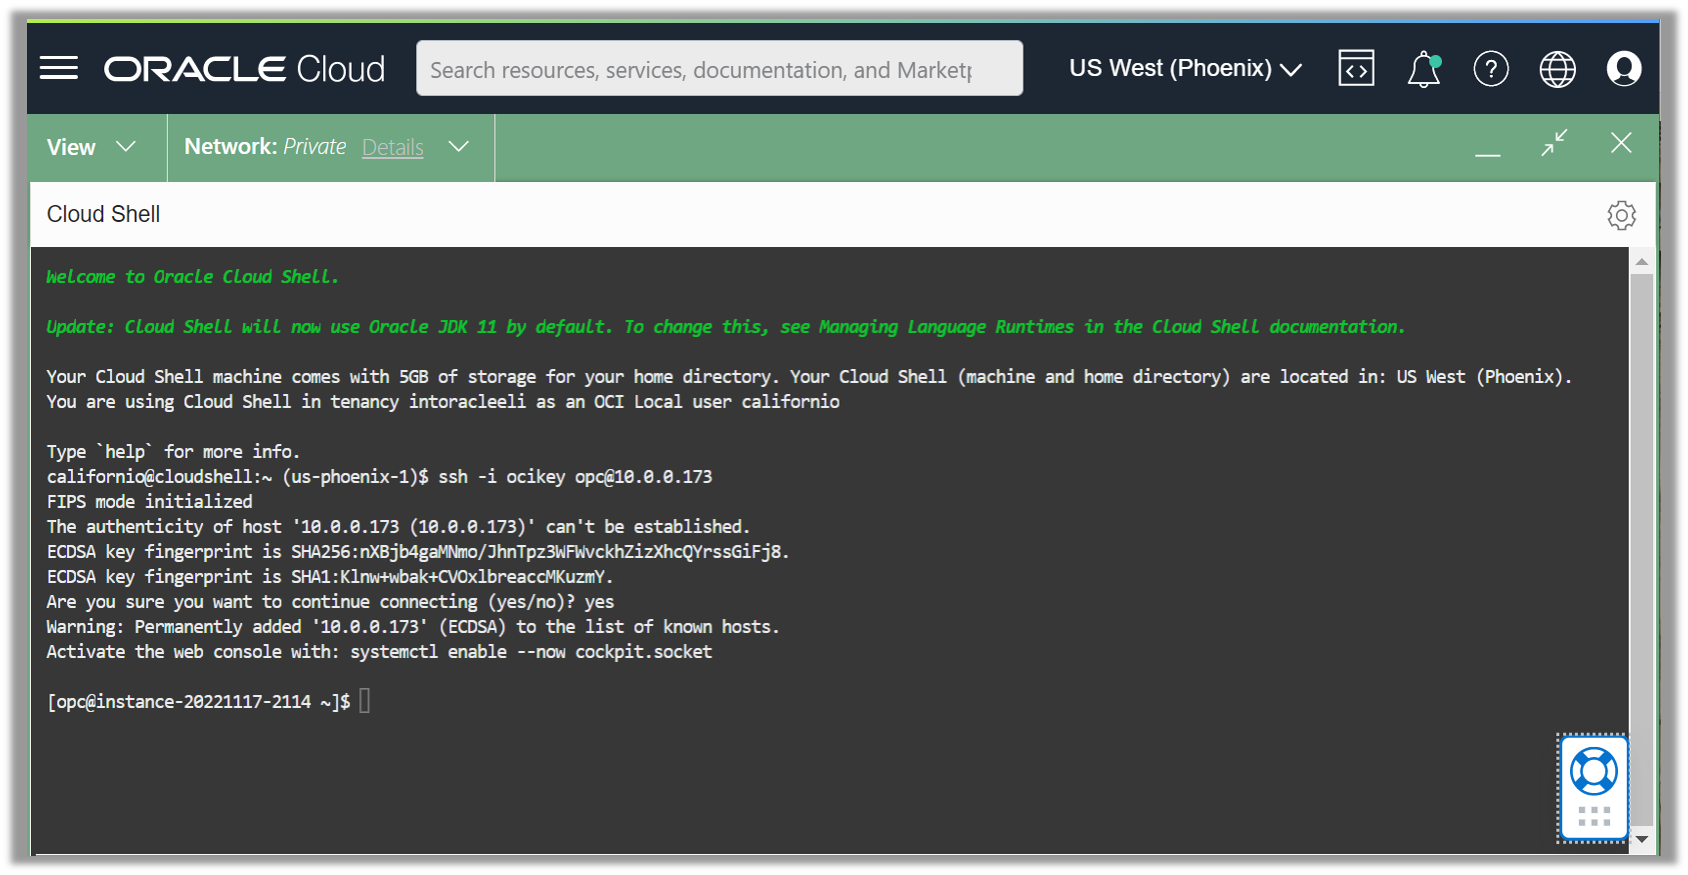
You are now connected to the Compute Instance in the Private Subnet!