It should be clear by now that Oracle embraces multicloud. The Oracle multicloud offerings include Oracle Database@Azure, Oracle Interconnect for Azure, and MySQL HeatWave on AWS, just to name a few. Now, Oracle Interconnect for Google Cloud is available. Since its general availability was announced on June 11, 2024, detailed technical announcements and blog posts about the product and how to configure it have been released, both from Oracle and Google.
In this post, I detail how to configure an IPv4/IPv6 dual stack Oracle Interconnect for Google Cloud. For this configuration, I’m using an Oracle Cloud Infrastructure (OCI) account with administrator’s access, and a Google Cloud trial account. This post assumes working knowledge of OCI Networking and Compute and the Oracle Cloud Console.
The setup looks as follows:

For this configuration, the Australia Southeast (Melbourne) ap-melbourne-1 OCI region is paired with the australia-southeast2 Google Cloud region. For a complete list of the interconnect paired regions, see Oracle Interconnect for Google Cloud.
Let’s get started.
Configure the OCI virtual cloud network and compute instance
To configure the OCI virtual cloud network (VCN), sign into the Oracle Cloud Console and select the Australia Southeast (Melbourne) region. Also, select a compartment that you have permission to create resources in.
Go to the virtual cloud networks list page, select Start VCN Wizard, and select the Create VCN with Internet Connectivity connection type. Enter a name for the VCN and verify that you’re in the correct compartment.
Because this is a dual stack configuration, select the Enable IPv6 option.
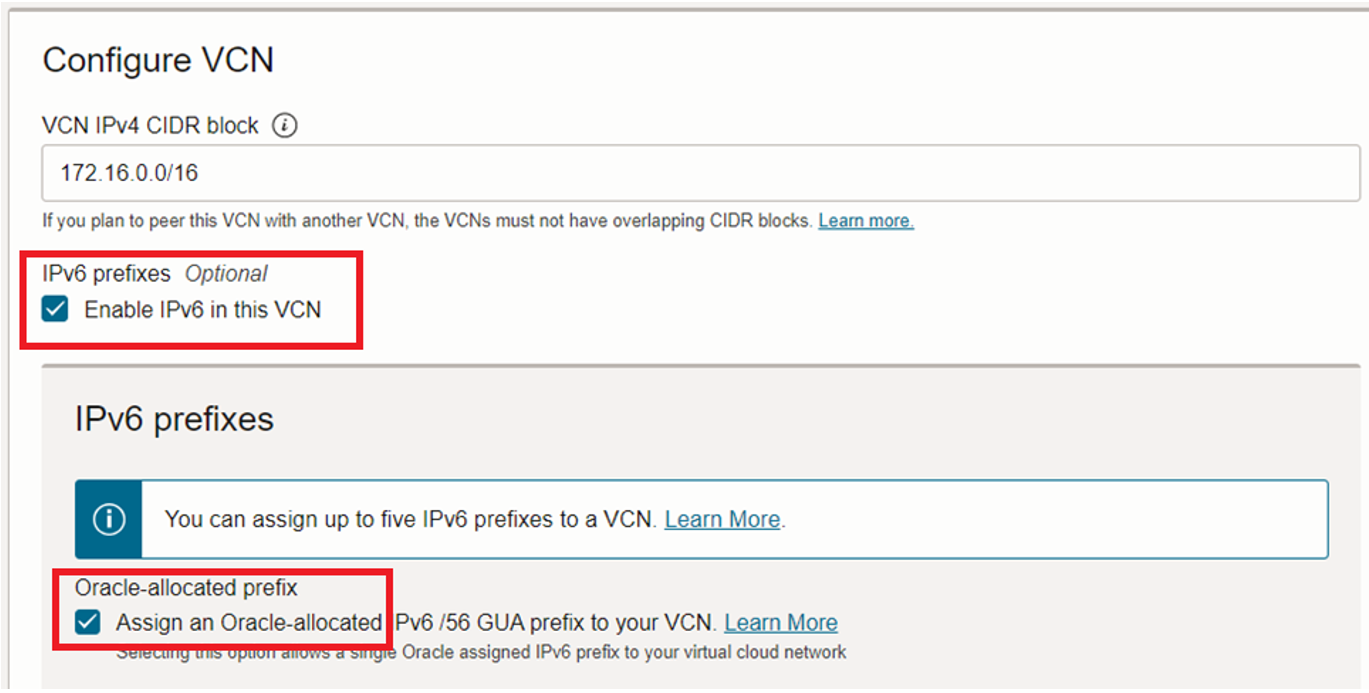
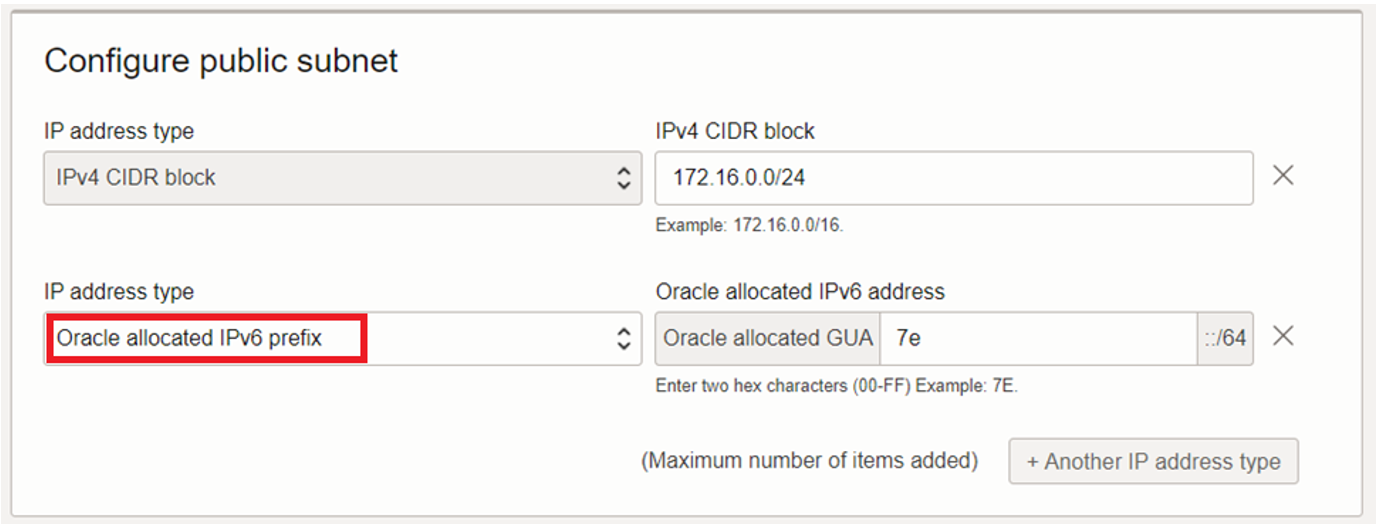
For the public subnet, add an Oracle allocated IPv6 prefix IP address type.
When you use the wizard to create the VCN, an egress rule is automatically included in the security list that allows all IPv6 protocols. That’s all we need. Click Create.
Next, create the Compute virtual machine (VM) instance in OCI. The VM instance in OCI is used for privately pinging the VM in Google Cloud, using IPv6. In this example, I’m using Oracle Linux 8 for the Compute image and AMD VM.Standard.E4.Flex for the shape.
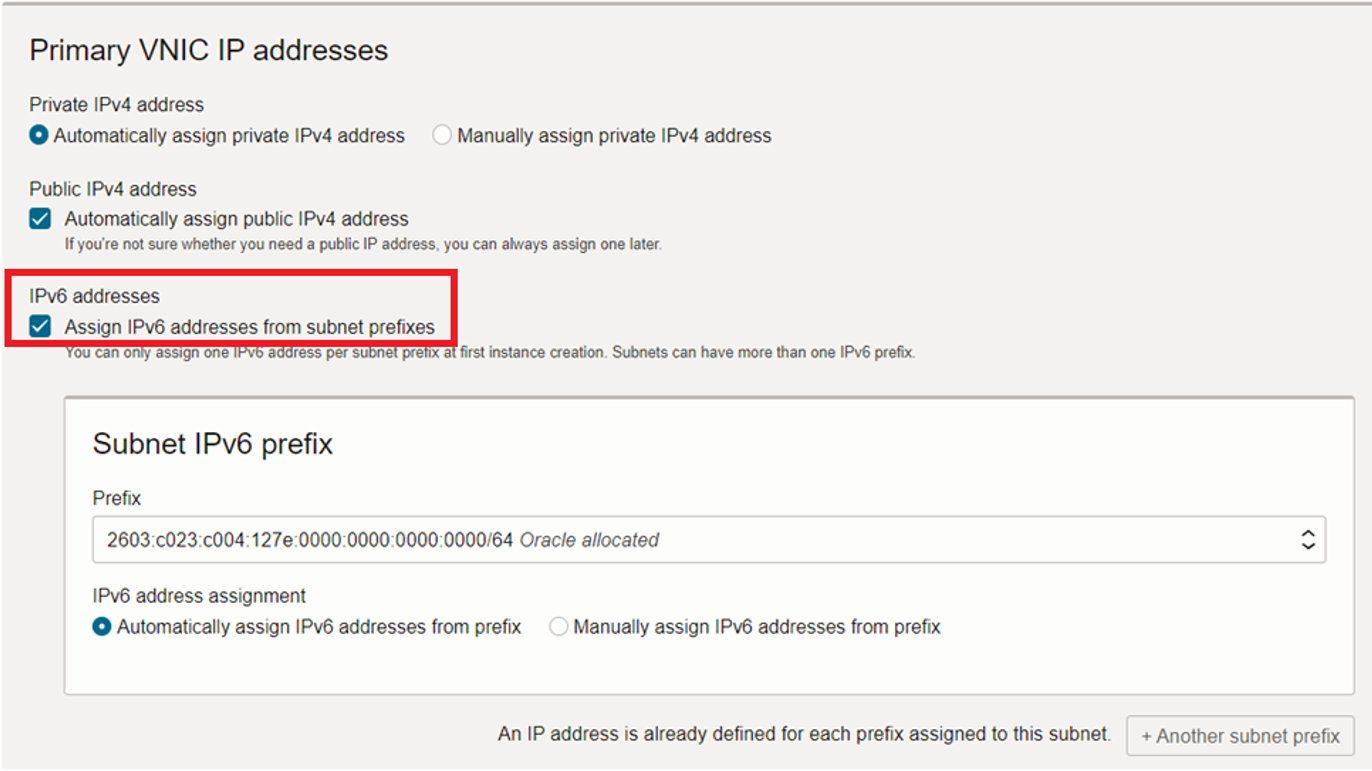
In the Primary VNIC information section, select the VCN and public subnet that you just created, and then select the IPv6 addresses checkbox. OCI assigns an IPv6 address for the subnet prefixes.
For the SSH key, select the best option for you. Provide the rest of the necessary values and click Create.
After the VM is up and running, use SSH to connect to it and enable IPv6 on the IP tables. I am using Cloud Shell for SSH to the VM.
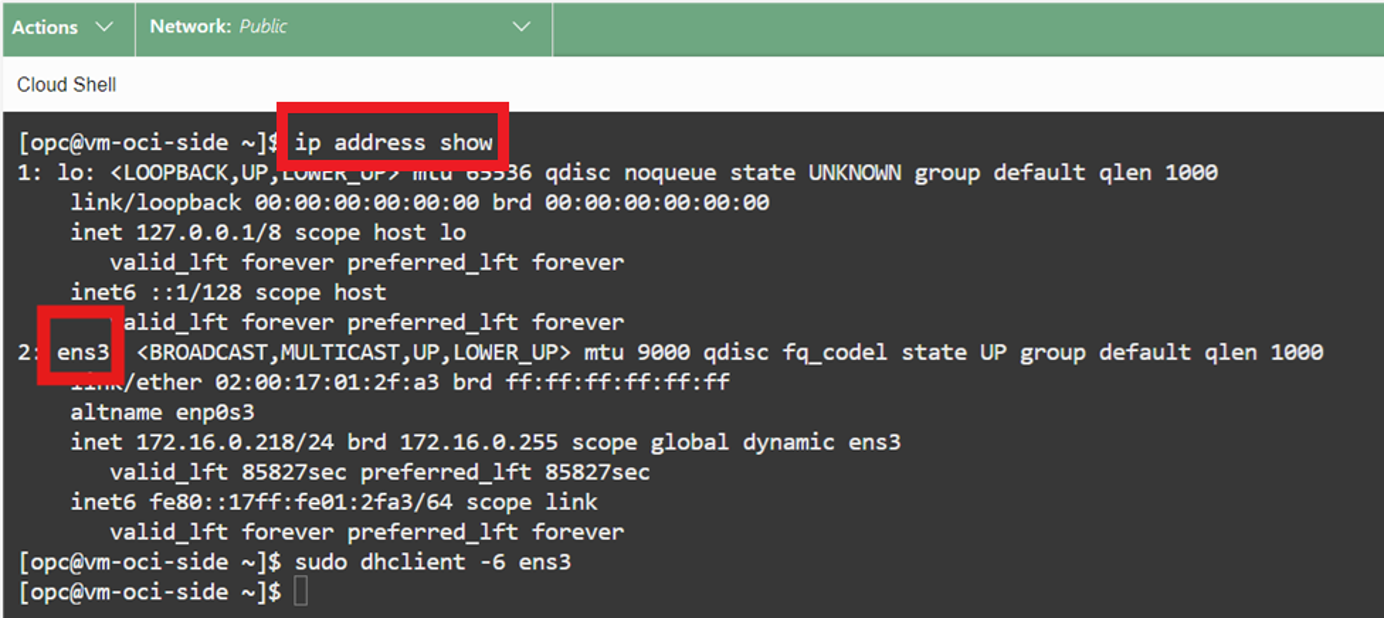
This shape’s virtual interface is ENS3, so the command for enabling IPv6 on the IP tables is sudo dhclient -6 ens3.
You need to use the virtual interface that comes with the shape you selected. Yours might not be ENS3. To find the interface that your VM is using, open Cloud Shell and enter the following command:
ip address show
Configure the OCI dynamic routing gateway and route rules
The next step is to create a dynamic routing gateway (DRG) and then attach it to the VCN.
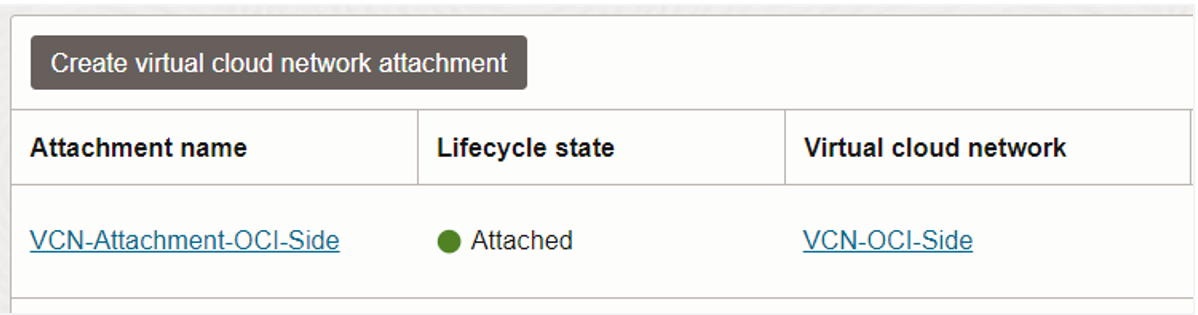
Then, create a route rule in the VCN that sends all IPv6 traffic to the DRG. In this example, I’m using the IPv6 prefix ::/0, which represents every IPv6 value. (This is the IPv6 equivalent of the IPv4 quad zero CIDR notation, 0.0.0.0/0). I’m using this prefix because I don’t know yet the IPv6 prefix of the virtual private cloud (VPC) on the Google Cloud side. A VPC is the VCN counterpart in Google Cloud.

The interconnect needs to originate from the Google Cloud side. After you initiate the connection, Google Cloud generates a service key called a pairing key. That pairing key value is pasted into the OCI service key field when FastConnect is configured, in a later section.
Let’s now move to Google Cloud.
Create a project in Google Cloud
First you need to select a project. In Google Cloud, a project serves a purpose similar to an OCI compartment or an Azure resource group.
After logging in to your Google Cloud account, enter project in the search field, and then select Manage Resources.
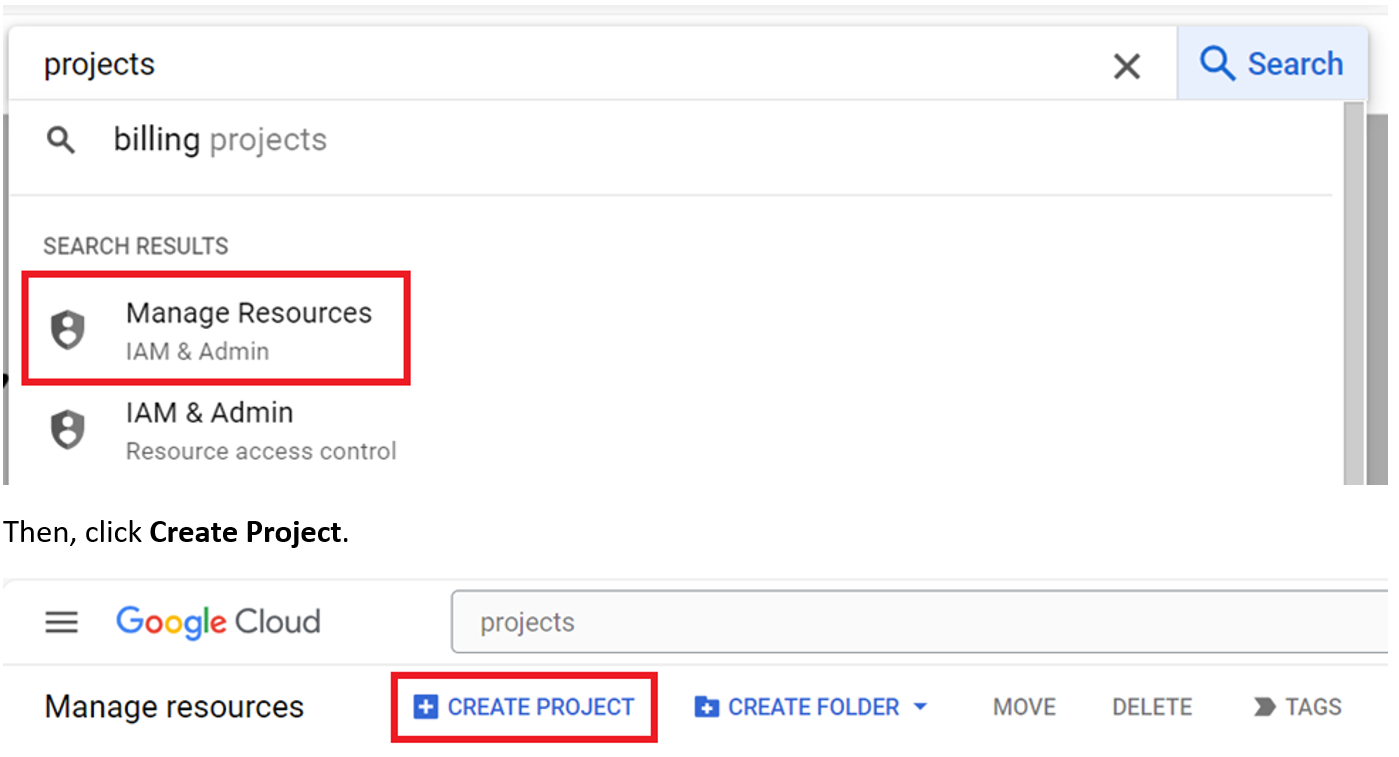
Enter name for the project. I used Main in this example.
After the project is created, click Google Cloud in the top-left corner of the page. On the main Google Cloud page, ensure that the project you created is displayed.
Configure the Google Cloud virtual private cloud (VPC) and Compute instance
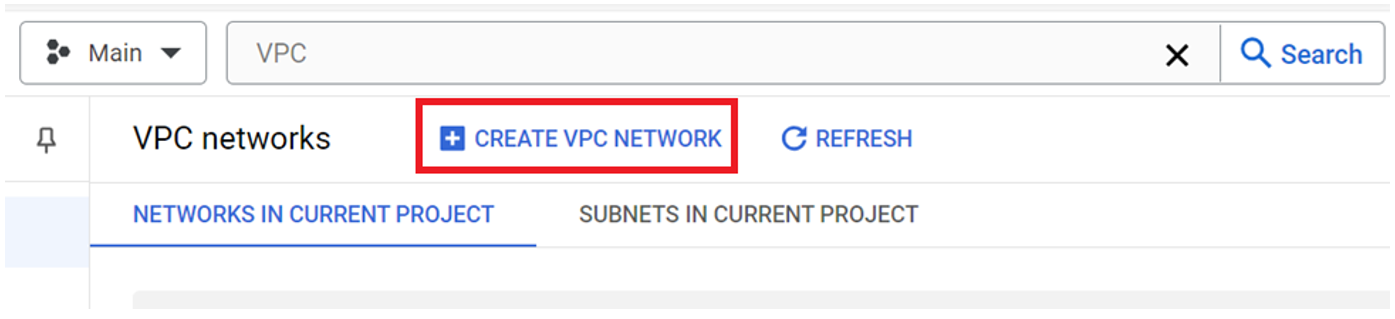
In the search field, type VPC. From the results, select VPC networks. The default VPC with many subnets and an MTU value of 1460 is displayed. VPCs in Google Cloud have global reach, and all new accounts come with a default VPC.
Under the search field, click Create VPC Network.
Enter a name for the network. In this example, I used vpc-gcp-side.
Select 1500 for MTU.
For Subnet creation mode, select Custom.
Select the Configure a ULA internal IPv6 range for this VPC Network checkbox.
For Allocate ULA internal IPv6 range, select Automatically.

The subnet also needs to be enabled with IPv6, so select the IPv4 and IPv6 (dual-stack) option for IP stack type under New subnet. Notice that you have to manually enter the subnet CIDR, but not a VPC CDIR.
The region must be australia-southeast2 for this example.

For IPv6 access type, select Internal. For Firewall rules, select only ICMP. It’s important to understand that this ICMP is only for IPv4. An option for IPv6 isn’t offered at this moment, but you’ll add one to the firewall after the VPC is created.
For Advanced dynamic routing configuration, select Regional. This setting limits the reach of the subnet to the australia-southeast2 (Melbourne) region. Leave everything else with the default values, and then click Create.
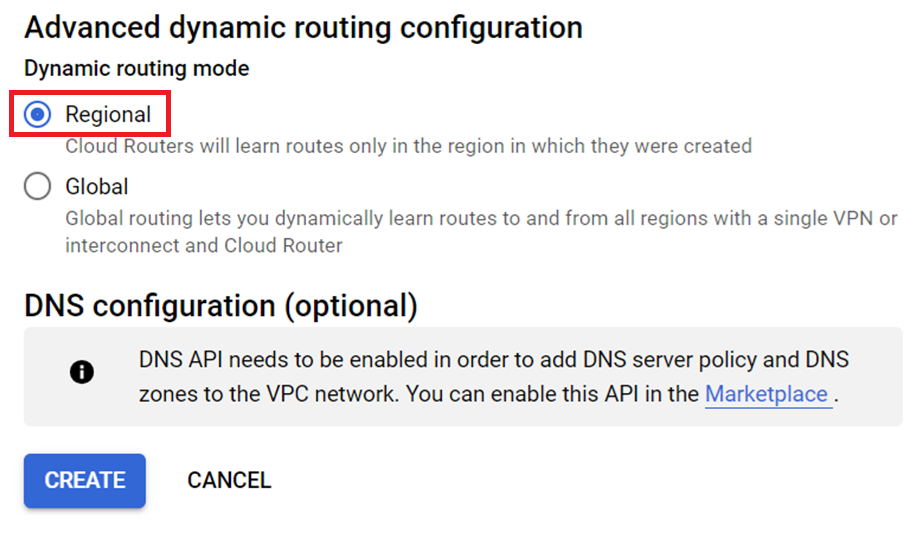
It takes about two minutes for the VPC to be created. When it becomes active, notice the IPv6 prefix and the single firewall rule.
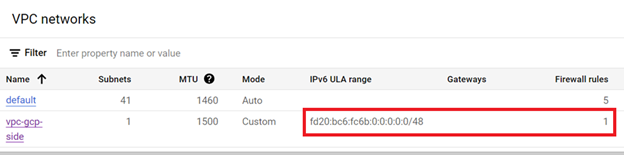
Select your recently created VPC. On the VPC details page, click the Firewalls tab and then click Add Firewall Rule.
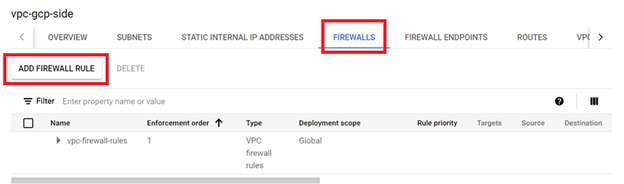
Enter a name and an optional description, and leave the default values as they are for the Logs, Network, Priority, Direction of traffic, and Action on match fields.
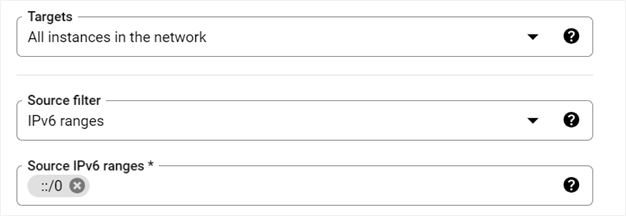
For Targets, select All instances in the network.
For Source filter, select IPv6 ranges.
In the Source IPv6 ranges field, enter ::/0.
For the Second source filter and Destination filter fields, leave the None default value.
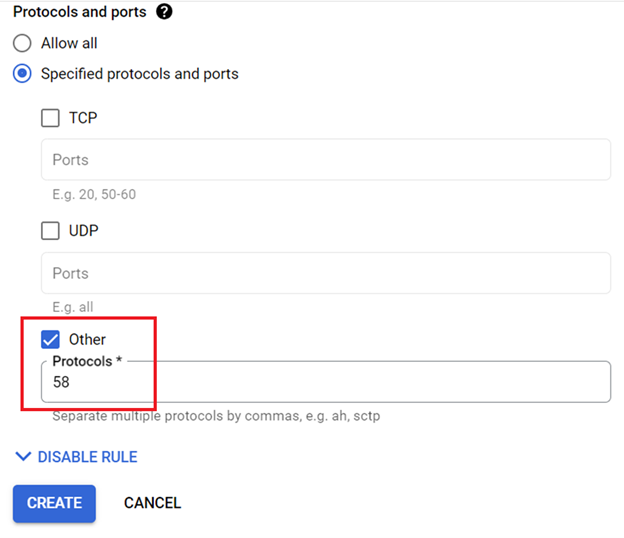
Finally, select Specified protocols and ports, select the Other checkbox, and enter 58 for Protocols (see IANA for more information).
Click Create.
In less than a minute, the firewall rule is created.

The next step is to create the Compute instance that you’ll ping from OCI. In the search field, type Compute. From the results, select Compute Engine. Then, click Create Instance.
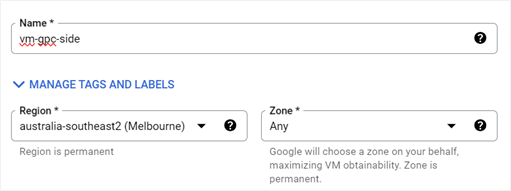
Enter a name for the instance and select australia-southeast2 (Melbourne) for Region. For Zone, leave the default value of Any as is.
For Machine configuration, select E2 and leave all the default values as they are.
Scroll down to Advanced options and expand it. Expand Networking.
For Network interface card, select VirtIO.
Expand Network Interfaces. For Network, select your VPC (vpc-gcp-side for this example) and ensure that your subnet is also selected.
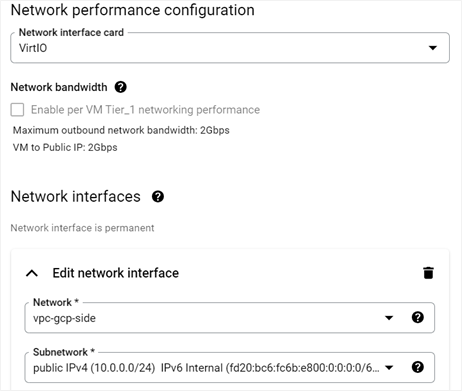
For IP Stack type, select IPv4 and IPv6 (dual-stack). Leave the default values for the rest of the fields.
Click Create.

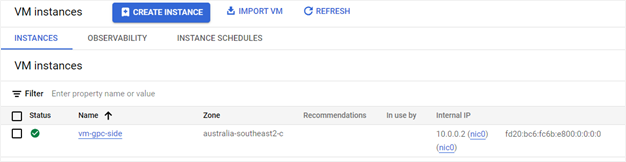
Note the IPv6 address of your Google Cloud Compute instance. In this example, it’s fd20:bc6:fc6b:e800:0:0:0:0.
Now that you have the basic resources on both sides, it’s time to start configuring the interconnect.
Configure the Google Cloud router and VLAN attachment
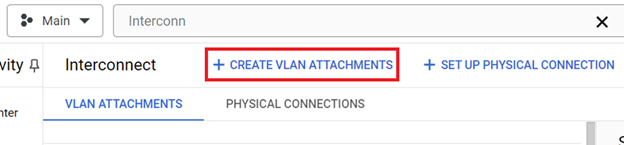
In the search field, type Interconnect. From the results, select Interconnect Network Connectivity. The Google Cloud console displays the interconnect options.
Select Create VLAN Attachments.
Three types of interconnect options are available. Select Partner Interconnect connection.
You might be tempted to select Cross-Cloud Interconnect connection because OCI is a cloud service provider (CSP). The difference is that with the Partner network, both OCI and Google Cloud have allocated physical resources in the paired data centers, and crossover interconnectivity and a partner agreement exist. In the case of the cross-connect (CSP) option, Google Cloud is the only one providing the Google cross-connectivity to the other cloud vendors, such as Azure, AWS, Alibaba, and possibly even OCI, in those regions, outside the 11 paired regions that are part of Oracle Interconnect for Google Cloud.

Click Continue, and then select I Already have a Service Provider.
In this post, I’ll bypass redundancy. If you decide to configure redundancy, you just need to enter the information for the second digital circuit, which in Google Cloud is a VLAN attachment, and in OCI is FastConnect.
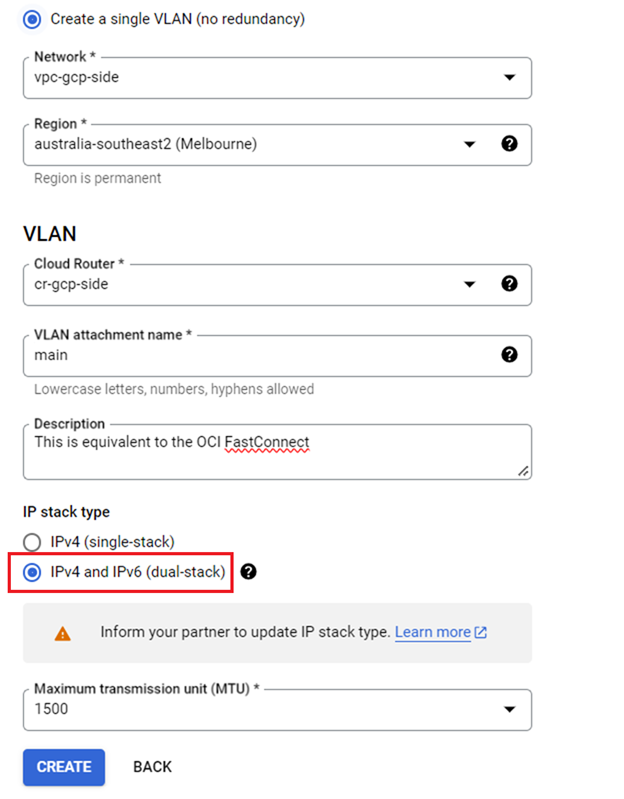
Under Redundancy, select the Create a single VLAN (no redundancy) option, and confirm the selection.
For Network, select your VPC, and for Region, select australia-southeast2 (Melbourne).
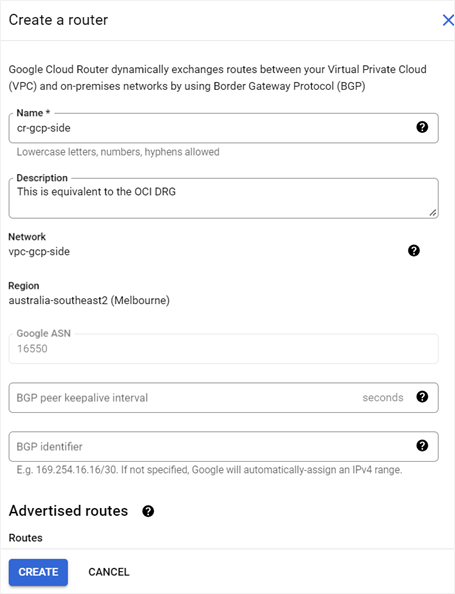
Now you need to create a cloud router, which is Google Cloud’s gateway equivalent to the DRG. Under VLAN, select Create New Router. Enter a name for the router and leave all the other fields with the default values.
Click Create.
Now that you have a cloud router, continue with the VLAN attachment configuration. Enter a name and an optional description for the VLAN attachment.
For the IP stack type, select IPv4 and IPv6 (dual-stack).
Select 1500 for the MTU.
Click Create.
After the VLAN attachment is created, it generates a pairing key. Copy the key into memory because you need it when configuring the OCI FastConnect virtual circuit.
Before returning to OCI, select the Enable checkbox under Pre-activate these VLAN attachments. Selecting this option causes the immediate exchange of BGP routing information between the two connected virtual networks when the connectivity becomes active. Select I Understand, Pre-Activate, and then click OK.
The VLAN attachment is displayed with the status indicating that it is waiting for the service provider.

This service provider is OCI. Let’s go back to OCI.
Configure OCI FastConnect
Open your OCI account in the Oracle Cloud Console, navigate to Customer Connectivity, and then select FastConnect. Ensure that you are in the Melbourne region and in the same compartment in which you create the VCN and VM.
Click Create FastConnect.
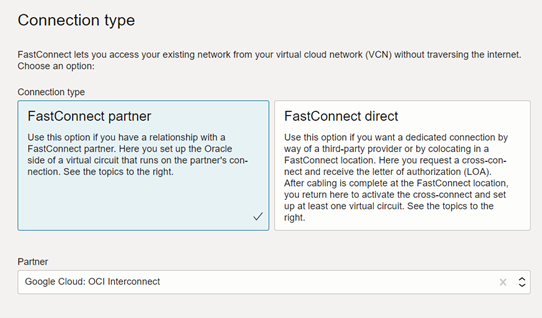
For Connection type, select FastConnect partner.
For Partner, select Google Cloud: OCI Interconnect. Then click Next.
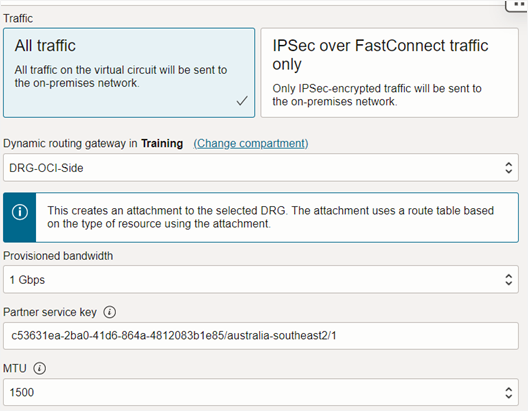
Enter a name for the connection. For Traffic, select All traffic.
For Dynamic routing gateway, select the DRG that you created earlier.
For Provisioned bandwidth, select 1Gpbs.
In the Partner service key field, paste the pairing key value that you copied from the Google Cloud VLAN attachment.
Enter 1500 for MTU.
Click Create.
The FastConnect provisioning process begins and takes about five minutes.
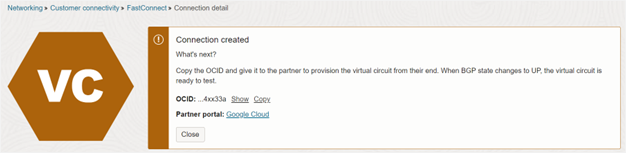
The Lifecycle state changes to Provisioned, and a couple of seconds later, both the IPv4 and IPv6 states change to UP.
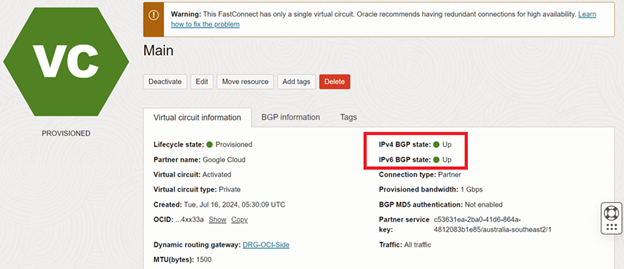
Success!
Test the interconnect
Now it’s time to verify the connectivity by using the VMs. Log in to the VM instance on OCI and run a ping6 command to the IPv6 address of the VM in Google Cloud.
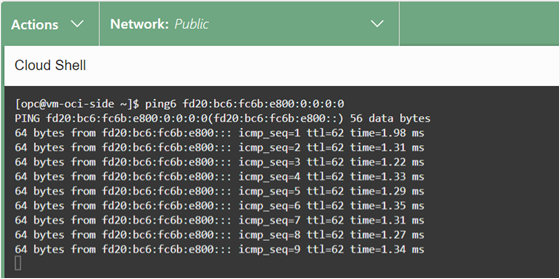
Success confirmed! The latency is under 2 ms. (The ping response time varies from region to region.)
I encourage you to try the Oracle Interconnect for Google Cloud yourself in any of the 11 paired regions.