
In our previous blog, we introduced the MRS Component and discussed how it can help web developers access MySQL data with less backend code to maintain. Here, we’ll build a REST API for customer orders. Products, orders, and line items live in a relational schema, and MRS will present that related data as nested JSON for the application to use.
We’ll configure the component and expose customer orders through a protected REST API. Then we’ll use cURL to sign in with a MySQL Server account and retrieve an order and its line items.
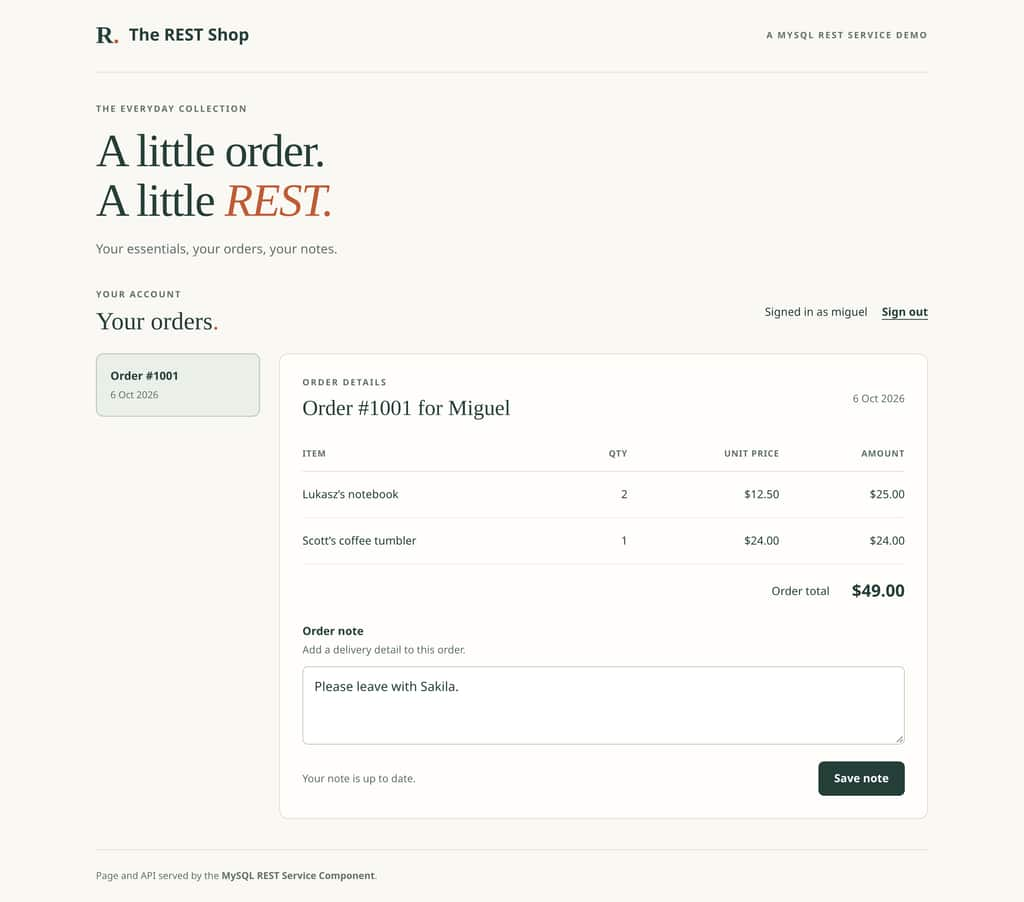
The screenshots show a small demo web frontend that uses this REST API to display orders and update delivery notes.
What you’ll need
- MySQL Server 26.10.0 (includes the MRS Component)
- MySQL Shell 26.10.0 (ships with the MRS plugin)
Use a fresh local development instance. The examples were tested on Linux with MySQL Server running under the same OS account as the terminal, bound to 127.0.0.1 on port 3306, with TLS enabled for MySQL connections. You’ll also need OpenSSL, cURL, and jq to format the JSON responses.
Start by connecting as an administrator, adjusting the port and account for your instance:
mysqlsh --host=127.0.0.1 --port=3306 --user=root --passwordKeep this Shell session open, and use a second terminal for OpenSSL and cURL. The sample password and certificate are for this local exercise.
1. Configure MRS
MRS serves requests over HTTPS. Create a localhost certificate in a terminal, in a location of your choice (but remember it):
openssl req -x509 -newkey rsa:2048 -sha256 -nodes \
  -days 30 -subj '/CN=localhost' \
  -addext 'subjectAltName=DNS:localhost,IP:127.0.0.1' \
  -keyout localhost-key.pem -out localhost-cert.pem

chmod 600 localhost-key.pem
If the Server runs under a separate OS account, place both files in a directory it can access, make that account the owner of the private key, and retain mode 600. Make sure the certificate file is also readable by the OS account running cURL.
In MySQL Shell, configure MRS and install the component (switch to SQL mode if needed with \sql). Replace the two certificate paths below with absolute paths readable by the MySQL Server process:
CONFIGURE REST METADATA;

INSTALL COMPONENT 'file://component_mysql_rest_service'
   SET PERSIST mysql_rest_service.ssl_cert = '/absolute/path/localhost-cert.pem',
       PERSIST mysql_rest_service.ssl_key = '/absolute/path/localhost-key.pem';

SHOW GLOBAL STATUS LIKE 'mysql_rest_service.state';
When the state is READY, the component is running. If it does not reach that state, check the MySQL error log.
2. Expose orders
Now that MRS is running, let’s build an API that returns a customer order together with its line items and product details as one nested JSON document.
But first, create the sample data in MySQL Shell: one order, two products, and their line items.
CREATE DATABASE shop;

CREATE TABLE shop.products (
    id INT PRIMARY KEY,
    name VARCHAR(100) NOT NULL
);

CREATE TABLE shop.orders (
    id INT PRIMARY KEY,
    customer_name VARCHAR(80) NOT NULL,
    ordered_at DATETIME NOT NULL,
    note VARCHAR(500) NOT NULL
);

CREATE TABLE shop.order_items (
    id INT PRIMARY KEY,
    order_id INT NOT NULL,
    product_id INT NOT NULL,
    quantity INT NOT NULL,
    unit_price DECIMAL(10,2) NOT NULL,
    FOREIGN KEY (order_id) REFERENCES shop.orders(id),
    FOREIGN KEY (product_id) REFERENCES shop.products(id)
);

INSERT INTO shop.products VALUES
    (1, 'Lukasz’s notebook'), (2, 'Scott’s coffee tumbler');

INSERT INTO shop.orders VALUES
    (1001, 'Miguel', '2026-10-06 09:30:00', 'Please leave with Sakila.');

INSERT INTO shop.order_items VALUES
    (1, 1001, 1, 2, 12.50), (2, 1001, 2, 1, 24.00);
Create the service and configure sign-in
Next, create a MySQL account, a REST service, and an authentication app named ShopMySQL. With automatic registration disabled, we explicitly associate miguel with the API.
CREATE USER 'miguel'@'localhost' IDENTIFIED BY 'Miguel-demo!26';

CREATE REST SERVICE /shop ENABLED PUBLISHED;
USE REST SERVICE /shop;

CREATE REST AUTH APP ShopMySQL VENDOR MYSQL
    DO NOT ALLOW NEW USERS TO REGISTER;

ALTER REST SERVICE /shop ADD AUTH APP ShopMySQL;

CREATE REST USER `miguel`@`ShopMySQL`
    OPTIONS {"vendor_user_id": "miguel@localhost"};
Wait, what’s under the hood?
MySQL Server validates miguel‘s password. In this case, the REST user associates that MySQL account with the API; there is no separate MRS password to maintain. We use the miguel@localhost account for this local setup.
We use MySQL Server authentication in this walkthrough. MRS also supports accounts managed by MRS and sign-in through supported OAuth2 providers. For authorization, REST roles control which operations users can perform, while row-ownership rules can restrict access to their own data. See the Authentication and Authorization documentation for details.
Define the order document
Now describe the JSON document you want MRS to return. The foreign keys connect the tables, and the REST view shapes their data into an order with an items array and a product inside each item.
CREATE REST SCHEMA /api ON SERVICE /shop FROM shop;

CREATE REST VIEW /orders ON SERVICE /shop SCHEMA /api
    AS shop.orders CLASS CustomerOrder @UPDATE {
        orderId: id @KEY,
        customerName: customer_name,
        orderedAt: ordered_at,
        note: note,
        items: shop.order_items {
            itemId: id @KEY,
            quantity: quantity,
            unitPrice: unit_price,
            product: shop.products {
                productId: id @KEY,
                name: name
            }
        }
    } AUTHENTICATION REQUIRED;
Note: @UPDATE enables updates through this view. In this walkthrough, we’ll update the delivery note. For a customer-facing API, use field-level @NOUPDATE annotations to protect values clients must not change, such as prices and product details.
Grant access to the API
Create a REST role that permits reading and updating through /orders, then assign it to miguel:
CREATE REST ROLE shop_user;

GRANT REST READ, UPDATE ON SCHEMA /api OBJECT /orders TO shop_user;

GRANT REST ROLE shop_user TO `miguel`@`ShopMySQL`;
The role authorizes the operations; the view defines which fields can change. Together, they let miguel retrieve the complete order and update its delivery note.
This example combines HTTPS, MySQL Server authentication, and explicit REST permissions. We use one account and one order to keep the walkthrough focused. In an application serving multiple customers, configure per-customer authorization so each customer can access only their own orders.
HTTP requests are authenticated using miguel‘s MySQL account. MRS executes the configured query through its data-access account.
3. Retrieve the order
In your second terminal, sign in and save the session cookie. Replace MRS_CA with the absolute path to the certificate you created in step 1. Note that jq reads the password from the environment and builds the JSON login request:
umask 077
MRS_URL='https://localhost:33443/shop'
MRS_CA='/absolute/path/localhost-cert.pem'

export MRS_PASSWORD='Miguel-demo!26'

jq -n '{
  authApp: "ShopMySQL",
  sessionType: "cookie",
  username: "miguel",
  password: env.MRS_PASSWORD
}' |
  curl --cacert "$MRS_CA" --cookie-jar miguel.cookies \
    --header 'Content-Type: application/json' \
    --data-binary @- \
    "$MRS_URL/authentication/login"

unset MRS_PASSWORD
The login request includes the password, and HTTPS encrypts the entire request in transit. Using HTTPS for login and subsequent authenticated requests follows OWASP’s guidance on protecting authentication with TLS. --cacert verifies the server certificate using the certificate created earlier. Use this disposable password only for the local exercise: you should know that literal assignments can appear in shell history, and environment variables are not secret storage.
A successful login returns HTTP 200 OK, and cURL saves the session cookie in miguel.cookies. Keep this file private: it authenticates subsequent requests. umask 077 makes newly created files readable and writable only by your OS account.
By the way, MRS also supports JWT bearer tokens through the Authorization header as an alternative to cookies. We’ll cover that option in a future post.
Note: MRS picks up configuration changes automatically. If your first login returns 404 immediately after setup, wait a few seconds and rerun the entire login block above, including export MRS_PASSWORD.
Now retrieve order #1001 using that cookie:
curl --cacert "$MRS_CA" --cookie miguel.cookies \
  "$MRS_URL/api/orders/1001" | jq
The response contains the order, its line items, and product details:
{
  "note": "Please leave with Sakila.",
  "items": [
    {
      "itemId": 1,
      "product": {
        "name": "Lukasz’s notebook",
        "productId": 1
      },
      "quantity": 2,
      "unitPrice": 12.5
    },
    {
      "itemId": 2,
      "product": {
        "name": "Scott’s coffee tumbler",
        "productId": 2
      },
      "quantity": 1,
      "unitPrice": 24.0
    }
  ],
  "links": [
    {
      "rel": "self",
      "href": "/shop/api/orders/1001"
    }
  ],
  "orderId": 1001,
  "orderedAt": "2026-10-06 09:30:00.000000",
  "customerName": "Miguel",
  "_metadata": {
    "etag": "B1D2B69D23594853A8BBB85D4304D2C2DE87298144011BDEEC490D059193B83B"
  }
}
The response contains everything our demo needs to display order #1001 and calculate the $49.00 total. The browser gets the product details in the same response.
You can stop here with a working read API, or try one small update below.
Optional: update the delivery note
Let’s use the same API to change the delivery note. First, save a fresh copy of the order:
curl --cacert "$MRS_CA" --cookie miguel.cookies \
  "$MRS_URL/api/orders/1001" --output order.json
Open order.json in a text editor and change only the note value to:
"note": "Please leave with Rui or Alfredo. They'll handle the REST."Keep the rest of the document unchanged, including _metadata.etag. This version identifier lets MRS detect whether the order changed after you read it.
Send the updated document back to the same endpoint:
curl --cacert "$MRS_CA" --cookie miguel.cookies \
  --request PUT --header 'Content-Type: application/json' \
  --data-binary @order.json "$MRS_URL/api/orders/1001"
Read the order again to confirm the saved note:
curl --cacert "$MRS_CA" --cookie miguel.cookies \
  "$MRS_URL/api/orders/1001" | jq
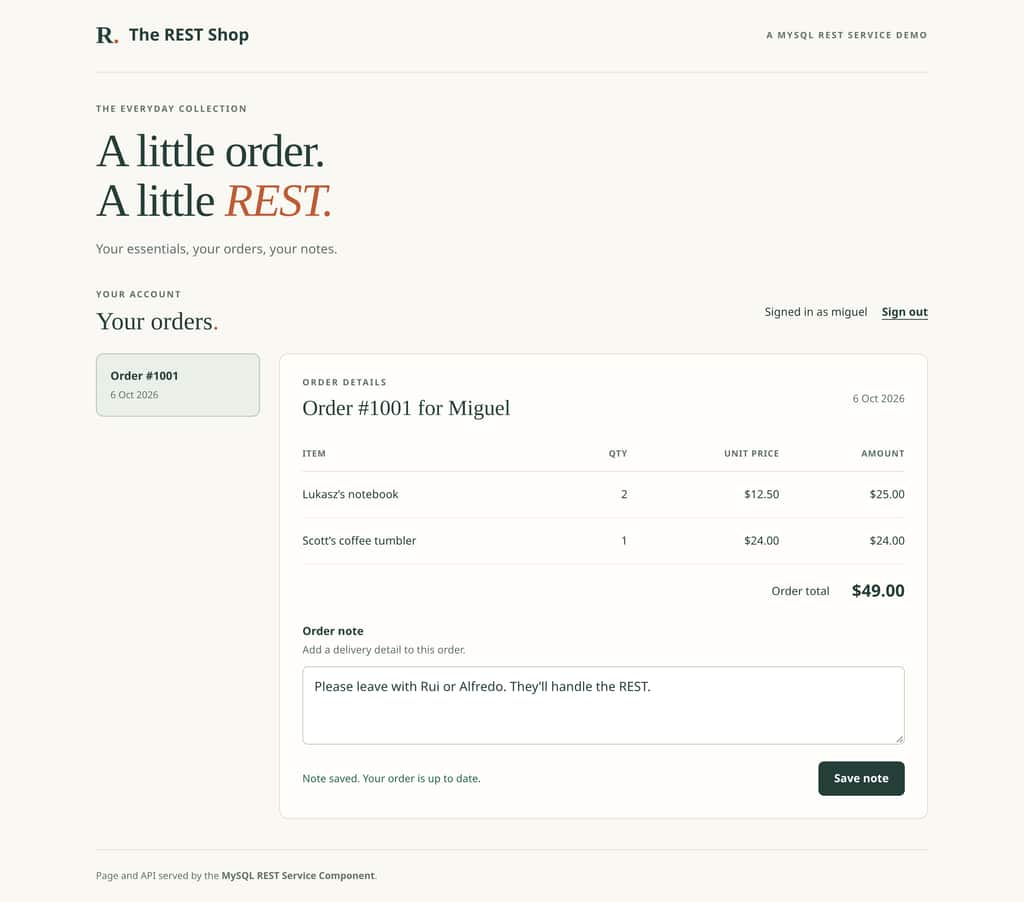
Here’s how the updated note appears in our demo application:
To verify the change directly in MySQL, run this in your MySQL Shell session:
SELECT id, note FROM shop.orders WHERE id = 1001;When you finish, whether you tried the update or stopped after reading the order, sign out:
curl --cacert "$MRS_CA" --cookie miguel.cookies \
  --request POST "$MRS_URL/authentication/logout"
Summary
You now have a working API for customer orders, served directly by MySQL Server. A single authenticated request returns an order, its line items, and product details as nested JSON, ready for your application to use. If you completed the optional delivery-note update, you also changed data through the API and verified the result in MySQL.
Your data stays in its relational schema, while MRS presents the document your application needs. HTTPS protects the connection, MySQL Server validates the login, and REST roles control the permitted operations. For applications serving multiple customers, you can also configure row-ownership rules so each customer can access only their own orders.
Pick one useful endpoint for your own application, define the document it should return, and make your first request!
Coming up in Part 3, “Inside MRS: From HTTP Request to MySQL and Back“: we’ll follow a request through routing, authentication and authorization, database execution, and response generation.
Get Involved
What would you expose through your first MRS API? Try the walkthrough and share your experience on MySQL Community Slack.
You can explore the MRS Component source code and contribute improvements. Our contribution guide explains how to get started.
Bugs and Feature Suggestions
If you find a problem or have a feature suggestion, please open an issue on GitHub or file a bug report.
For support requests, please open a support ticket.
More Information
Documentation
- MySQL REST Service Component Documentation
- MySQL REST Service Documentation
- MySQL REST Service SQL Reference
Downloads
- Download MySQL Shell & MySQL Community Server from MySQL Community Downloads.
- MySQL Enterprise binaries are available on My Oracle Support or through Oracle Software Delivery Cloud.
Enjoy, and thank you for using MySQL!