The 26.01 release of Oracle Integration is now available. This release focuses on bringing improvements to process life cycle management tasks and improving the user experience across instance tracking.
Unified Identity Application
Starting from this release, new process instances provisioned through Oracle Integration will no longer have a separate identity application.
This will remove additional configuration requirements needed to access the service and eliminate the ongoing burden of role membership synchronisation.
Existing instances created prior to this release will not be affected. They will continue to use a separate identity application for process.
How It Works
For administrators managing Oracle Integration, here’s what changes:
No separate Process application – Newly provisioned process instances share the Oracle Integration identity application. You’ll no longer see a separate Process Automation application listed under Oracle Cloud Services

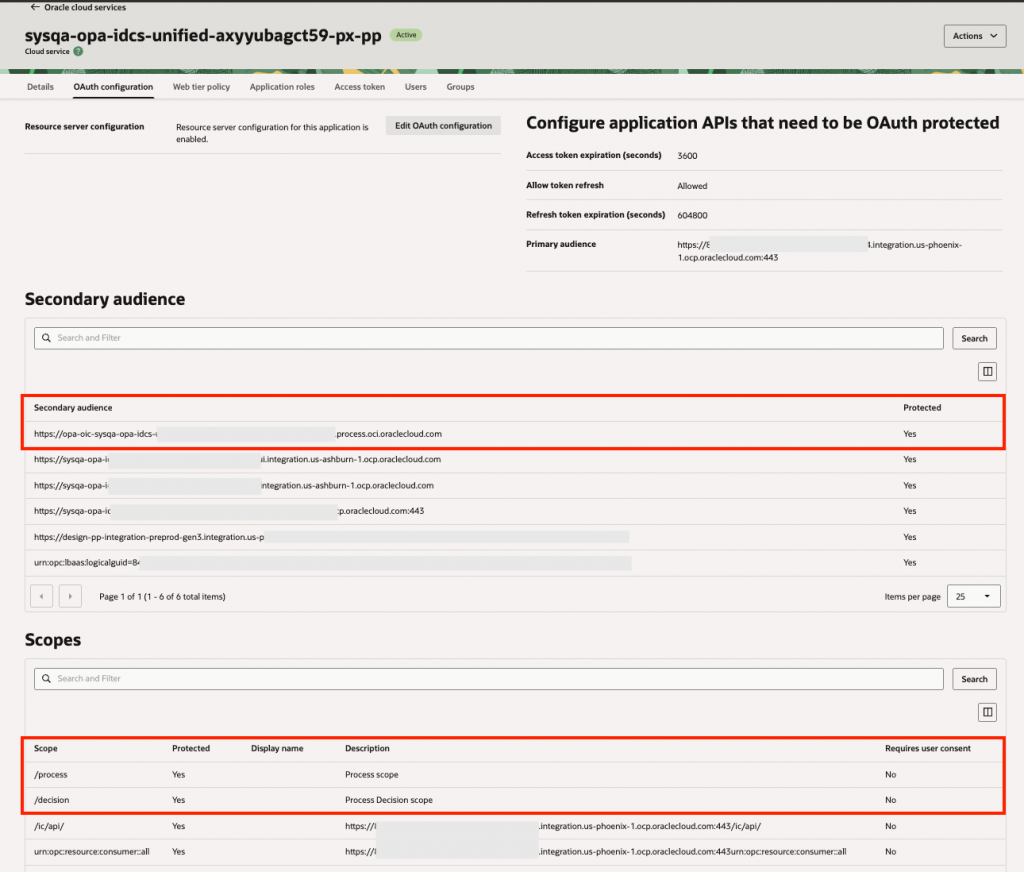
Unified scopes – When you enable process automation, the Oracle Integration identity application automatically updates to include:
- The process instance as a secondary audience
- Process and decision scopes
Single authentication – This configuration allows authorization tokens to cover both Integration and Process services, enabling seamless authentication across your entire platform.
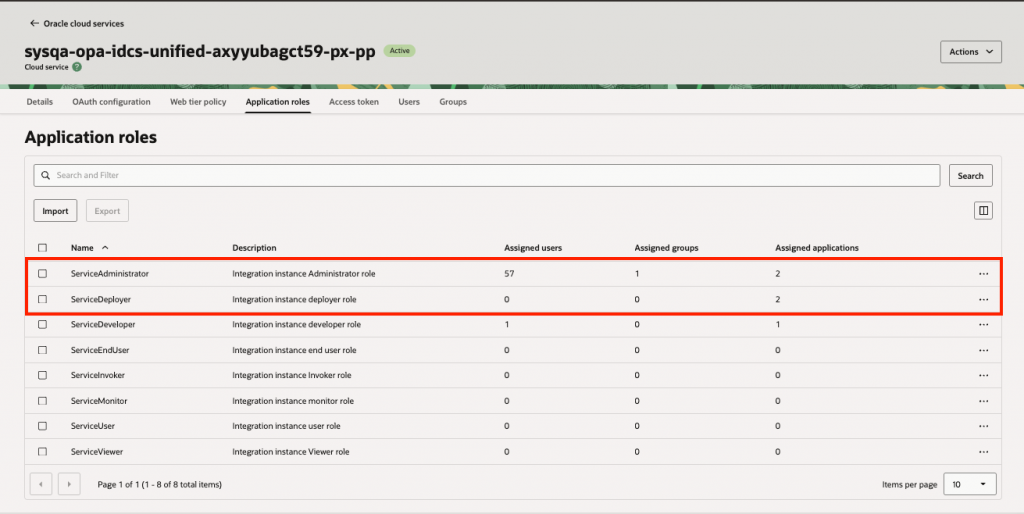
Role-based access remains unchanged – The ServiceDeveloper and ServiceAdministrator application roles continue to control user access to specific functionality. Learn more about these here.
Design time changes – some changes are needed when establishing client connections to process via the unified application
- Oracle Integration: No change is needed when interacting with process or decisions via native actions. For REST based connectivity you will need to refer to the steps defined here to create a confidential application and configure the REST Connector to use an OAuth based policy. The scope used to establish the connection would be based on the primary audience of the Oracle Integration identity application + the one, process or decision scope.
- Visual Bulder: When configuring VB backends to connect to newly provisioned process instances, you will need to use the OAuth 2.0 User Assertion policy. The scope would be comprised of the primary audience of the Oracle Integration identity application + the desired process scope.
Disable Process Automation from Oracle Integration
You now have the flexibility to remove Process Automation from your Oracle Integration instance when needed. This capability is particularly useful when you want to:
- Downgrade to Standard Edition
- Replace your process instance as part of the Standalone EOL migration
How It Works
Service administrators can remove Process Automation in just a few steps:
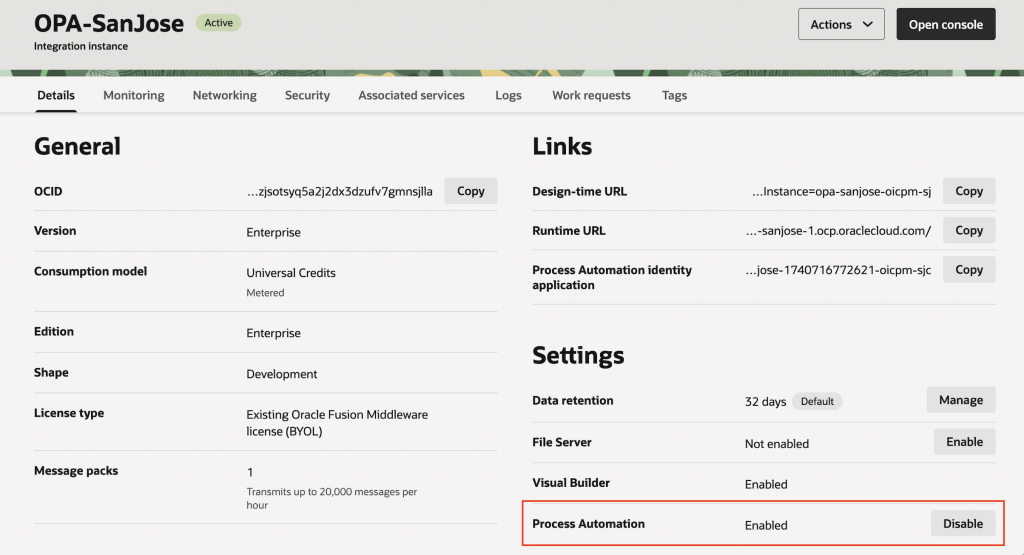
- Navigate to your instance – Go to the Oracle Integration service instance page in the OCI Cloud Console.
- Locate the Process Automation settings – Find the Process Automation section in your instance configuration (see screenshot below).
- Disable Process Automation – Click the “Disable” button to initiate the removal process.
Important: This is a destructive operation that permanently deletes the process instance and all associated data. Ensure you’ve backed up any necessary information before proceeding.
Re-enabling Process Automation
If needed, you can re-enable Process Automation at any time from the same location, by clicking Enable. This will provision a fresh process instance with no data from the previous instance.
Process Instance Tracking
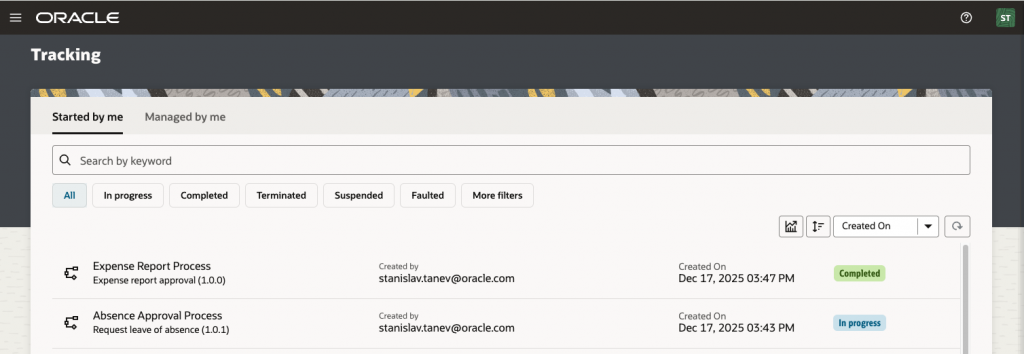
The process instance tracking page in the OPA Workspace is now organised into two focused tabs, making it simpler to find exactly what you’re looking for.
How It Works
Instance tracking is now divided into two views based on your role and needs:
- Started By Me: Shows instances started by you (the logged in user). This view is designed for requestors who want to check the status of their own process instances—perfect for tracking expense reports, approvals, or any workflows you’ve submitted.
- Managed by Me: An administrative view showing all instances you have Manage permission on. This is designed for process administrators who need visibility into the state of all instances within a process application.
⚠️ Permission Update
Users with USE permissions on a process application will no longer see instances in the Tracking UI page. This is by design to ensure users only see instances they need to manage.
- USE permission users can still complete their assigned tasks but won’t see instances that are started by others
- Need instance visibility?
Grant Manage permission to users who require tracking access beyond their own tasks
Learn more about process permissions
Withdraw Requests
Requestors can now terminate their own process instances directly from the Tracking page without administrator intervention. This gives users the flexibility to withdraw requests when circumstances change, such as canceling a travel request or closing an outdated approval.
Previously, only users with Manage permission could terminate process instances. This new capability empowers requestors to manage their own submissions.
How it Works
Once you initiate a process instance, you’ll find it in your Started By Me tab in the Tracking UI. Here’s how to withdraw it:
1. Open the process instance – Click on the instance you want to withdraw.
2. Access the Actions menu – In the instance detail view, click the Actions dropdown in the top-right corner
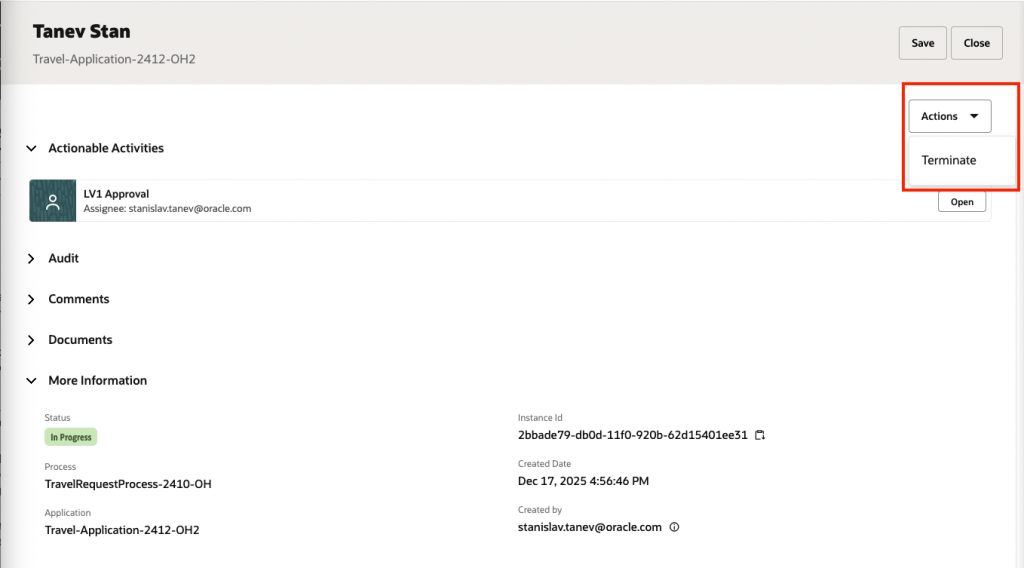
3. Select Terminate – Choose “Terminate” from the menu.
4. Provide context – You’ll be prompted to enter a comment explaining why you’re withdrawing the request. This creates an audit trail and helps administrators understand the reason for termination.
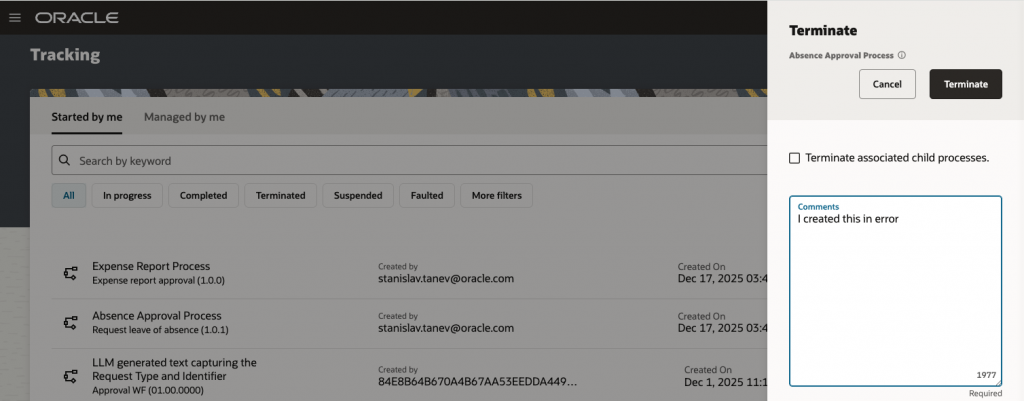
5. Confirm termination – Click Terminate to complete the action.
This will automatically withdraw all the open tasks within that process instance and mark the Process instance as TERMINATED.
Reassign Tasks
Process administrators can now reassign tasks even when they’re in a “Request Info” state—eliminating workflow bottlenecks when task assignees are out of office.
Previously, when additional information was requested from a user, and that user went on leave, the workflow would stall. Process admins, had no direct way to reassign the task to someone else that could take action.
Users with Manage permission can now use the standard Reassign action on tasks in the Request Info state, just as they would with any other task.
How It Works
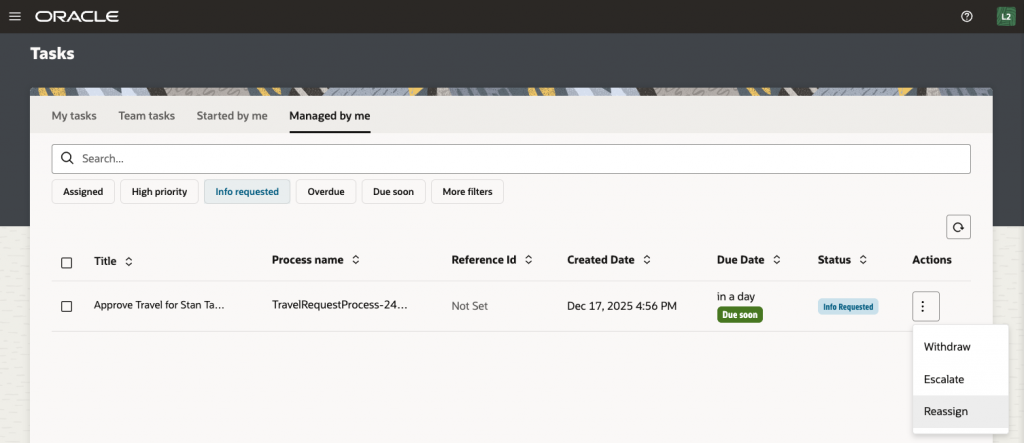
When a task is in Request Info state:
- Open the task as a user with Manage permission
- Select Reassign from the Actions menu
- Choose the new assignee
- The reassigned user can now respond to the information request and continue the workflow
This simple change ensures your business processes don’t grind to a halt due to planned or unplanned absences.
Getting Started
We encourage you to check out the What’s New section of our documentation next for more information that can help you get started.