
The coding assistant can only build what you describe. A short request gets a reasonable guess; a structured request gets the agent you had in mind on the first pass. The structure is the same whether you’re creating a Business Object, a workflow, an agent, or changing something that already exists.
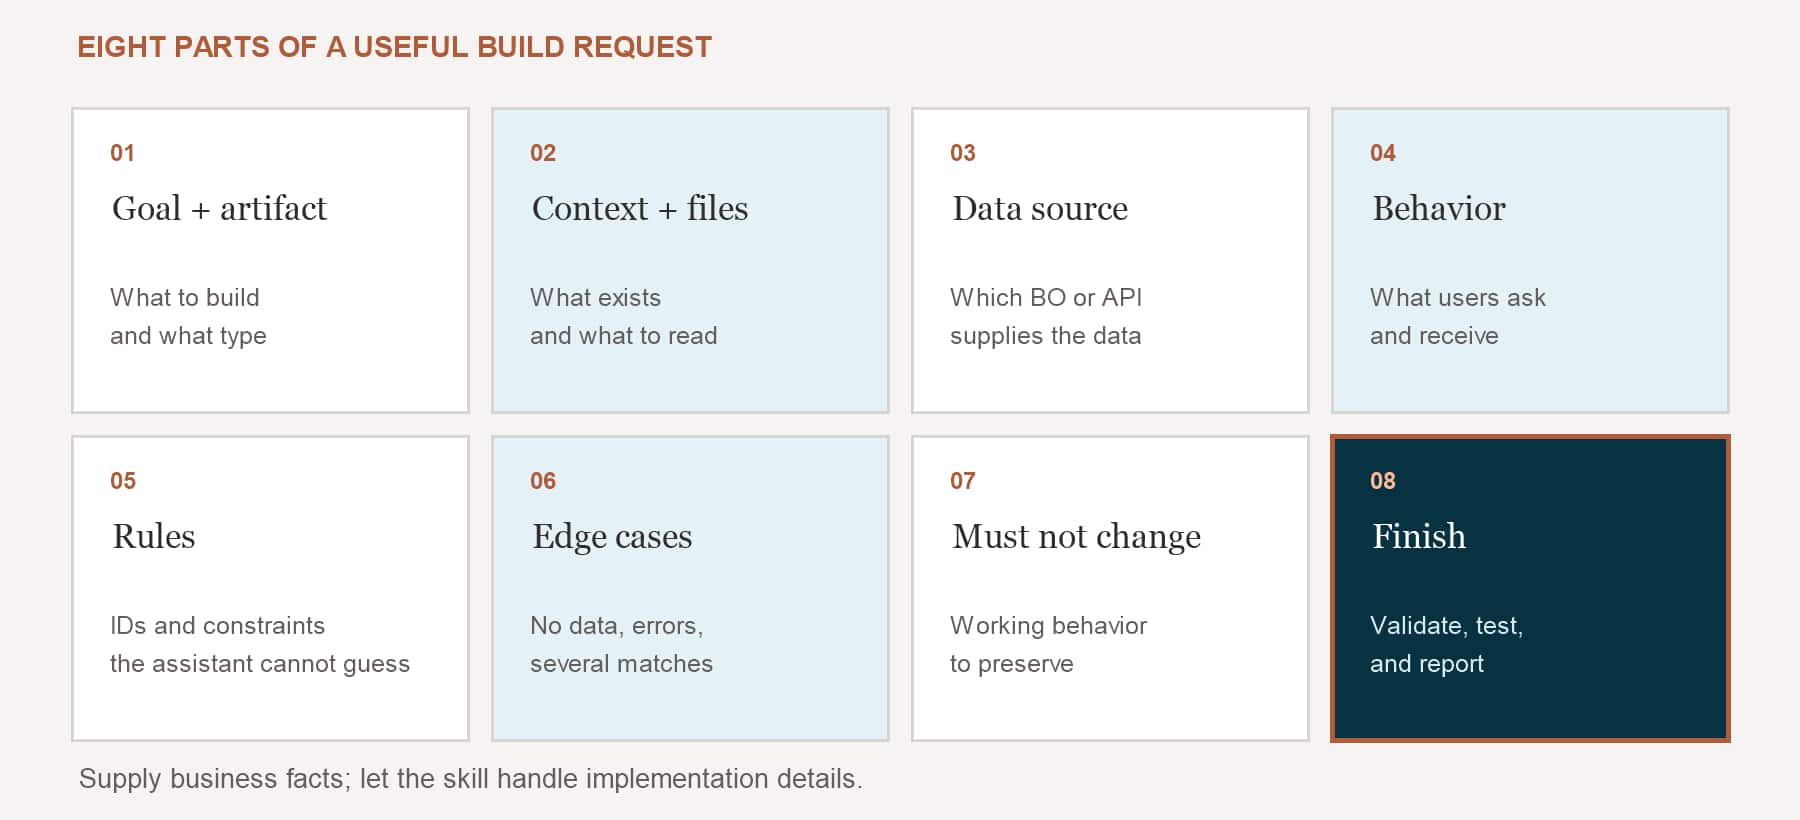
The parts of a good request
Use these as headings in your request. Not every request needs all eight; leave out the ones that don’t apply, or write “omit for now” so the assistant knows you’ve decided.
Goal and artifact
What you’re building and what type it is: a standalone workflow, an app-backed workflow, a Business Object, a tool, an agent.
Context and files
The files to read first: existing artifacts, OpenAPI describe files in the project root, related workflows.
Data source
Which Business Object or API supplies the data. Ask it to search for an existing one and confirm with you before building a new one.
Behavior
What the user asks and what they get back: each intent, path, or panel, in business terms.
Rules
What the assistant can’t guess: which ID to use, what never to create, which node type to use for a step.
Edge cases
Not found, no data, several matches, errors, out-of-scope questions. Each one becomes a path and a test.
Must not change
For edits: the behavior that has to keep working. It becomes a regression test.
Finish
Validate, let the tests run, keep it local or save a DRAFT, and what the closing summary must include.
Let the assistant draft, then review
For a focused workflow, state the question it should answer, the Business Object to use, how to handle no data, and what to validate. For a larger process, add the decisions and side effects that require confirmation. Part 6 applies that prompt-first approach to a position-to-job-requisition workflow.
Examples
Four requests that build on each other: a Business Object, a workflow that uses it, an agent that uses it as a tool, and a change to the workflow. Each one starts after the guardrail request from Part 4.
Try it: Example A · Create a Business Object from a describe file
Create a Business Object for purchase orders.

Goal and artifact
- A new .bo Business Object, local only.

Context and files
- The OpenAPI describe for purchase orders is in the project root:
  purchase-orders-describe.json.

Data source
- First search for an existing Business Object that already covers purchase orders and
  show me what you find. Create a new one only if nothing fits.

Behavior
- Functions: list the current user's open purchase orders, get one purchase order by its
  number, and list that order's lines.
- Build each function from the matching operation in the describe file.

Rules
- Read-only. No create, update, or delete functions.
- Don't invent paths, parameters, or fields that aren't in the describe file.

Finish
- Validate the Business Object and list each function with its method, path, and
  parameters.
Try it: Example B · Build a standalone workflow
Build a standalone workflow called Purchase Order Status.

Goal and artifact
- A standalone workflow, not app-backed, that answers a buyer's question about purchase
  orders.

Data source
- Use the Purchase Orders Business Object in src/businessObjects/purchase_orders.bo.

Behavior
- Read the question from the input message.
- If it includes a PO number: get the order and its lines, then summarize status,
  supplier, total amount, and any lines not yet received.
- If it has no PO number: list the buyer's open purchase orders.
- Anything unrelated: reply with a short message explaining what this workflow does.

Rules
- Use a CODE node for calculations and an LLM node only for the written summary.

Edge cases
- PO not found, no open orders, and Business Object errors each get a clear message.
  Never make up data.

Finish
- Prettify and validate, let the workflow tests run, and show me Validation and
  Insights.
Try it: Example C · Create an agent with a tool and a topic
Create an agent that answers buyers' questions about purchase orders.

Goal and artifact
- A new .agent, plus the .tool and .topic it uses. Local only.

Data source
- Create a Business Object tool over src/businessObjects/purchase_orders.bo that exposes
  only the list and get functions.

Behavior
- Create a topic called "Purchase order questions" with these instructions: answer only
  from tool results, always include the PO number, and say clearly when data isn't
  available.
- Create the agent and attach the tool and the topic.

Rules
- No create, update, or email tools.

Finish
- Validate the tool, the topic, and the agent, and summarize how they're connected.
Try it: Example D · Change an existing workflow
Change src/workflows/purchase_order_status.wf so overdue lines are flagged.

Behavior
- After getting the order lines, mark a line as overdue when its promised date is before
  today and it hasn't been received.
- Add the number of overdue lines to the summary.

Rules
- Do the date comparison in a CODE node, not in the LLM.

Must not change
- PO not found, no open orders, and out-of-scope behavior.

Finish
- Prettify and validate, let the test sync update the affected tests, and keep changes
  local.
Tests come with every build
None of these requests has to ask for tests separately. Examples B and D change a workflow, so the skill runs the workflow test sync on its own and finishes with Validation and Insights.
Part 10 explains how tests and reports work.
Key takeaways
- Structure every request: goal and artifact, context, data source, behavior, rules, edge cases, what must not change, and how to finish.
- Say what type of artifact you want and whether a workflow is standalone or app-backed.
- Edge cases and must-not-change items turn into tests, so the more specific they are, the better the tests.
Previous: The Development Lifecycle with the AI Studio CLI | Next: Build a Workflow with a Coding Assistant
Back to the Learning Path for Fusion AI Agent Studio CLI