This article is part of a series on API Authentication in Fusion AI Agent Studio using OCI Identity (OAuth2 JWT Bearer flow). In this step, we’ll generate the self-signed certificates required to securely create and sign JWT assertions.
Recall the main actors from Part 1 of this flow: the End User, the Client Application, the Authorization Server (OCI Identity), and the Resource Server (your Oracle Fusion application environment).
In this setup, the client application generates a JWT user assertion on behalf of the end user. To establish trust, this JWT must be digitally signed using the client application’s private key. Once the assertion is sent to the Authorization Server (OCI Identity), it validates the signature using the corresponding public certificate that was uploaded during the configuration of the OAuth confidential application.
Because this trust model relies on asymmetric cryptography, the first step – before even configuring the OAuth client – is to generate a public/private key pair.
An important principle to understand in this setup is:
The private key never leaves the client application. It is used to digitally sign the JWT assertion before the token request is sent. The corresponding public certificate is uploaded to Oracle Identity when creating or updating the OAuth confidential application. Oracle uses that certificate to validate the signature and determine whether the assertion can be trusted.
This example is provided for demo purposes only : Steps and sample script (I am using macOS and pre-installed openSSL libraries)
This example is for demo use only. In production, certificates and keys should follow your organization security rules. Private keys must be stored securely in a vault or key management system. Proper access control and auditing should be applied. Use least privilege access. Keys should be rotated and certificates should be managed regularly.
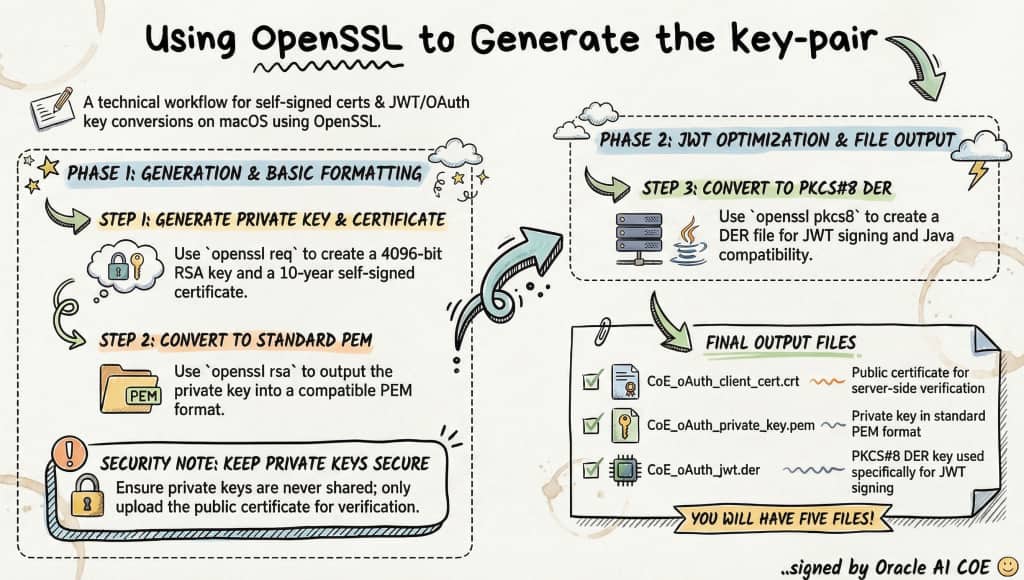
STEP 1: Generate private key + self-signed certificate
PREFIX="CoE_oAuth"

openssl req \
  -subj "/CN=AICOE_TechServices" \
  -newkey rsa:4096 \
  -x509 \
  -sha256 \
  -days 3650 \
  -nodes \
  -out "${PREFIX}_client_cert.crt" \
  -keyout "${PREFIX}_client_privatekey.key"
STEP 2: Convert private key to PEM format. Some tools require PKCS#1 PEM format for signing (JWT use case). Output: clean PEM private key
openssl rsa \
  -in "${PREFIX}_client_privatekey.key" \
  -out "${PREFIX}_private_key.pem"
STEP 3: Convert private key to PKCS#8 DER format. PKCS#8 is often required by enterprise tools / APIs
DER = binary format (not human-readable)
-nocrypt → no encryption (needed for JWT signing)
openssl pkcs8 \
  -topk8 \
  -inform PEM \
  -outform DER \
  -in "${PREFIX}_private_key.pem" \
  -nocrypt \
  -out "${PREFIX}_jwt.der"
STEP 4: Create public key file from certificate. In many OAuth setups (like OCI), you upload the certificate to oAuth client APP that you will create in IDCS. This step simply copies the cert as a “public key” reference file
cp "${PREFIX}_client_cert.crt" "${PREFIX}_pub.pem"
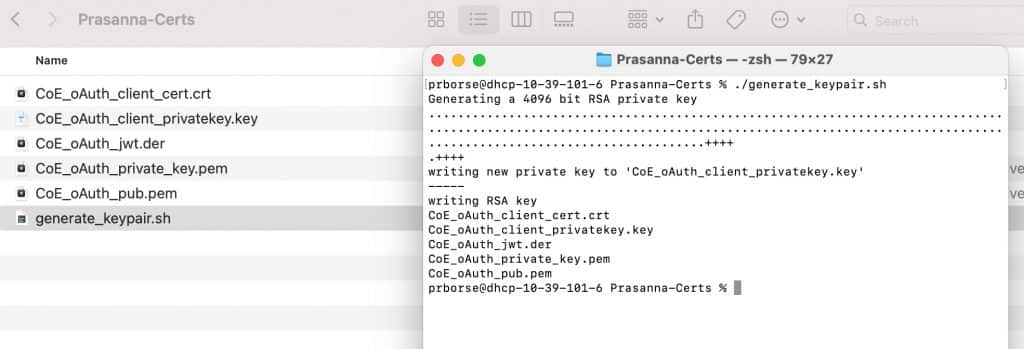
STEP 5: Verify generated files
ls -1 "${PREFIX}"_*How to run it as a script? You can save these commands to a script file say generate_keypair.sh and then
chmod +x generate_keypair.sh
./generate_keypair.sh
Next Steps in This Series
➡️ Configuring OAuth Client App in Oracle Cloud Identity (OCI Identity Domains)
Full Series Navigation
- Part 1: API Authentication in Fusion AI Agent Studio with OCI Identity (OAuth2 JWT Bearer Explained)
- Part 2: Generating Self-Signed Certificates using OpenSSL
- Part 3: Configuring an OAuth Client App in Oracle Cloud Identity for Your Fusion Environment
- Part 4: Getting the IDCS Access Token: User Assertions and Client Authentication Explained