Oracle Fusion Data Intelligence is a family of prebuilt, cloud-native analytics applications for Oracle Fusion Cloud Applications that provide ready-to-use insights to help improve decision-making. It is extensible and customizable, allowing customers to ingest data and expand the base semantic model with additional content.
Overview
This blog is part of the series FDI Notifications where we walk you through deploying Oracle Cloud Infrastructure (OCI) Functions for Oracle Fusion Data Intelligence (FDI) event notification triggers.
OCI Functions is a serverless platform that enables you to run code in response to events without managing infrastructure. For custom use cases, such as storing event data in OCI Object Storage or formatting notifications from OCI Event Services, you can design functions that react to a variety of triggers and process information flexibly.
Note: The names used for all artifacts in this document are based on the formatting notifications use case, but you can change them to fit your specific use case.
Configuring IAM Policies
- Follow the OCI documentation to create policies. See Create a policy using OCI Console.
- Use the OCI policy templates for Functions as your starting point. See Functions policy template.
- Choose a compartment (a child to your root compartment) where you will create artifacts such as Policies, Application, Bucket, Email Domain, Topic, Rule, etc. Use this same compartment anywhere the steps mention “compartment” or
<Child Compartment Name>. If the compartment doesn’t exist, create it first. See Create a Compartment in OCI. - Create a Dynamic Group and reference it in the policy template. See Creating Dynamic Groups using OCI Console. To create a dynamic group (example: FAW_DG) with a matching rule scoped to your compartment OCID, use the following matching rule:
ANY {resource.compartment.id='<Child Compartment OCID>'}See Sample Policy Template for an example policy snippet.
Note: The snippet includes ‘Default / All Tenant Users’, which typically means the policy is granting permissions to all users in the tenant. Use this only if you explicitly want tenant-wide access; otherwise, use a dedicated dynamic group to follow least-privilege access.
Creating Application and Deploying Function
- Create an OCI Functions application in your compartment. See Create OCI Functions – Applications.
Note: In the example used in the next steps, you’re creating an application named Mail_Formatting. Update the application name and related values as needed for your use case. - Navigate to Functions under your created application and select Create in Code Editor.
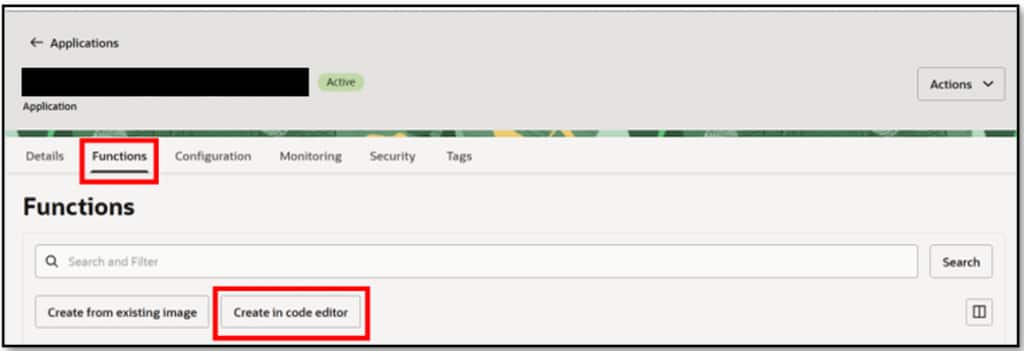
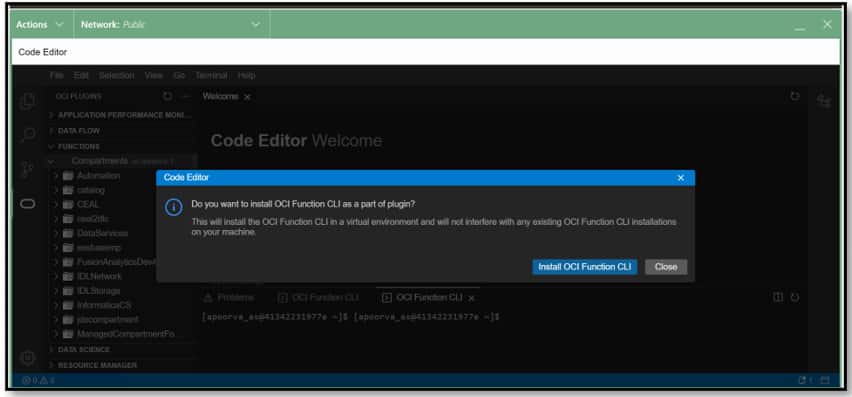
- A code editor opens with a prompt to install the OCI Function CLI. Click Install OCI Function CLI to open a CLI terminal where you can run your commands.
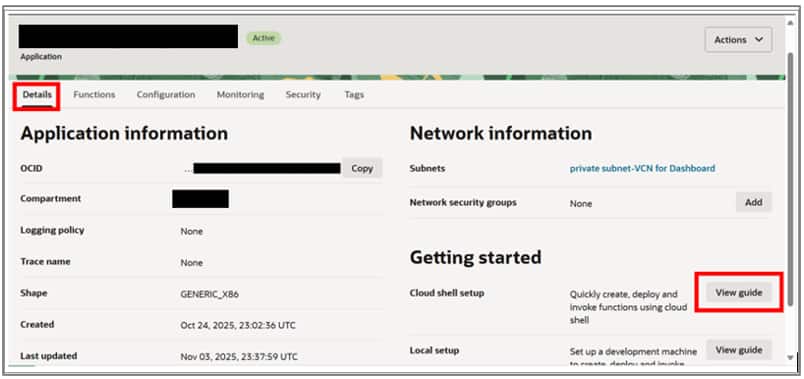
- Minimize the Code Editor window, navigate to the Details tab under your application, and click View Guide for Cloud Shell setup. This opens a tab with the commands you can run in your CLI terminal to set up the function.
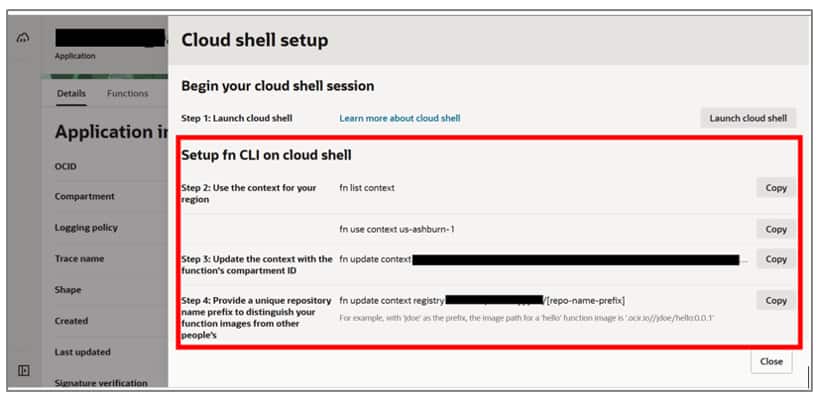
- Run commands in the Cloud Shell that you previously minimized:
- Follow the steps provided in the View Guide up to Step 3.
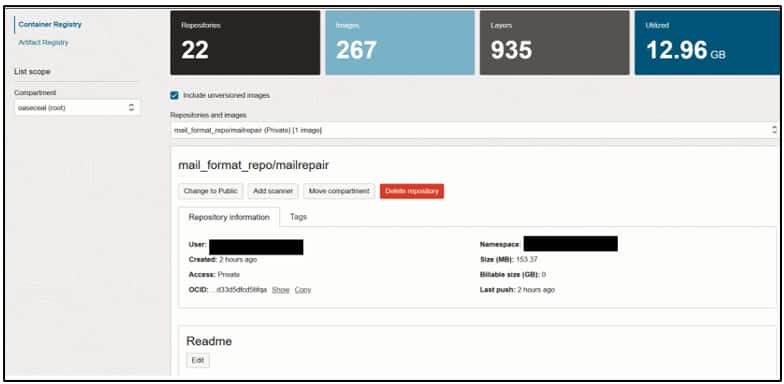
- Step 4: This step creates a repository under Container Registry in Developer Services, where your function build images are stored. Replace the placeholder in the command as follows:
fn update context registry iad.ocir.io/<objectstorage_namespace>/mail_format_repoNote: If your tenancy is configured to auto-create repositories on first push (an OCIR setting), you may not need to pre-create the repo — OCI creates it when the image is pushed. If not, create the repository in your OCI Registry. See Creating repositories using OCI Console.
- Step 5: Update the Fn context to specify the compartment OCID where the function image created in the previous step will be stored. Replace
<compartment-ocid>with your target compartment OCID.
fn update context oracle.image-compartment-id <compartment-ocid>- Step 6: Generate an auth token. See Generate Auth token.
- Step 7: Log in to OCIR using Docker. Replace
<REGION>,<TENANCY_NAMESPACE>, and your user details as appropriate:
docker login <REGION>.ocir.io -u '<TENANCY_NAMESPACE>/username@oracle.com' -p '<GENERATED_AUTH_TOKEN>'If your user is in a non-Default IAM domain, include the IAM domain in the username. For example:
docker login <REGION>.ocir.io -u '<TENANCY_NAMESPACE>/OracleIdentityCloudService/username@oracle.com' -p '<GENERATED_AUTH_TOKEN>'- Step 8: Initialize a new function project in the specified runtime environment (Python example):
fn init --runtime python mailrepair- Step 9: Navigate to the directory of the newly created function project:
cd mailrepairYou see three files: func.py, func.yaml, and requirements.txt.
- Step 10: Open
func.py:
nano func.py- Step 11: In
func.py, delete the existing code and replace it with the function code provided in the relevant blog(s) for your use case. - Step 12: Open
requirements.txtand add dependencies as listed in the respective blog(s) for your specific use case.
nano requirements.txt- Step 13: Deploy the function to your application (example app name: Mail_Formatting):
fn -v deploy --app Mail_FormattingThis creates a Docker image in the container registry associated with your OCIR repository.
Monitoring function execution when an OCI event is triggered
- To monitor the function for errors during execution, enable log monitoring on the application. See Observing Functions.
- Review the logs and troubleshoot any issues as needed.

References
For additional information, see the following documentation and blog articles:
- How to use Code Editor to create a new function in OCI Functions based on a template function.
- How to troubleshoot problems when deploying applications and functions with OCI Functions.
Conclusion
OCI Functions provides a powerful and flexible way to automate your cloud workflows, allowing you to easily respond to events, process data, and integrate with other OCI services, all without the need to manage servers or infrastructure. To see these capabilities in action, refer to the following related blog posts:
- Formatting Oracle Fusion Data Intelligence Pipeline Email Notifications
- Writing events to Autonomous AI Lakehouse via ORDS
- Writing events to OCI Object Storage
Call to Action
Now that you’ve read this post, try it yourself and let us know your results in the Oracle Analytics Community, where you can also ask questions and post ideas. If you have questions or need more details, you can always check the Oracle Help Center for Oracle Analytics documentation.