As with the previous parts of this mini-series, this is the blog version of my MOS Note 2065199.1, although this time I’ll deviate a bit more from the “original”.
In the previous section, we saw how to create and deploy templates on standalone systems. While straightforward, it was all commandline work. On SuperCluster, this is very different. First of all, you can’t create a template on SuperCluster. That’s because it’s not supported to manually create domains on SuperCluster, and all the domains that are created by the tools don’t use a file backend for their rpool. Deployment, on the other hand, is made even easier than on standalone systems by the very easy to use “IO Domain Creation Tool”.
The “IO Domain Creation Tool” manages all aspects of the lifecycle of an IO domain – a new type of domain introduced in the 2.0 release of SuperCluster. I will not go into the details of this tool and the SuperCluster IO domain here. Have a look in the official documentation for details. However, IO domains also support OVM templates as a possible installation method, and this is what I’ll cover here.
On standalone systems, you’re responsible for managing your own templates. Typically, you’ll have some shared storage with a collection of templates that you use. In SuperCluster, this collection is formalized into a “Library” from which you can pick a template at install time. So, to get started, the first step is to upload a template into that library. 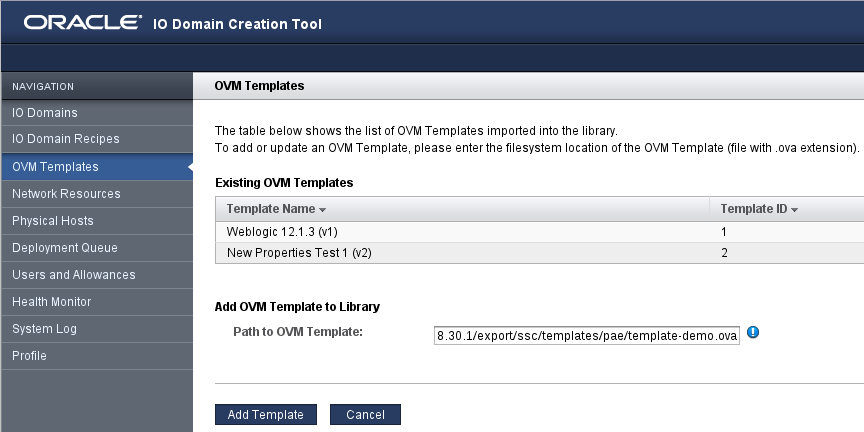 To do that, the template file will need to be available on a filesystem visible on the first node primary domain. In the example I’ll use here, this is /net/192.168.30.1/export/ssc/templates/pae/template-demo.ova. In the IO Domain Creation Tool, go to the “OVM Templates” tab, enter the full pathname of the OVA file and select “Add Template”. Click on the images for a readable view.
The template will now be uploaded to the library. 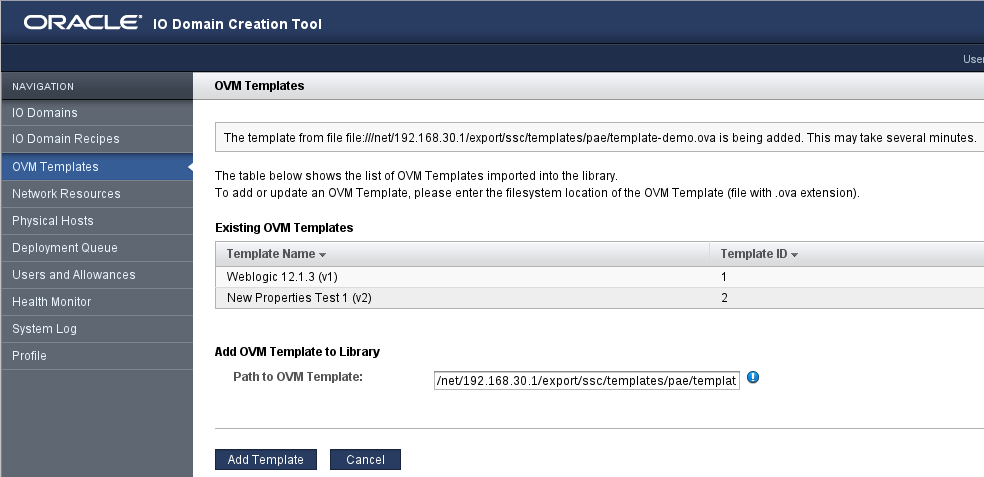 Since this includes unpacking the OVA file and uncompressing the disk images, it will take several minutes. There is no progress display, but you can check the contents of the library from time to time.
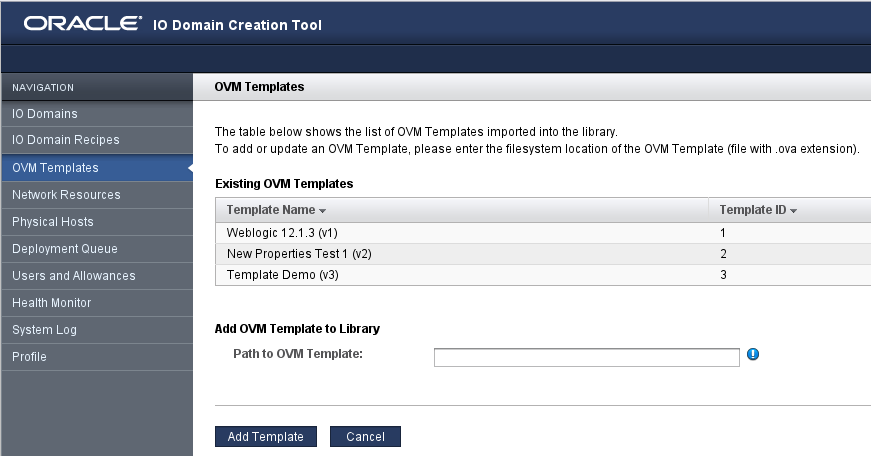 The template will be displayed in the list of existing templates once the import process has completed. Note that at this time, you can’t delete or otherwise modify a template once it’s in this library. We’re working on that…
Allocating Hardware and Selecting the Template
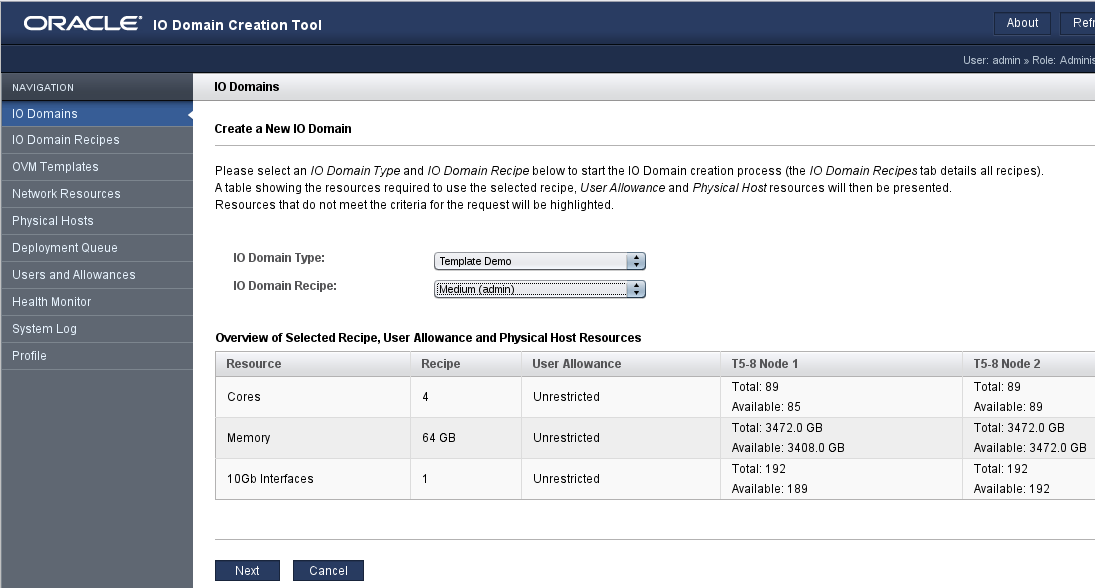 On SuperCluster, you can’t just create a new domain using ldm commands like you would on a standalone system. All hardware resources available for IO domains are managed by the IO domains subsystem. You’ll need to “register” the hardware you want for the new domain with that subsystem, using the IO Domain Creation Tool. To do that, go to the “IO Domains” tab of the IO Domain Creation Tool. It will display a list of existing IO Domains. Select the “Add IO Domain” button. On the following screen, select your template as the domain type and the desired hardware size as the domain recipe. The size you choose here will override any resource requirements layed down in the template. Then click “Next”.
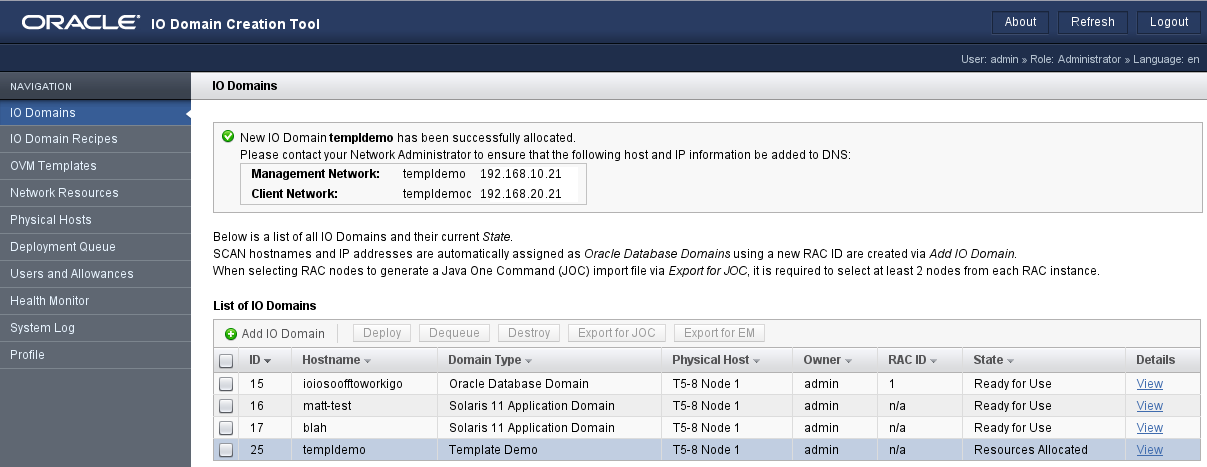
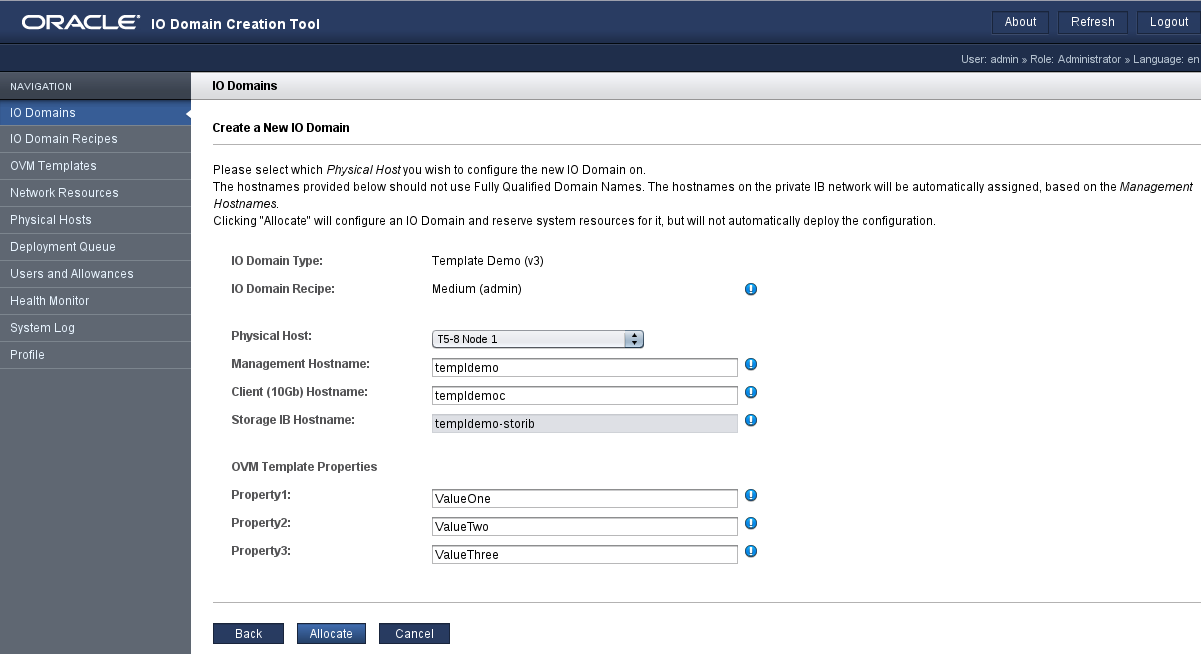 The next screen will ask you to provide values for various properties. Some of these are hostnames for different network interfaces. These are SuperCluster specific and will override any settings configured in the template. Depending on the template, there might be other properties to be filled with values. In our example, you will be asked to provide values for the three properties defined earlier. Once you are satisfied with your entries, click “Allocate”. This will take you back to the list of IO domains.
Deploying the Domain
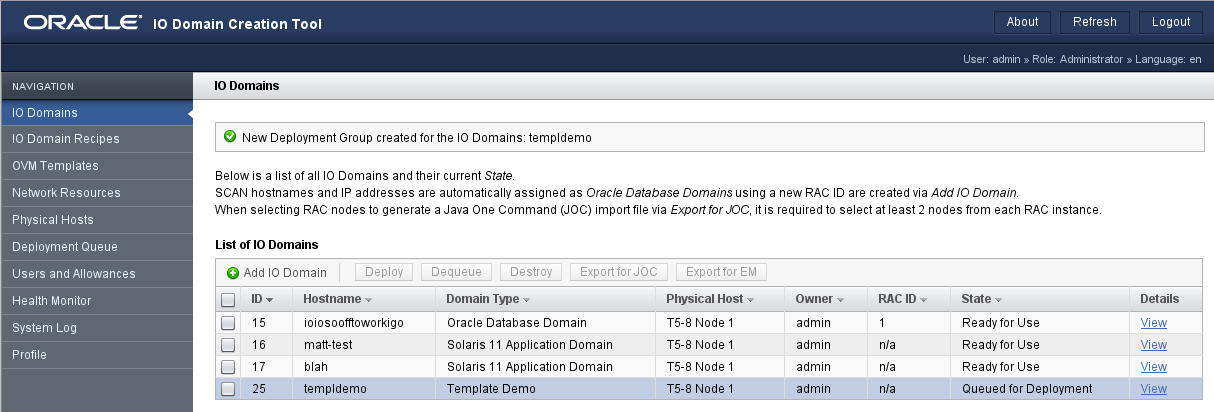
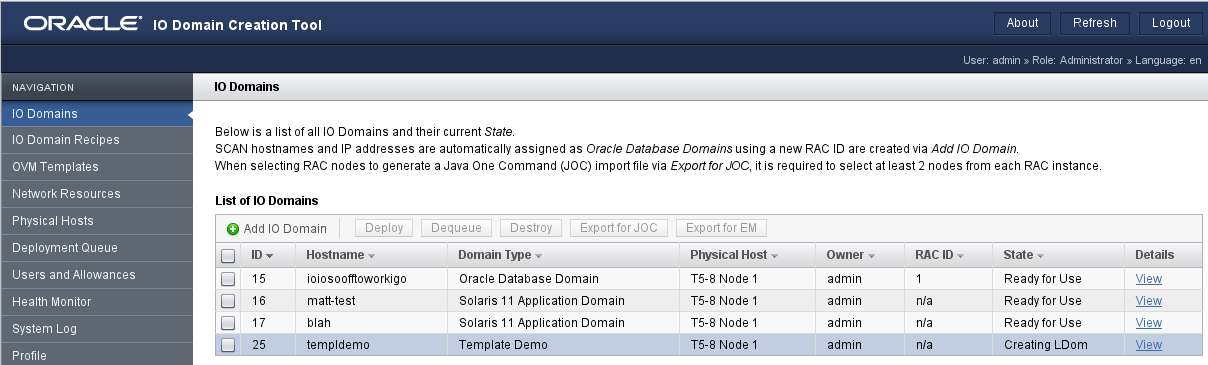 Now wait for the Domain to be created.
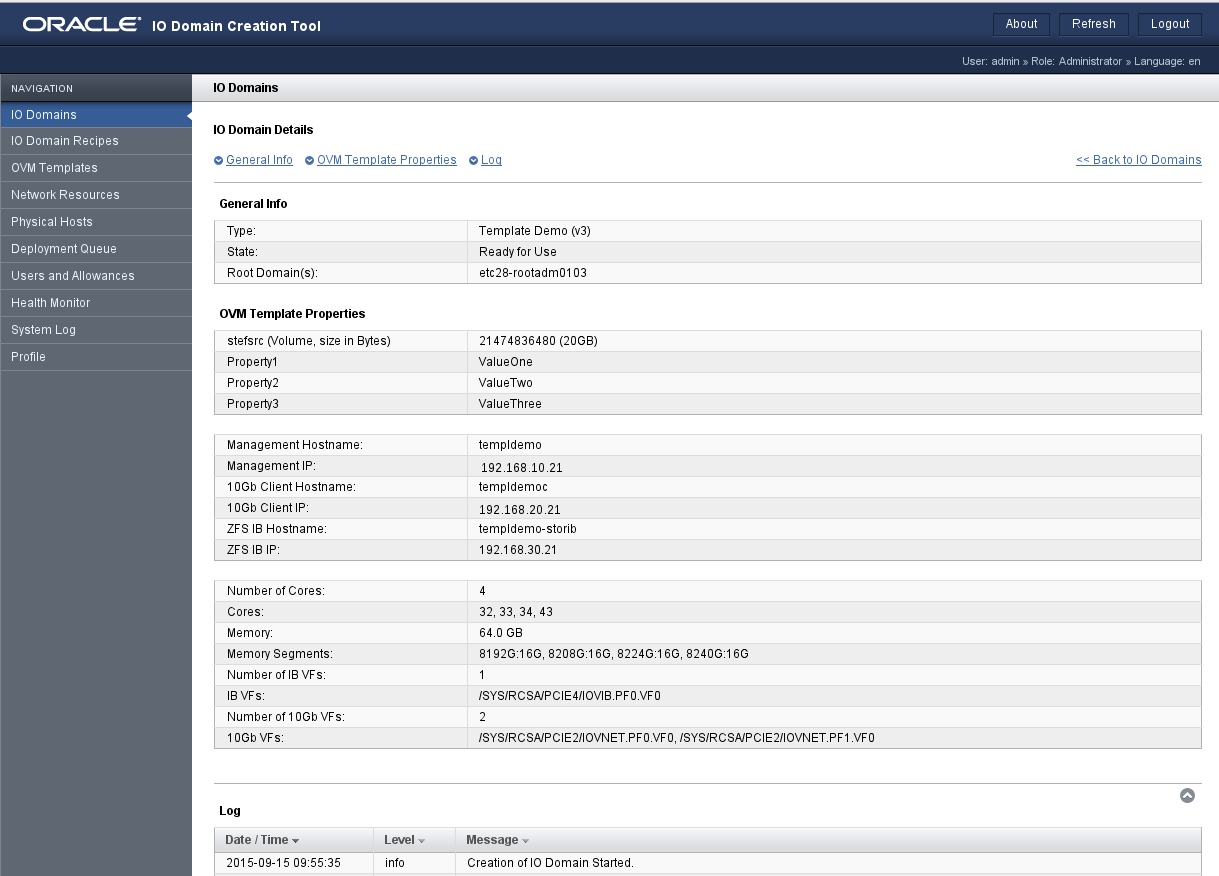 Once ready, you can view some details.
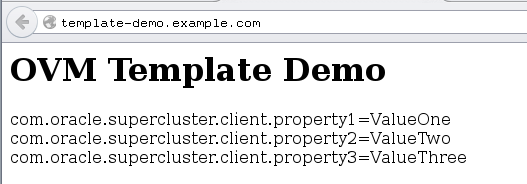 And of course, you can connect to the application and see if it works.
Differences to Templates on Standalone Systems
Domains deployed using templates on standalone systems are configured based on the requirements defined in the template. This means the number of CPUs, the amount of memory, the number of network interfaces, the type and location of the disk images are either taken from the template definition or are defined by the administrator during template deployment and configuration. When deploying on SuperCluster, all of this is controlled by the IO domain creation utility:
- The domain size is set by the utility based on the domain recipe chosen by the administrator.
- Network adapters are created and configured to conform with the SuperCluster network environment, overriding any settings in the template.
- Disk images are always provided as iSCSI LUNs from the central ZFS SA. The image sizes are take from the template.
- /etc/hosts is populated with entries from the SuperCluster environment.
- The Solaris publisher is set to the standard publisher in the SuperCluster environment. This includes adding the exa-family publisher.
- ssctuner is installed and activated.
- The domain’s root password is set to a default password.
The net effect of these differences is that the IO domain, although based on a template, is a normal SuperCluster IO domain that provides full connectivity to the SuperCluster environment and is fully supported, just like any other application domain. This also means that any restrictions that apply to normal application domains also apply to IO domains deployed from a template.
For additional and background reading, please refer to the links I provided at the end of the first article in this mini-series.