| |
configure disk layout, software to be installed, more locales… | configure root password, network environment, default locale… | ||
| AI |
Jumpstart |
AI |
Jumpstart |
|
| Terminology |
manifest |
profile |
profile |
sysidcfg |
| File Name |
doesn’t matter (the name stored in AI database is the name specified in ai_instance) | can be a random name (specified in rules) | file name will be stored in AI database | must be “sysidcfg” |
| Command to specify |
installadm create-manifest |
add_install_client -c |
installadm create-profile |
add_install_client -p |
| Can we delete the configuration file after installadm or add_install_client? |
YES |
NO |
YES |
NO |
| If not provided… |
use default manifest |
will be prompted during installation |
will be prompted in the first reboot after installation |
will be prompted during installation |
| How to modify? |
installadm update-manifest |
directly modify it |
installadm update-profile |
directly modify it |
| How to remove this configuration? |
installadm delete-manifest |
rm_install_client (all jumpstart configurations will be removed) |
installadm delete-profile |
rm_install_client (all jumpstart configurations will be removed) |
Here is a typical profile, lines between <!– and –> are comments,
<!DOCTYPE service_bundle SYSTEM “/usr/share/lib/xml/dtd/service_bundle.dtd.1”>
<service_bundle type=”profile” name=”sysconfig”>
<service version=”1″ type=”service” name=”system/config-user”>
<instance enabled=”true” name=”default”>
<!–
Following lines sets root password, which can be obtained from /etc/shadow, and root type with possible values “normal” / “role”
–>
<property_group type=”application” name=”root_account”>
<propval type=”astring” name=”login” value=”root”/>
<propval type=”astring” name=”password” value=”$5$lQTMwbI4lGMxgEBX$umxc15BI2i9XXvHnr0DMDpfskfQ613SfcrHLsf8LL30“/>
<propval type=”astring” name=”type” value=”role“/>
</property_group>
<!–
Following lines create an additional user coco, with its password, it’s a normal user, gid 10, /usr/bin/tcsh as the shell
In normal Solaris 11 installation, if an additional user is created, root will be created as a “role”, not a “normal” user, which means that you can not directly login to system by root, and instead, you have to login as the additional user first, then su or sudo to gain root privileges.
So, if you do not want to create an additional user, remember to set root user type to “normal” above or you will have no account to login to the system.
–>
<property_group type=”application” name=”user_account”>
<propval type=”astring” name=”login” value=”coco“/>
<propval type=”astring” name=”password” value=”$5$rounds=5000$fY8.aGBN.wpQs$w0sgbP8GThjZS/jUNuIudbJxsZ.bv9pTewHUYxpdtf/“/>
<propval type=”astring” name=”type” value=”normal“/>
<propval type=”astring” name=”description” value=”Coco”/>
<propval type=”count” name=”gid” value=”10“/>
<propval type=”astring” name=”shell” value=”/usr/bin/tcsh“/>
<propval type=”astring” name=”profiles” value=”System Administrator”/>
<propval type=”astring” name=”sudoers” value=”ALL=(ALL) ALL”/>
</property_group>
</instance>
</service>
<service version=”1″ type=”service” name=”system/timezone”>
<instance enabled=”true” name=”default”>
<!–
The following lines set timezone of the client. In this case it’s Asia/Taipei.
You can execute this command to retrieve all available timezones from IPS, (replace http://192.168.1.115:90/ with your own IPS)
# pkg contents -g http://192.168.1.115:90/ -r -m system/data/timezone |
grep “^file” | ggrep -o “zoneinfo/[^\ ]*” | sed ‘s/zoneinfo\///’ | grep
“^[A-Z]” | sort -u
–>
<property_group type=”application” name=”timezone”>
<propval type=”astring” name=”localtime” value=”Asia/Taipei“/>
</property_group>
</instance>
</service>
<service version=”1″ type=”service” name=”system/environment”>
<instance enabled=”true” name=”init”>
<!–
The followings lines set default locale of the client.
You can run the command (replace http://192.168.1.115:90/ by your own IPS)
# pkg contents -g http://192.168.1.115:90/ -r -m system/locale | ggrep -o “path=usr/lib/locale/[^/]*” | sed ‘s/path=usr\/lib\/locale\///’ | sort -u
to get all locales other than C (C is included in core OS)
–>
<property_group type=”application” name=”environment”>
<propval type=”astring” name=”LANG” value=”C“/>
</property_group>
</instance>
</service>
<!–
The following lines configures hostname (nodename), here it’s test3
–>
<service version=”1″ type=”service” name=”system/identity”>
<instance enabled=”true” name=”node”>
<property_group type=”application” name=”config”>
<propval type=”astring” name=”nodename” value=”test3“/>
</property_group>
</instance>
</service>
<!–
Keyboard layout is US-English
–>
<service version=”1″ type=”service” name=”system/keymap”>
<instance enabled=”true” name=”default”>
<property_group type=”system” name=”keymap”>
<propval type=”astring” name=”layout” value=”US-English“/>
</property_group>
</instance>
</service>
<service version=”1″ type=”service” name=”system/console-login”>
<instance enabled=”true” name=”default”>
<property_group type=”application” name=”ttymon”>
<propval type=”astring” name=”terminal_type” value=”sun-color”/>
</property_group>
</instance>
</service>
<!–
Following lines in BLUE set
1. a static ip address 192.168.1.60 with netmask 255.255.255.0 to network interface net0
2. default router is 192.168.1.1
3. name service switch (nsswitch) for host is “files dns”
4. dns servers that will be put in /etc/resolv.conf are 168.95.1.1 and 168.95.192.1
5. dns search domain is example.com
You can also set an DHCP environment by replacing these long settings with just 7 lines, no network interface will be specified,
<service version=”1″ type=”service” name=”network/physical”>
<instance enabled=”true” name=”default”>
<property_group type=”application” name=”netcfg”>
<propval type=”astring” name=”active_ncp” value=”Automatic”/>
</property_group>
</instance>
</service>
–>
<service version=”1″ type=”service” name=”network/physical”>
<instance enabled=”true” name=”default”>
<property_group type=”application” name=”netcfg”>
<propval type=”astring” name=”active_ncp” value=”DefaultFixed”/>
</property_group>
</instance>
</service>
<service version=”1″ type=”service” name=”network/install”>
<instance enabled=”true” name=”default”>
<property_group type=”application” name=”install_ipv4_interface”>
<propval type=”astring” name=”address_type” value=”static”/>
<propval type=”net_address_v4″ name=”static_address” value=”192.168.1.60/24“/>
<propval type=”astring” name=”name” value=”net0/v4″/>
<propval type=”net_address_v4″ name=”default_route” value=”192.168.1.1“/>
</property_group>
<property_group type=”application” name=”install_ipv6_interface”>
<propval type=”astring” name=”stateful” value=”yes”/>
<propval type=”astring” name=”stateless” value=”yes”/>
<propval type=”astring” name=”address_type” value=”addrconf”/>
<propval type=”astring” name=”name” value=”net0/v6″/>
</property_group>
</instance>
</service>
<service version=”1″ type=”service” name=”system/name-service/switch”>
<property_group type=”application” name=”config”>
<propval type=”astring” name=”default” value=”files”/>
<propval type=”astring” name=”host” value=”files dns“/>
<propval type=”astring” name=”printer” value=”user files”/>
</property_group>
<instance enabled=”true” name=”default”/>
</service>
<service version=”1″ type=”service” name=”system/name-service/cache”>
<instance enabled=”true” name=”default”/>
</service>
<service version=”1″ type=”service” name=”network/dns/client”>
<property_group type=”application” name=”config”>
<property type=”net_address” name=”nameserver”>
<net_address_list>
<value_node value=’168.95.1.1‘/>
<value_node value=’168.95.192.1‘/>
</net_address_list>
</property>
<property name=’search’>
<astring_list>
<value_node value=’example.com‘/>
</astring_list>
</property>
</property_group>
<instance enabled=”true” name=”default”/>
</service>
<!–
The remaining is to set auto registry, you can fill in your own information.
–>
<service version=”1″ type=”service” name=”system/ocm”>
<instance enabled=”true” name=”default”>
<property_group type=”application” name=”reg”>
<propval type=”astring” name=”user” value=”anonymous@oracle.com”/>
<propval type=”astring” name=”password” value=””/>
<propval type=”astring” name=”key” value=””/>
<propval type=”astring” name=”cipher” value=””/>
<propval type=”astring” name=”proxy_host” value=””/>
<propval type=”astring” name=”proxy_user” value=””/>
<propval type=”astring” name=”proxy_password” value=””/>
<propval type=”astring” name=”config_hub” value=””/>
</property_group>
</instance>
</service>
<service version=”1″ type=”service” name=”system/fm/asr-notify”>
<instance enabled=”true” name=”default”>
<property_group type=”application” name=”autoreg”>
<propval type=”astring” name=”user” value=”anonymous@oracle.com”/>
<propval type=”astring” name=”password” value=””/>
<propval type=”astring” name=”index” value=””/>
<propval type=”astring” name=”private-key” value=””/>
<propval type=”astring” name=”public-key” value=””/>
<propval type=”astring” name=”client-id” value=””/>
<propval type=”astring” name=”timestamp” value=””/>
<propval type=”astring” name=”proxy-host” value=””/>
<propval type=”astring” name=”proxy-user” value=””/>
<propval type=”astring” name=”proxy-password” value=””/>
<propval type=”astring” name=”hub-endpoint” value=””/>
</property_group>
</instance>
</service>
</service_bundle>
I hope to associate this profile to my machine with mac address 08:00:27:82:9D:49 so save above content to a file profile-08:00:27:82:9D:49.xml, then add it into install service i386-11_2 by,
# installadm create-profile -n i386-11_2 -p profile-08:00:27:82:9D:49.xml -c mac=08:00:27:82:9D:49
After the command the file content is saved to AI database so you can delete this file or move it to other location.
To confirm the creation just run
# installadm list -n i386-11_2 -p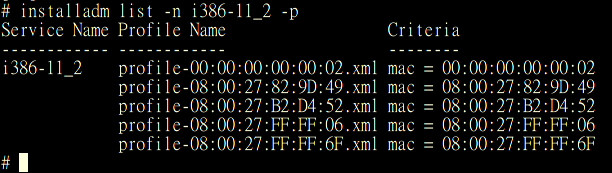
To review the profile content use
# installadm export -n i386-11_2 -p profile-08:00:27:82:9D:49.xml
To modify/update profile, firstly we export it to a file, modify the exported file, validate it, then send it back,
# installadm export -n i386-11_2 -p profile-08:00:27:82:9D:49.xml -o a.xml
(modify a.xml ……)
# installadm validate -n i386-11_2 -P a.xml
# installadm update-profile -n i386-11_2 -p profile-08:00:27:82:9D:49.xml -f a.xml
To remove this profile from AI database,
# installadm delete-profile -n i386-11_2 -p profile-08:00:27:82:9D:49.xml