Overview
I’d like to show how to build open source software on a publicly available, for non-commercial use, Oracle Solaris CBE 11.4.42 system released in March 2022. As a person who often tries out other operating systems or distributions, I’m well aware that using a new system for the first time might not be as easy as expected since one may not know the most basic commands and tools specific to each operating system.
CBE stands for Common Build Environment as that is what we use to build Oracle Solaris itself.
As an example, I will build, install, and use my favorite window manager, FVWM2, as that is not part of the Solaris package repository, and then install packaged Firefox and Evince from our repo. Note that Oracle Solaris 11.4 comes with Gnome3 which works out of box. If that is what you are looking for, see the solaris-desktop package below for more information.
We first released Oracle Solaris CBE 11.4.42 packages to upgrade Solaris 11.4 GA (General Availability) system released in 2018. Shortly after we announced the release of images to download which can be used to install 11.4.42 from scratch. I’m going to use the installation 11.4.42 ISO. Note that you will need to create a free, or use an existing, Oracle account to download the images.
Installing Oracle Solaris 11.4.42
On the page for Solaris Downloads, click on the Oracle Solaris 11.4 Common Build Environment 11.4.42 link, then download one of the ISOs (do not click on any links under the section Oracle Solaris 11.4.0 GA Downloads as those are for images for the first 11.4 release in 2018). However, first you have to select a platform, then read and accept the terms, then click directly on one of the ISO file names, e.g. V1019840-01.iso for x86 test install (that’s the last one). Note that the [Download] button may not work on your platform as it uses a pop-up window to run the download manager. I will use the x86 text install ISO to install Solaris 11.4.42 into a VirtualBox machine.
You need at least 5GB of memory for the installation, the VirtualBox default 4GB for Solaris is not enough for this release. You may set it to 4GB later if you want to, based on what you are going to do with the system. Also make sure that System->Motherboard->Pointing-Device is PS/2 Mouse (I got USB tablet by default).
The installer is very easy to use, just select your keyboard and language, the default will be fine for most. Then wait a moment for a text menu with numbered choices. Type 1 (Install Oracle Solaris) and confirm with Enter. Go through several installations screens, if your F2 key is not working to get to the next screen, use the usual Esc+2 workaround (that is, hit Esc, then hit 2).
The defaults are reasonable so you can just accept them, that is, you can keep pressing F2 until you need to explicitly set the root password. Well, I did change the Computer Name field from solaris to sol-cbe. The default is DHCP, choose the static network configuration if needed. After setting the root password, confirm with F2 again, press a couple more F2s, until the installation starts. Note that the progress bar is task based, not time based, and you can spend a little more time in 99% while the final pkg(1) operation is finishing up. After the install, you can reboot with F8. Do not forget to eject the ISO from your VM settings then as you would boot from it again after the system shutdown.
The first boot may take a couple of minutes while the system do various one-off tasks, like loading SMF service descriptions. You will see a graphical screen during the boot with a rotating icon, after that it will exit to a console login. You may see a console warning about the svc:/milestone/goals:default service but you can ignore that, the service will come up fine. You have a running Solaris CBE 11.4.42 instance now.
Configuring Oracle Solaris CBE 11.4.42
Log in using the root password you set up during the installation. You can check what is your boot environment via beadm list, check whether there are any unexpected service failures via svcs -xv, and list all services via svcs -a. And of course, check your version:
root@sol-cbe:~# uname -a
SunOS sol-cbe 5.11 11.4.42.111.0 i86pc i386 i86pc virtualbox

janp@sol-cbe:~$ beadm list
BE Name       Flags Mountpoint Space Policy Created
------------- ----- ---------- ----- ------ ----------------
11.4.42.111.0 NR    /          3.06G static 2022-06-21 13:02
If you wonder what that 111 stands for, that is an internal build number which this system version is based on. You can run man -s 7 pkg to learn more.
If I only need to work in the command line, I prefer to log in via SSH from my laptop host (in the VirtualBox Networking section for the virtual machine, instead of the default “NAT”, I chose “Bridged Adapter” and set it to my host WLAN interface to get an IP address via DHCP), so I added a local user to log in to. Be default, each user gets its own ZFS dataset, btw:
root@sol-cbe:~# useradd -c janp -m -g staff -s /bin/bash janp
root@sol-cbe:~# passwd janp
root@sol-cbe:~# su - janp
janp@sol-cbe:~$ zfs list rpool/export/home/janp
NAME                    USED  AVAIL  REFER  MOUNTPOINT
rpool/export/home/janp   44K  24.5G    44K  /export/home/janp
If you want to use SSH to root directly from your host system, not otherwise recommended, set PermitRootLogin to yes in /etc/ssh/sshd_config, then run svcadm restart ssh to restart the SSH daemon. As mentioned above, all services present on your system are shown via svcs -a. To learn what is the guest’s IP address so that you can use it to log in from your host, run ipadm.
If your DNS nameserver is not received through DHCP, you need to manually configure it. In the example below, 172.20.20.1 is my local nameserver. Keep the quoting of parentheses. If you want more name servers, just put them there separated by spaces.
root@sol-cbe:~# export TERM=xterm-color # my rxvt-unicode-256color is not known
root@sol-cbe:~# svccfg -s system/name-service/switch setprop config/host = astring: "files dns"
root@sol-cbe:~# svcadm refresh system/name-service/switch
root@sol-cbe:~# svccfg -s network/dns/client setprop config/nameserver = net_address: \( 172.20.20.1 \)
root@sol-cbe:~# svcadm refresh network/dns/client
root@sol-cbe:~# svcadm enable network/dns/client
Now you should be able to ping www.oracle.com (use ping -s for once-per-second continuous send). See also man -s 7 smf to learn more about Service Management Facility (SMF).
In case you decided to use a static IP address instead of DHCP, you could do it as follows:
ipadm
ipadm delete-addr net0/v4
ipadm create-addr -T static -a 172.20.20.114/24 net0/v4
route -p add default 172.20.20.1
ipadm without options above shows you an overview of your current network configuration. To see your “physical” network interfaces, run dladm show-phys, to see your MAC addresses, use dladm show-phys -m etc.
Accidentally, the package publisher was left pointing to the support repository which is not publicly available. One has to change it to the solaris/release publisher so that we can install packages from the public repository. If you do not do that, you would get an SSL handshake error when trying to install any new package. So, change the publisher now:
root@sol-cbe:~# pkg publisher
PUBLISHER                   TYPE     STATUS P LOCATION
solaris                     origin   online F https://pkg.oracle.com/solaris/support/

root@sol-cbe:~# pkg set-publisher -G'*' -g http://pkg.oracle.com/solaris/release/ solaris
You can see all the Oracle Solaris system versions available from that publisher. So, you could have also installed 11.4 GA (11.4-11.4.0.0.1.15.0) from an ISO (publicly available), then type pkg update to update the system to this 11.4.42 CBE release. Using 11.4.42 installation ISO was faster, of course.
janp@sol-cbe:~$ pkg list -af entire
NAME (PUBLISHER)                                  VERSION                    IFO
entire                                            11.4-11.4.42.0.0.111.0     i--
entire                                            11.4-11.4.0.0.1.15.0       ---
entire                                            0.5.11-0.175.3.1.0.5.3     ---
entire                                            0.5.11-0.175.3.1.0.5.2     ---
entire                                            0.5.11-0.175.3.1.0.5.1     ---
entire                                            0.5.11-0.175.3.1.0.5.0     ---
Boot verbosely in text mode
If you want to see what exactly is going on during the boot, change from the default graphical screen showing the rotating wheel to the verbose textual boot output:
root@sol-cbe:~# /usr/sbin/bootadm list-menu
The location of the boot loader configuration files is: /rpool/boot/grub
default 0
console graphics
timeout 30
0 Oracle Solaris 11.4.42.111.0
# Now get the details on one specific menu item, probably 0.
/usr/sbin/bootadm list-menu -i 0
root@sol-cbe:~# /usr/sbin/bootadm list-menu -i 0
The location of the boot loader configuration files is: /rpool/boot/grub
title: Oracle Solaris 11.4.42.111.0
kernel: /platform/i86pc/kernel/amd64/unix
kernel arguments: -B console=graphics
boot archive: /platform/i86pc/amd64/boot_archive
bootfs: rpool/ROOT/11.4.42.111.0
# Change the kernel arguments.
bootadm change-entry -i 0 kargs="-B console=text -v"
# Verify.
root@sol-cbe:~# /usr/sbin/bootadm list-menu -i 0
The location of the boot loader configuration files is: /rpool/boot/grub
title: Oracle Solaris 11.4.42.111.0
kernel: /platform/i86pc/kernel/amd64/unix
kernel arguments: -B console=text -v
boot archive: /platform/i86pc/amd64/boot_archive
bootfs: rpool/ROOT/11.4.42.111.0
Installing packages to build C code
Install GCC, Git, and a few other packages we will need to build FVWM2 (and possibly any other C software). It will also install all their dependencies automatically, as expected.
root@sol-cbe:~# pkg install autoconf automake-116 git gcc-c-11

           Packages to install: 15
           Mediators to change:  3
            Services to change:  1
       Create boot environment: No
Create backup boot environment: No

DOWNLOAD                                PKGS         FILES    XFER (MB)   SPEED
Completed                              15/15     1748/1748  323.0/323.0  2.9M/s

PHASE                                          ITEMS
Installing new actions                     2341/2341
Updating package state database                 Done
Updating package cache                           0/0
Updating image state                            Done
Creating fast lookup database                   Done
Updating package cache                           1/1
If anywhere during your building of anything, you find a file/binary missing, look for it using pkg search, then install the package. For example, if you try to build FVWM2 without Automake, it will complain about missing aclocal. You can find what package contains it as follows, then you would install the missing package:
root@sol-cbe:~# pkg search aclocal
INDEX      ACTION VALUE             PACKAGE
basename   dir    usr/share/aclocal pkg:/developer/build/automake-116@1.16.3-11.4.42.0.0.111.0
basename   link   usr/bin/aclocal   pkg:/developer/build/automake-116@1.16.3-11.4.42.0.0.111.0
root@sol-cbe:~#
root@sol-cbe:~# pkg install automake-116
To see installed packages on your system, run pkg list, or pkg info for more detailed output. If you want to see all packages available to install on your system version, run pkg list -a. To see all packages and all their packages versions, even those not compatible with your system version, run pkg list -af.
Building and installing FVWM2
Get fvwm2 and build it:
root@sol-cbe:~# wget https://github.com/fvwmorg/fvwm/releases/download/2.6.9/fvwm-2.6.9.tar.gz
root@sol-cbe:~# tar xfzv fvwm-2.6.9.tar.gz
root@sol-cbe:~# cd fvwm-2.6.9
root@sol-cbe:~/fvwm-2.6.9# ./configure
...
checking for X11/xpm.h... yes
checking for Xpm 3.4g or better... yes
checking for libpng...... checking pkg-config is at least version 0.9.0... ./configure[9116]: no: not found [No such file or directory]
no
checking for png... no
configure: error: ***
                       libpng not found, and --disable-png not given.
                       It is recommended to use libpng so that PNG icons can
                       be rendered by FVWM, which the default configuration
                       file needs, as well as other third-party programs
                       which generate menus, for example.
OK, not sure why it did not find libpng already installed:
root@sol-cbe:~/fvwm-2.6.9# ls -l /usr/lib/libpng*
lrwxrwxrwx   1 root     root          11 Jun 21 13:04 /usr/lib/libpng.so -> libpng16.so
lrwxrwxrwx   1 root     root          19 Jun 21 13:04 /usr/lib/libpng16.so -> libpng16.so.16.37.0
lrwxrwxrwx   1 root     root          19 Jun 21 13:04 /usr/lib/libpng16.so.16 -> libpng16.so.16.37.0
-r--r--r--   1 root     bin       290920 Dec  4  2021 /usr/lib/libpng16.so.16.37.0
However, given that the development of FVWM2 is over and its last version got frozen, let’s build without it, no big deal. There is FVWM3 under development but let’s go with the trusted version 2. Btw, the issue above is one of the reasons why we released the CBE build, in hope such issues could be fixed more easily.
root@sol-cbe:~/fvwm-2.6.9# ./configure --disable-png
...
root@sol-cbe:~/fvwm-2.6.9# gmake install
Install X11 packages and start FVWM2
Note that the group/system/solaris-large-server meta package is installed from the ISO, and it does not contain X11. A group package identifies the collection of packages to be installed through dependencies in its meta data. We also have group/system/solaris-small-server and group/system/solaris-minimal-server, and group/system/solaris-desktop. To see what dependencies are in a package, you can do e.g. pkg contents -m solaris-large-server | grep ^depend. If you need to see contents of a package not yet installed, use pkg contents -r ....
If you want the Solaris desktop right away, you can install the desktop group package using pkg(1) as shown above, and you will get Gnome3 installed, many apps like Firefox and such, and also a graphical login. However, I prefer to install less if possible, and this is all you need:
root@sol-cbe:~# pkg install \
    x11/server/xorg x11/server/xserver-common x11/session/xinit \
    pkg:/x11/server/xorg/driver/xorg-video-vmware \
    pkg:/x11/server/xorg/driver/xorg-input-vmmouse

           Packages to install: 23
            Services to change:  3
       Create boot environment: No
Create backup boot environment: No

DOWNLOAD                                PKGS         FILES    XFER (MB)   SPEED
Completed                              23/23     1824/1824    19.8/19.8  1.1M/s

PHASE                                          ITEMS
Installing new actions                     2409/2409
Updating package state database                 Done
Updating package cache                           0/0
Updating image state                            Done
Creating fast lookup database                   Done
Updating package cache                           1/1
Those two last packages are needed only if you use VirtualBox.
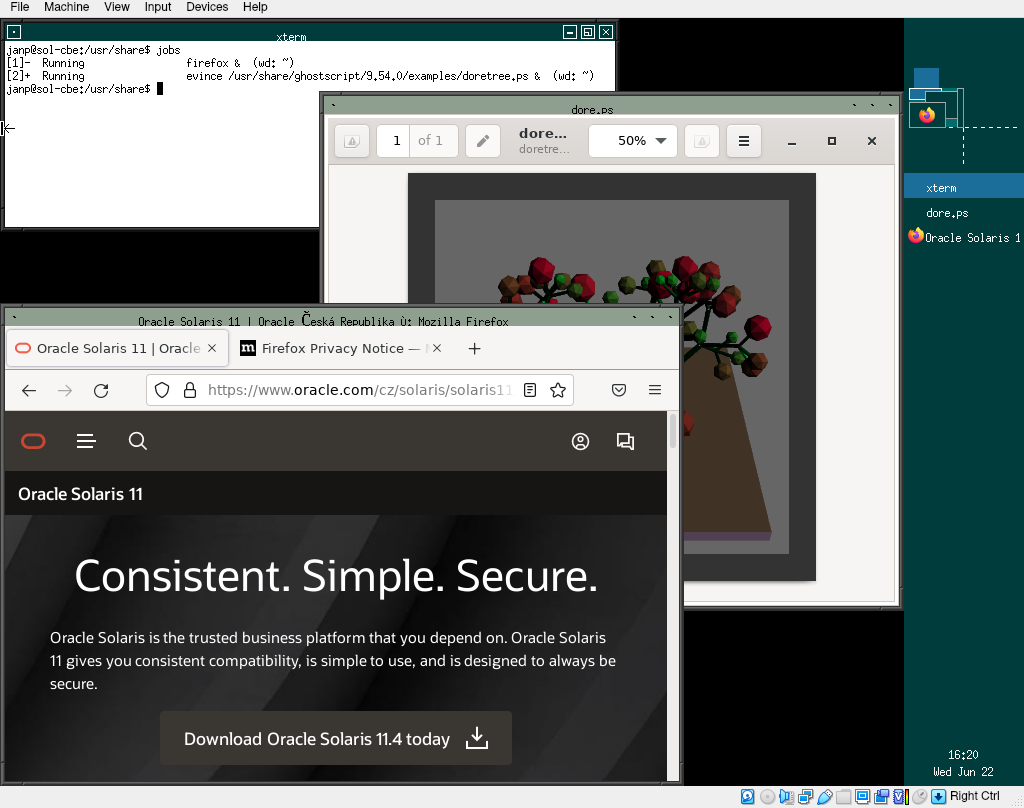
Now, just tell startx what to execute. FVWM2 comes with the default configuration, no need to create its configuration file if you are OK with the default. So, at last, you will be able to start the window manager. You should see what is displayed in the title image of this blog post, save for the running applications.
You can even do that over SSH, it will come up fine in the VirtualBox window.

janp@sol-cbe:~# su - janp
janp@sol-cbe:~$ echo "exec /usr/local/bin/fvwm" > ~/.xinitrc
root@sol-cbe:~$ startx
If you do not look at the graphical FVWM window manager screen with a logo right now, something went wrong (the logo will go away after a few seconds :-). Please check the error message and possibly go through the instructions above again.
Install more packages
I will install Firefox and Evince as that is what I mostly need in a programmer’s life – a browser, a PDF viewer, and a terminal. Note that Firefox version is 91.3.0esr (it based on SRU42 released in March 2022). The upcoming 11.4 SRU48 will have 91.10.0 but SRUs are not freely available.
You can either use SSH again, or in the window manager within the VirtualBox machine, click left mouse button, and select “XTerm” (xterm was already brought in as a dependency of the x11/session/xinit package we installed above, in case you were wondering). What you see below is a case when the terminal is not recognized by the system, in which case pkg will just print progress on multiple lines:
root@sol-cbe-2:~# echo $TERM
rxvt-unicode-256color
root@sol-cbe:~# pkg install firefox evince
 Startup: Refreshing catalog 'solaris' ... Done
Planning: Solver setup ... Done
Planning: Running solver ... Done
Planning: Finding local manifests ... Done
Planning: Fetching manifests:  0/54  0% complete
Planning: Fetching manifests: 54/54  100% complete
Planning: Package planning ... Done
Planning: Merging actions ... Done
Planning: Checking for conflicting actions ... Done
Planning: Consolidating action changes ... Done
Planning: Evaluating mediators ... Done
Planning: Planning completed in 8.68 seconds
           Packages to install: 54
            Services to change:  9
       Create boot environment: No
Create backup boot environment: No

Download:     0/14456 items    0.0/274.0MB  0% complete
Download:   635/14456 items    3.2/274.0MB  1% complete (660k/s)
Download:   913/14456 items    6.7/274.0MB  2% complete (693k/s)
Download:  1766/14456 items    8.3/274.0MB  3% complete (531k/s)
Download:  2575/14456 items    9.8/274.0MB  3% complete (320k/s)
Download:  3351/14456 items   10.6/274.0MB  3% complete (232k/s)
Download:  3552/14456 items   16.5/274.0MB  6% complete (677k/s)
Download:  4235/14456 items   18.4/274.0MB  6% complete (801k/s)
Download:  5115/14456 items   19.9/274.0MB  7% complete (347k/s)
Download:  5964/14456 items   21.7/274.0MB  7% complete (333k/s)
Download:  6745/14456 items   23.3/274.0MB  8% complete (334k/s)
Download:  7511/14456 items   24.5/274.0MB  8% complete (291k/s)
Download:  8339/14456 items   26.0/274.0MB  9% complete (298k/s)
Download:  9166/14456 items   28.1/274.0MB  10% complete (361k/s)
Download:  9856/14456 items   36.4/274.0MB  13% complete (1.0M/s)
Download: 10092/14456 items   65.0/274.0MB  23% complete (3.6M/s)
Download: 10547/14456 items   70.6/274.0MB  25% complete (3.5M/s)
Download: 11151/14456 items   77.3/274.0MB  28% complete (1.3M/s)
Download: 11788/14456 items   87.1/274.0MB  31% complete (1.6M/s)
Download: 12378/14456 items   97.8/274.0MB  35% complete (2.0M/s)
Download: 12687/14456 items  105.4/274.0MB  38% complete (1.9M/s)
Download: 13317/14456 items  109.5/274.0MB  39% complete (1.2M/s)
Download: 13663/14456 items  118.1/274.0MB  43% complete (1.2M/s)
Download: 13720/14456 items  133.0/274.0MB  48% complete (2.3M/s)
Download: 13721/14456 items  138.0/274.0MB  50% complete (2.2M/s)
Download: 13721/14456 items  141.7/274.0MB  51% complete (1002k/s)
Download: 14045/14456 items  146.1/274.0MB  53% complete (817k/s)
Download: 14170/14456 items  168.6/274.0MB  61% complete (2.6M/s)
Download: 14260/14456 items  200.9/274.0MB  73% complete (5.5M/s)
Download: 14276/14456 items  214.8/274.0MB  78% complete (4.7M/s)
Download: 14278/14456 items  230.9/274.0MB  84% complete (3.0M/s)
Download: 14278/14456 items  240.9/274.0MB  87% complete (2.6M/s)
Download: 14278/14456 items  251.6/274.0MB  91% complete (2.1M/s)
Download: 14278/14456 items  263.1/274.0MB  96% complete (2.2M/s)
Download: 14282/14456 items  272.2/274.0MB  99% complete (2.1M/s)
Download: Completed 274.00 MB in 172.19 seconds (1.6M/s)
 Actions:     1/16322 actions (Installing new actions)
 Actions: 10337/16322 actions (Installing new actions)
 Actions: 14859/16322 actions (Installing new actions)
 Actions: Completed 16322 actions in 14.99 seconds.
 Done
Now you can type firefox and evince on the XTerm running within your FVWM2 session.
Online help
We have very good, up to date manual pages. If connected via SSH, your terminal may not be known, in that case set it to something else, e.g. export TERM=xterm-color. Note that if you want to read a man page from a specific section, on Solaris, you need the -s option:
janp@sol-cbe:~$ man pkg         # will show pkg(1)
janp@sol-cbe:~$ man -s 7 pkg    # will show pkg(7)
If you want to learn more about Oracle Solaris, we have an excellent online library, Oracle Solaris 11.4 Documentation Library, publicly available.
If you want to ask a question, we have a community page on https://community.oracle.com/mosc/categories/oracle_sun_technologies. You will need to create a free account to access that.
Conclusion
As with any new platform, the initial interaction might be a bit frustrating as one may not know the basic tools to navigate and/or configure the system. Hopefully, this blog post helped with a few tasks one might need to build a piece of open source software.