
Logs are essential for troubleshooting, but they can also contain sensitive data such as IP addresses, usernames, email addresses, hostnames, tokens, and customer IDs. When logs move from individual systems into a centralized analytics platform, they become easier to search, correlate, and share across teams. That visibility is useful, but it also increases the importance of controlling what sensitive values are collected and indexed. Source-level data filters help reduce that risk early in the log lifecycle, while preserving enough information for troubleshooting and trend analysis.
Oracle Log Analytics Data Filters let you mask, hash, remove, or discard sensitive content at the log-source level. The same source configuration is used for Management Agent collection, Object Storage collection rules, and on-demand uploads. With Management Agent collection, filtering occurs on the host before log content leaves your environment. For Object Storage collection and uploads, filtering occurs in Oracle Log Analytics before the data is indexed.
Configure a Data Filter
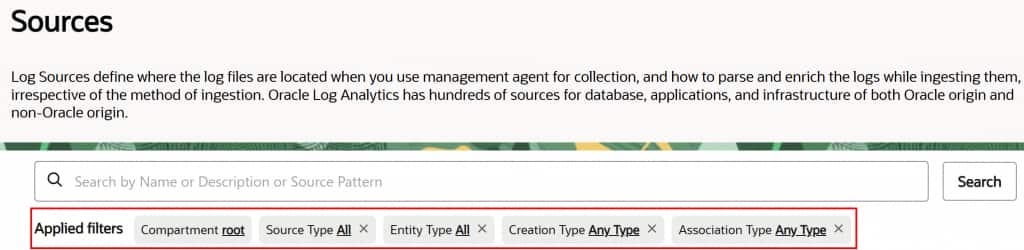
- Log in to the Oracle Cloud Console. Go to Observability & Management. Under Log Analytics, go to Administration, and click Sources.
- Search for the source and click Edit for a user-defined source or Customize for an Oracle-defined source.
- Open Data Filters tab.
- Add the filter and keep Enabled checked. Save the source.

Which Filter Type Should You Use?
There are different ways to mask data depending on your use case.
- Mask: Replace sensitive text with a fixed value, such as masked_email.
- Hash Mask: Hide the value but keep repeated values correlatable.
- Drop String: Remove only the matched keyword or value.
- Drop Log Entry: Discard the whole log entry when a pattern appears.
Example 1: Mask an Email Address
In this example, let’s replace the original email address with the value ‘masked_email’ whenever it’s encountered in the logs related to login activity.
Configuration shown:
- Name: Mask Email
- Type: Mask
- Find Expression: [A-Za-z0-9._%+-]+@[A-Za-z0-9.-]+\.[A-Za-z]{2,}
- Replace Expression: masked_email
- Enabled: checked

Example 2: Hash a Customer ID
In this example, let’s replace the customer ID in a purchase transaction log with it’s numeric hash.
Configuration shown:
- Name: Hash Customer ID
- Type: Hash Mask
- Find Expression: customerId=[0-9]+
- Replace Expression: Numeric Hash
- Enabled: checked

Example 3: Drop a Token Value
In this example, when we detect a token value as described using the find expression, we configure the data filter to drop it while retaining the remaining data in the log.
Configuration shown:
- Name: Drop Token Value
- Type: Drop String
- Find Expression: token=[^ ]+
- Enabled: checked

Example 4: Drop a Debug Token Log Entry
In this example, when a log entry with the debug token is encountered, it is not collected or indexed.
Configuration shown:
- Name: Drop Debug Token Logs
- Type: Drop Log Entry
- Find Expression: .*debugToken=.*
- Enabled: checked

Simple Regex Starters
Here are some simple find expressions that can be useful when you’re setting up data filters.
IPv4 address:
\b\d{1,3}(.\d{1,3}){3}\bUsername field:
user=[A-Za-z0-9._-]+Email address:
[A-Za-z0-9._%+-]+@[A-Za-z0-9.-]+.[A-Za-z]{2,}Hostname field:
host=[A-Za-z0-9.-]+Token field:
token=[^ ]+Customer ID:
customerId=[0-9]+How to Check That the Filter Works
- Save the source after adding the data filter.
- Generate a new test log entry.
- Upload the logs to Oracle Log Analytics. See Upload Logs on Demand.
- In Log Explorer, filter by source, entity, log group, and recent time range.
- Search for the original value; it should not appear.
- If you have set up a replacement value, then search for the replacement, such as masked_email.
- Delete the test logs after you verified the proper working of the filter.
Common Errors
- Filter does not run: Make sure Enabled check box is checked. Ensure that the filter is added to the source used for log collection.
- Agent logs unchanged: Confirm source-entity association for the Management Agent.
- Regex misses data: Start simple and test with a small sample.
- Log fields are missing or parsing fails: Keep replacement text compatible with the log format.
- Old values still appear: Check new logs only; indexed logs are not rewritten.
Factors to Remember
- Data filters are configured at source-level.
- For Management Agent log collection, configure the Data Filter in the source and associate that source with the monitored entity.The agent uses the source instructions during collection, so masking happens before upload.
- For log collection from your OCI object storage bucket or on-demand upload, select the same source that you have configured with data filters in the workflow.
- Filters apply to new data after the source is updated. Already indexed logs are not rewritten.
In the Closing
By applying data filters at the source, you can keep operational logs useful while reducing exposure of sensitive values. Start with a small set of high-risk patterns, test with new log entries, and expand the filters as you identify additional data that should be masked, hashed, removed, or dropped.