A prerequisite for this blog is that you already have some familiarity using foundational Oracle Cloud Infrastructure components.
In a traditional Enterprise Manager infrastructure, the targets can be added and managed within a datacenter or customer premise with a different approach. In this current cloud evaluation the infrastructure elements are moving towards hybrid topology where administrators face multiple issues in connecting and managing their targets running on Cloud. This blog focuses on managing different targets running on OCI with Enterprise Manager deployed with OCI Marketplace.
To monitor and manage targets like VM’s, DB System, Autonomous Databases etc. running on Oracle Cloud Infrastructure (OCI) in Enterprise Manager, you must first deploy the agents to the target VMs and then discover and promote the targets. This blog details how to push an agent on OCI Cloud targets through the Enterprise Manager deployed using Marketplace application.
Prerequesites for how to discover targets in an OCI Enterprise Manager instance
Before you push an agent to a host, there are several prerequisites that need to be performed. Start by completing the following prerequisites. These apply to all target types:
1. Provision the EM instance via Marketplace (single or multi-node)
2. Provision a machine to perform the agent push and database on the same network (VCN & Subnet). Agents can also be pushed to the database systems for discovery (this is automatically done for the OMR database as a part of EM Setup).
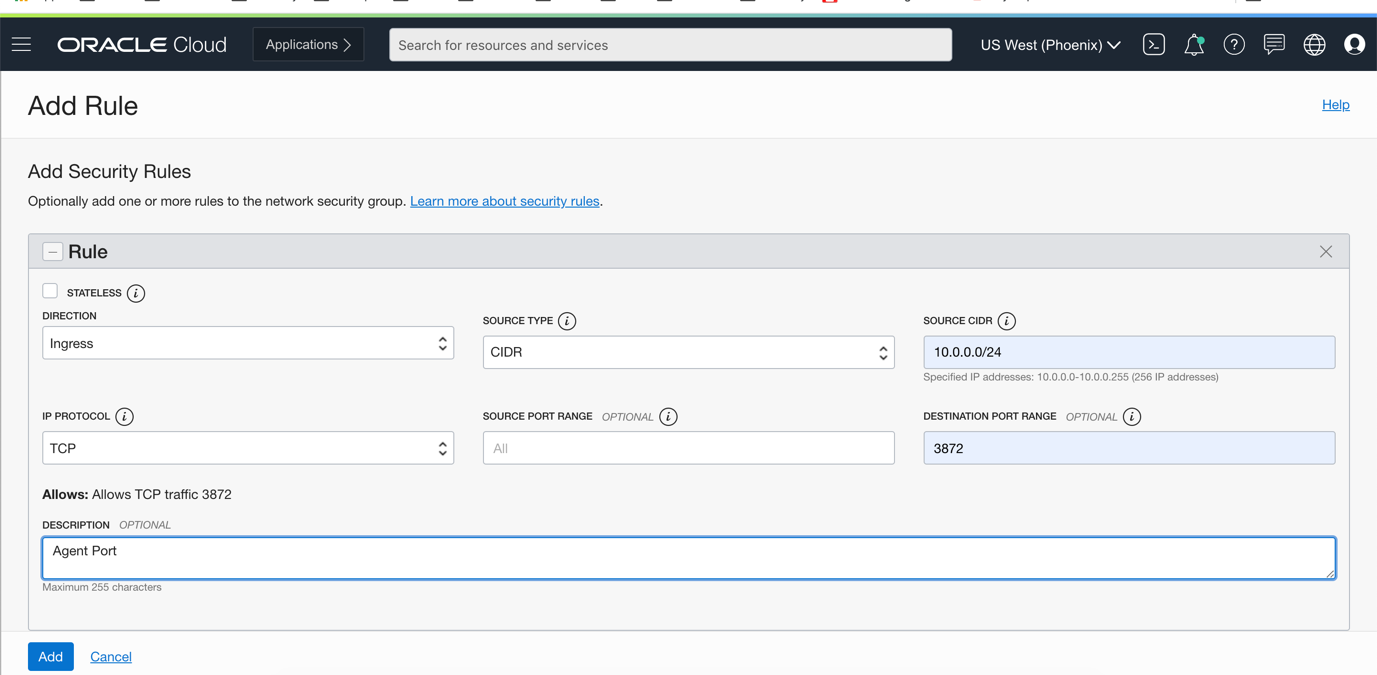
a. If the target hosts are running on different VCN then open the agent port default 3872 or select the free port within the range of 1830 to 1849 : navigate to Networking, then Virtual Cloud Networks, Security Lists, Ingress Rules and click on Add Ingress Rules.
Firewall ports and rules for database systems when setting up Enterprise Manager on OCI
3. Login to the target host, as opc user for instances deployed on OCI and open the firewall ports:
ssh opc@<target host ip>
a. Firewall rules for database systems:
sudo iptables -I INPUT -p tcp -m state --state NEW -m tcp -s <cidr> --dport 3872 -m comment --comment "Required for access to Agent Listener, Do not remove or modify." -j ACCEPT
example: sudo iptables -I INPUT -p tcp -m state --state NEW -m tcp --dport 3872 -m comment --comment "Required for access to Agent Listener, Do not remove or modify." -j ACCEPT
sudo iptables-save
b. For Normal VM instances with Oracle Linux 7.x and above, use the following commands:
sudo firewall-cmd --zone=public --permanent --add-port 3872/tcp
 sudo firewall-cmd --list-all
 sudo firewall-cmd --get-services
 sudo firewall-cmd --get-zones
 sudo firewall-cmd --reload
4. Create a passwordless SSH login from the OMS host to the agent host as the opc user. Copy the SSH keys (id_rsa, id_rsa.pub) from the Bastion host to oms1 and add the id_rsa.pub content to the target machines .ssh/authorized_keys file in case of multi OMS.
On Bastion:
opc@bastion $ cd .ssh/
 opc@bastion $ scp .ssh/id_rsa.* opc@oms1:.ssh/
On OMS:
opc@oms1 $ cd .ssh
 opc@oms1 $ cat .ssh/id_rsa.pub > authorized_keys
5. For a single node OMS environment, create an SSH key pair with the following command: ssh-keygen -t rsa -m pem. Copy the SSH keys to the target machines’s .ssh/authorized_keys file
6. Validate the SSH connection between the OMS node and agent host by logging in. Try login to target machine from OMS with ‘ssh opc@<target_host_ip>’
7. Make sure the ports are open on the target host where the agents will be deployed, run these commands from the OMS host:
nc -zvw3 <TARGET_HOST> <target_port>
 nc -zvw3 <TARGET_HOST> <listener_port>
 nc -zvw3 <TARGET_HOST> <oms_upload_port>
The reply should be in the below format:
Ncat: Version 7.50 ( https://nmap.org/ncat )
 Ncat: Connected to 10.0.1.248:3872.
 Ncat: 0 bytes sent, 0 bytes received in 0.01 seconds.
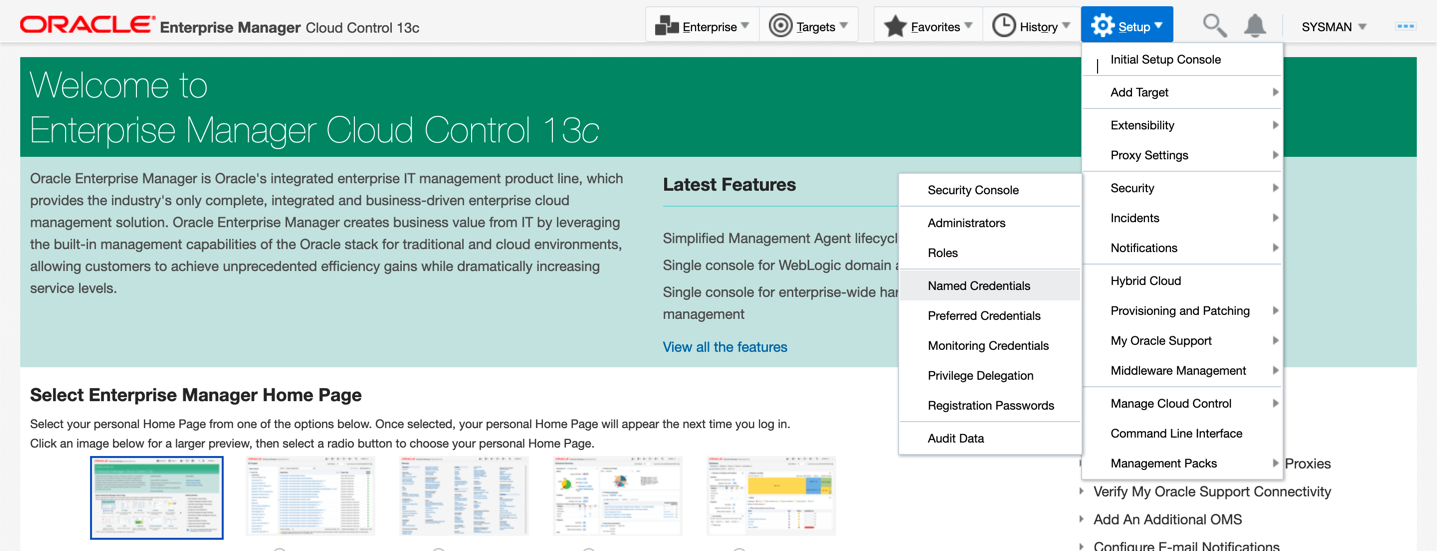
Named credentials on EM instance
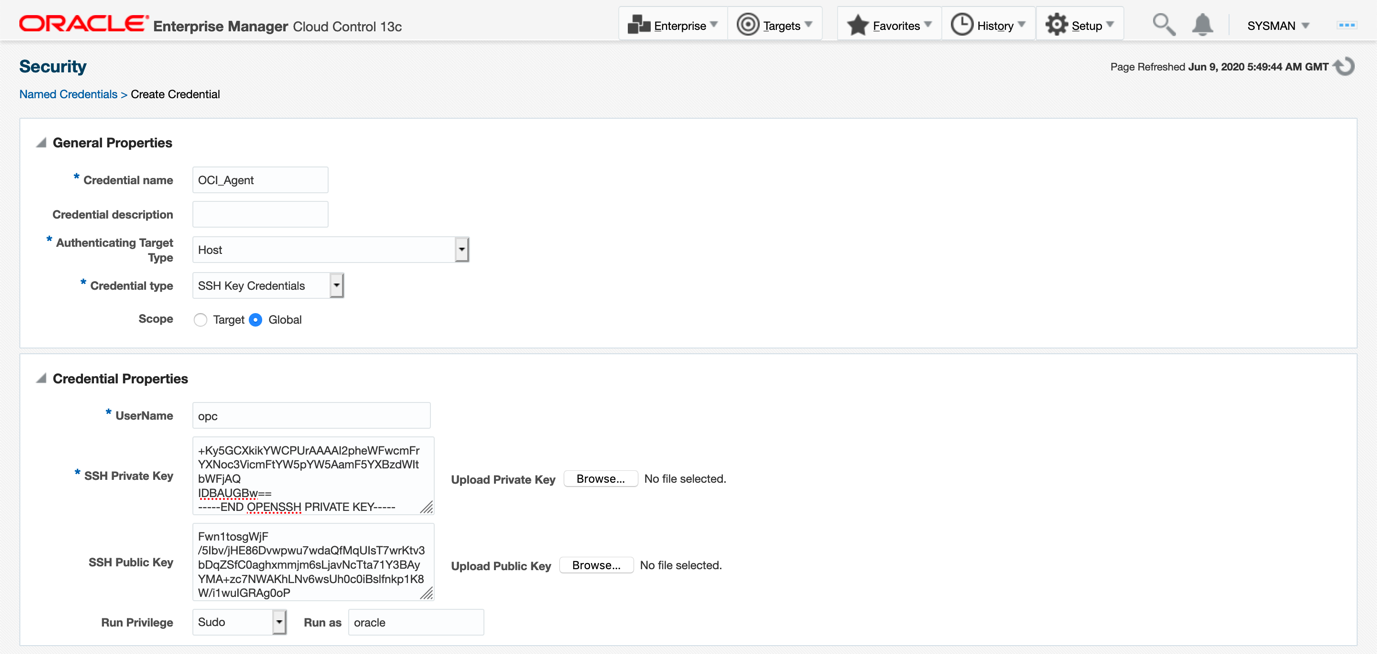
8. Create named credentials on the EM instance with the SSH key created above
a. Credential Name: OCI_Agent
b. Credential Type: SSH Key Credentials
c. Scope: Global
d. Username: opc
e. Run Privilege: sudo
f. Run as: oracle
9. Add the agent hosts IP and hostname to the EM hosts file and add EM details on the target machines host file.
a. Example hosts for multi node OMS
$ cat /etc/hosts
 10.0.1.3 oms1
 10.0.1.4 oms2
 10.0.1.6 dbhost1
 10.0.1.7 dbhost2
b. Target host Side
$ cat /etc/hosts
 10.0.1.6 dbhost1.emdb.emcc.oraclevcn.com dbhostt1
 192.168.16.18 dbhost1-priv.emdb.emcc.oraclevcn.com dbhostt1-priv
 10.0.1.8 dbhost1-vip.emdb.emcc.oraclevcn.com dbhostt1-vip
 10.0.1.7  dbhost2.emdb.emcc.oraclevcn.com  dbhostt2
 192.168.16.19  dbhost2-priv.emdb.emcc.oraclevcn.com  dbhostt2-priv
 10.0.1.9  dbhost2-vip.emdb.emcc.oraclevcn.com  dbhostt2-vip
 10.0.1.3 oms1
 10.0.1.4 oms2
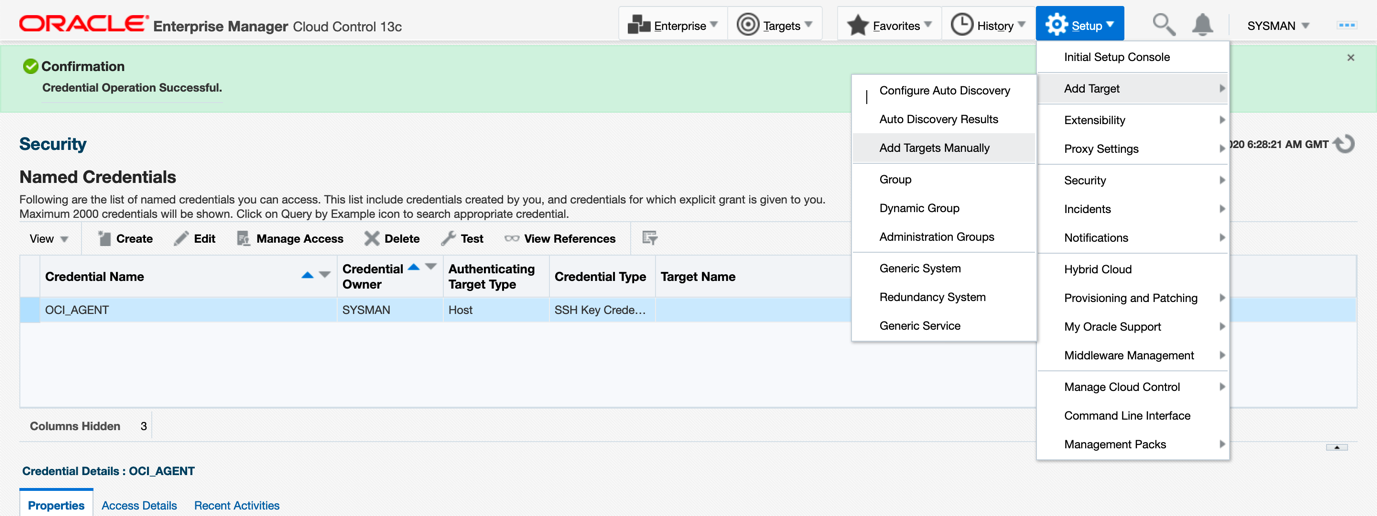
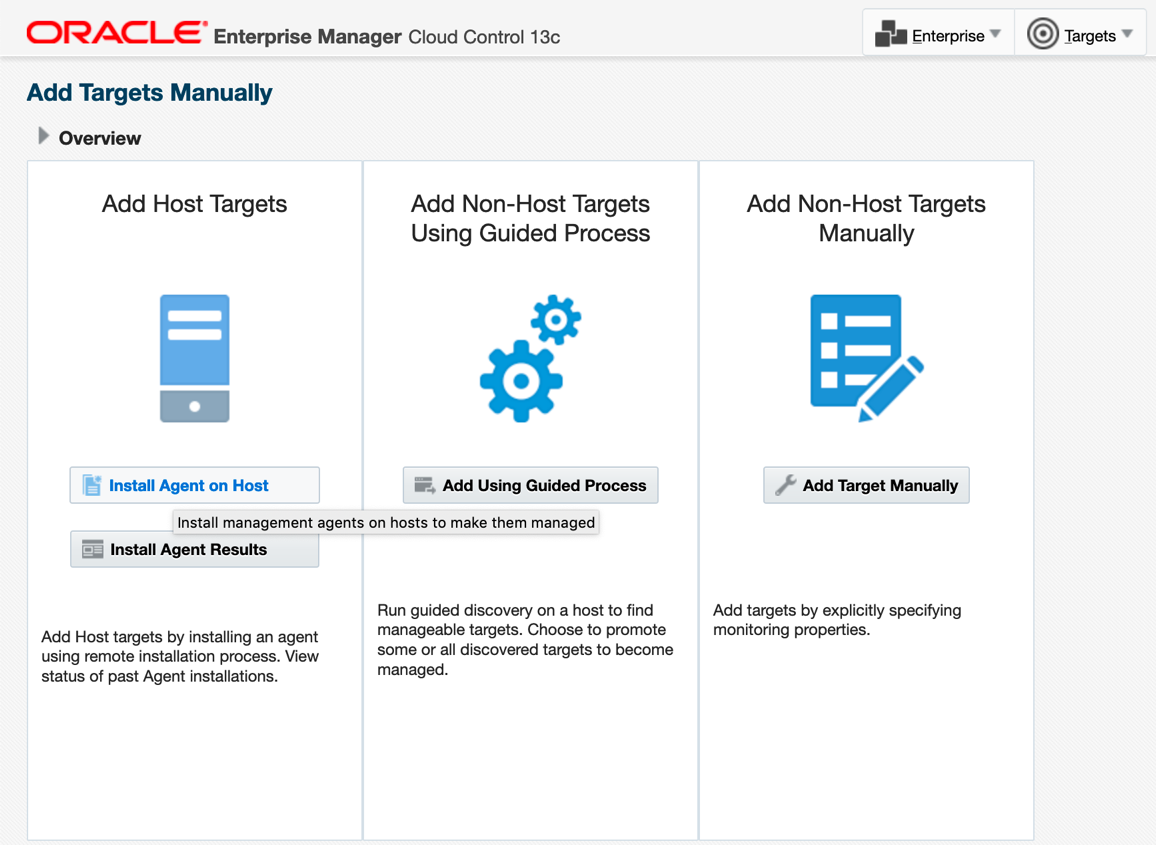
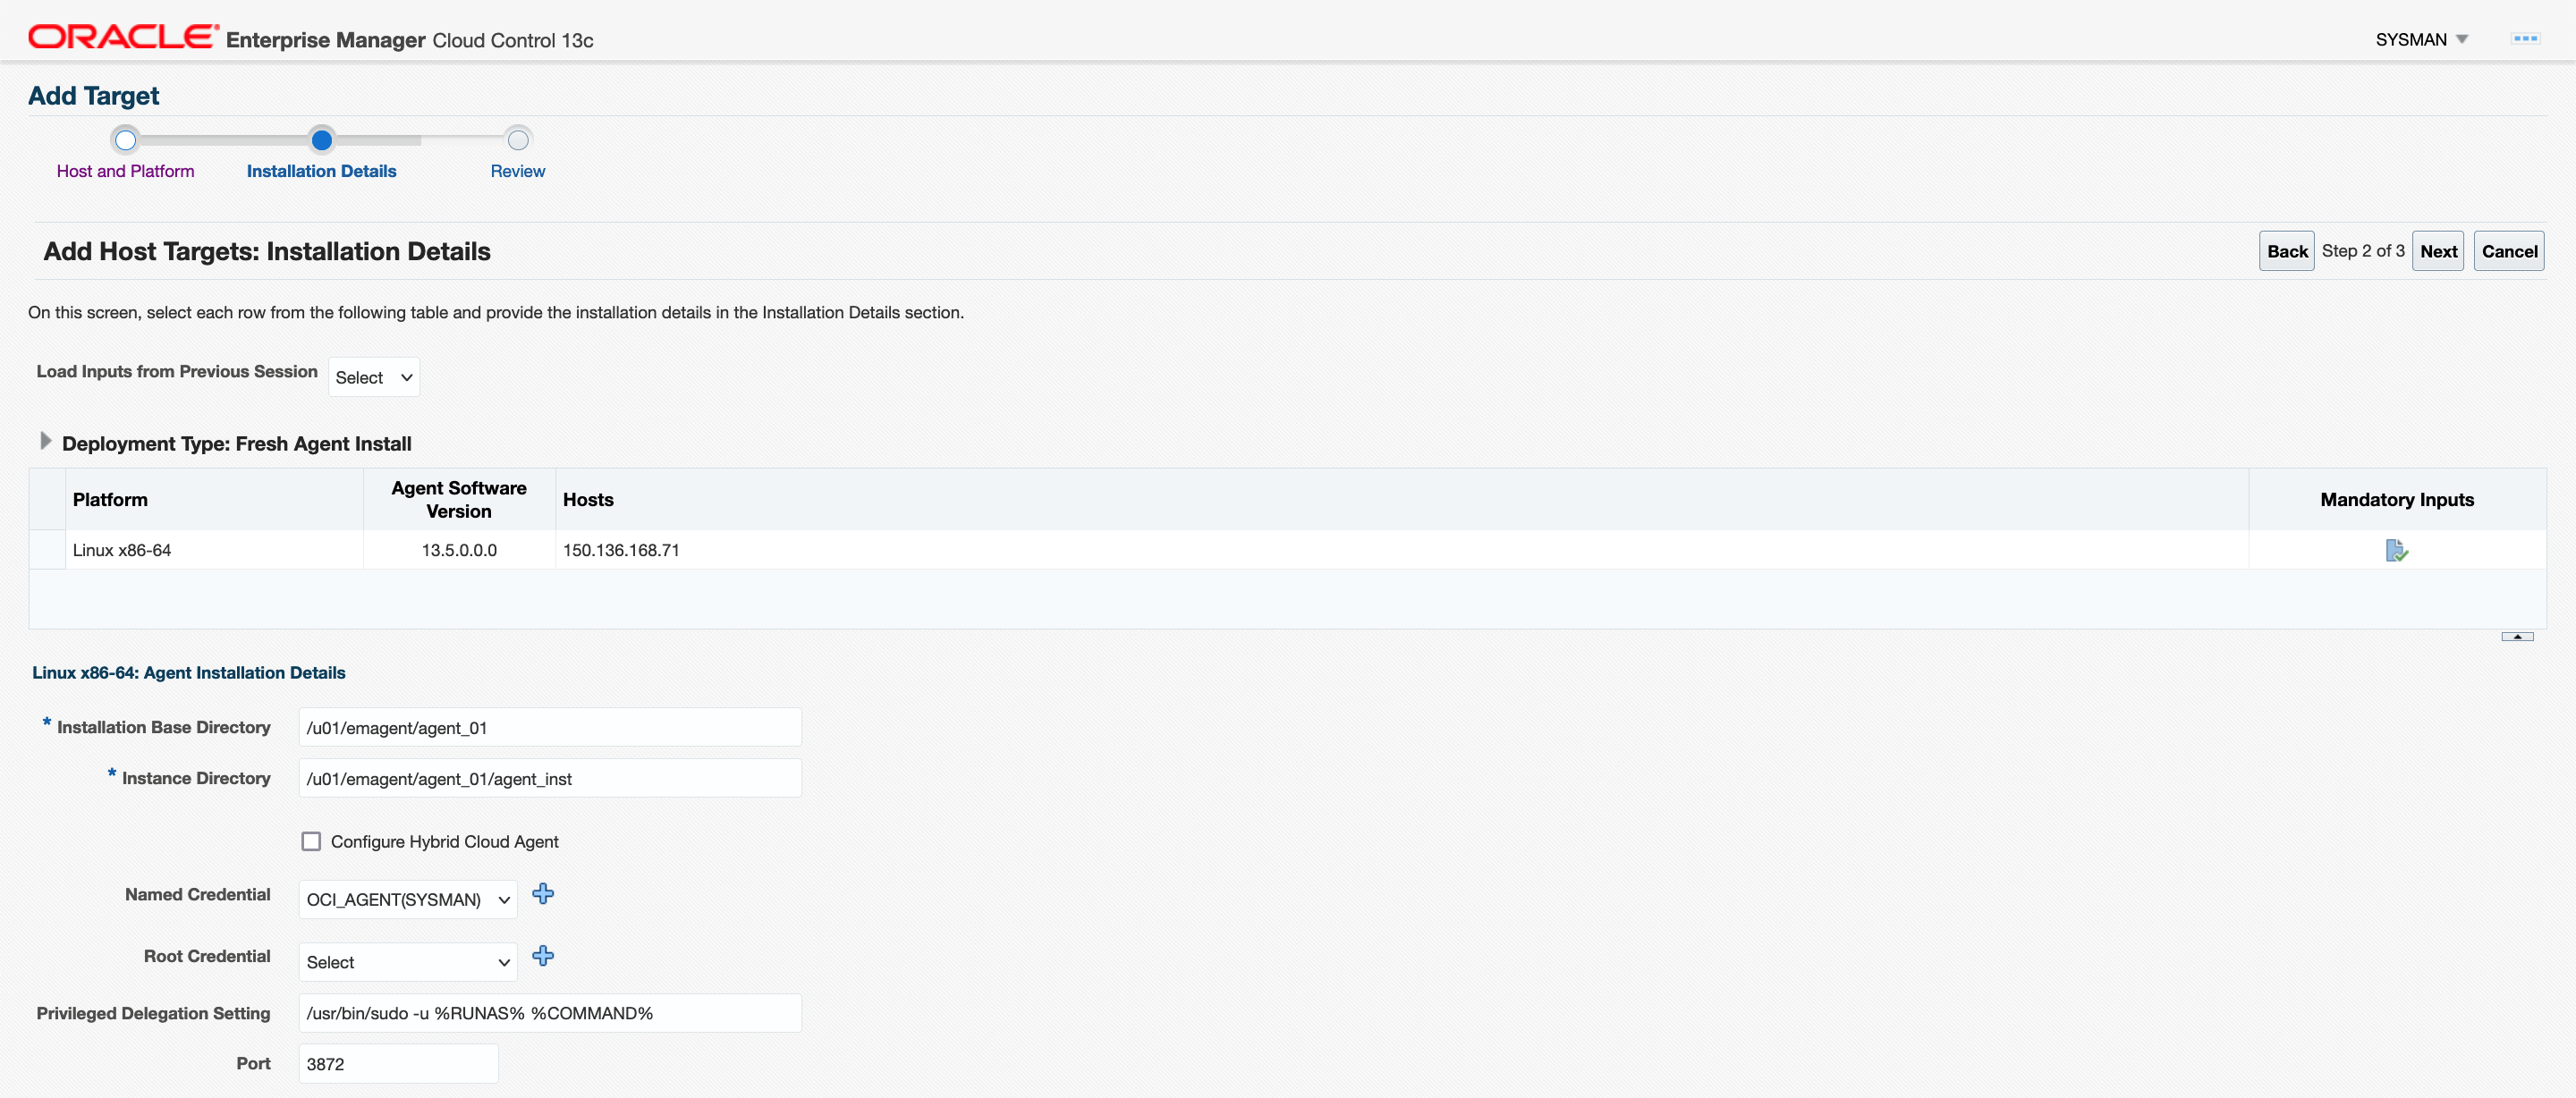
10. Add the agent using push method.
Validate targets on Enterprise Manager under the All Targets page
11. After the agent push is done, make sure the agent is shown as Up on EM under the All Targets page.
NOTE: If the agent shows as Availability Evaluation Error. Check that the firewall rules are open for the agent port and run the following command from the agent bin directory ($ORACLE_HOME/agent_inst/bin):
./emctl config agent addinternaltargets; ./emctl upload agent
Privilege delegation
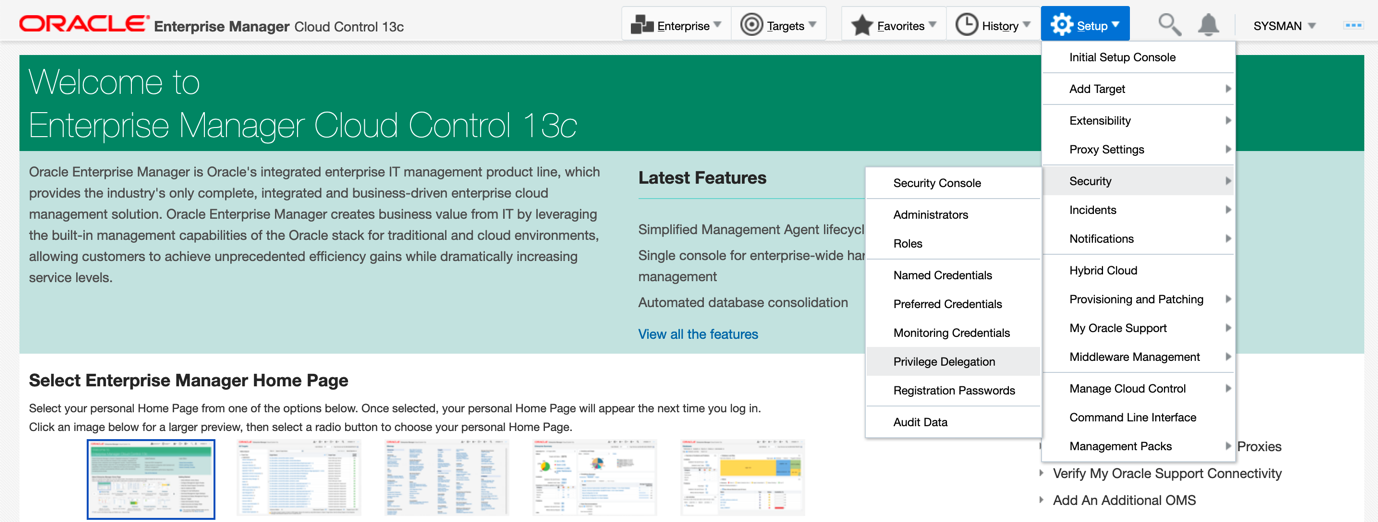
12. Navigate to Setup, then Security, and select Privilege Delegation .
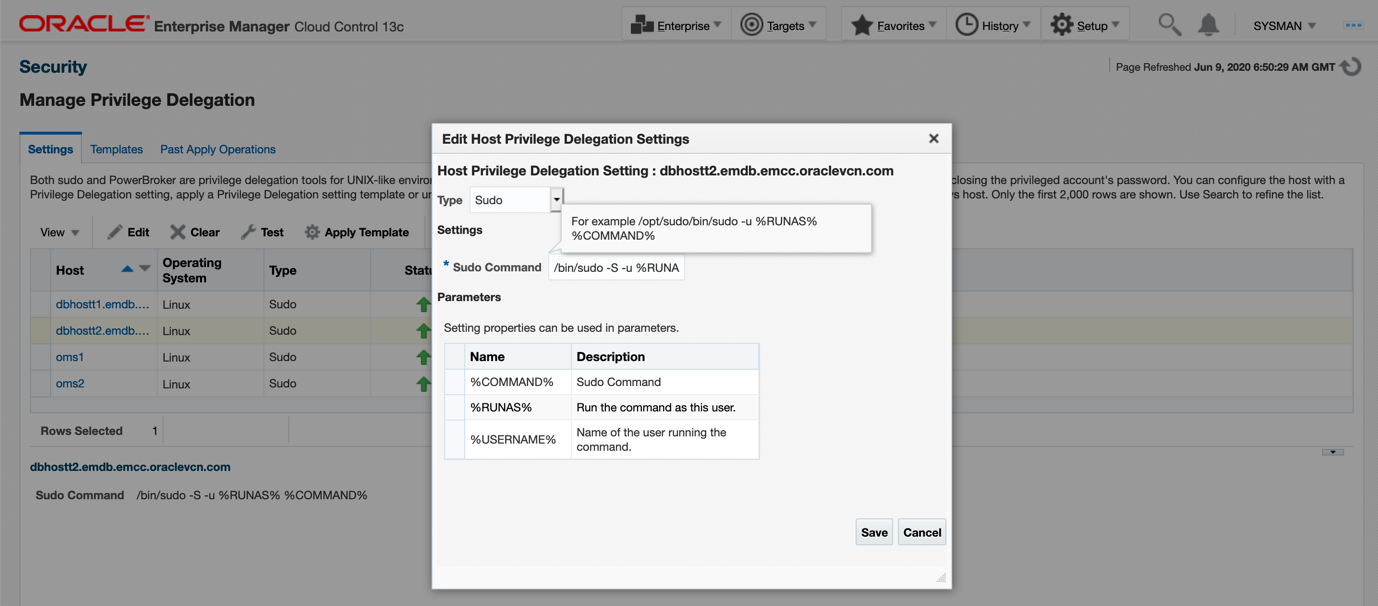
Editing Host Privilege Settings
13. Choose the installed agent and make sure the privilege delegation is set for the agent. Privileged Credentials specify root users’ authentication information on a system. Privileged credentials are the root account details used to perform privileged actions like executing root scripts
Database discovery example
14. Now, open the Listener Port in the Database System Host for database discovery. Open port 7001 for WLS discovery and open the necessary port on the firewall before target discovery.
The following is an example for database discovery:
sudo iptables -I INPUT -p tcp -m state --state NEW -m tcp --dport 1521 -m comment --comment "Required for access to DB Listener" -j ACCEPT
 sudo service iptables save
 sudo service iptables reload
Troubleshooting
15. Continue the same steps for all the required targets (Databases / WLS / Hosts/ATP etc.) to be monitored with Enterprise Manager.
Troubleshooting steps
1. Agent push error: Connection to the SSH daemon (sshd) on the target host failed with the following error : java.security.InvalidKeyException: IOException : Short read of DER length
Regenerate the ssh key in PEM format. ssh-keygen -t rsa -m pem
2. To check the ports on the agent run the following commands from OMS.
nc -zvw3 <TARGET_HOST> <AGENT_PORT>
3. To check if the ports on the agent are already occupied run: ss -lntp | grep <target_port>.
Start deploying your Enterprise Manager on the OCI Marketplace
In summary, you now have an understanding of the addition and management of targets like (Oracle Database, WebLogic Server, Oracle VM, Autonomous Database, ExaData…) running on Oracle Cloud Infrastructure using Oracle Enterprise Manager.
Next, we encourage you to put your understanding into action using the EM image on the Oracle Cloud Marketplace to further gain experience doing it. That way you not only gain some actual hands on hybrid cloud management skills but have something you can tout in your next resume update.