Multicloud is a cloud adoption strategy that utilizes services from multiple cloud providers rather than relying on just one. This approach enables organizations to take advantage of the best services for specific tasks, enhances resilience, and helps reduce costs. Additionally, a multicloud strategy offers the flexibility necessary to meet regulatory requirements and increases options for the geographic location of cloud workloads. Typically, a multicloud strategy is driven by considerations related to workload, business needs, and data governance requirements.
In this blog post, we will deploy a HeatWave instance on AWS and use it as a backend for a WordPress site deployed on an EC2 instance in AWS.

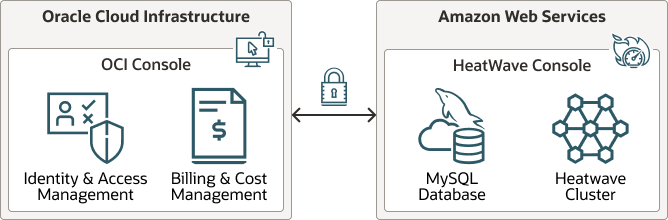
From OCI’s to HeatWave MySQL on AWS Console
The OCI console is used to deploy a HeatWave MySQL instance on AWS; you cannot deploy it directly from your usual AWS console.
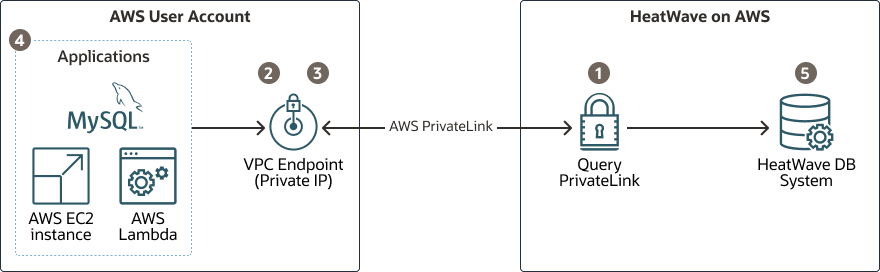
This figure available from the documentation, illustrates it:
Let’s deploy our first instance in AWS:
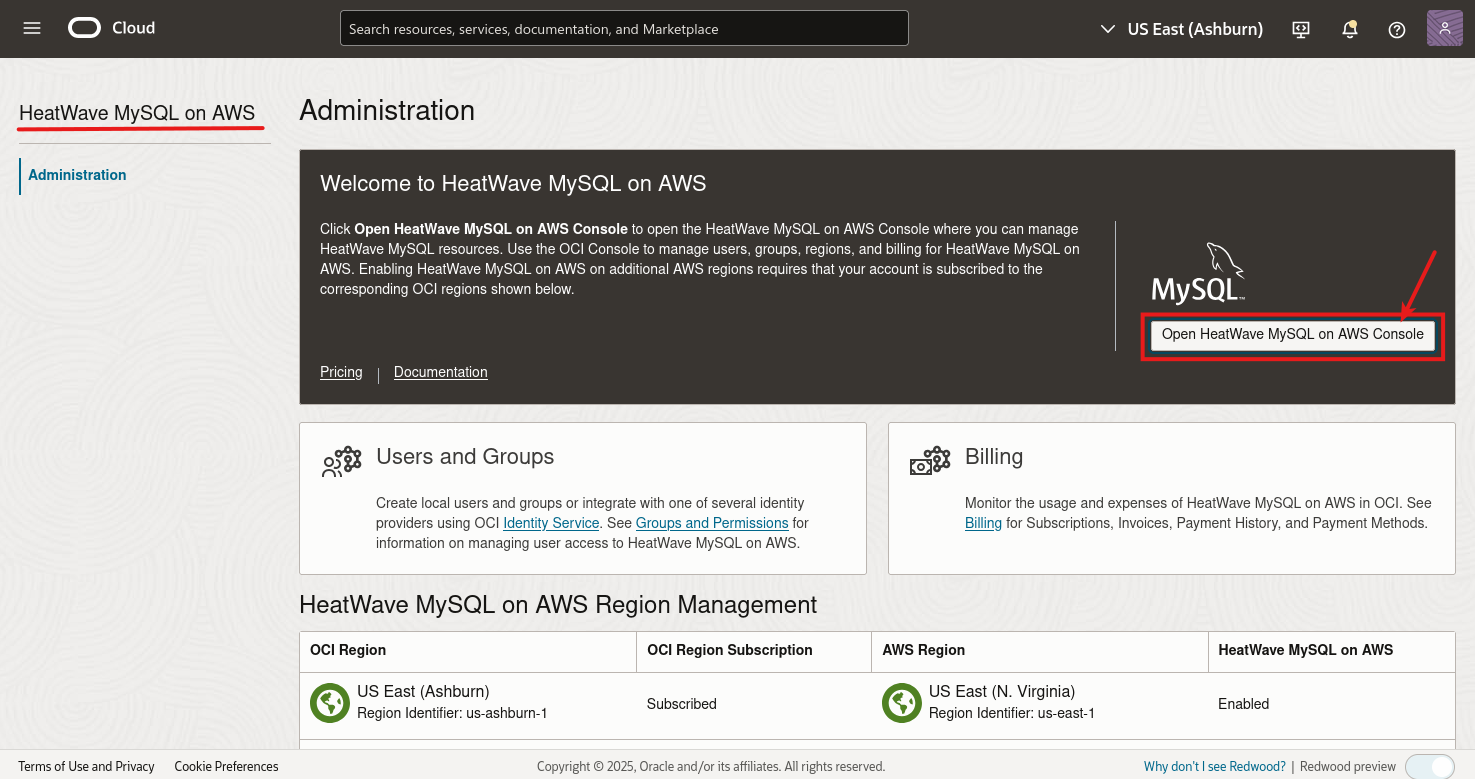
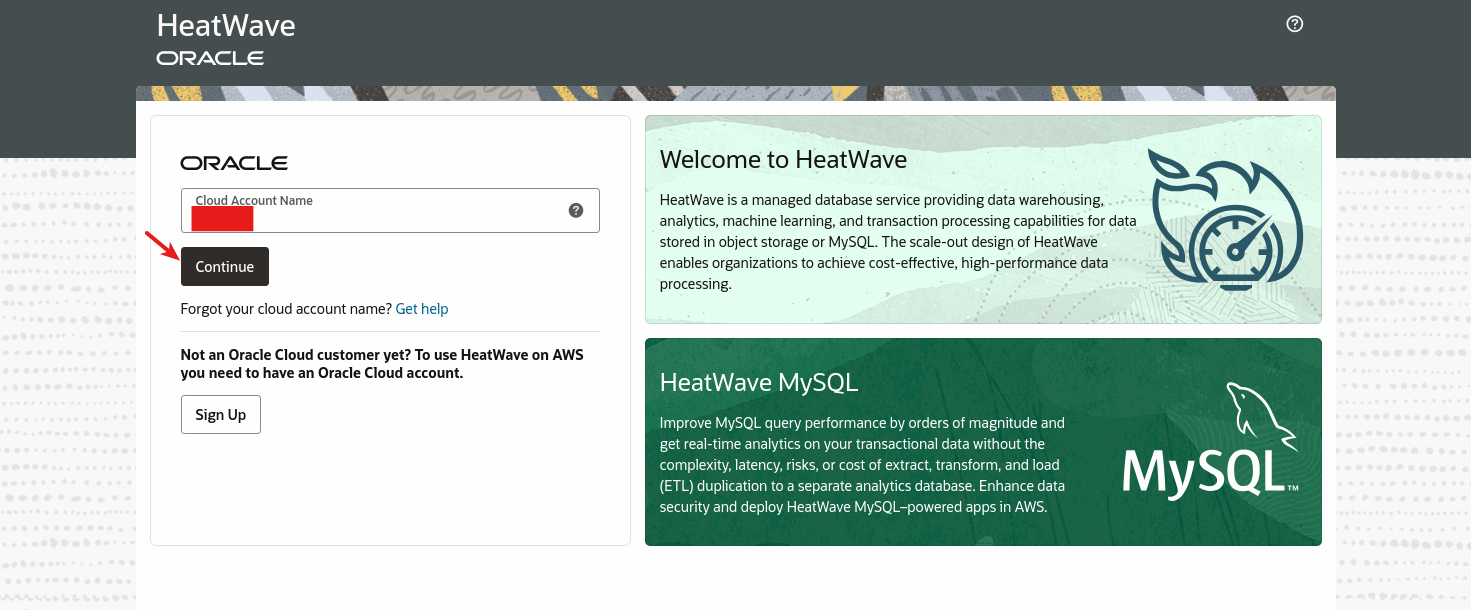
Then we need to authenticate to the AWS console but this is still using our OCI information:
Once we have logged in, we can see this new console:
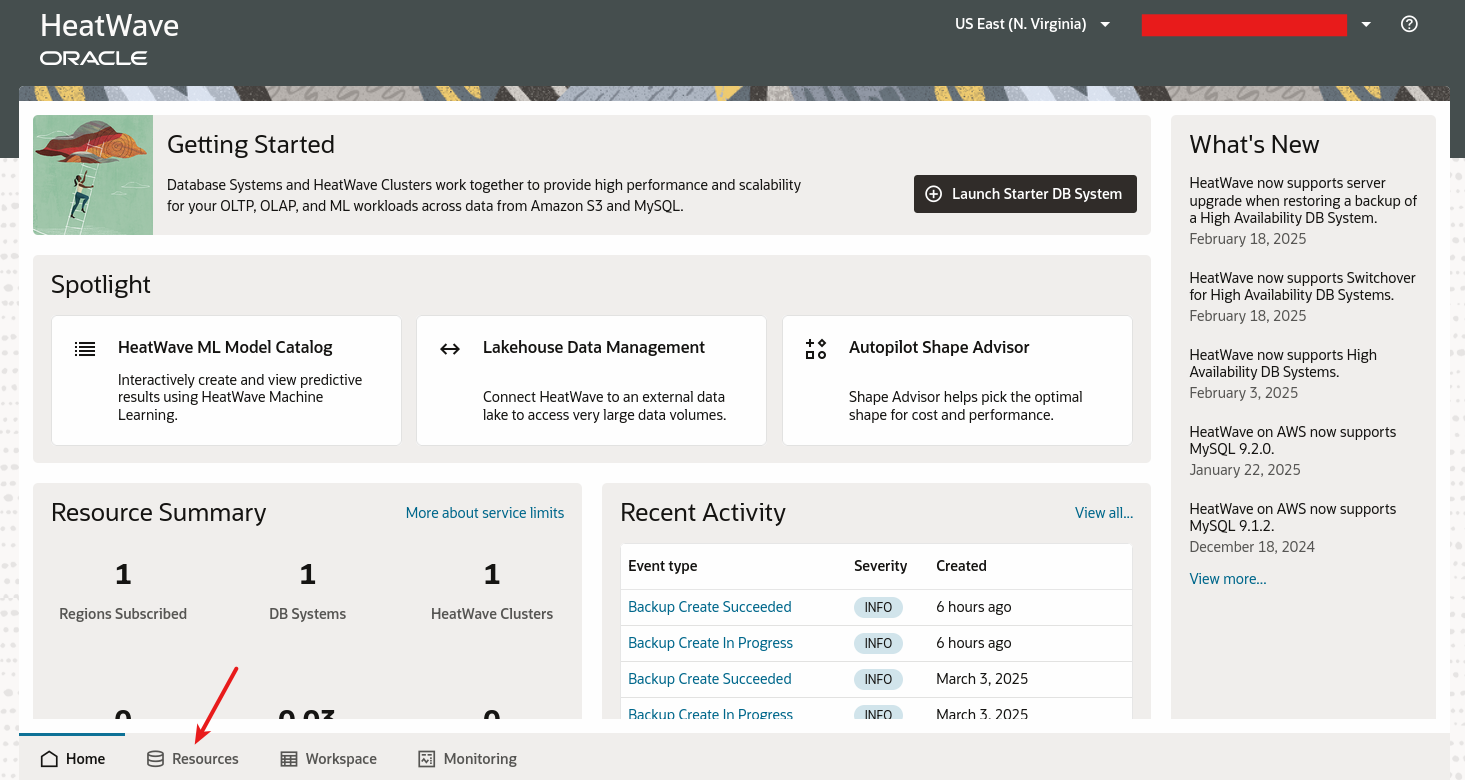
We can click on Resources at the bottom of the screen.
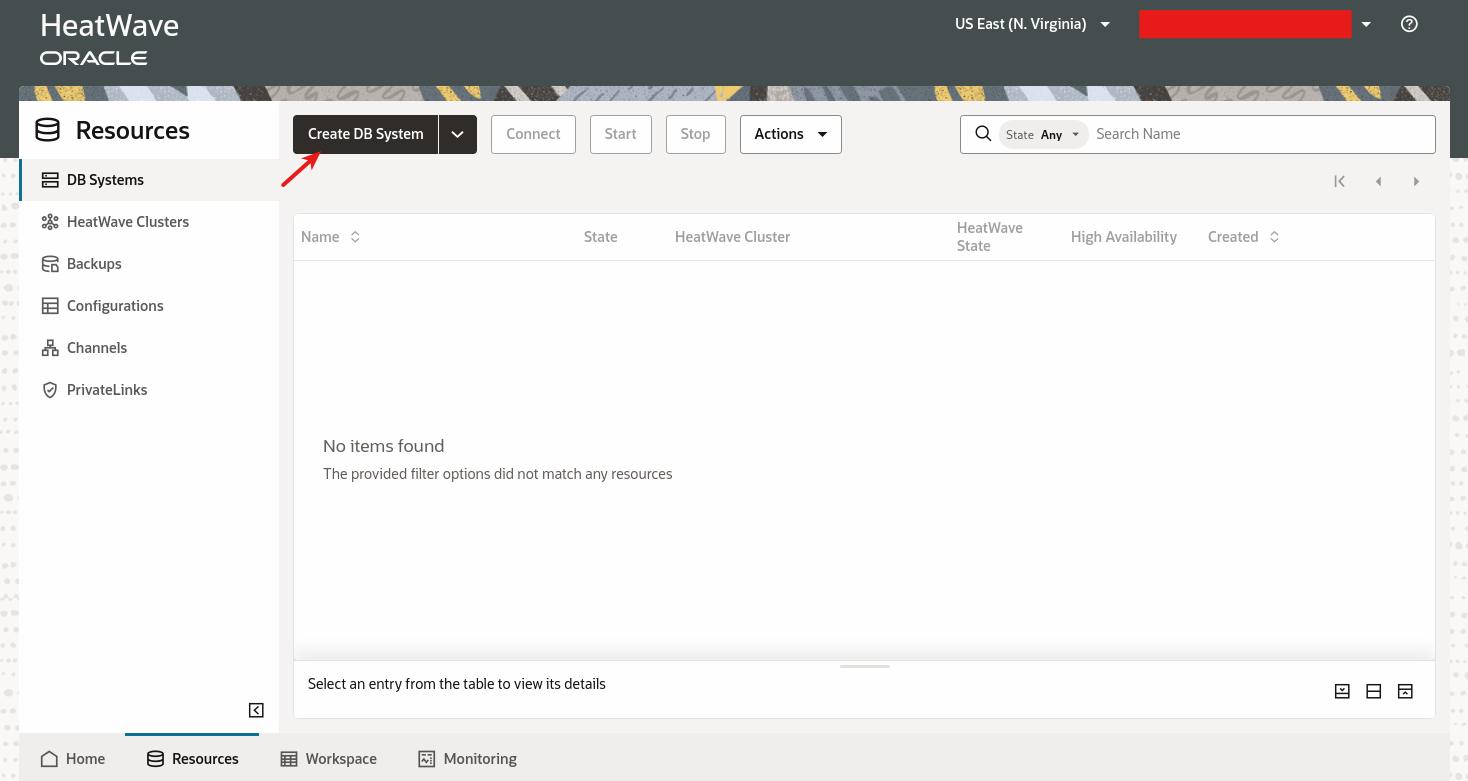
DB System Creation
On the next screen listing all eventual MySQL HeatWave DB instances, we can click on the button to create a DB System:
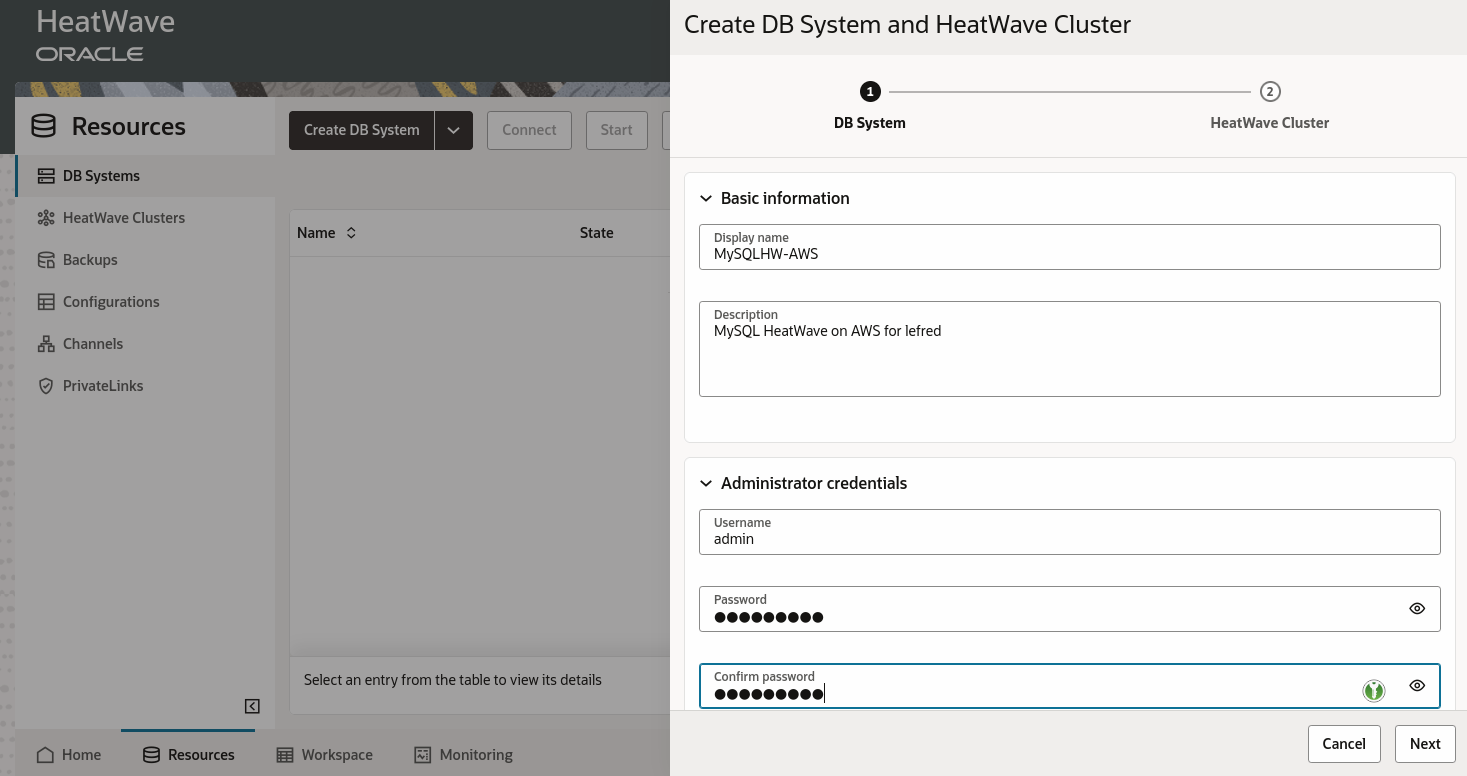
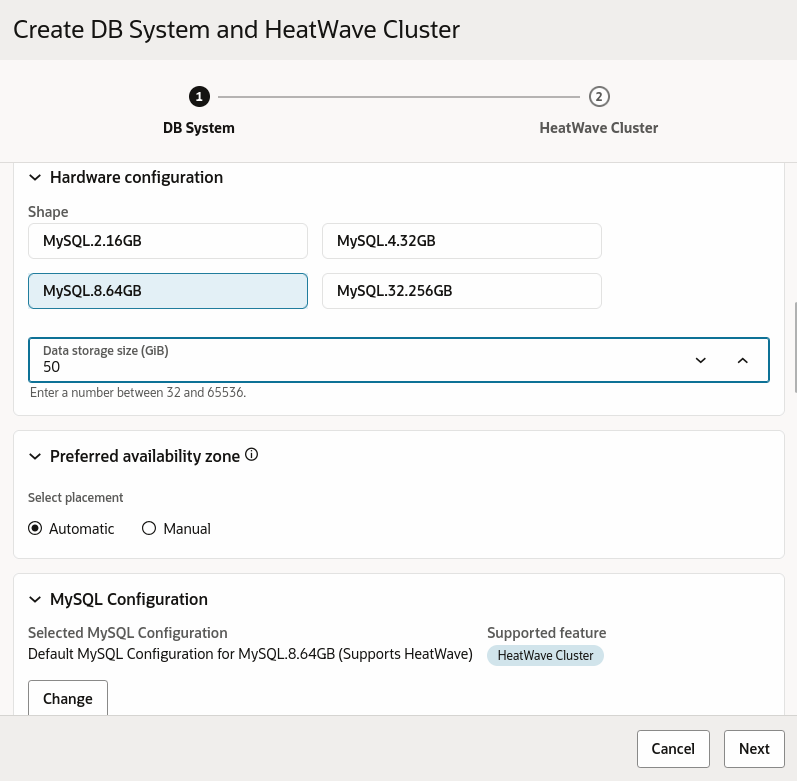
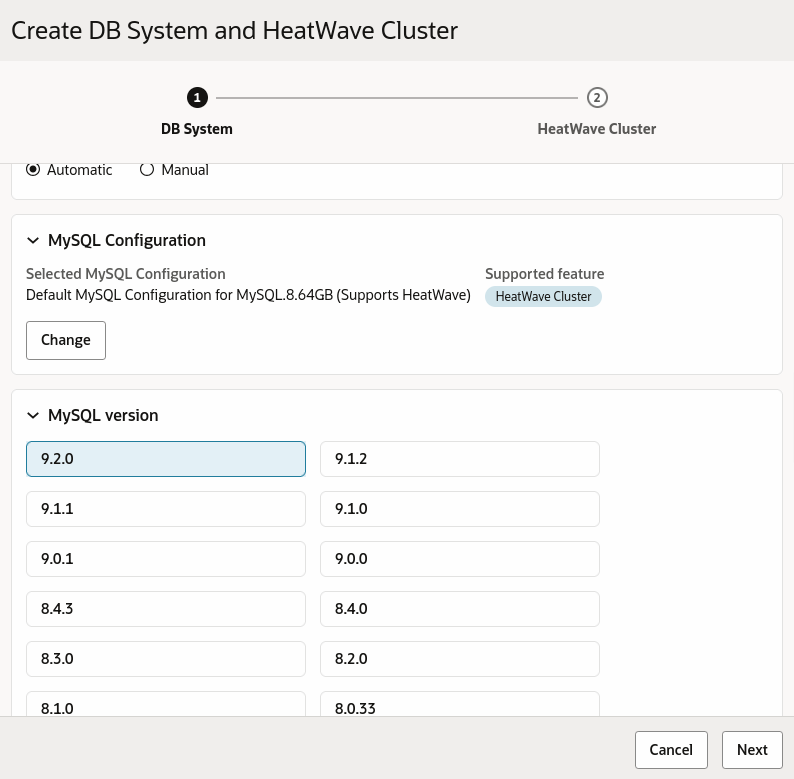
And we follow the wizard:
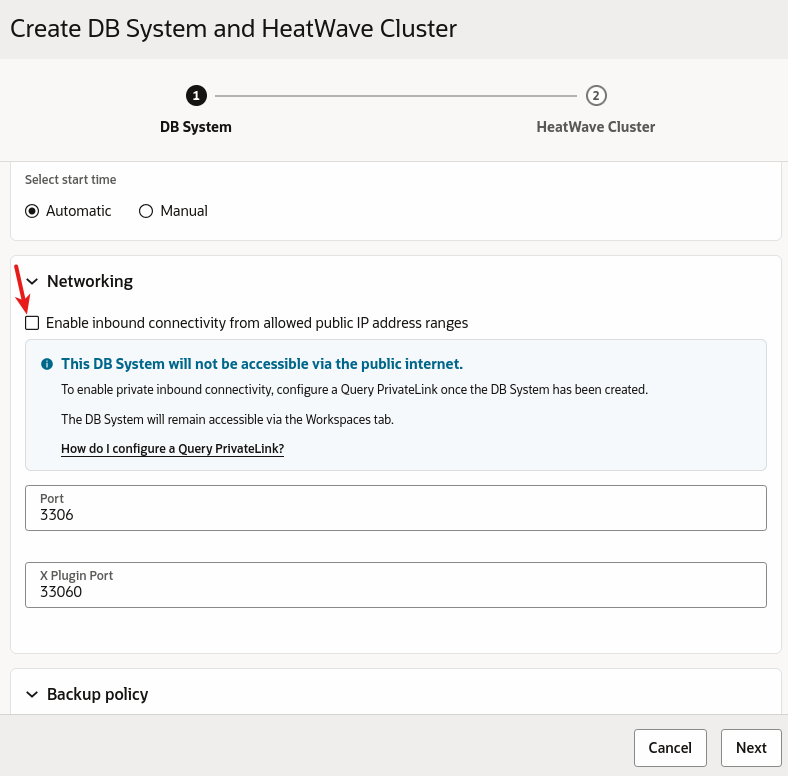
We don’t need to access our database from the public Internet, so no need to check that box:
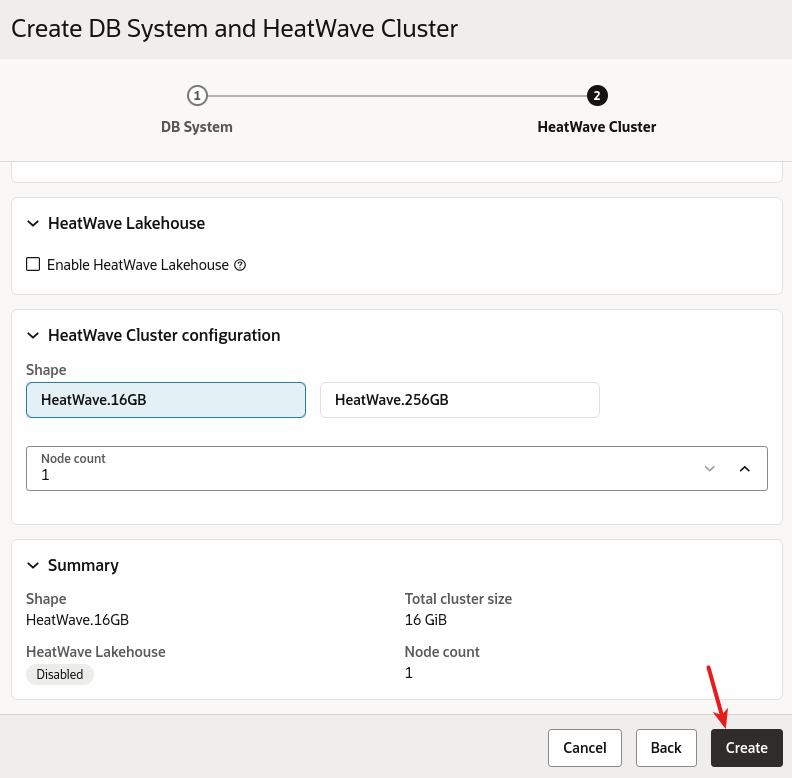
Then we specify the HeatWave related information such as enabling LakeHouse plus the shape and amount of nodes for the HeatWave cluster:
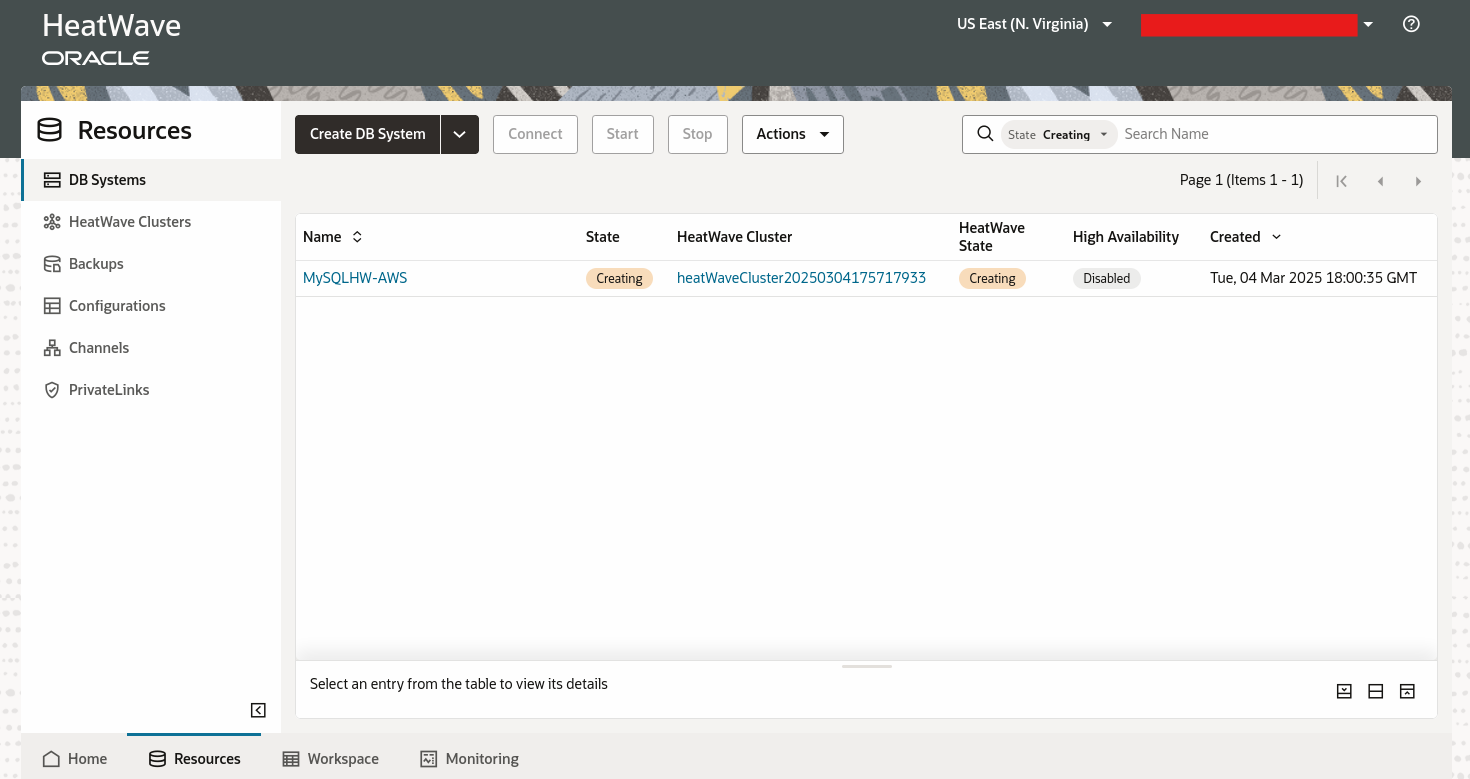
Then we can follow the creation status:
EC2 Compute Instance
The creation of a compute instance in AWS is made using the traditional AWS console. We need to connect to it using our AWS credentials.

Once created, we can see it in the list:


We can connect to it in ssh and install MySQL Shell:
sudo dnf install https://repo.mysql.com/yum/mysql-tools-innovation-community/el/9/x86_64/mysql-shell-9.2.0-1.el9.x86_64.rpm
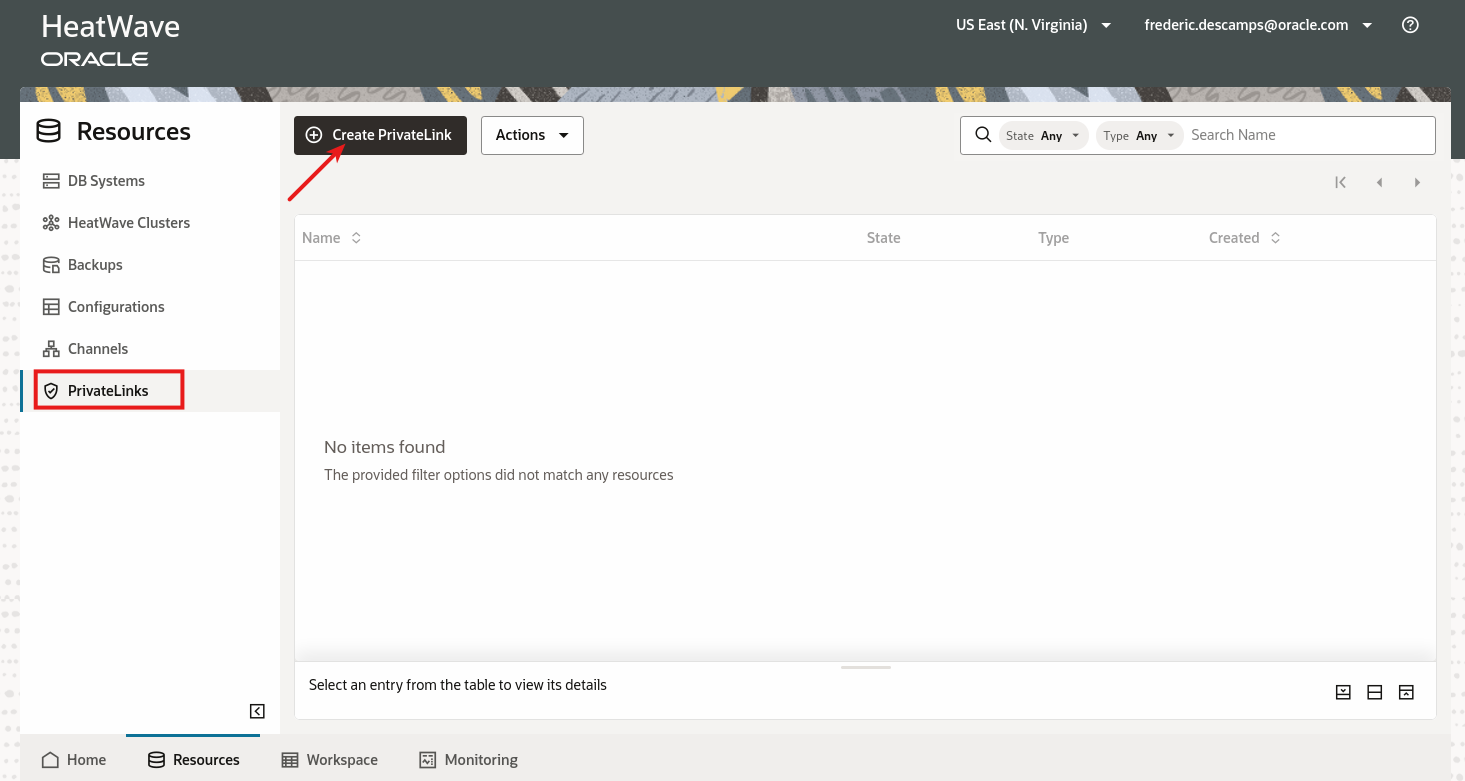
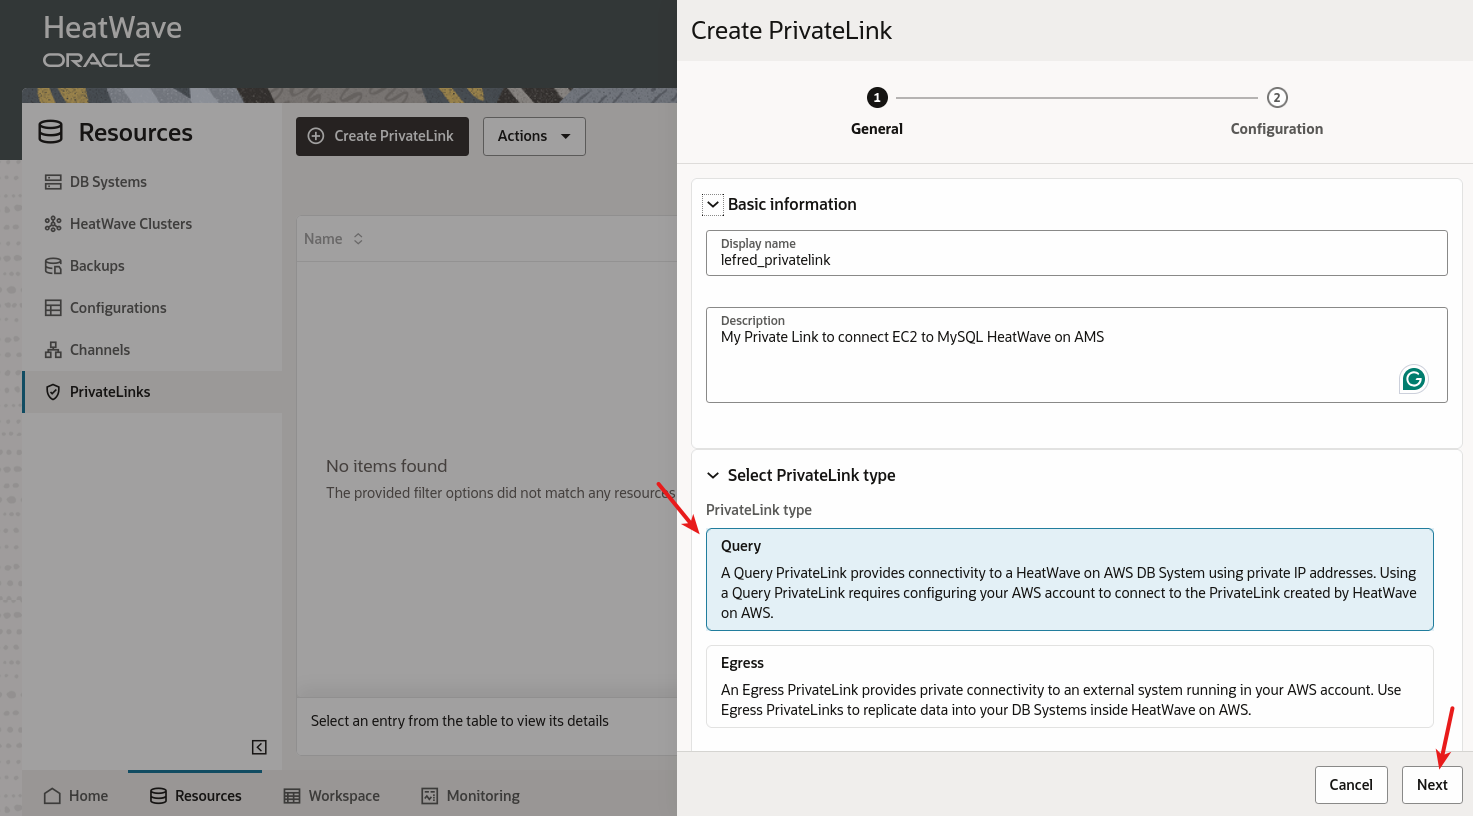
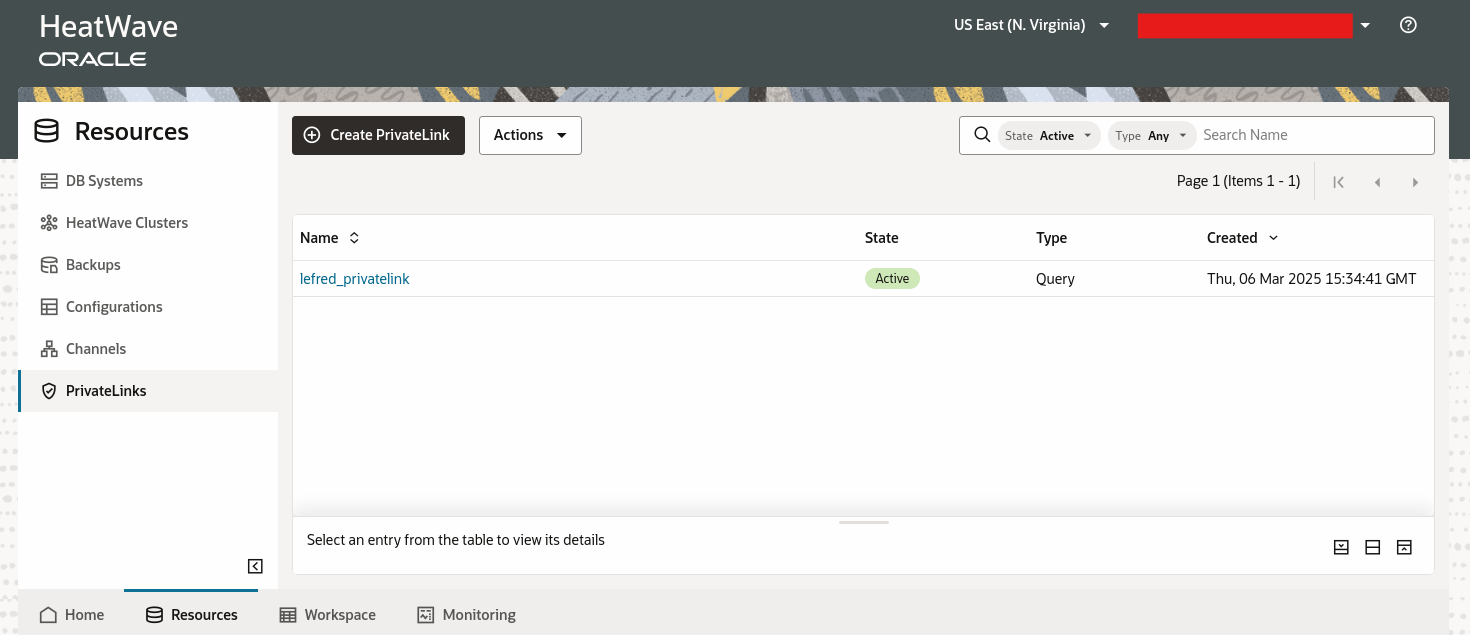
PrivateLink
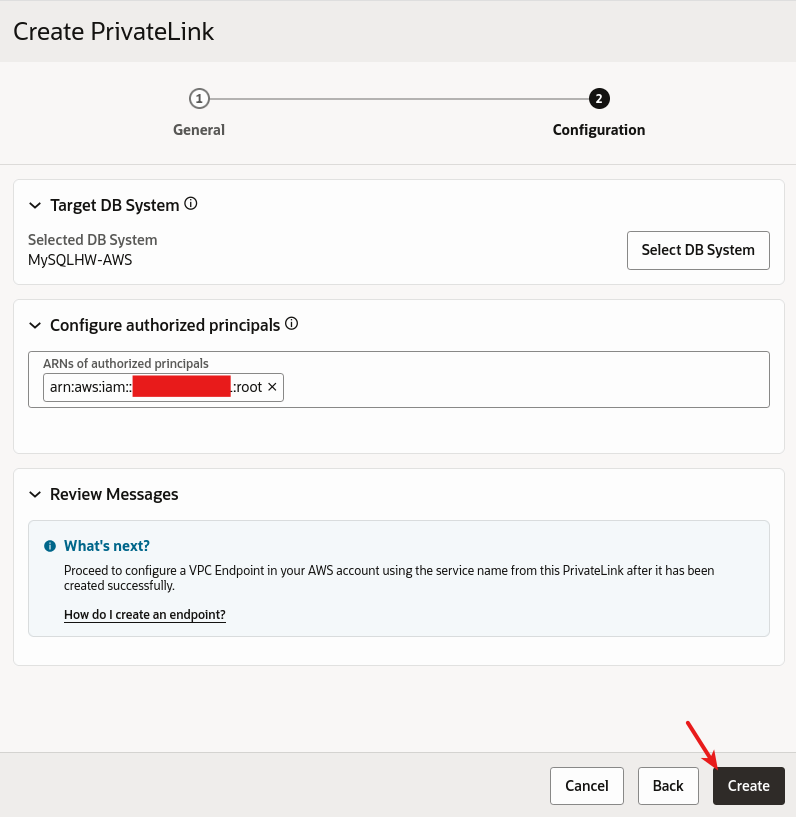
To allow connections from our EC2 instance to our MySQL HeatWave DB System, we need to create from the OCI AWS Console a PrivateLink as specified in the documentation:
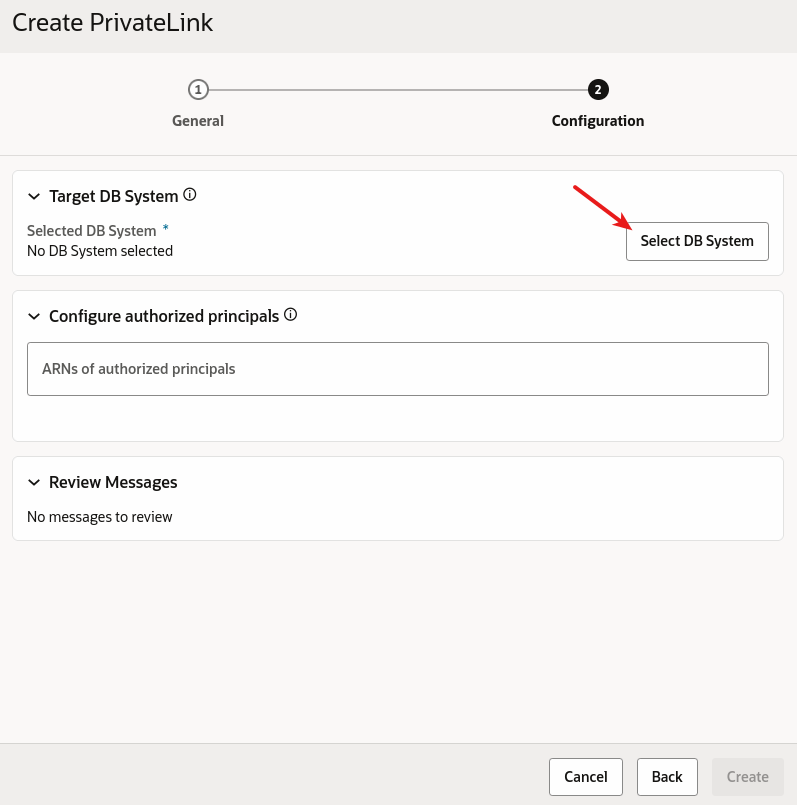
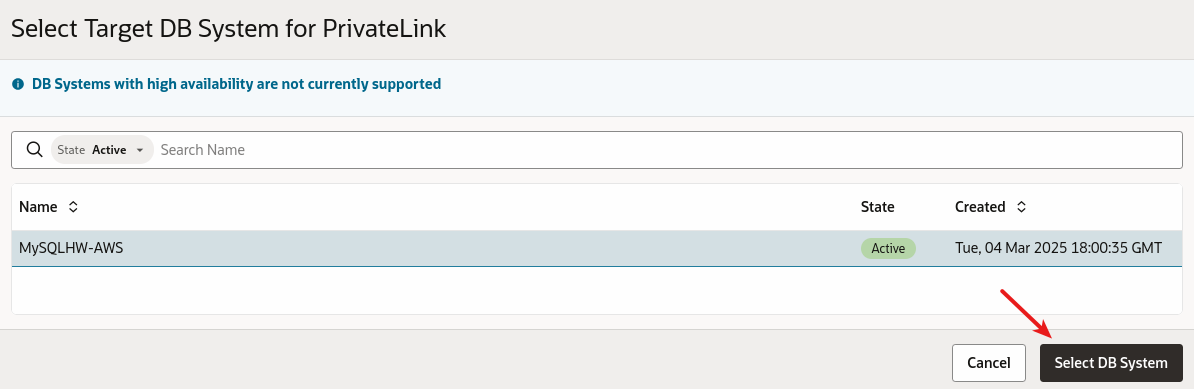
We need to select our HeatWave DB Instance:
Then we need to specify the ARN, which includes your account ID number. It’s displayed on the right top corner when you are logged into the AWS console:

Just copy it without the - as arn:aws:iam::<THAT NUMBER>:root
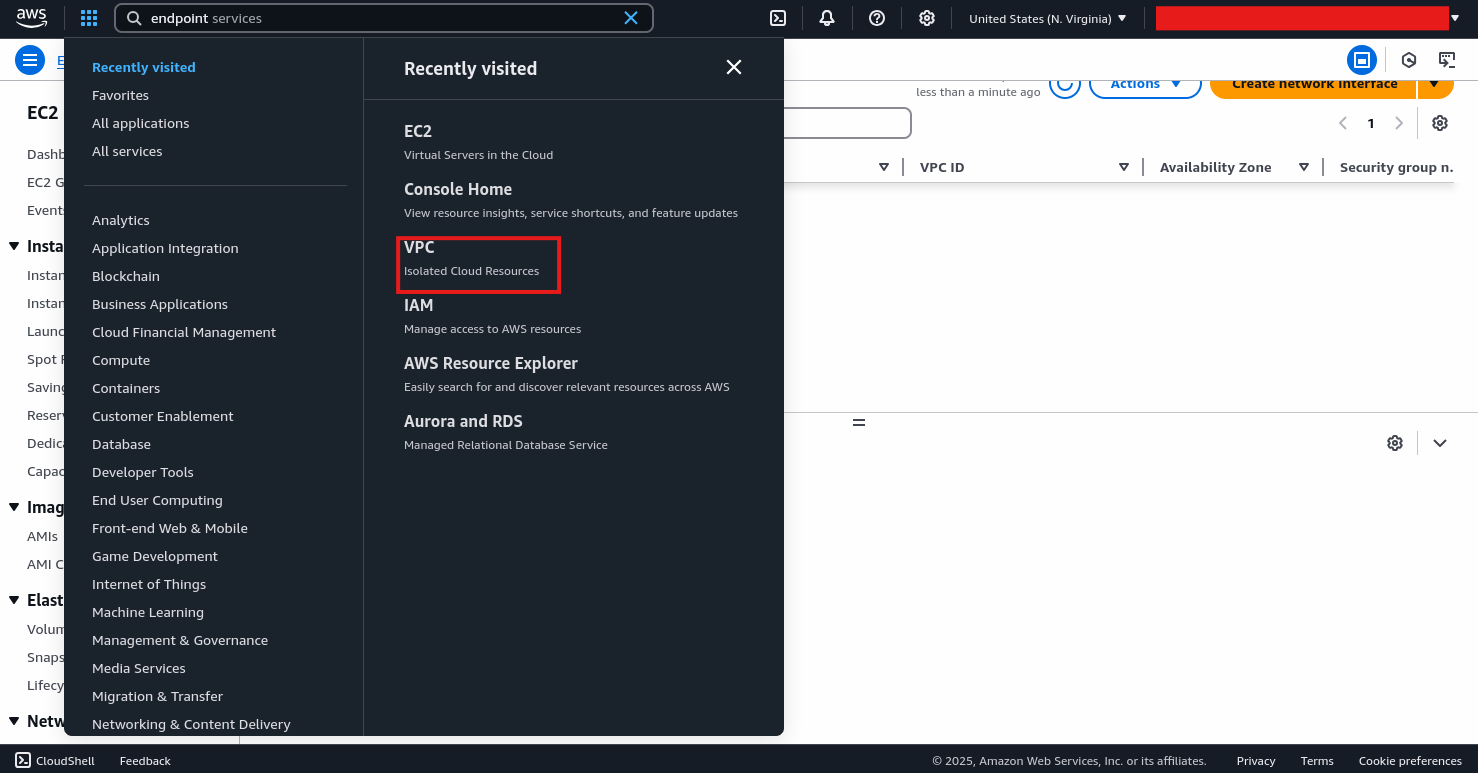
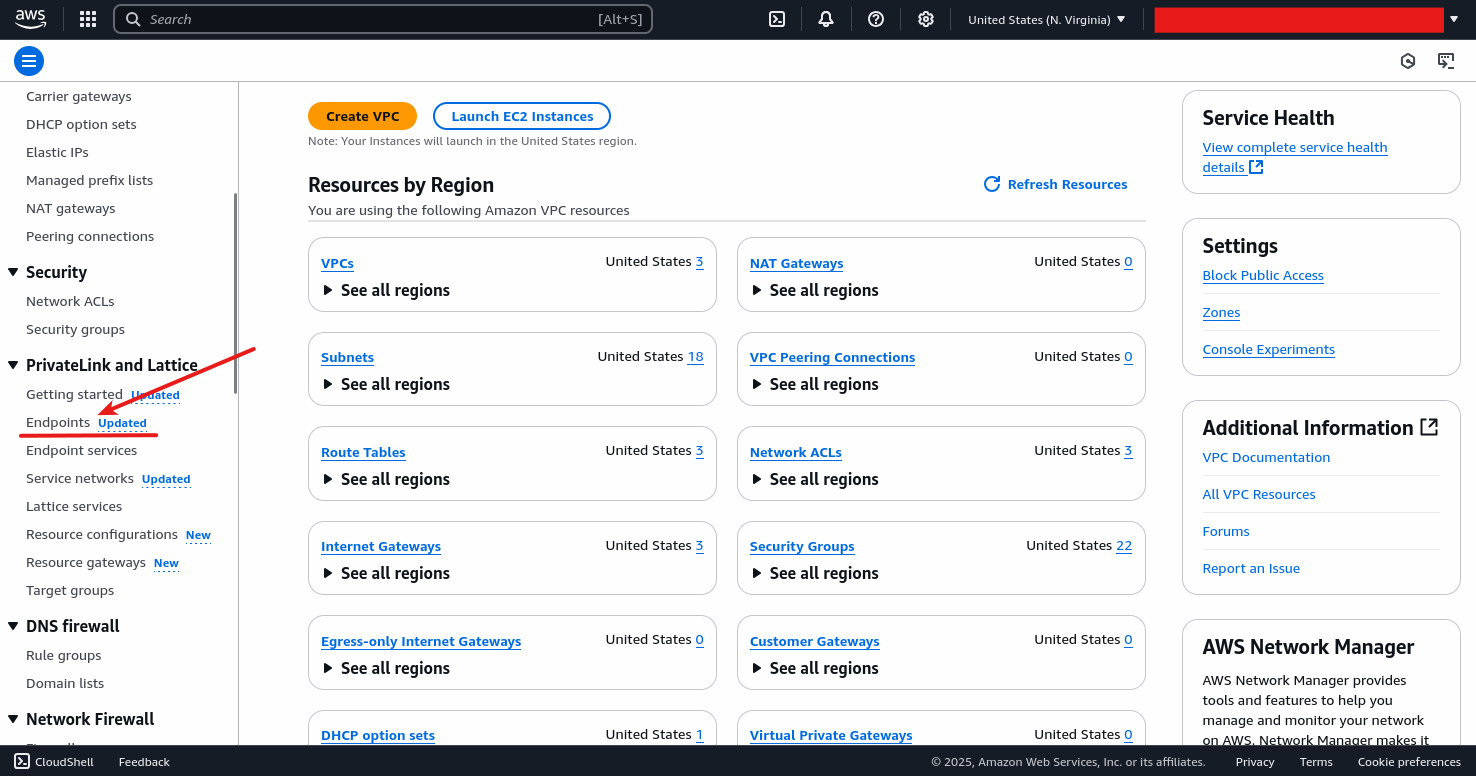
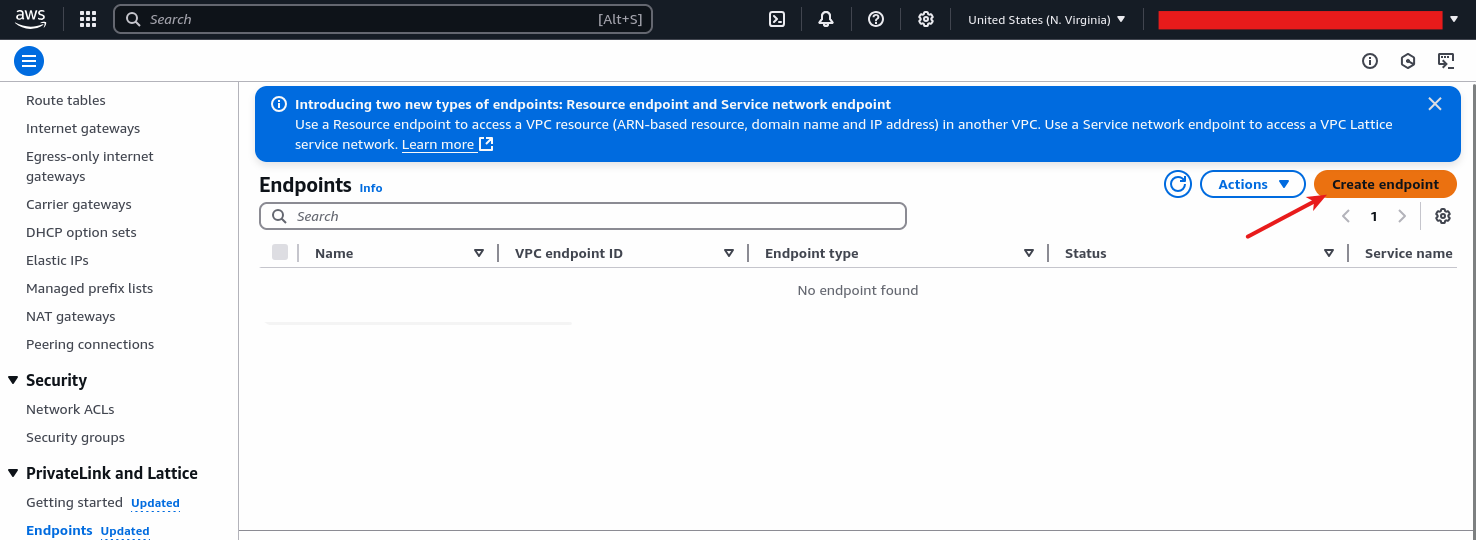
Endpoint
Then we need to create an Endpoint in the AWS console:
We just need to click on Create Endpoint:
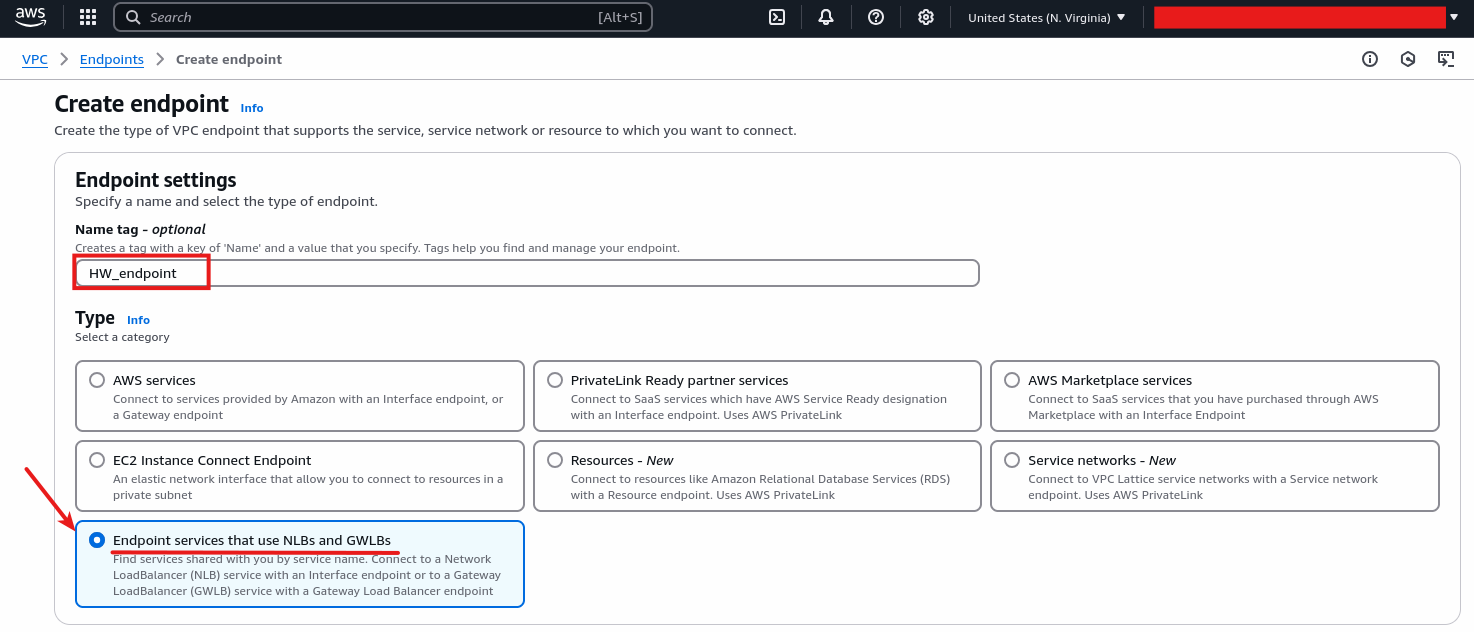
We need to provide a name for our endpoint and select Endpoint services that use NLBs and GWLBs:
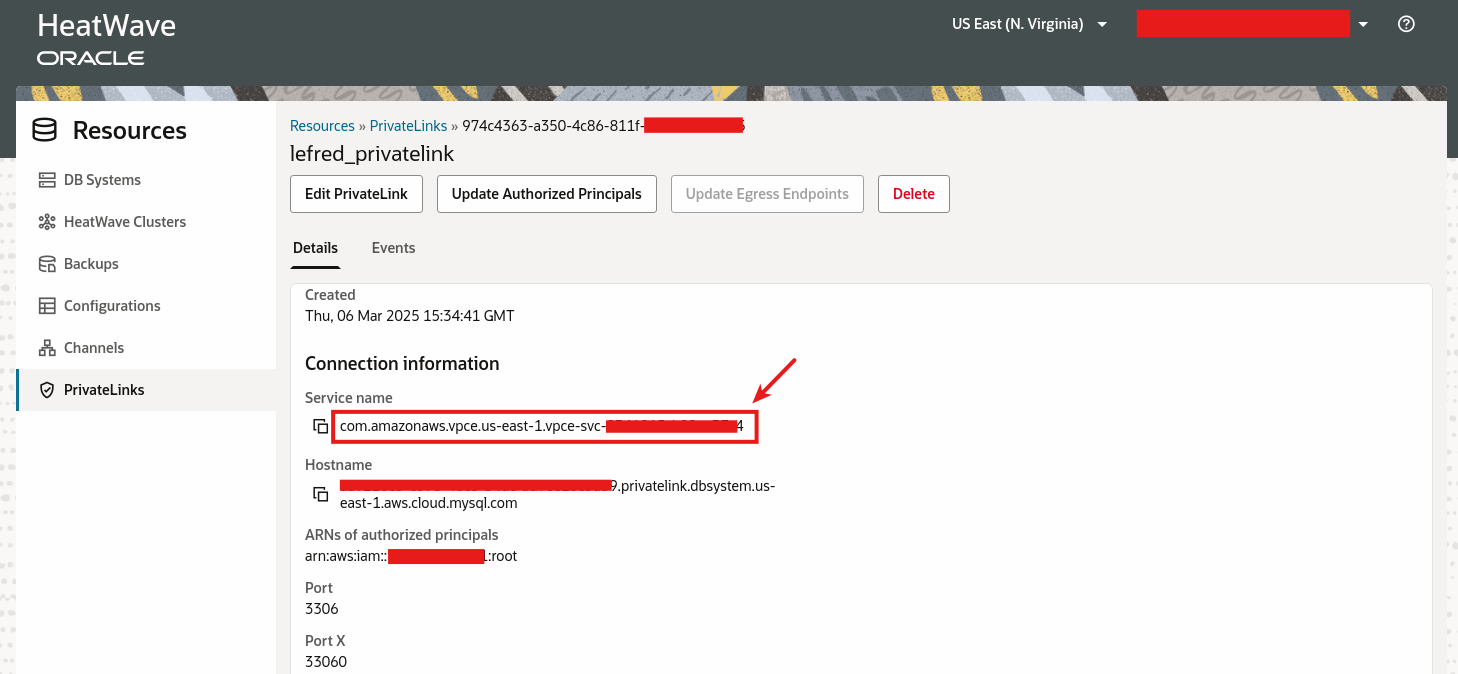
On the next screen we will need to name of the PrivateLink’s service. We can get it from the OCI AWS Console from the PrivateLink details:
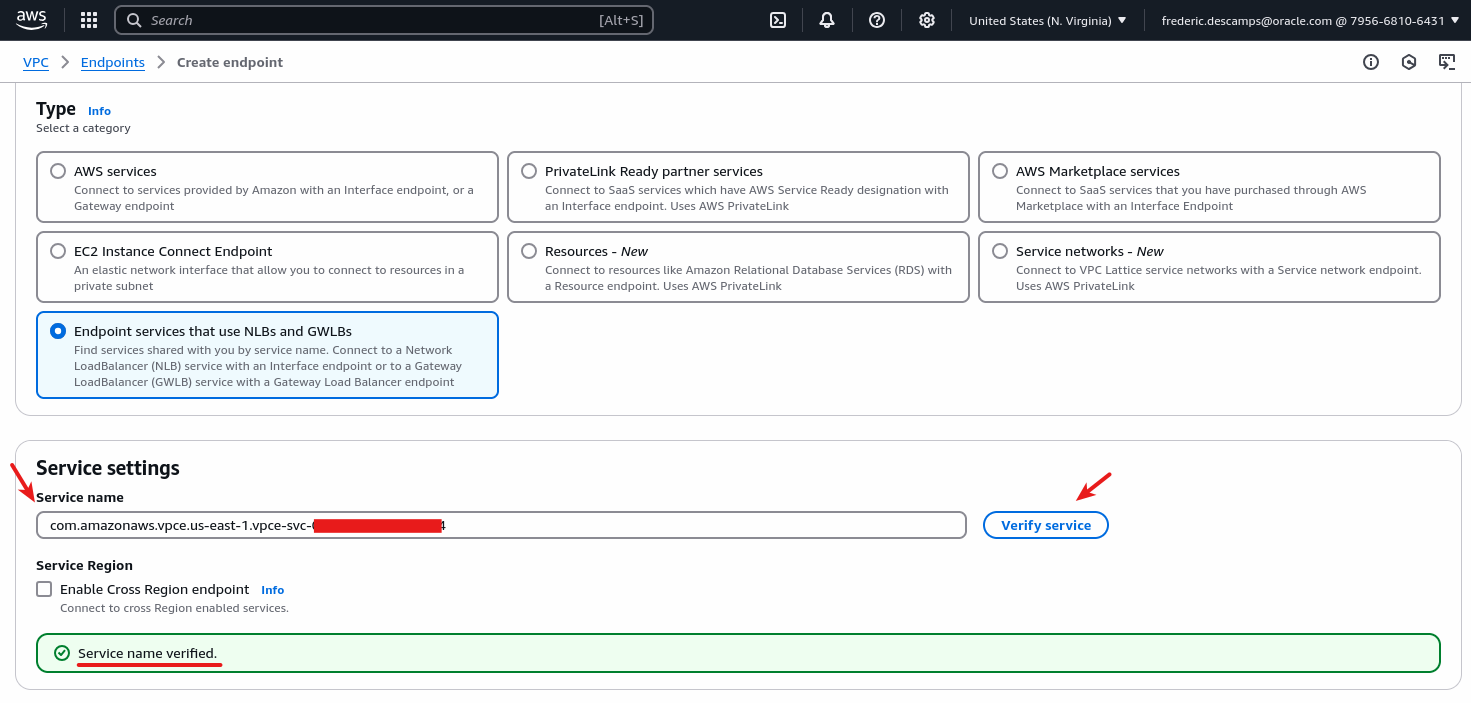
We copy and paste the service name and we verify it:
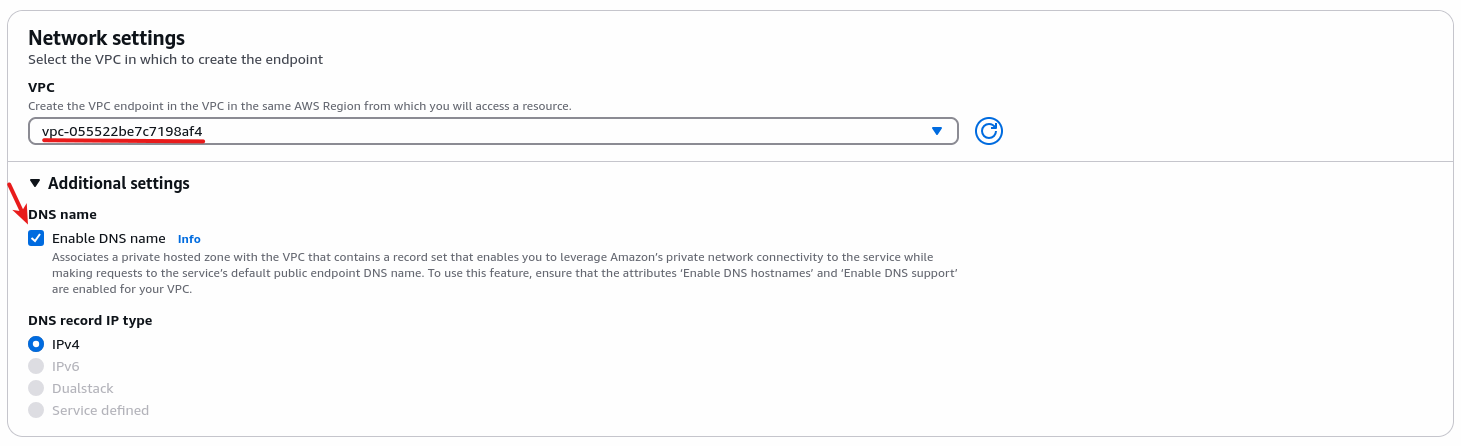
We need to specify our VPC (the same as the EC2 instance) and enable DNS name:
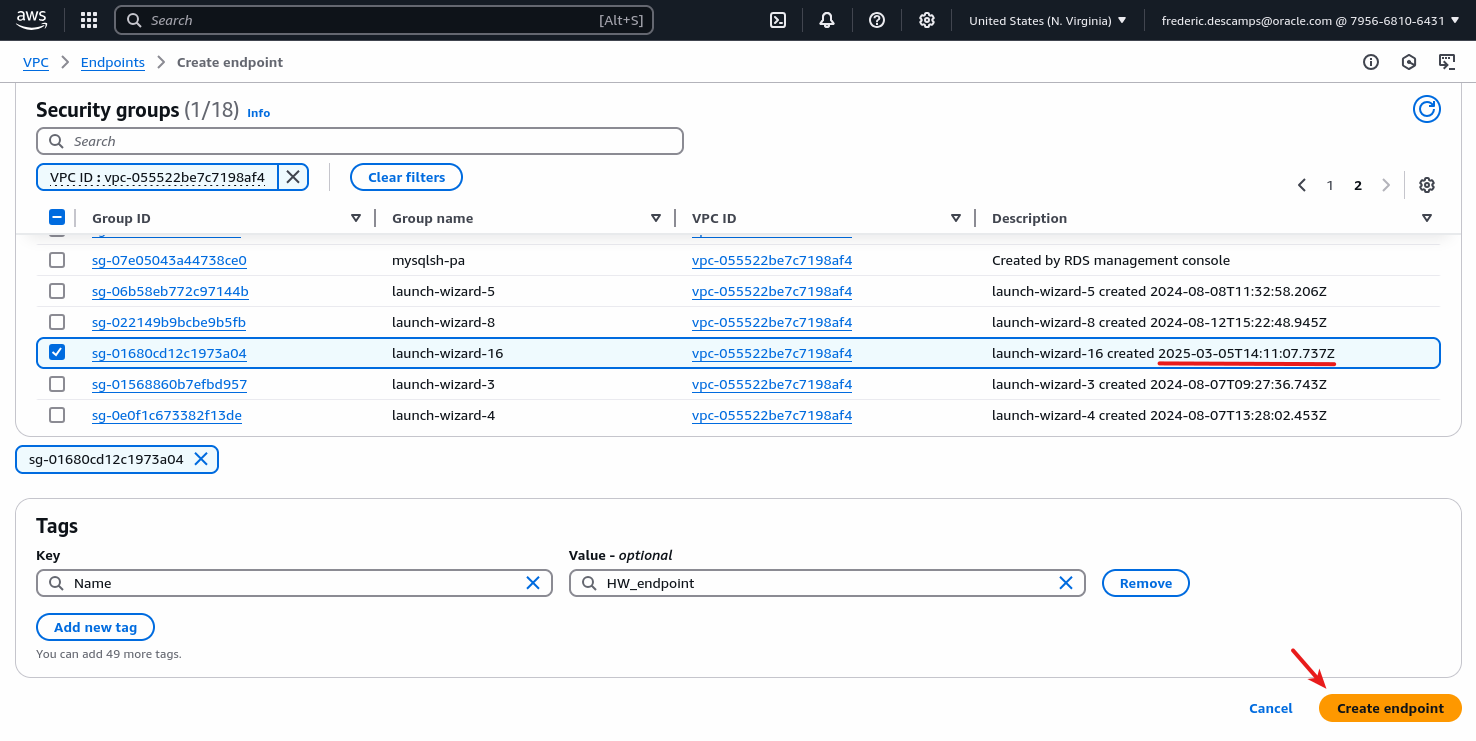
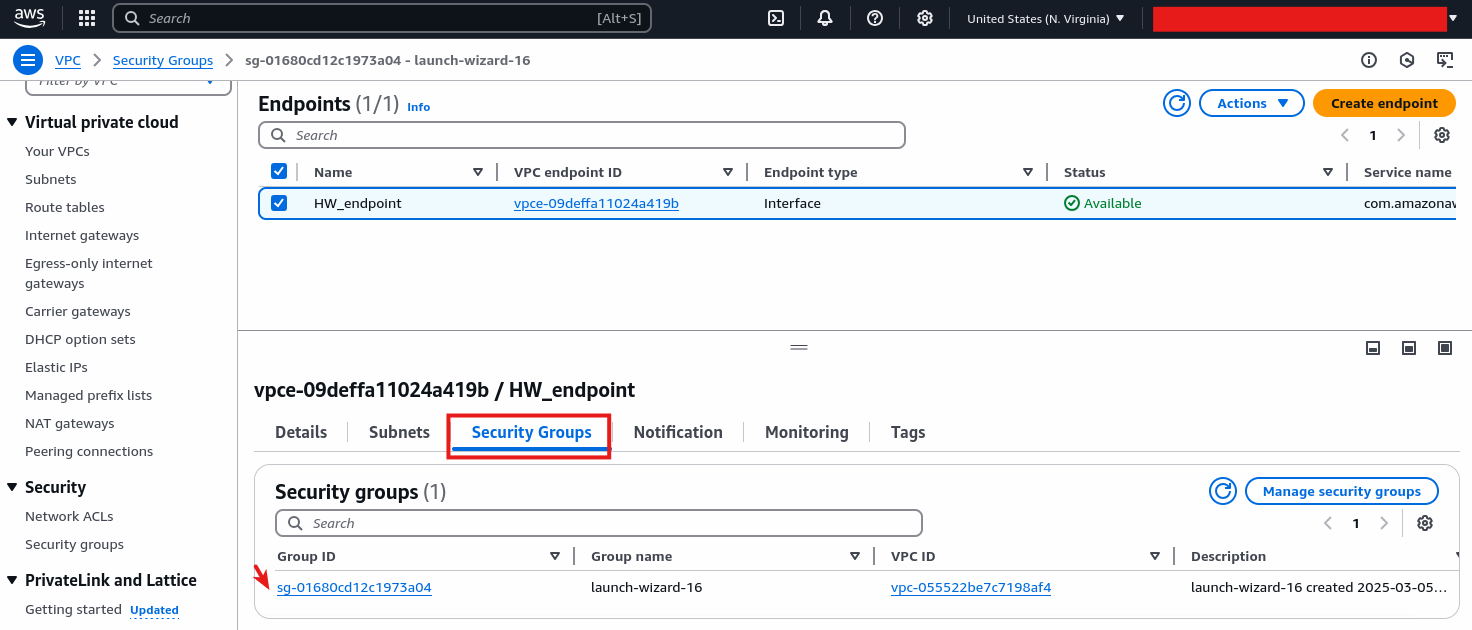
We use a security group, if we don’t have any created for it already, we just choose the one that was auto-generated during the launch of the EC2 instance to allow SSH and HTTP traffic, it’s probably the last one for that particular VPC:
Then the endpoint is created and looks like this:
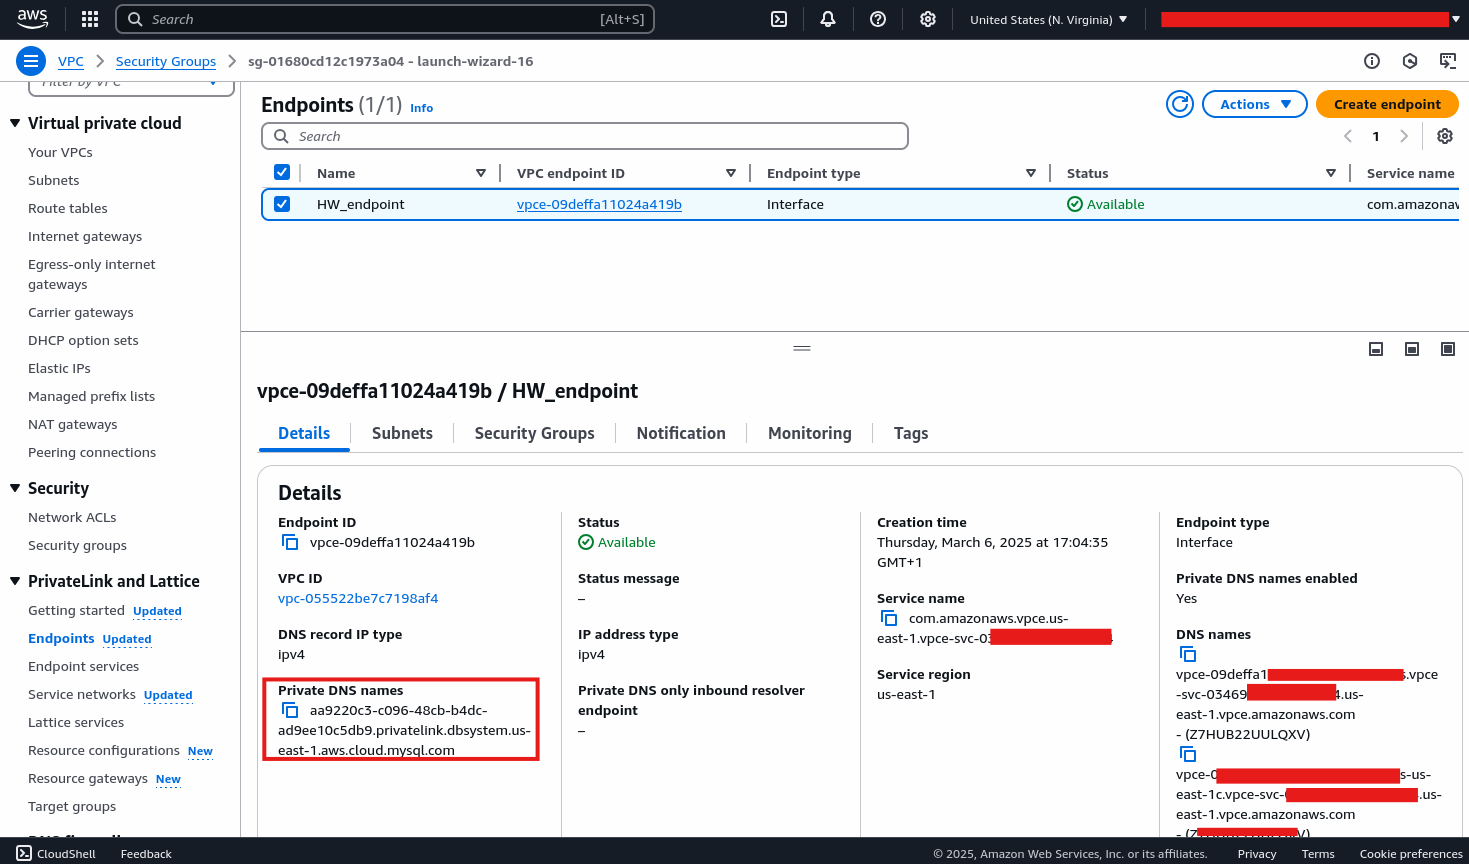
The private DNS name is the name we will use to connect from the EC2 instance to our MySQL HeatWave DB Instance.
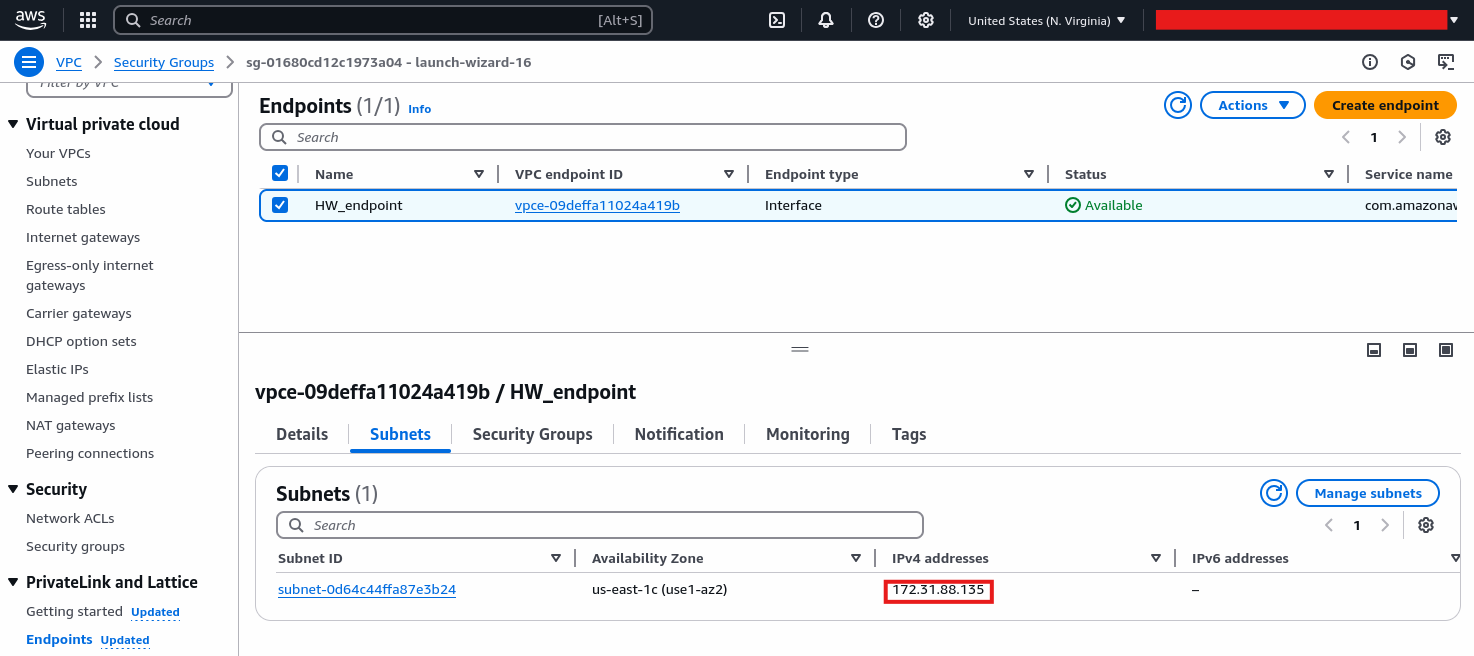
We can also see the endpoint’s IP:
We also need to verify that we allow connections to the MySQL port (3306) with the security group we selected:

If not, we just need to add it.
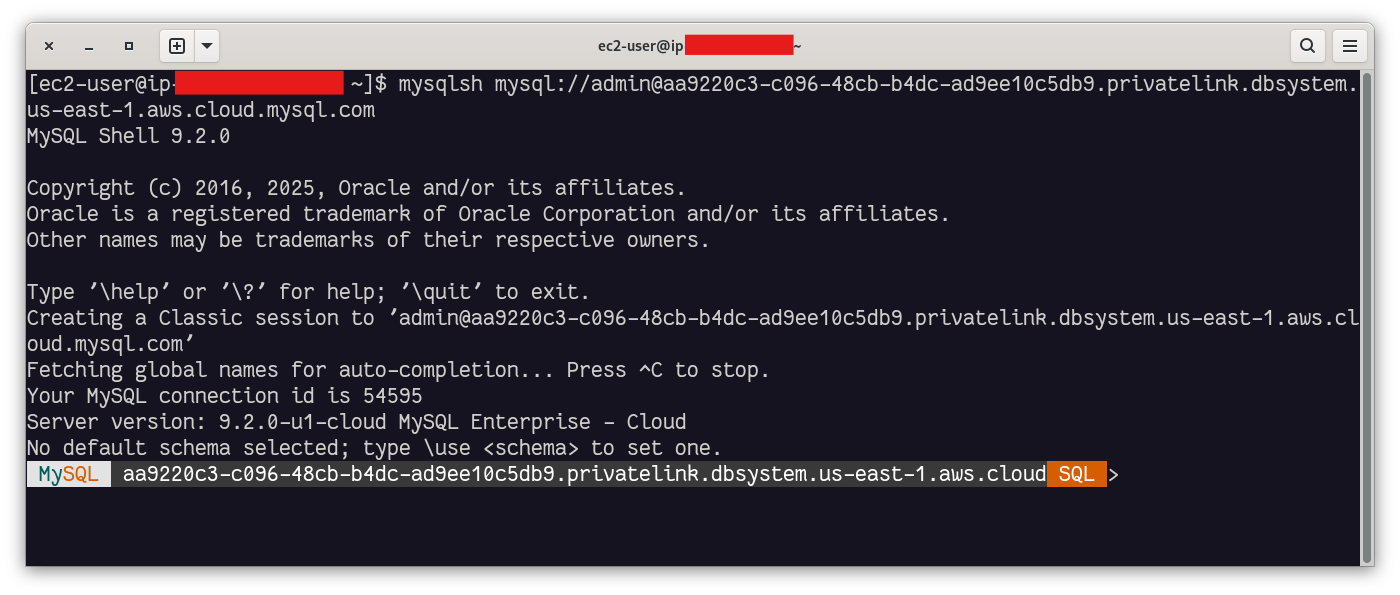
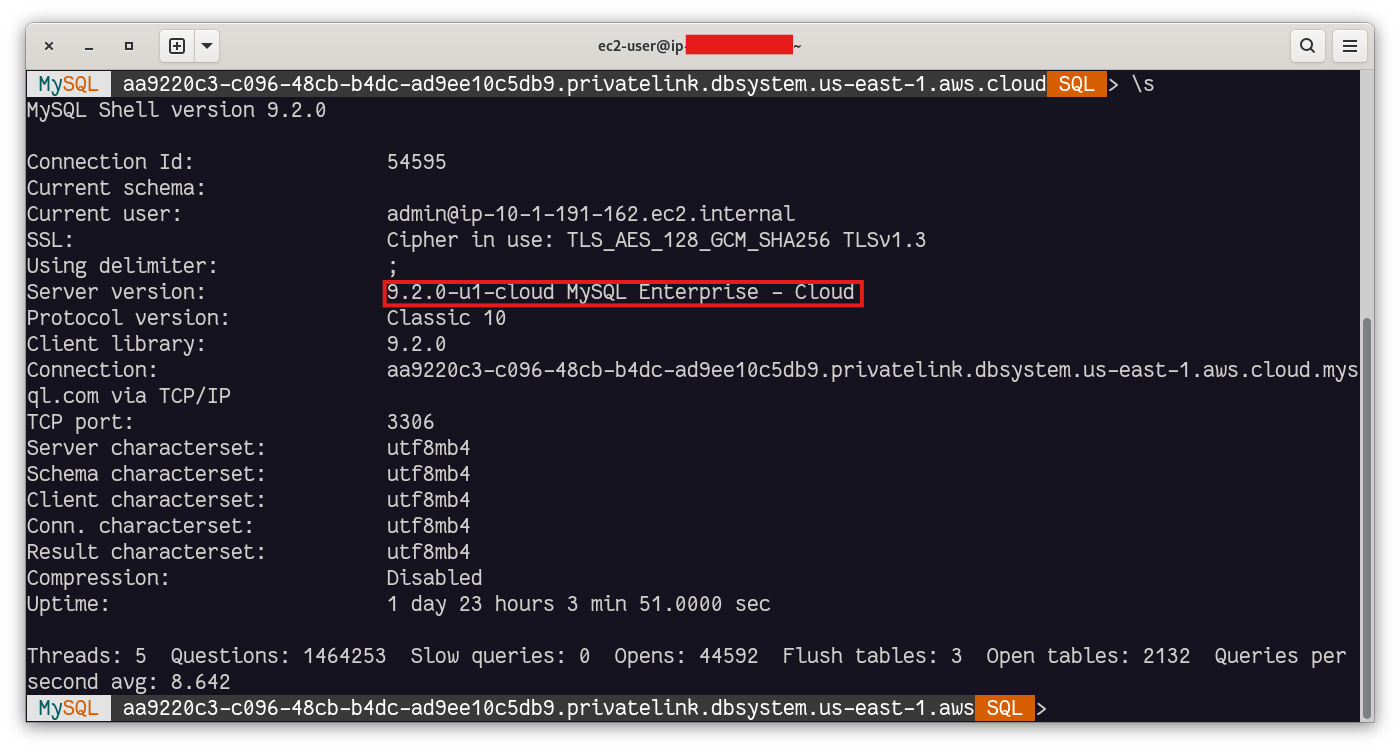
Testing the connection
We can now test the connection using MySQL Shell on our EC2 instance:
WordPress
Now we need to install Apache (httpd), PHP (and php-mysqlnd) on the EC2 instance and start apache (systemctl start httpd).
In MySQL Shell, we create the database, a user and its privileges:
SQL> create database wordpress;
SQL> create user wp identified by 'WPpassw0rd!';
SQL> grant all privileges on wordpress.* to wp
You can connect on your browser and you will see the WordPress setup wizard:
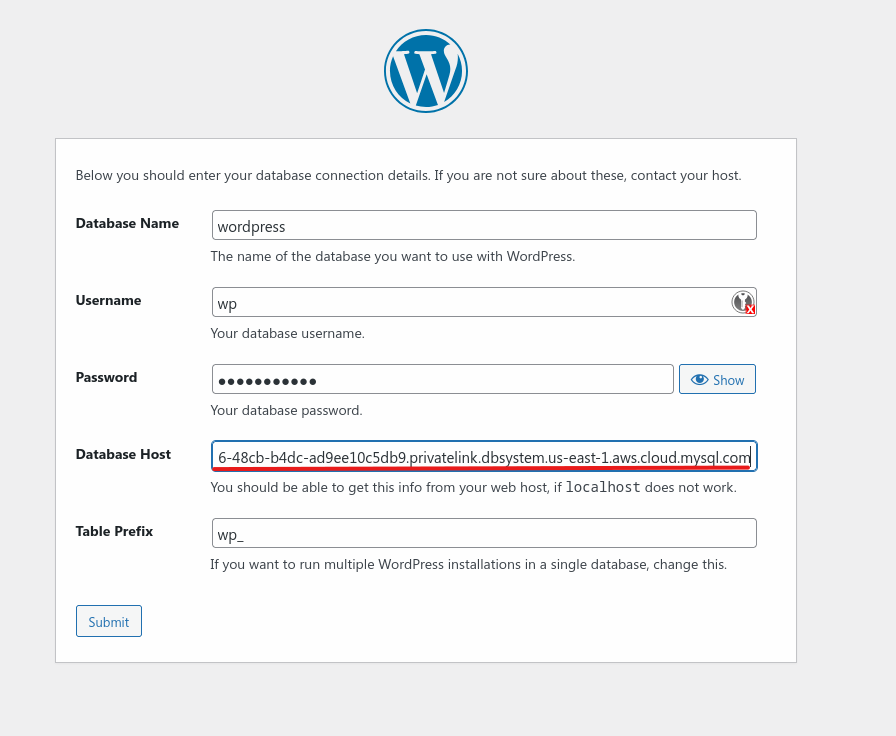
However, the WordPress wizard will fail even with the right information because of SSL:
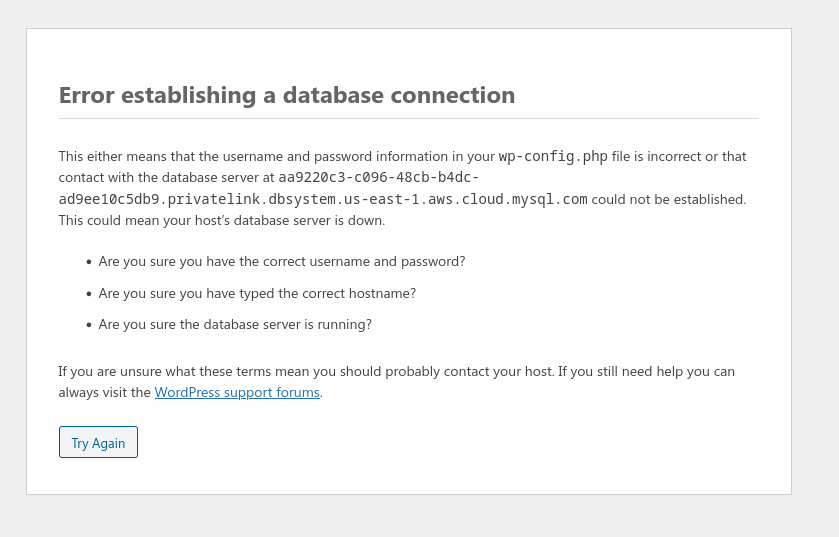
To fix, this we need to create the wp-config.php manually.
We first copy the sample file:
# cd /var/www/html
# cp wp-config-sample.php wp-config.php
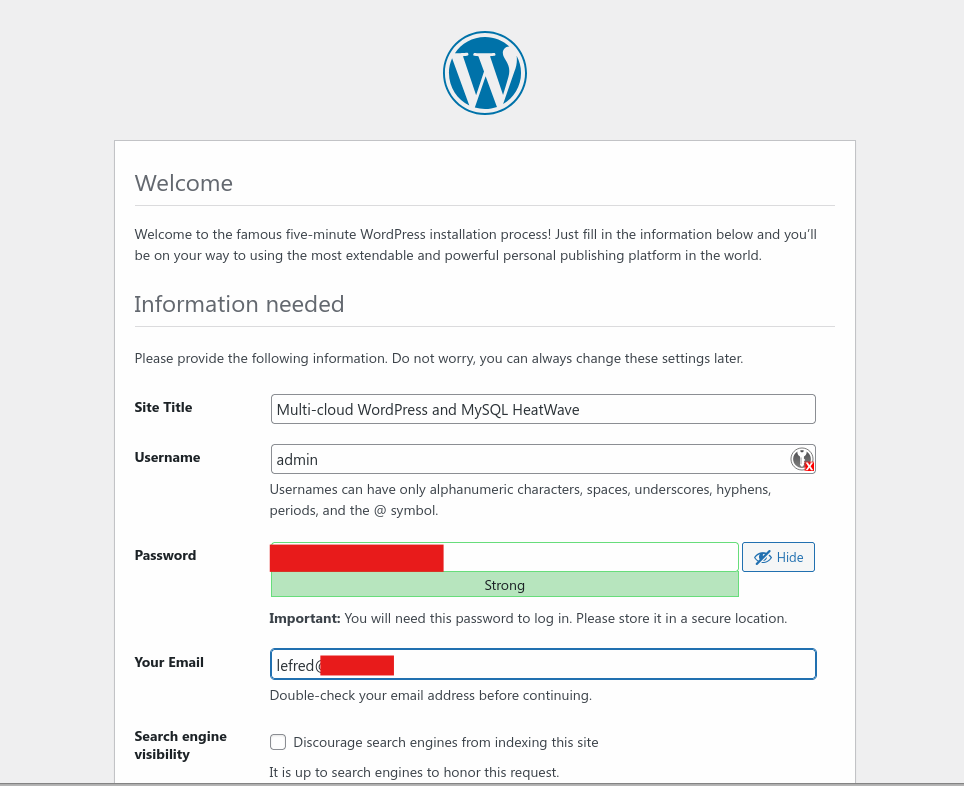
# chown apache: wp-config.phpAnd we modify the DB config variables (DB_NAME, DB_PASSWORD and DB_HOST) and we add the following two lines:
define('DB_SSL', true);
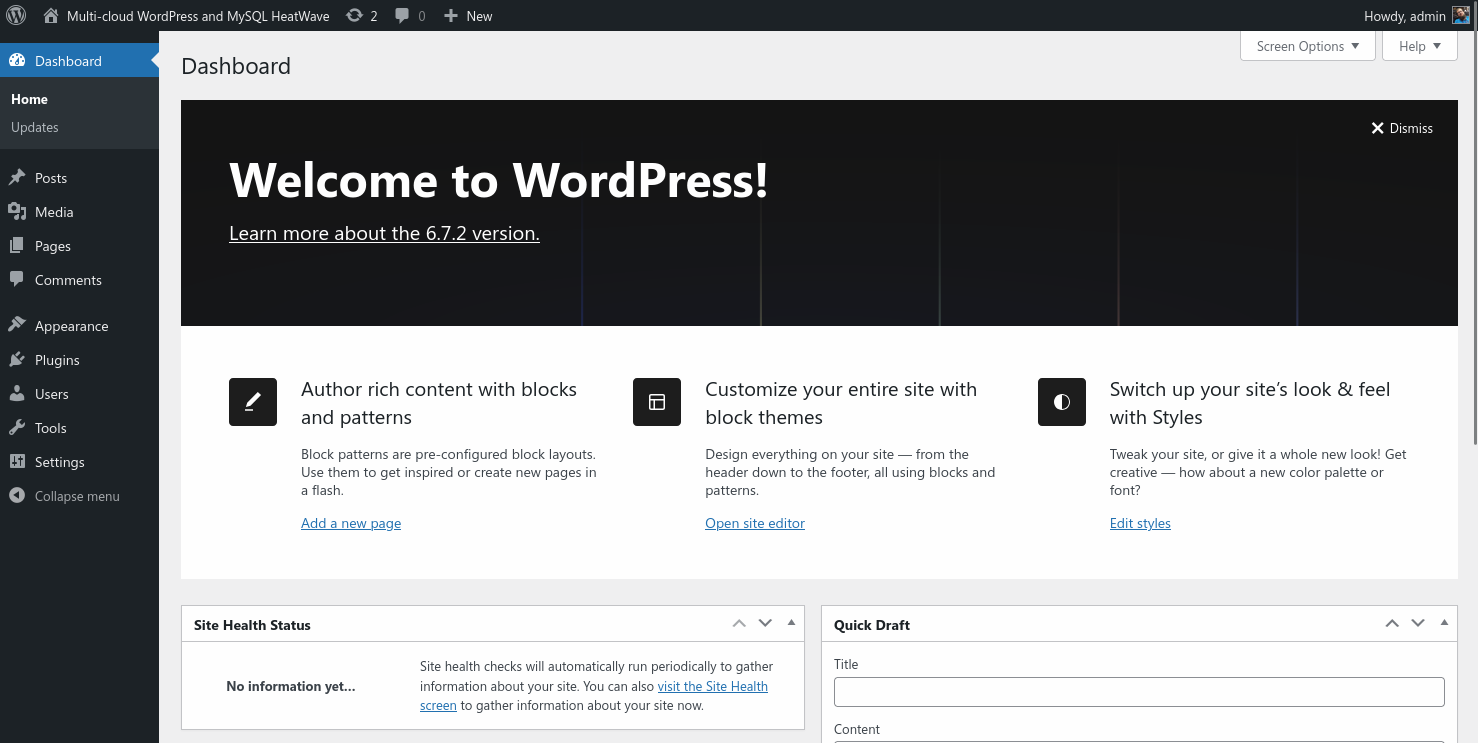
define('MYSQL_CLIENT_FLAGS', MYSQLI_CLIENT_SSL);And now you can access the WordPress site and finish the setup:
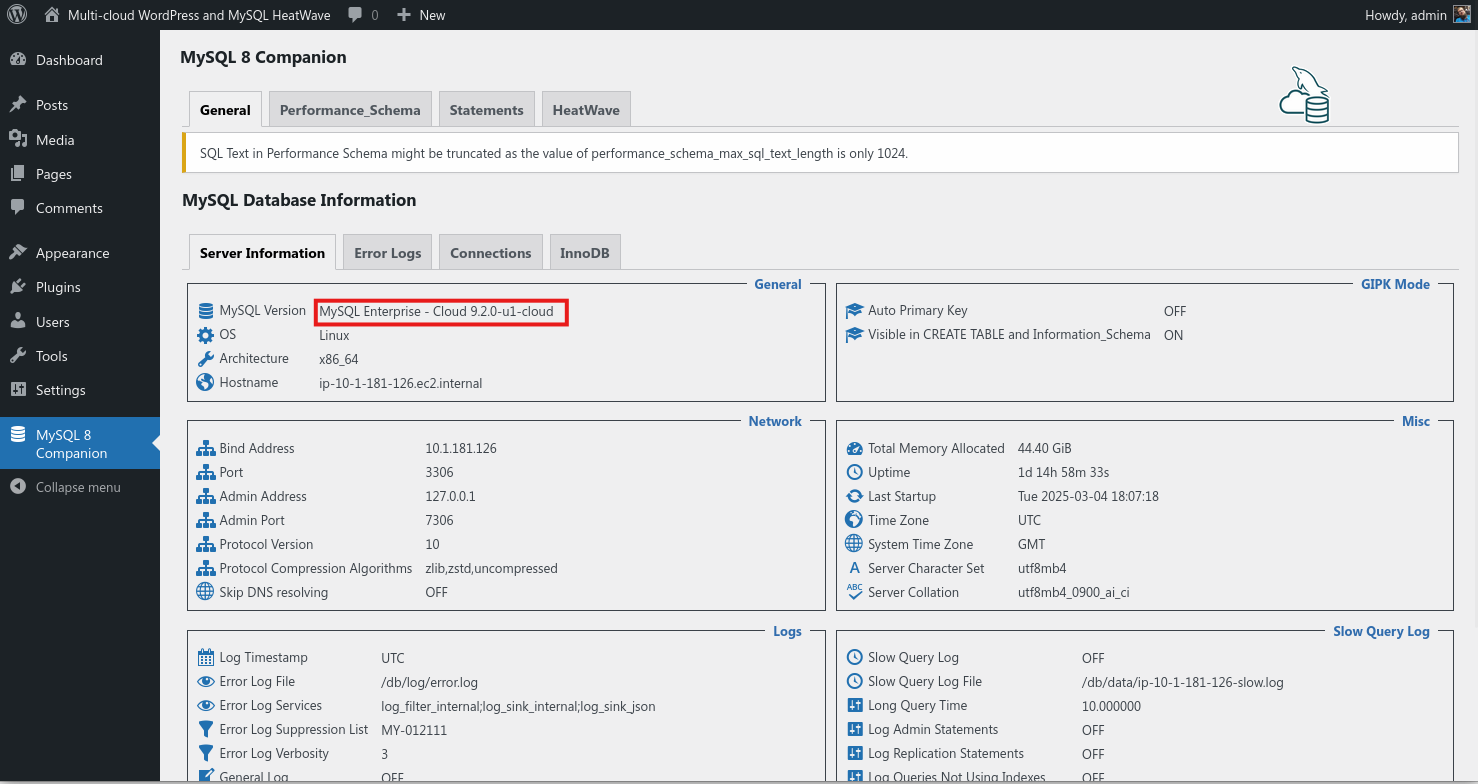
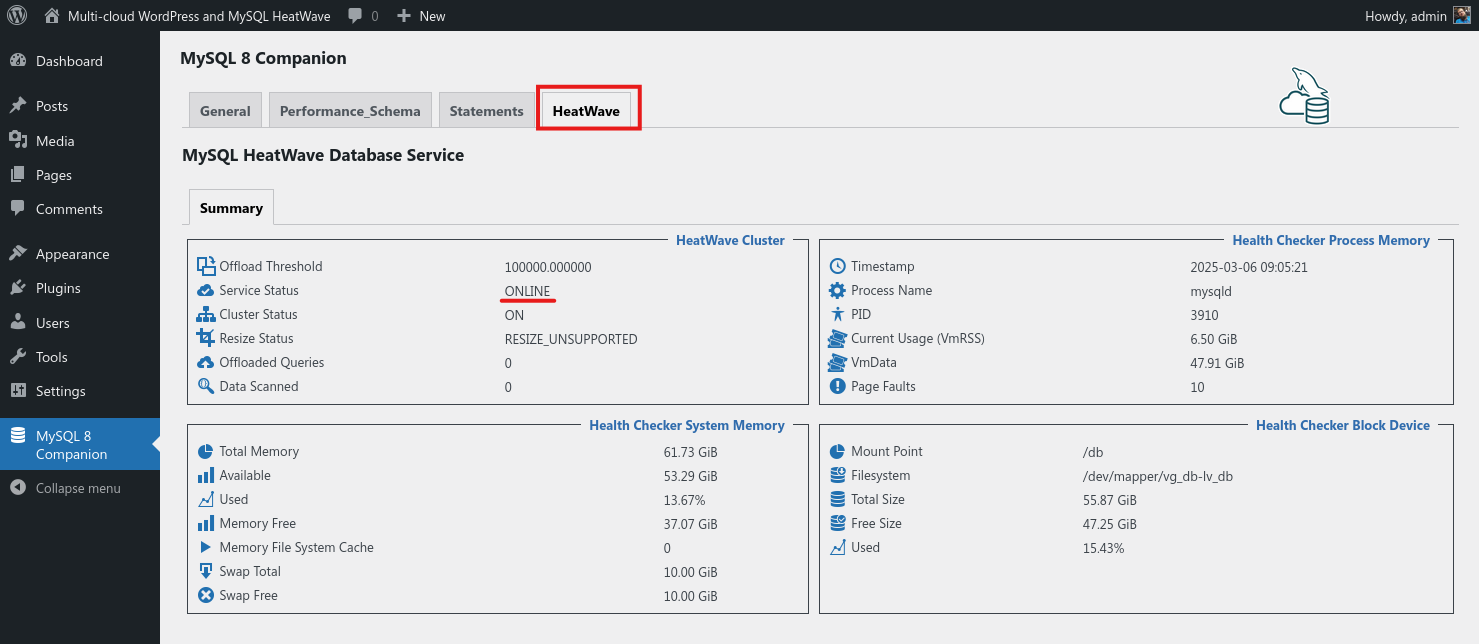
We can install the MySQL 8 companion plugin to see some extra information:
Conclusion
In this blog post, we have explored how to create a new MySQL HeatWave database instance on AWS and access it from EC2 instances using PrivateLink. This marks the first step in our multicloud journey. If you have applications running in Amazon Cloud, you now know how to take advantage of a MySQL Database as a Service (DBaaS) managed by the MySQL Team at Oracle, which includes all the latest innovations, machine learning capabilities, and acceleration features.