MySQL HeatWave Database (HeatWave) is a fully-managed service on Oracle Cloud Infrastructure (OCI) that is developed, managed, and supported by the MySQL team at Oracle. For security reasons, the HeatWave instance does not have a public IP address, so you may only connect to the instance from inside the OCI network. While you may connect to HeatWave (inside or outside the OCI network) via clients such as MySQL Shell, MySQL Client, MySQL Workbench and the (pre-GA) MySQL Plugin for VS Code – you may also use the Oracle Cloud Shell, which is a web browser-based terminal accessible from the Oracle Cloud Console.
Cloud Shell provides:
– An ephemeral machine to use as a host for a Linux shell, pre-configured with the latest version of the OCI Command Line Interface (CLI) and a number of useful tools – including MySQL Shell.
– 5GB of encrypted persistent storage for your home directory
– A persistent frame of the Console which stays active as you navigate to different pages of the console
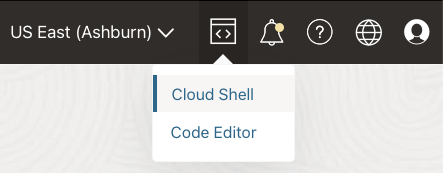
Getting started with Cloud Shell is fairly easy. To begin, login to your OCI cloud account. Click on the Developer Tools menu on the upper-right hand side of the OCI Console page, and select Cloud Shell.
You will probably see a message while you are connecting:

And you will probably see this message reminding you that since you will be on a private network, you may not have access to the Internet.

If you haven’t used Cloud Shell before, it might take a few moments to create the instance. Once the Cloud Shell has launched, you should see the welcome message and the OS prompt:

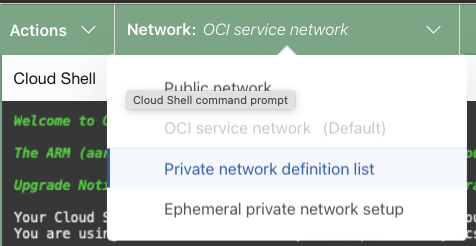
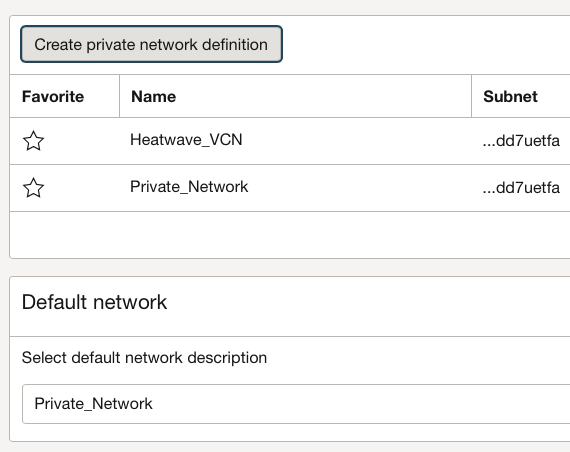
If this is your first time using Cloud Shell, you will need to configure your Private network definition list. Click on the menu Network: OCI service network and scroll down to Private network definition list.
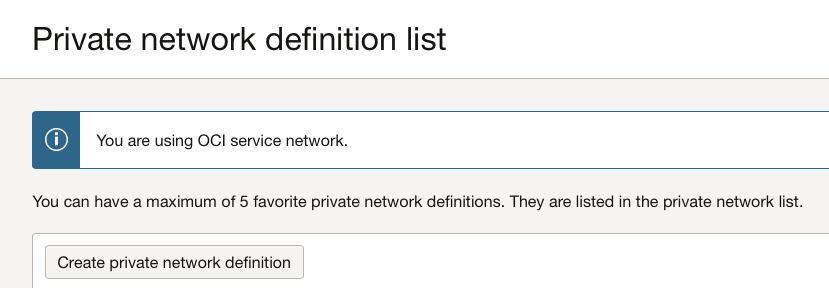
Click on Create private network definition.
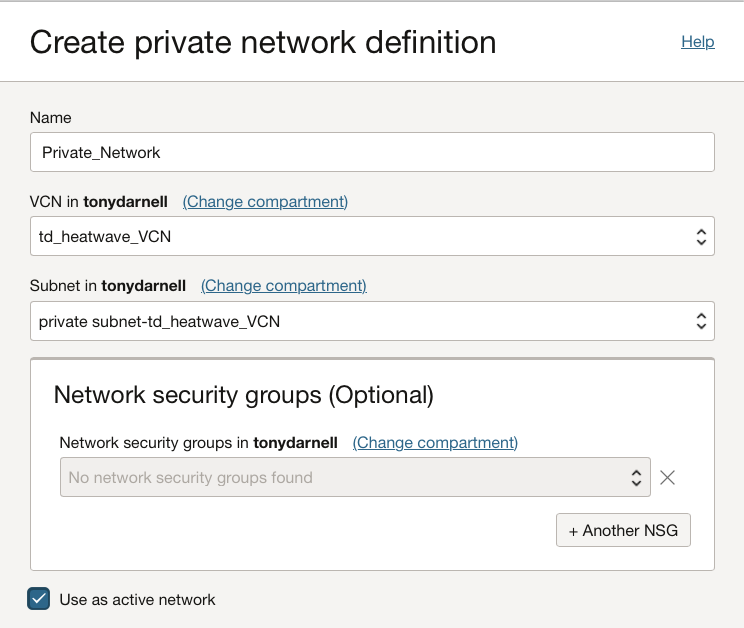
Give the private network a name (I was unimaginative and named it Private_Network), and select the VCN and private subnet that is being used by your HeatWave instance and click Use as active network. Then click the Create button at the bottom of the page.
After the private network definition has been created, you should see it in the Private network definition list. Select the default private network you want to use for future Cloud Shell sessions.
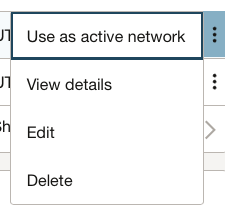
You can have a maximum of five favorite private network definitions. You may also select one of your private networks to be the active one by clicking on the three dots to the far right of the private network name you want to use, and select Use as active network:
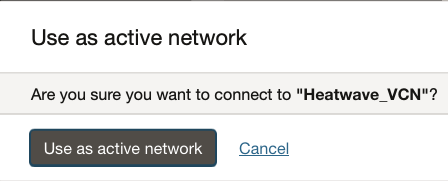
And confirm that you want to use this as your active network:
When you are finished editing your Private network definition list, click Close at the bottom of the page.
You will now see the private network you have selected. (It make take a few seconds to connect)

Since MySQL Shell is already installed, I can run Shell via the mysqlsh command, and then connect to my HeatWave instance using the connect command \c user@private_IP address. I can then change to sql mode via the \sql command and run a simple command show databases to confirm the connection.

And I am now connected to my HeatWave instance using MySQL Shell running inside Oracle Cloud Shell!