The MySQL Configurator for Windows was introduced as part of the MySQL Server 8.1.0 packages, allowing the configuration and reconfiguration of server installations with an easy to use GUI. However, the prior tool did not support upgrading existing server installations to the most recent version, only allowing side-by-side configuration to a newer server version. This meant that users needed to manually perform an upgrade and migrate their data into the new installation.
Starting with version 8.3.0, MySQL Configurator is now able to perform an in-place upgrade of a previous installation to the latest one while keeping the existing data and previous configurations.
Upgrading an existing MySQL Server installation
For an MSI installation, upon installing the latest version of MySQL Server the configurator tool will be automatically launched, when executing the MSI package with the “Run MySQL Configurator” checkbox in the last wizard page was checked. Alternatively, you can launch the tool anytime via the Windows Start Menu shortcut or directly from the installation folder. If you obtained MySQL Server through a zip package, launch the mysql_configurator.exe file located in the bin folder of the extracted files.
After the initial Welcome screen, you will be presented with a new configuration page which will either be the MySQL Server Installations or the Data Directory page. The former can be used to upgrade an existing server installation while the latter serves as a standalone side-by-side configuration. Which configuration page is shown is based on the MySQL Configurator detecting a currently running instance(s) (mysqld.exe Windows processes) of MySQL Server. If running instances are found, the MySQL Server Installations configuration page will be shown, otherwise you go straight to the Data Directory page.
MySQL Server Installations configuration page
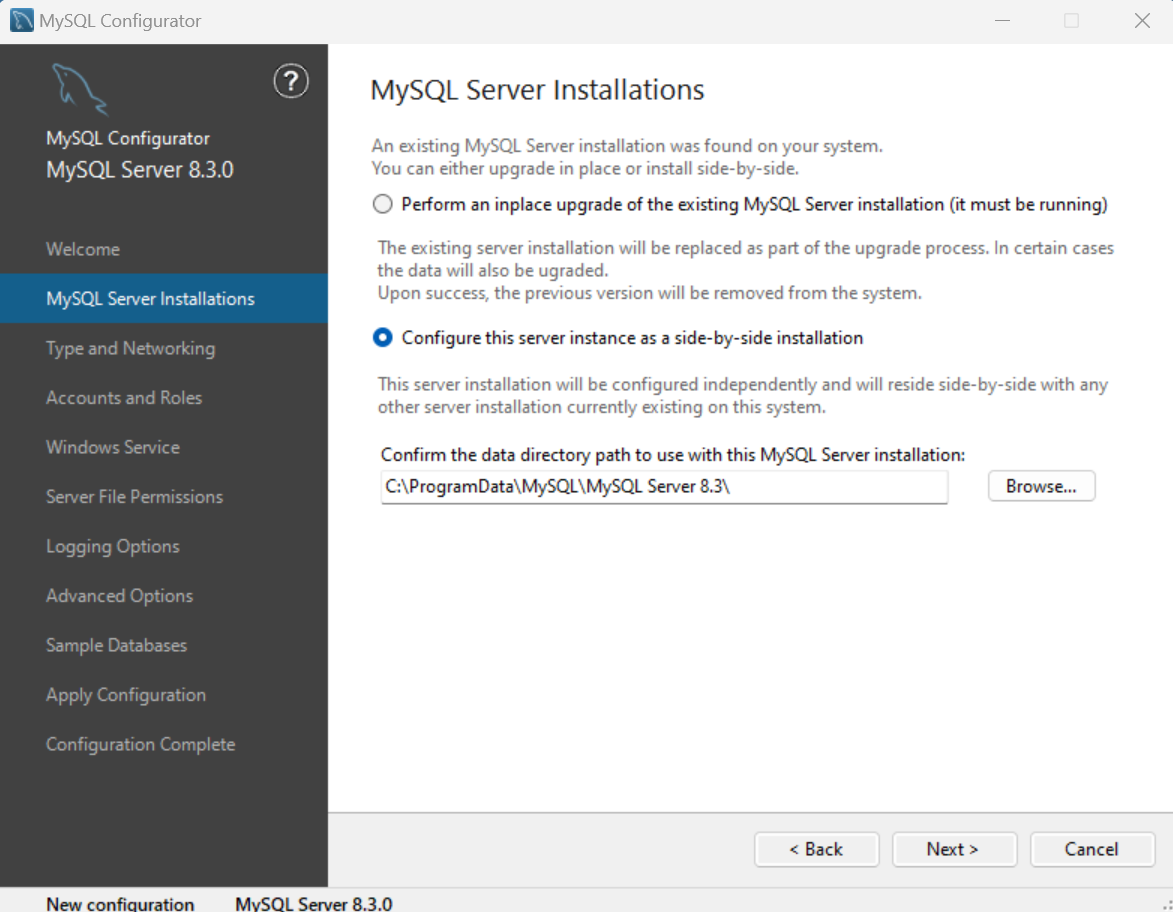
As mentioned earlier, MySQL Configurator identifies any server instances that can potentially be upgraded by looking for running mysqld.exe Windows processes. If any mysqld.exe Windows processes are found and the new server installation has not yet been configured, the MySQL Server Installations configuration page is shown with two options:
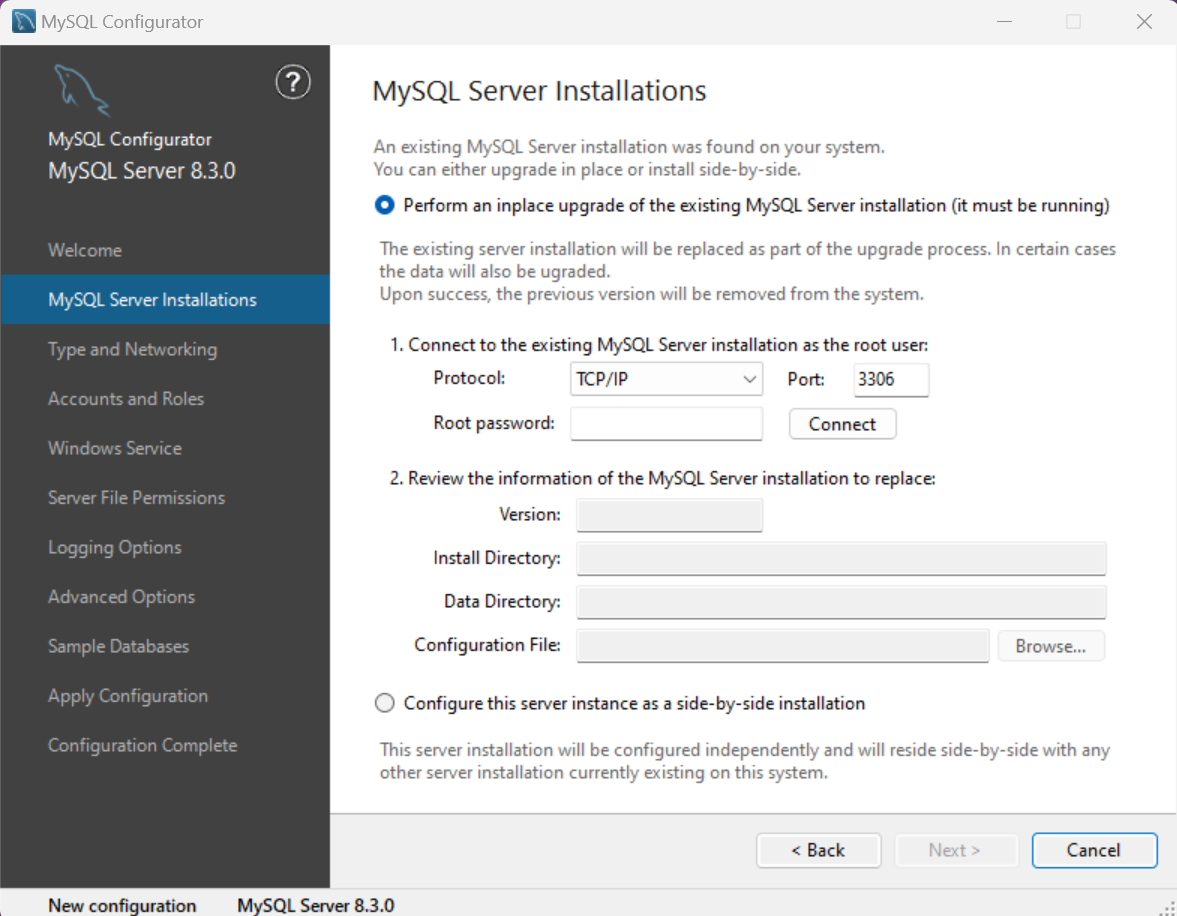
Option 1: Perform an in-place upgrade of the existing MySQL Server installation (it must be running)
Use this option for upgrading your existing installation to the new version while retaining your existing data.
As a first step, selecting this option requires a successful connection to the running server instance. Accepted protocols are TCP/IP, Named Pipes and Shared Memory. If TCP/IP is selected then a port number is also required, while selecting Named Pipes or Shared Memory will require the corresponding Windows Pipe Name or Shared Memory Name to also be provided. Finally, input the password for the root user. When all the connection details have been provided, click the Connect button to connect to the running server instance.
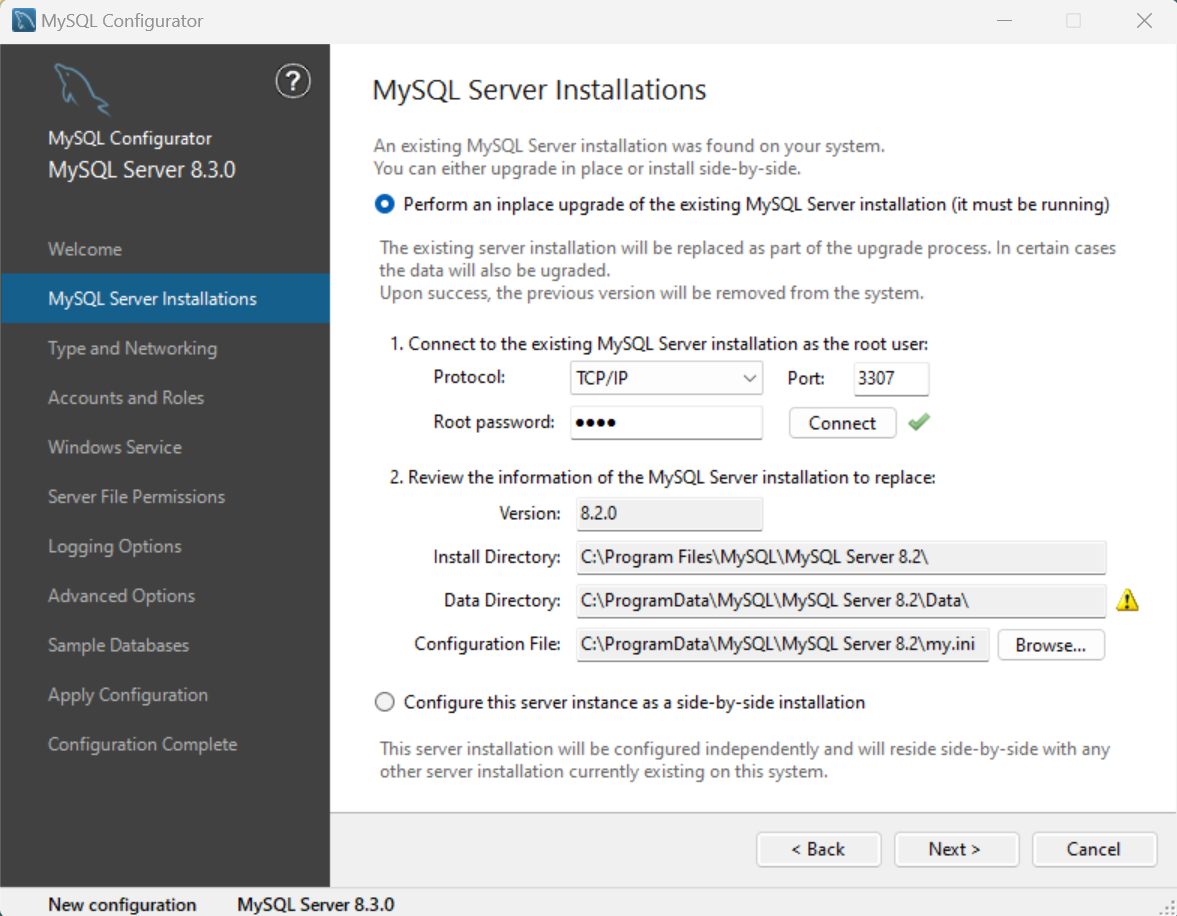
If connection is successful, the second step validates that the Version, Install Directory, Data Directory and Configuration File identified during the connection attempt are correct. The MySQL Configurator expects to find the configuration file (named “my.ini” or “my.cnf”) in the same folder as the Data Directory. If this is not the case, an error will be raised and you will be prompted to manually provide a path by clicking the Browse button. Server installations configured using MySQL Configurator will typically be able to find the configuration file (unless you manually changed the original setup).
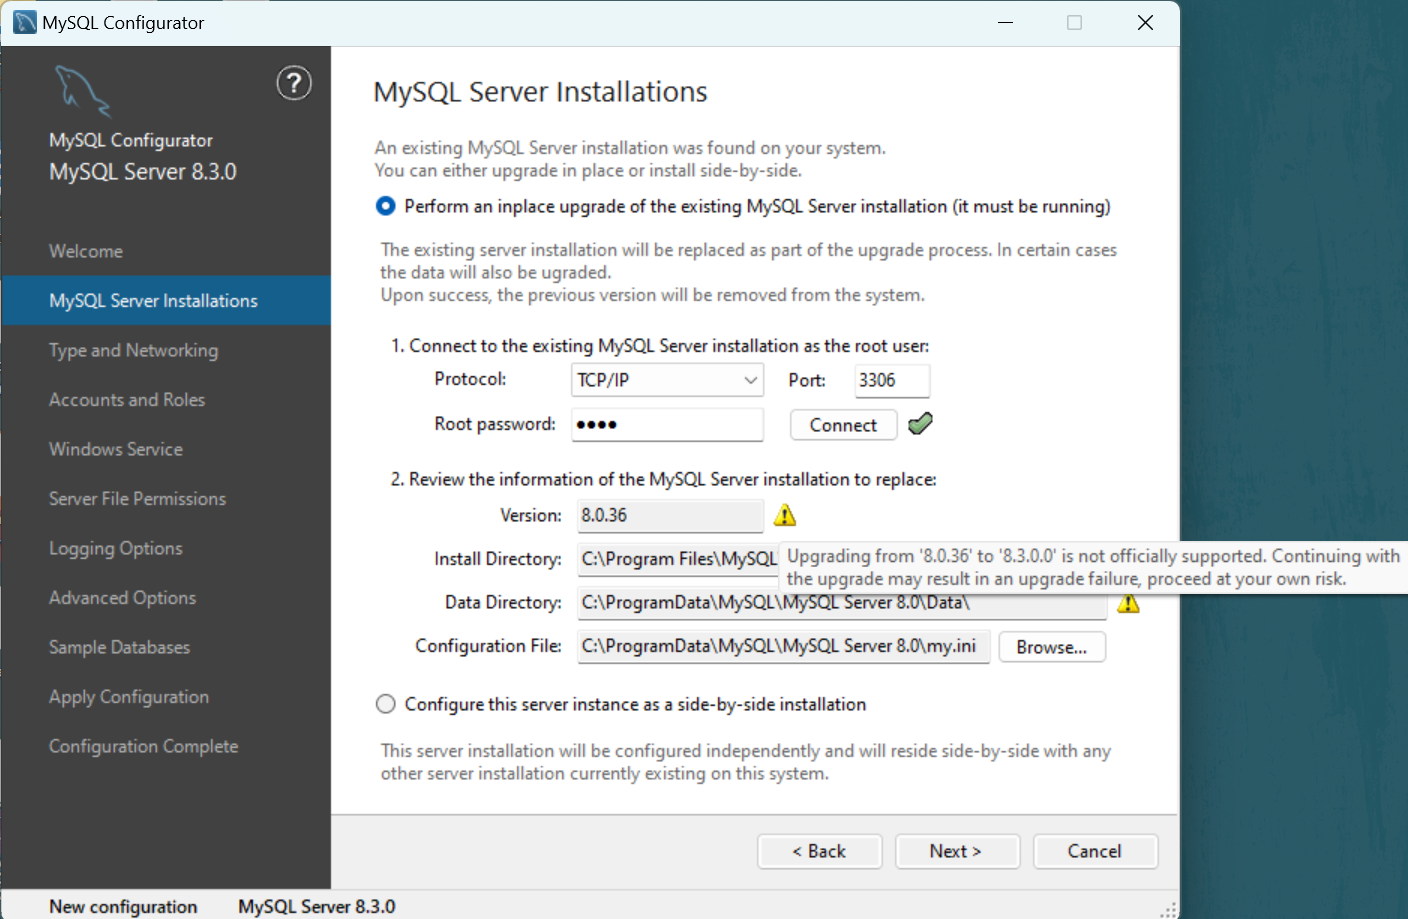
If the data upgrade between the old and the new server versions is not recommended (see this documentation for a list of supported upgrade scenarios) a warning icon will be displayed next to the Version field along with a tooltip message stating that even though the upgrade is not supported you can still proceed at your own risk. If you decide to proceed with an unsupported scenario, we strongly recommend that you have a backup of your data in case anything goes wrong.
This image showcases a successful connection (green check) with no version warning due to selecting a valid upgrade scenario.
Note: the warning icon next to the Data Directory field indicates the directory will be renamed to match the version of the new installation. (8.2 -> 8.3)
If the upgrade path is not supported, this page will provide the following warning.
When you have validated that all the data is correct, simply click the Next button to proceed with the upgrade operation.
Note: the list of configuration pages shown in the sidebar will be updated and that the status bar (also introduced in MySQL Configurator 8.3.0) will now reflect that an upgrade operation was selected.
Here, the status bar is reflecting the intention to upgrade from MySQL Server 8.2.0 to 8.3.0 and that the data directory (which has 8.2 as its name) will be renamed with the new version number:
![]()
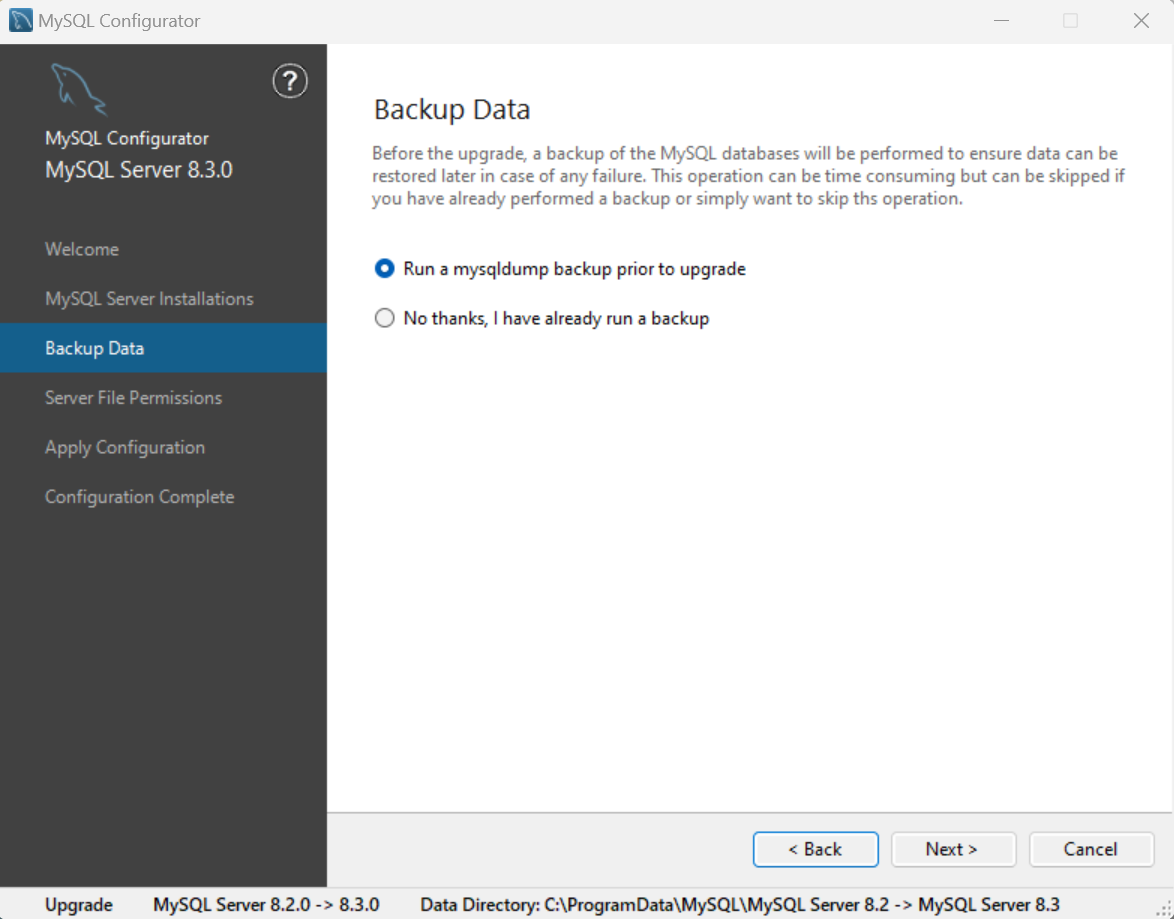
Next, you will be presented with the Backup Data configuration page which can be used to backup any existing data by using the mysqldump tool. This backup can later be found in the MySQL program data folder, typically “C:\ProgramData\MySQL”. Optionally, you can select to skip the backup in case you have already created one or simply don’t want one to be created.
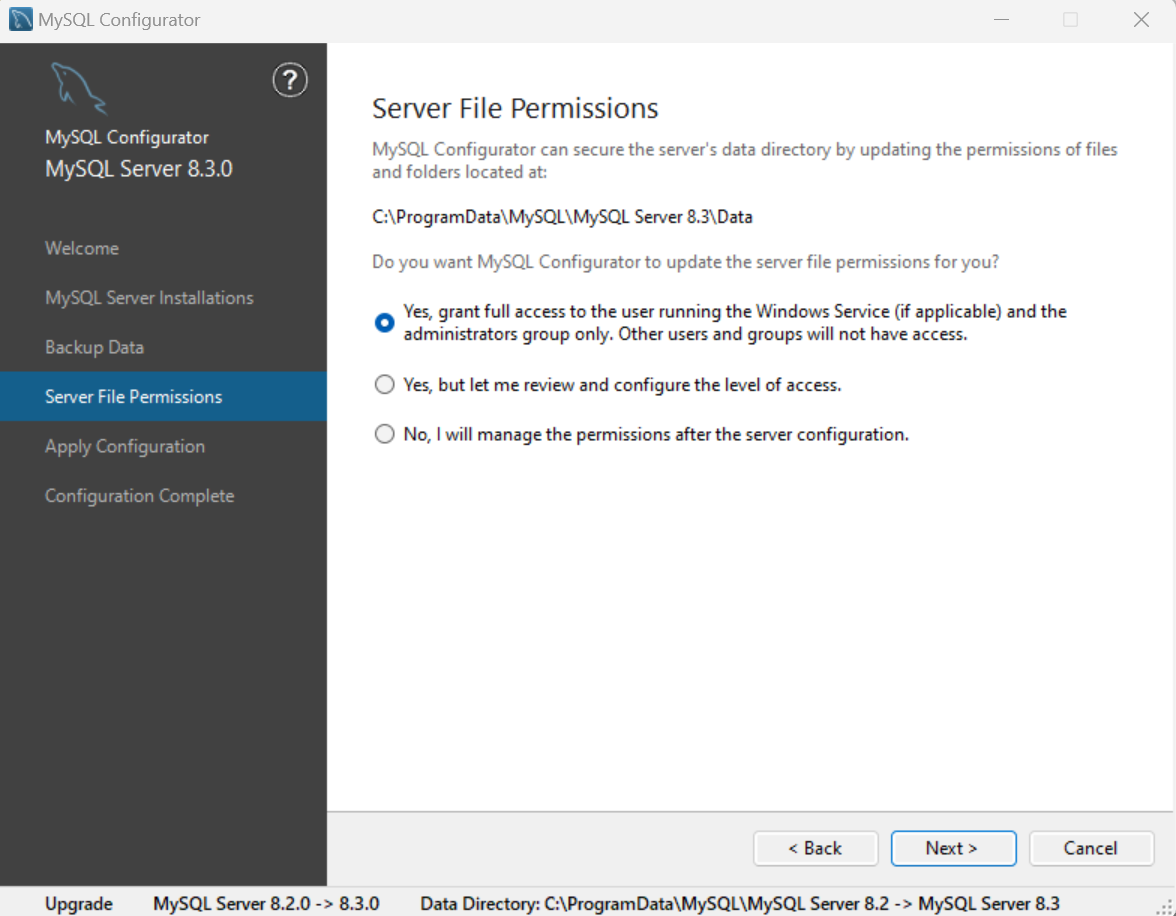
The Server File Permissions configuration page allows you to specify the permissions granted to the files within the data directory. Select the desired behavior and click Next.
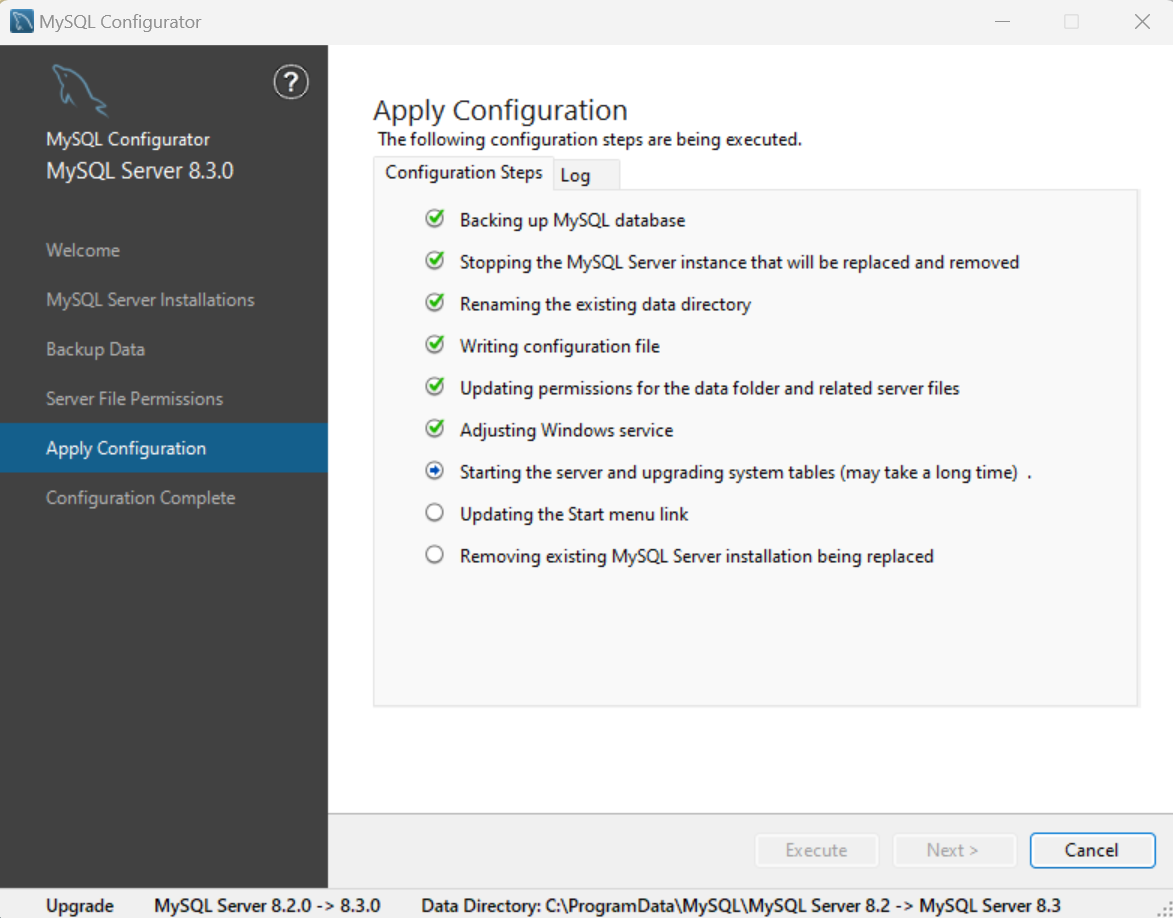
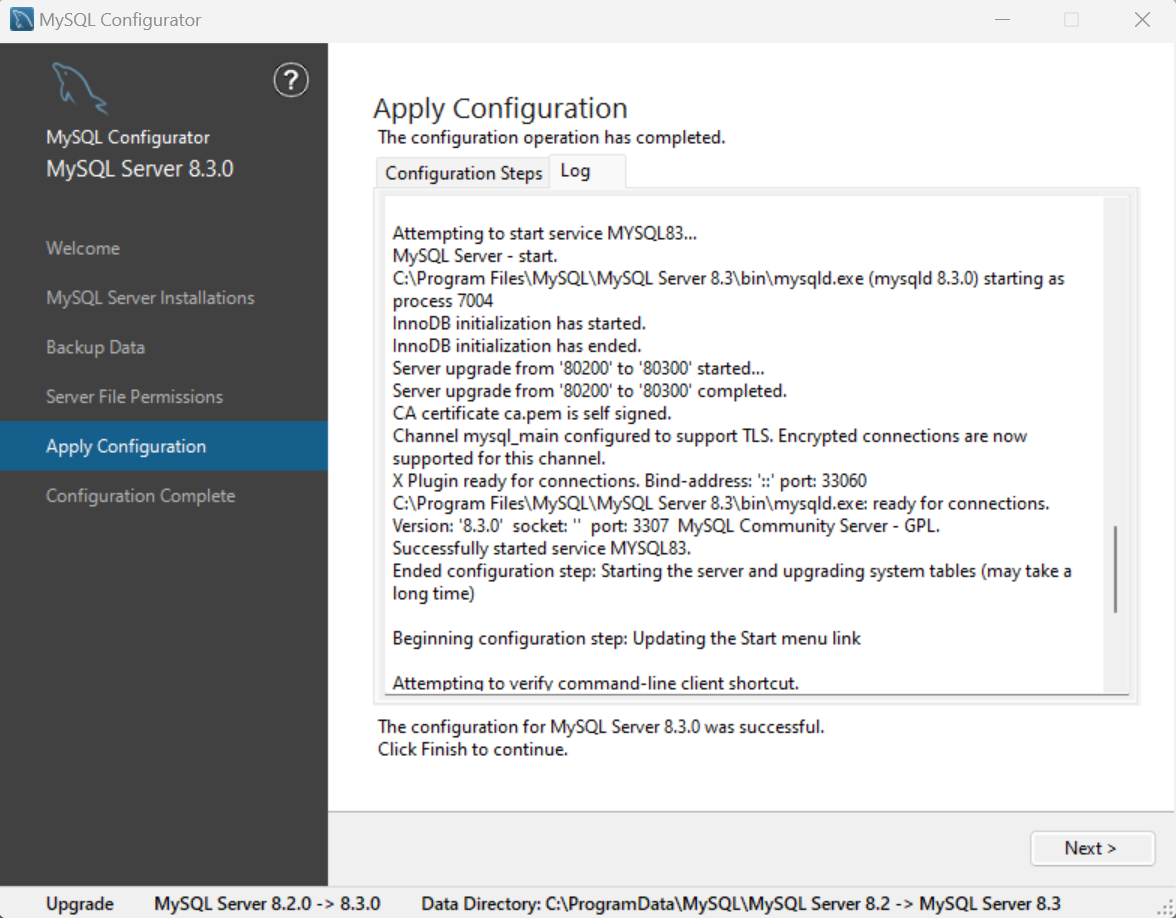
Finally, click the Execute button in the Apply Configuration page to begin with the upgrade process. Along with other operations, an in-place upgrade operation will take place. Details on the operation can be reviewed in the Log tab. As a final step, the existing installation (either MSI or zip) will be removed and only the new version will remain on the system.
Option 2: Configure this server instance as a side-by-side installation
Selecting the side-by-side option will configure the new server independently, resulting in an additional server instance running on your computer. To proceed with this option either use the default assigned data directory path or provide a custom path, then click Next.
Now, simply select the desired configurations in the configuration pages and execute the operation by clicking Apply Configuration.
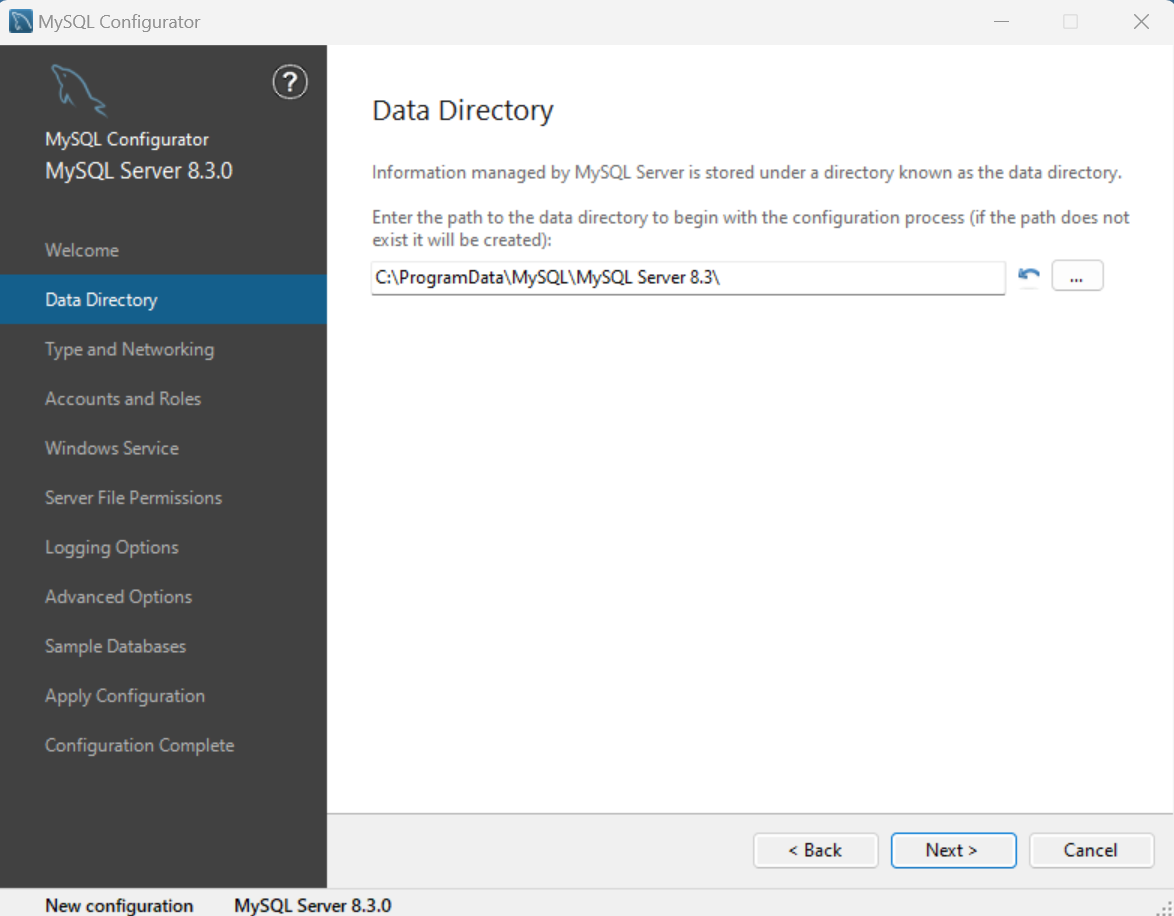
Data Directory configuration page
In previous versions of MySQL Configurator it was only possible to use a default data directory when configuring your server installation, this has changed in 8.3.0.
When no running server instances are detected and the recent server installation has not yet been configured, you will be presented with the Data Directory configuration page. Similar to the side-by-side option explained earlier, you will be able to either use the default data directory path or provide a custom one. To proceed click Next.
Then simply proceed with the configuration as desired and execute the operation on the Apply Configuration page.
Rolling back failed configurations
An upgrade operation may fail at times. It might be that an unsupported upgrade scenario was selected or some custom configurations made manually are incompatible with MySQL Configurator or you could simply encounter a bug. MySQL Configurator has a builtin rollback feature that kicks in whenever a required step fails in the Apply Configuration page. When this happens, any steps that can be reverted are reverted and visually you will see the name of the affected step being appended with a “(REVERTED)” string. This rollback feature aims at allowing users to re-execute the steps once the underlying issue has been fixed. Improvements to this feature will come in future releases.
Thank you for using the MySQL products!
We hope these new features in MySQL Configurator will enhance your experience keeping up to date with the latest MySQL releases. For any issues or incorrect behavior, please file a MySQL Configurator bug report. To do so, access MySQL Bugs and raise a new bug under the MySQL Server: Install Configuration Tool category. Ideally, first check that a similar issue has not yet been raised. Also, please provide clear steps for reproducing the issue.
As always, thank you for using MySQL.