


Oracle AI Agent Studio supports builders across a range of experiences, from business users creating applications through natural language to developers building sophisticated agentic applications with code. No-code and guided builder experiences will be covered separately; this article continues the pro-code journey. It shows how developers can use the AI Agent Studio CLI, AI-native tooling, and enterprise APIs to build and extend agentic applications with the flexibility and control of a local development workflow.
Building on our earlier article, Fusion AI Agent Studio CLI: The Pro-Code Builder Experience, which introduced the workflow with Codex, this installment uses Google Antigravity. We will prepare the environment through either an automated setup skill or a manual installation, then connect to Fusion and build, validate, and test a first workflow. Both routes use the same Oracle CLI and project skills, providing a common foundation for this series across coding agents.
Choose the quick route if you want Antigravity to check and prepare the environment for you. Choose the manual route if you want to understand each component or control its installation. After setup, the routes join at authentication and a Hello World workflow.
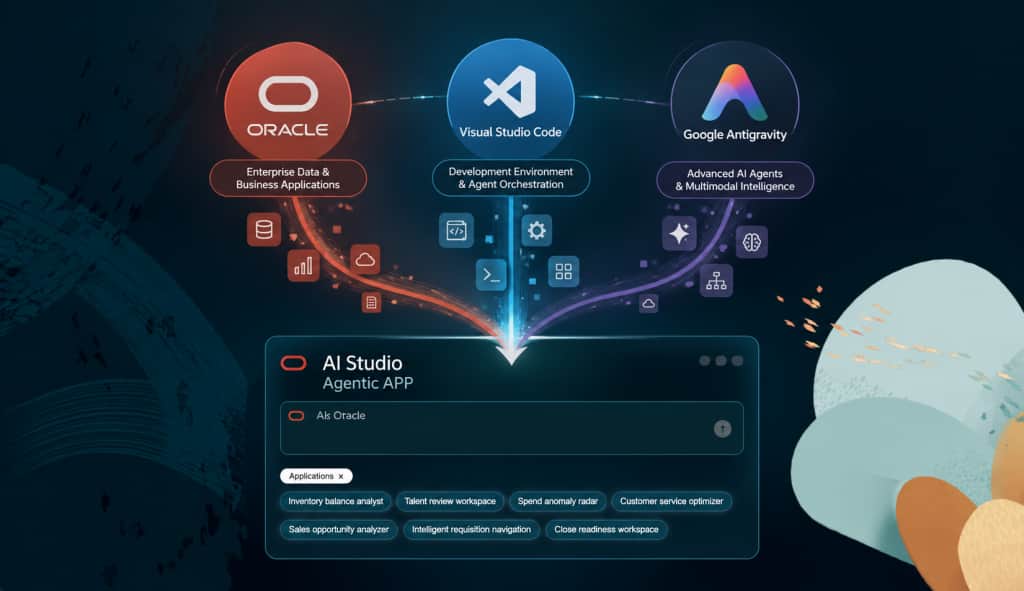
Choose your setup experience
Choose the setup approach that best fits your development style and team standards. You only need to complete one route.
| Route | Best for | Summary |
| 1 Use the setup skill | Readers who prefer AI guided onboarding | Antigravity checks prerequisites and prepares the local environment using reusable instructions. |
| 2 Complete setup manually | Readers who prefer step by step control | Install the tools and configure the same workspace with the steps and commands below. |
What you will use
- Google Antigravity Desktop to start the automated setup, or the Antigravity extension in VS Code for development.
- Node.js and npm, Visual Studio Code, and the Google and Oracle VS Code extensions.
- Oracle Fusion AI Studio CLI, its complete agent skills, and sample artifacts from the official repository. Git is convenient; a repository ZIP is an alternative.
- A local writable folder and a nonproduction Fusion AI Studio environment. Your administrator supplies the access details when you reach authentication.
Use the installation guide in the branch matching your Fusion release: Oracle Fusion AI Studio repository and release guidance
Route 1: Use the setup skill
A setup skill gives the agent a repeatable installation procedure. It is different from Oracle’s aistudio authoring skill, which helps the agent create and modify Fusion artifacts after the environment is ready.
Install Antigravity Desktop and open a local project
If Desktop is not installed, download it from Google Antigravity download
Select the installer for your operating system and supported architecture, complete the installation, and sign in with your approved Google account. Open or create a local project in a writable folder, such as Documents/oracle-ai-agent-studio. The setup helper assumes Desktop is already installed; installing Desktop is the first step you perform yourself.
Give Antigravity the setup instructions
Open the helper repository: AI Agent Studio CLI Setup Helper for Google Antigravity
Use the following prompt in the local Antigravity project. If the agent cannot retrieve the link, download SKILL.md from the repository and attach or reference that file in the chat instead.
Read and follow this setup skill:
https://github.com/joseantoniojuarez/AI-Agent-Studio-CLI-Setup-Helper-for-Google-Antigravity/blob/main/SKILL.md

Detect my operating system and prepare Oracle AI Agent Studio CLI for Google Antigravity and VS Code. Check existing tools, install missing prerequisites, register aistudio so it works from any directory, and initialize a new blank project in this workspace. Preserve existing files and verify the result.

Also create AGENTS.md in the project root with these rules: use the Oracle aistudio skill and bundled CLI from the project root; do not read or modify env.properties or expose credentials; plan changes first; validate workflows and follow Oracle test sync guidance; keep artifacts local unless I request a remote operation; report changed files and results. Preserve any existing AGENTS.md and defer Fusion authentication to me.
What the automated route prepares
- Checks the native OS, architecture, installed tools, writable folders, and command conflicts.
- Installs missing or incompatible Node.js/npm and VS Code, the Google Antigravity extension, and the terminal Antigravity CLI when needed.
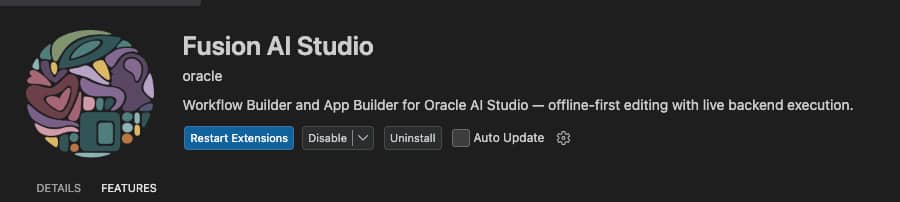
- Downloads the official Oracle repository, records the selected snapshot, copies Oracle skills and samples, and installs the Oracle Fusion AI Studio VS Code extension.
- Registers a persistent aistudio launcher, creates a new project scaffold when requested, and checks that the command works outside the workspace.
- With the additional instruction above, creates AGENTS.md for project conventions. The published setup skill does not currently include that file as an automatic step on its own.
Review the proposed paths and approve installation or configuration changes when required. Existing compatible installations should be reused. The final report distinguishes local tooling from sign-in and Fusion access. Once the local checks pass, skip Route 2 and continue with the shared steps below.
Route 2: Complete setup manually
The manual route prepares the same environment. Use only the command block for your OS. The commands assume a new, empty setup folder; inspect existing destinations first and do not overwrite a project. Replace example paths and the release branch where needed. Start a fresh terminal after installing tools.
Install and check the prerequisites
Install a supported Node.js LTS package with npm from Node.js official downloads
Install VS Code from Visual Studio Code downloads
Choose installers compatible with your OS and architecture. On Windows, the VS Code User Installer can configure the code command in PATH. On macOS, open the VS Code Command Palette and run Shell Command Install code command in PATH. If Node.js and npm are already usable and compatible, retain them. Git is optional for the ZIP alternative below.
Windows PowerShell checks
node --version
npm.cmd --version
code.cmd --version
git --version
macOS Terminal checks
node --version
npm --version
code --version
git --version
A missing git command only affects the clone route. If another tool is installed but not found, locate its launcher and reopen the terminal before reinstalling it. On Windows, npm.cmd avoids problems caused by a blocked npm.ps1 shim.
Install Antigravity in VS Code and verify its CLI
Install the Google extension in the VS Code profile you will use for this project. From PowerShell use code.cmd in place of code in these commands:
code --install-extension Google.google-antigravity
code --list-extensions --show-versions
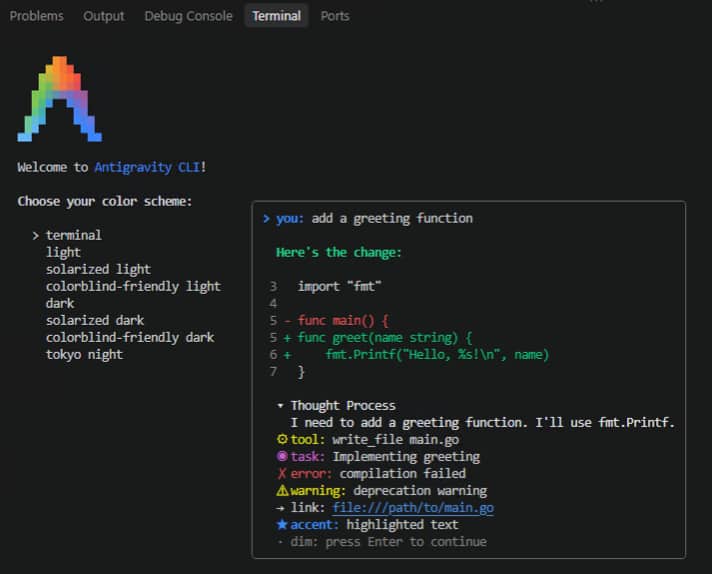
Open the Antigravity panel in VS Code and complete Google sign-in yourself. The extension may install its backend on first launch. Check whether the standalone terminal CLI is already usable before installing another copy:
agy --version
agy --help
If the terminal CLI is missing, follow Antigravity CLI installation guide
For a manual terminal installation, download and inspect the official installer before executing it. Run the Windows block from PowerShell or the macOS block from Terminal in the setup folder. Stop if corporate policy blocks execution rather than bypassing the policy. Inspect any existing agy aliases first; the installer may adjust shell configuration.
Windows PowerShell
New-Item -ItemType Directory -Path downloads
Invoke-WebRequest -Uri 'https://antigravity.google/cli/install.ps1' `
  -OutFile '.\downloads\install-antigravity.ps1'
Get-Content '.\downloads\install-antigravity.ps1'
# Execute after reviewing the downloaded script.
& '.\downloads\install-antigravity.ps1'
macOS Terminal
mkdir -p downloads
curl -fL https://antigravity.google/cli/install.sh \
  -o downloads/install-antigravity.sh
less downloads/install-antigravity.sh
# Execute after reviewing the downloaded script.
bash downloads/install-antigravity.sh
Reopen the terminal and repeat the agy version/help checks. An older agy command that only opens an editor is not the standalone agent CLI. No CLI account sign-in needs to be automated by the setup instructions.
Download the Oracle repository
Select the branch matching your Fusion release. At the time of this walkthrough, Oracle lists release-26C as its default release branch. The example below uses that branch; verify the repository guidance before copying it for another release. Run this from your chosen setup folder:
git clone --branch release-26C --single-branch https://github.com/oracle/fusion-ai-studio.git fusion-ai-repo
git -C fusion-ai-repo rev-parse HEAD
If Git is unavailable, open the official repository, select the matching release branch, choose Code then Download ZIP, and extract it. Name the extracted repository folder fusion-ai-repo. Check that .agents/skills, aiapps, extensions, and how-to are present. Keep the original archive and record its branch and download date. Read the installation guide inside that selected snapshot.
Create the project and copy skills and samples
Start with the final folder structure below. The commands that follow create the blank project and copy Oracle skills and samples into it. AGENTS.md is added in the shared project guidance step.
oracle-ai-agent-studio/
  fusion-ai-repo/
  fusion-ai-workspace/         Open this project root
    AGENTS.md                  Add project guidance below
    .agents/skills/aistudio/
      SKILL.md
      scripts/aistudio.js
      references/
      resources/
    aiapps/
    src/
    test/
The bundled aistudio.js is the Oracle CLI; it is not a separate npm package to install globally. Initialize a new project through the script, then copy the complete skills tree and sample apps. Keep all referenced resources, including hidden folders.
Run commands individually and stop if any step fails. These copy commands are for a new project with empty destinations; do not merge them into existing skills or sample directories without checking conflicts.
Windows PowerShell
$root = (Get-Location).Path
$repo = Join-Path $root 'fusion-ai-repo'
$workspace = Join-Path $root 'fusion-ai-workspace'
$cliSource = Join-Path $repo '.agents\skills\aistudio\scripts\aistudio.js'
node $cliSource init --help
node $cliSource init --dir $workspace
New-Item -ItemType Directory -Path (Join-Path $workspace '.agents\skills')
Get-ChildItem -LiteralPath (Join-Path $repo '.agents\skills') -Force |
  ForEach-Object { Copy-Item -LiteralPath $_.FullName `
    -Destination (Join-Path $workspace '.agents\skills') -Recurse }
Copy-Item -LiteralPath (Join-Path $repo 'aiapps') `
  -Destination $workspace -Recurse
macOS Terminal
root="$PWD"
repo="$root/fusion-ai-repo"
workspace="$root/fusion-ai-workspace"
node "$repo/.agents/skills/aistudio/scripts/aistudio.js" init --help
node "$repo/.agents/skills/aistudio/scripts/aistudio.js" init --dir "$workspace"
mkdir -p "$workspace/.agents/skills"
ditto "$repo/.agents/skills" "$workspace/.agents/skills"
ditto "$repo/aiapps" "$workspace/aiapps"
Install the Oracle VS Code extension
Extract fusion-ai-repo/extensions/aistudio-extension.zip into a new extension-staging folder. Inspect the archive before extraction and locate the resulting .vsix file. In VS Code, open Extensions, select the menu, choose Install from VSIX, and select that file. Alternatively use the verified VS Code launcher with the actual extracted path:
code --install-extension "<absolute-path-to-aistudio-extension.vsix>"
code --list-extensions --show-versions
Use code.cmd in PowerShell. Reload VS Code if requested and confirm that Fusion AI Studio Configure Authentication appears in the Command Palette. The current extension ID is oracle.fusion-aistudio-vscode. This extension belongs in VS Code; Desktop uses the Oracle CLI and project skills.
Make aistudio available from any directory
A launcher saves you from typing the full script path for every command. It must retain your terminal’s current directory, because the CLI works on the project opened there. Keep its referenced Node executable and Oracle script at stable paths. Inspect existing aistudio aliases, functions, or launchers before adding another.
macOS Terminal
Run this in the same terminal where root and workspace were set above. It creates a user executable and preserves paths with spaces or apostrophes. Stop if the destination already exists.
nodeBin="$(command -v node)"
cli="$workspace/.agents/skills/aistudio/scripts/aistudio.js"
mkdir -p "$HOME/.local/bin"
NODE_BIN="$nodeBin" AISTUDIO_SCRIPT="$cli" node - <<'JS'
const fs = require('fs');
const path = require('path');
const quote = s => "'" + s.replace(/'/g, "'\"'\"'") + "'";
const out = path.join(process.env.HOME, '.local/bin/aistudio');
const content = '#!/bin/sh\nexec ' + quote(process.env.NODE_BIN) +
  ' ' + quote(process.env.AISTUDIO_SCRIPT) + ' "$@"\n';
fs.writeFileSync(out, content, {flag: 'wx', mode: 0o700});
JS
If $HOME/.local/bin is not on the persistent PATH, add the following line once to your actual shell startup file, for example ~/.zshrc for the default macOS zsh shell. Preserve the existing file; reopen Terminal afterward.
export PATH="$HOME/.local/bin:$PATH"Windows PowerShell
This creates a .cmd launcher usable by PowerShell and CMD without editing a PowerShell profile. Run it in the same terminal as the workspace commands. The example uses ASCII encoding and checks its paths accordingly; if your account/path uses other characters, use the setup skill to select and verify a suitable encoding or location.
$nodeExe = (Get-Command node.exe).Source
$cli = Join-Path $workspace '.agents\skills\aistudio\scripts\aistudio.js'
$bin = Join-Path $env:LOCALAPPDATA 'OracleAIStudio\bin'
$launcher = Join-Path $bin 'aistudio.cmd'
if (Test-Path -LiteralPath $launcher) { throw 'Inspect existing launcher first.' }
if (($nodeExe + $cli) -match '[^\x00-\x7F]') {
  throw 'Use the setup skill to verify non-ASCII launcher paths.'
}
New-Item -ItemType Directory -Path $bin -Force | Out-Null
$nodeLiteral = $nodeExe.Replace('%', '%%')
$cliLiteral = $cli.Replace('%', '%%')
$lines = @('@echo off', 'setlocal DisableDelayedExpansion',
  ('"{0}" "{1}" %*' -f $nodeLiteral, $cliLiteral),
  'exit /b %errorlevel%')
[IO.File]::WriteAllLines($launcher, $lines, [Text.Encoding]::ASCII)
$userPath = [Environment]::GetEnvironmentVariable('Path', 'User')
$found = @($userPath -split ';' | Where-Object {
  [Environment]::ExpandEnvironmentVariables($_).TrimEnd('\') -ieq $bin
}).Count -gt 0
if (-not $found) {
  $sep = if (!$userPath -or $userPath.EndsWith(';')) { '' } else { ';' }
  [Environment]::SetEnvironmentVariable('Path', $userPath + $sep + $bin, 'User')
}
Restart VS Code or Antigravity and open a fresh terminal so the new user PATH is inherited. Do not replace user PATH with the combined process PATH and do not use setx PATH. Verify outside the workspace with aistudio version and aistudio –help; on Windows check from both PowerShell and CMD. If you move the CLI folder later, update the launcher.
Shared steps: Confirm the project and connect to Fusion
Continue here after either setup route. Open fusion-ai-workspace itself in VS Code, not just its parent folder. Use the same root in Desktop or launch agy from that folder. Oracle’s project-local skill is discovered under .agents/skills; a global command alone does not make those instructions available in unrelated projects.
Add project guidance and verify skill discovery
Create AGENTS.md in the project root if the automated prompt has not already done so. Use that exact plural, uppercase filename. It holds conventions that Antigravity can load; it is separate from SKILL.md and is not generated by aistudio init. Paste this guidance, reviewing any existing instructions before merging:
# Fusion AI Studio project guidance
- Use .agents/skills/aistudio/SKILL.md for Fusion artifact tasks.
- Run the bundled Oracle CLI from the project root.
- Do not read or modify env.properties or expose credentials.
- Propose a plan before changing multiple artifacts.
- Validate workflow changes and follow Oracle's test sync guidance.
- Keep artifacts local unless I request a remote operation.
- Report changed files, validation results, and pending actions.
For the supported project instruction files, see Antigravity project rules
Ask Antigravity to confirm discovery before changing artifacts:
Review this project without changing files. Identify the Oracle aistudio skill under .agents/skills, read AGENTS.md, and explain which CLI and project root you will use. Do not read env.properties.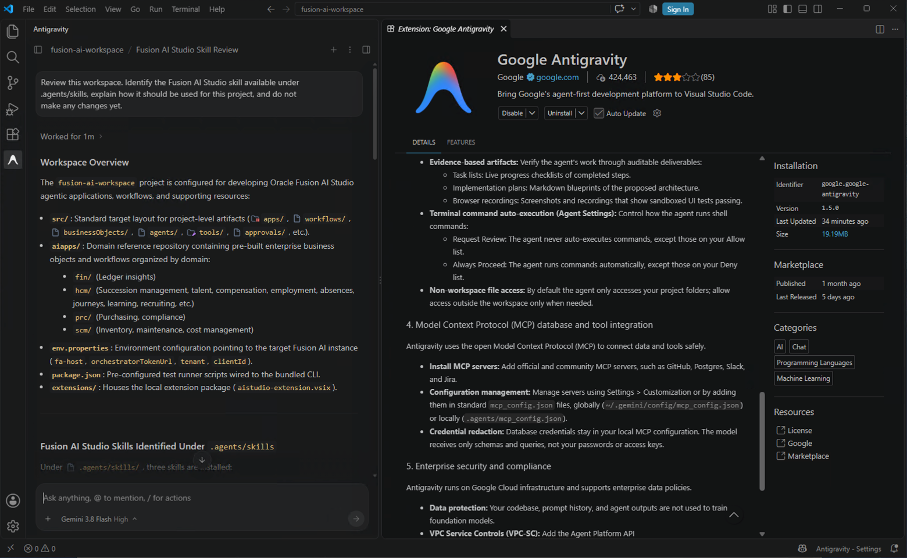
AGENTS.md guides behavior but is not a file-access control. Keep credentials out of prompts and screenshots and use the host’s access restrictions where appropriate.
Confirm initialization and configure authentication
Both setup routes above initialize a new project. Do not run init again over existing artifacts or configuration. Check that src and test exist and that the copied CLI help works. If you intentionally skipped scaffolding, run aistudio init only in the new project after checking its contents.
Before connecting, ensure env.properties is excluded by .gitignore. Add env.properties on a new line if it is absent; do not assume init already ignores it. It generated .debug/ and test-reports/ ignore entries in the CLI snapshot checked for this article.
In VS Code, open the Command Palette with Ctrl+Shift+P on Windows or Cmd+Shift+P on macOS. Run Fusion AI Studio Configure Authentication, select the appropriate authentication method, and enter the environment details supplied by your administrator. Complete any official sign-in prompts yourself. Verify the extension’s result without copying credentials into the agent chat.
Local tooling readiness does not establish Fusion access. Resolve authentication with your administrator before running commands that use the target environment.
Build your first workflow with Antigravity
Hello World gives you a small, inspectable first development cycle. For this walkthrough, use a standalone workflow in the new src layout. Replace the initials in the prompt and ask Antigravity to plan before making changes:
Use the Oracle aistudio skill and AGENTS.md. Inspect this project without reading env.properties.

Create a standalone workflow called <Your Initials> Antigravity Hello World, with business pillar HCM and product Global HR. When started, greet the user with a friendly, encouraging message under 20 words about creating their first AI workflow.

First show the implementation plan and expected files. After I approve, use the bundled Oracle CLI, validate the workflow, and follow the skill's workflow test sync procedure. Keep artifacts local unless a test requires an authorized environment operation; explain that operation before proceeding. Do not change credentials or publish anything.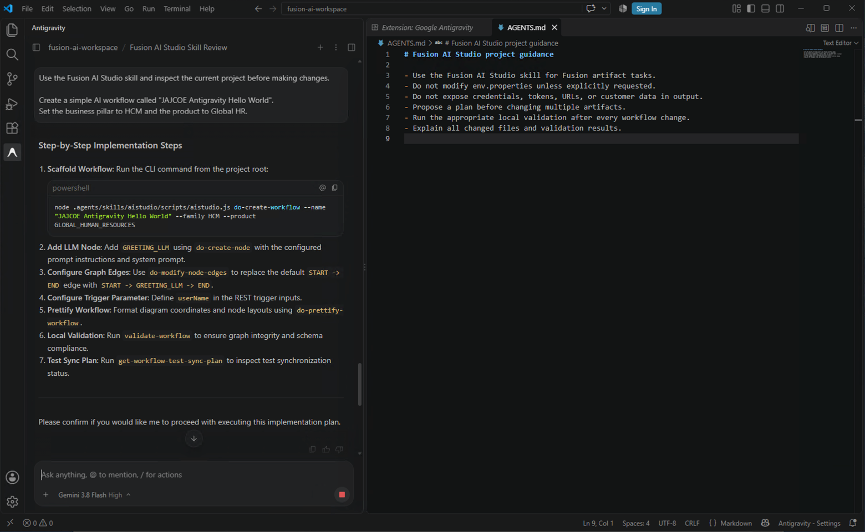
Review the proposed workflow, greeting behavior, files, and test actions. Once you approve, the agent uses the Oracle skill and CLI to create the artifact. Open the resulting .wf file in the Fusion AI Studio editor and inspect the nodes and connections. If you choose to scaffold the workflow through the extension instead, ask the agent to update that existing artifact rather than creating a duplicate.
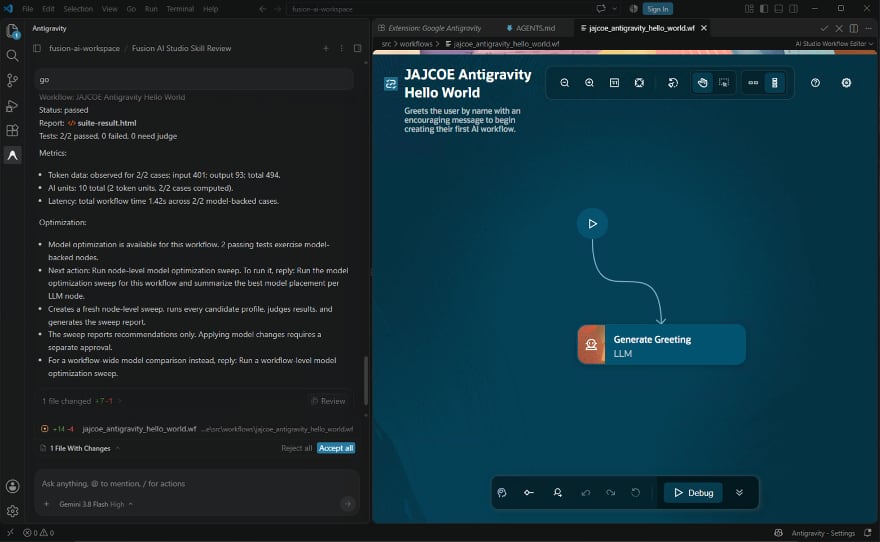
Validate and test with commands or natural language
You can run the CLI yourself or ask Antigravity to run the same operations. Structural validation checks the local artifact. Workflow execution and test runs can use the Fusion debug endpoint; file replay supplies test data but does not guarantee an offline run. Complete authentication first and review the operation before execution.
Run the CLI commands yourself
From the project root, replace the path and workflow code with those from your generated artifact. The following commands use the persistent launcher; you can also invoke node .agents/skills/aistudio/scripts/aistudio.js followed by the same command and options.
aistudio validate-workflow --file "src/workflows/<workflow-file>.wf"
aistudio get-workflow-test-sync-plan --file "src/workflows/<workflow-file>.wf"
aistudio run-workflow-tests --workflow-code <WORKFLOW_CODE>
aistudio get-workflow-test-final-summary --file "src/workflows/<workflow-file>.wf"
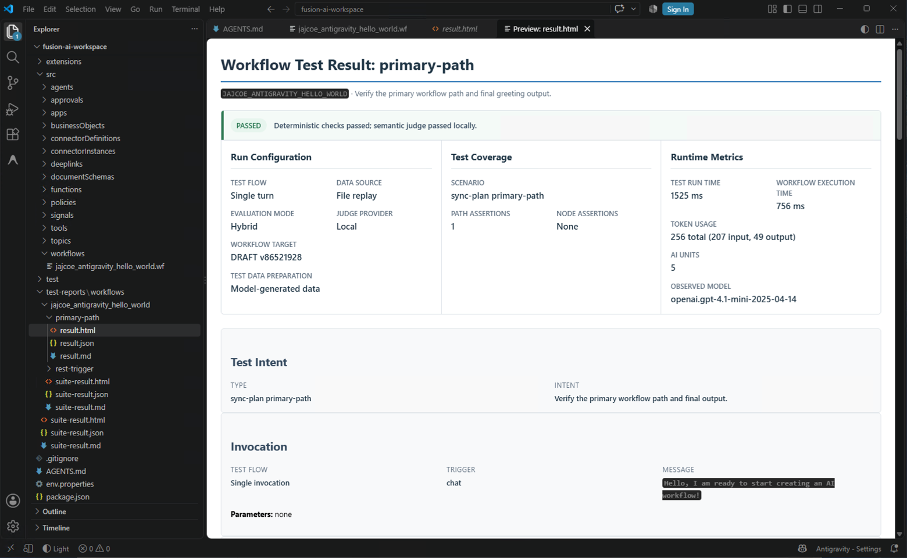
The sync-plan command only inspects required test work; it does not create or repair tests. Run the suite after test definitions and replay data have been prepared through the Oracle skill. If hybrid tests need a local semantic judge, a test run can return a nonzero result until those judgments are attached. Follow the repository’s test-authoring procedure or use the natural-language route below. Do not label missing tests, incomplete judging, or a failed run as passed. Structural validation alone does not run the tests automatically.
Ask Antigravity to perform the validation
Use the Oracle aistudio skill to validate src/workflows/<workflow-file>.wf with the bundled CLI. Inspect and complete the workflow test sync plan, then run the tests for <WORKFLOW_CODE> using the configured test data source. Follow the local judge attachment procedure if required. Report the final summary, test counts, report location, and any remaining actions. Do not change credentials, switch to remote judging, or publish the workflow.Review changed test files and the generated report. In the supplied example capture, the primary-path test passed, including local semantic judging. That screenshot illustrates a completed run; use your own current results to decide whether your workflow is ready.
Run the workflow and review the greeting
For a direct CLI test execution, run aistudio run-workflow-tests –workflow-code <WORKFLOW_CODE> after the test setup above. To see the conversational greeting, open the workflow in the configured Fusion AI Studio environment and use its test or preview experience. If the local draft must be saved first, explicitly authorize that draft operation and follow the release guide.
You can also ask Antigravity to handle the test execution:
Run the prepared tests for <WORKFLOW_CODE> through AI Studio CLI in the configured nonproduction environment. Show the greeting returned in the report and check that it is friendly and under 20 words. If a draft must be saved or a remote action is required, explain it and wait for my approval. Do not publish.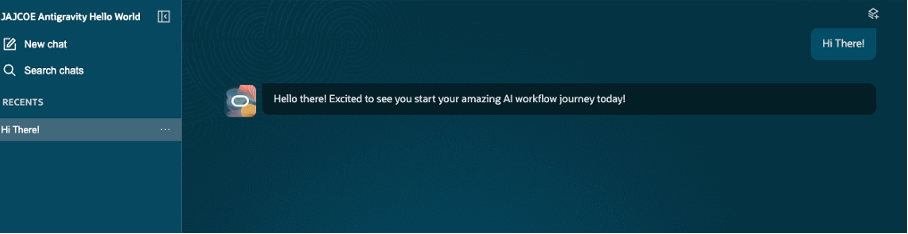
Review the greeting and the test report together. Save or deploy only after checking the intended changes. Publish through the AI Agent Studio UI after the workflow behaves as expected; this walkthrough does not publish workflows from the CLI.
Your workspace is ready. Bring your ideas to life with AI Agent Studio and Google Antigravity, let’s build your next Agentic App!