Executive Summary
Oracle Fusion REST APIs rely on a trust relationship with an OCI IAM Domain for OAuth-based authentication. Before building custom integrations, it is recommended to verify that tokens issued by the IAM Domain are accepted by Fusion and that authenticated users are authorized to access the required business APIs.
This article provides two practical validation tests:
- Test 1 – Basic Trust Validation confirms that an access token issued by the IAM Domain is trusted by Fusion and can be used to retrieve Fusion data.
- Test 2 – Interactive Authentication Validation confirms that Authorization Code Flow works correctly for browser-based applications such as Oracle APEX or custom web applications.
The validation can be performed using standard REST tools without requiring any custom code.
A common challenge when implementing Fusion integrations is that responsibilities often span two domains. Fusion administrators and SaaS specialists are familiar with Fusion users, roles, and business APIs, while OCI administrators and developers are familiar with OAuth, IAM Domains, and application integration patterns. When issues occur, it can be difficult to determine whether the root cause lies in the IAM configuration, the OAuth client, the trust relationship, or the Fusion authorization model. The validation approach described in this article provides a common verification procedure that helps both teams establish a shared understanding of the configuration and isolate issues before application development begins.
Overview
Access to Oracle Fusion REST APIs from Oracle APEX, custom applications, integration platforms, or other external consumers depends on a trust relationship between Oracle Fusion Applications and an OCI IAM Domain.
While the technical integration appears straightforward, successful implementations require knowledge from both the Fusion SaaS and OCI IAM domains. A valid OAuth token alone does not guarantee successful API access, and Fusion permissions alone are insufficient if the IAM configuration or trust relationship is incomplete. As a result, integration projects often encounter delays when teams validate only one side of the configuration.
Before implementing an integration, it is therefore recommended to validate both the authentication and authorization path. This verification provides implementation teams with a repeatable test procedure and provides architects, administrators, and project owners with evidence that the configuration is ready for production use.
By executing the validation tests described in this article, Fusion administrators can confirm that users and permissions are configured correctly, while IAM administrators and developers can verify that OAuth clients, token issuance, and authentication flows are functioning as expected.
What This Validation Proves
The validation described in this article confirms that:
| Validation Area | Success Criteria |
| Fusion–IAM Trust | Fusion accepts access tokens issued by the configured IAM Domain |
| OAuth Configuration | Access tokens can be successfully issued for the configured client application |
| Token Configuration | Tokens contain the expected audience and Fusion scope |
| Fusion Authentication | Fusion recognizes the authenticated user represented by the token |
| Fusion Authorization | The user can access Fusion APIs according to assigned roles and security profiles |
| Interactive Authentication | Authorization Code Flow works for browser-based integrations |
| Production Readiness | Machine-to-machine and interactive integration scenarios can be implemented using the validated configuration |
A successful execution of both tests provides sufficient evidence to sign off the Fusion–IAM trust configuration and proceed with application development.
Assumptions
This article assumes:
- The Fusion environment is integrated with an OCI IAM Domain.
- A dedicated Confidential Client Application is used.
- The Oracle Cloud Services application is not used directly for custom integrations.
- Authentication is performed using actual Fusion users.
- Validation is performed using REST-based tools.
Used Configuration & Calls

Trust Relationship (green dotted line)
The trust relationship is the static configuration between Oracle Fusion Applications and the OCI IAM Domain. It defines which tokens Fusion accepts and how authenticated identities are mapped into Fusion.
Trust Validation (blue circular arrows)
The validation flow proves that the trust relationship works as expected. A token issued by the IAM Domain is presented to Fusion, successfully validated, and used to access Fusion business APIs under the permissions of the authenticated user.
Scope
The approach works for:
- Legacy PaaS4SaaS environments (not yet migrated to Fusion IAM Domains)
- Fusion environments integrated with Fusion IAM Domains
- Machine-to-machine OAuth scenarios
- Interactive OAuth (Authorization Code) scenarios
Validation Tests
Two validation tests are performed:
Test 1 – Basic Trust Validation
Verifies that:
- An OAuth access token can be issued by the IAM Domain.
- The token contains the expected Fusion audience and scope.
- Fusion accepts the token.
- Fusion data can be retrieved through a REST API.
This test validates the fundamental trust relationship between Fusion and the IAM Domain and is typically sufficient for service-to-service integrations.
Test 2 – Interactive Authentication Validation
Verifies that:
- Authorization Code Flow is configured correctly.
- User authentication succeeds through the IAM Domain.
- Access tokens can be obtained through a browser-based flow.
- Fusion APIs accept the resulting access token.
This test is recommended for interactive applications such as Oracle APEX, custom web applications, and Single Sign-On scenarios.
Production Readiness Criteria
The Fusion–IAM integration can be considered production-ready when all of the following conditions are met:
✓ Access tokens can be issued by the IAM Domain.
✓ Token introspection confirms the correct audience and scope.
✓ Fusion accepts IAM-issued tokens.
✓ A Fusion business API returns data successfully.
✓ Fusion user permissions have been validated.
✓ Authorization Code Flow succeeds for interactive users.
✓ Evidence has been collected and archived.
Test 1 – Basic Trust Validation
Objective
Verify that:
- An OAuth access token can be issued by the Fusion IAM Domain.
- The token is recognized and accepted by Fusion.
- Fusion data can be accessed using the token.
A successful test proves that the trust relationship between Fusion and the IAM Domain is functioning correctly.
Step 1 – Create a Confidential Client
Within the Fusion IAM Domain:
1 Navigate to Integrated Applications.
2 Create a Confidential Application. 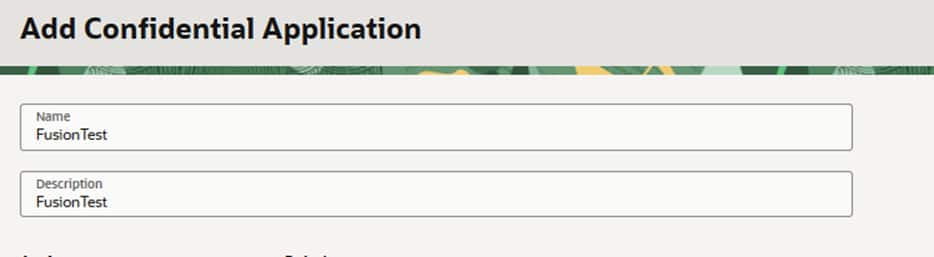
Only after submitting in the First Screen the following steps can be applied.
3 Enable OAuth.
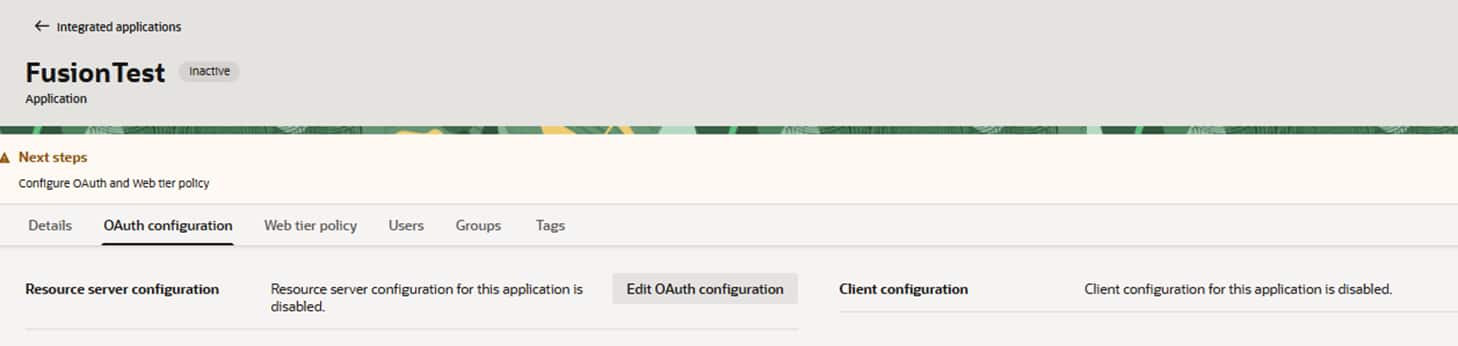
Choosing Edit OAuth to be able to apply the Confidential Clients configuration.
4 Configure Confidential Client
Turn on client in the OAuth Screen and leave resource server setting as it is.
The Screen expands now. Set values for Client Credentials and Resource Owner Flow.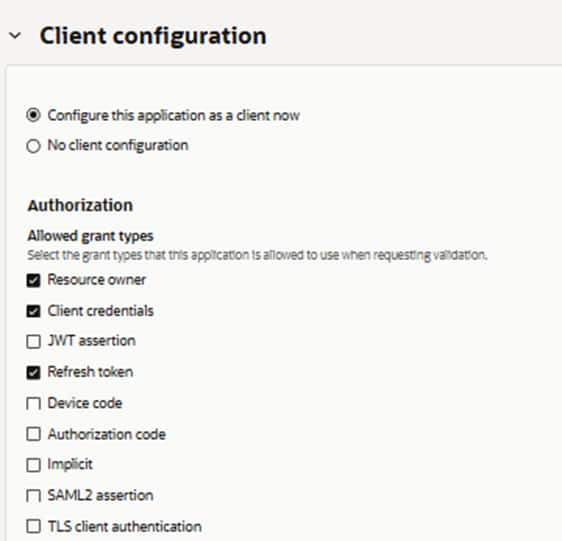
Scroll Down for section Add resources, switch Add Resources, screen will look like this: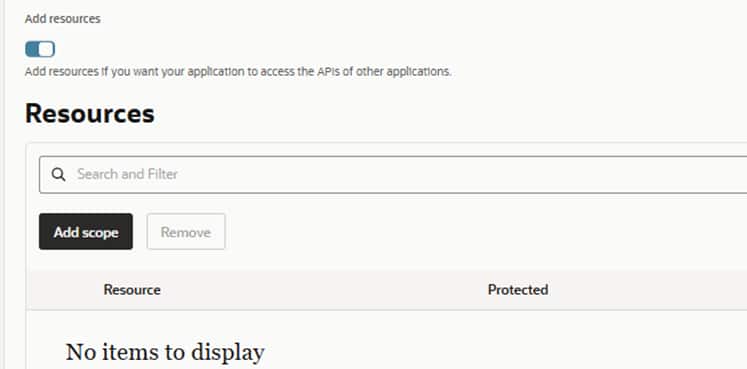
Use the Add Scope Button to be able to select your Fusion App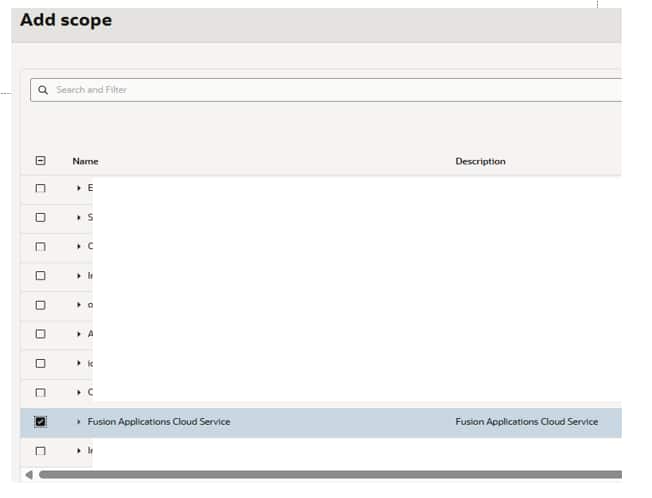
If added, will look like this: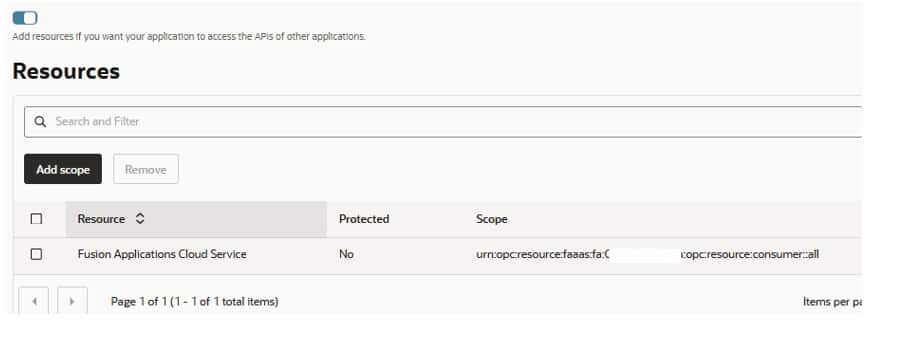
5 Record:
- Client ID and Client Secret
- IAM Domain URL
- Scope (previous screen)
The application will be used to request OAuth tokens. It allows two flow types, client credentials and resource owner.
Step 2 – Request an Access Token
Request an access token from the IAM Domain, here with the resource owner flow.
Example:
curl --location 'https://<iam-domain>/oauth2/v1/token' \
--header 'Content-Type: application/x-www-form-urlencoded' \
--header 'Accept: application/json' \
--header 'Authorization: Basic <base64(clientid:secret)>' \
--data-urlencode 'grant_type=password' \
--data-urlencode 'scope=<FusionAudience><FusionScope>' \
--data-urlencode 'username=<fusion-user>' \
--data-urlencode 'password=<password>'
Notes
The Fusion scope must match the values configured for the Fusion application within Oracle Cloud Services.
The resulting response should contain:
{
    "access_token": "eyJ...",
    "token_type": "Bearer",
    "expires_in": 3600
}
A pure Client Credentials flow may also work if the clientid is mapped appropriately within a Fusion user and the required permissions are assigned.
Step 3 – Optional Token Introspection
Token introspection can be used to validate token contents.
curl --location 'https://<iam-domain>/oauth2/v1/introspect' \
--header 'Content-Type: application/x-www-form-urlencoded' \
--header 'Authorization: Basic <base64(clientid:secret)>' \
--data-urlencode 'token=<access-token>'
A response should include:
    "sub": "<this username needs to be same as in Fusion>",
    "aud": [
        "<this is Fusion Host>",
        "urn:opc:resource:faaas:fa:<fusion instance>"
    ],
Verify:
- Token is active
- Audience matches Fusion
- Expected scopes are present
Step 4 – Validate the Token Against Fusion (HCM)
Call a standard Fusion REST API using the issued access token.
curl --location \
'https://<fusion-host>//hcmRestApi/resources/latest/workers?limit=1' \
--header 'Authorization: Bearer <access-token>' \
--header 'Accept: application/json'
A response can look like:
{
    "items": [
        {
            "PersonId": <number>,
"PersonNumber": "<number>",
"CorrespondenceLanguage": null,
...
}
]
}
Success Criteria
A successful response demonstrates:
- Fusion trusts the IAM Domain token.
- OAuth authentication is working correctly.
- The user with sub is a valid Fusion user and can access it’s HCM date
Common Failures
| Error | Possible Cause |
| 401 Unauthorized | Invalid token, audience mismatch, trust configuration issue |
| 403 Forbidden | User authenticated successfully but lacks Fusion permissions |
| Empty data set | User lacks data access through security profiles |
Step 5 – Validate the Token Against Fusion (SCM)
Call a standard Fusion REST API using the issued access token.
curl --location \
'https://<fusion-host>/fscmRestApi/resources/latest/purchaseRequisitions' \
--header 'Authorization: Bearer <access-token>' \
--header 'Accept: application/json'
A response may look like:
{
    "items": [],
    "count": 0,
    "hasMore": false,
    "limit": 25,
    "offset": 0,
    "links": [
        {
            "rel": "self",
            "href": "<FusionHost>/fscmRestApi/resources/11.13.18.05/purchaseRequisitions",
            "name": "purchaseRequisitions",
….
Success Criteria
A successful response demonstrates:
- Fusion trusts the IAM Domain token.
- OAuth authentication is working correctly.
Common Failures
| Error | Possible Cause |
| 401 Unauthorized | Invalid token, audience mismatch, trust configuration issue |
| 403 Forbidden | User authenticated successfully but lacks Fusion permissions |
| Empty data set | User lacks data access through security profiles |
Remember that API access requires appropriate:
- Job Roles
- Duty Roles
- Data Roles
- Security Profiles
Authentication and authorization are separate validation steps.
Sign-off Criteria for Test 1
Test 1 can be considered successful when:
- OAuth token issuance succeeds.
- Token introspection confirms expected audience and scope.
- Fusion accepts the token.
- A Fusion REST API returns data successfully.
At this point the trust relationship can be considered validated.
Test 2 – Interactive OAuth Validation
Objective
Verify support for browser-based user authentication using the Authorization Code Flow.
This is the recommended validation for:
- Oracle APEX applications
- Custom web applications
- Single Sign-On scenarios
- Interactive user experiences
Step 1 – Configure the Confidential Client
The Confidential Client should support:
- Authorization Code Flow
- Refresh Tokens
Required scopes (as in Test 1): <FusionScope>
The Confidential Client from Test 1 can be used if the Flows are enabled. This is already configured in Test 1. All you need to add it the callback URL of the Client. The callback URL is part of Authorization Code Flow and will be proved by the server and is used for the redirect. So can’t be omitted.
Step 2 – Configure OAuth in Your REST Test Client
The test client needs Authorization Code Flow. So ensure the OAuth client used got this configuration. Here the Flow (authorization code) and the Redirect URL are added to the confidential client from Test 1: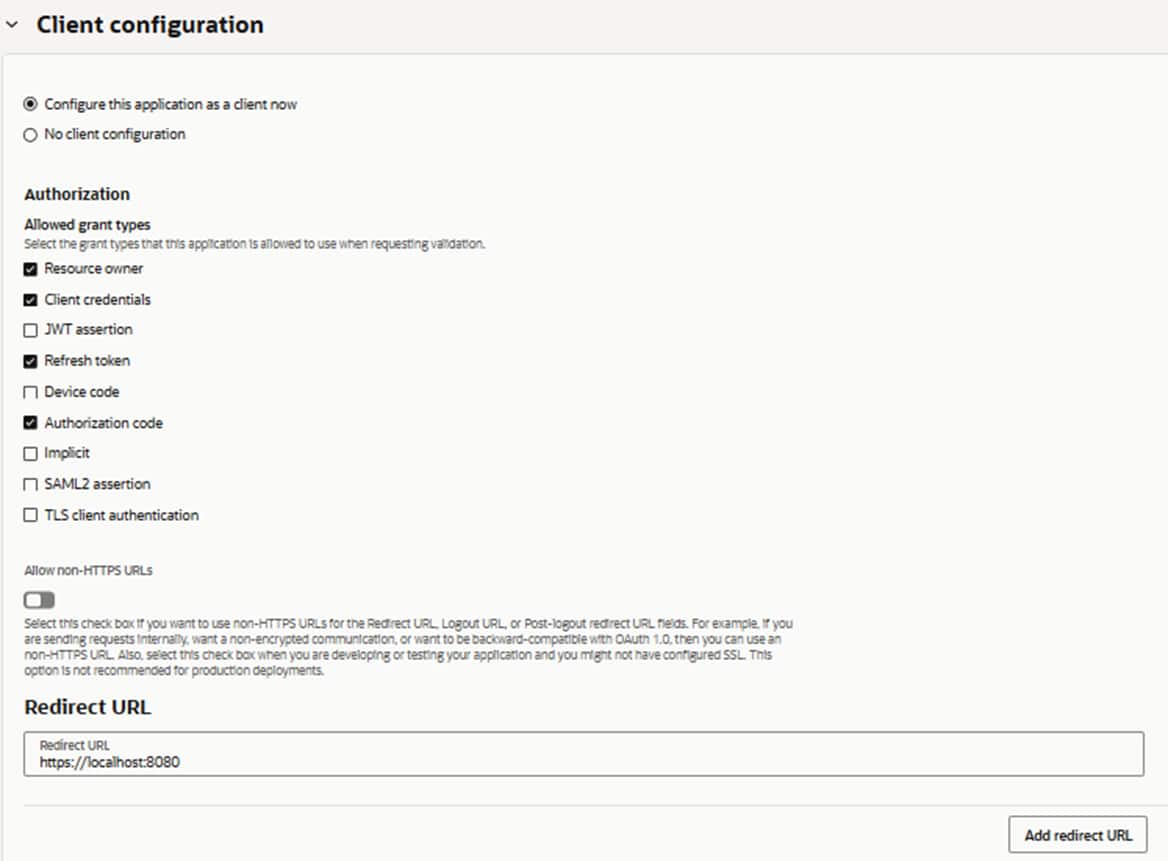
Several values are needed to be configured for the Flow. These values can be retrieved from the confidential client (see step before) and the OpenID .well-known endpoint (https://<domainURL>/.well-known/openid-configuration).
Well-known config may look like this:
{
    "issuer": "https://identity.oraclecloud.com/",
    "authorization_endpoint": "https://<iam-domainurl>.oraclecloud.com:443/oauth2/v1/authorize",
    "token_endpoint": "https://<iam-domainurl>.identity.oraclecloud.com:443/oauth2/v1/token",
 .....
For the request URL of the well-known endpoint see https://docs.oracle.com/en-us/iaas/Content/Identity/api-getstarted/usingopenidconnect.htm
Example settings for the Authorization Code Flow:
| Setting | Value |
| Grant Type | Authorization Code |
| Callback URL | https://localhost:8080 (or of Rest Client) |
| Authorization URL | https://<iam-domain-url>/oauth2/v1/authorize |
| Token URL | https://<iam-domain-url>/oauth2/v1/token |
| Client ID | Client ID |
| Client Secret | Client Secret |
| Scope | openid <fusionscope> |
| State | Any unique value |
There is no need to set further scopes like profile or email. Optional possible within same call. Allowed scopes see .well-known endpoint.
For details about the OCI IAM Authorization Code Flow and other supported OAuth Flows see following Whitepaper: https://docs.oracle.com/en-us/iaas/Content/Resources/Assets/whitepapers/oci-iam-oauth-flows-best-practices.pdf
Step 3 – Execute the Authorization Flow / Request an Access Token
Start authentication. A browser window should open and redirect the user to the IAM Domain login page.
After successful authentication:
- The user authenticates with his IAM credentials.
- An authorization code is returned.
- The authorization code is exchanged for an access token.
Most REST clients perform this code exchange automatically.
During request you will get a query for consent if configured.
A preferred way might be using a local browser (several rest clients allow to choose between encapsulated browserengine or external browser) for the flow as this is easier to grab content, debug and intercept. Intercept may help e.g. for the exchange of the code for an access token. This can be done with a dedicated call e.g. for troubleshooting.
Excerpt from token may include:
{
...
  "sub": "<username from Fusion and IAM>",
  "scope": "openid profile urn:opc:resource:consumer::all",
  "aud": [
    "<FusionURL>",
    "urn:opc:resource:faaas:fa:<domain>",
    "<iam-domain-url>"
  ],
...
}
Step 4 – Validate the Token Against Fusion
Use the resulting access token to call the same Fusion REST APIs used in Test 1.
Successful API access demonstrates that:
- Interactive authentication works.
- Authorization Code Flow is configured correctly.
- Fusion accepts tokens issued through browser-based authentication.
For details about supported Flows, incl the authorization code flow with Fusion see: https://docs.oracle.com/en/cloud/saas/sales/faaps/configure_oauth.html
This doc visualizes the authorization code flow:
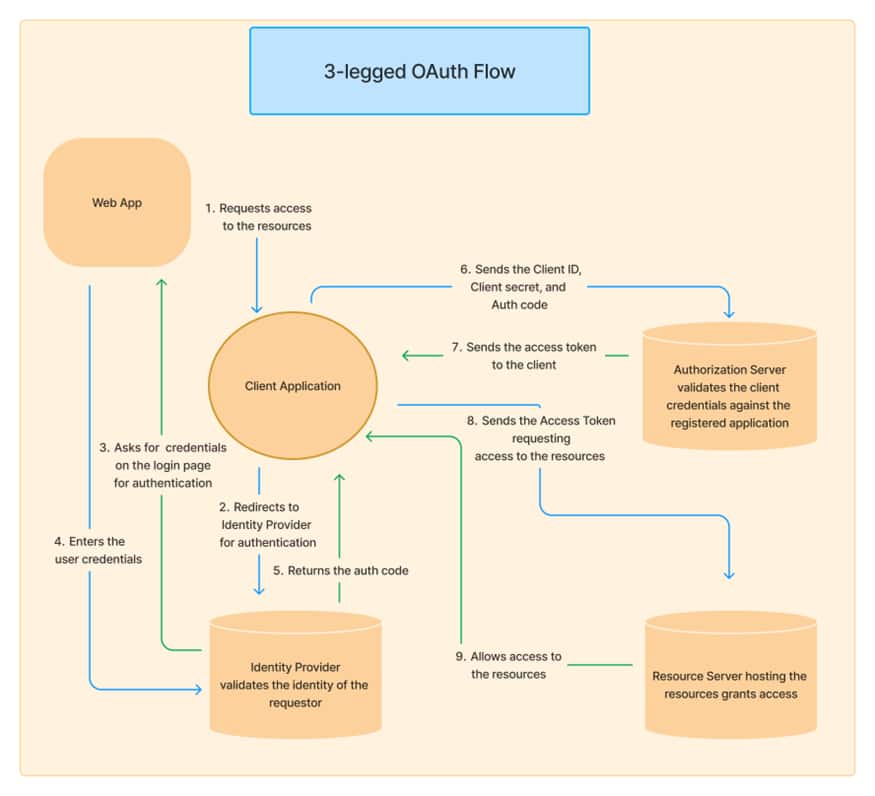
For the Test2 scenario this maps:
- The client application is the rest client
- The identity provider is OCI IAM domain
- The WebApp is either WebUI from IAM domain (browser-based) or the UI from rest client
- The Authorization Server is OCI IAM domain
- The Resource Server is the Fusion instance with the rest API.
Sign-off Criteria for Test 2
Test 2 is successful when:
- User authentication succeeds.
- Authorization Code Flow completes successfully.
- An access token is issued.
- Fusion APIs accept the token and return data.
Next Steps
After both tests have succeeded:
- Trust between Fusion and the IAM Domain has been verified.
- OAuth configuration has been validated.
- Fusion authorization has been confirmed.
You can now proceed with building application integrations such as Oracle APEX, custom web applications, mobile applications, or other API consumers.
For an Oracle APEX implementation example, see:
Enhancing Oracle Fusion Applications with Oracle APEX – Getting Started
https://blogs.oracle.com/apex/enhancing-oracle-fusion-applications-with-oracle-apex-getting-started