
Model Context Protocol (MCP) is rapidly becoming the standard when AI clients need controlled access to tools and data. MCP servers are currently emerging en masse, and numerous MCP registries provide search functions and descriptions for your tailored MCP server.
Oracle now offers four different MCP server approaches for Oracle Database—depending on the operating model and use case:
- Oracle Autonomous AI Database MCP Server: integrated, multi-tenant capability for Autonomous AI Database Serverless.
- Database Tools MCP Server in OCI: a fully managed cloud service that gives MCP clients secure access to Oracle AI Database.
- Oracle SQLcl MCP Server: part of SQLcl and therefore also available in the Oracle extension for Visual Studio Code; ideal for the local developer workstation.
- ORDS MCP Server: available as a new feature in ORDS Standalone since ORDS 26.2. It provides an
/mcpendpoint and securely connects MCP clients to selected database pools through OAuth 2.0/JWT. Oracle MCP · ORDS 26.2 Documentation
In this article, we configure the ORDS 26.2 MCP Server with Keycloak as the identity provider. In principle, any identity-management system that supports the OAuth protocol can be used, for example MS Entra ID, OCI IAM, the mostly free auth0 service, and many more. Keycloak is considered comprehensive, is available beyond cloud environments, and often plays an important role as an identity broker in Kubernetes environments, mediating between local environments and enterprise-wide identity solutions.
The goal: only authenticated users with the Keycloak realm role saleshistory are granted access to a designated MCP database pool.
Note: The credentials used below are suitable only for a demo. In production environments, passwords belong in a secret store; MFA and restrictive client-registration policies are mandatory.
Target architecture
The MCP client—for example MCPJam —calls the ORDS /mcp endpoint. ORDS directs the client to Keycloak, which authenticates the user and issues an access token. ORDS then checks the signature, issuer, audience, the global MCP scope, and the user’s role.
The key point: ORDS executes the tools provided through MCP via a direct database pool. The pool credentials determine which database user executes SQL; the Keycloak role determines whether the user may see and use the pool at all. The role can be queried in the database session context, allowing additional security rules to be defined.
Prerequisites
- ORDS 26.2 as a standalone deployment or Docker container. The MCP endpoint is not available for Tomcat or WebLogic deployments.
- An accessible Keycloak server, version 27.0 or later.
- A direct ORDS database pool for the Sales History data.
- An MCP-capable client, such as MCPJam.
- Example addresses:
- ORDS:
https://ords.example.com - Keycloak:
https://keycloak.example.com - Keycloak realm:
ordsmcp
- ORDS:
Enable ORDS MCP and connect it to Keycloak
First, enable the new MCP endpoint in ORDS:
ords --config /path/to/conf config set --global feature.mcp trueNext, configure ORDS to validate JWTs as part of an OAuth sign-in. The values must exactly match the tokens later generated in Keycloak.
ords --config /path/to/conf config set --global \
  mcp.security.jwt.profile.issuer \
  https://keycloak.example.com/realms/ordsmcp

ords --config /path/to/conf config set --global \
  mcp.security.jwt.profile.audience \
  https://ords.example.com/mcp

ords --config /path/to/conf config set --global \
  mcp.security.jwt.profile.jwk.url \
  https://keycloak.example.com/realms/ordsmcp/protocol/openid-connect/certs

ords --config /path/to/conf config set --global \
  mcp.security.jwt.profile.authorization.server.url \
  https://keycloak.example.com/realms/ordsmcp

ords --config /path/to/conf config set --global \
  mcp.security.jwt.profile.role.claim.name /roles
With mcp.security.jwt.profile.role.claim.name /roles, ORDS operates in role mode. ORDS therefore expects a simple role list in the access token, such as:
"roles": [
  "saleshistory"
]
The global scope urn:oracle:dbtools:ords:mcpserver:all also remains mandatory: without it, ORDS does not accept access to the MCP endpoint.
Allow the database pool only for the saleshistory role
First, create a direct ORDS pool or use an existing direct pool. This pool should use a dedicated database account with minimum privileges—for example, a reporting-only user for the Sales History schema.
Then assign the pool to the Keycloak role saleshistory :
ords --config /path/to/conf config --db-pool mcp-sh set \
  mcp.role saleshistory

ords --config /path/to/conf config --db-pool mcp-sh set \
  db.description "Sales History MCP Reporting Database"

For completeness, the usual additional pool parameters are included here:
    ords config --db-pool mcp-sh set db.connectionType basic
    ords config --db-pool mcp-sh set db.hostname mydatabase-host
    ords config --db-pool mcp-sh set db.port 1521
    ords config --db-pool mcp-sh set db.servicename freepdb1
    ords config --db-pool mcp-sh set db.username SH
    ords config --db-pool mcp-sh secret db.password <<EOF
    PwdForSH1234#
    PwdForSH1234#
    EOF
Important: a pool with the mcp.role or mcp.scope parameters is reserved entirely for MCP and is no longer used for regular ORDS REST URL mapping. Therefore, use a separate pool.
Restart ORDS after making the changes. An initial test should now return an OAuth challenge (“www-authenticate”) in the header:
$ curl -i https://ords.example.com/mcp

HTTP/2 401
date: Fri, 24 Jul 2026 14:37:15 GMT
content-type: text/html;charset=iso-8859-1
content-length: 411
www-authenticate: Bearer error="invalid_request", resource_metadata="https://ords.example.com/.well-known/oauth-protected-resource/mcp", scope="urn:oracle:dbtools:ords:mcpserver:all"
cache-control: must-revalidate,no-cache,no-store
strict-transport-security: max-age=31536000; includeSubDomains

<html>
<head>
<meta http-equiv="Content-Type" content="text/html;charset=ISO-8859-1"/>
<title>Error 401 Unauthorized</title>
</head>
<body><h2>HTTP ERROR 401 Unauthorized</h2>
<table>
<tr><th>URI:</th><td>/mcp</td></tr>
<tr><th>STATUS:</th><td>401</td></tr>
<tr><th>MESSAGE:</th><td>Unauthorized</td></tr>
<tr><th>SERVLET:</th><td>oracle.dbtools.ords.mcp.McpServlet-1800a575</td></tr>
</table>
</body>
</html>
With a complete configuration, ORDS responds with 401 Unauthorized and refers to its OAuth resource metadata in the WWW-Authenticate header. Important: ORDS generates a so-called well-known URL and prefixes it with the protocol (http or https), depending on whether ORDS was started in “plain” mode or with the parameters for certificates, HTTPS port, and HTTPS hostname.
Create the realm and demo user in Keycloak
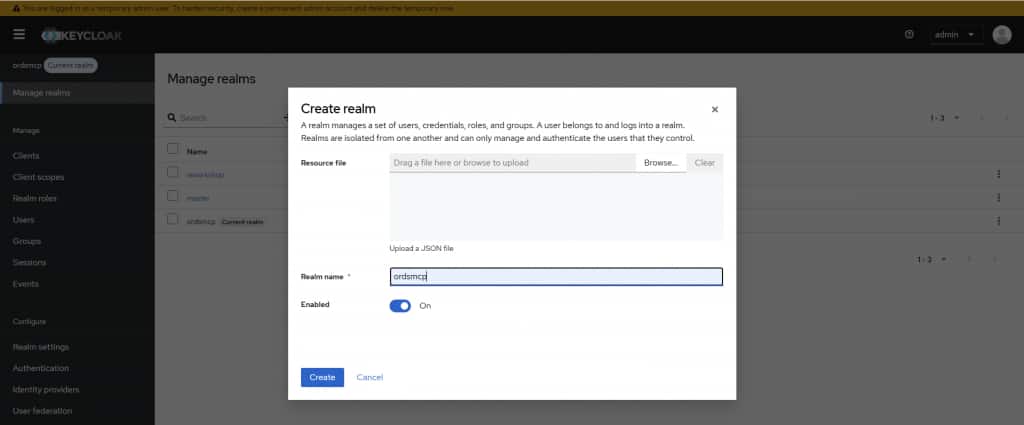
Sign in to the Keycloak Admin Console and create a realm:
- Open the realm selector and choose Create realm.
- Enter
ordsmcpas the name. - Save the realm.
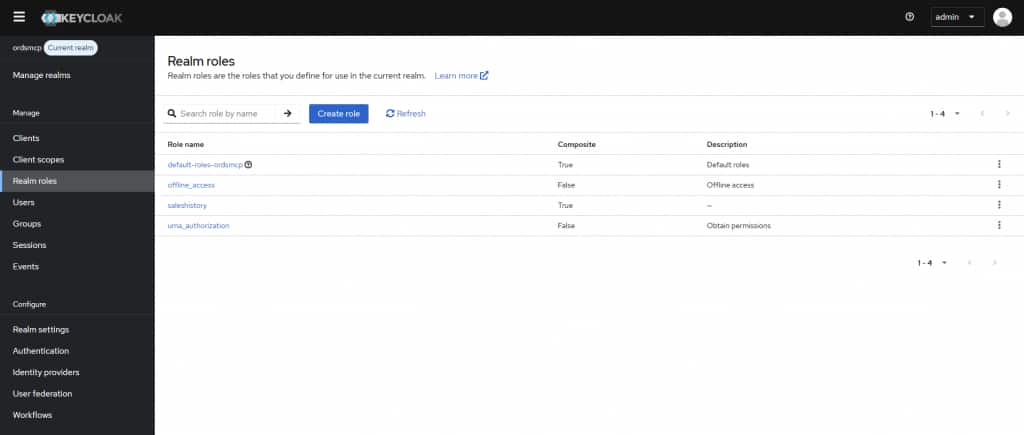
Then create the required realm role:
- Go to Realm roles.
- Choose Create role.
- Create the
saleshistoryrole.
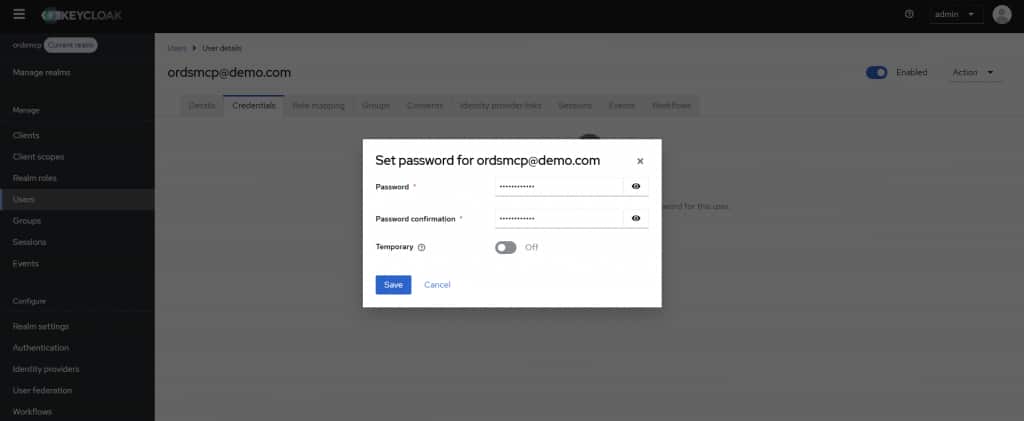
Now create the demo user:
- Open Users and choose Add user.
- Set the username and email to
ordsmcp@demo.com. - After saving, open the Credentials tab.
- Set the password to
Welcome1234#. - Disable Temporary so Keycloak does not force a password change at first sign-in.
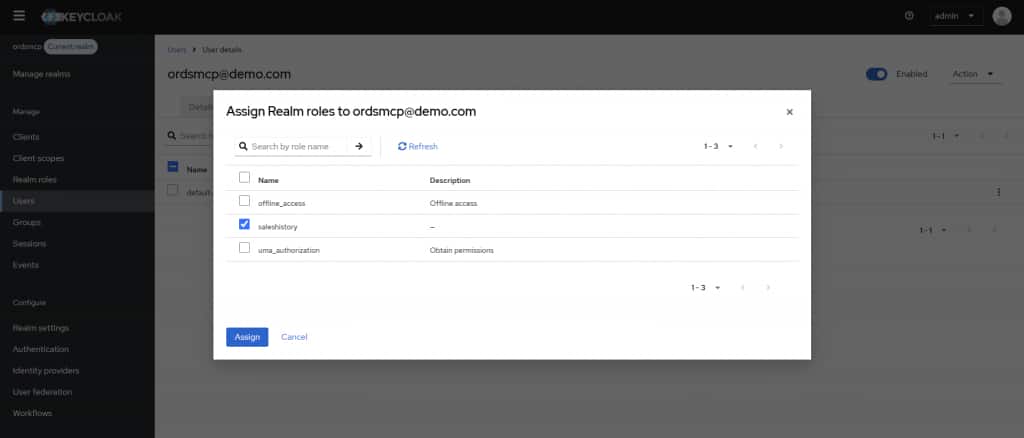
- Go to Role mapping and assign the
saleshistoryrealm role.
Configure the ORDS MCP scope and token mapping
For ORDS to accept access, the access token must contain the urn:oracle:dbtools:ords:mcpserver:all scope as well as the appropriate audience and role list.
Create a client scope
- Go to Client scopes.
- Choose Create client scope.
- Use the following name:
urn:oracle:dbtools:ords:mcpserver:all- Set the type to Optional.
- Save the client scope.
Add an audience mapper
- Open the new client scope and select the Mappers tab.
- Click Configure a new mapper.
- Select Audience.
- For example, give it the name
ords-mcp-audience. - Enter the ORDS MCP endpoint as the custom audience:
https://ords.example.com/mcp- Enable Add to access token.
- Save.
The audience must exactly match mcp.security.jwt.profile.audience in the ORDS configuration.
Output realm roles as a flat list
- Create another mapper in the same client scope.
- Select User Realm Role.
- For example, use the name
realm-roles-for-ords. - Set Token Claim Name to:
roles- Set Claim JSON Type to
String. - Enable Multivalued.
- Enable Add to access token.
- Save.
The result is deliberately not the usual nested Keycloak structure under realm_access.roles, but a simple list:
{
  "scope": "openid urn:oracle:dbtools:ords:mcpserver:all",
  "aud": "https://ords.example.com/mcp",
  "roles": [
    "saleshistory"
  ]
}
This exact flat claim structure matches the ORDS setting:
mcp.security.jwt.profile.role.claim.name=/rolesPrepare dynamic client registration for the setup
MCP clients such as MCPJam in our case, or VSCode, can register dynamically. By default, Keycloak deliberately protects this capability strongly. Therefore, for an isolated demo or test setup, we disable two client-registration policies.
- In the
ordsmcprealm, open Clients. - Open the Client registration tab, then Client Registration Policies.
- Select the policies for anonymous registrations.
- Delete Trusted Hosts Policy.
- Delete Full Scope Policy.
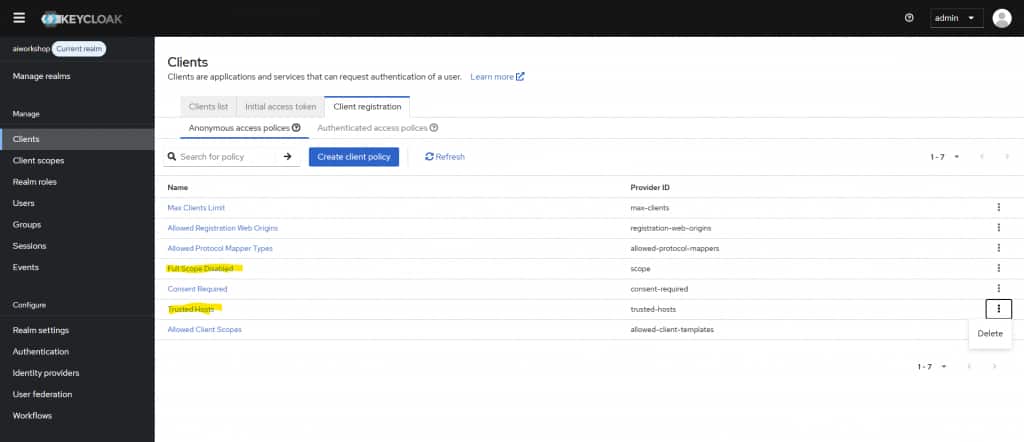
The first change allows redirect URIs or hosts outside a predefined trust list. The second grants newly registered clients the full scope and thus the signed-in user’s realm roles.
Security warning: This configuration is suitable only for a controlled demo. In production, you should at minimum explicitly restrict trusted hosts and preferably use initial access tokens or a dedicated service account with minimum privileges for client registration. Keycloak explicitly documents the effects of both policies. Keycloak Client Registration
For automatic registration of your MCP tool with Keycloak to work, Keycloak version 27.0 or later should preferably be installed. This resolves several related bugs, such as incorrect CORS headers. The “well-known” information page, with links to login, logout, token, refresh, the algorithms used, and more, is now also in the correct location required by RFC 8414. This worked only partially with earlier versions such as 26.4.0.
Alternative: non-dynamic clients:
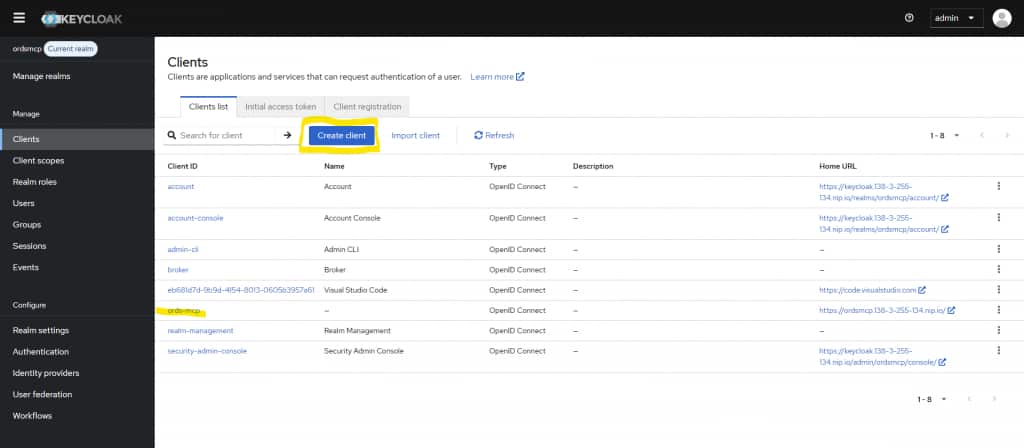
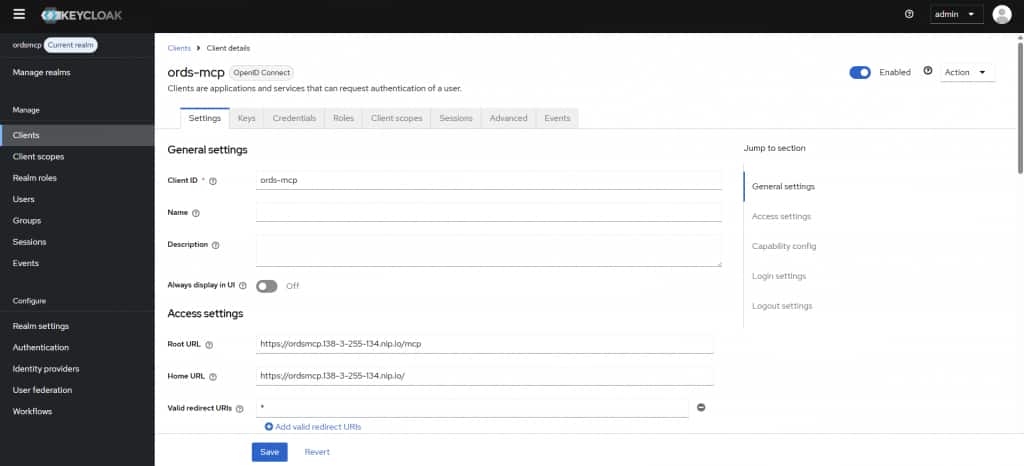
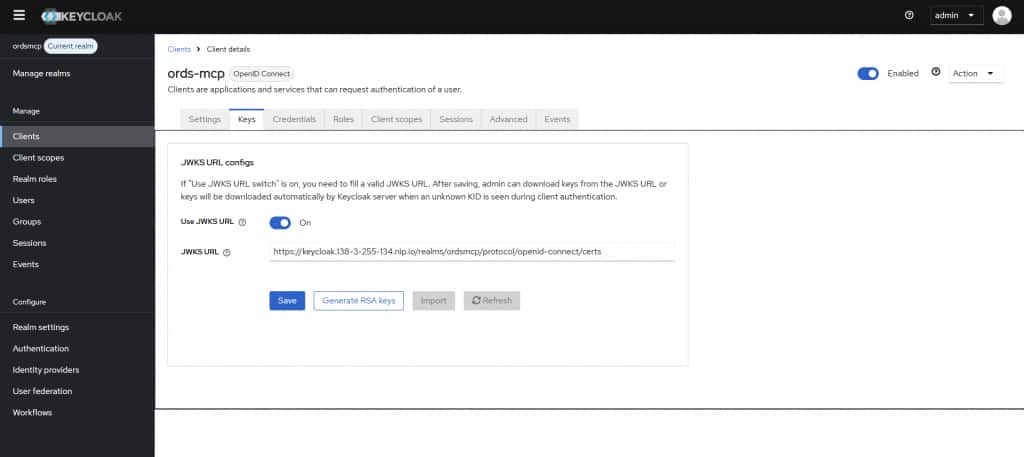
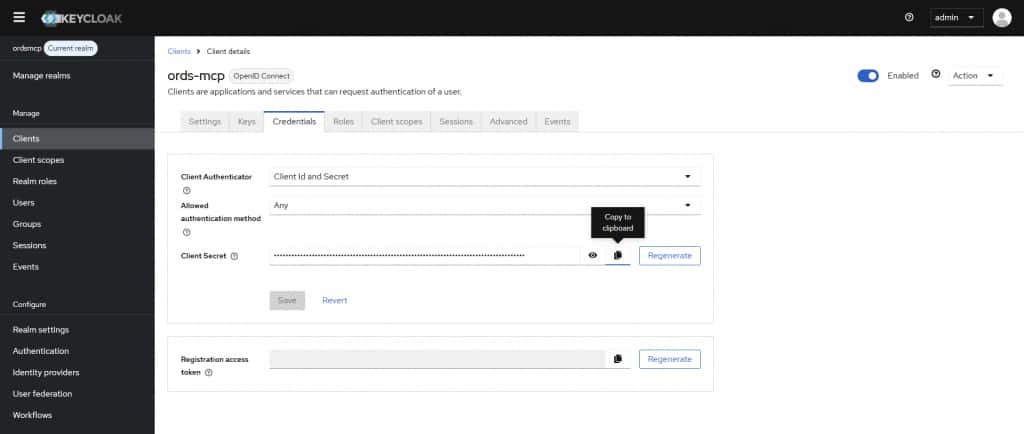
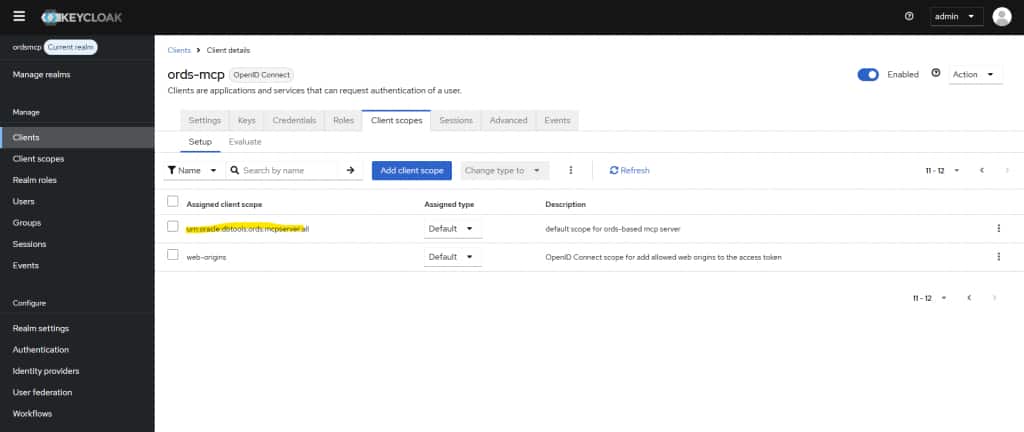
Of course, you can also sign in to Keycloak without dynamically registering your applications (clients). The configuration effort only increases slightly. Explicitly create a new client with a meaningful name. Then enter all permitted server names and redirect URLs for your application(s). On the “Keys” tab, enter the URL of the Keycloak server that provides Java Web Keys for download so ORDS can validate the tokens sent after sign-in. On the “Credentials” tab, note the password for your client for later: the MCP tool needs the client name and its credential when dynamic registration is NOT used. Finally, on the “Client Scopes” tab, add the scope created in the previous section.
Connect sign-in and the MCP client
The actual sign-in and connection to MCPJam then take place through the OAuth flow. The client discovers the protected ORDS endpoint, registers with Keycloak—provided dynamic client registration is allowed—and redirects to the Keycloak sign-in page.
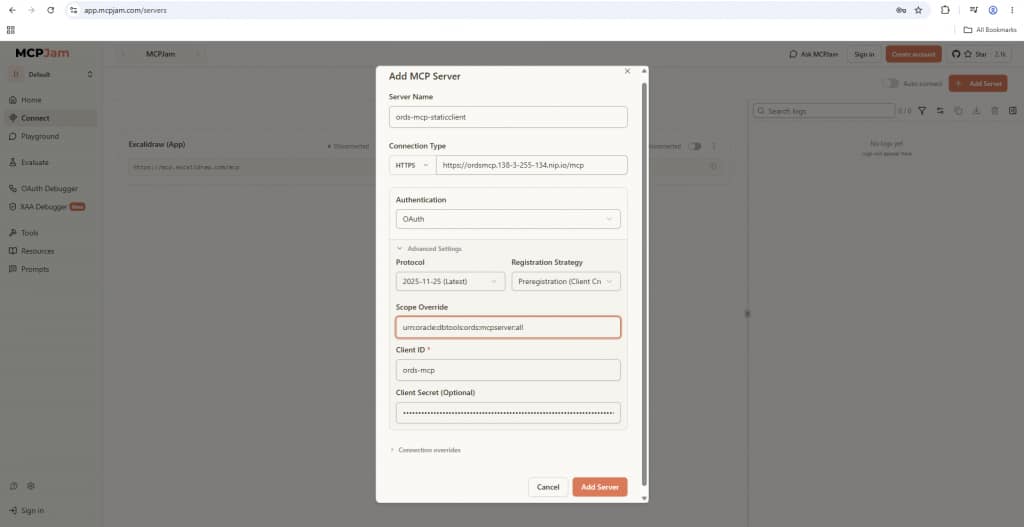
In MCPJam , define a new connection to the ORDS MCP Server for testing. At this point, decide whether to use dynamic client registration by choosing either “Automatic” or “Preregistration” when signing in through OAuth. With “Automatic,” MCPJam attempts to determine how it can sign in by retrieving various URLs from ORDS. With “Preregistration,” a few more parameters are required: the client name, the client password or secret (do you still have it in your clipboard?), and the scope to use, urn:oracle:dbtools:ords:mcpserver:all.
Sign in with the following demo user that you defined in Keycloak at the start:
Username: ordsmcp@demo.com
Password: Welcome1234#
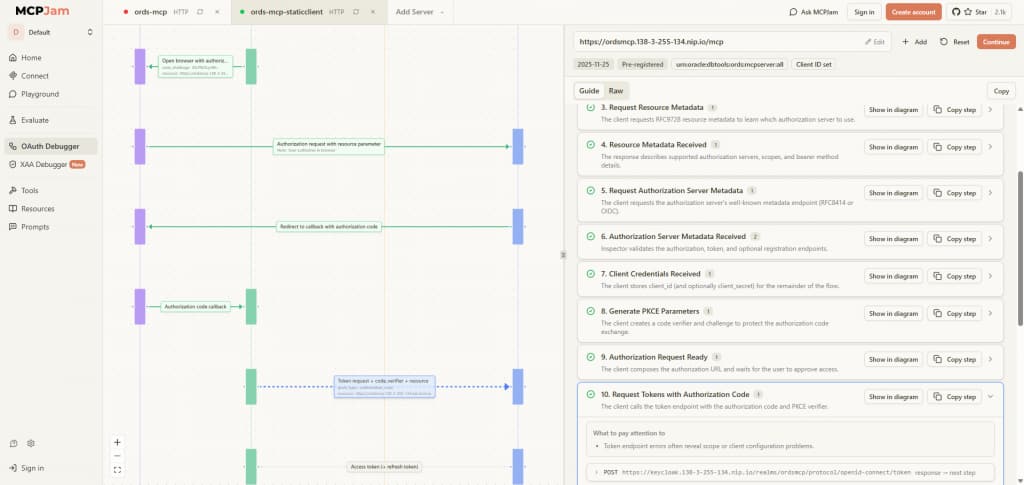
After a successful sign-in, the client receives an access token with the ORDS MCP scope, the correct audience, and the saleshistory role. ORDS validates the token through the Keycloak JWKS endpoint and makes only the mcp-sh pool available. For sign-in issues, MCPJam provides an excellent OAuth and JWT debugger that visualizes every sign-in and registration step and can run each step individually.
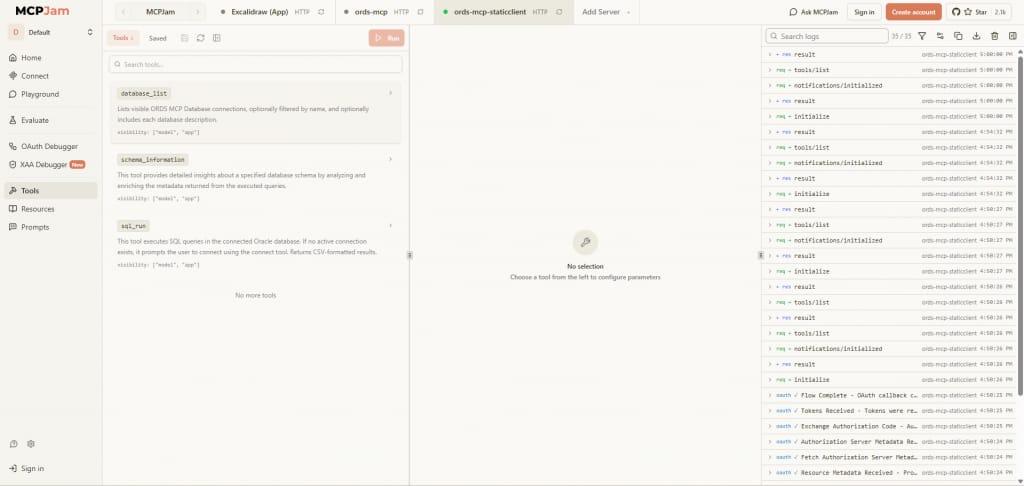
In MCPJam, you should now see the new MCP server and, under “Tools,” the functions provided by MCP: database_list, schema_information, and sql_run.
The MCP server can now be integrated into various chatbots provided by MCPJam, such as ChatGPT, Claude, or your own bot in the so-called “Playground.”
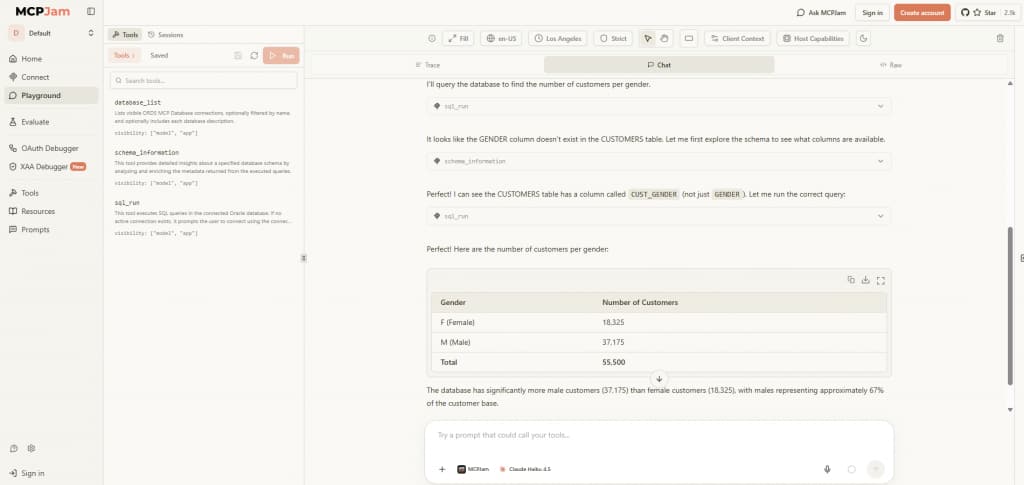
Have fun testing how well each agent and LLM can work with this MCP server without requiring excessive prompting or asking many follow-up questions.
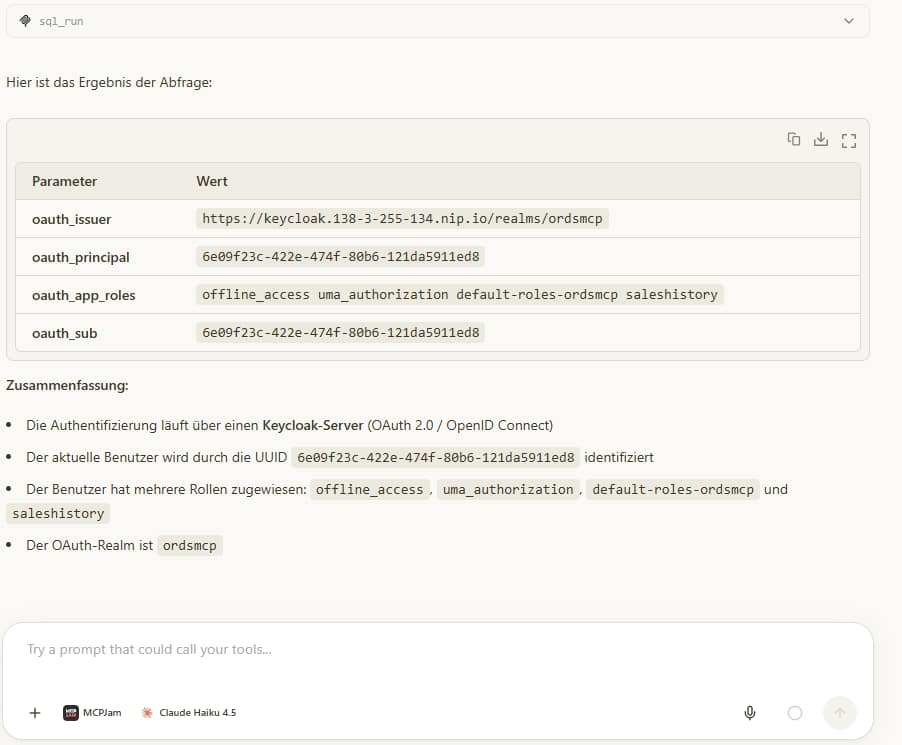
The application role “saleshistory” that is used can, of course, be queried directly in the database session and, for example, applied as a filter to every query. Example query:
select sys_context( 'CLIENTCONTEXT', 'OAUTH_ISSUER' ) as oauth_issuer,
sys_context( 'CLIENTCONTEXT', 'OAUTH_PRINCIPAL' ) as oauth_principal,
sys_context( 'CLIENTCONTEXT', 'OAUTH_APP_ROLES' ) as oauth_app_roles,
sys_context( 'CLIENTCONTEXT', 'OAUTH_SUB' ) as oauth_sub from dual;
When this query is entered and executed in the MCPJam chatbot, it returns, among other things, the saleshistory role in a list. These metadata can be used further—for example, as filters for all queries, as the basis for Virtual Private Database Security Policies and the DBMS_RLS package—or, once also supported by ORDS, for our new database feature Deep Data Security.
Conclusion
ORDS 26.2 brings MCP directly into an established Oracle Database access model. Combined with Keycloak, it creates a traceable security chain:
- Keycloak authenticates the end user.
- The token (JSON Web Token, JWT) contains the scope, audience, and roles, among other information.
- ORDS cryptographically validates the JWT and also checks its validity period.
- The realm role limits which MCP database pools are visible.
- The direct database pool uses dedicated, minimum database privileges.
- The database session context contains application roles that can be used for further security purposes, such as VPD and Deep Data Security.
This makes it possible not only to enable an MCP server technically, but also to integrate it cleanly into existing OAuth, SSO, and role models.
Links
The links that I found most helpful when setting up the new ORDS MCP Server and Keycloak:
- Jeff Smith “ORDS: now a streaming HTTP MCP Server for Oracle Database“
- wadahiro “Protecting MCP Server with OAuth 2.1“
- Oracle Documentation: “Using ORDS Model Context Protocol“
- MCPJam OAuth debugger and MCP tester: https://app.mcpjam.com/
- New feature “Deep Data Security” to secure MCP and AI requests in the database, among other things. Not YET available for ORDS MCP, but on the roadmap.
- Jeff Smith: VPD and Row Level Security Policies with the ORDS MCP Server