Table of contents
Introduction
Almost everyone has heard the opinion, that Oracle Database is the excellent example of an old, traditional, pure-relational, old-fashioned etc, etc, etc… monolithic databaase, which, additionally to that, is also very expensive. Yup. We’ve heard it too. But the fact is that it is completely false. In this article we will prove, that it is possible and easy to build a system, which meets all the modern development approaches, can be provisioned in a minute, has everything needed to start developing an application, which uses all possible data models and – is completely for free! To do this we will use the following components
- Oracle Database 21c XE
- Oracle REST Data Services 22.4.3
- Oracle Application Express 22.2
Below picture is also very well known, I think, to most of Oracle Database users and administrators: it describes one of obvious use cases of Oracle Database multitenant option: support for containerized applications
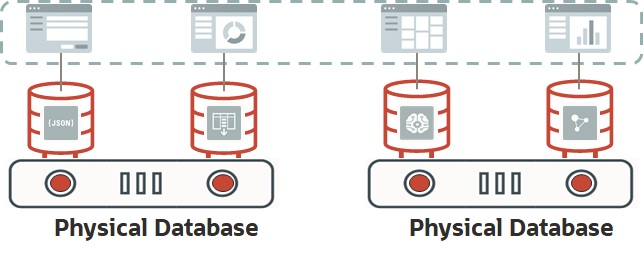
But in this article we will describe a different scenario: instead of providing support for external containers, we will build a container which will provide all the typical Oracle Converged Database services: SODA, PGQL, REST, MongoDB API and APEX. If you want to learn more about Oracle’s converged database features, you can get an overview in the posting Oracle Database Development #blockchain #graph #JSON #lowcode #spatial #SQL #textsearch #XML.
So – let’s start doing this!
Docker Software Installation
At the first stage we need to install docker. Below procedure describes its installation on Oracle Linux 8 and may be different on other operating systems. We assume in this post, that the host machine is already up and works under control of this operating system. Oracle Linux 8, by the way, can be downloaded from here.
All the below commands need to be executed as root on our host machine:
# We will start from installing required packages...
dnf install -y dnf-utils zip unzip java-17-openjdk
# ...after that we will add Docker official repo to our host OS...
dnf config-manager --add-repo=https://download.docker.com/linux/centos/docker-ce.repo
# ...runc needs to be uninstalled, as it is in conflict with Docker software...
dnf remove -y runc
# ...now we can install Docker...
dnf install -y docker-ce
# ...create directory for Docker images and containers...
mkdir /var/lib/docker
# ...and start the Docker engine as a system service
systemctl enable --now docker.service
# ...finally we need to create an OS account, belonging to "docker" group...
# ...we will use this account to work with containers and images...
# ...in case, when an OCI instance is used, it is enough to add "opc" user to this group
useradd -m -d /home/docker -g docker docker
Now we need to reconfigure the system firewall
# We need to enable masquerading to provide network services to containers...
firewall-cmd –-permanent --zone=public --add-masquerade
# ...open well-known ports used by Oracle software...
firewall-cmd --permanent --add-port=1521/tcp
firewall-cmd --permanent --add-port=5500/tcp
firewall-cmd --permanent --add-port=8080/tcp
firewall-cmd --permanent --add-port=8443/tcp
# ...and remember about MongoDB port - it will be used by MongoDB API, which we plan to enable
firewall-cmd --permanent --add-port=27017/tcp
Container Configuration
As we have Docker installed and configured, so we can start to work on the second stage of our project – development of an Oracle Database Express Edition Docker image. We will start from creating a “golden image” – Docker Oracle Linux 8 container where everything will happen… (now we don’t need to work as root – instead of this we will use the account created/modified in the last step of Docker installation stage)
# As we need to install a couple of packages, like Oracle preinstall check, Oracle RDBMS, ords,...
# ...instead of uploading everything into the container, it is better to create it with a folder shared with the host...
# ...we also need to remember about port mapping...
# ...and providing some environment variables into the container, which we will use during software configuration
mkdir $HOME/orainstall
docker create -it --name oracle21xe -p 1521:1521 -p 5500:5500 -p 8080:8080 -p 8443:8443 -p 27017:27017 \
-e DBA_PWD=ConvergedDB_1234 -e USR_PWD=ConvergedDB_1234 \
-e DOCKER_HOST=NOHOSTNAME \
-v $HOME/orainstall:/orainstall oraclelinux:8
where
- DBA_PWD is the environment variable, which will provide to the container DBA password – in the above example we have set it to “ConvergedDB_1234”, and – of course – it can be customized later
- USR_PWD is the environment variable, which will provide to the container end user password – in the above example also set to “ConvergedDB_1234”
- DOCKER_HOST is the environment variable, which is required only if you want to activate SSL for ORDS. In that case it needs to be set to the real “hostname.domain” or IP address of the host machine. In the above example, as we’ll see later, “NOHOSTNAME” value causes, that ORDS will work only in non-SSL mode.
To complete next steps we need to download and store in $HOME/orainstall the following software
- Oracle Database 21c Express Edition for Oracle Linux 8
- Oracle REST Data Services 22.4.3
- Oracle Application Express 22.2
Now we can start to configure the container. Let’s connect to it:
# let's create a root session inside of the container
docker start oracle21xe
docker exec -it oracle21xe /bin/bash
Now let’s install few standard linux packages, which will be used in our configuration
# inside of the container...
dnf install -y sudo hostname zip unzip which java-17-openjdk
As you see, for the purpose of this post we are using OpenJDK instead of OracleJDK… In case of any license-related questions please refer to OracleJDK Licensing FAQs page or contact your sales representative.
Now we can install the software, which we have downloaded into orainstall folder: Oracle Database 21c Preinstall Check, Oracle Database 21c XE, ORDS and Apex. The procedure is exactly the same as in case of installing it on a physical machine, so I will not describe in this article how to do this. The only difference is that in case of installing Oracle Database software in a Docker container we need to set ORACLE_DOCKER_INSTALL environment variable to true:
#...still inside of the container...
export ORACLE_DOCKER_INSTALL=true
#...typical Oracle rpms (preinstall check and database xe21c) installation and database configuration takes place here...
#PLEASE NOTE, that we assume in this post, that during execution of "oracle-xe-21c configure" the DBA password will be set to "ConvergedDB_1234"
The next step is technically optional. We can (but it is not a technical requirement) add oracle user to sudoers file to allow it to make sudo to root. But if we want to make our “Golden Oracle Database Image” customizable – we should do it – it would be possible to make sudo to root and extend functionality of this installation.
#...and still inside of the container...
vi /etc/sudoers
root    ALL=(ALL)       ALL
oracle  ALL=(ALL)       ALL # this is the line we want to add to /etc/sudoers file
After that let’s make our life a little bit easier, by adding some environment variables to oracle’s .bashrc file and setting a password for this account
# ...still and still inside of the container...
vi /home/oracle/.bashrc
# User specific aliases and functions
export ORACLE_NET_HOME=/opt/oracle/homes/OraDBHome21cXE/network/admin
export ORACLE_CFG_SCRIPTS=/opt/oracle/scripts
export ORACLE_HOME=/opt/oracle/product/21c/dbhomeXE
export ORACLE_SID=XE
export ORDS_HOME=/opt/oracle/ords
export ORDS_CONFIG=$HOME/ordsconfig
export PATH=$ORACLE_CFG_SCRIPTS:$ORACLE_HOME/bin:$ORDS_HOME/bin:$PATH
# ...now let's setup the password for oracle to ARandomOne_1234. It will be changed automatically to $DBA_PWD value
# during the first start of the container with all the software installed
passwd oracle
Now we can “install” ORDS and APEX – I mean – simply unzip files into appropriate directories…
# ...let's become "oracle" user inside of the container we're working on...
su - oracle
# ...being already "oracle" - create a directory for ORDS configuration...
mkdir $HOME/ordsconfig
# ...and another directory, where we'll place all the scripts required to automate the startup and configuration process...
mkdir /opt/oracle/scripts
# ...and "install" ords and apex - which means simply unzipping appropriate files into appropriate directories.
unzip /orainstall/ords-latest.zip -d /opt/oracle/ords
unzip /orainstall/apex_22.2.zip -d /opt/oracle/product/21c/dbhomeXE
The next step is to configure APEX and ORDS – exactly in the same way as in case of a traditional installation on a physical machine. As these processes are well documented in many manuals, blog posts and even some Youtube videos, I will not describe them here, just want to add the note, that even in case when we plan to run an SSL-based configuration, at the stage of initial configuration of ORDS we’ll configure only http mode and port 8080… Why? Of course, if we have an SSL certificate, then we can configure ORDS to use https from its first run, but we assume in this post, that our container is not being built for a production purposes, (which usually means, that we have company certificates, public domains, etc…) but rather for a demonstration. In that case ORDS started with –secure parameter will generate its own, self-signed certificate, which is good enough for doing some demos, even if it causes, that a web browser generates a warning…
After configuring ORDS we may want to (as it is not being done in ords installation automatically)
- Create an additional database user, which will play the role of a “developer” and grant to this account privileges allowing for development a database application.
- Configure a Database Actions user. It is described, for example here.
- Enable MongoDB API. It is described, for example here.
- Create sample database schemas. It is also well described in multiple places.
The last step is specific to our confguration and – the most important – we need to automate the initial configuration and startup of OracleNet, database and ords… Of course – there are many ways of how to do this, but there’s always need to remember about one fundamental difference between a docker-based installation and installation on a physical or even virtual, but “traditionally virtualized” machine: Docker Oracle Linux 8 image doesn’t use systemd, since then typical oratab-based methods are in such cases not applicable. In this article we’ll use an ancient and (almost, fortunately not quite) forgotten art of shell scripting ;).
Below diagram presents scripts which we want to develop. All of them will be stored in /opt/oracle/scripts directory and owned by “oracle” user:
startup.sh (main script, which will be used in EntryPoint attribute of the Docker image we're working on)
    |
    |---- oraclenetsetup.sh (executed only once, during container first start, it configures listener.ora and tnsnames.ora files
    |
    |---- dbstartup.sh (executed every time when container starts. It starts listener and the database)
    |            |
    |            |
    |             ---- dbstartup.sql (starts the database)
    |
    |---- oraclepwdsetup.sh (executed only once, during container first start, it configures passwords for database users
    |     and oracle OS user
    |            |
    |            |
    |             ---- oraclepwdsetup.sql (called by oraclepwdsetup.sh, it changes passwords directly in the database)
    |
    |
     ---- apexstartup.sh (executed every time container starts - it starts ords)
So – at the beginning let’s automatize the OracleNet files configuration. We need to do this, as their content (listener.ora and tnsnames.ora) depends on a hostname of the CONTAINER. And this hostname may be setup automatically during a container creation…
# ...being still "oracle" user inside of the container...
# ...let's copy listener.ora and tnsnames.ora to .sample files....
cp $ORACLE_NET_HOME/listener.ora $ORACLE_NET_HOME/listener.sample
cp $ORACLE_NET_HOME/tnsnames.ora $ORACLE_NET_HOME/tnsnames.sample
# ...and change all occurences of the container hostname to %HOSTNAME% tag in these .sample files...
# ...and now we can start to work on the first of the serie of scripts we need to develop...
--- content of oraclenetsetup.sh ---
#!/bin/bash
if [ ! -f ${ORACLE_CFG_SCRIPTS}/system_already_configured ];
then
        export HOSTNAME=`hostname`
        printf "Configuring new container %s.\n" $HOSTNAME
        cp $ORACLE_NET_HOME/listener.sample $ORACLE_NET_HOME/listener.ora
        cp $ORACLE_NET_HOME/tnsnames.sample $ORACLE_NET_HOME/tnsnames.ora
        sed -i 's/%HOSTNAME%/'$HOSTNAME'/g' $ORACLE_NET_HOME/listener.ora
        sed -i 's/%HOSTNAME%/'$HOSTNAME'/g' $ORACLE_NET_HOME/tnsnames.ora
        printf "Container %s configured.\n" $HOSTNAME
fi
--- end of oraclenetsetup.sh ---
The next two scripts will change database passwords to $DBA_PWD and $USR_PWD: oraclepwdsetup.sql and oraclepwdsetup.sh
--- oraclepwdsetup.sql content ---
alter user sys identified by &1;
alter user system identified by &1;
alter session set container=xepdb1;
alter user pdbadmin identified by &1;
alter user hr identified by &2;
alter user oe identified by &2;
alter user pm identified by &2;
alter user ix identified by &2;
alter user sh identified by &2;
alter user bi identified by &2;
exit
--- end of oraclepwdsetup.sql content ---


--- oraclepwdsetup.sh ---
#!/bin/bash
# it changes oracle user password to the value provided by DBA_PWD environment variable...
echo -e "ARandomOne_1234\n${1}\n${1}"|passwd
# ...and executes oraclepwdsetup.sql with values provided by DBA_PWD and USR_PWD environment variables.
sqlplus "/ as sysdba" @/opt/oracle/scripts/oraclepwdsetup.sql ${1} ${2}
--- end of oraclepwdsetup.sh ---
Two other scripts are responsible for starting the database up:
--- dbstartup.sql ---
startup
exit
--- end of dbstartup.sql ---


--- dbstartup.sh ---
#!/bin/bash
lsnrctl start
sqlplus "/ as sysdba" @${ORACLE_CFG_SCRIPTS}/dbstartup.sql
--- end of dbstartup.sh ---
Now the script, which starts ORDS…
--- apexstartup.sh ---
#!/bin/bash

if [ "$DOCKER_HOST" = "NOHOSTNAME" ];
then
        # if we have not changed DOCKER_HOST value to a non-default, then it means that we want to use only non-SSL configuration
        nohup ords serve >> ${ORACLE_CFG_SCRIPTS}/oracle21xe.log 2>&1 &
else
        # we have provided a non-default value for DOCKER_HOST, then it means, that we want to use SSL-based configuration
        # in that case ords will generate its own self-signed certificate during the first startup
        nohup ords serve --secure --port 8443 >> ${ORACLE_CFG_SCRIPTS}/oracle21xe.log 2>&1 &
fi
--- end of apexstartup.sh ---
Now it’s time to finalize our small project. The main script – startup.sh
--- startup.sh ---
#!/bin/bash

# as we will use this script as the container entrypoint, it will not execute $HOME/.bashrc...
# ...so we need to setup the environment.
export ORACLE_NET_HOME=/opt/oracle/homes/OraDBHome21cXE/network/admin
export ORACLE_CFG_SCRIPTS=/opt/oracle/scripts
export ORACLE_HOME=/opt/oracle/product/21c/dbhomeXE
export ORACLE_SID=XE
export ORDS_HOME=/opt/oracle/ords
export ORDS_CONFIG=$HOME/ordsconfig
export PATH=$ORACLE_CFG_SCRIPTS:$ORACLE_HOME/bin:$ORDS_HOME/bin:$PATH

if [ ! -f ${ORACLE_CFG_SCRIPTS}/system_already_configured ];
then
        printf "Starting OracleNet configuration\n" >> ${ORACLE_CFG_SCRIPTS}/oracle21xe.log 2>&1
        ${ORACLE_CFG_SCRIPTS}/oraclenetsetup.sh >> ${ORACLE_CFG_SCRIPTS}/oracle21xe.log 2>&1
        printf "OracleNet configuration completed\n" >> ${ORACLE_CFG_SCRIPTS}/oracle21xe.log 2>&1
        if [ "$DOCKER_HOST" != "NOHOSTNAME" ];
        then
                printf "ORDS SSL reconfiguration.\n"
                # we need to remove an old self-signed certificate if it exists. Otherwise ords will not generate a new one
                rm -f ${ORDS_CONFIG}//global/standalone/self-signed.*
                # we need to configure standalone.https.host property in order to make SSL-based configuration working
                ords config set standalone.https.host ${DOCKER_HOST} >> ${ORACLE_CFG_SCRIPTS}/oracle21xe.log 2>&1
                printf "ORDS SSL reconfiguration completed.\n"
        fi
fi


# if the database instance is not up, there's need to start it up with apex
if [ `ps -ef|grep lgwr|wc -l` -lt 2 ];
then
        ${ORACLE_CFG_SCRIPTS}/dbstartup.sh >> ${ORACLE_CFG_SCRIPTS}/oracle21xe.log 2>&1
        ${ORACLE_CFG_SCRIPTS}/apexstartup.sh >> ${ORACLE_CFG_SCRIPTS}/oracle21xe.log 2>&1
fi


# if we start the container for the first time, there is need to change default passwords
if [ ! -f ${ORACLE_CFG_SCRIPTS}/system_already_configured ];
then
        printf "Starting password configuration\n" >> ${ORACLE_CFG_SCRIPTS}/oracle21xe.log 2>&1
        ${ORACLE_CFG_SCRIPTS}/oraclepwdsetup.sh ${DBA_PWD} ${USR_PWD} >> ${ORACLE_CFG_SCRIPTS}/oracle21xe.log 2>&1
        printf "Password configuration completed\n" >> ${ORACLE_CFG_SCRIPTS}/oracle21xe.log 2>&1
        touch ${ORACLE_CFG_SCRIPTS}/system_already_configured >> ${ORACLE_CFG_SCRIPTS}/oracle21xe.log 2>&1
        printf "New system configuration completed\n" >> ${ORACLE_CFG_SCRIPTS}/oracle21xe.log 2>&1
fi

tail -f /opt/oracle/scripts/oracle21xe.log

--- end of startup.sh ----
Of course, we have to remember about adding execution privilege to all *.sh scripts we have created:
#...being still oracle inside of the container...
chmod 755 ${ORACLE_CFG_SCRIPTS}/*.sh
And that’s all – our work on “golden image container” is done!
Docker Image Creation
Finally the job inside of the container is done. What we need to do now is to create a Docker image, test if it works (by istantiating another image) and – if we want to do this – publish it to a registry. Since then the next steps will be executed on the host machine.
First we need to create an image from the container we’ve prepared:
# ...inside of the host machine...
# ...let's stop the container we were working on...
docker stop oracle21xe
# ... create a "golden image" from this container ...
docker commit -a "Author's data" --change='ENTRYPOINT ["/opt/oracle/scripts/startup.sh"]' \
--change='USER "oracle"' --change='ENV DOCKER_HOST=NOHOSTNAME' \
oracle21xe oracle21xegoldenimage
Now we can create a test container to check how our setup works
# ...still in a host machine as a docker user...
docker create -it --name test \
-p 1521:1521 -p 5500:5500 -p 8080:8080 -p 8443:8443 -p 27017:27017 \
-e DOCKER_HOST="<host>.<domain>|<host_ip_address>" \
oracle21xegoldenimage
# ...and finally - start the test container...
docker start test
We can test services provided by the container in the following way:
- database, by using, for example SQLcl: sql user/password@<docker_host_machine>:1521/xepdb1
- Application Express
- in case, when SSL is configured: https://<docker_host_machine>:8443/ords
- in case, when SSL is not configured: http://<docker_host_machine>:8080/ords
- Database Actions
- In case, when SSL is configured: https://<docker_host_machine>:8443/ords/sql-developer
- In case, when SSL is not configured: http://<docker_host_machine>:8080/ords/sql-developer
Of course, as oracle user is in /etc/sudoers file, we can use root account of the container to install additional packages or, in general, perform further customizations. In general – we have full control over the image we’ve created, which, in case of a test installation is rather an advantage (however – in case, when we want to use such image for a produciton purpose, such configuration may drive to some security threads).
Summary
To summarize all the steps we have completed:
- We have created a Docker image, providing all the services, which are required in a modern development environment, using Oracle Database as its foundation.
- This image can be used to provision and start a new environment in a minute.
- And finally – it is completely for free!
Such Oracle Database Golden Image can be easily used in different CI/CD scenarios, it meets requirements of any modern development environment or DevOps/SysOps approaches. Also Oracle 21c Express Edition has many features coming directly from Enterprise Edition, like, for example, Partitioning or In-Memory options. It also supports multi- and cross-model approach of Converged Database. Of course it has also some limitations, but it is an obvious result of its price – its for free :). So – please, don’t believe in rumours and fake opinions and instead of this…
Have a fun with Oracle Converged Database and Docker Containers 🙂
Important resources
Oracle Database 21c Express Edition Main Page
Oracle Database licensing information
Oracle Database Express Edition Download Page
Note
This Article has been updated to use the newest version of the Oracle Database software: Oracle Databas 23c Free Developer Edition. Updated version can be found here