Keycloak as a component of the enterprise container platform “Oracle Verrazzano” can be used very easily as an identity management system for container and microservice applications thanks to the support of modern programming languages and protocols. However, Keycloak never stands alone, an already existing Identity Management System always has to be connected. Per Identity Federation, users and their metadata like groups are elegantly passed through from other Identity Providers, Keycloak goes from being an Identity Management System to an “Identity Broker”. We would like to show what has to be done for this using the example of the Oracle Identity Cloud Service or its new name “IAM Domain”.
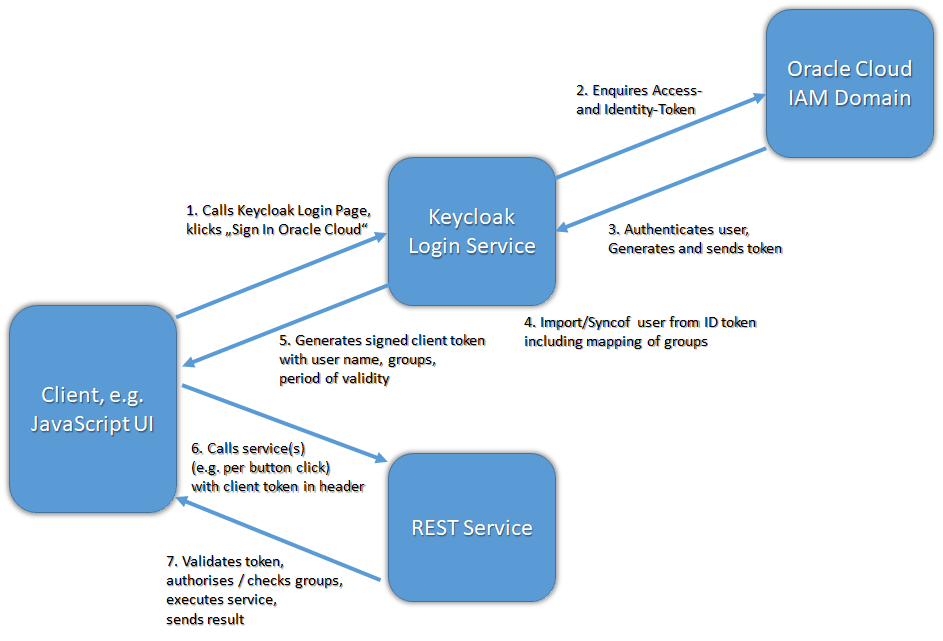 In an older blog entry “Single SignOn in Oracle Verrazzano with Keycloak” we presented a small demo application built with a UI written in JavaScript and accessing a protected REST service. Authorization for the application, both UI and REST service, was handled via the OAuth protocol , right after a login (authentication) via a login page provided by Keycloak. Now we want to link the local Keycloak installation with users and groups managed in an Identity and Access Management Domain (IAM Domain), formerly Identity Cloud Service of Oracle Cloud.
First, we faced the choice of which direction to integrate. Because there are two possibilities: Should an application user log in to Oracle Cloud with his credentials or to Keycloak? Or in other words, which of the two systems should represent an identity broker that requests locally non-existent users from other identity providers and transfers them to itself? The most common way is probably that a container-based application wants to log on to its local identity management system. In our case this would be the Keycloak belonging to the local installation. This identity management system should then communicate with other identity providers such as the Oracle Identity Cloud Service (or an IAM domain) in such a way that users stored there who are not yet defined in Keycloak are synchronized. This process would also involve mapping groups or roles that the user belongs to in the other identity provider to locally defined groups. The Keycloak system typically presents itself to the Identity Cloud Service as a client or application (type), and the Identity Cloud Service is stored in return as an “Identity Provider” in Keycloak with all the necessary access data.
The second decision to be made concerned the protocol to be used for this “identity federation”, the merger of two identity management systems. The common denominators here are SAML and OpenID Connect. For our example, we chose the more recent OpenID Connect, which exchanges its metadata in the convenient and very flexible JSON format and works with easily understandable JWTs (JSON Web Tokens), also called OAuth Tokens. Under the hood, the identity provider provides several URLs to generate access tokens and identity tokens, to renew them in case of imminent expiration or to enable a single sign-off.
What are OAuth and OpenID Connect ?
To keep the two mechanisms OAuth and OpenID Connect apart, a brief explanation: OAuth represents an authorization option in which a user-specific token is generated in JSON format. This can be used for transparent logins to permitted servers until it typically loses its validity after several minutes and has to be renewed. The form of authentication by which the token is generated is left open in OAuth, since in addition to “confidential” clients such as end users, “public” clients such as end devices without user IDs are also provided for in OAuth.
OpenID Connect enables a real Single SignOn, can query user data and logins in other Identity Providers to make them visible and usable or to transfer them from one Identity Management System to another, e.g. for linking local groups. A full import or sync of a user from another Identity Management System, so that the user can be considered a “local” user, would be called Identity Provisioning and comes to full bloom with another standard, SCIM.
OpenID Connect relies on OAuth authentication: Part of the OpenID Connect mechanism, for example, is to use a “technical” user access via OAuth to retrieve the actual desired user data. These come with various (optional) metadata such as email address, full name and also group memberships. All of this information is also contained in a JSON web token called an Identity Token. Also the access with a technical user, who is allowed to retrieve this information in the first place, is present as a JWT – the so-called Access Token. A more detailed and quite understandable explanation of Identity Federation using OpenID Connect can be found for example on the pages of “connect2id.com”. The blogger Gayn Winter offers concise explanations of OAuth, OpenID Connect und SCIM and a short comparison on his pages.
Now let’s begin with
Setup of Keycloak as client or application in Oracle Identity Cloud Service / IAM Domain
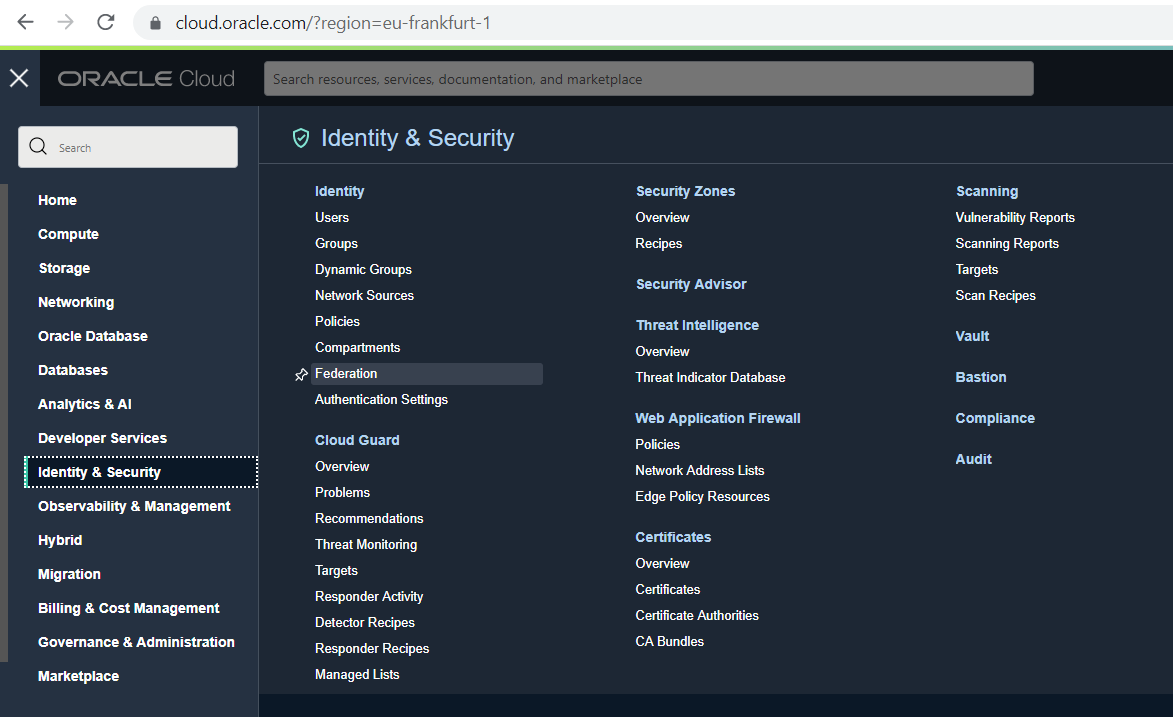
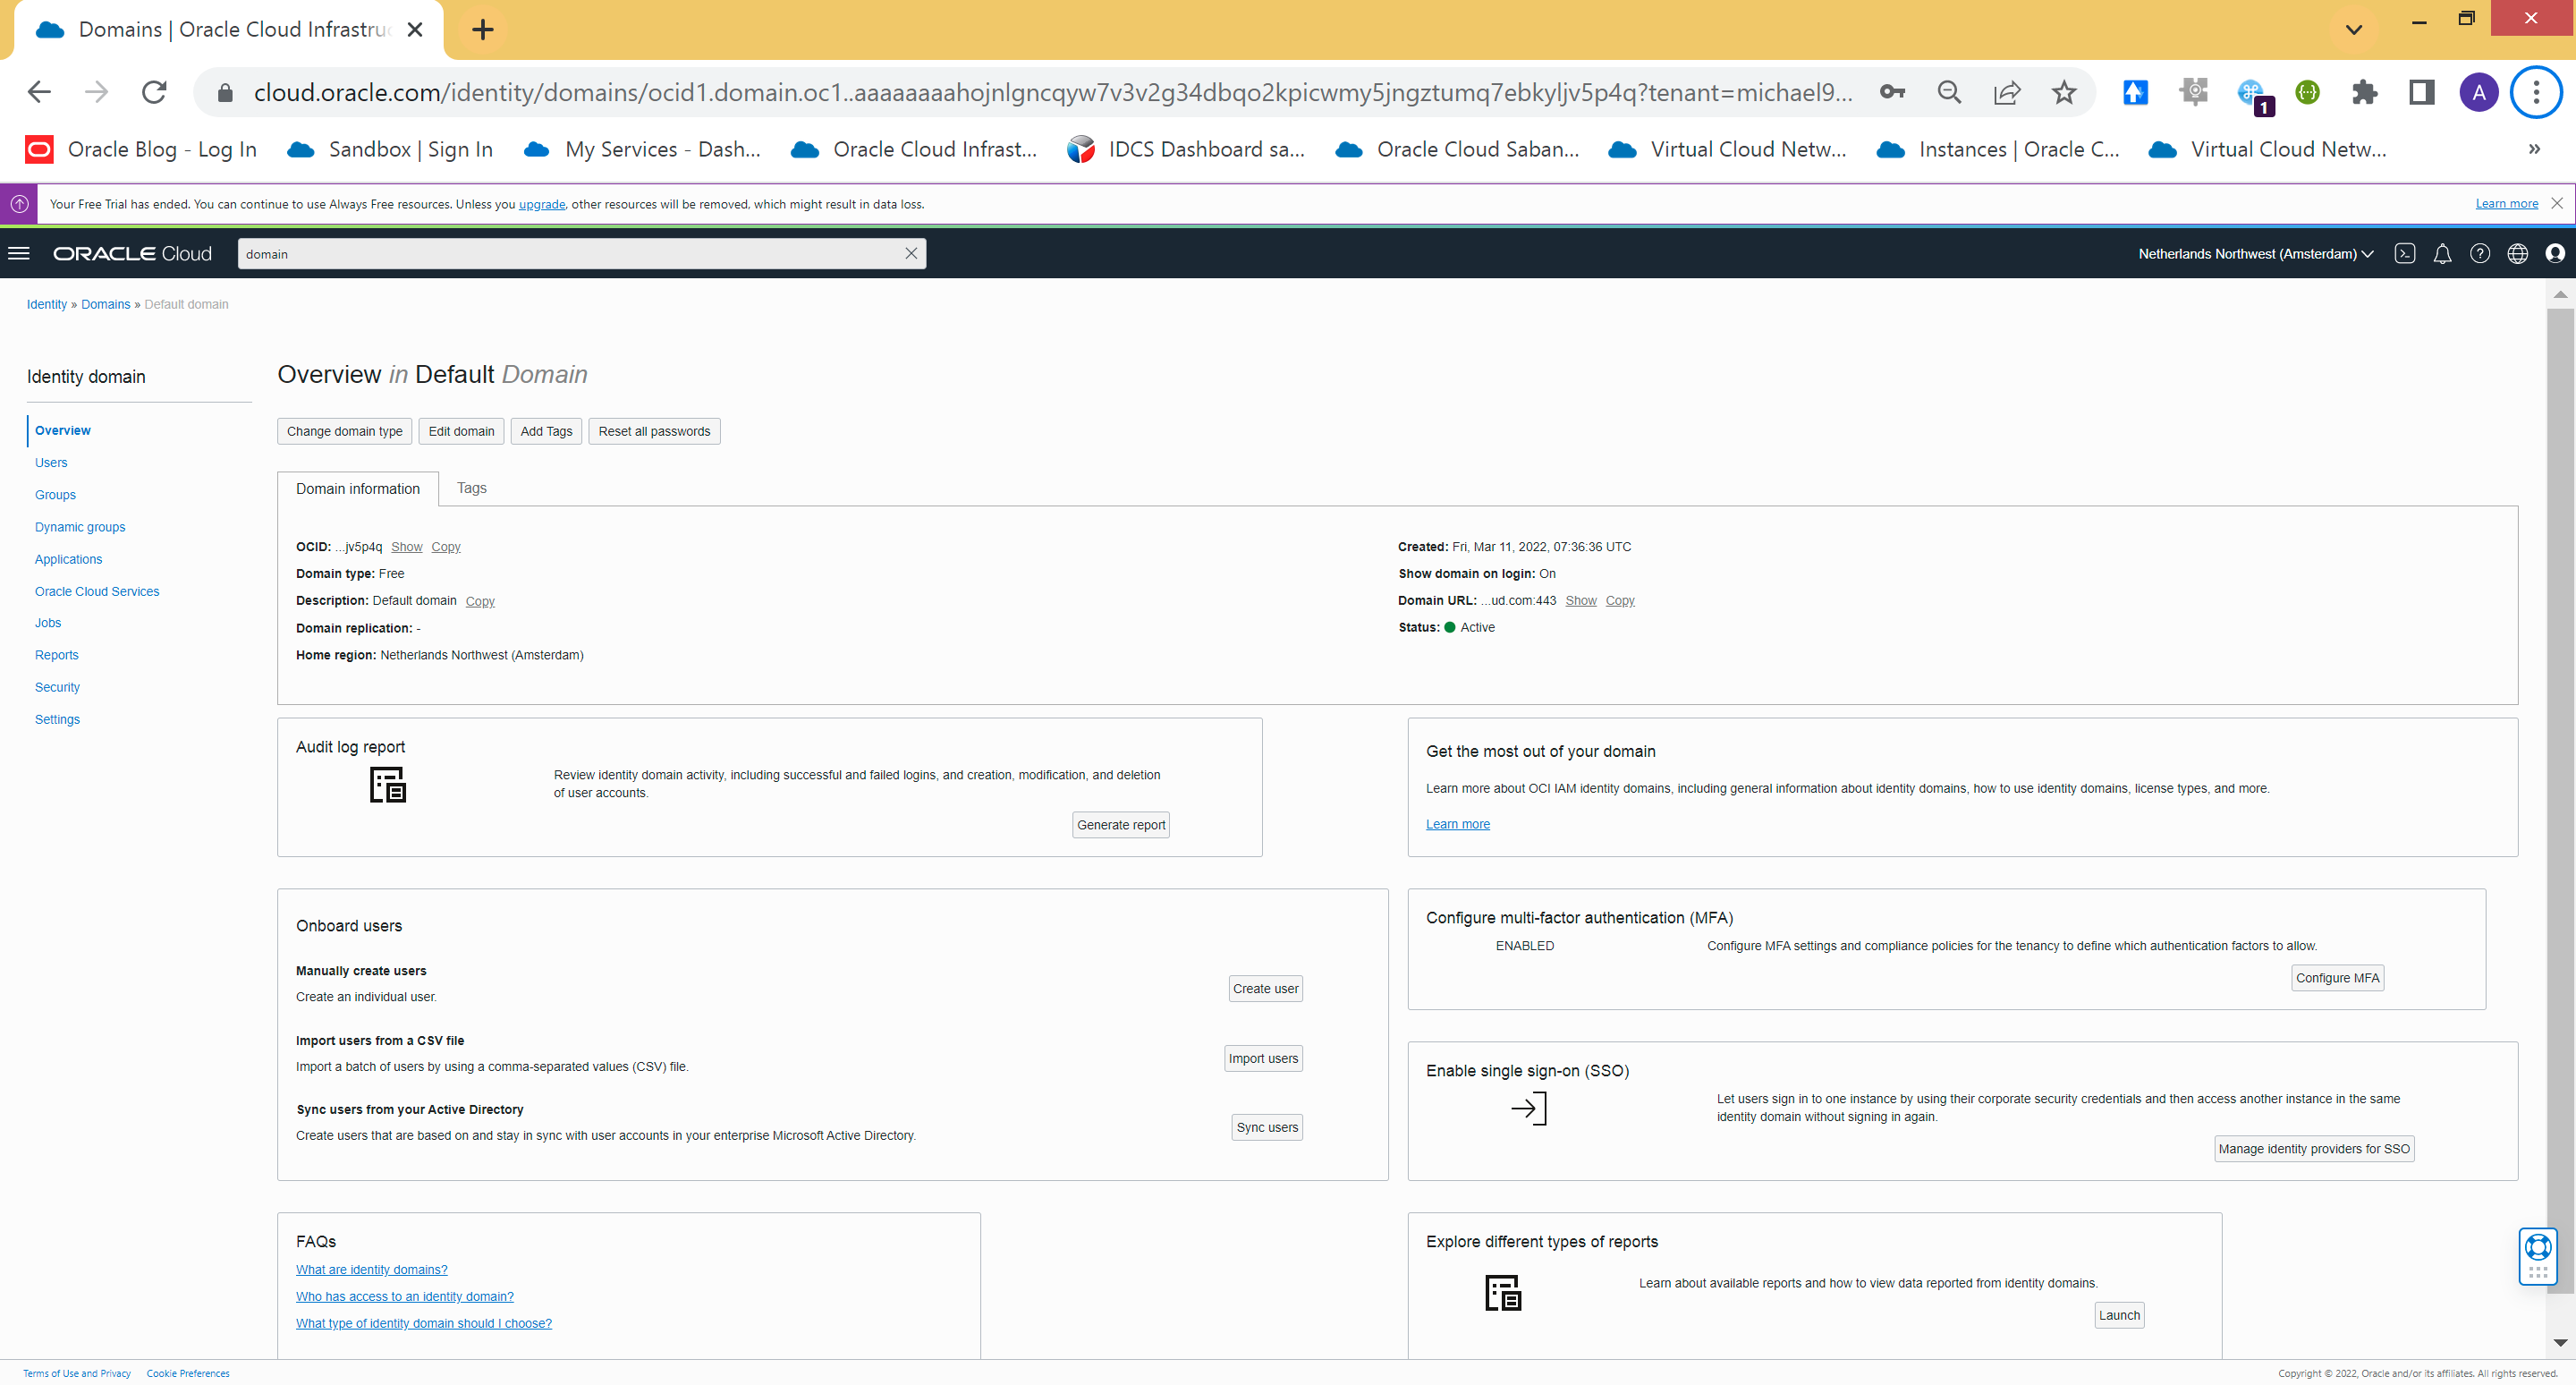
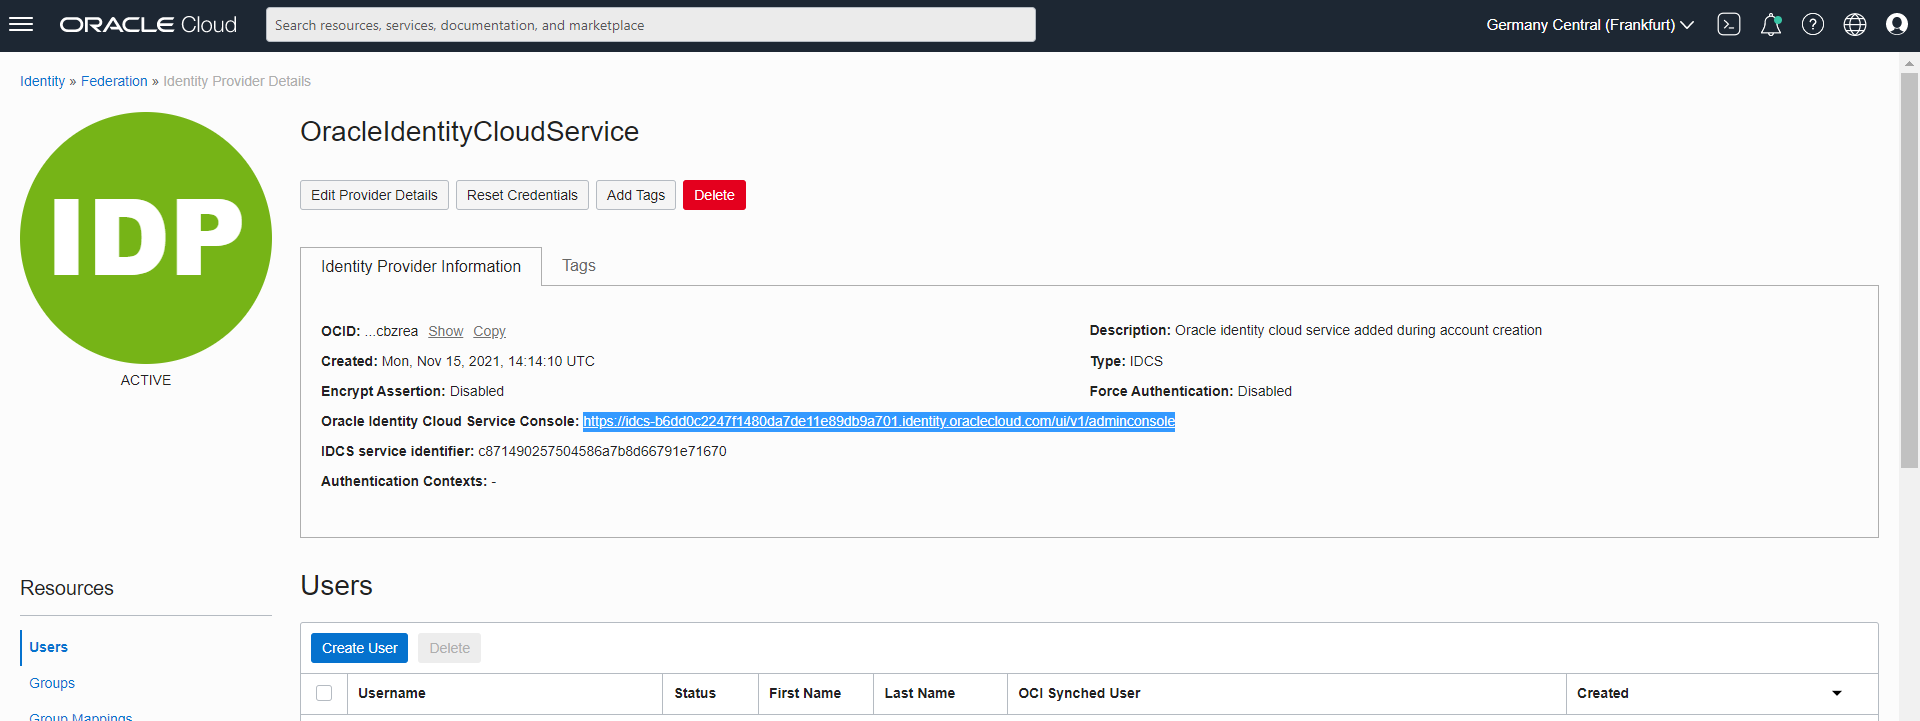
Log in to Oracle Cloud with a user who has enough privileges to set up the Identity Cloud Service or the newer IAM Domain designation, e.g. as an administrator of your cloud tenant. Then switch to the “Identity Management” -> “Federation” section. In the new interface for IAM domains, click “Identity Management -> Domains -> Default Domain” instead.
Now click on your Identity Cloud Service instance or Identity Domain in the classic interface:
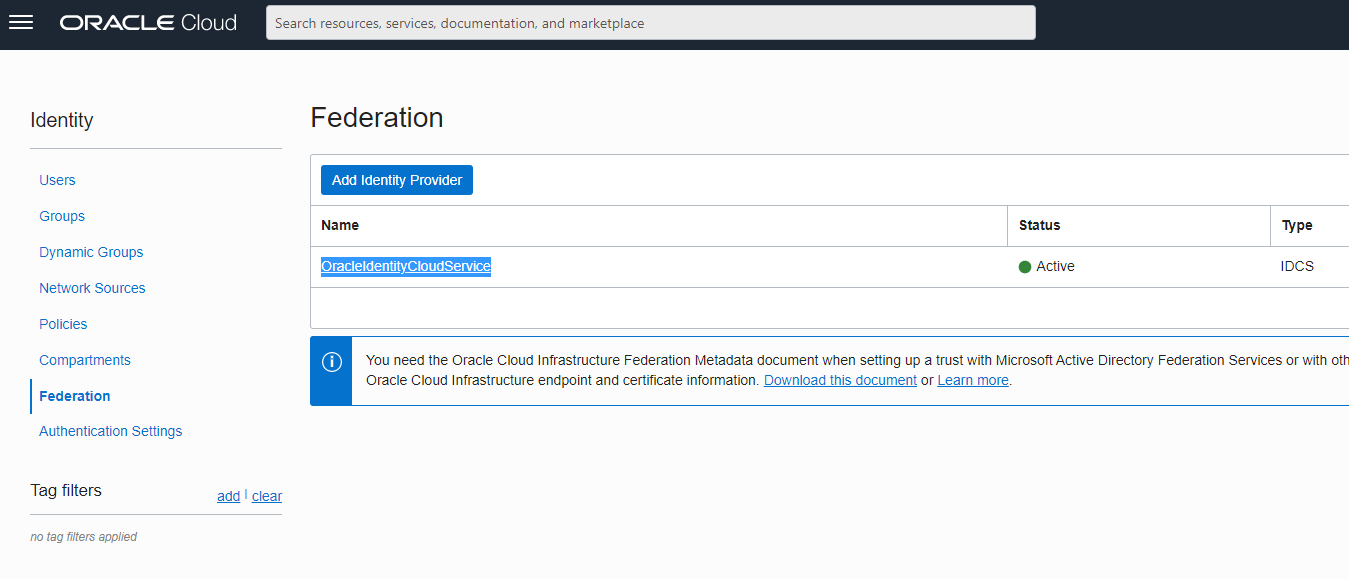
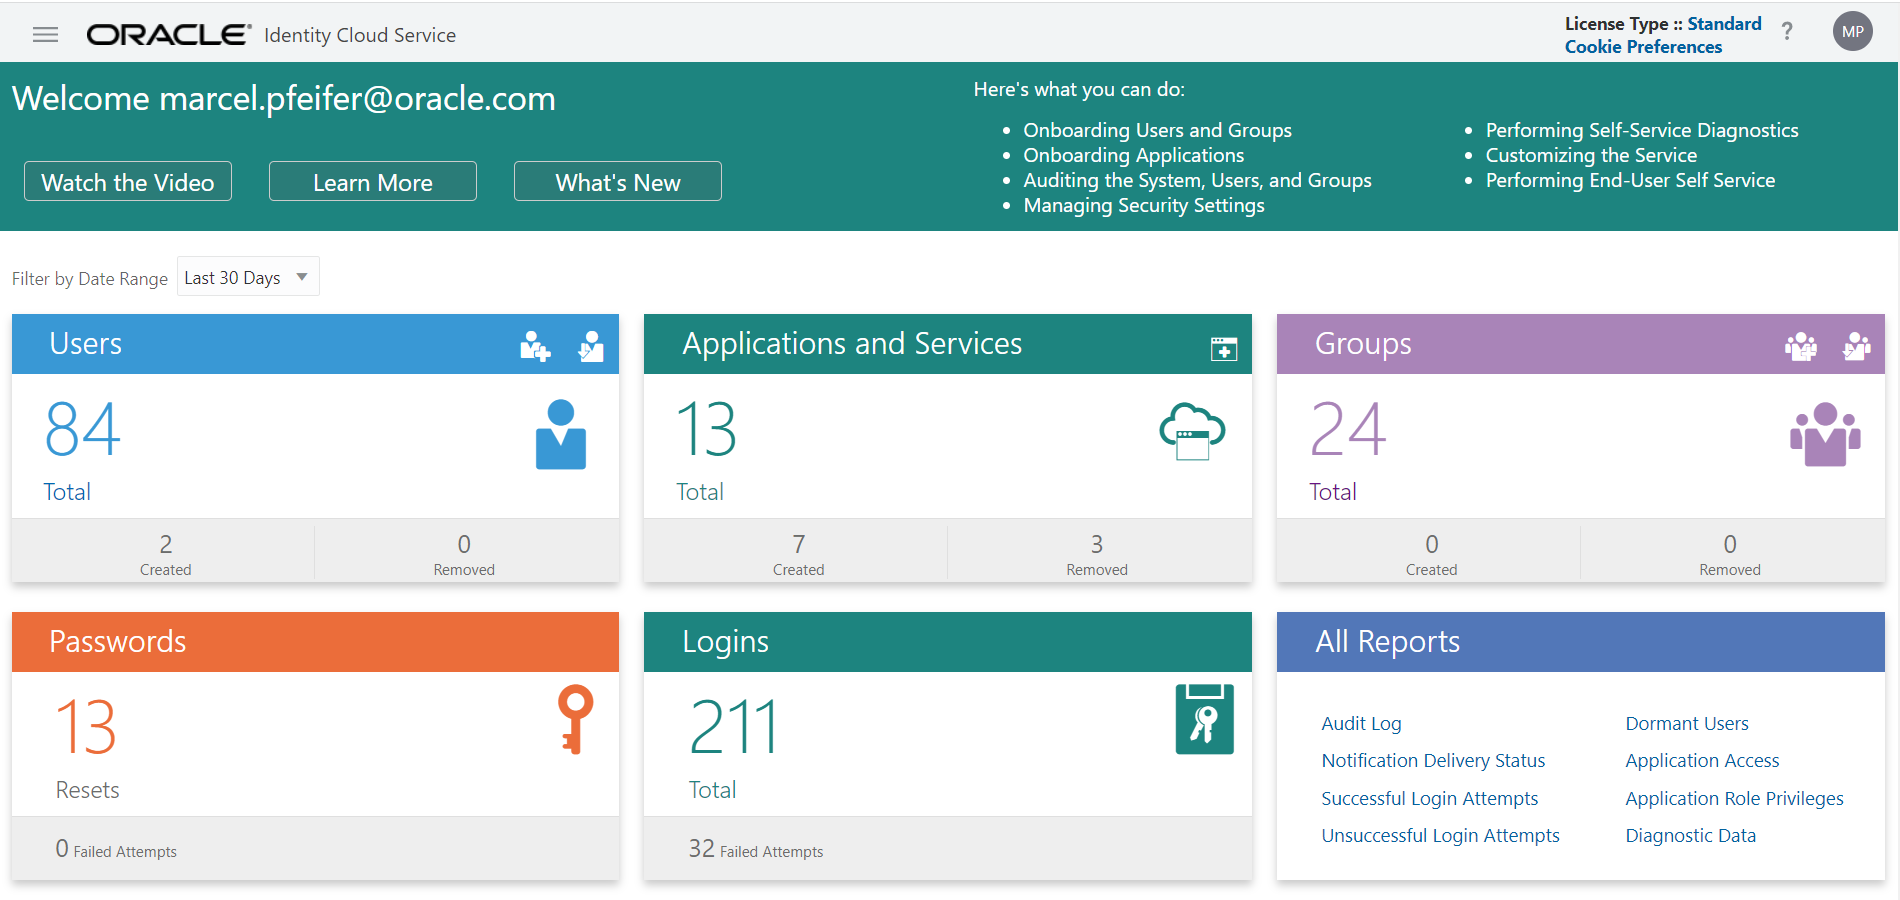
On the following page in the traditional interface, you will get the link to your IDCS Console. Click the link.
Now click on the cloud icon in the Applications and Services tile.
In the new IAM Domain interface, you will see a link to “Applications” on the left, click that instead.
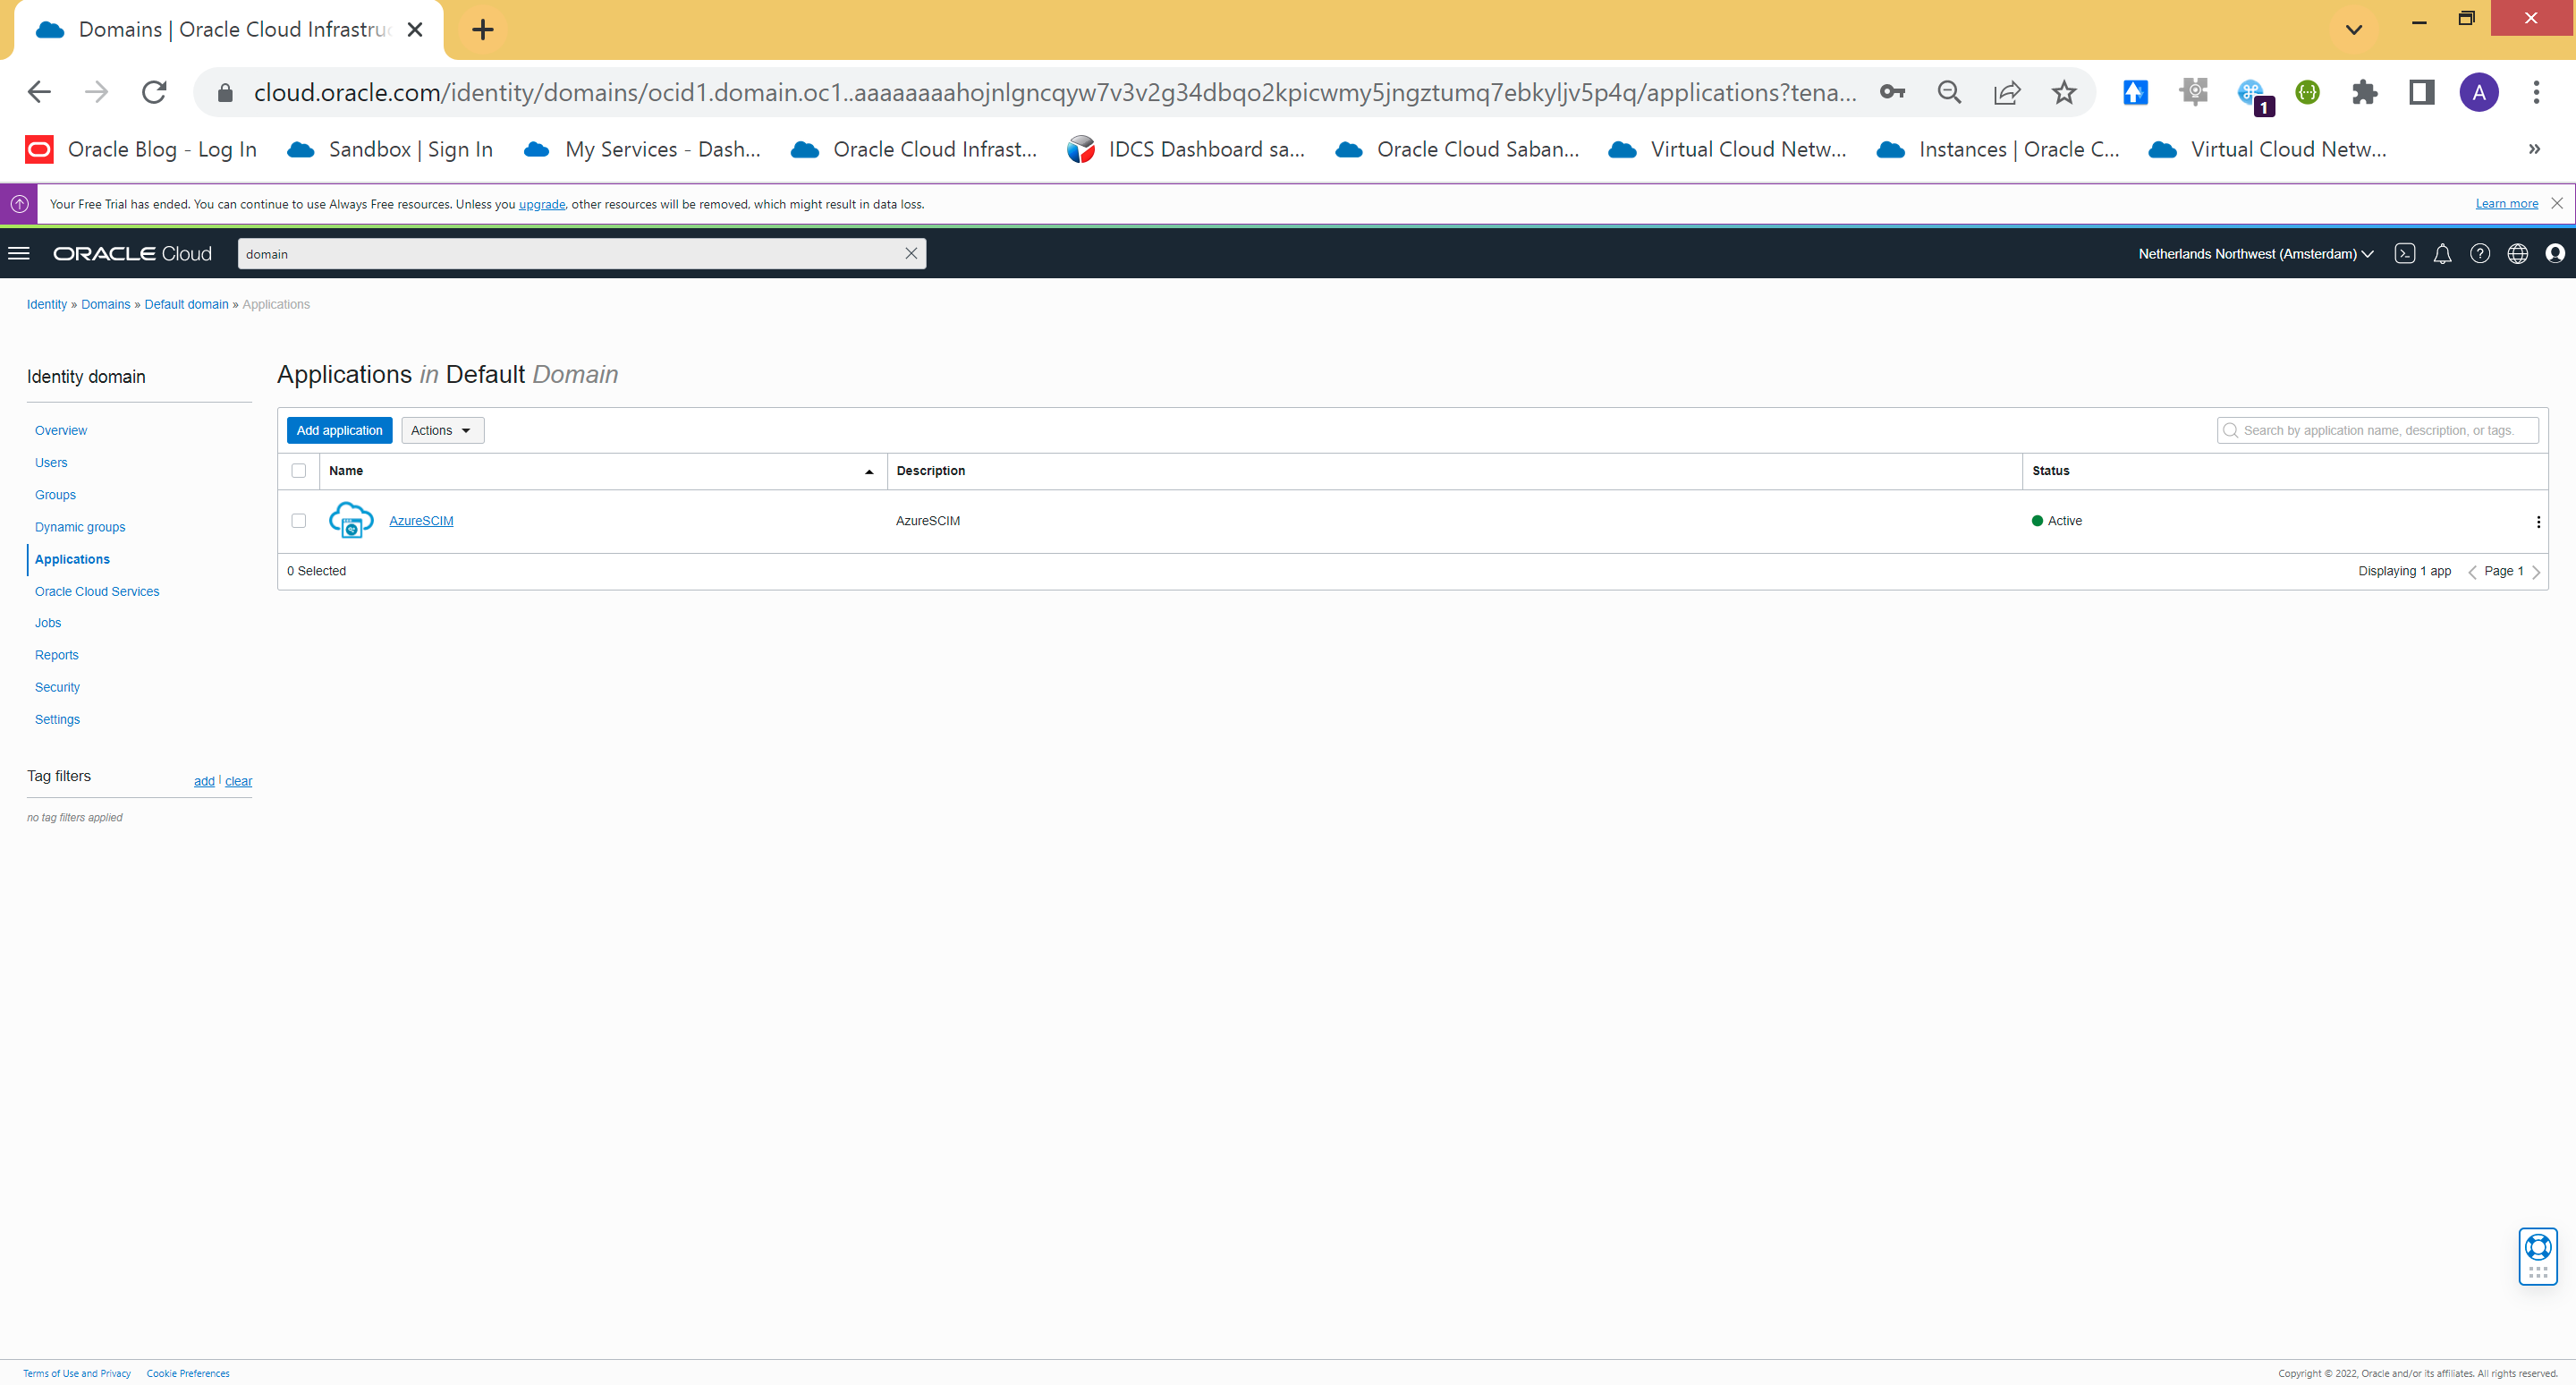
Now click on the “+ Add” link and add a new Confidential Application (i.e. protected by OAuth):

Give the client type or application a name, e.g. “Keycloak” or “Keycloak_OpenID”. Leave all other fields empty for the time being, i.e. select “Skip for later” in all subsequent fields. Save with “Finish” your for the time being empty, not activated application definition.

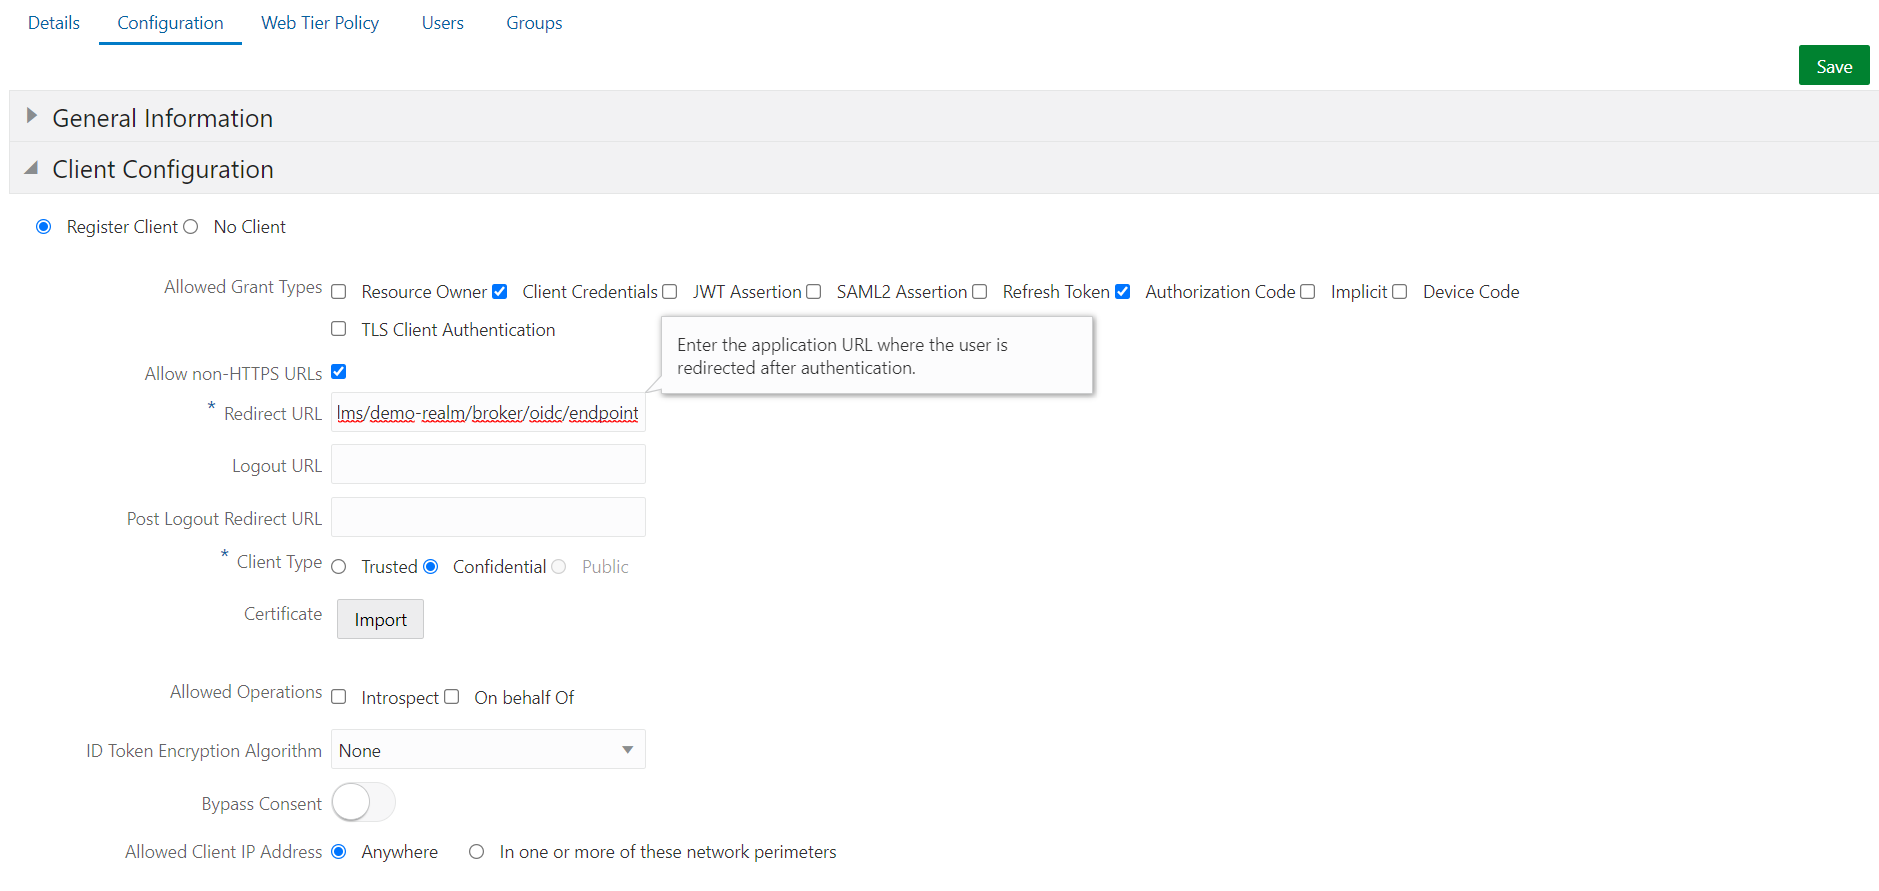
Then click on the “Configuration” tab of your “Keycloak” application, there in the first area “Client Configuration” click on “Register Client”:

- The client needs the features “Client Credentials” and “Authorization Code”, so that the later token contains user data, additional data and also associated groups. Set the checkmarks according to the screenshot.
- Check “Allow non-HTTPS URLs” if your Keycloak installation is not encrypted.
- Enter a URL to the so called “OpenID Endpoint” of your Keycloak installation, namely to your realm “demo-realm” which has to be created there (later…) and to the Identity Provider “oidc” which has to be defined there, e.g. https://keycloak.default.130.162.35.213.nip.io/auth/realms/demo-realm/broker/oidc/endpoint.
- Select the “Confidential” client as client type.
- Take the entry “Anywhere” as “Allowed Client IP Address”.
- Leave all other entries at default.
- Click on the “Save” button on the right. A client ID and a client secret will be created for you, which we will need from time to time in the next steps.
Now switch to the “General Information” area and copy the client ID to the clipboard.
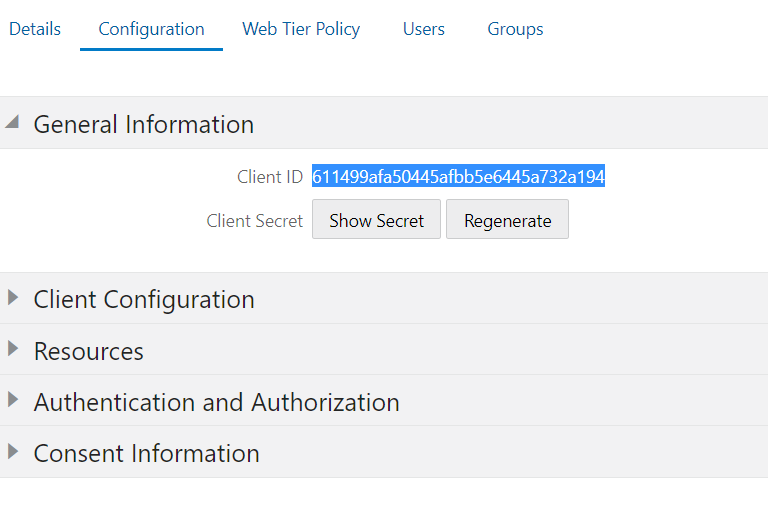
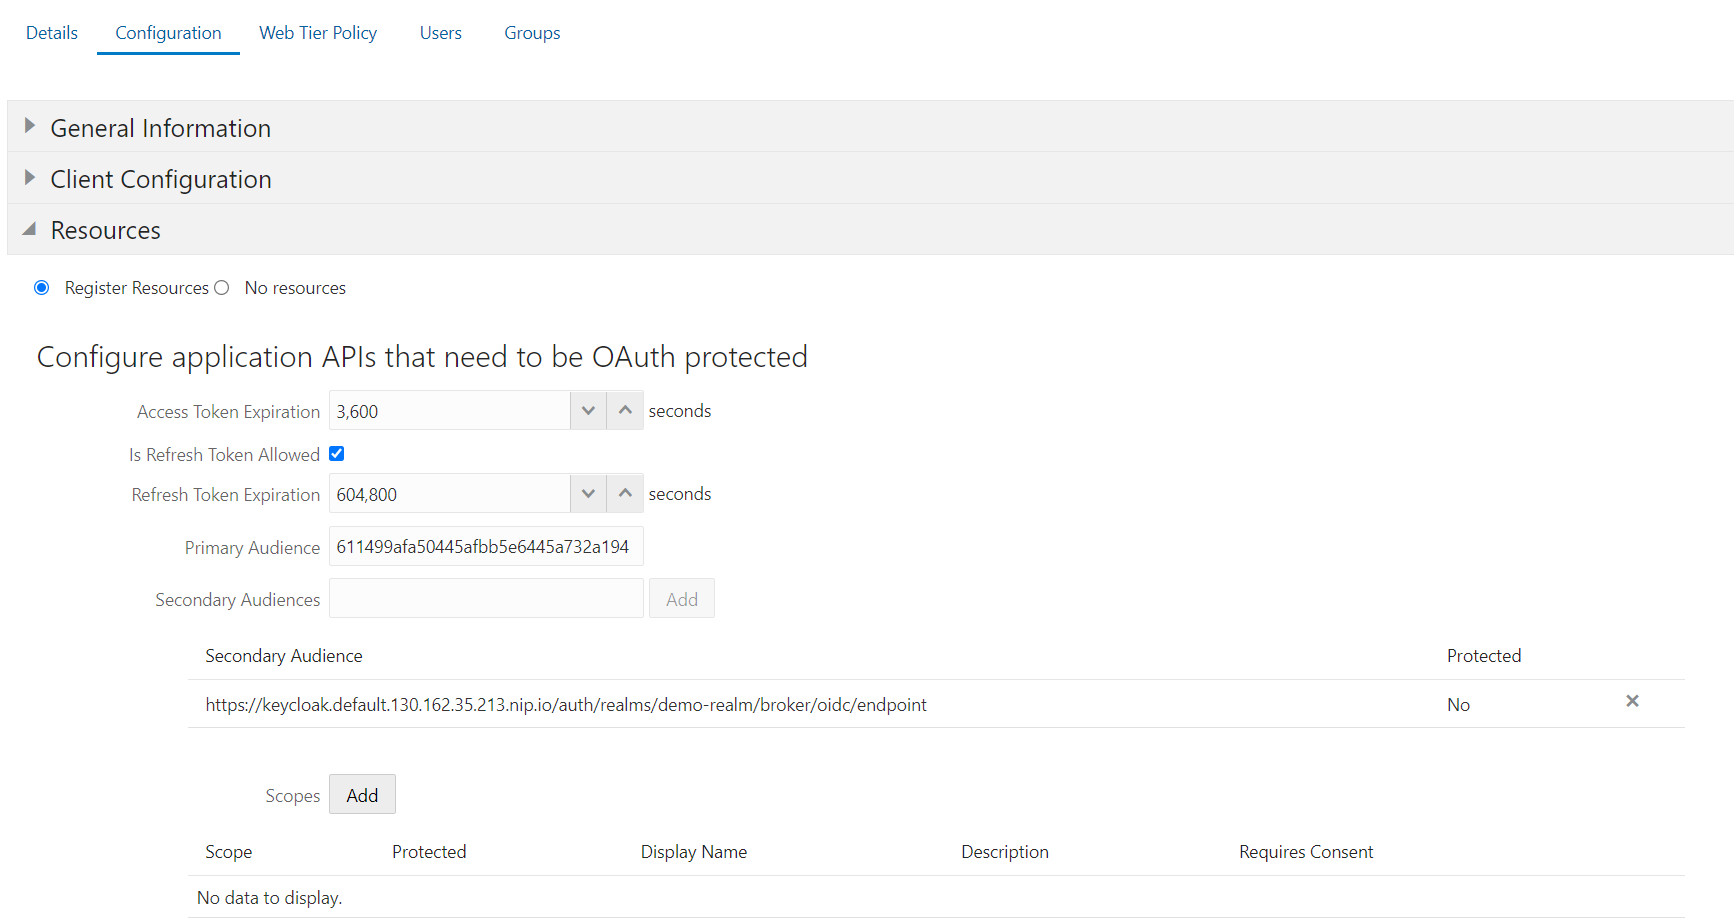
- Switch to the “Resources” area, click on “Register Resources” and enter the Client ID you just copied as “Primary Audience”. (Important step!)
- As Secondary Audiences you can enter the OpenID Endpoint URL of your Keycloak installation, e.g.
https://keycloak.default.130.162.35.213.nip.io/auth/realms/demo-realm/broker/oidc/endpoint - Optionally, select whether an auto-refresh of the token should be possible and change how long the token should be valid.
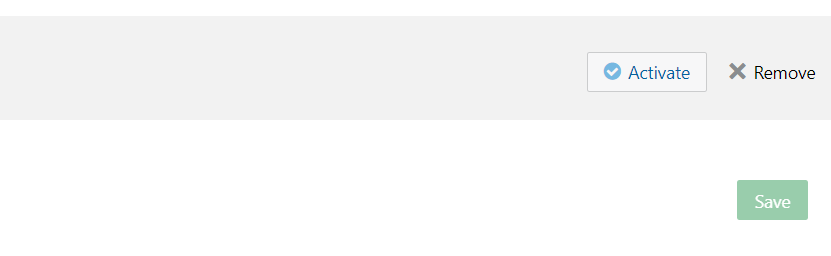
Leave all other areas at default, save using the “Save” button and -very important- activate the application.
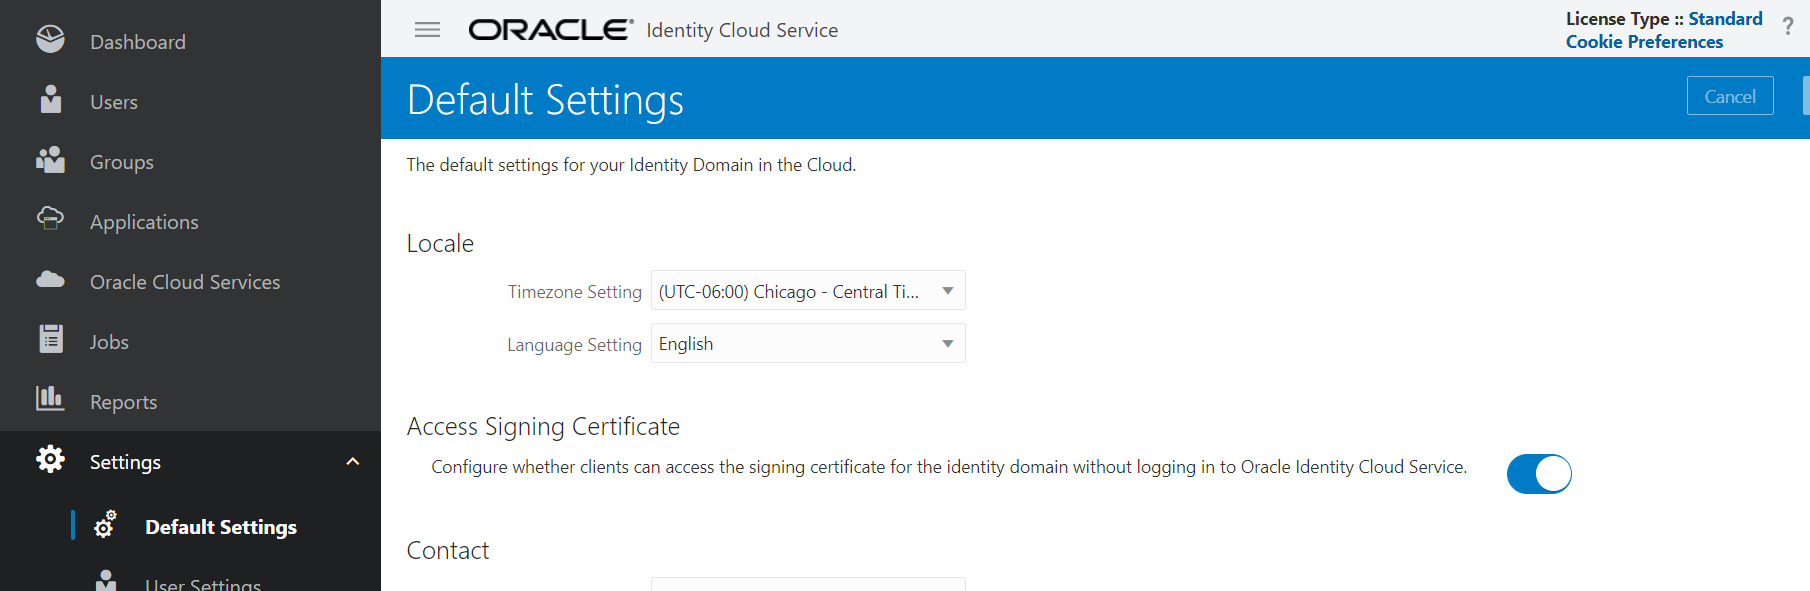
Last but not least, in order for Keycloak to have access to the certificates used by IDCS, you should enable public access to these certificates.
To do this, click on the hamburger menu in the upper right corner of your IDCS Admin Console, then click on “Settings” , “Default Settings” and activate the “Access Signing Certificate” switch:
The IDCS/IAM domain part of the configuration should now be complete and working. Part of the OpenID connect flow is the generation of an access token, which is then used to pick up an ID token. You can also use the Postman or curl tools to generate this access token in order to test whether access is basically working and has been enabled. To do this, you need the exact host name of your IDCS instance; this can be found, for example, in the Admin Console in your browser, highlighted in blue here:

Call an info URL in your browser to get a list of all available services of your IDCS instance. For example, you get SAML, OpenID Connect, and OAuth URLs for token generation, login and logout, and so on. The info URL is composed of the host name of your IDCS instance and the path “/.well-known/idcs-configuration”:

You can use the URI “/oauth2/v1/authorize”, highlighted in blue here, for testing and generating an access token. You also need the client ID from the above configuration as “technical user name” and the client secret as its password for access. Use “curl” to send a short request document as POST request to your IDCS address:
curl  -H "Content-Type: application/x-www-form-urlencoded;charset=UTF-8" \
 --request POST https://idcs-wieauchimmerIhrHostHeisst.identity.oraclecloud.com/oauth2/v1/token \
 -d "grant_type=client_credentials&scope=urn:opc:idm:__myscopes__" \
 --user 611499afa50445afbb5e6445a732a194
 Enter host password for user '611499afa50445afbb5e6445a732a194': <client-secret-for-client-id>

 {"access_token":"eyJ4NXQjUzI1NiI6InZEbnd0UE8tVzdSSFlUTkdWYTZNdWE4cGNiZWN6WFAtcDlYcWpXNVptVG8iLCJ4NXQiOiI0RmsyaUw2aWZYLTdjYllHa0NDM0dHVTEzelkiLCJraWQiOiJTS
 UdOSU5HX0tFWSIsImFsZyI6IlJTMjU2In0.eyJzdWIiYzdiYjJiNWMwNCJ9.BA5NZJAUD_WEWudgVRvV_1VnUm20lTc65ujzOX0GcMnbjNqP3ih1rs9928DcYI80ihtOawbtAhzEX_3d2PiX_M3t6HenFU
 wsILCI7WeLhbV9k77dl1BZm0TsL5K4NVBsYxPfT3MrKwiozYu_vZ26vRY6HVDXmOgaqLMusWCSSwocv7YGUI-JlLev0LHsjo26wDu8fi_DUv3qzJvjc1uuoKWsAHMCEUq2O1lSHrB4-
 drFBmSowrN2SDSliTcj-Yjz0C-kD3pm26_WiBJi-7L-nleTfzctJQICXDVjJYdcD-96OqF_pqIF4XOvQO4QfEuAM2Cb7qyndkBses0w-ljyfw","token_type":"Bearer","expires_in":3600}
The returned Access Token has been shortened for the sake of readability. It consists of three areas, each separated by a dot “.”. The first two areas are actually readable JSON content after a Base64 decoding, the third area should be an encrypted byte sequence to validate the content of the second area.
Congratulations, the IDCS or IAM domain part is done. Now let’s switch to the Keycloak configuration:
Set up the IDCS/ IAM domain as an identity provider in Keycloak.
For testing purposes, we will create a new Identity Realm in Keycloak, create a user and a group in it that does not exist in Oracle Cloud. Finally, we define the Oracle Cloud IDCS as the Identity Provider and finally log in as an Oracle Cloud user, but in Keycloak. This should then import to Keycloak successfully, automatically and with customized group membership.
Log them into your Keycloak installation as the user “keycloakadmin”. At Oracle Verrazzano, a custom DNS entry was created for the Keycloak environment, e.g. https://keycloak.<domain-name> or in my personal example environment https://keycloak.default.132.226.206.148.nip.io.
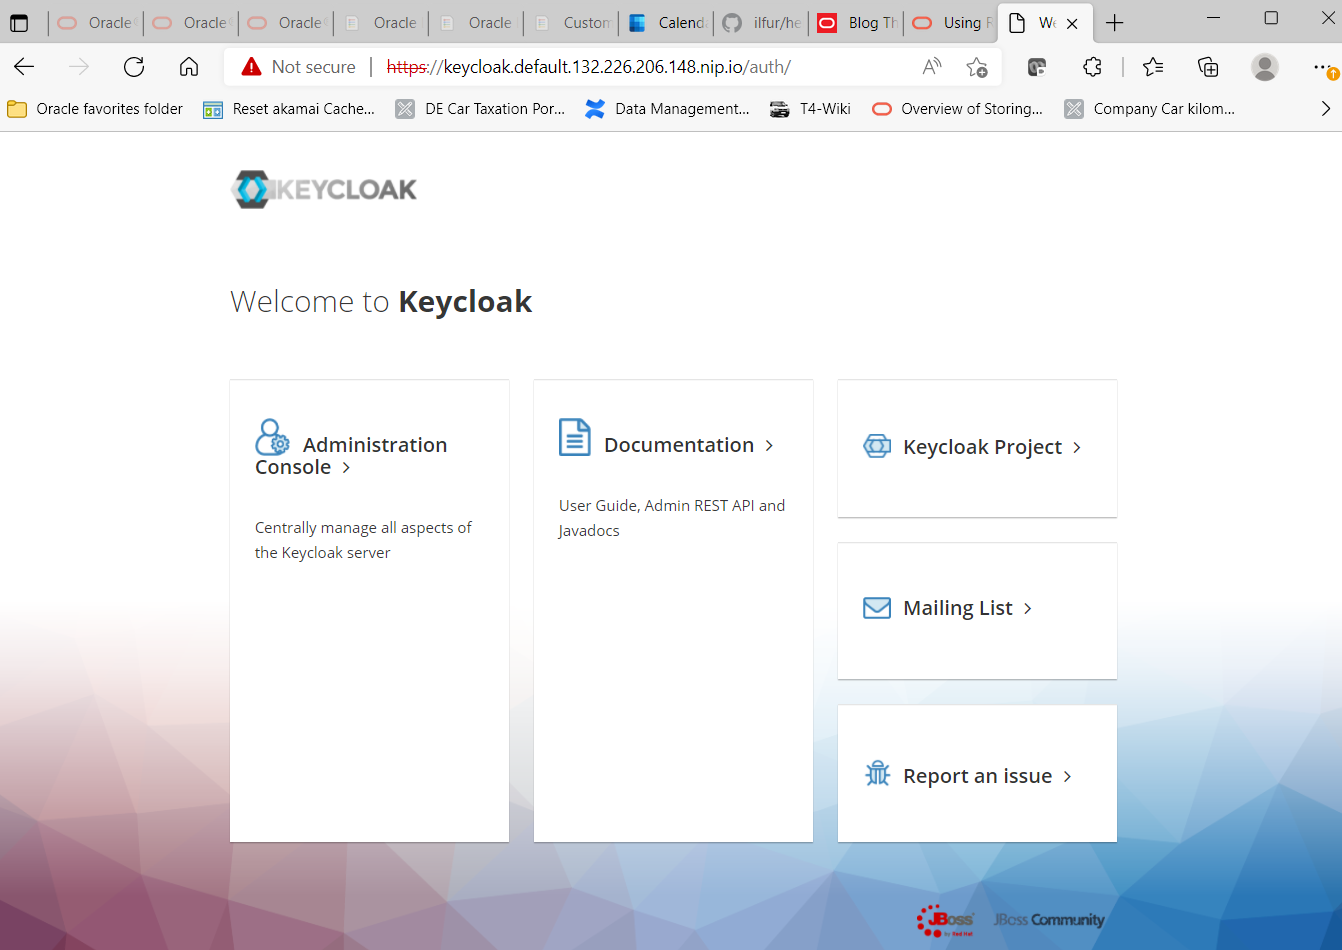
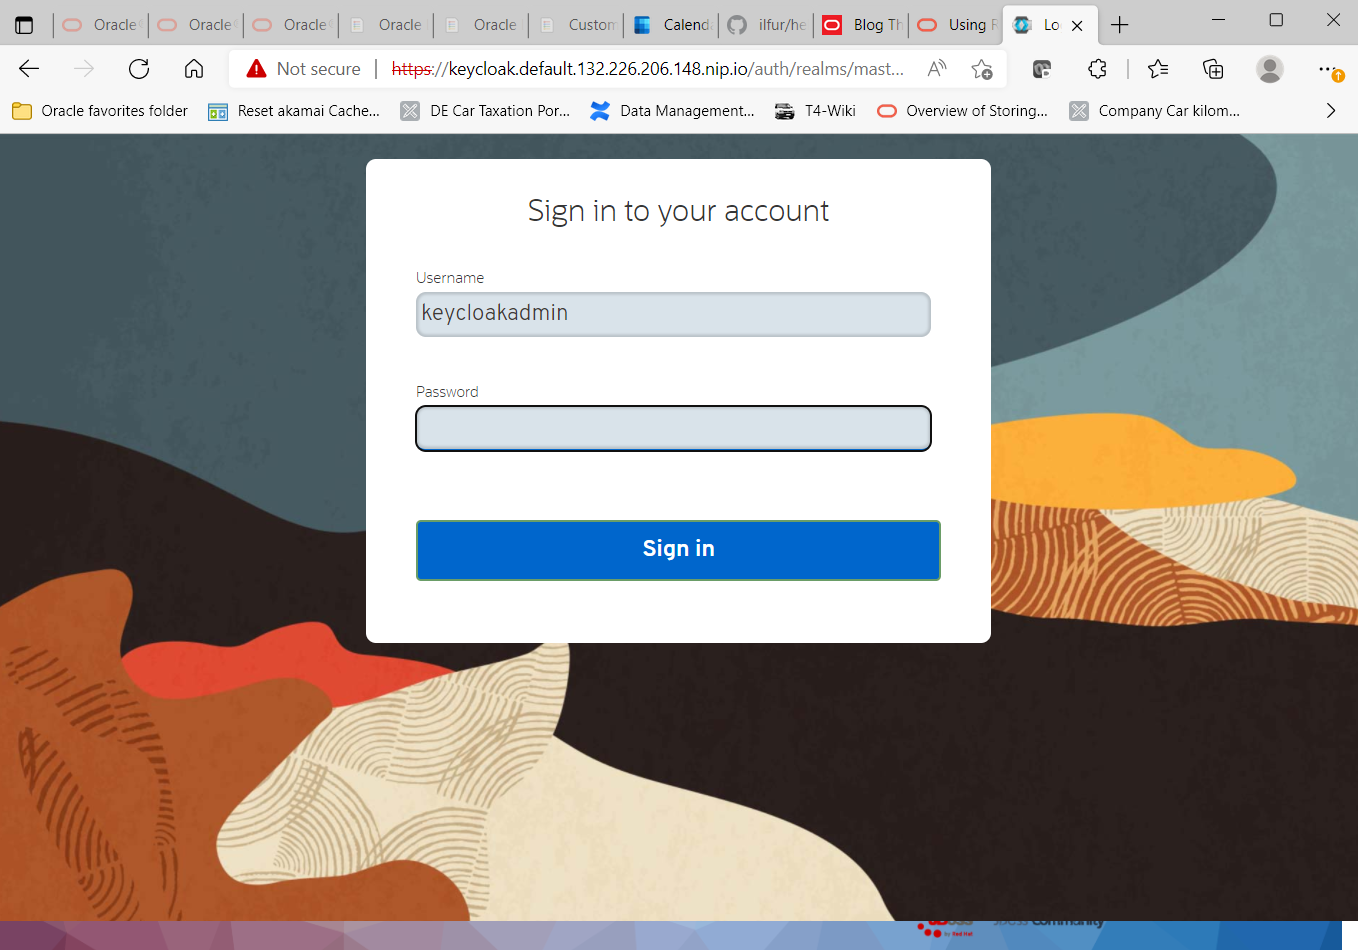
Click on “Administration Console” and the login screen appears. There you log in as user “keycloakadmin”. You can get the password for this with a Verrazzano installation, for example, through a kubectl call:
kubectl get secret \
 --namespace keycloak keycloak-http \
 -o jsonpath={.data.password} | base64 -d ; echo
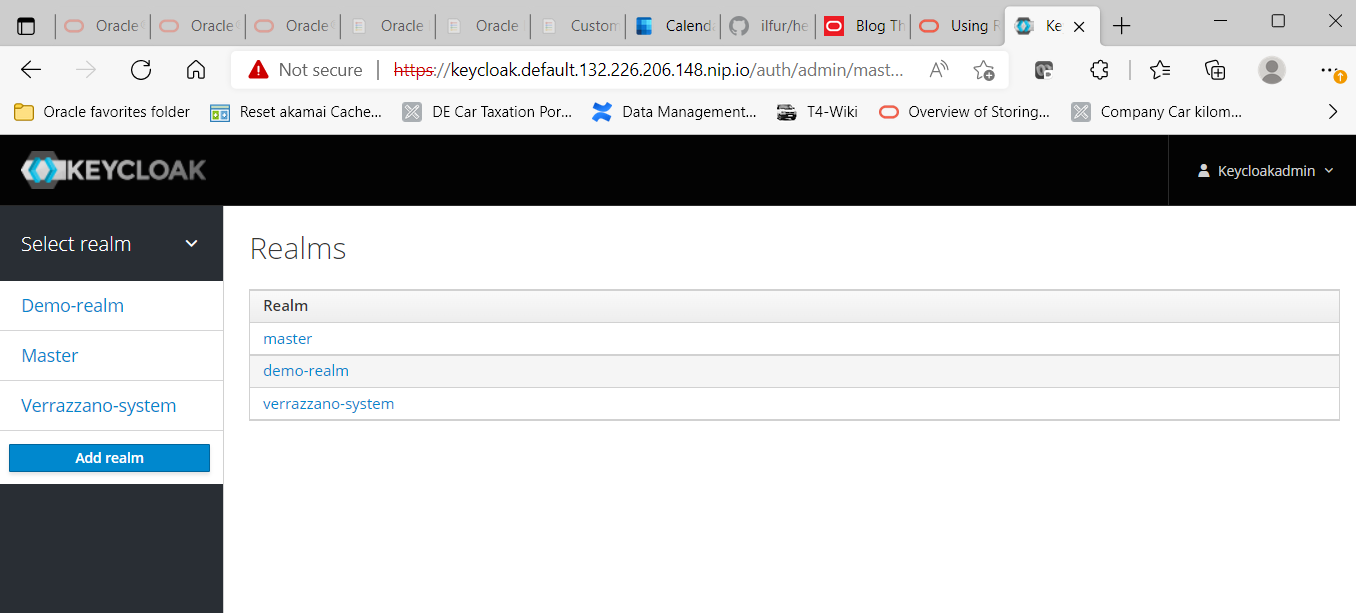
Now use the “Add Realm” button to create a new environment for storing identities, defining application clients, connecting external identity management systems and much more. The name of the new realm in our example is “demo-realm“.
Nothing else needs to be done in the realm settings for the time being. Check that “OpenId Endpoint Configuration” is entered as the endpoint (besides SAML).
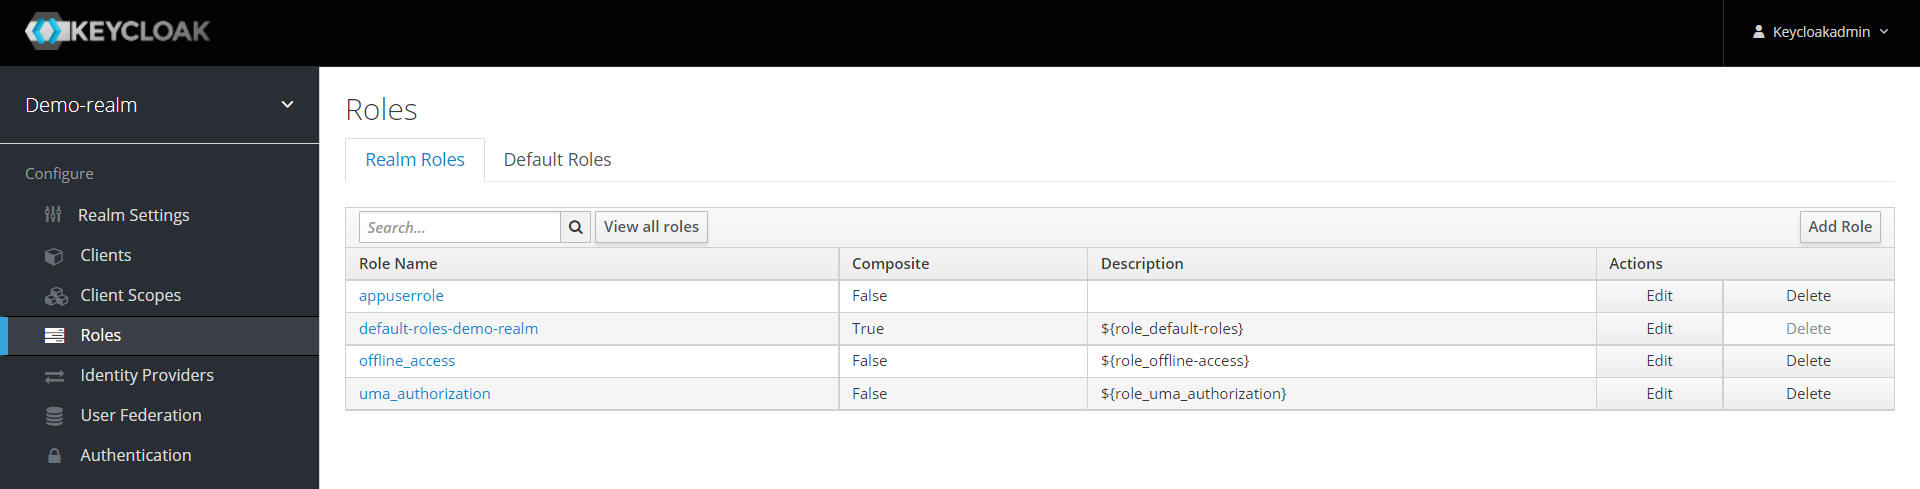
Now it is time to create a role, user and group for the newly created realm, with which authentication and authorization can actually be performed. Application roles are actually defined in Keycloak and not exclusively in the application as in the days of Java EE. So first click on “Roles” , “Add Role“, and add the new role “appuserrole“.
Now create a new group “AppUsers” under “Groups” and link it to the role “appuserrole“.
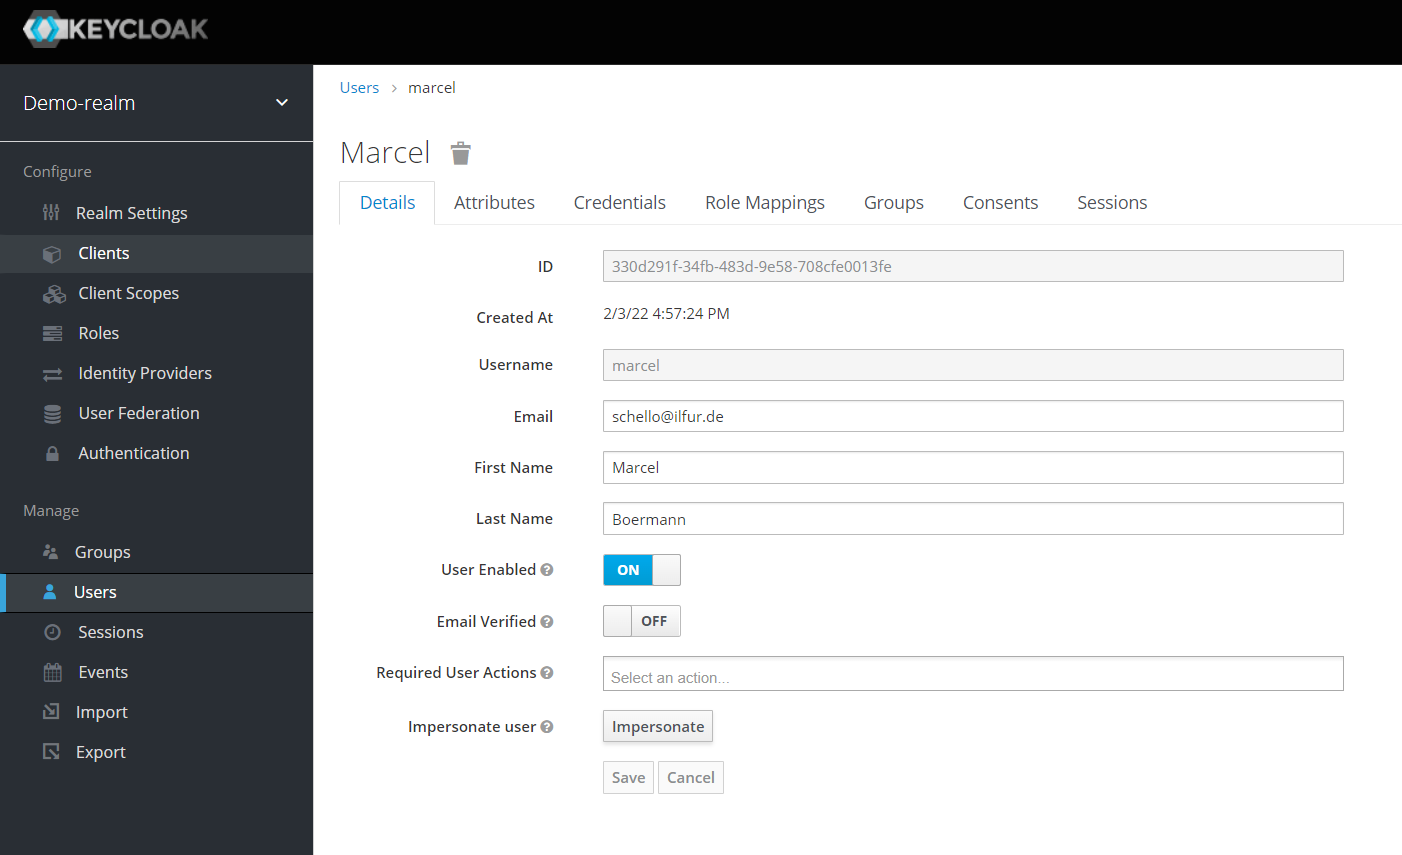
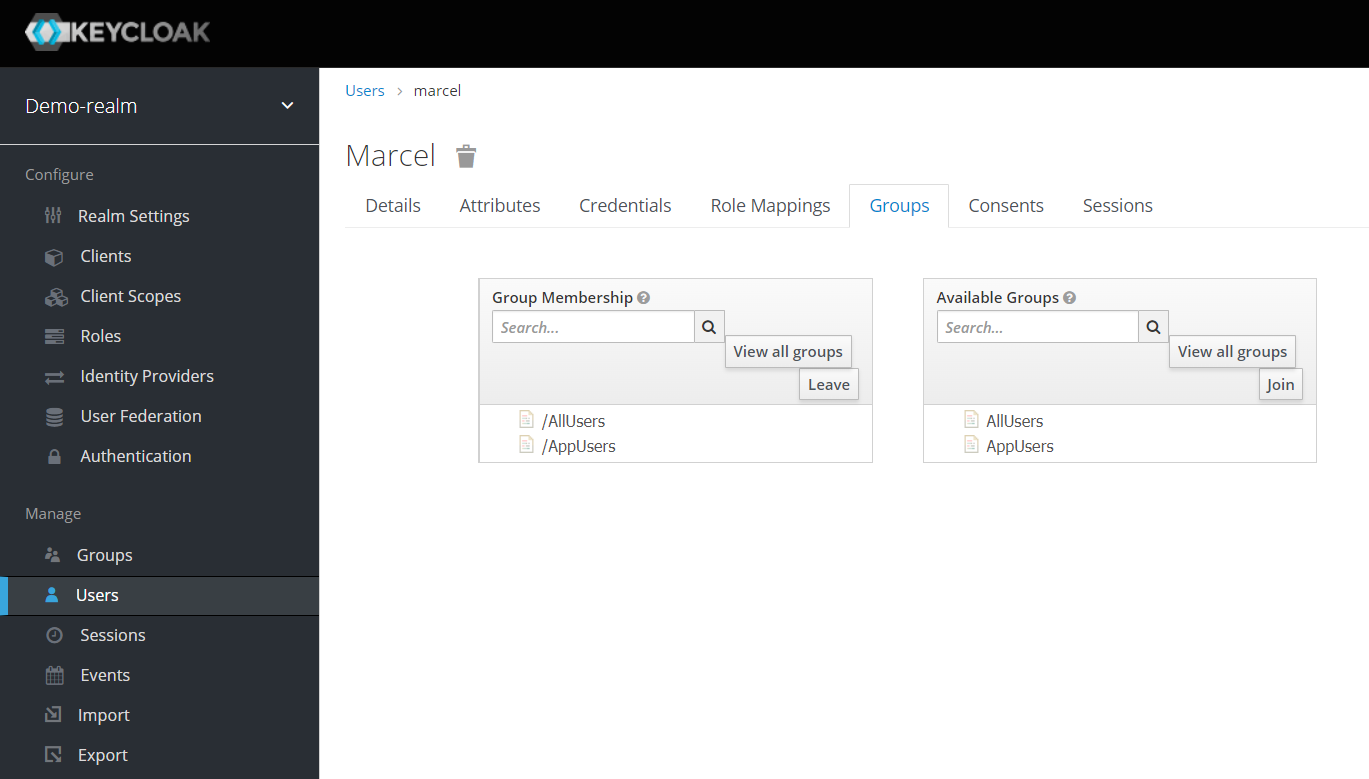
Last but not least, create a new user under “Users”, e.g. “Marcel” with full name and complex password, and assign him the group “AppUsers”. You could also assign the application role “appuserrole” directly to the user, but I personally resist doing that because it can make things unnecessarily complicated later.
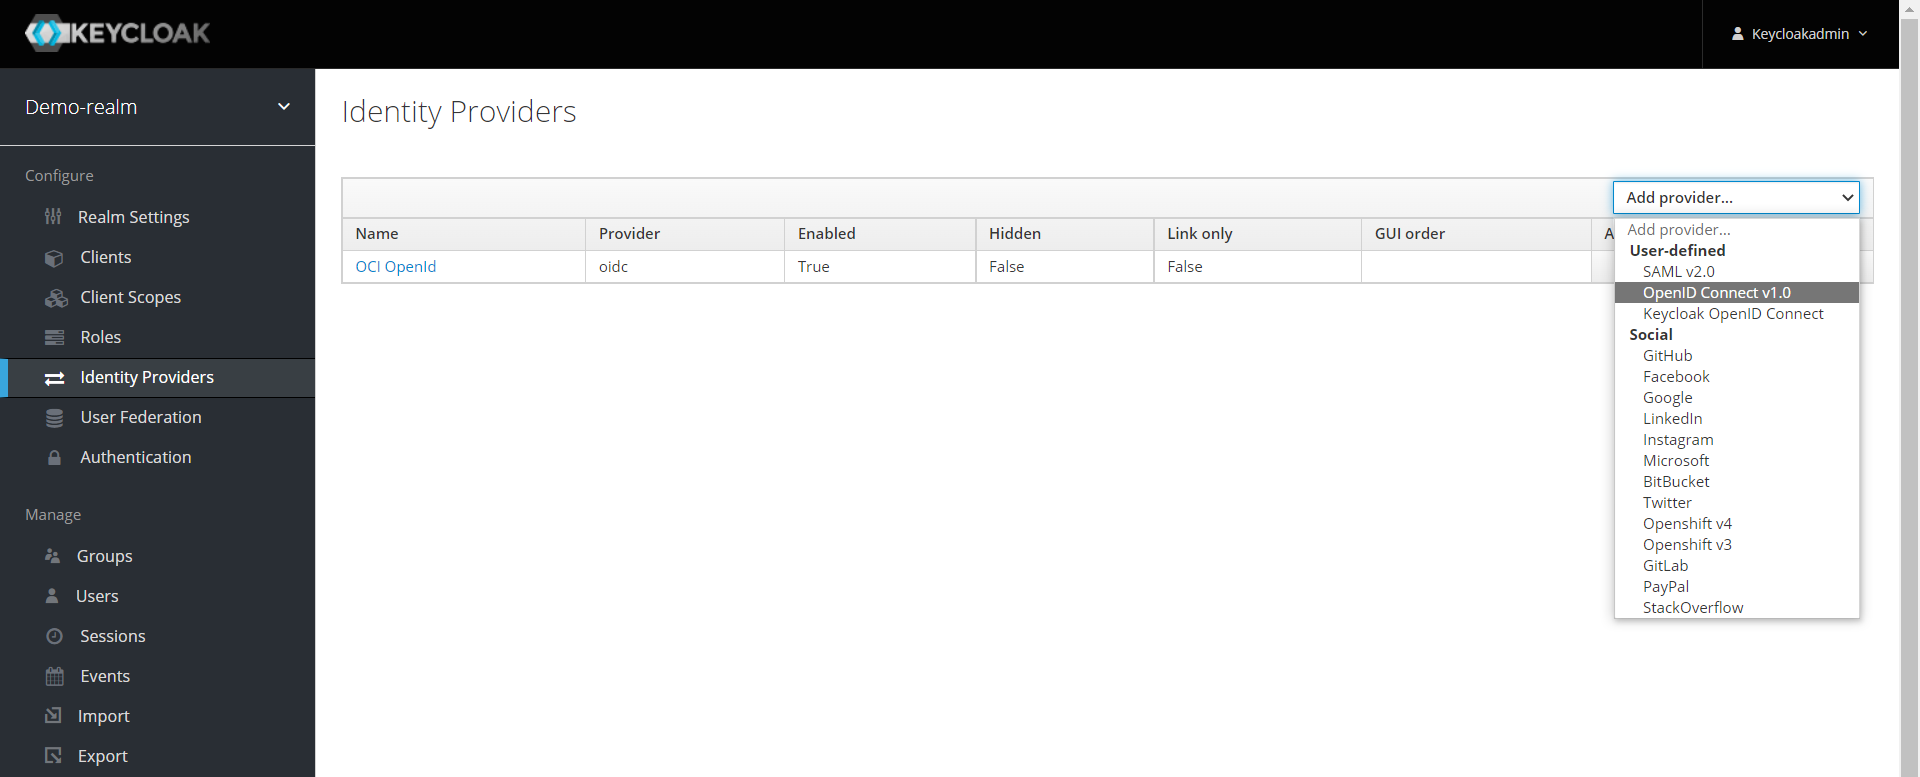
Now we come to the crucial step, the setup of a new Identity Provider. This should point to your Oracle Cloud client, to your IDCS instance.
In your demo realm, click on “Identity Providers” on the left, then add a new “OpenId Connect v1.0” provider in the popup list on the far right titled “Add Provider“:
- Give the provider the alias “OCI OpenId”. In the Keycloak login window, this name will be offered to you later as a button.
- The alias “oidc” to be entered is even more important. It will be part of the URL you already entered in IDCS as redirect URL.
- The “enabled” switch should be active, so that the identity provider is available for selection at login.
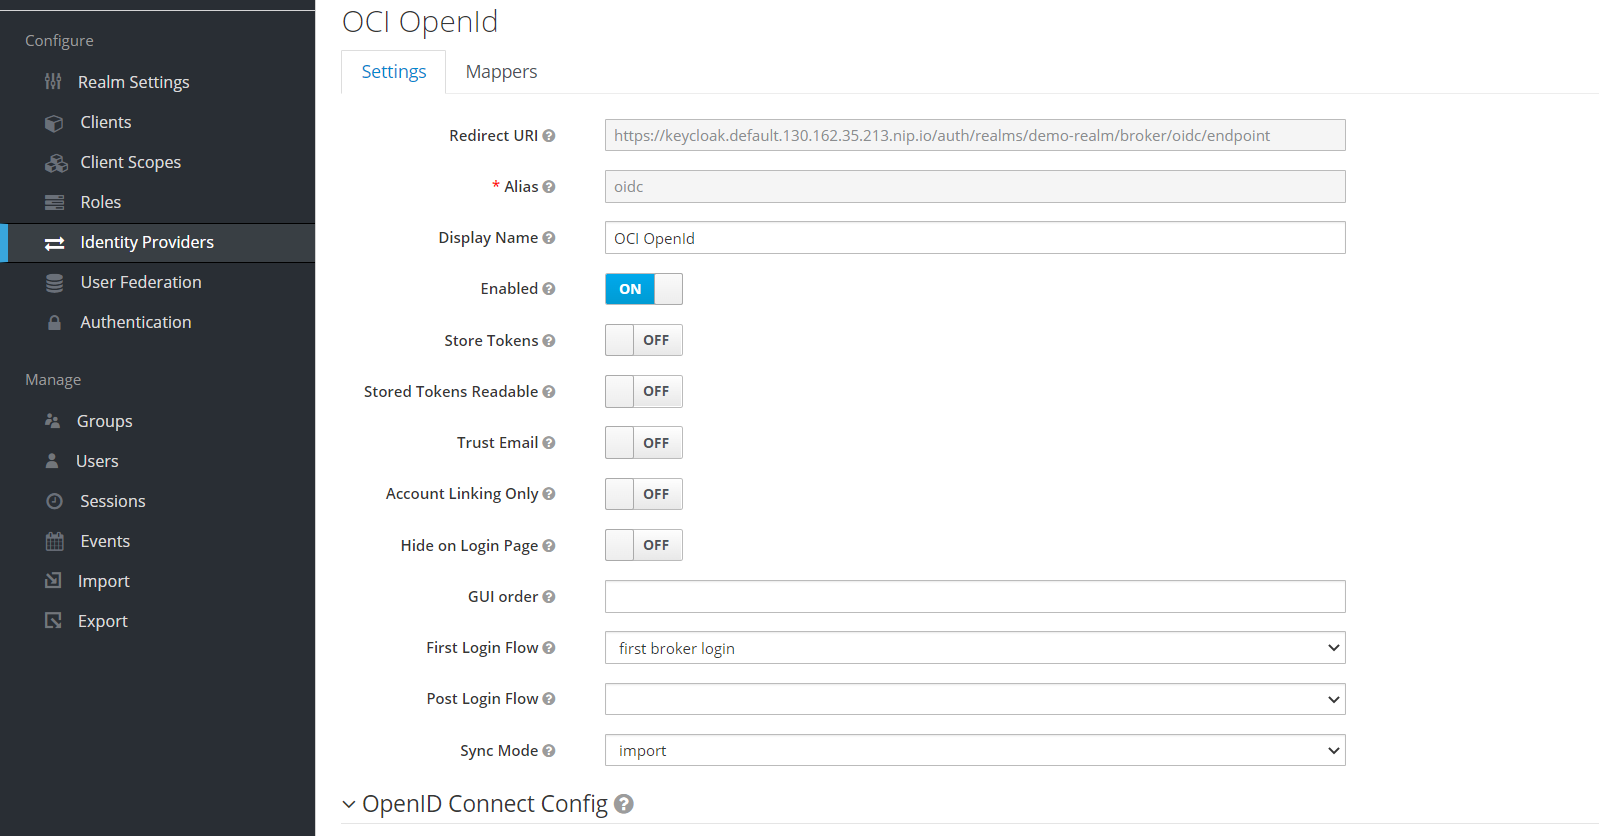
But this is not all. The really exciting part now follows in the OpenID Connect Config area.
Now enter, among other things, some of the URLs that you were able to retrieve via the “/.well_known/idcs_config” URI:
- For Authorization URL, the URL to your IDCS instance with the path /oauth2/v1/authorize,
e.g. https://idcs-b6dd0c2247f1480da7de11e89db9a701.identity.oraclecloud.com/oauth2/v1/authorize - For Token URL, the URL to your IDCS instance with the path /oauth2/v1/token,
e.g. https://idcs-b6dd0c2247f1480da7de11e89db9a701.identity.oraclecloud.com/oauth2/v1/token - For Logout URL (optional) the URL to your IDCS instance with the path /oauth2/v1/userlogout,
e.g. https://idcs-b6dd0c2247f1480da7de11e89db9a701.identity.oraclecloud.com/oauth2/v1/userlogout - For User Info URL (optional) the URL to your IDCS instance with the path /oauth2/v1/userinfo,
e.g. https://idcs-b6dd0c2247f1480da7de11e89db9a701.identity.oraclecloud.com/oauth2/v1/userinfo - For Client Authentication select “Client Secret sent as Basic Auth”.
- Then enter your IDCS Client ID and the Client Secret at Client ID and Client Secret.
- As “Client Assertion Signature Algorithm” a RS256 is ok for now, you can experiment with other algorithms later.
- The issuer must be specified with https://identity.oraclecloud.com/ , i.e. also with the slash (“/”) at the end.
- The default scopes define which data should be transferred. Instead of just “openid”, i.e. username and full name, the email address and associated groups should also be transferred. If you leave the default “openid”, the groups for a mapping are missing and you will be asked to enter the eMail address manually at login. So use the entries “openid groups email“, separated by spaces. The “/.well-known/idcs-config” address of your IDCS instance tells you what is allowed by IDCS under the entry “scopes_supported”.
- Leave all other entries at their default.
- Click the Save button at the very end of the form.

We are not quite done yet – the transferred groups, or at least a relevant part of them, needs to be mapped to the “appuserrole” role defined in Keycloak.
To do this, switch to the “Mappers” tab at the very top of the form.
You will see an empty list, in our example you already see several defined mappers.
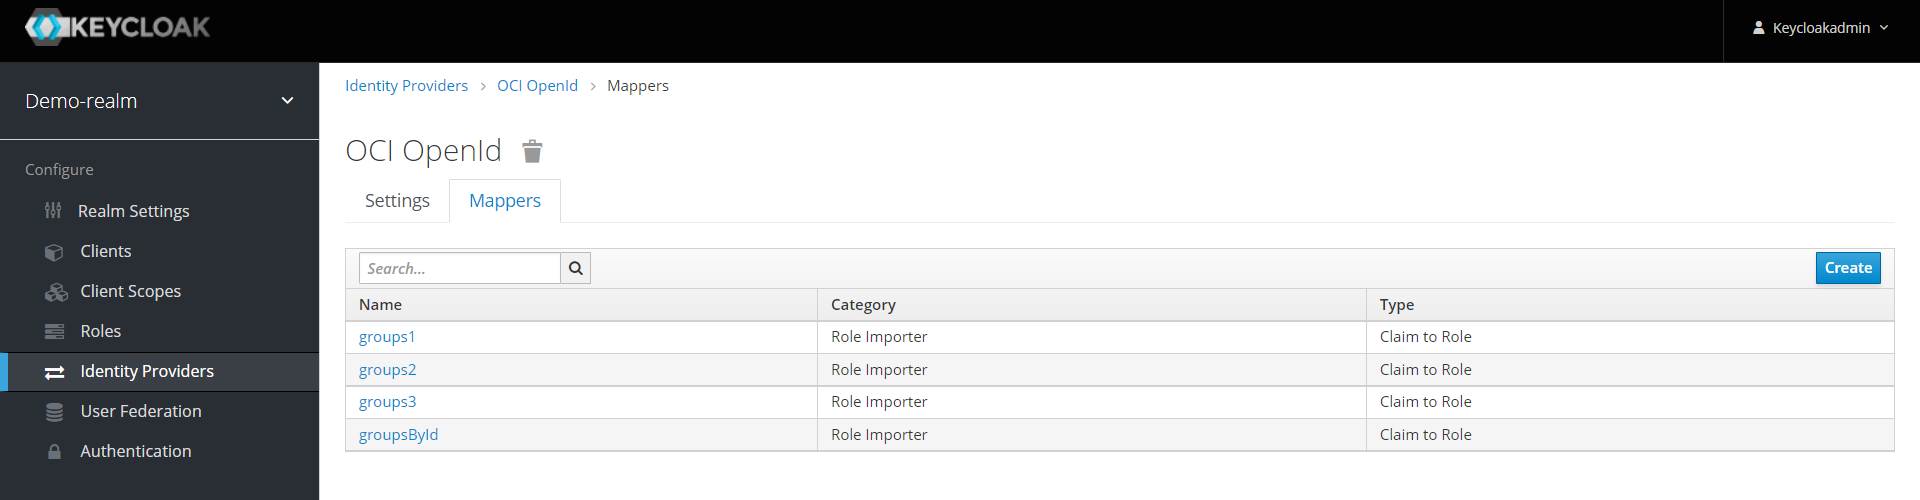
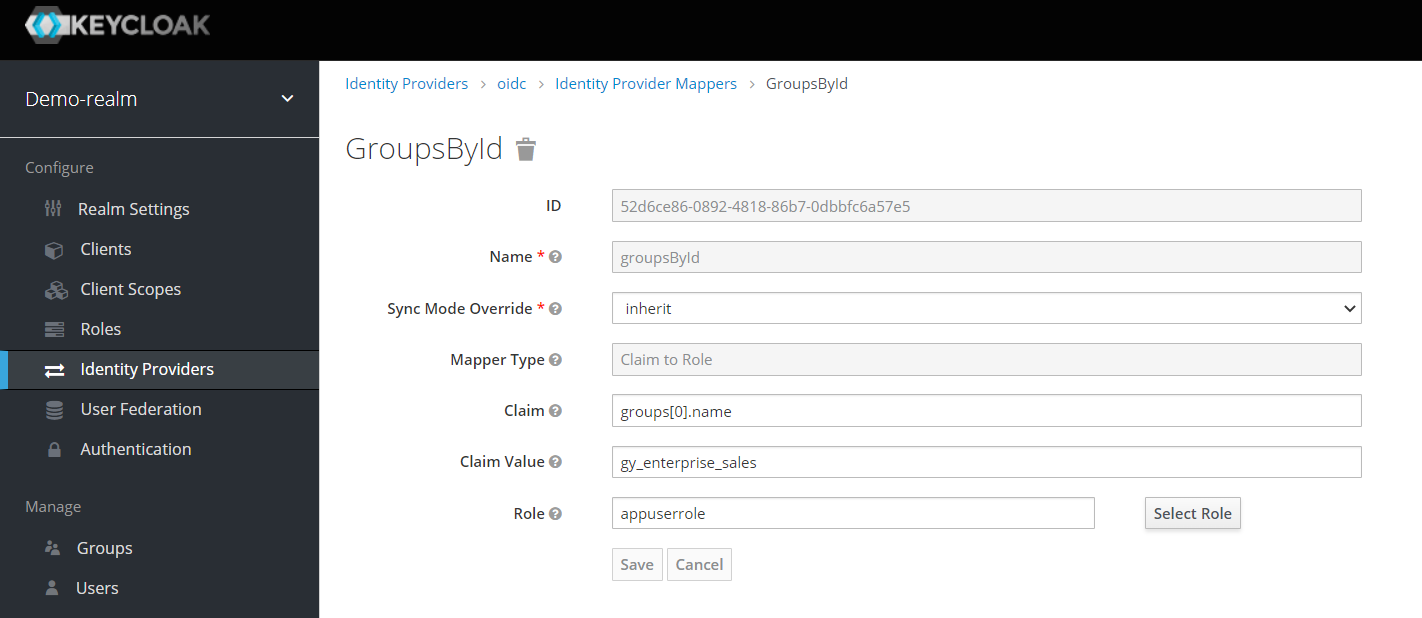
Click on the “create” button and fill in the first form as follows:
- Field Name: “groupsById”
- Field Sync Mode Override: “inherit” (default)
- Field Mapper Type: “Claim to Role
- Field Claim: “groups[0].name”.
Explanation: the groups come from IDCS as an object array, not as an array of strings. In the object array, there is a field “name” that contains the name of the group among other fields like id and type. The selected mapper can only handle string arrays, so in multiple mappers we have to iterate through all the groups transferred and check if the selected group is the one we want to map. - Claim Value field: the name of one of the groups in IDCS that your cloud user belongs to. In our example “gy_enterprise_sales”, for you it will probably be different.
- Field Role: “appuserrole“
Explanation: if the group was found, i.e. if the value of the claim “groups[0].name” is equal to the value specified under “Claim Value”, the imported user will be associated with the role “appuserrole” in Keycloak.
Click on “Save” and create 5 more mappers of the same type for safety’s sake with exactly the same content, only the “Claim” field has the following different values:
“groups[1].value”
“groups[2].value”
“groups[3].value”
“groups[4].value”
“groups[5].value”
With this we can be quite sure that the group we are looking for will be found. I could not find a better standard way of mapping, alternatively a self-written mapper could be included which searches the object array automatically. Or there would be a way to convert the object array into a string array.
So much for the configuration, now let’s get to testing everything in combination.
Test the configuration by logging in via Keycloak
Go with your browser to a login page of your Keycloak installation that belongs to the newly created realm “demo-realm”,
e.g.: https://keycloak.default.130.162.35.213.nip.io/auth/realms/demo-realm/account
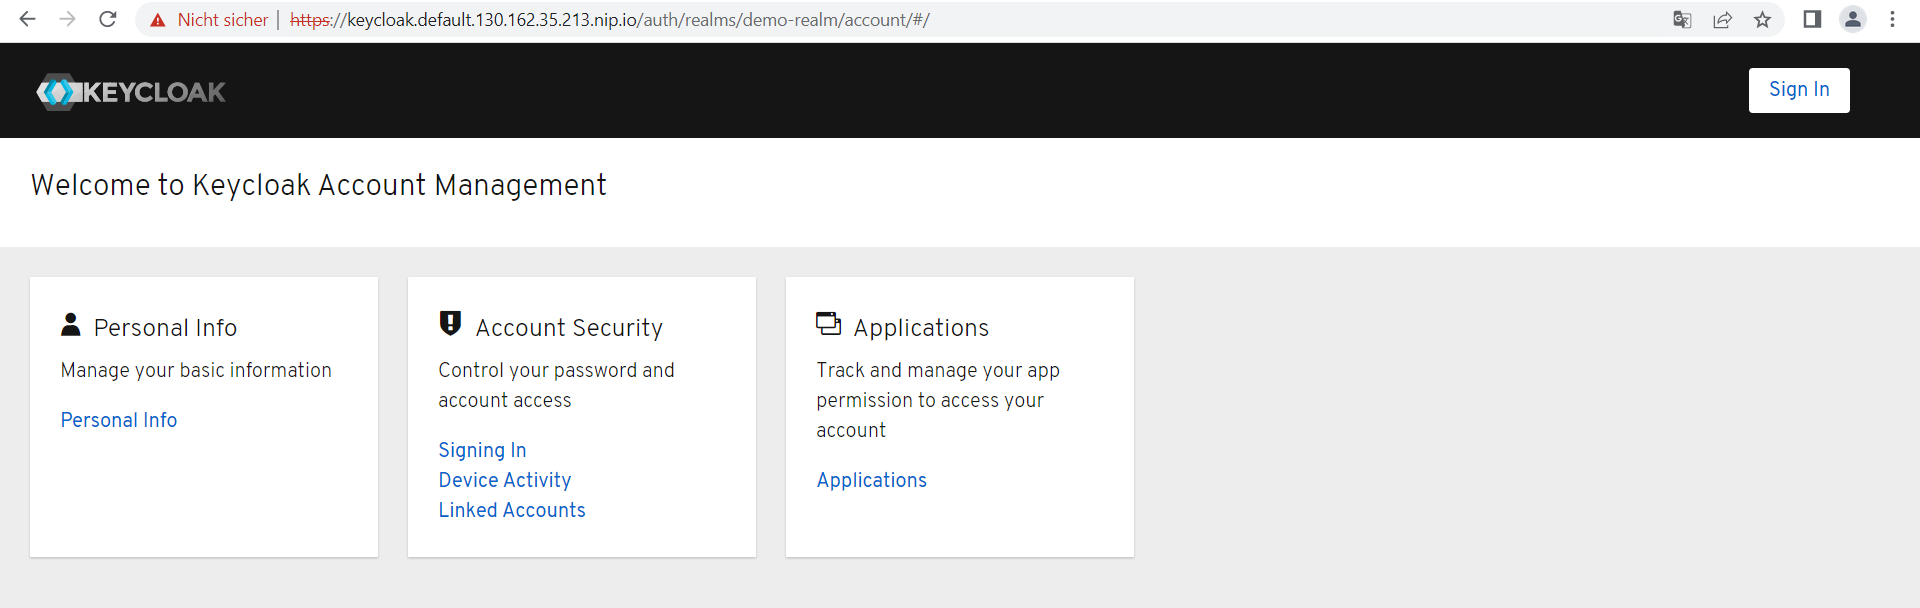
Click on the “Sign In” button in the upper right corner.
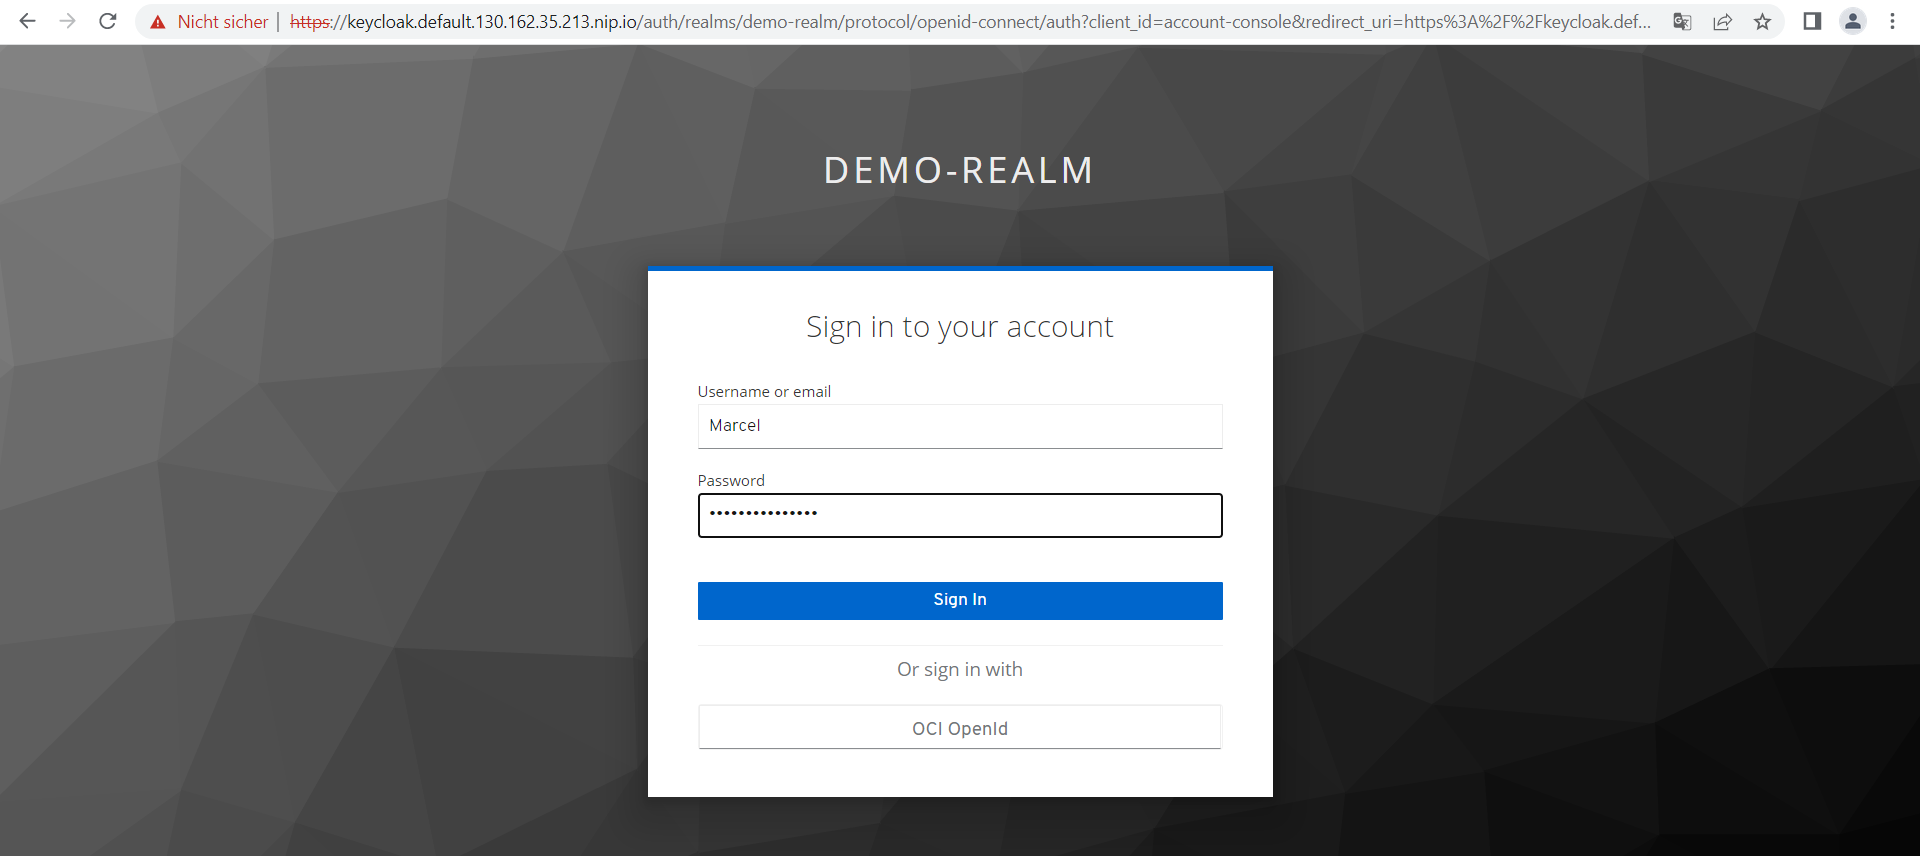
You will probably see that the login screen now shown contains two buttons next to username and password, one for Oracle Cloud login (provider OCI OpenId) and one for keycloak. First, log in as the local keycloak user that you created yourself in previous steps as part of the demo-realm configuration. In our example “Marcel” with a complex password.
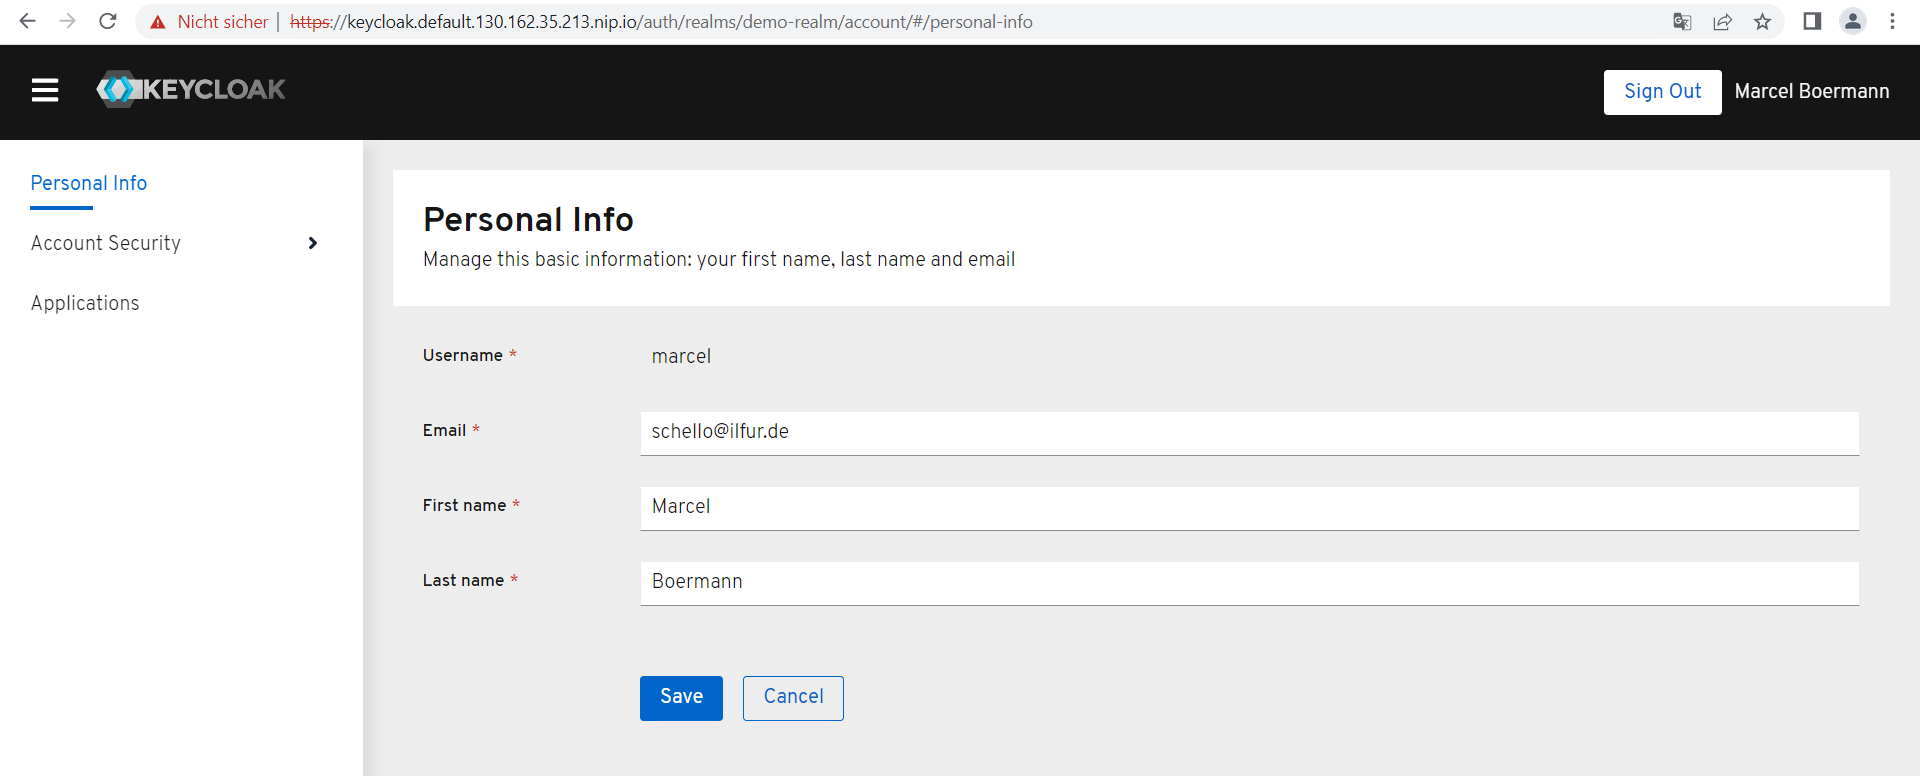
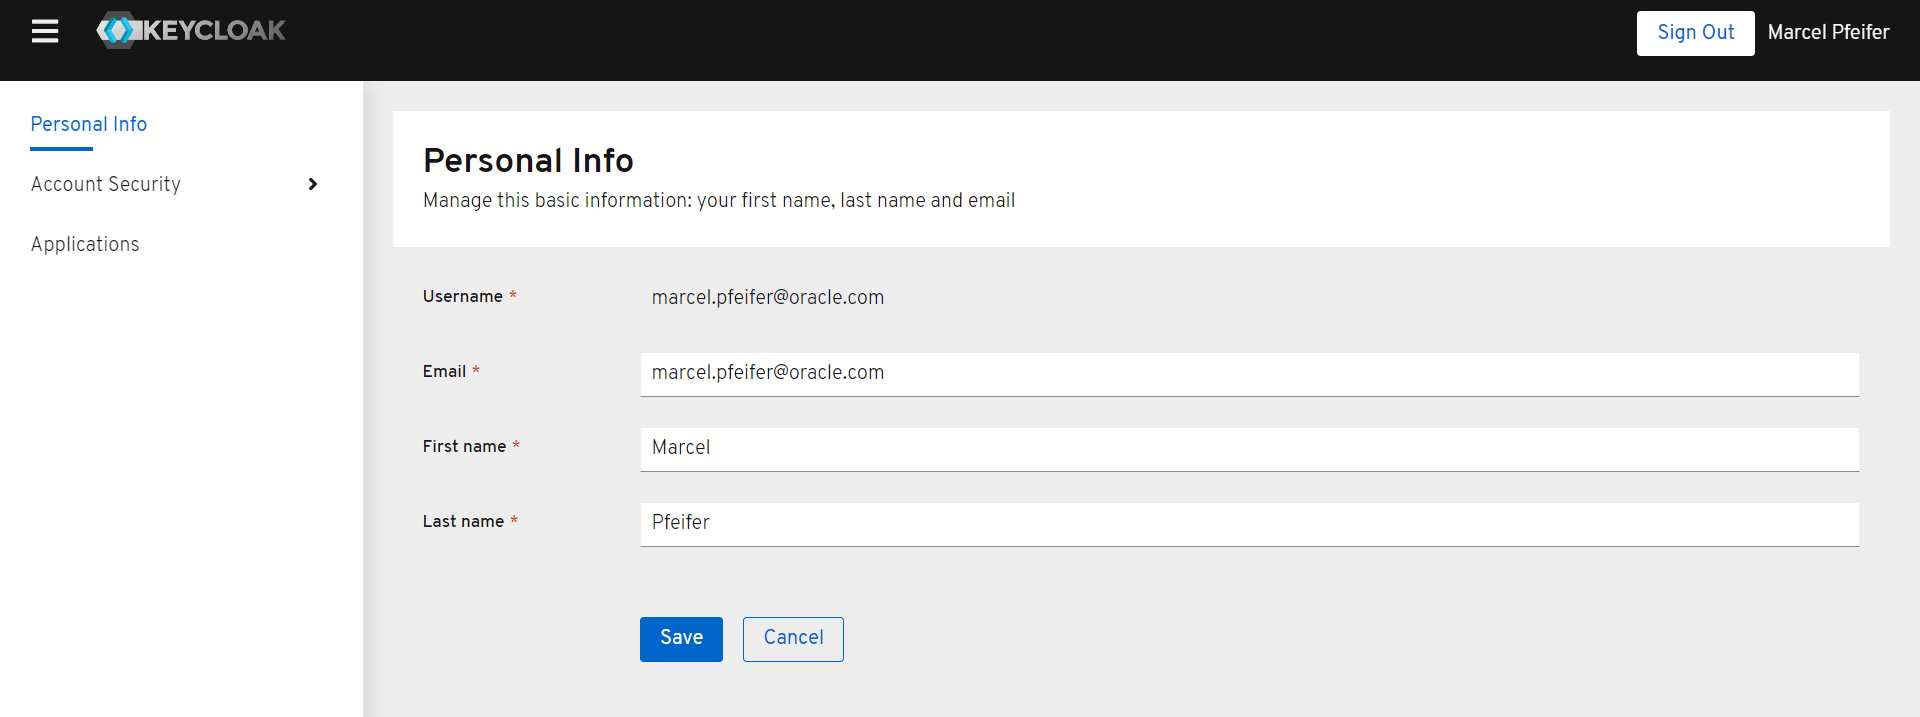
After you have signed in, click on the “Account” link to retrieve your account information via “Personal Info”. You should see some metadata like your full name and email address.
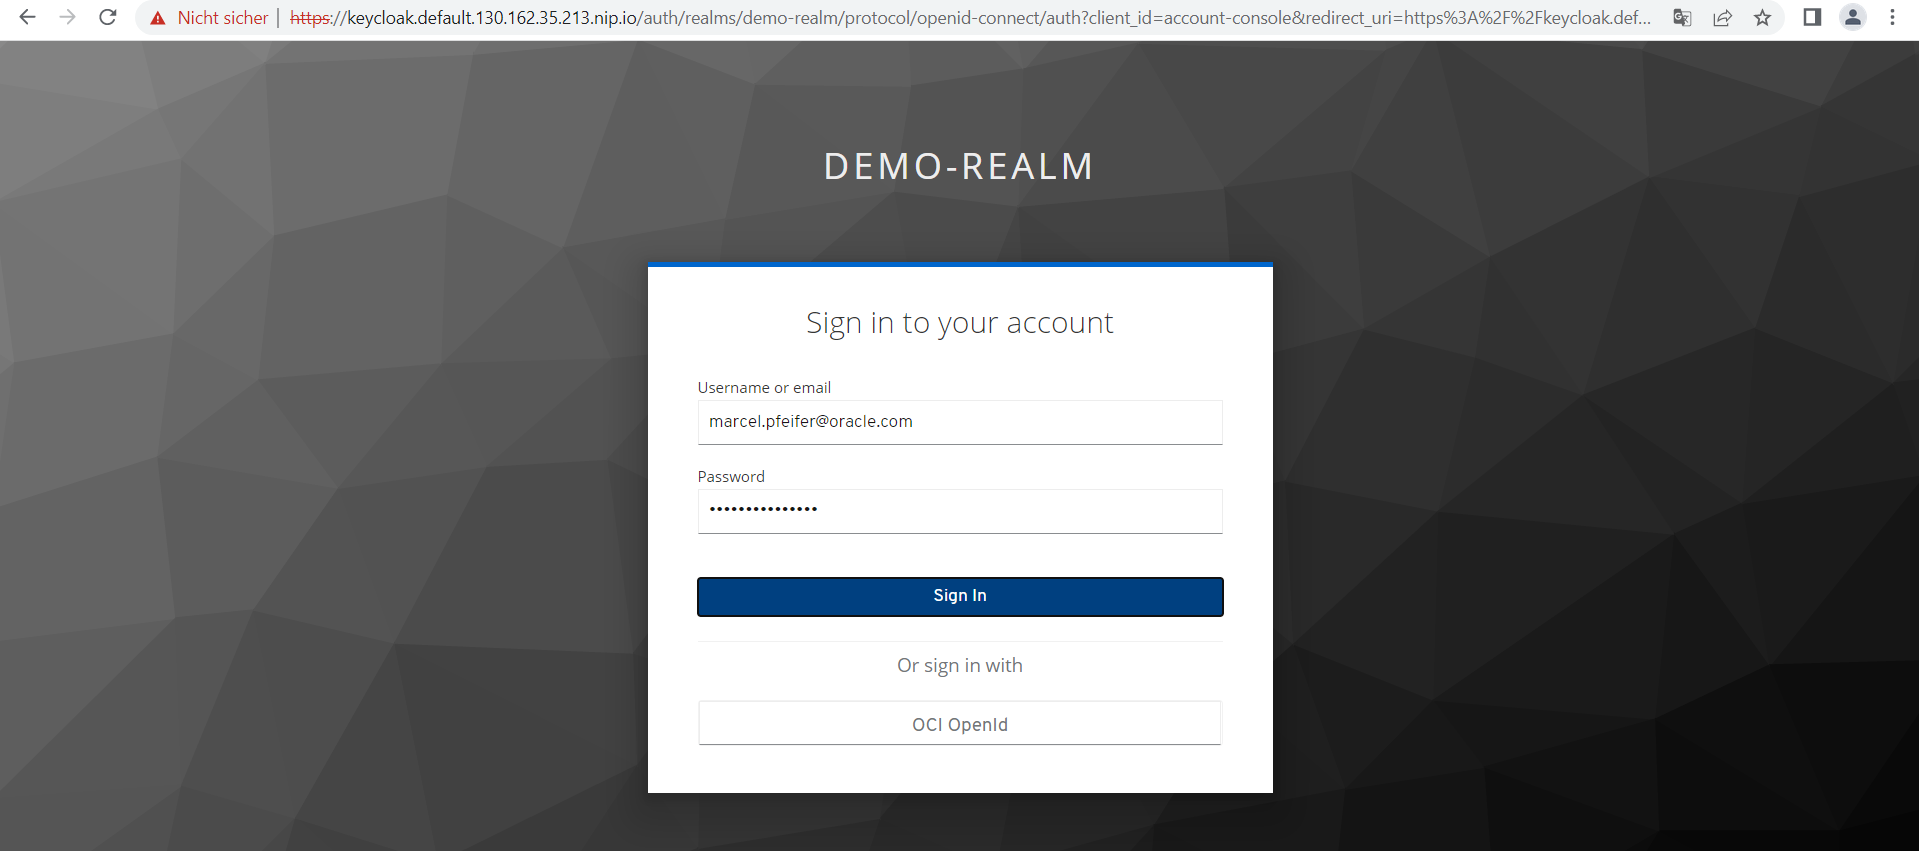
Now click on “Sign Out” in the upper right corner and log in to the site again (button “Sign In”).
This time use the username of your Oracle Cloud access (probably an eMail address) with its password, click on the provider button “OCI OpenId”:
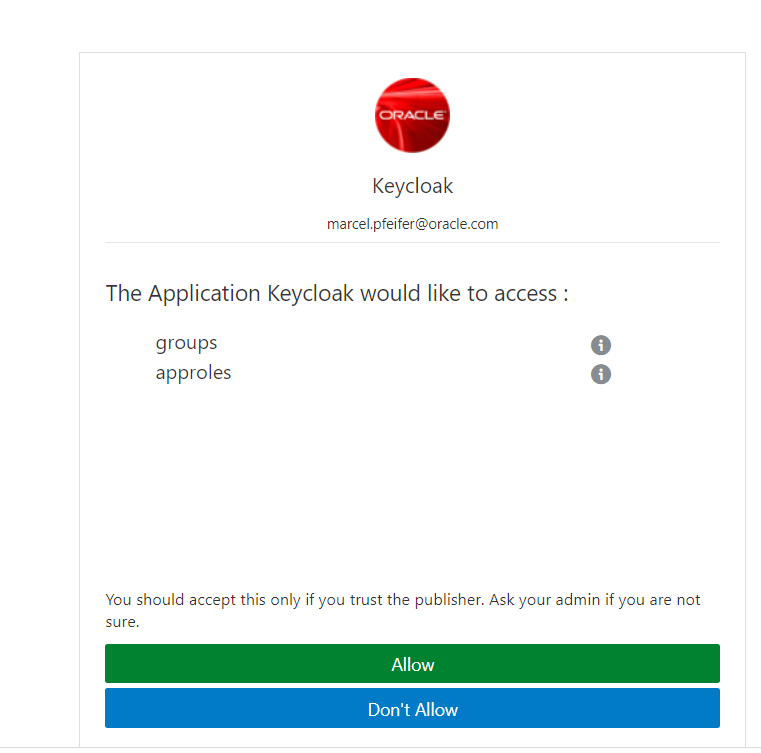
You may now be asked if you want to transfer certain data of your cloud user. If you trust your Keycloak installation, please confirm this.
In any case, after that you will get back to the page to retrieve your user data. You should now see some details that you made at some point in the Oracle Cloud.
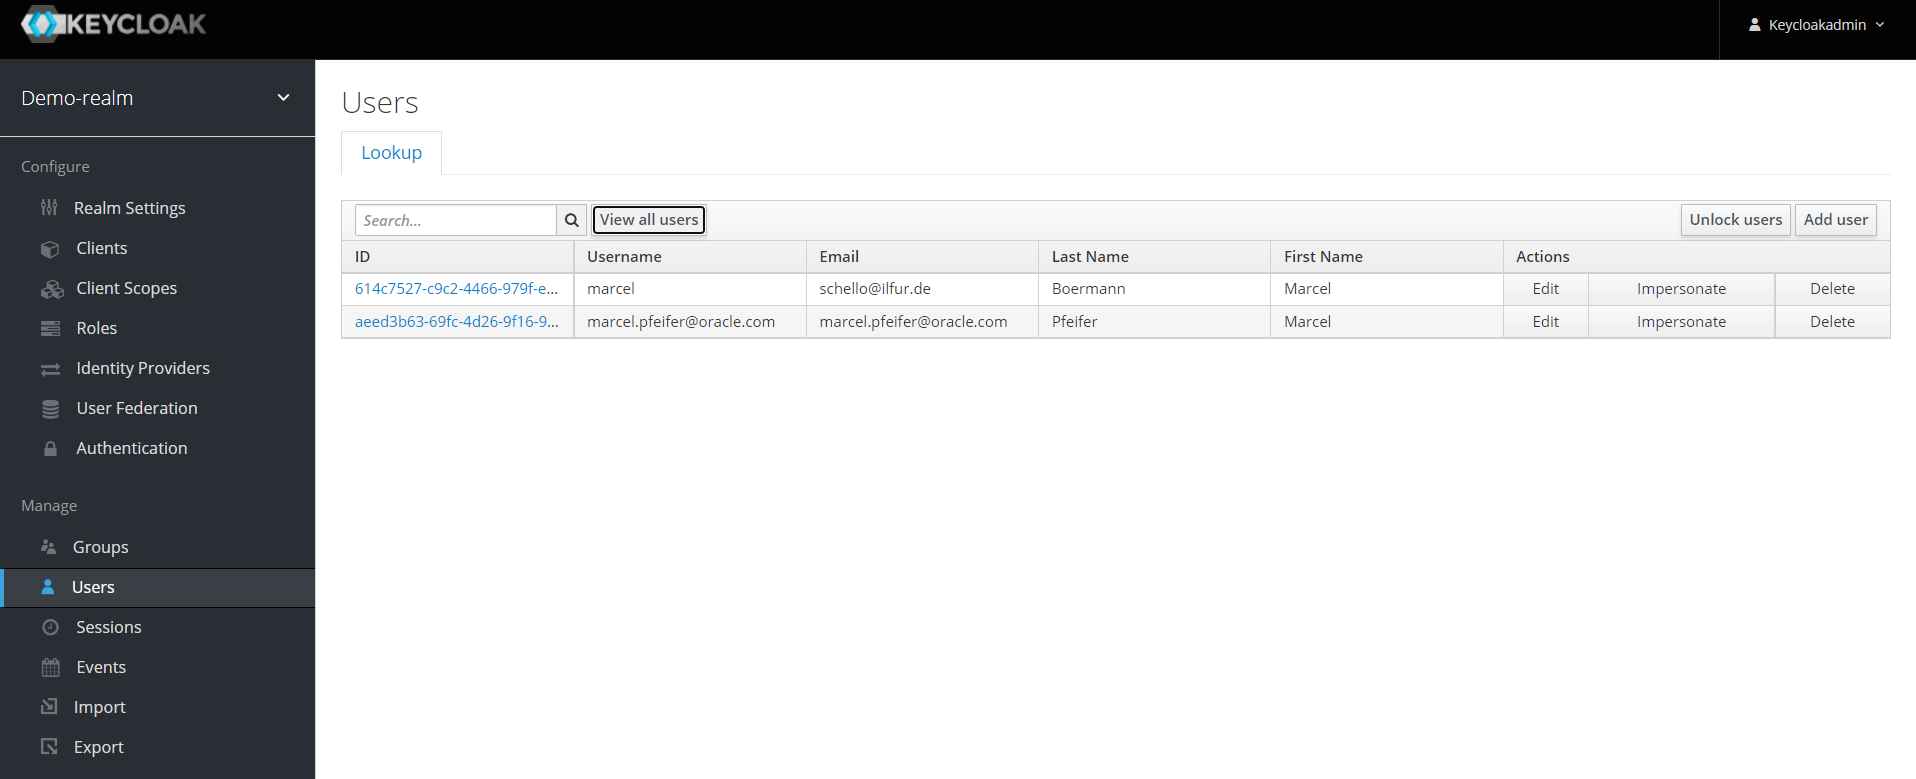
Now switch to the keycloak admin interface and display all users of the realm “demo-realm”. There should now be two users – one created in keycloak and one imported from Oracle Cloud.
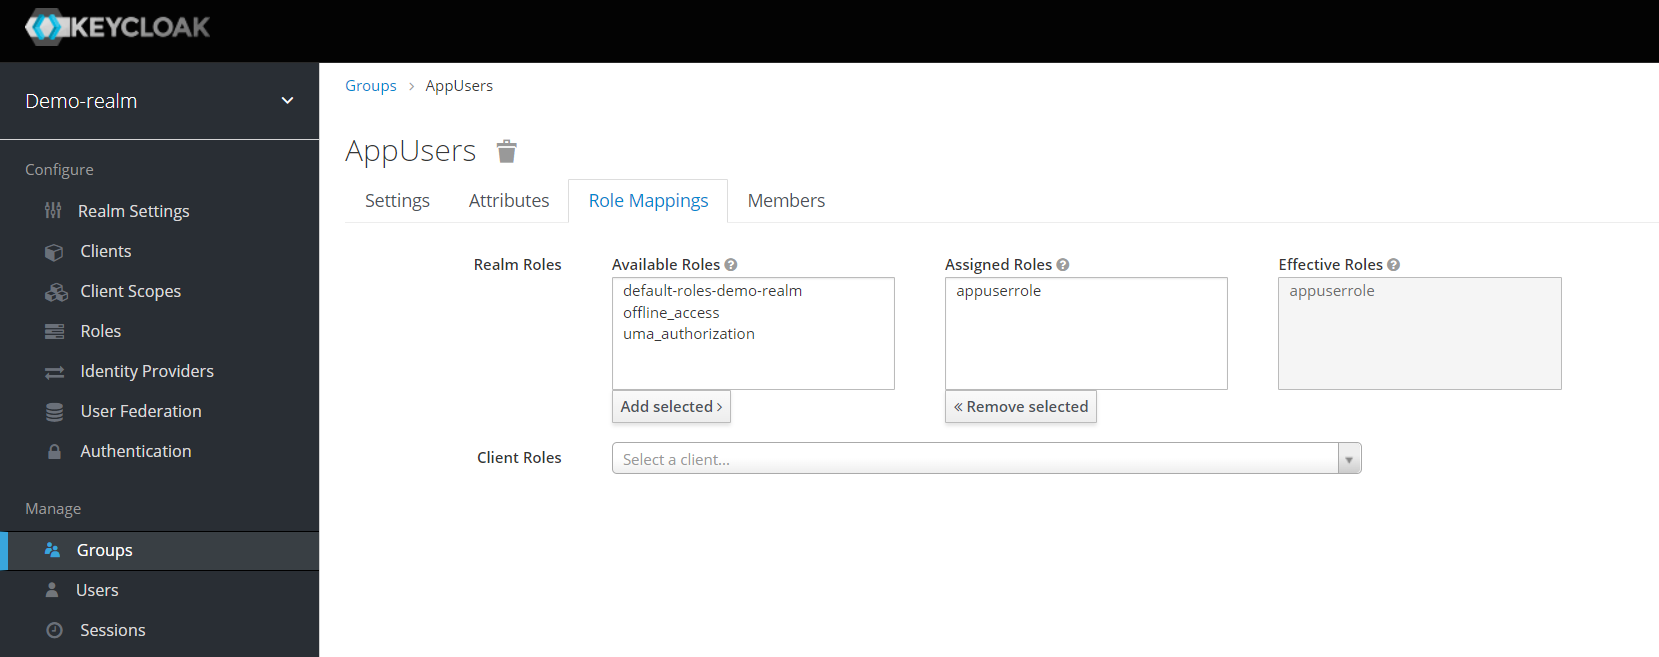
Click on the imported user and display its role mappings.
Is the role “appuserrole” among the “Assigned Roles” or “Effective Roles” as in our example ?
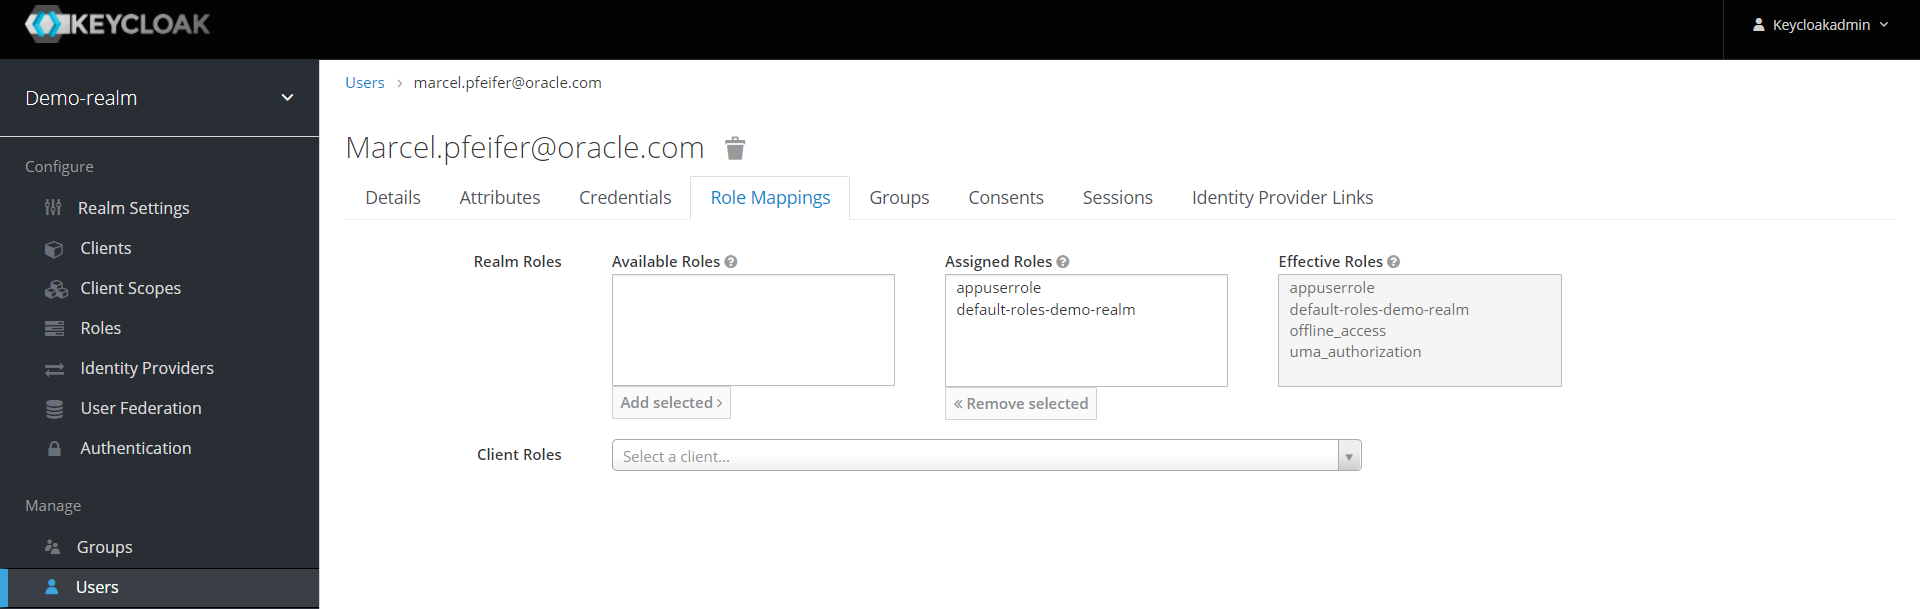
If yes, congratulations for the great success!
If no, there can’t be much missing, maybe your user just has too many group memberships and you should increase the number of mappers a bit more.
You can also check the log entries of your Keycloak server to see if there were problems with certificates or maybe syntax errors when mapping the groups.
If you have a Verrazzano installation, you can find the keycloak server (pod “keycloak-0”) in the namespace “keycloak”, you could look at its logs via kubectl command or via Rancher to find possible errors in the communication.
kubectl logs keycloak-0 -n keycloak
Here is a small example log of a failed import due to an issuer incorrectly specified in keycloak, a screenshot from the admin tool “Rancher” included in Verrazzano:

This OpenID Connect example worked fine with an OAuth-based demo application that reads the submitted JWT token and displays group information, for example. Setting up the demo application and linking it to Keycloak is described in the blog entry “Single SignOn in Oracle Verrazzano with Keycloak”. If you want to try this as well, we are of course very happy about it – and also about your feedback and questions.
As always, have fun testing and trying it out !