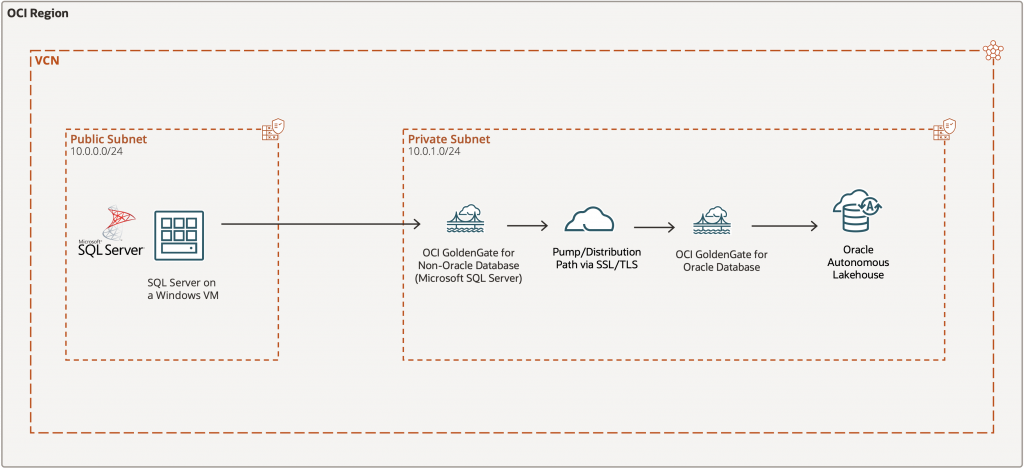
Need fresh analytics without batch delays? This post shows how to replicate changes from Microsoft SQL Server to Autonomous Lakehouse in near real time using OCI GoldenGate Microservices, covering the core setup and validation steps end-to-end. Note: This walkthrough was completed in a test/non-production environment—please exercise due diligence and ensure you select the appropriate licensing when implementing in your environment.
Prerequisites
- Microsoft Windows Server 2022 Standard Compute provisioned in public subnet (Microsoft SQL Server installed & configured)
- Configure network route rules to allow TCP port 3389 (RDP) and 1433 (SQL Server) access to subnet
- Provisioned 26ai Autonomous Lakehouse in private subnet
Task 1: Prepare Microsoft SQL Server for OCI GoldenGate
--Create SQL Server Login (Instance Level)
CREATE LOGIN GGADMIN WITH PASSWORD = '<password>';

--Create Database User for Login, maps server login to database user
CREATE USER GGADMIN FOR LOGIN GGADMIN;

--Grant Sysadmin Role (Convenience Access)
ALTER SERVER ROLE sysadmin ADD MEMBER GGADMIN;

--Create Source Database
CREATE DATABASE SRC_DB;

--Ensure database recovery model is compatible with CDC
ALTER DATABASE SRC_DB SET RECOVERY FULL;

--Switch Context to Source Database, following commands apply to SRC_DB
USE SRC_DB;

--Create Schema Owned by GGADMIN
CREATE SCHEMA SRC_DB_SCHEMA;
--Enable Change Data Capture (CDC), required for GoldenGate SQL Server capture
EXEC sys.sp_cdc_enable_db;

--Purge CDC staging table
EXECUTE sys.sp_cdc_drop_job 'cleanup'

--Create Sample Source Table
CREATE TABLE SRC_DB_SCHEMA.employees
(
    employee_id INT PRIMARY KEY,        -- Unique employee ID
    first_name  VARCHAR(50),            -- Employee first name
    last_name   VARCHAR(50),            -- Employee last name
    email       VARCHAR(100) UNIQUE,    -- Unique email address
    hire_date   DATE,                   -- Date of joining
    salary      DECIMAL(10,2)            -- Salary with 2 decimals
);
GO
INSERT INTO SRC_DB_SCHEMA.employees (employee_id, first_name, last_name, email, hire_date, salary)
VALUES
(1, 'John', 'Doe', 'john.doe@example.com', '2024-01-01', 5000.00),
(2, 'Jane', 'Smith', 'jane.smith@example.com', '2024-02-01', 5500.00);

--Enable CDC on a specific Table, must be run after CDC is enabled at the database level
EXEC sys.sp_cdc_enable_table
    @source_schema = 'SRC_DB_SCHEMA',
    @source_name   = 'employees',
    @role_name     = NULL;
Task 2: Prepare Autonomous Lakehouse for OCI GoldenGate
Since GGADMIN user already exist in Autonomous Lakehouse, run below commands to unlock the user and create identical schema/table structure for replication.
alter user ggadmin account unlock;
alter user ggadmin identified by <password>;
CREATE TABLE admin.employees
(
    employee_id INT PRIMARY KEY,        -- Unique employee ID
    first_name  VARCHAR(50),            -- Employee first name
    last_name   VARCHAR(50),            -- Employee last name
    email       VARCHAR(100) UNIQUE,    -- Unique email address
    hire_date   DATE,                   -- Date of joining
    salary      DECIMAL(10,2)            -- Salary with 2 decimals
);
Note: Schema and Tables DDL/Metadata eligible for real time data replication between source and Target must be manually created and made ready before starting the replicat process.
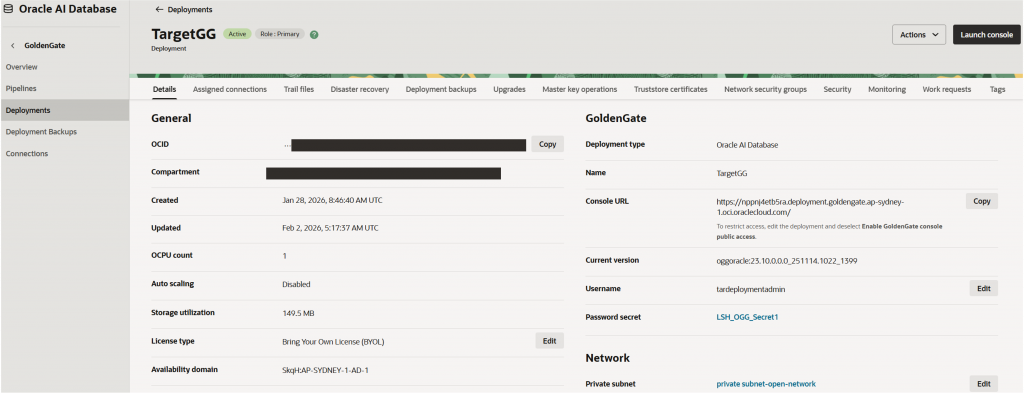
Task 3: Create OCI GoldenGate Deployments
From OCI GoldenGate, hit “Create deployment” and provide meaningful deployment name.
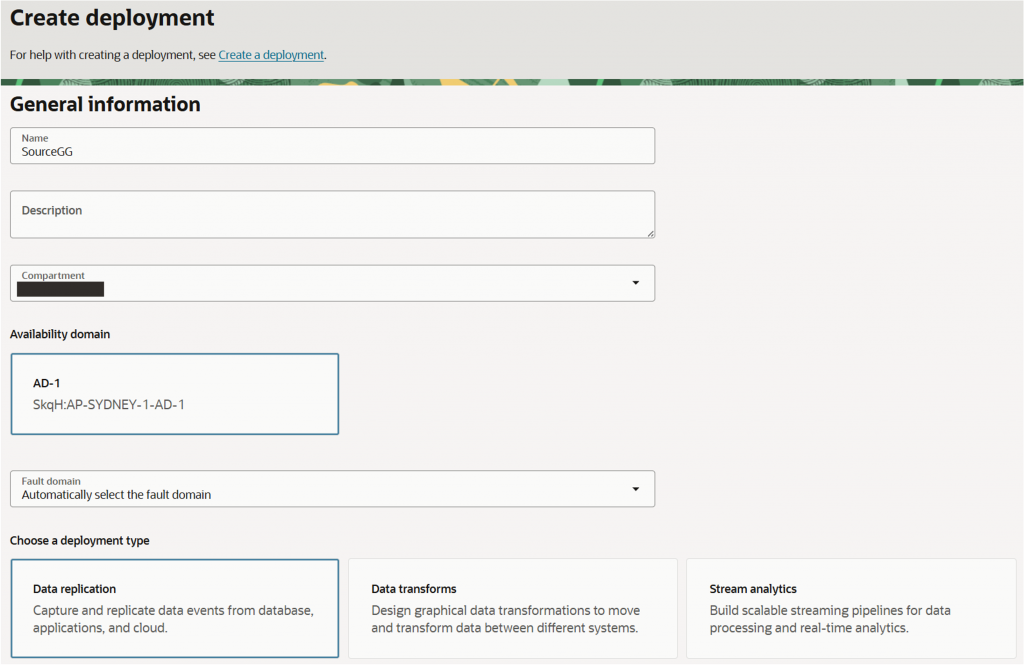
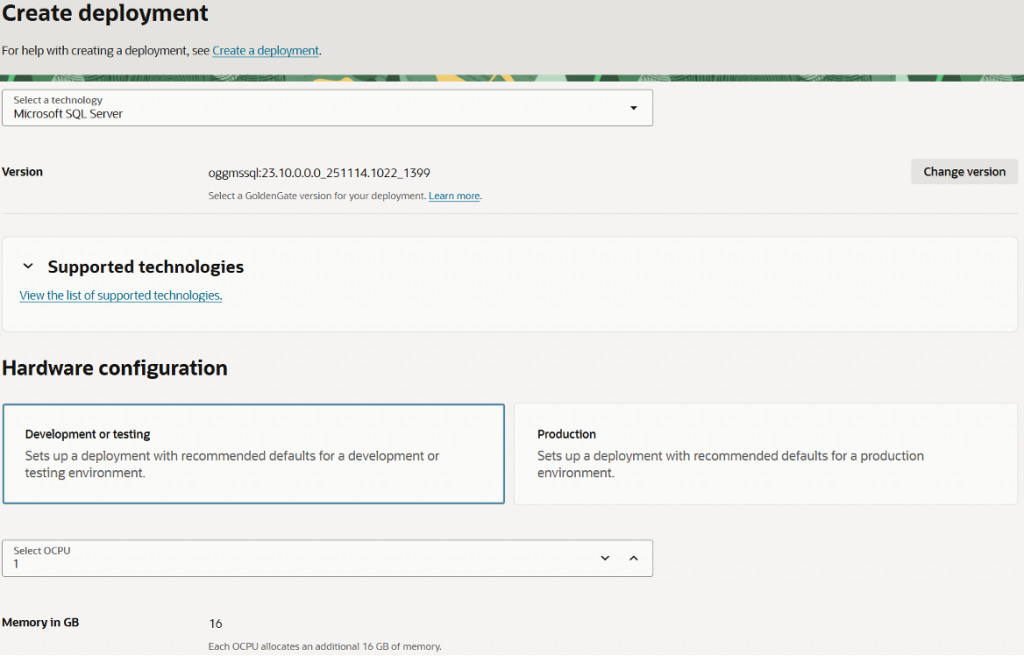
Under “Select a technology”, select “Microsoft SQL Server” for source deployment and “Oracle Database” for target deployment.
Select desired private subnet to deploy, provide meaningful GoldenGate instance name and administrator username. For password secret, simply hit “create password secret” to create password in desired vault
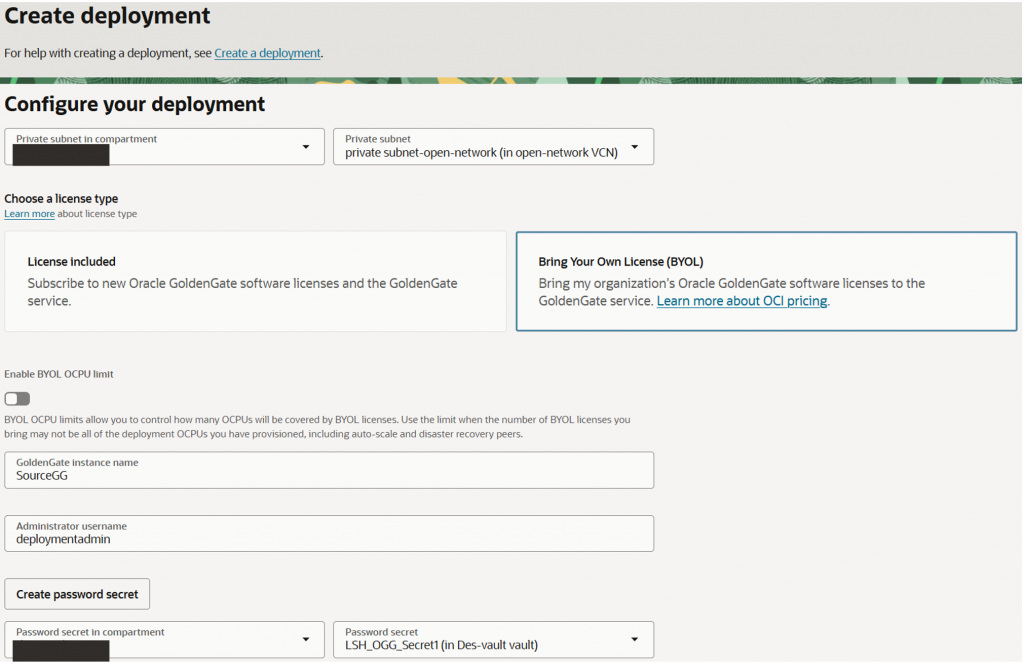
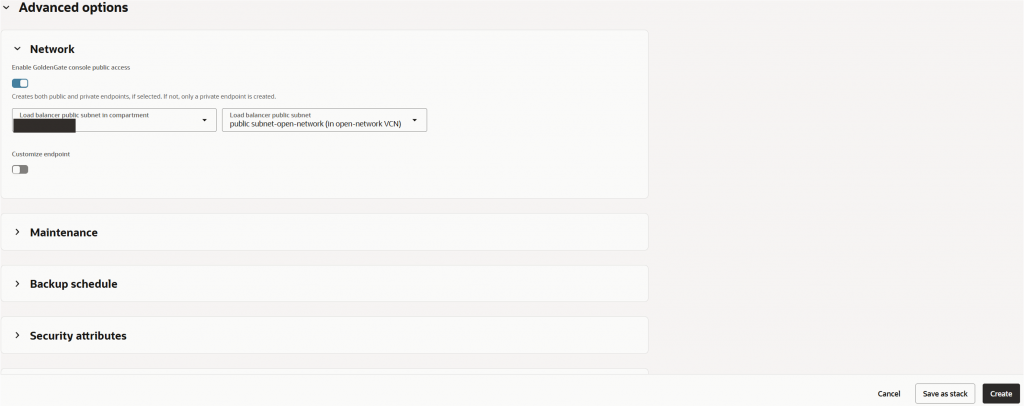
Under “Advanced options”, ensure “Enable GoldenGate console public access” for easier access to GoldenGate console. Select desired public subnet. Hit “Create” to create deployment.
Note: Repeat above process for target deployment creation. Add ingress rule to public subnet to allow GoldenGate instance in private subnet to access TCP port 1433.
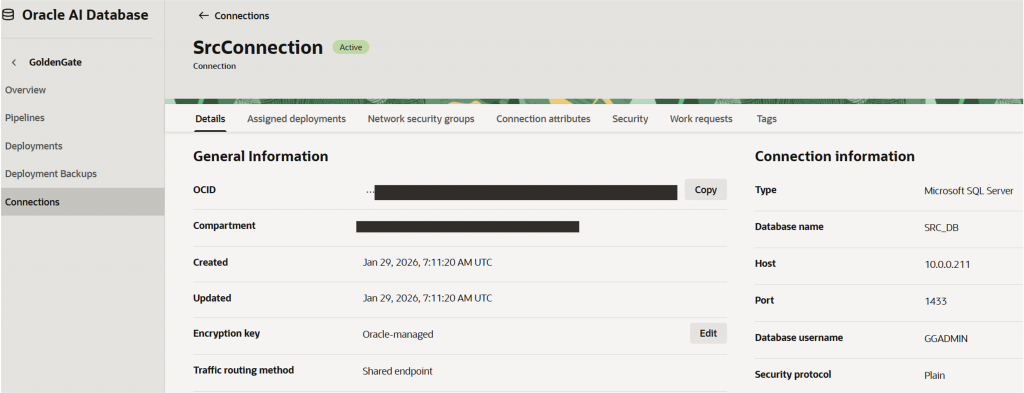
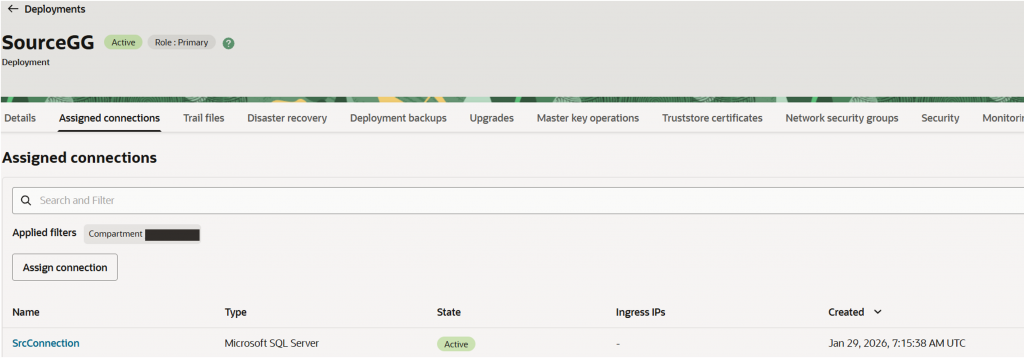
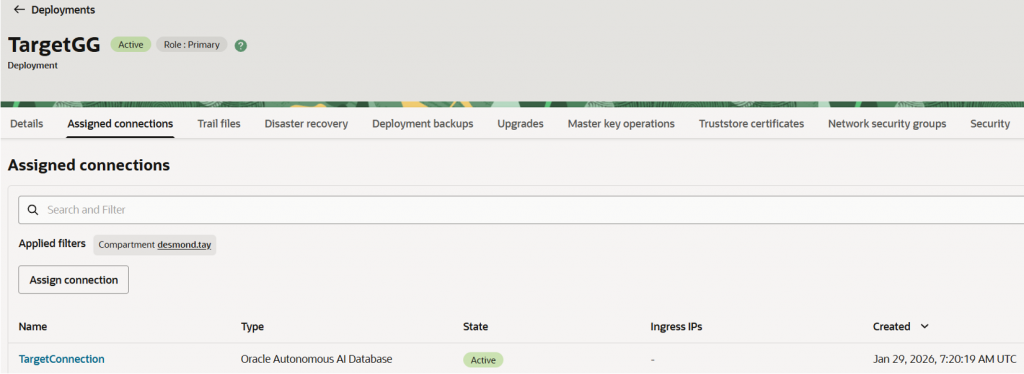
Task 4: Create OCI GoldenGate connections and assign it to desired deployment
Under “Connections”, hit “Create connection” and provide a meaningful connection name
- Type will be “Microsoft SQL Server” for source and “Oracle Autonomous AI Database” for target connection
- Name of databases will be the of source and target respectively
- Host is the private IP of Microsoft Windows Server 2022 Standard Compute
- Username is the “GGADMIN” user created/unlocked above
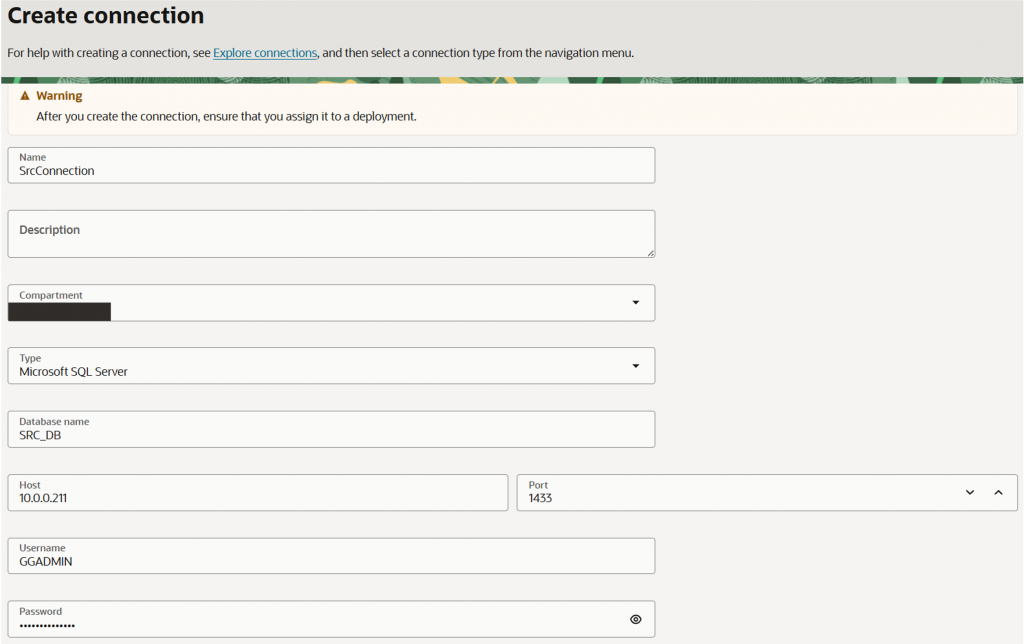
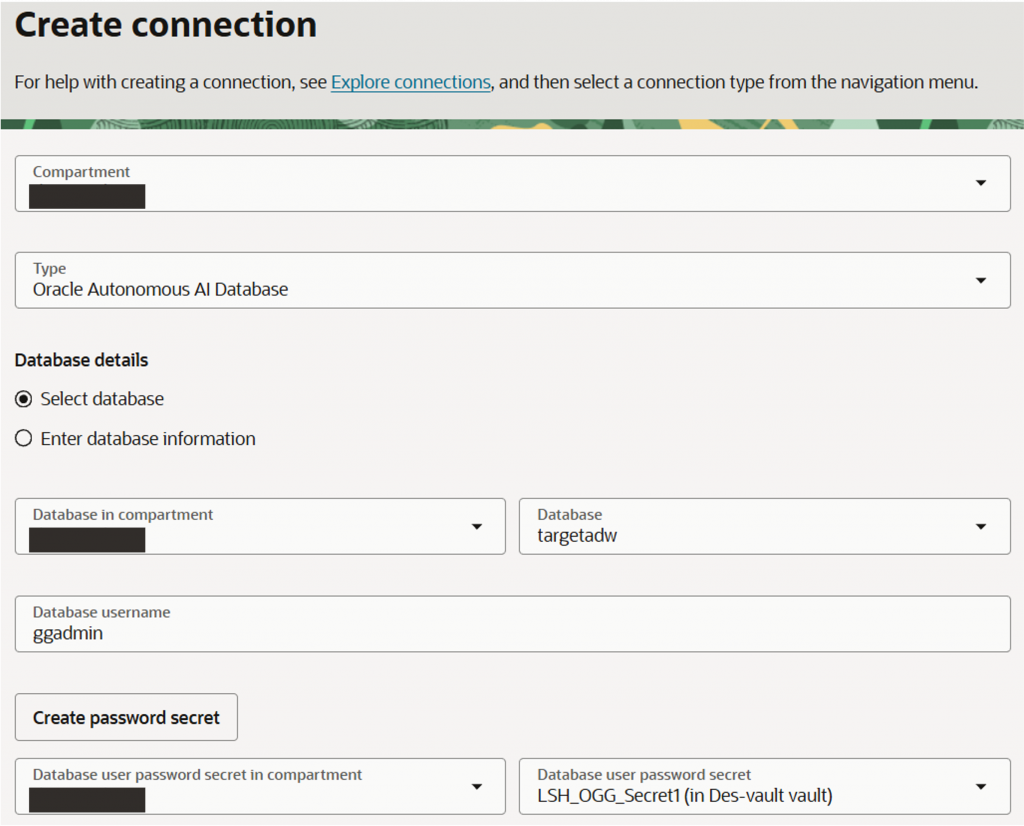
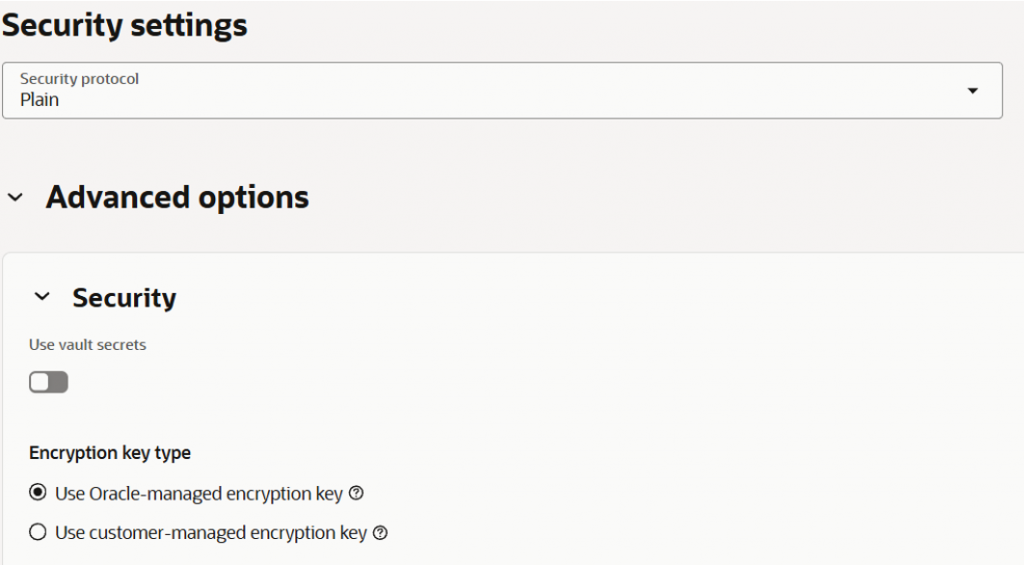
For simplicity, under “Advanced options”, uncheck “Use vault secrets” so we can use normal password
Hit “Create” once all information are keyed in

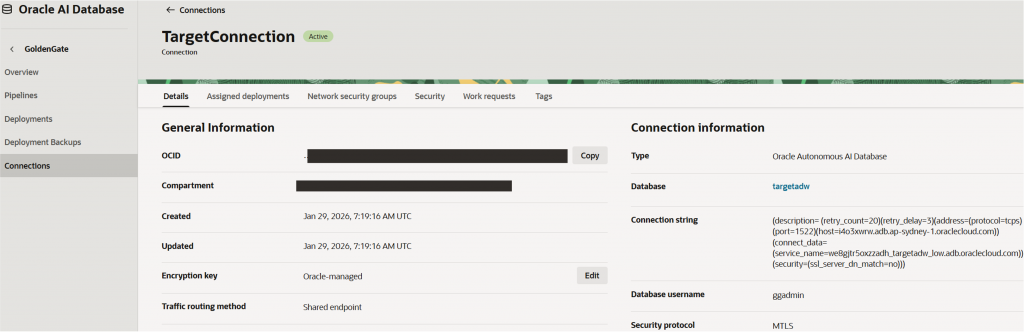
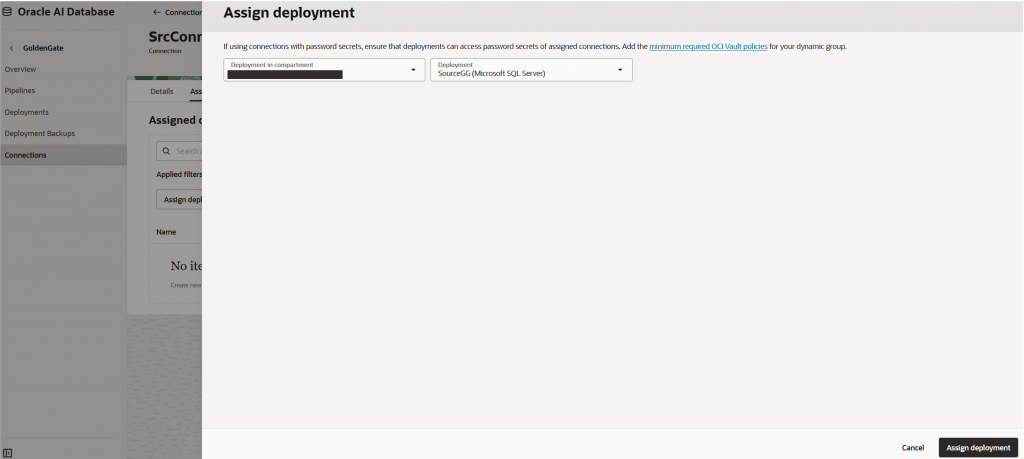
Under “Assigned deployments”, hit “Assign deployment”.
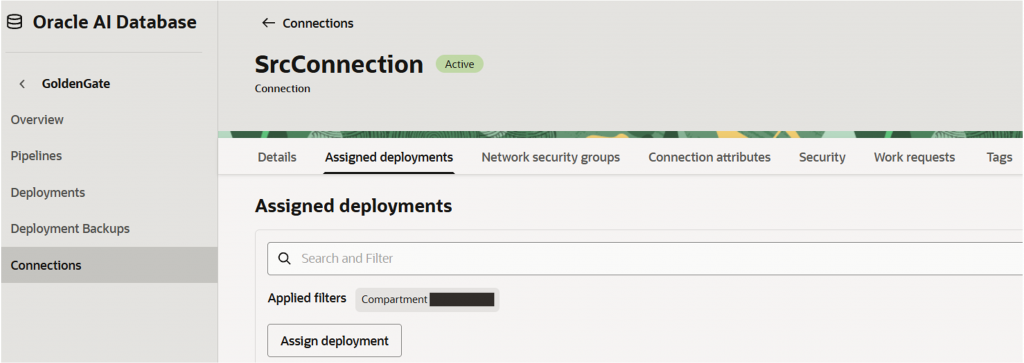
Associate connection to respective deployment.
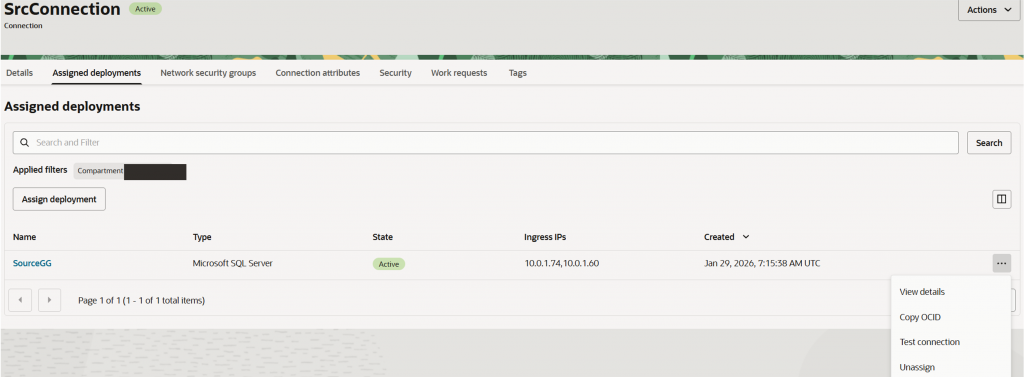
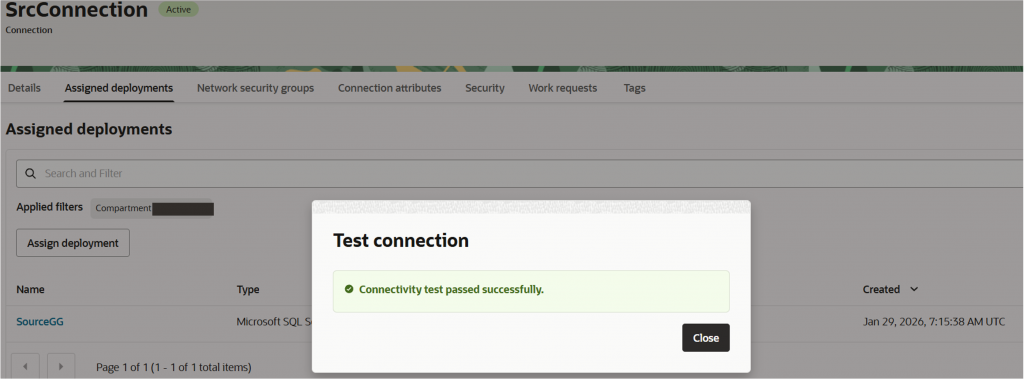
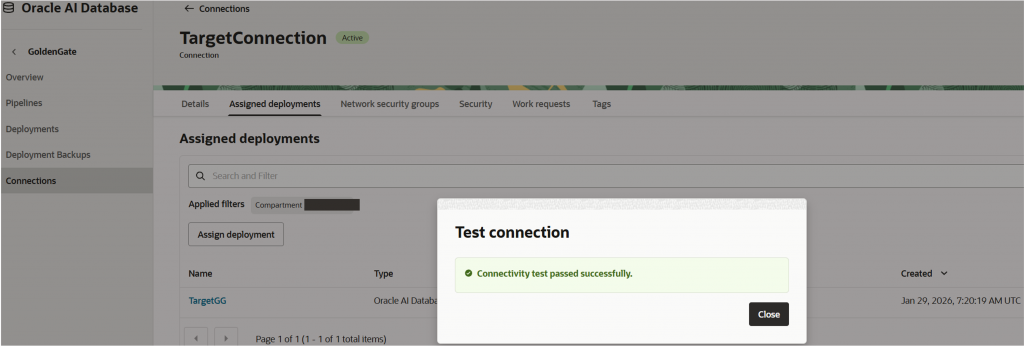
Hit “Test connection” and ensure connectivity test passed successfully.
Note: Repeat above process for target connection.
Task 5: Setup connectivity between deployments
Upon successful connection to respective deployments, establish connection between them to enable trail file flow using distribution path.
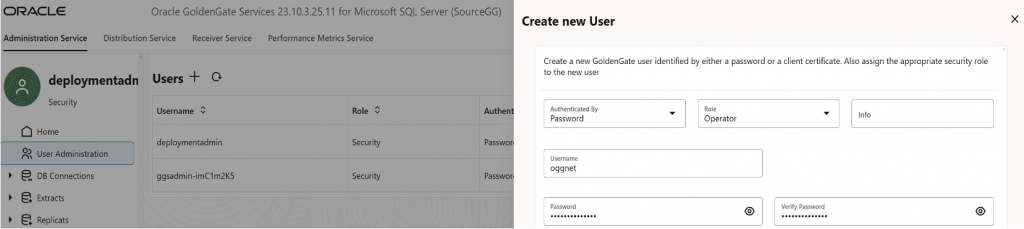
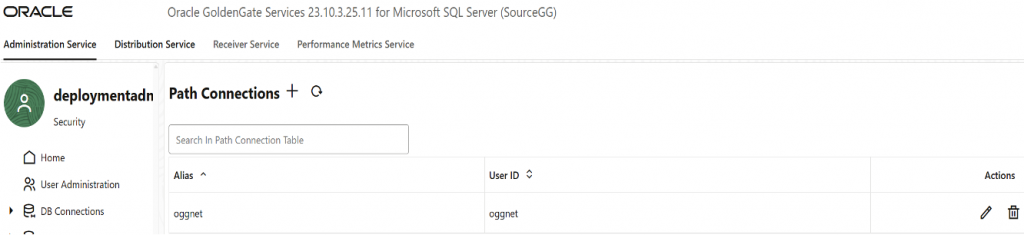
In both source and target deployment GoldenGate Console, under “User Administration”, hit “+” to create a new “Operator” user. This user enables communication between the deployments. Hit “Submit”.
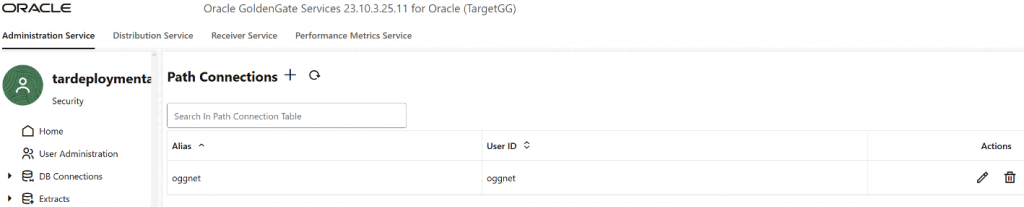
Under “Path Connections”, hit “+” and provide the user’s username and password created in above steps.
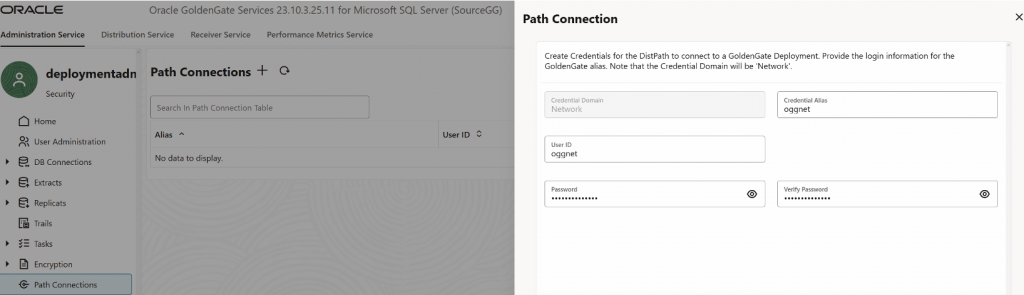
Note: Repeat process for target deployment
Task 6: Create (initial load) Extract Process
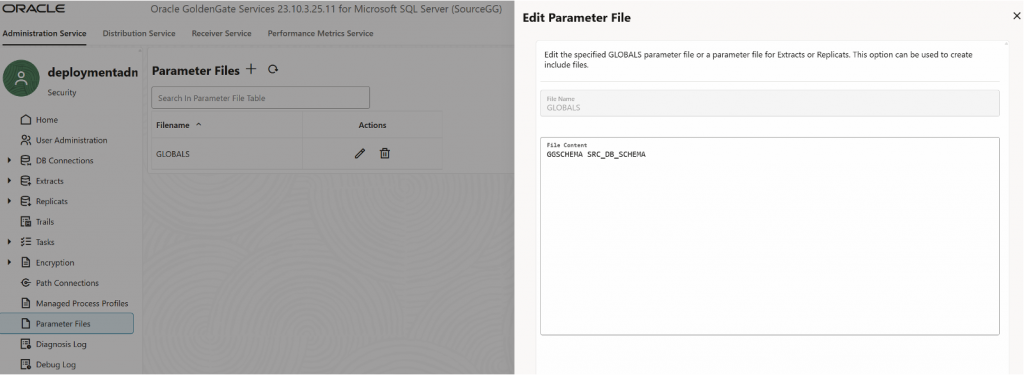
In source OCI GoldenGate console, under “Parameter Files”, update it to the source’s schema.
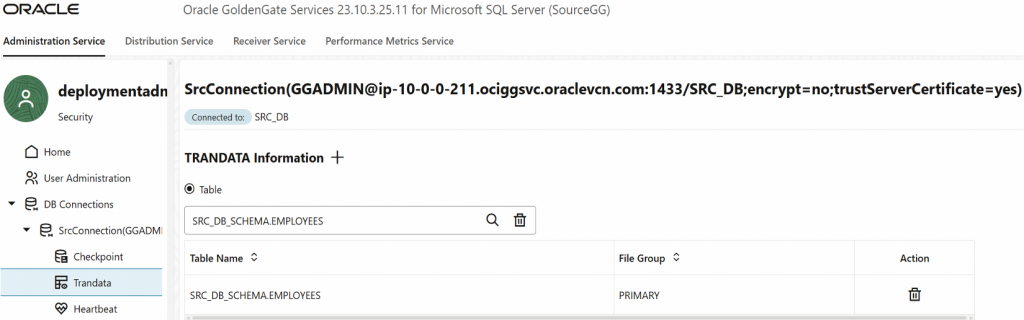
Under “DB Connections” > “TRANDATA information”, hit “+” to add schema Trandata. Hit “Submit”.
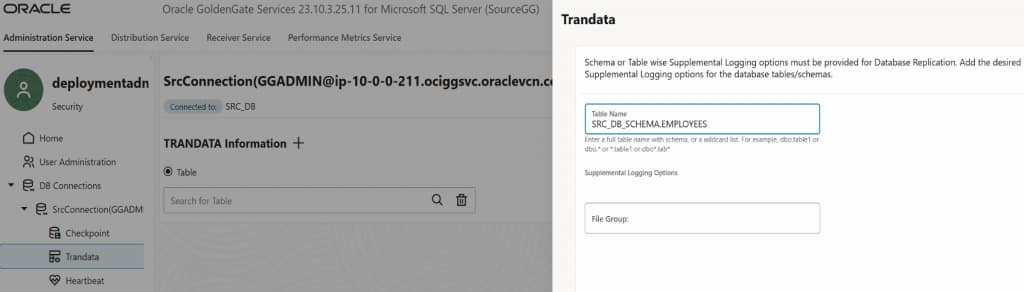
Verify that desired schema has been added.
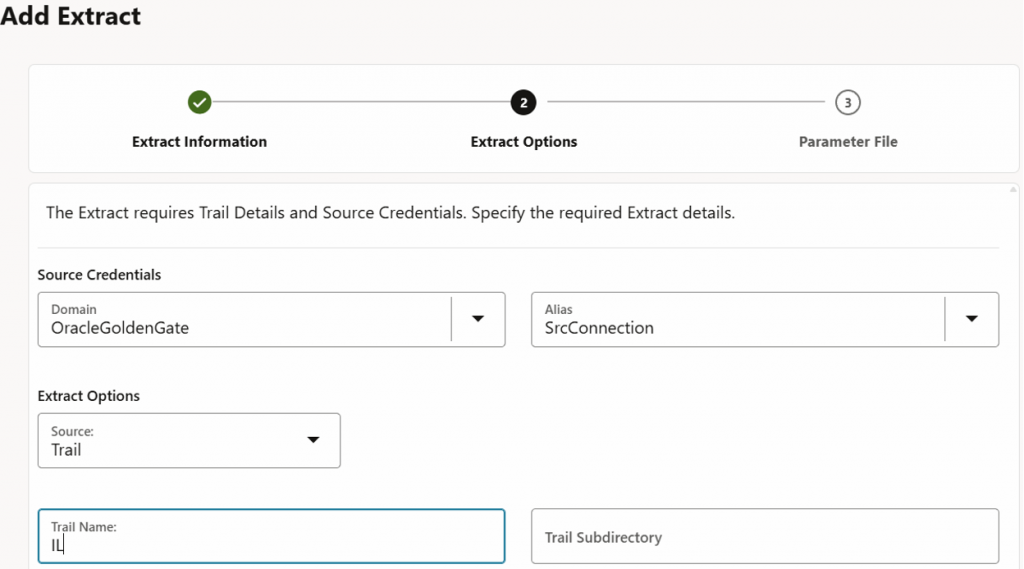
Under “Extracts”, hit “+” and provide a meaningful extract name followed by hitting “Next”.

Select respective “Domain”, “Alias” and provide a trail name.
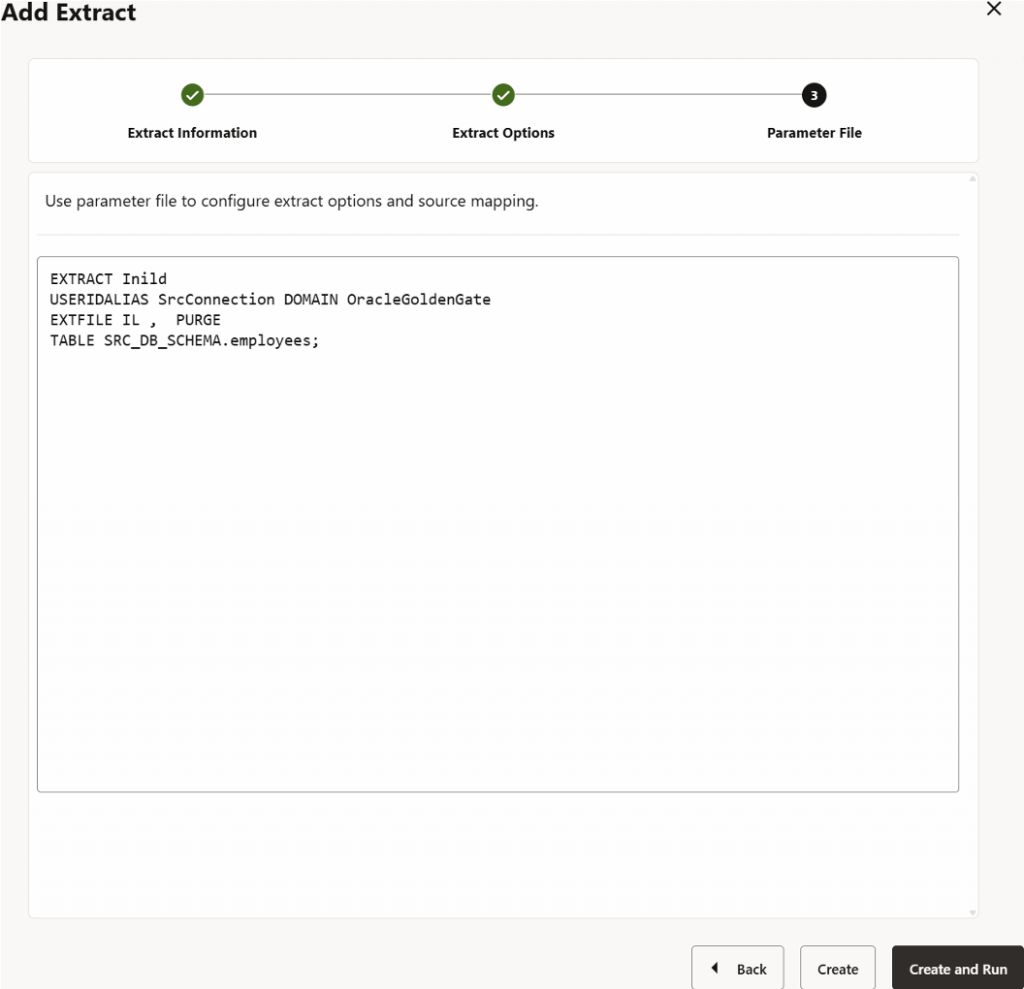
Replace *.* with desired <schemaName>.<tablename>. Hit “Create and Run”.
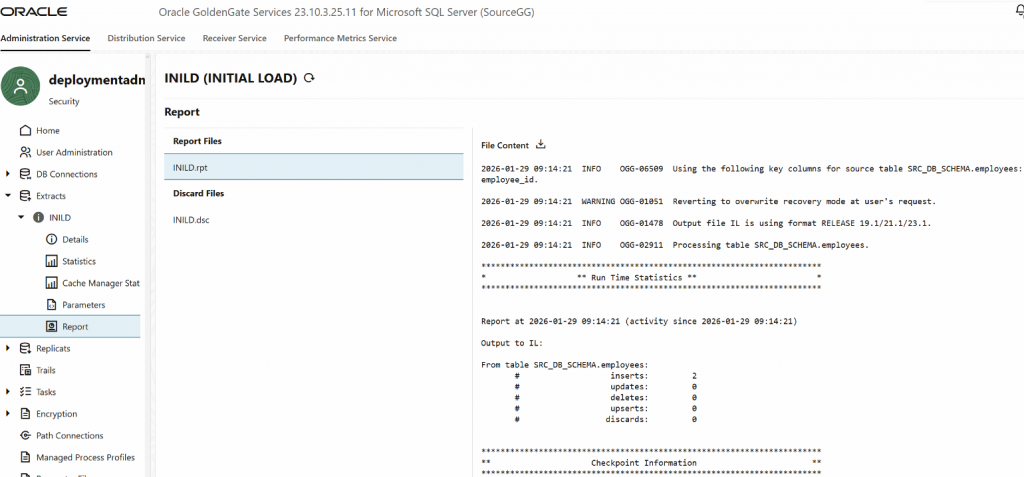
Verify that intended data in the source schema has been captured in this initial load extract.
To establish communication and move trail files between the 2 deployments, a Distribution Path is needed.
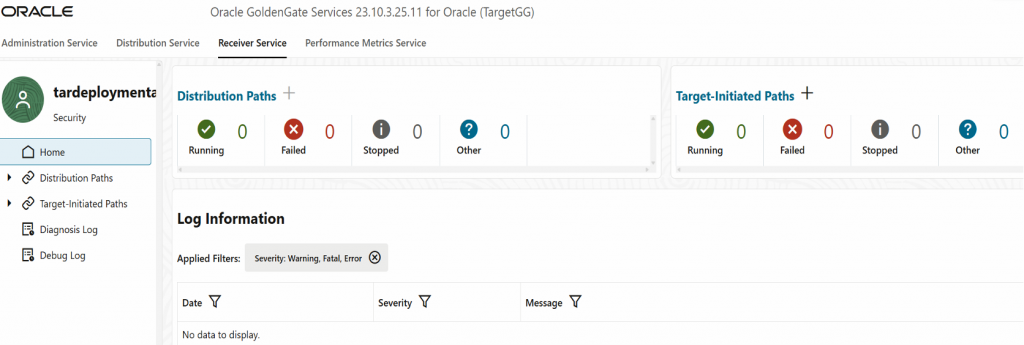
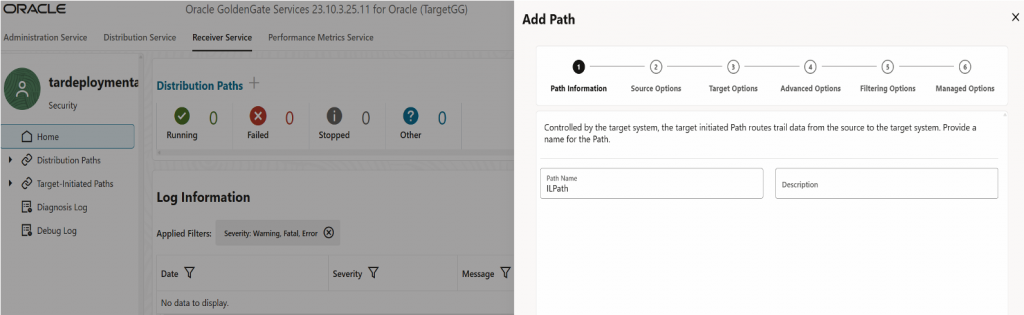
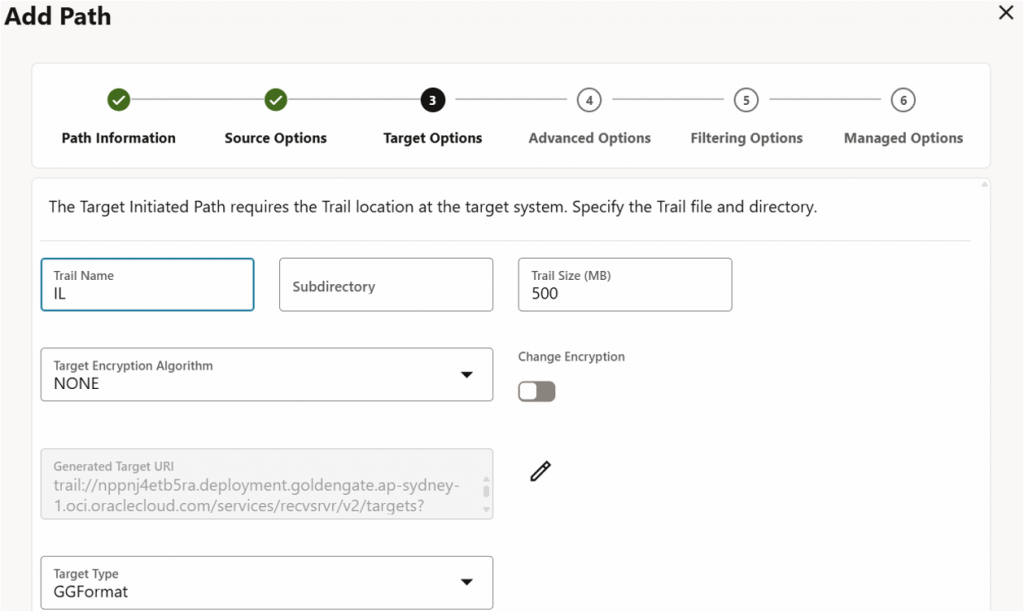
Navigate to target’s deployment GoldenGate console. Under “Receiver Service” > “Target-Initiated Path” > “+”, provide a meaningful path name.
Select “wss” as the source protocol, provide source host (source deployment URL), port 443 and the same trail name and username. Ensure “https:” and the ending “\” are not included in the “Source Host”.
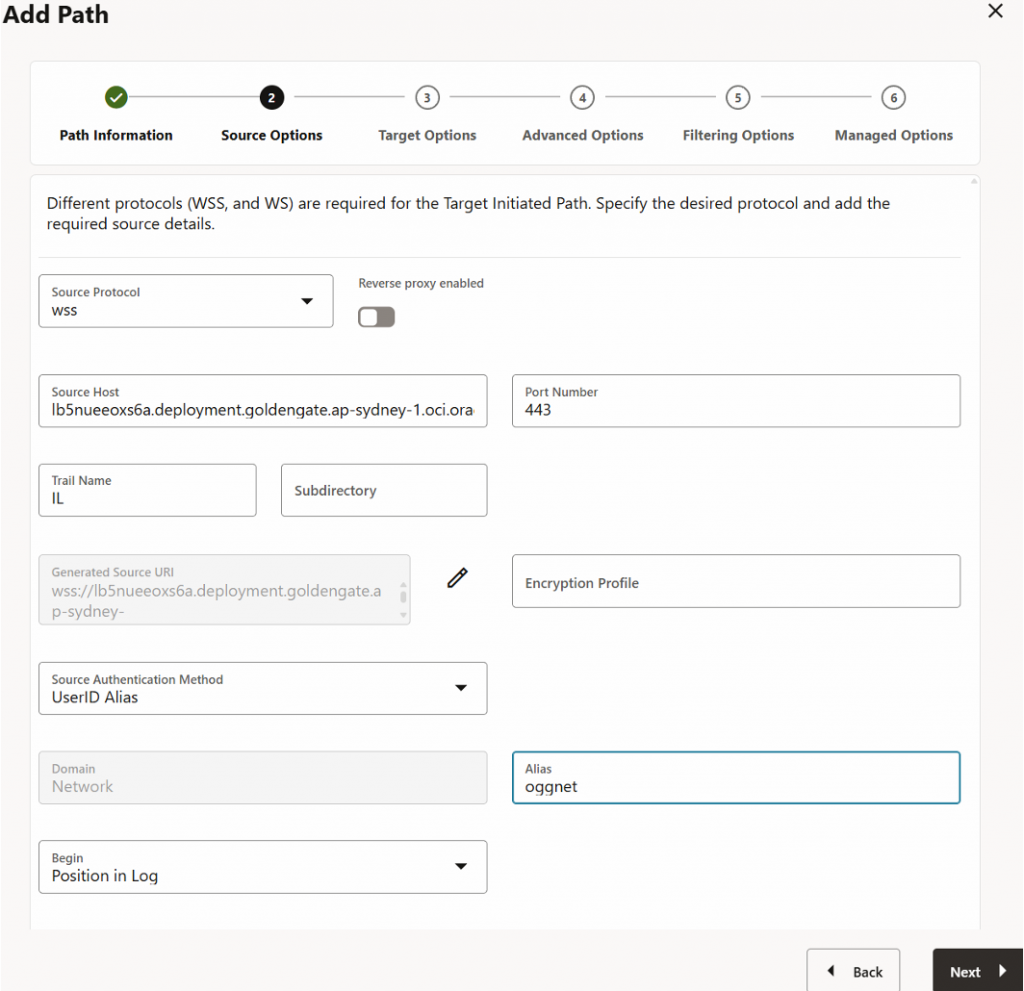
Leave “Adanced Options” and “Filtering Options” as default and hit “Create and Run”.

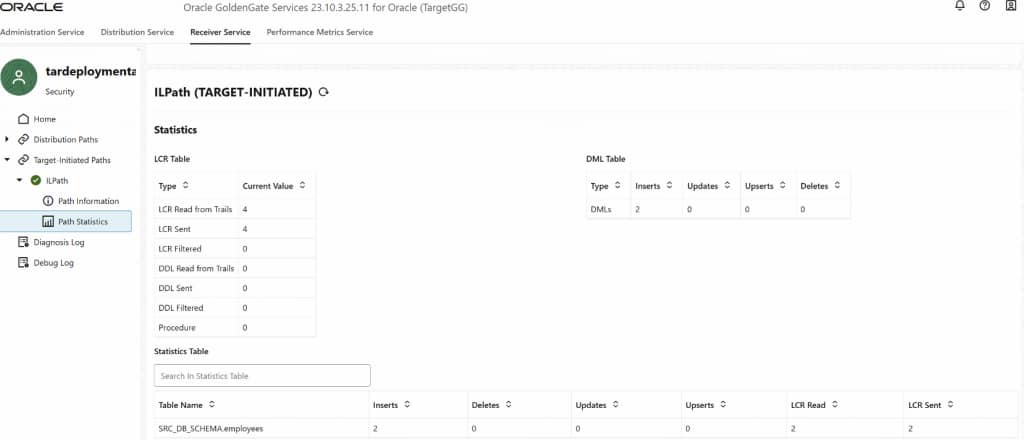
Validate that the extracted initial load data has been replicated.
Task 7: Create (initial load) Replicat Process
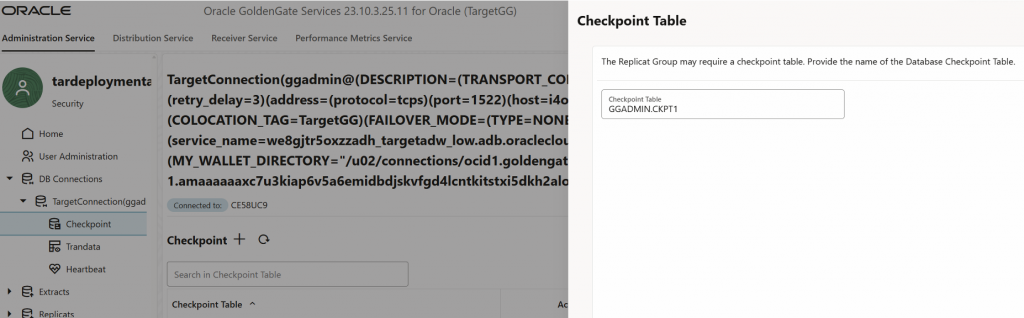
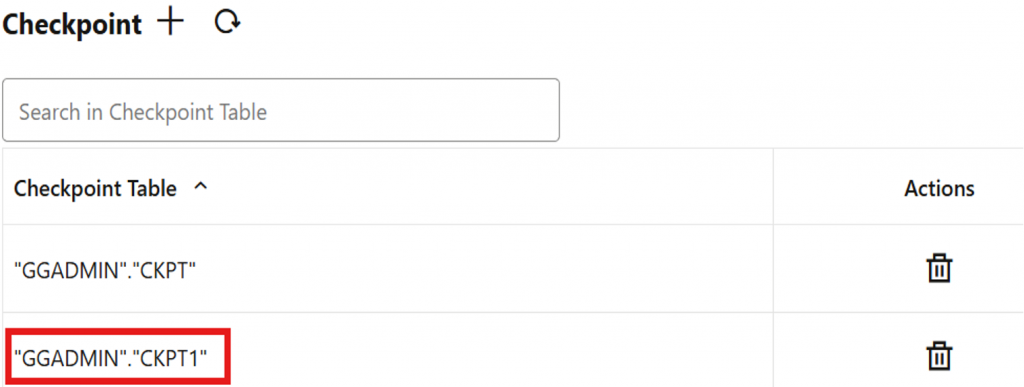
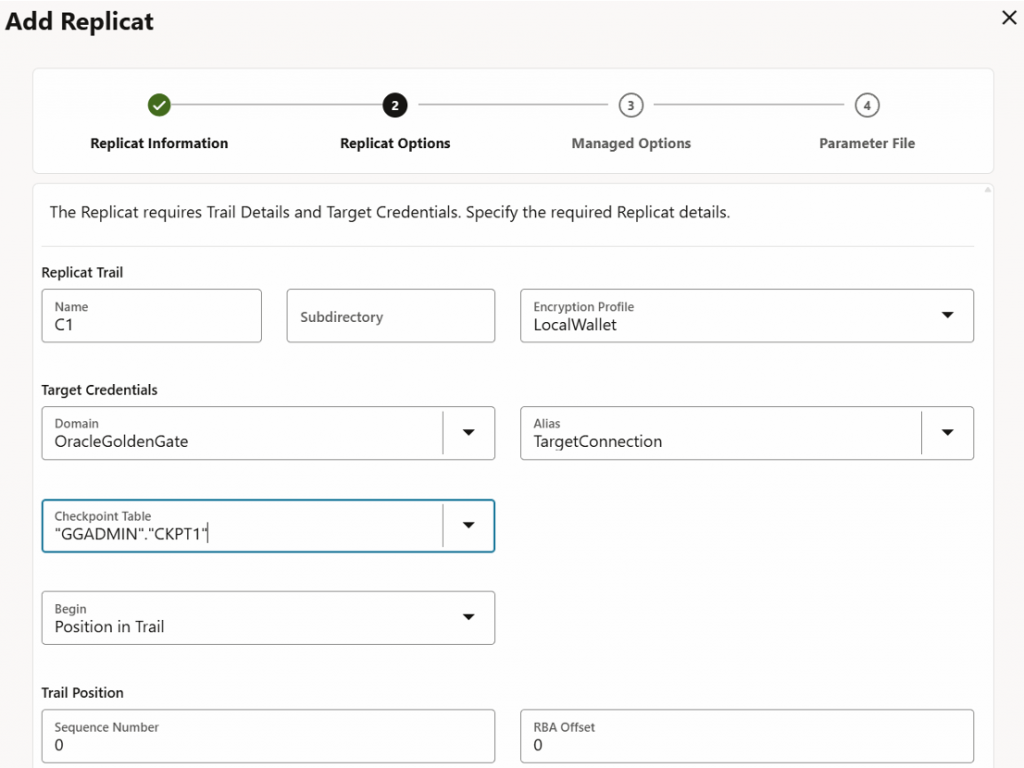
Setup (Initial Load) Replicat on target’s GoldenGate Console. Navigate to “DB Connections” > “Checkpoint” to create a Checkpoint table. Provide a meaningful checkpoint table name and hit “Create”.
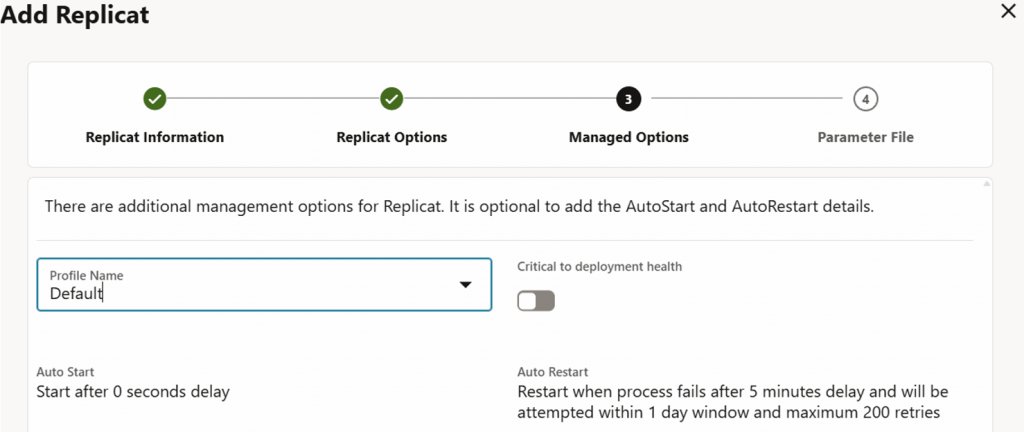
Navigate to “Replicats” > “+” to add a replicat. Keep the default settings and provide a meaningful process name.
Replicat Trail Name should be as declared in target’s target-initiated path. Select respective “Domain”, “Alias” and “Checkpoint Table”.
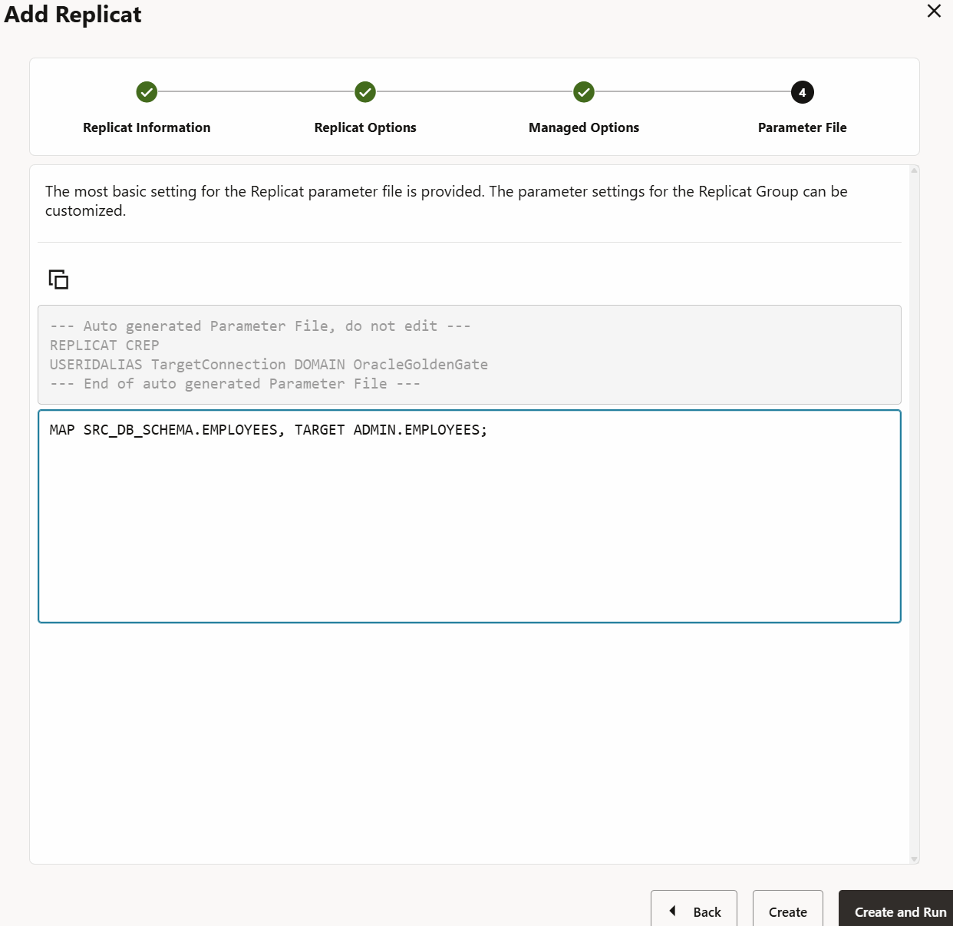
Provide respective mapping for table. Hit “Create and Run”.

Review in “Replicats” > “Statistics” to validate initial load data are replicated to target.
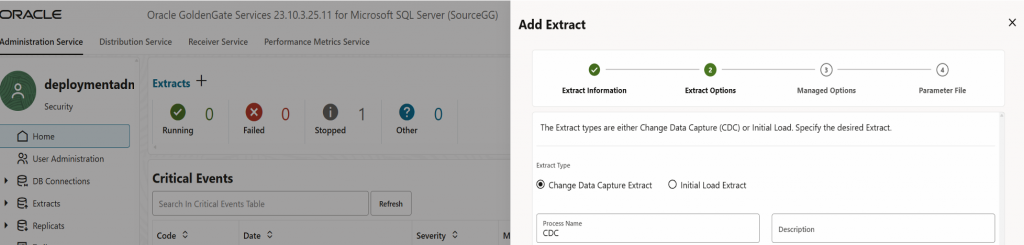
Task 8: Create (CDC) Extract Process
Create a distribution path for CDC extract and push the trail files from source to target deployment.
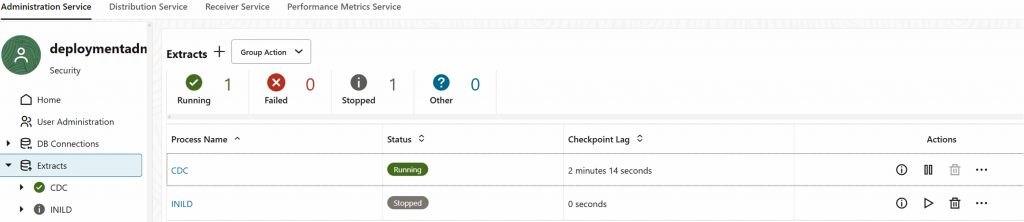
Navigate to source GoldenGate Console > “Extracts” > “+” to add Extracts. Select “Change Data Capture Extract” and provide a meaningful process name.
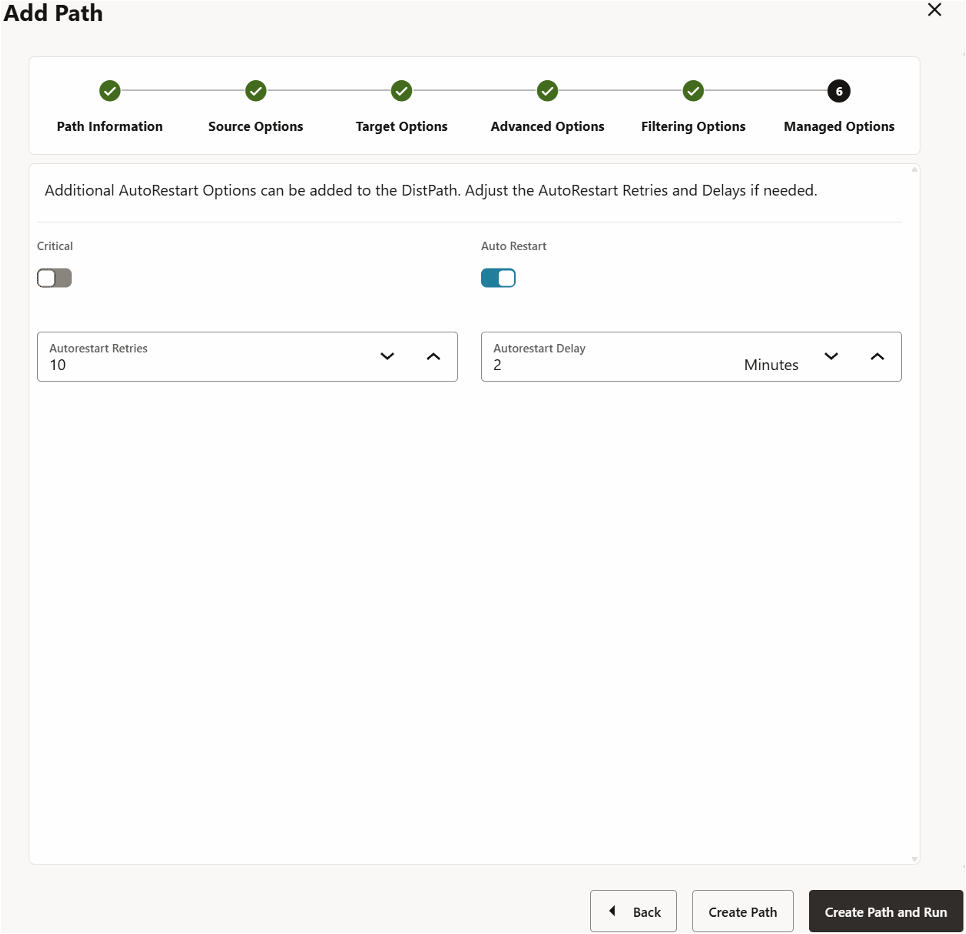
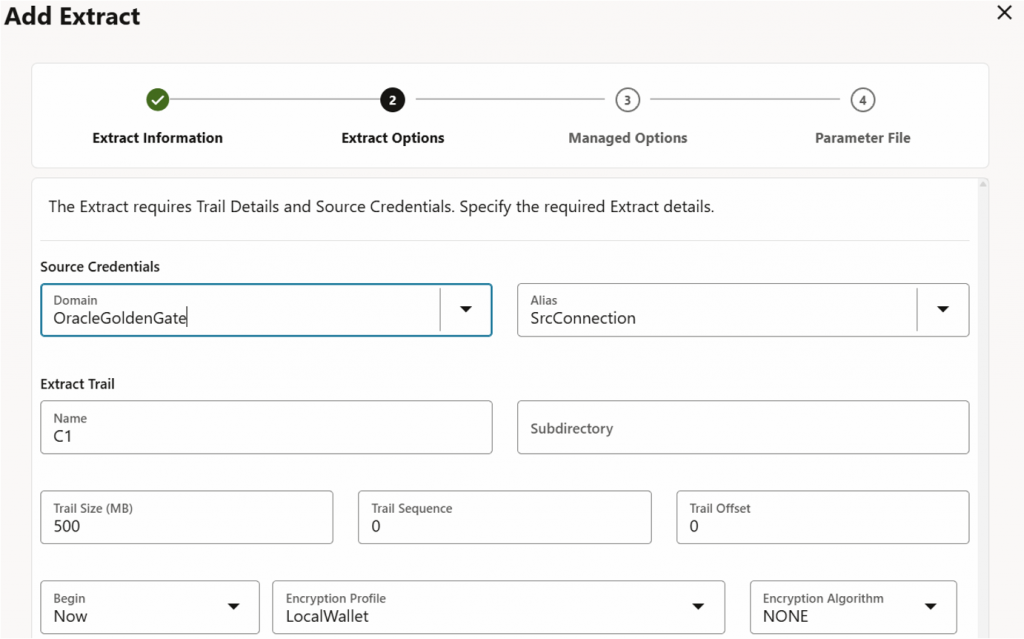
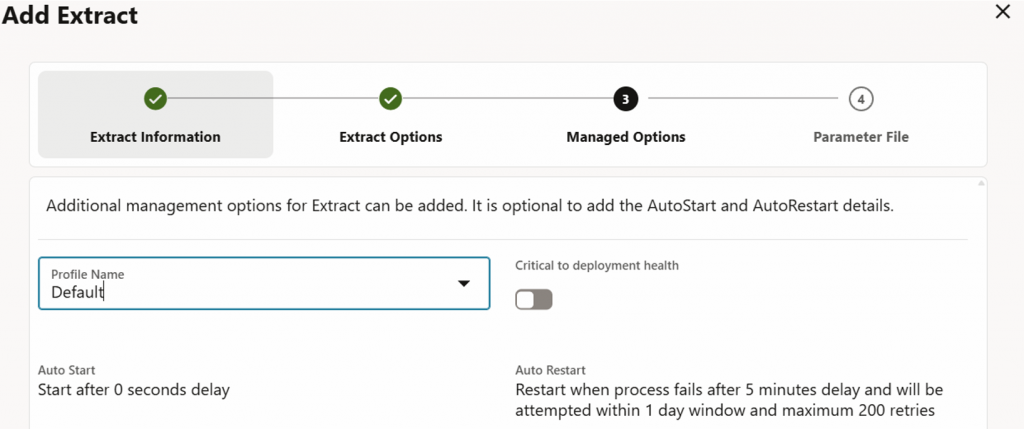
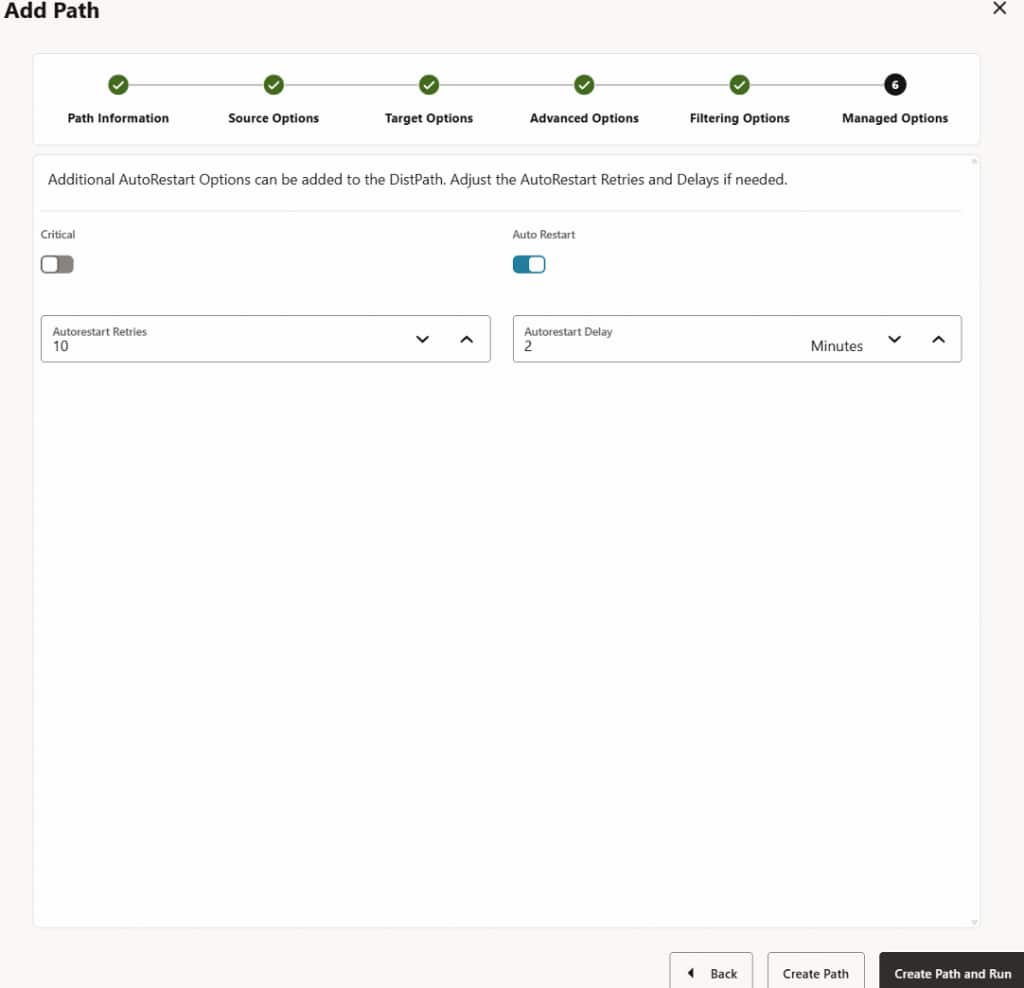
Select respective “Domain”, “Alias” and provide an “Extract Trail Name”. Keep the “Managed Options” setting as default.
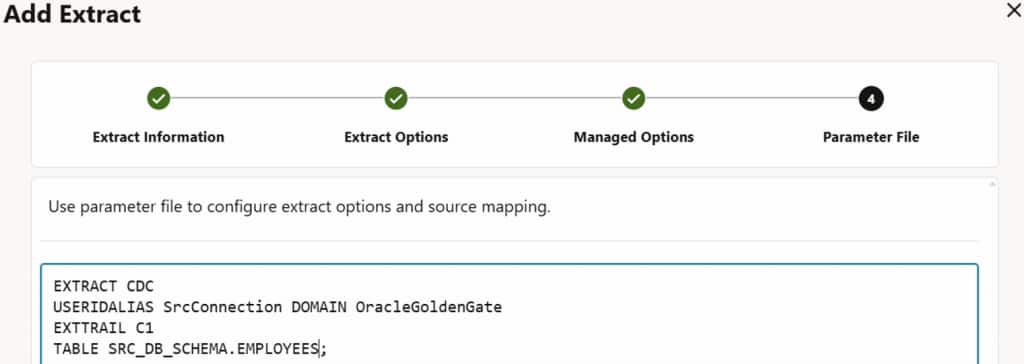
Replace *.* with desired <schemaName>.<tablename> to be extracted. Hit “Create and Run.
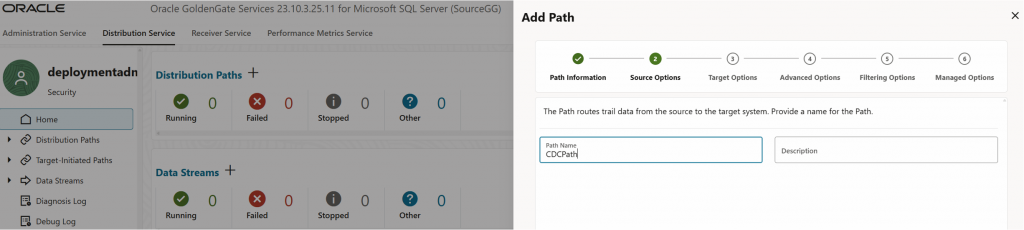
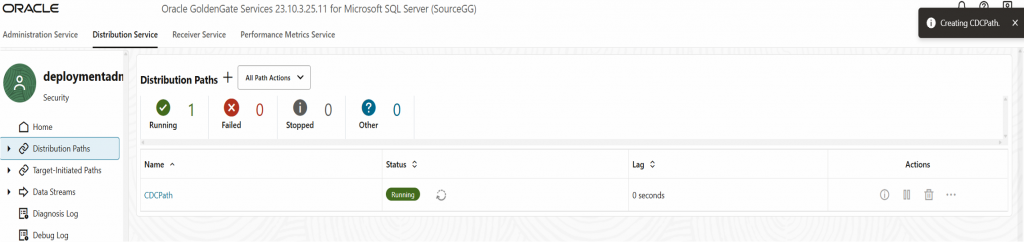
Once it is running, navigate to “Distribution Service” > “Distribution Paths” > “+”. Provide a meaningful path name.
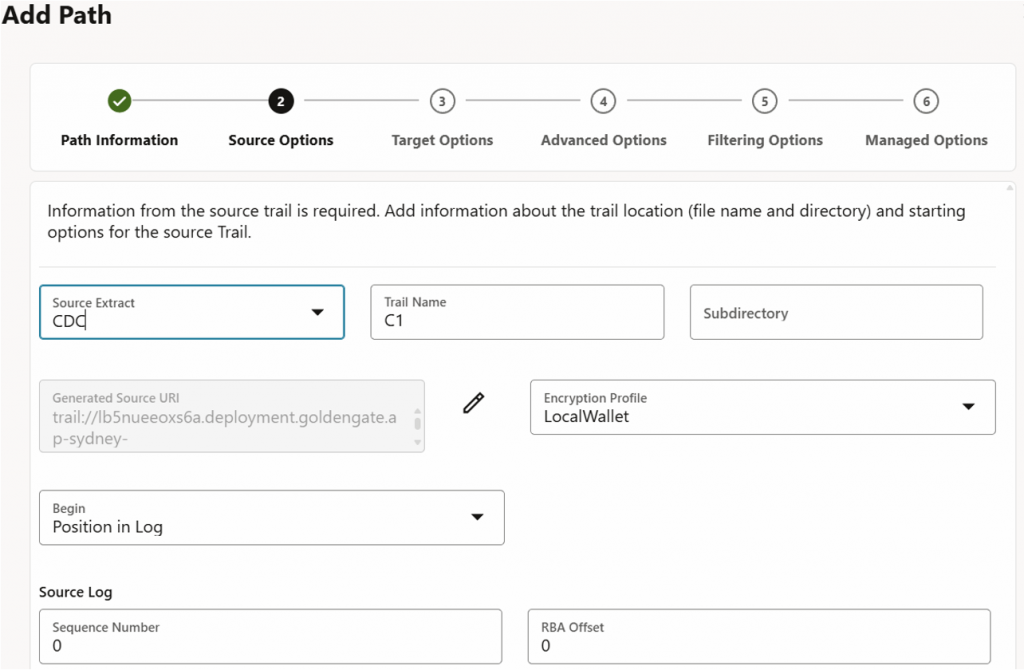
Select the “Source Extract” and “Trail Name” created in the previous step.
Select “wss” as the target protocol, provide target host (target deployment URL), port 443 and the same trail name and username. Ensure “https:” and the ending “\” are not included in the “Target Host”. Provide respective “Alias” to be used.
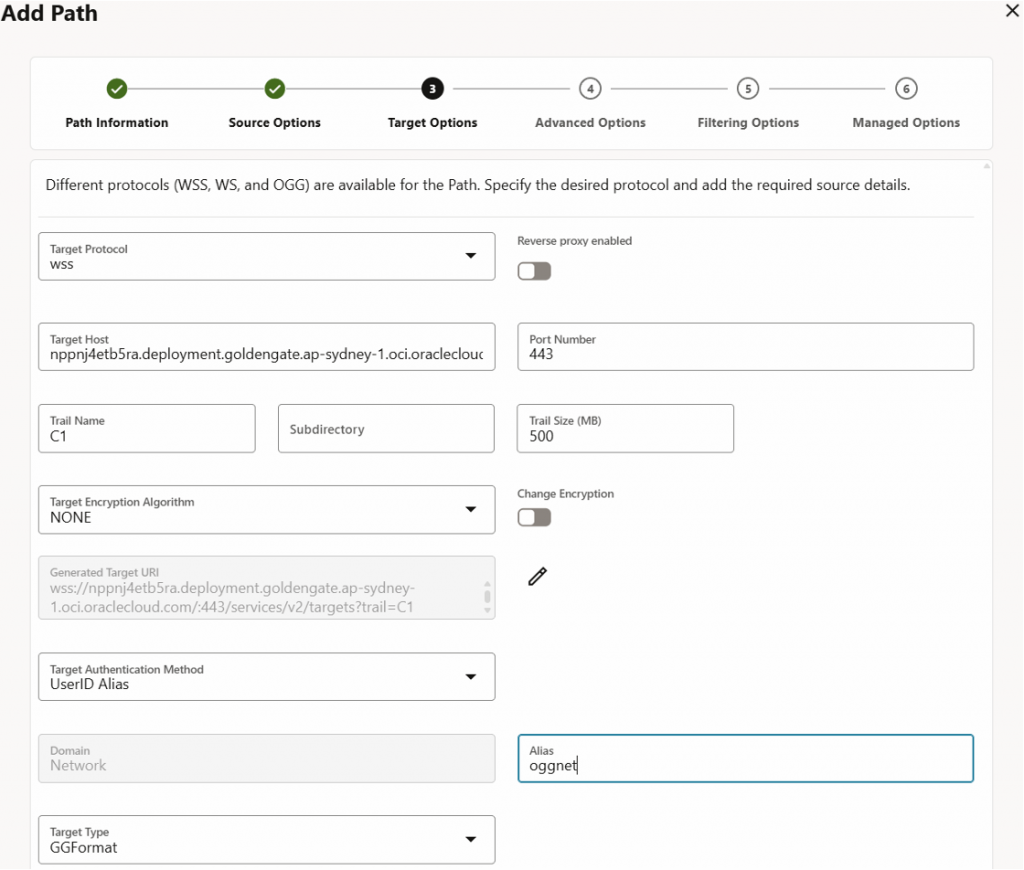
Leave the rest as default for “Advanced Options and “Filtering Options”, then hit “Create Path and Run”.
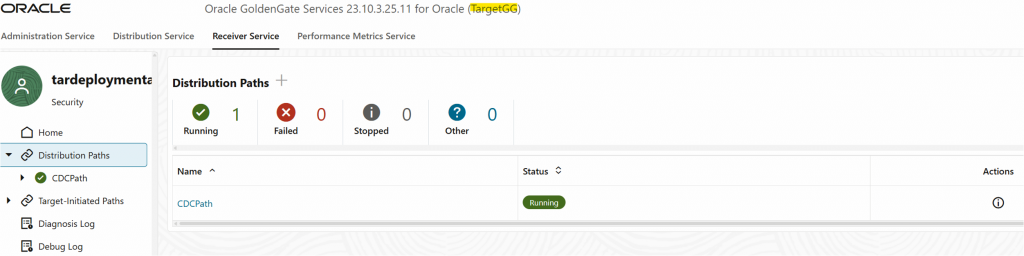
Distribution Paths will be reflected under target deployment console “Receiver Service”.
Task 9: Create (CDC) Replicat Process
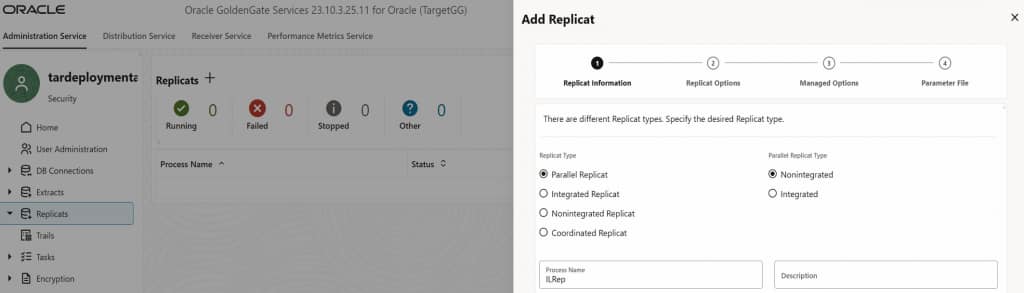
Navigate to target deployment console > “Replicats” > “+”. Provide a meaningful process name for CDC Replication.
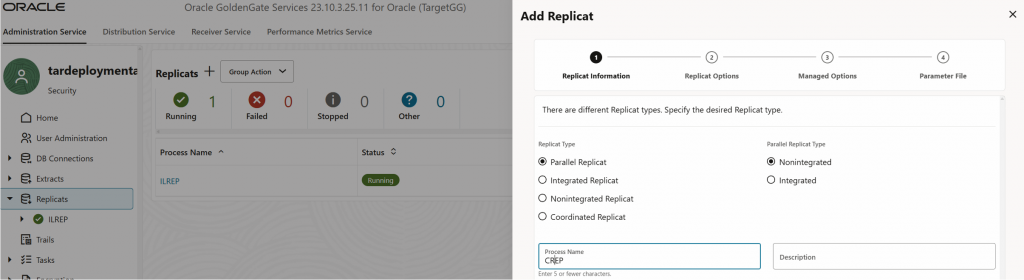
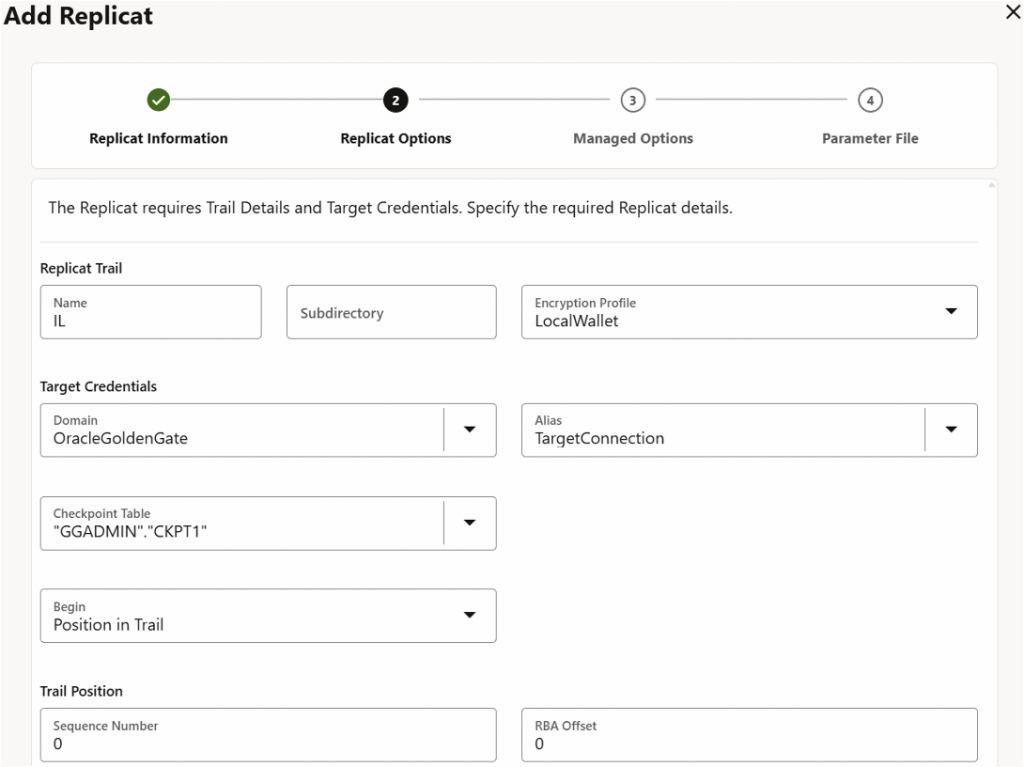
Use the same “Replicat Trail Name” as created previously. Select respective “Domain” and “Alias” and “Checkpoint Table”. Keep “Managed Options” as default.
Provide respective mapping for table, then hit “Create”.
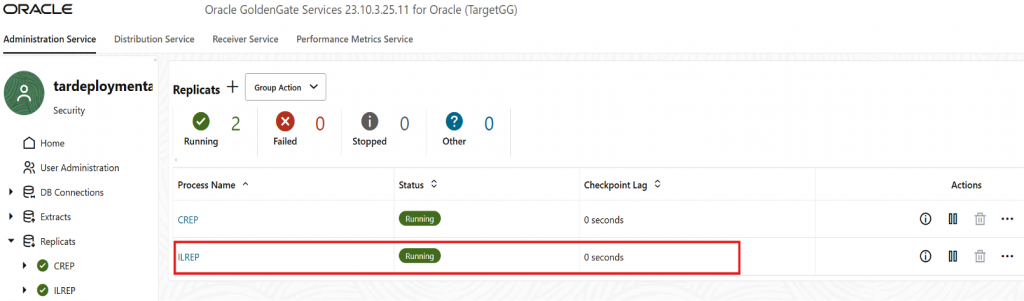
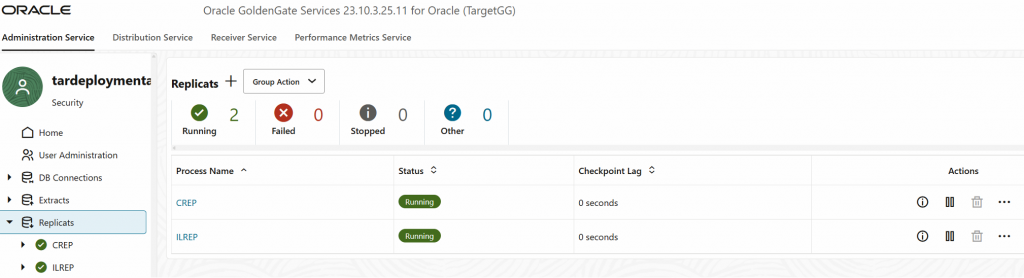
Once initial load synchronization has completed, we can run the CDC replicat to enable real-time data replication between source and target database.
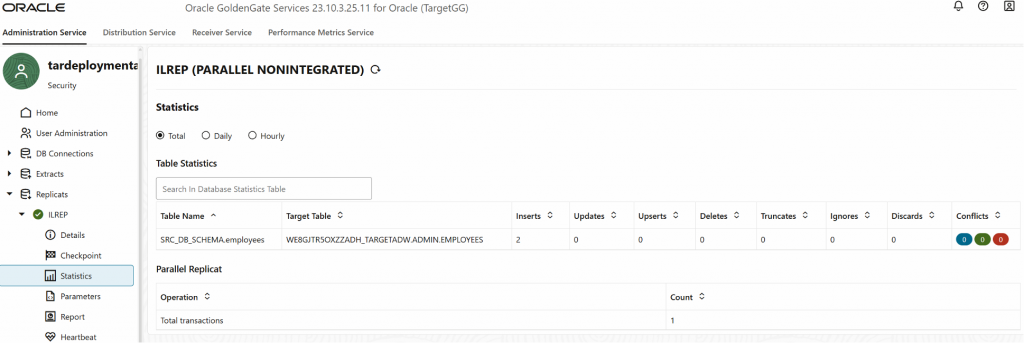
Task 10: Validate GoldenGate deployment
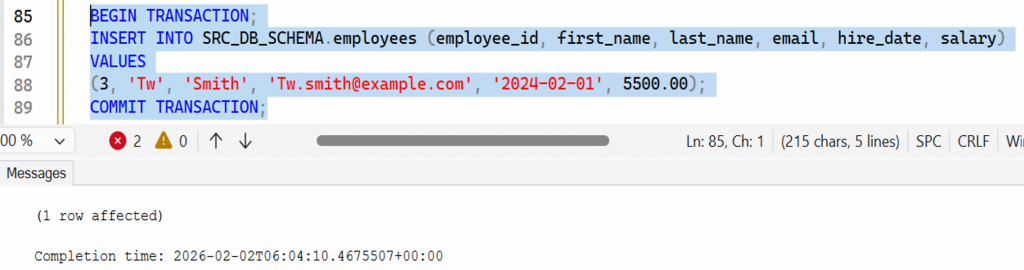
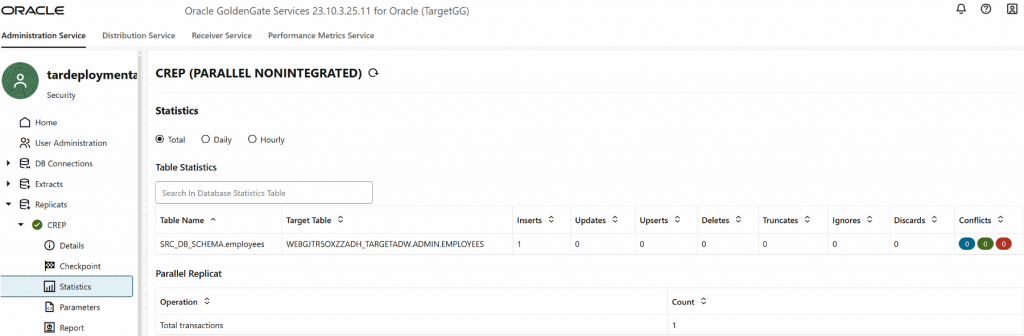
Observe that number of “Inserts” became 1 as we have added 1 row of data.
Perform 1 update in source SQL Server and validate them in target Autonomous Lakehouse.
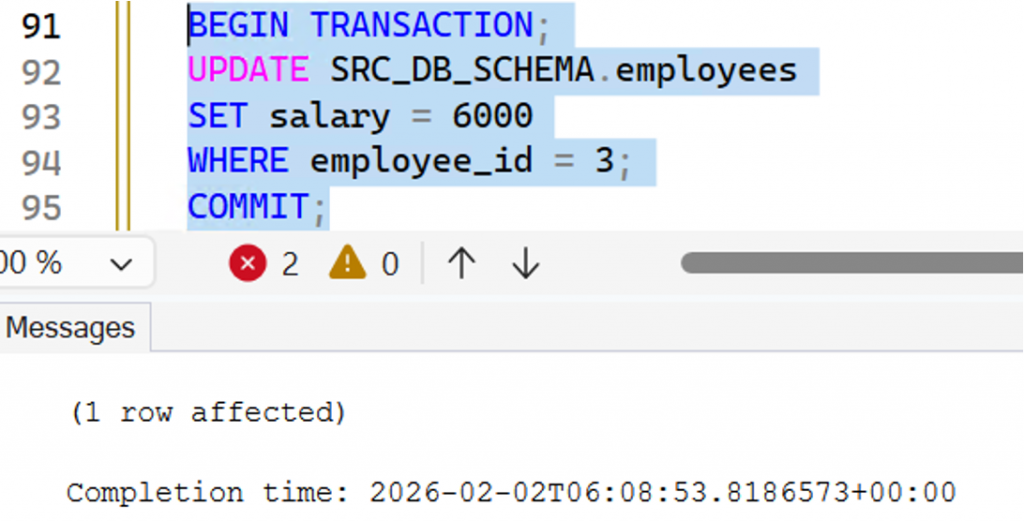
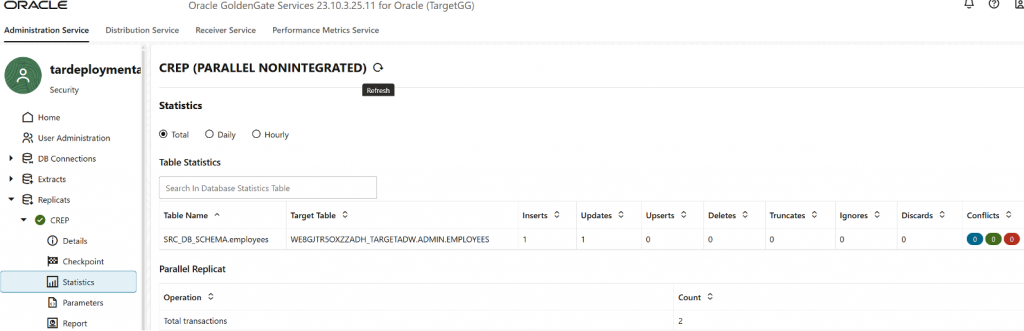
Observe that number of “Updates” became 1 as we have updated 1 row of data.
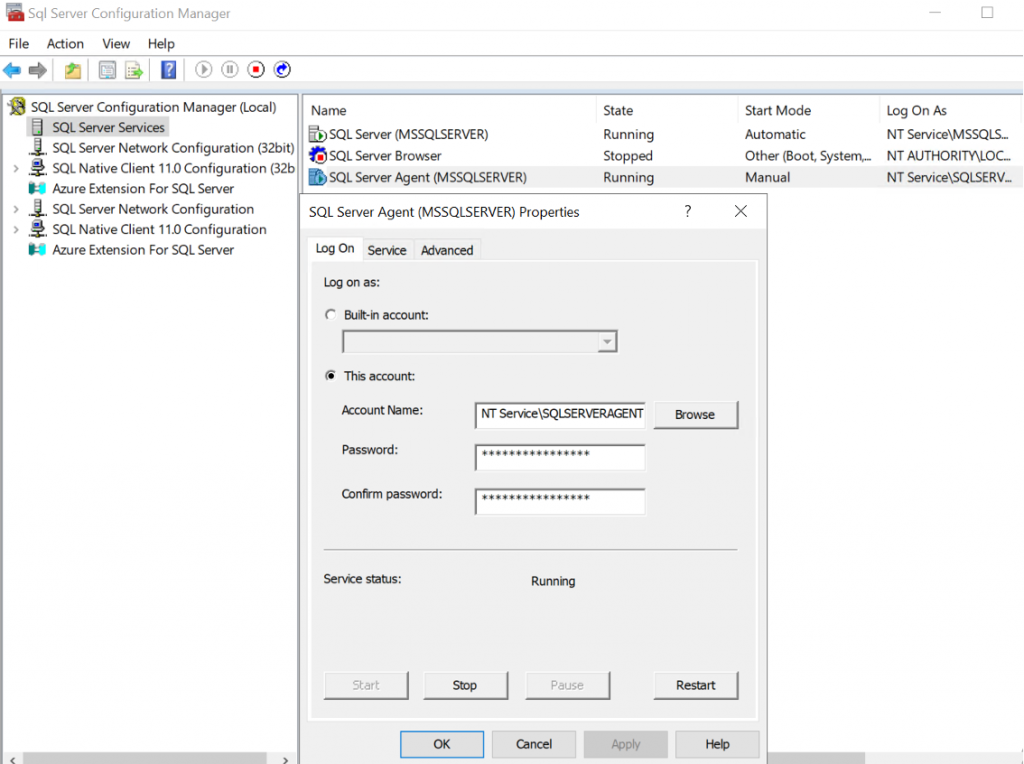
Troubleshooting
If no data are being synchronized on the target GoldenGate deployment, ensure SQL Server Agent service is started.
By the end of this walkthrough, you should have a working near real-time replication pipeline from Microsoft SQL Server into Autonomous Lakehouse using OCI GoldenGate Microservices, along with a simple approach to validate end-to-end data movement. From here, consider hardening the solution for production—review security and network controls, monitor lag and throughput, and implement error handling and retention—so your downstream analytics stay current and reliable.
Related Links
- Using Oracle Cloud Infrastructure (OCI) GoldenGate with Azure SQL and Microsoft SQL Server Databases
- Replicate data from Azure SQL Managed Instance to Autonomous Transaction Processing
- Connect to GoldenGate Distribution and Receiver Paths
- Set up Real-Time Data Replication from On-Premises Microsoft SQL Server Database to ADW Database using OCI GoldenGate
More Learning Resources
Explore other labs on docs.oracle.com/learn or access more free learning content on the Oracle Learning YouTube channel. Additionally, visit education.oracle.com/learning-explorer to become an Oracle Learning Explorer.
For product documentation, visit Oracle Help Center.