Introduction
Digital native companies are known for building and scaling in the cloud at speed. Over the years, many of these organizations have created highly innovative platforms using patterns such as single-page-applications or statically generated sites.
In this blog, we look at how to run single-page applications or statically generated sites on Oracle Cloud Infrastructure by using a Caddy web server running on a container instance. The same approach can be applied to any scenario in which you want to serve a static file over HTTP, whether for a simpler app or static webpages and provide a reliable online experience to your users on the OCI platform.
To make it easy to update the site content we’ll host the static files being served on object storage and cache the content being served on the instance.
Prerequisites
- Access to an Oracle Cloud Tenancy
- Public DNS Zone hosted on OCI
- OCI CLI and Terraform on your local machine and authorized to deploy to your tenancy
- A statically generated site or single-page-application
Task 1: Create an Oracle Object Storage Bucket
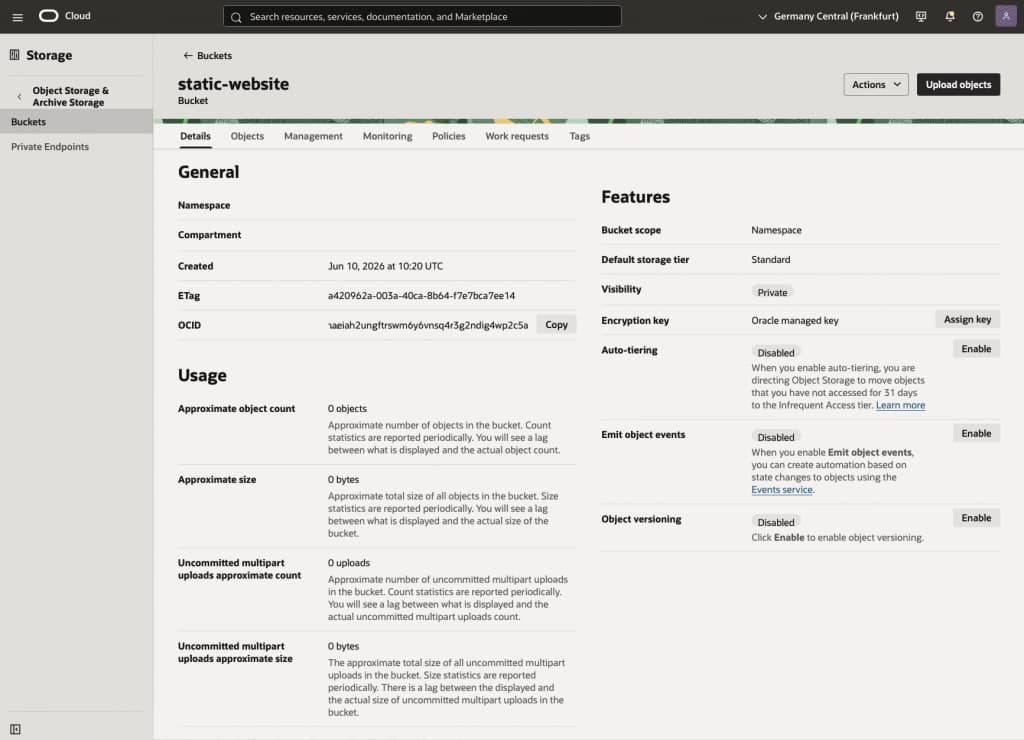
Let’s begin by creating a new bucket in OCI Object Storage. Open the OCI Object Storage Console and navigate to the Buckets view. Create a new private bucket and accept all the defaults for bucket scope, storage tier, and encryption. This bucket will be used to host your static website.
Task 2: Upload your distribution files in the Bucket
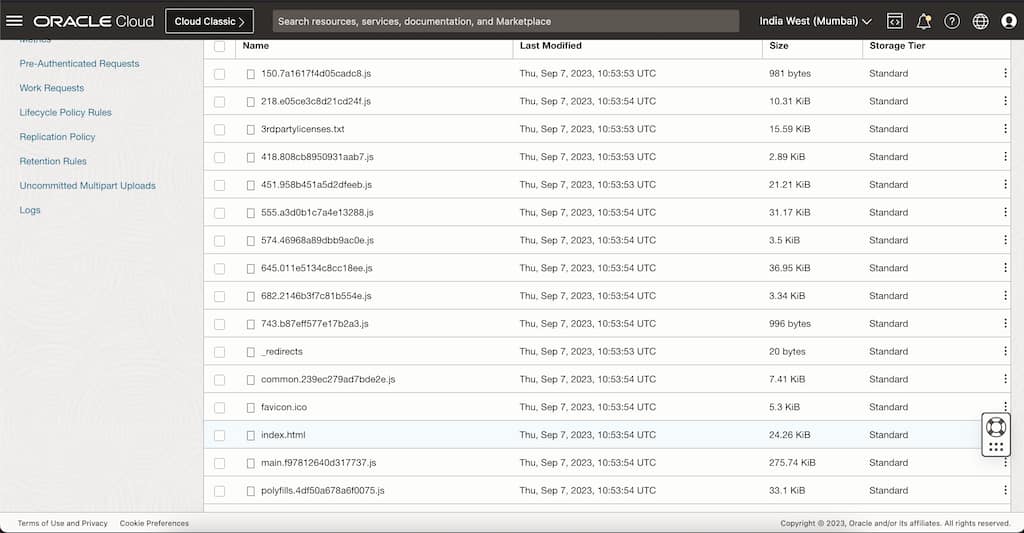
Upload your application distribution files into a prefix within the bucket created in the previous task. Your application distribution files are typically located in the /dist folder of your application directory and are the output of the webpack build.
Tip: If you want to use the oci-cli to upload your files, make sure to specify the --content-type auto parameter to make sure the Content-Type gets set correctly.
Task 3: Create Pre-Authenticated-Request
To allow the Caddy container instance to serve the distribution files over the internet, you need to create a pre-authenticated-request PAR for your object storage bucket where distribution files are stored.
As you put your uploaded files into a specific prefix, we’ll want to only generate a pre-authenticated-request (PAR) covering this prefix. When creating the PAR select “Objects with prefix” and only permit object reads; our web server will not have to write to that bucket, so read will be fine. You’ll also have to select an expiration time for the PAR; make sure it is far enough in the future so it will not expire while the Caddy container is still running.
We will use the PAR URL when configuring the Terraform variables before deploying the Caddy Container Instance.
Task 4: Clone the repository and configure the Terraform variables
Now clone the git repository that contains the Terraform definitions. It also includes the Dockerfile that was used to build the Caddy container that we’ll deploy, but you don’t need to build it yourself now, you can just use the published public container in the GitHub Container Registry. That said you may want to look at the Dockerfile and maybe build your own later if you want to use other Caddy modules or make other modifications to it.
git clone https://github.com/gpoul/tf-caddy-container-instance.gitThen create a terraform.tfvars file using the sample below as a template and follow the instructions below on how to set the variables to successfully deploy in your tenancy:
### Variables that need to be customized depending on the target tenancy

tenancy_ocid              = "<OCID of your tenenacy>"
compartment_ocid          = "<OCID of the compartment you want to deploy to>"
region                    = "eu-frankfurt-1" # region to deploy to

# FQDN; the domain must be hosted on OCI
fqdn = "mycaddycontainer.example.com"

# Replace with the backend URL Caddy should proxy to.
upstream_url = "<Pre-Authenticated-Request-URL>/<path to your files>/index.html"

### Variables that can be reused as-is

# Public image from GitHub Container Registry (built from the Dockerfile in this repo)
caddy_image_url = "ghcr.io/gpoul/tf-caddy-container-instance:latest"
availability_domain_index = 0 # availability domain to deploy to (0 for AD1)
container_instance_name = "caddy-container-instance"
cache_ttl               = "300s" ##
As the fqdn you can use any name you want, but the domain must be hosted on OCI as a public zone. The terraform definitions will look up the OCID of your domain definition (in the sample example.com) and create a new A resource record with the IP address of your container instance during deployment.
For the upstream_url you use your previously generated PAR and point to your index.html that should be loaded when a client requests ‘/’ via HTTP. Based on this upstream_url, because the PAR works for the prefix, Caddy will also be able to serve any other files below that prefix. If you’re interested in the details on how Caddy handles the upstream_url loading, look at how the Caddyfile is constructed in the Terraform definitions. – To test whether you constructed the upstream_url correctly, you can test it in your browser or with curl/wget. It is correct, if you’re able to load the index.html contents using upstream_url.
You do not have to change the values for caddy_image_url, availability_domain_index, container_instance_name, or cache_ttl, but you definitely can customize them if you have your own container or want to test deploying to other ADs.
Task 5: Create the Caddy Container Instance
Before we can start to validate our configuration, let’s initialize Terraform first:
terraform initTo make sure all your variables are defined correctly and your DNS Zone can be found in your tenance, run:
terraform planIf you’re seeing any errors, you’ll have to resolve them before proceeding with the deployment. Once the planning phase completes successfully you can deploy the container instance:
terraform applyTask 6: Test
The outputs from the terraform stack will contain a caddyUrl and the container_instance_public_ip, both of which you can use to access and test your web application.
Apply complete! Resources: 8 added, 0 changed, 0 destroyed.

Outputs:

caddyUrl = "http://mycaddycontainer.example.com"
container_instance_id = "ocid1.computecontainerinstance.oc1.eu-frankfurt-1..."
container_instance_public_ip = "123.123.123.123"
Task 7: Look at configuration and logs
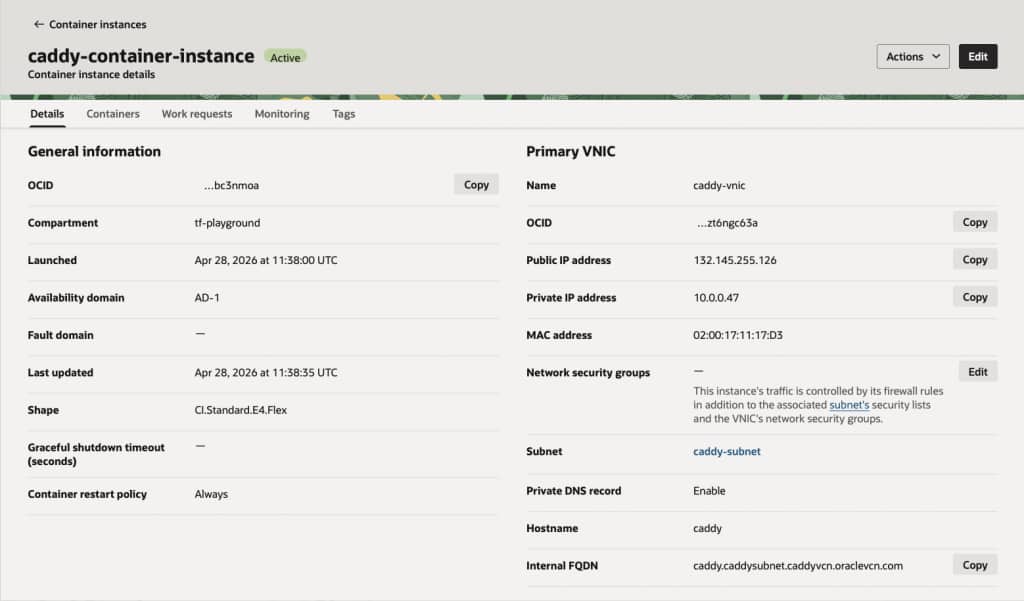
Open your container instance console and look at your container instance configuration. From here you can also stop / start the instance and access monitoring metrics.
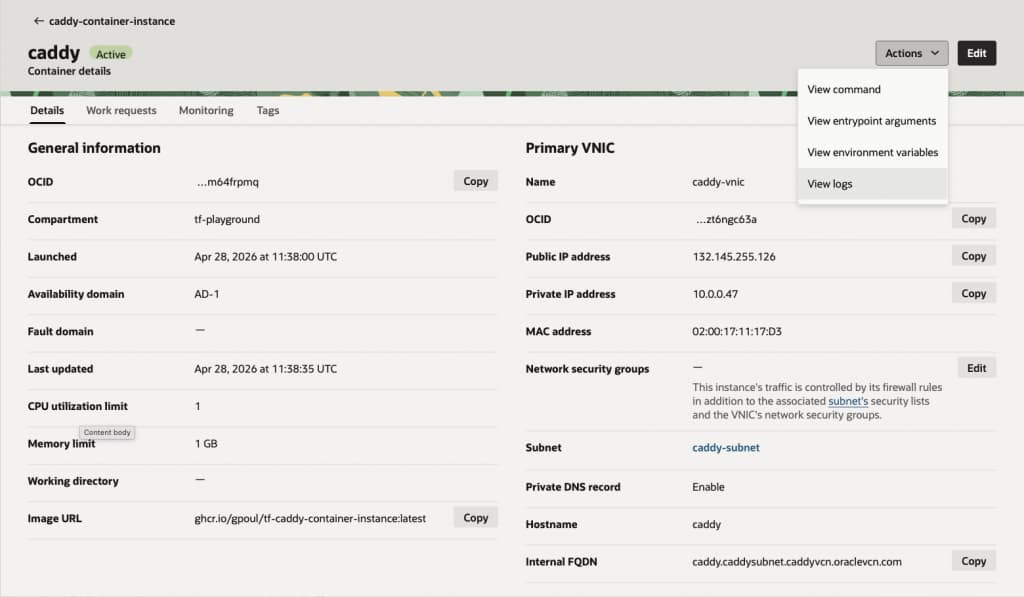
In the Containers tab you’ll see the one running caddy container on the instance; within the container details you can review its metadata and access runtime logs.
Task 8: Cleanup (optional)
To remove all the deployed artifacts from your tenancy again, you’ll have to run:
terraform destroyThat will only leave your bucket still in your tenancy. If you want to delete that as well, go to the object storage bucket console and delete the bucket from there.
Dive deeper (further reading)
This tutorial introduced OCI Container Instances and Object Storage by deploying a web server container and serving files from a bucket. To dive deeper look at the Terraform definitions you used for deployment of the container instance and look at the following resources: