Original Publish date : 7/31/2013
NOTE :
– A WebLogic Server instance that is configured for SAML 2.0 SSO cannot sent a request to a server instance configured for SAML 1.1, and vice-versa.
– WebLogic Server does not support encrypted assertions in SAML.
– It is always recommended to create a domain in which the RDBMS security store is configured.
– The RDBMS security store is required by the SAML 2.0 security providers in production environments so that the data they manage can be synchronized across all the WebLogic Server instances that share that data.
– Note that Oracle does not recommend upgrading an existing domain in place to use the RDBMS security store. If you want to use the RDBMS security store, you should configure the RDBMS security store at the time of domain creation. If you have an existing domain with which you want to use the RDBMS security store, create the new domain and migrate your existing security realm to it.
– If you are configuring SAML 2.0 services in a cluster, each Managed Server in that cluster must be configured individually.
– Note that I have not used an RDBMS security store in the following configuration, ( I am using embedded LDAP ) This is only for demonstration purpose and is not recommended for production environments.
– While configuring SAML2 with Weblogic Server in production environment, please make sure you create a domain with RDBMS security store configured.
Prerequisite :
– In the following example I have created two domains ” SAML2_IDP_Source_Domain ” and ” SAML2_SP_Destination_Domain ” on Weblogic Server 12.1.1.
– I have created self signed certificates and configured SSL on both the domains.
– Source domain HTTP and HTTPS ports are 7001 and 7002 respectively.
– Destination domain HTTP and HTTPS ports are 7003 and 7004 respectively.
Demo :
SAML Souce site configuration :
– Create a ” Credential Mapper ” on Weblogic Source domain, i.e on the IDP end.
– Login to Source domain – Weblogic console –> Click on ” myrealm ” –> ” Providers ” –> ” Credential Mapping ” –> and add a ” SAML2CredentialMapper ” say ” SAML2_CredentialMapper ” as shown below :
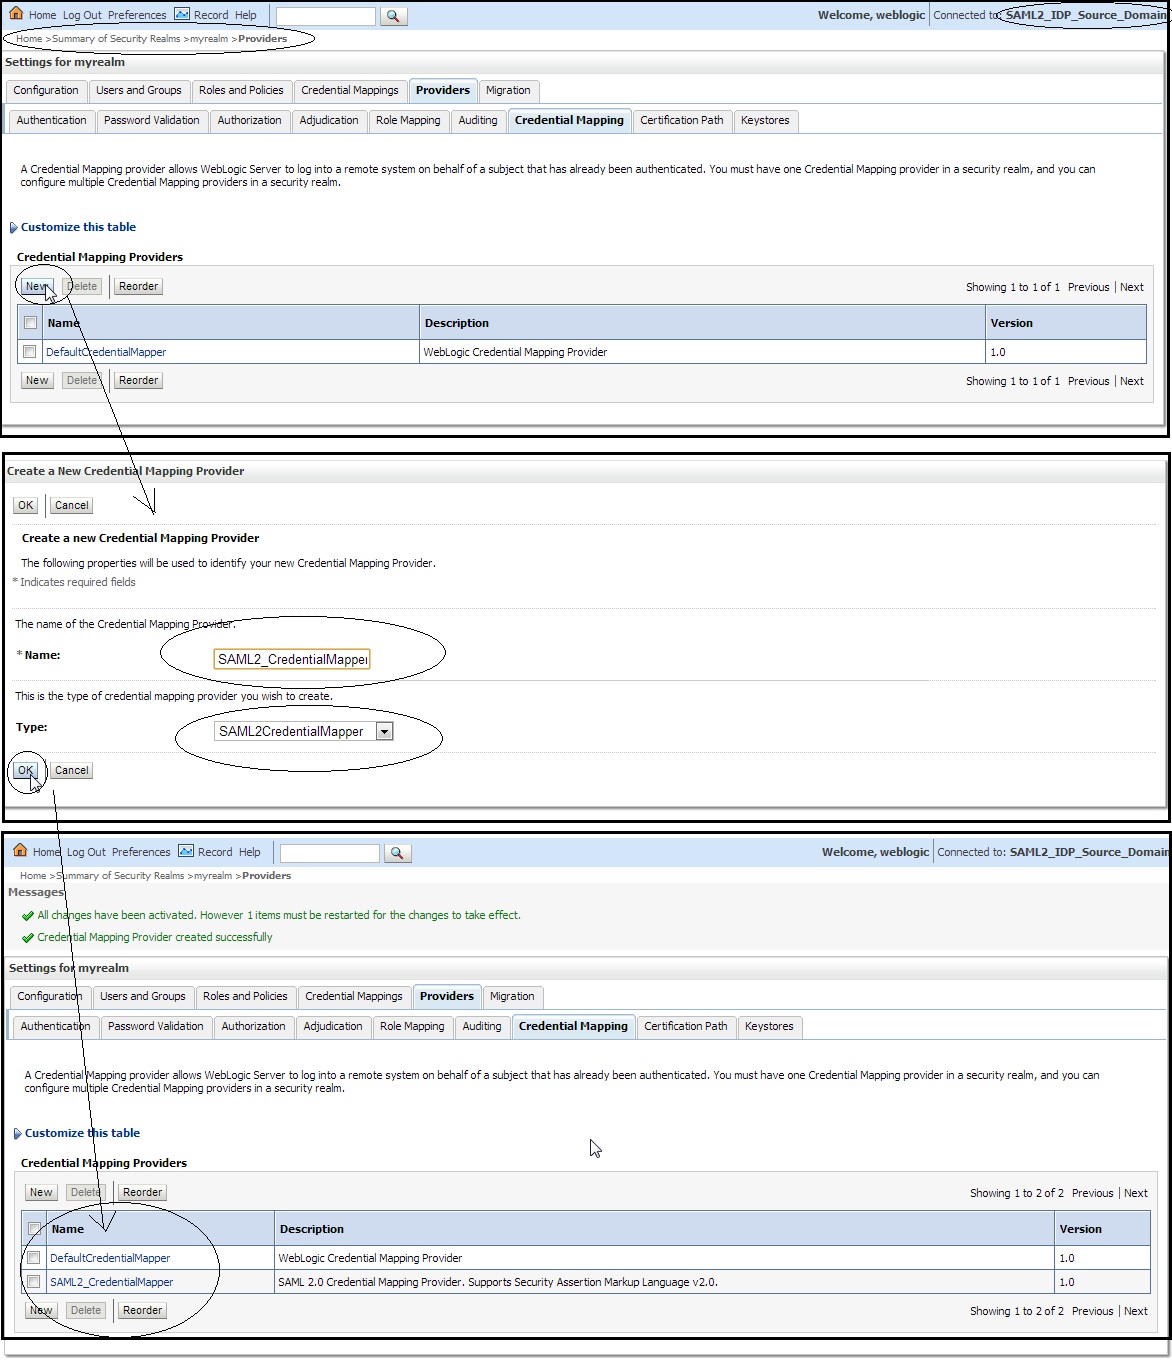
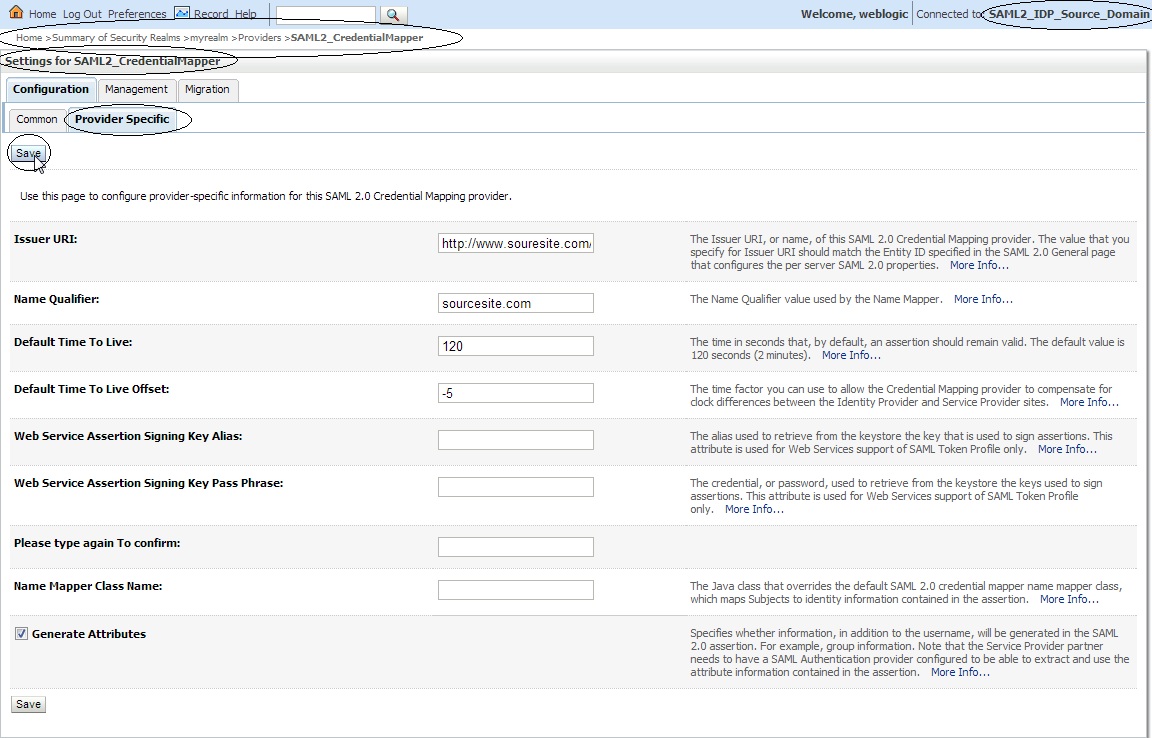
– Now click on the newly created SAML2CredentialMapper say ” SAML2_CredentialMapper ” and make the following changes :
Issuer URI : http://www.souresite.com/saml
Name Qualifier : sourcesite.com
“>
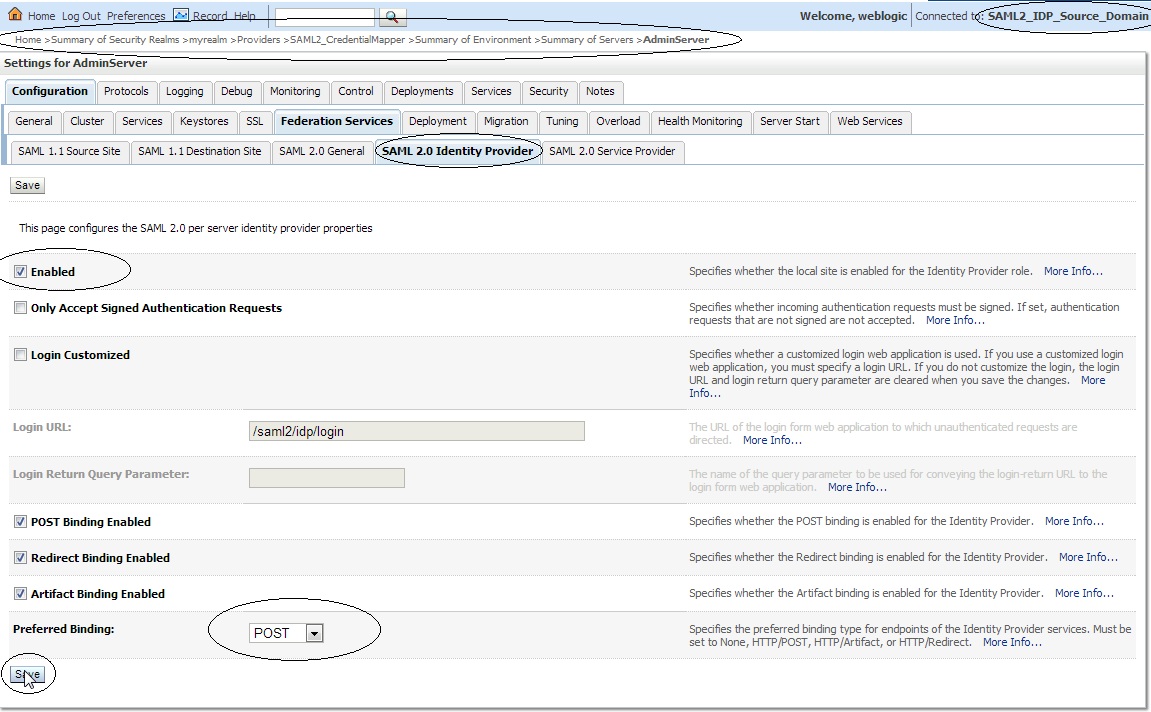
– Click on ” Servers ” –> Admin Server –> ” Federation Services ” –> ” SAML 2.0 Identity Provider ” and make the following changes :
Enabled : check
Preferred Binding : POST
– Click on ” Servers ” –> Admin Server –> ” Federation Services ” –> ” SAML 2.0 General ” and make the following changes :
Replicated Cache Enabled – Uncheck / Check
Contact Person Given Name
Contact Person Surname
Contact Person Type
Contact Person Company
Contact Person Telephone Number
Contact Person Email Address
Organization Name
Organization URL
Published Site URL : http://<SourceSiteDNSName>:<PORT>/saml2
Entity ID : ( Source Domain name)
Single Sign-on Signing Key Alias
Single Sign-on Signing Key Pass Phrase
Confirm Single Sign-on Signing Key Pass Phrase
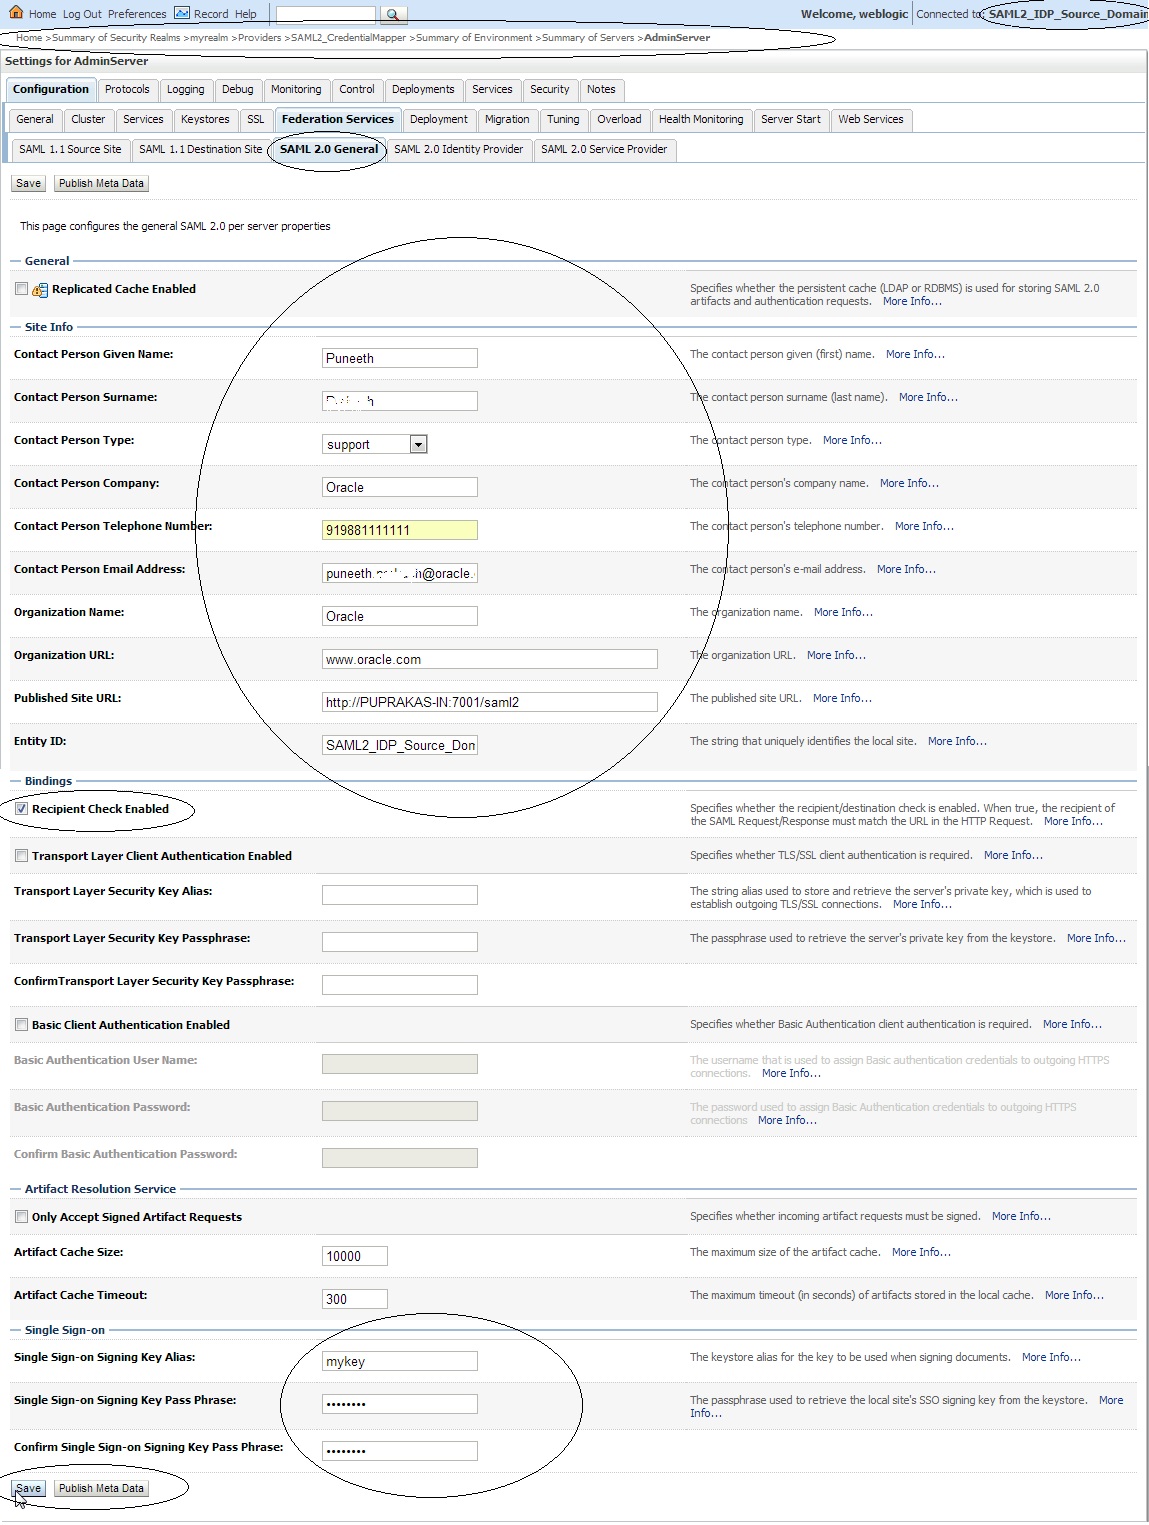
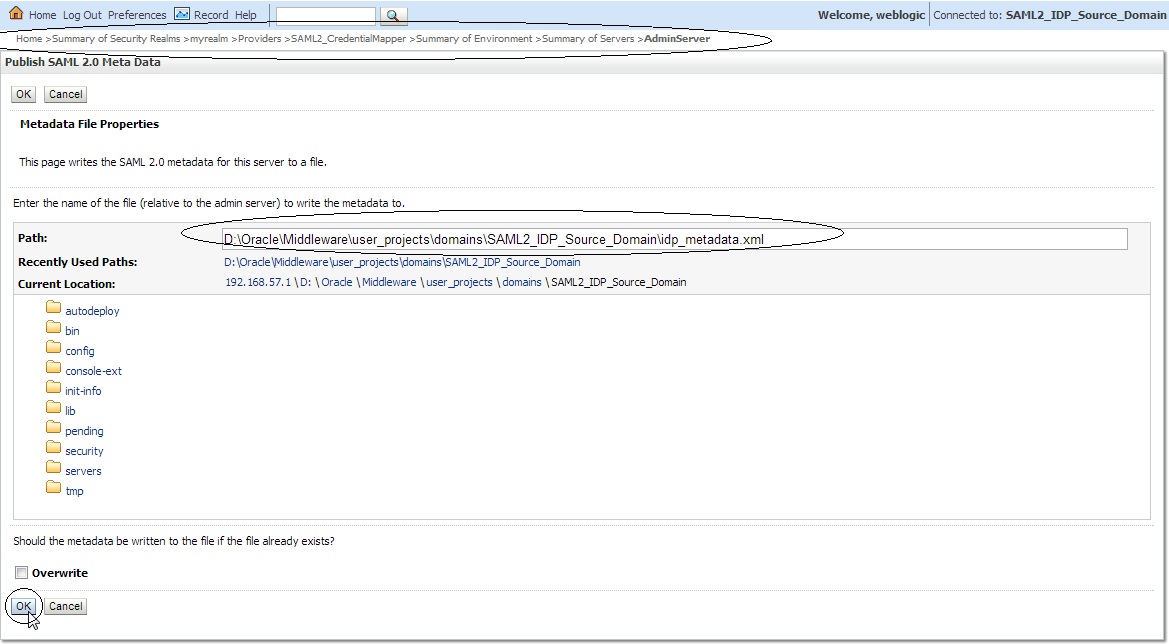
Save the changes and export the IDP metadata into a XML file –> Click on “ Publish Meta Data ” button. ( say idp_metadata.xml ). We need to copy this file to the destination domain later.
Destination Site Configuration :
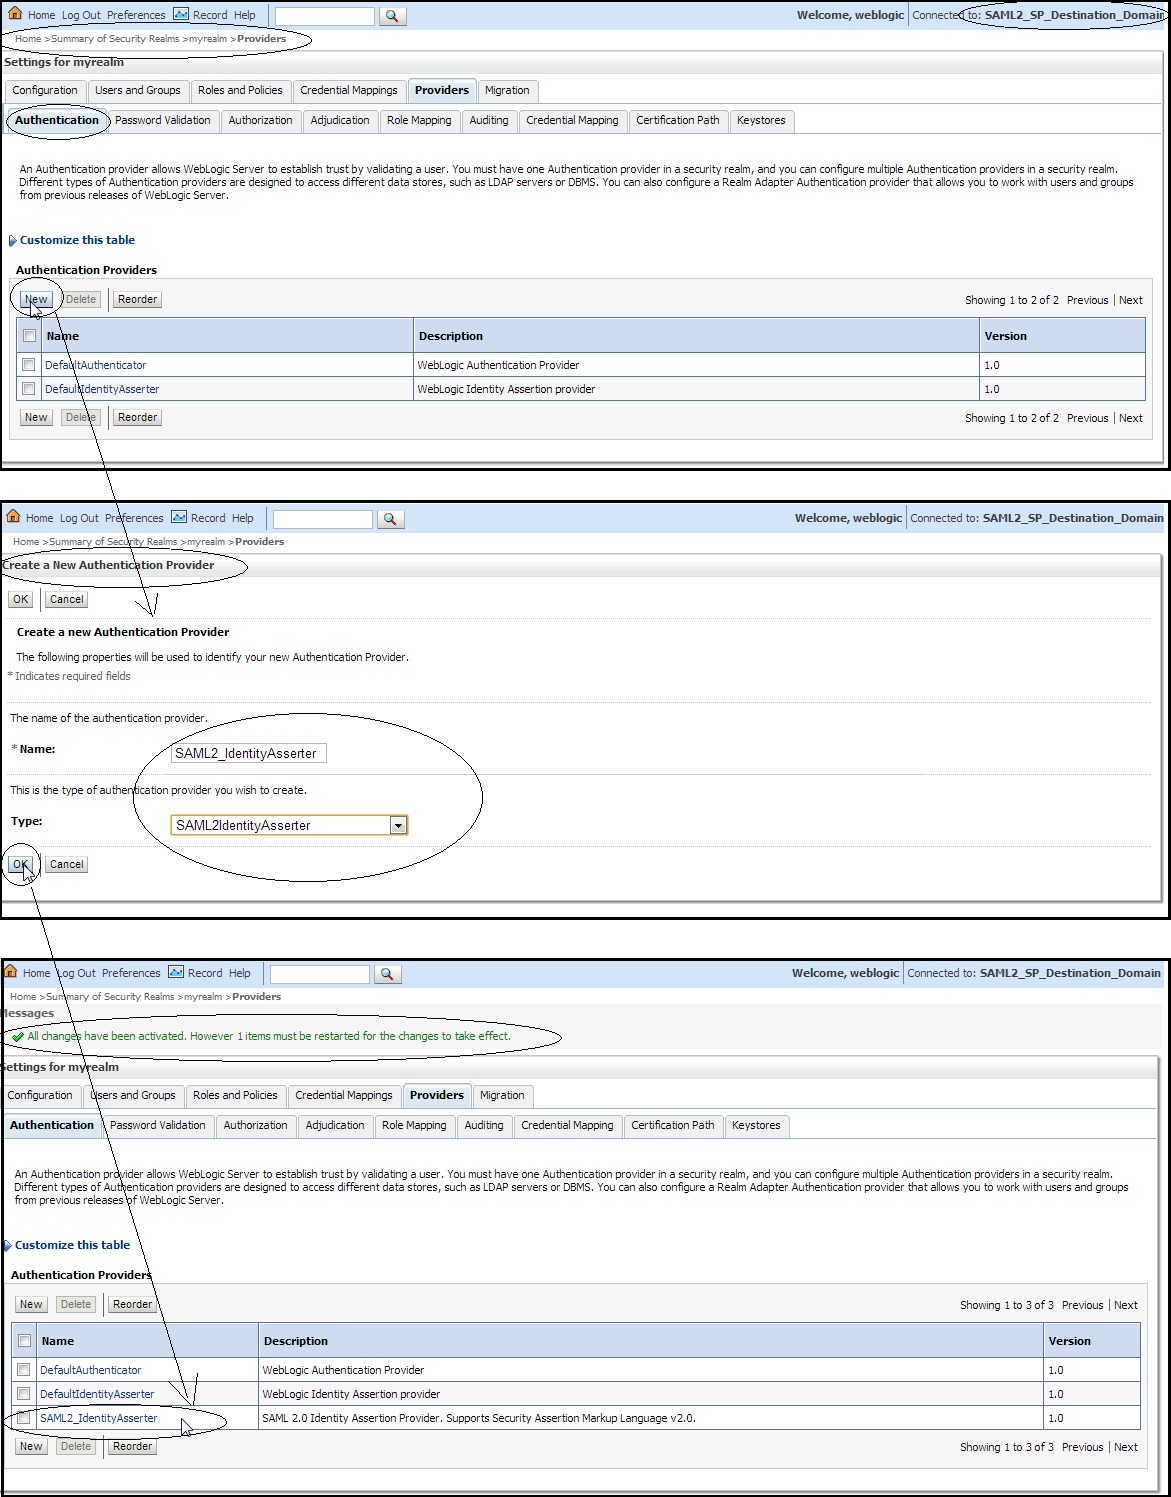
– Create an Identity Asserter on the destination domain, i.e SP end.
– Login to Destination domain – Weblogic console –> Click on ” myrealm ” –> ” Providers ” –> ” Authentication ” –> new ” SAML2IdentityAsserter “ say ” SAML2_IdentityAsserter :
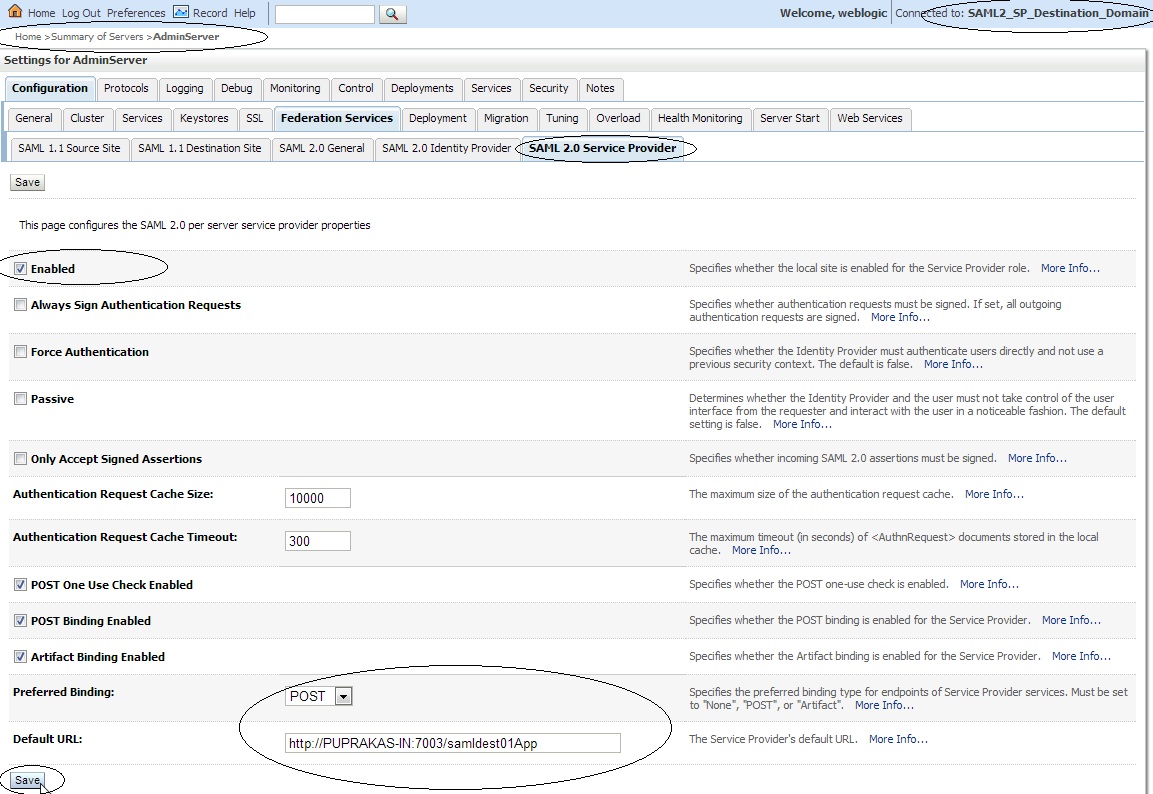
Click on ” Servers ” –> Admin Server –> ” Federation Services ” –> ” SAML 2.0 Service Provider ” and make the following changes :
Enabled : check
Preferred Binding : POST
Default URL : http://<DestinationSiteDNSName>:<PORT>/samldest01App
Replicated Cache Enabled : Uncheck / Check
Contact Person Given Name
Contact Person Surname
Contact Person Type
Contact Person Company
Contact Person Telephone Number
Contact Person Email Address
Organization Name
Organization URL
Published Site URL : http://<DestinationSiteDNSName>:<PORT>/saml2
Entity ID : ( Destination Domain name)
Single Sign-on Signing Key Alias
Single Sign-on Signing Key Pass Phrase
Confirm Single Sign-on Signing Key Pass Phrase
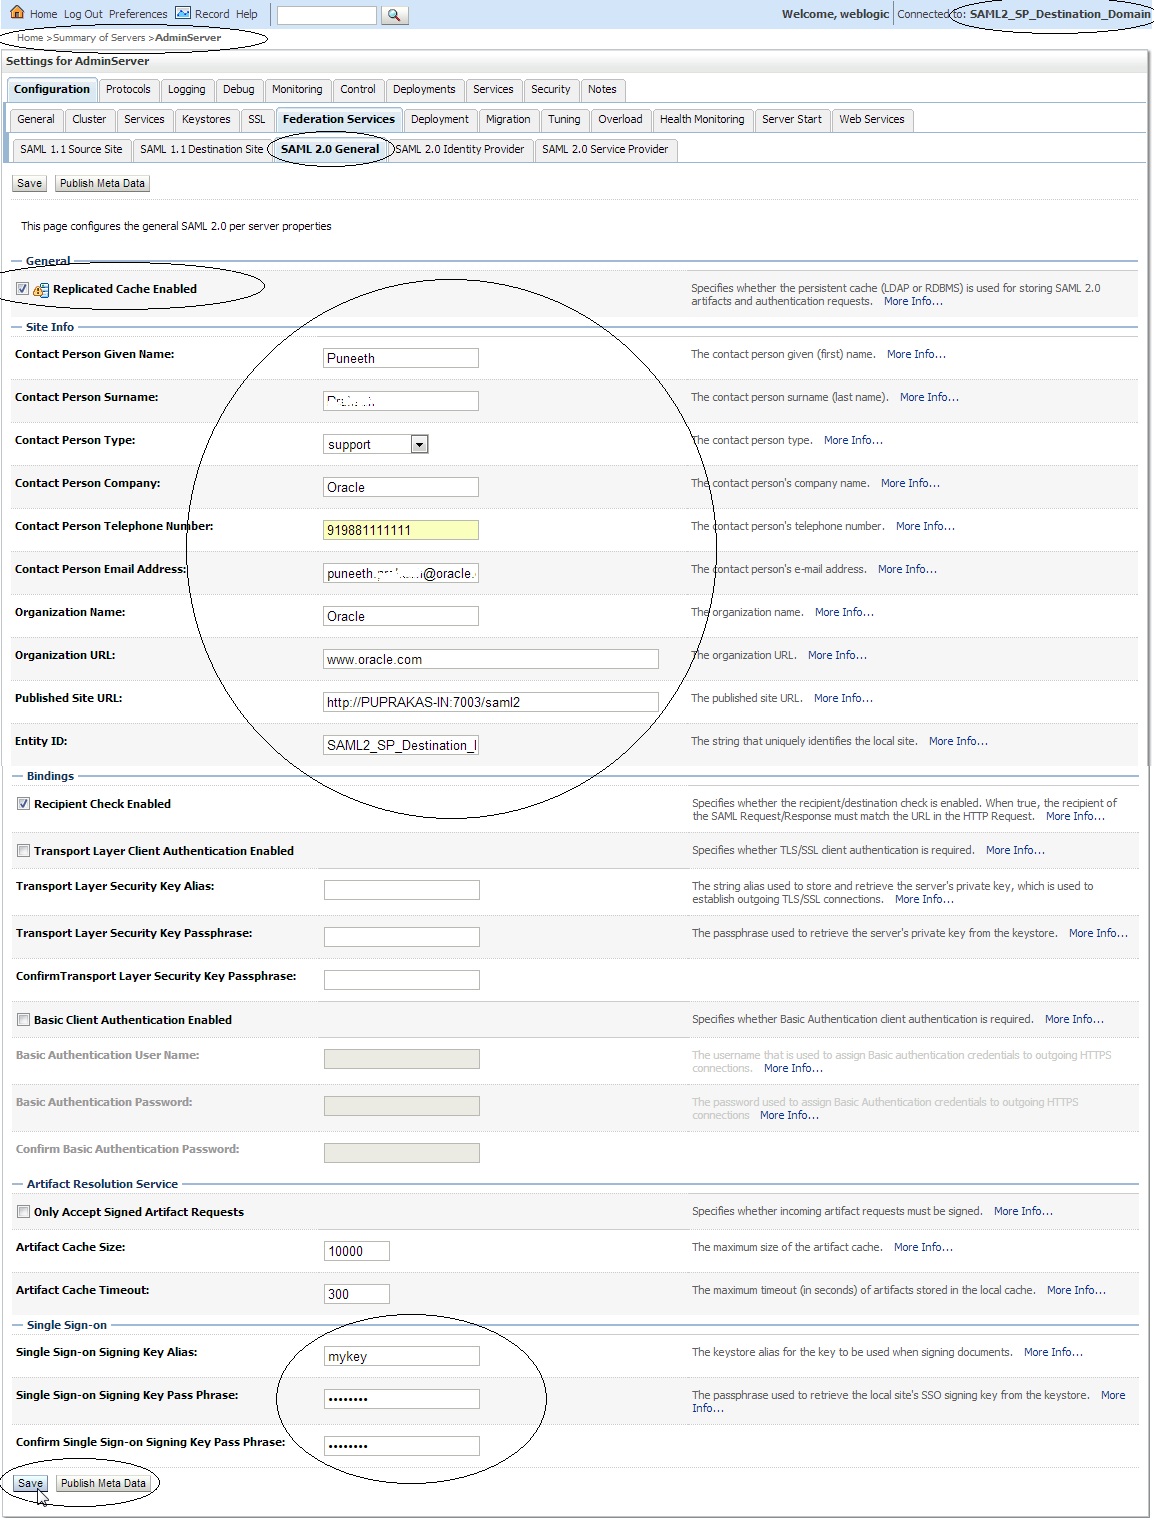
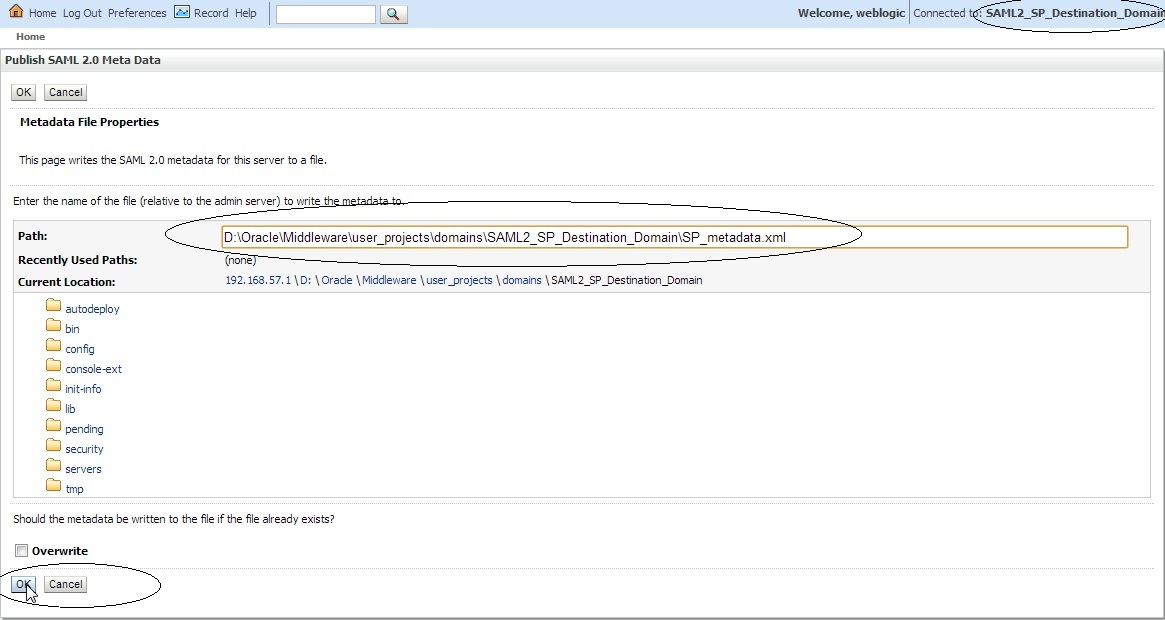
Save the changes and export the IDP metadata into a XML file –> Click on “ Publish Meta Data ” button. ( say SP_metadata.xml ).
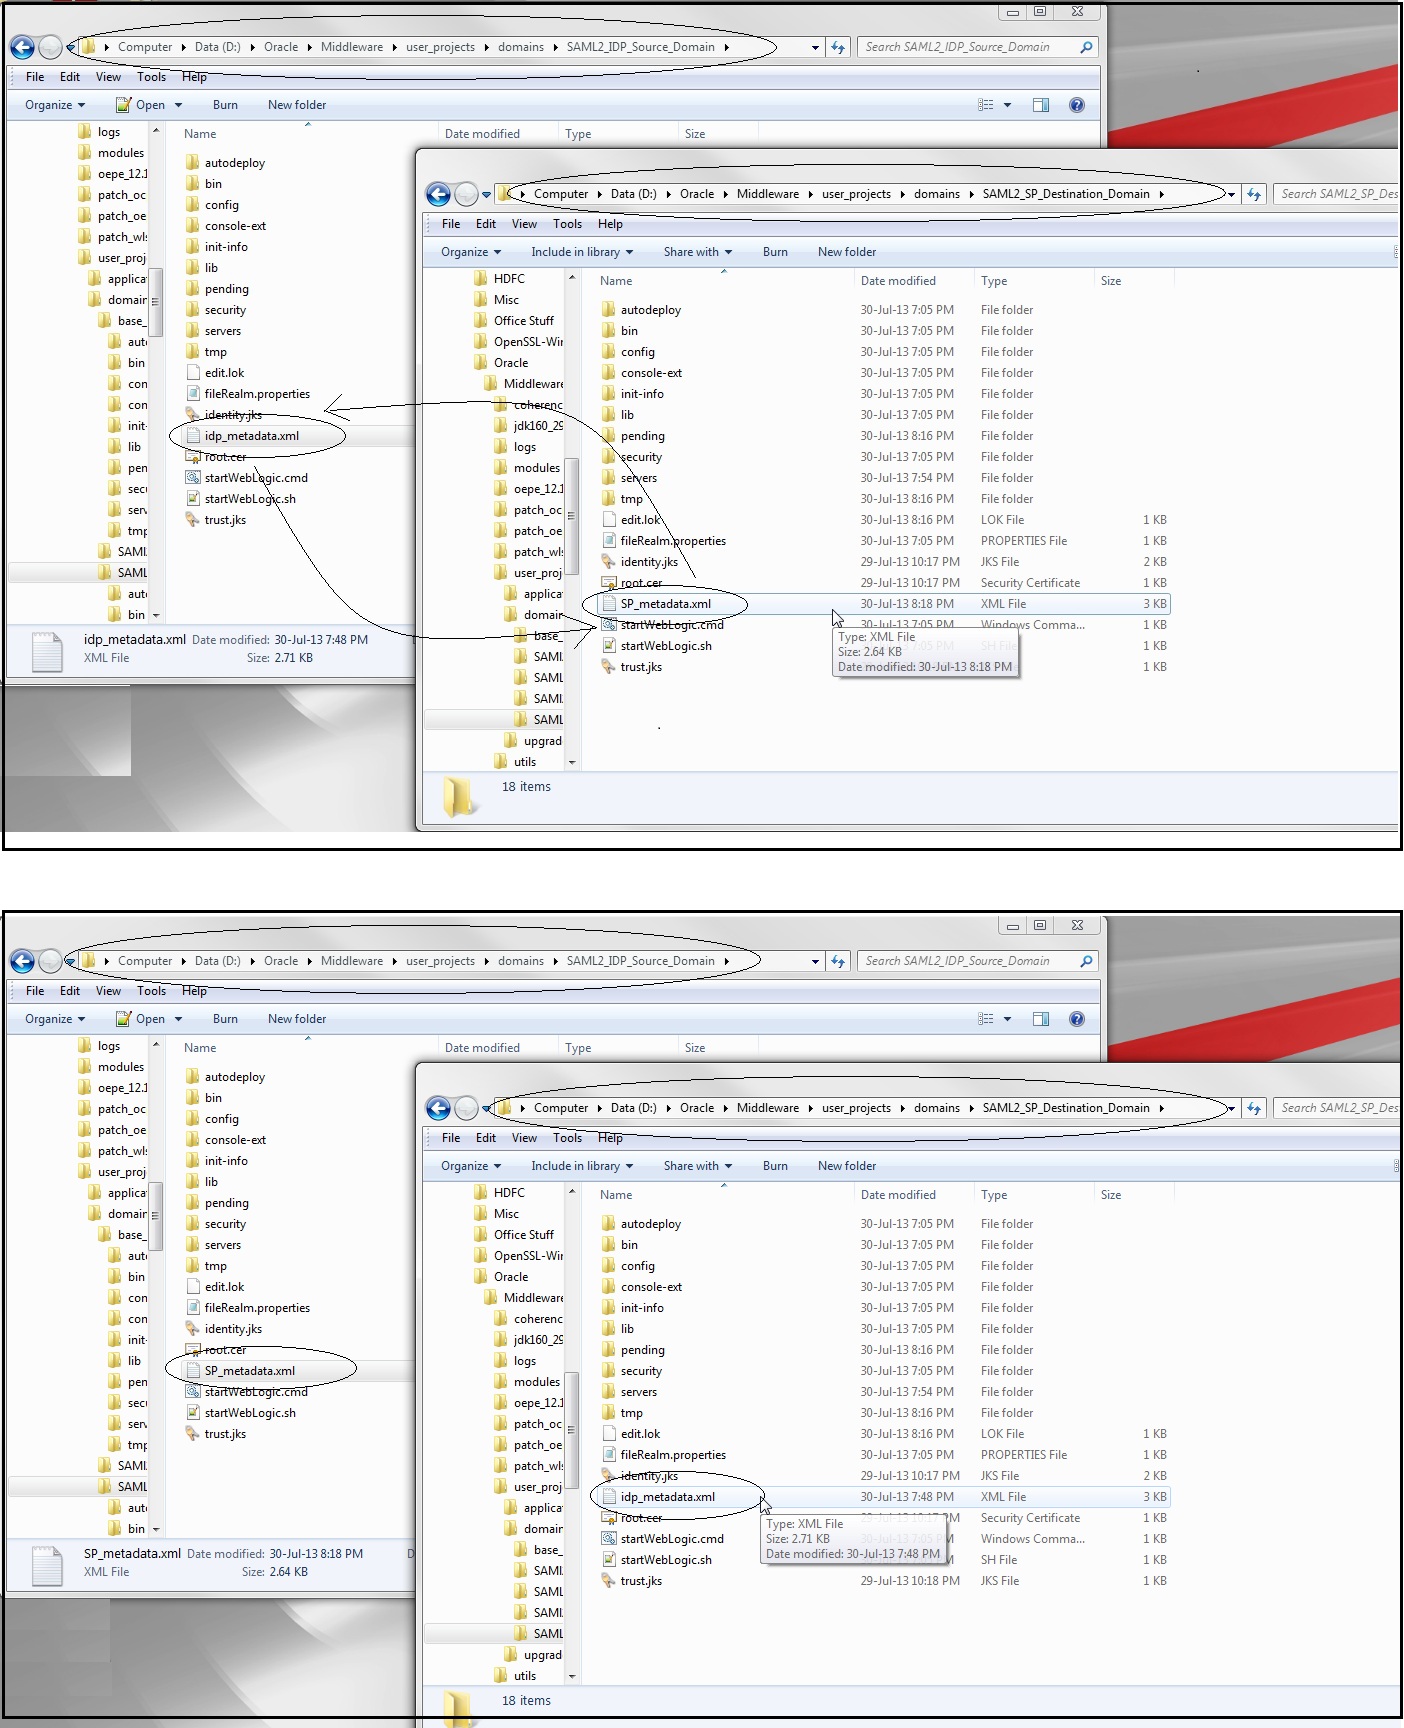
Copy service provider metadata ( SP_metadata.xml ) to Source Domain and identity provider metadata ( idp_metadata.xml ) to the Destination Domain as shown below :
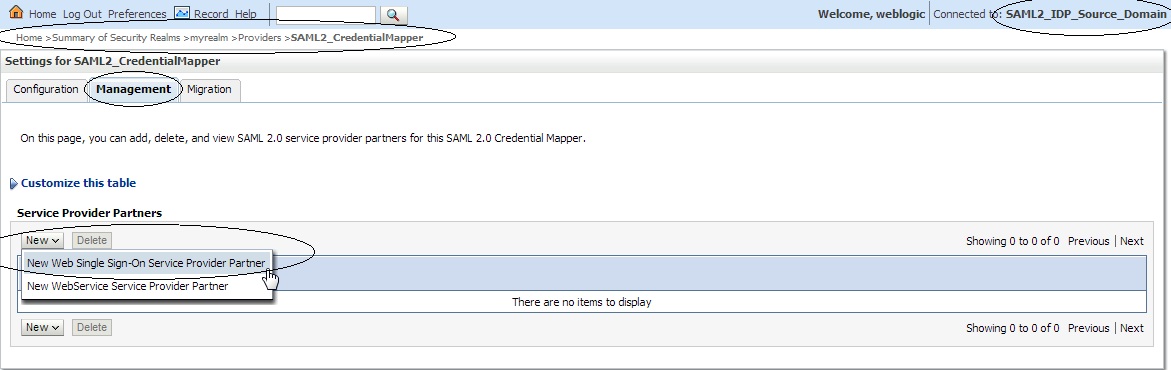
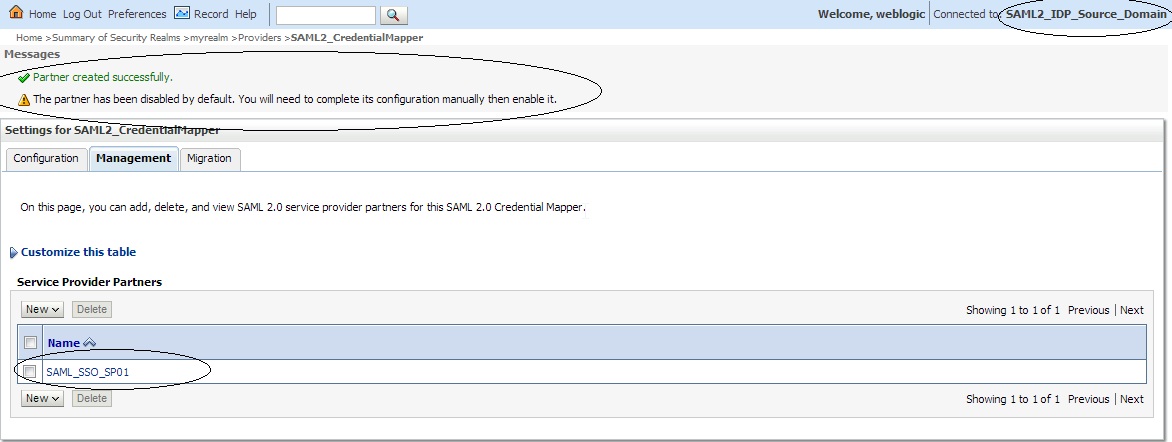
Log in to the source site Admin Console and click on ” Security Realms ” –> ” myrealm ” –> ” Providers ” –> ” Credential Mapper ” –> ” SAML2_CredentialMapper ” –> ” Management ” –> ” New ” –> ” New Web Single Sign-On Service Provider Partner ” :
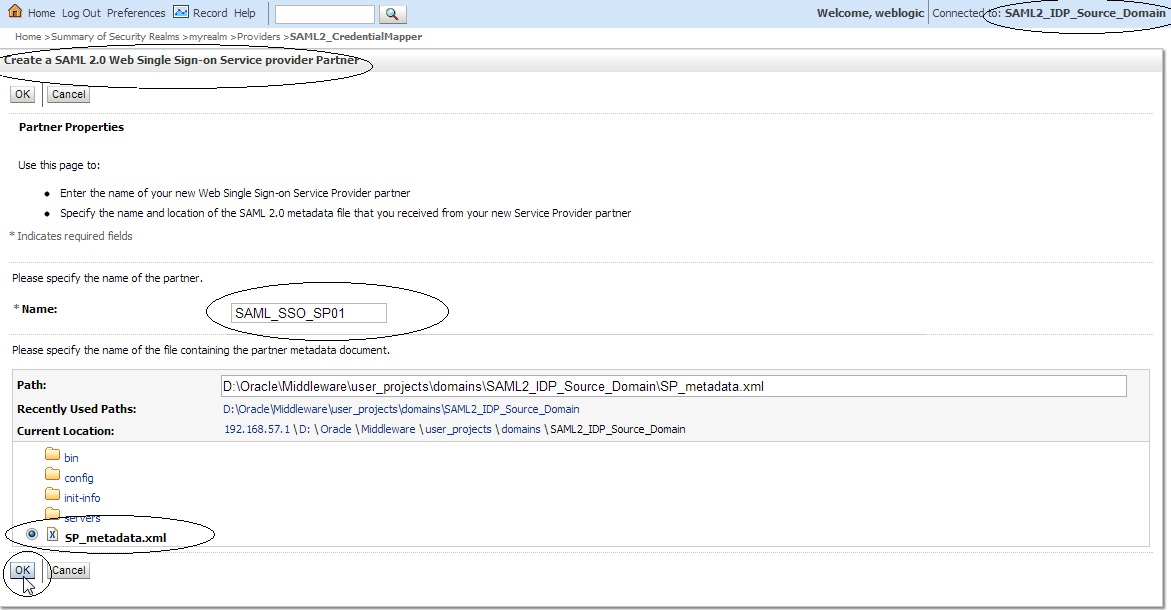
Name this ”New Web Single Sign-On Service Provider Partner” as “SAML_SSO_SP01″ and select the SP_metadata.xml file.
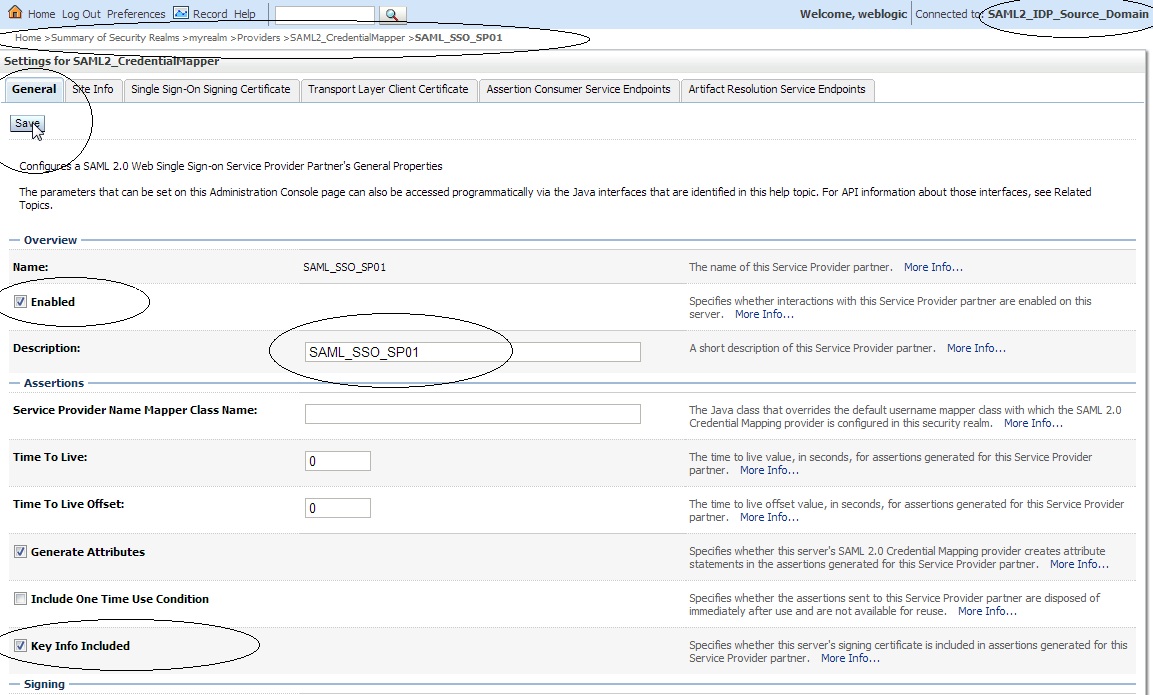
Click on the newly created ” SAML_SSO_SP01 ” and enter the following :
Name : SAML_SSO_SP01
Enabled : Checked
Description : SAML_SSO_SP01
Key Info Included : Check
“>
Click on Site info and verify the data :

——
Now configure Identity Provider metadata on SAML Service Provider in Destination site :
Login to Destination Site Admin Console :
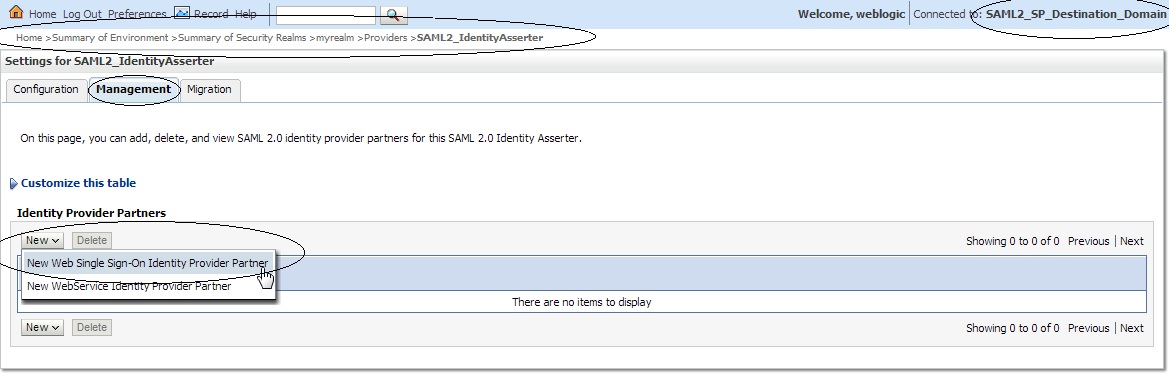
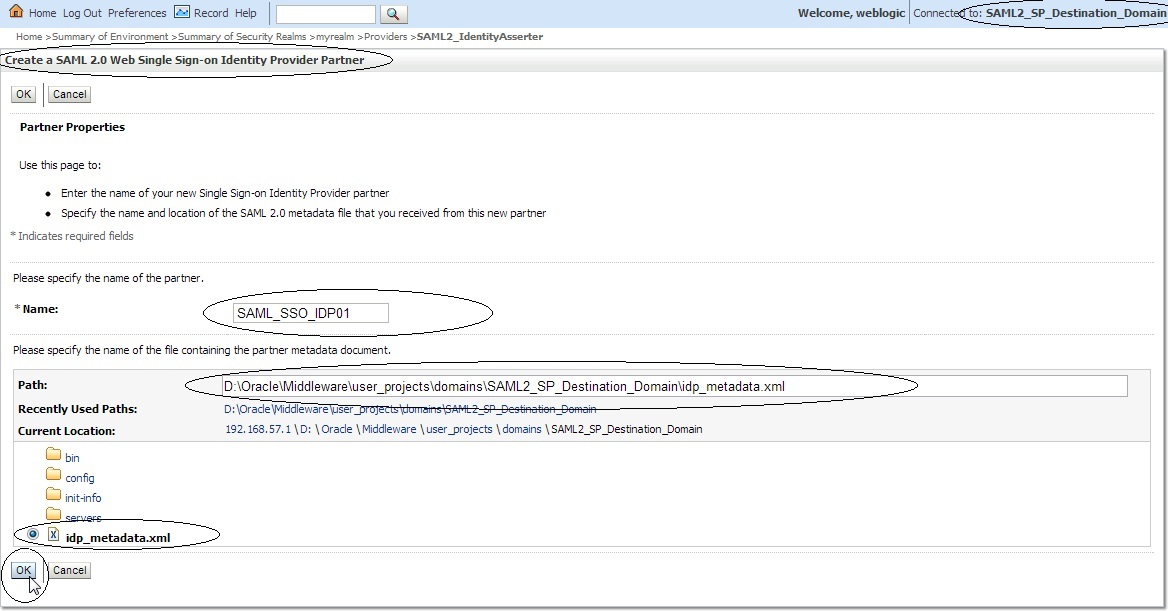
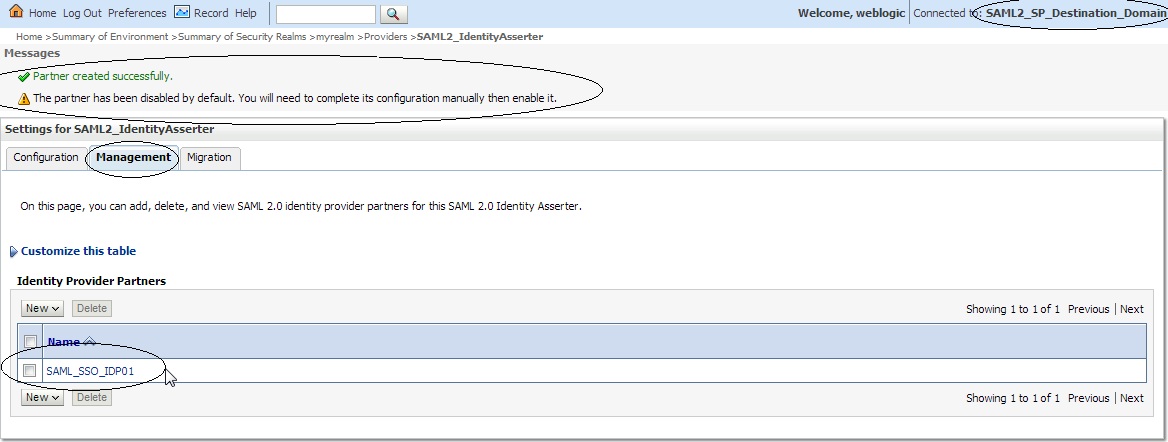
Click on ” Security Realms ” –> ” myrealm ” –> ” Providers ” –> Authentication -> SAML2_IdentityAsserter –> ” Management ” –> ” New ” –> “ New Web Single Sign-On Identity Provider Partner ” say ” SAML_SSO_IDP01 ” and then select ” idp_metadata.xml ” :
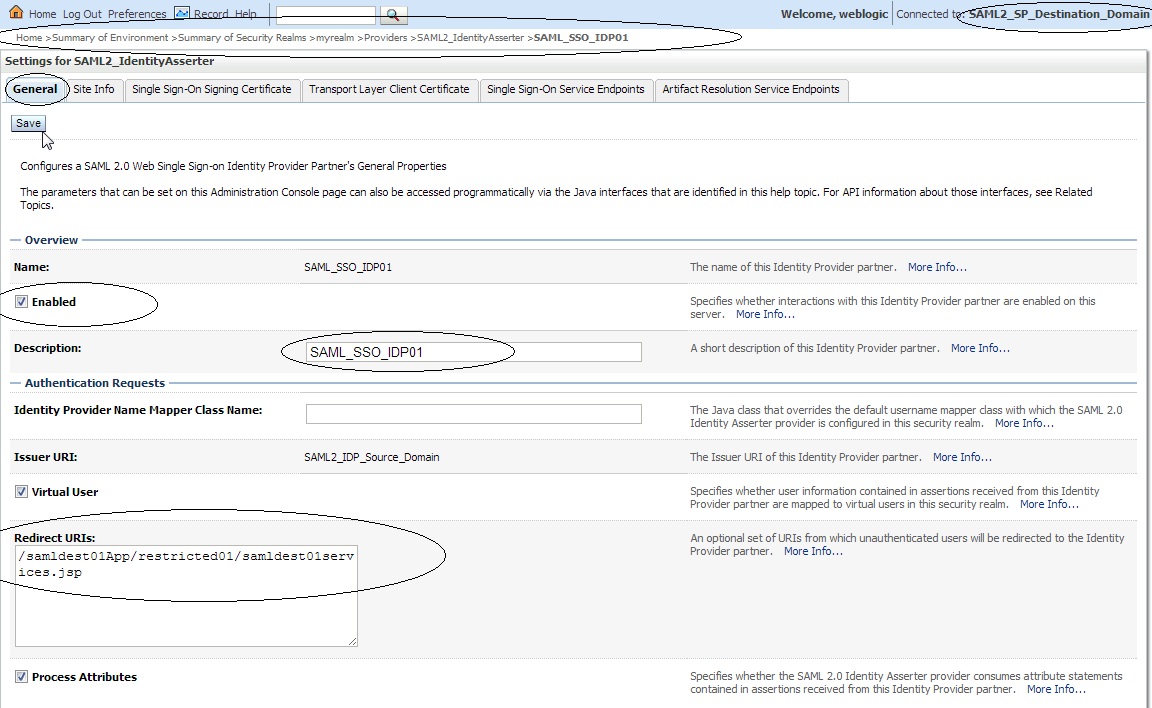
Click on ” SAML_SSO_IDP01 ” and enter the following :
Name : SAML_SSO_IDP01
Enabled : Check
Description : SAML_SSO_IDP01
Redirect URIs : /samldest01App/restricted01/samldest01services.jsp
We have successfully configured SAML 2 with Weblogic Server…!!
Deploy the source and destination application and check if SAML 2.0 works fine.
DOWNLOAD : Source Application. ( NEW )
DOWNLOAD : Destination Application. ( NEW )
Note :
– To test this sample application login using ” weblogic ” user.
The principal I have used in weblogic.xml file of this application is :
<security-role-assignment>
<role-name>SamlTrainee</role-name>
<principal-name>Administrators</principal-name>
</security-role-assignment>
– So you should be able to login to this application with a user ” Administrators ” or any user who is part of a group called ” Administrators “.
– When you access the Source application, you will get a challenge, enter username ” weblogic ” and its password. Now click on the redirect URL and you should not be asked for a challenge while accessing the Destination app.
– In the application jsp pages I have specified ” localhost ” in the URL, change it to your respective host / IP address.
– If you have the Source and Destination domain on the same machine, then make sure you edit the jsp page and change the redirect URL to IP / host, donot use ” localhost ” as it may go into a loop.
—
Demo :
Have a look at the following video which shows how to install the sample application and enable Virtual User feature in WebLogic :
NOTE: The video shows a sample application from JCS SAML blog but it holds good for the sample application used in this blog as well.
