
This article explains how to configure OCI Email Delivery for Oracle Fusion Data Intelligence (FDI), giving you a reliable way to send reports, alerts, and notifications to stakeholders by email.
OCI Email Delivery provides a fully managed outbound email service with built-in authentication and sender reputation management, reducing the need to maintain your own email infrastructure. It’s also a practical option when FDI can’t access your organization’s internal email server.
The configuration connects OCI Email Delivery with FDI to support secure outbound communication. Once complete, you’ll have an email setup ready to distribute FDI reports and insights across your organization.
Prerequisites
Before you begin, make sure you have:
- Access to the OCI Console.
- An email domain to use for sending emails. Private domains aren’t supported.
- Access to your organization’s DNS Administrator.
- Access to the FDI Environment.
Step 1: Create an Email Domain
Register your organization’s existing email domain with OCI Email Delivery.
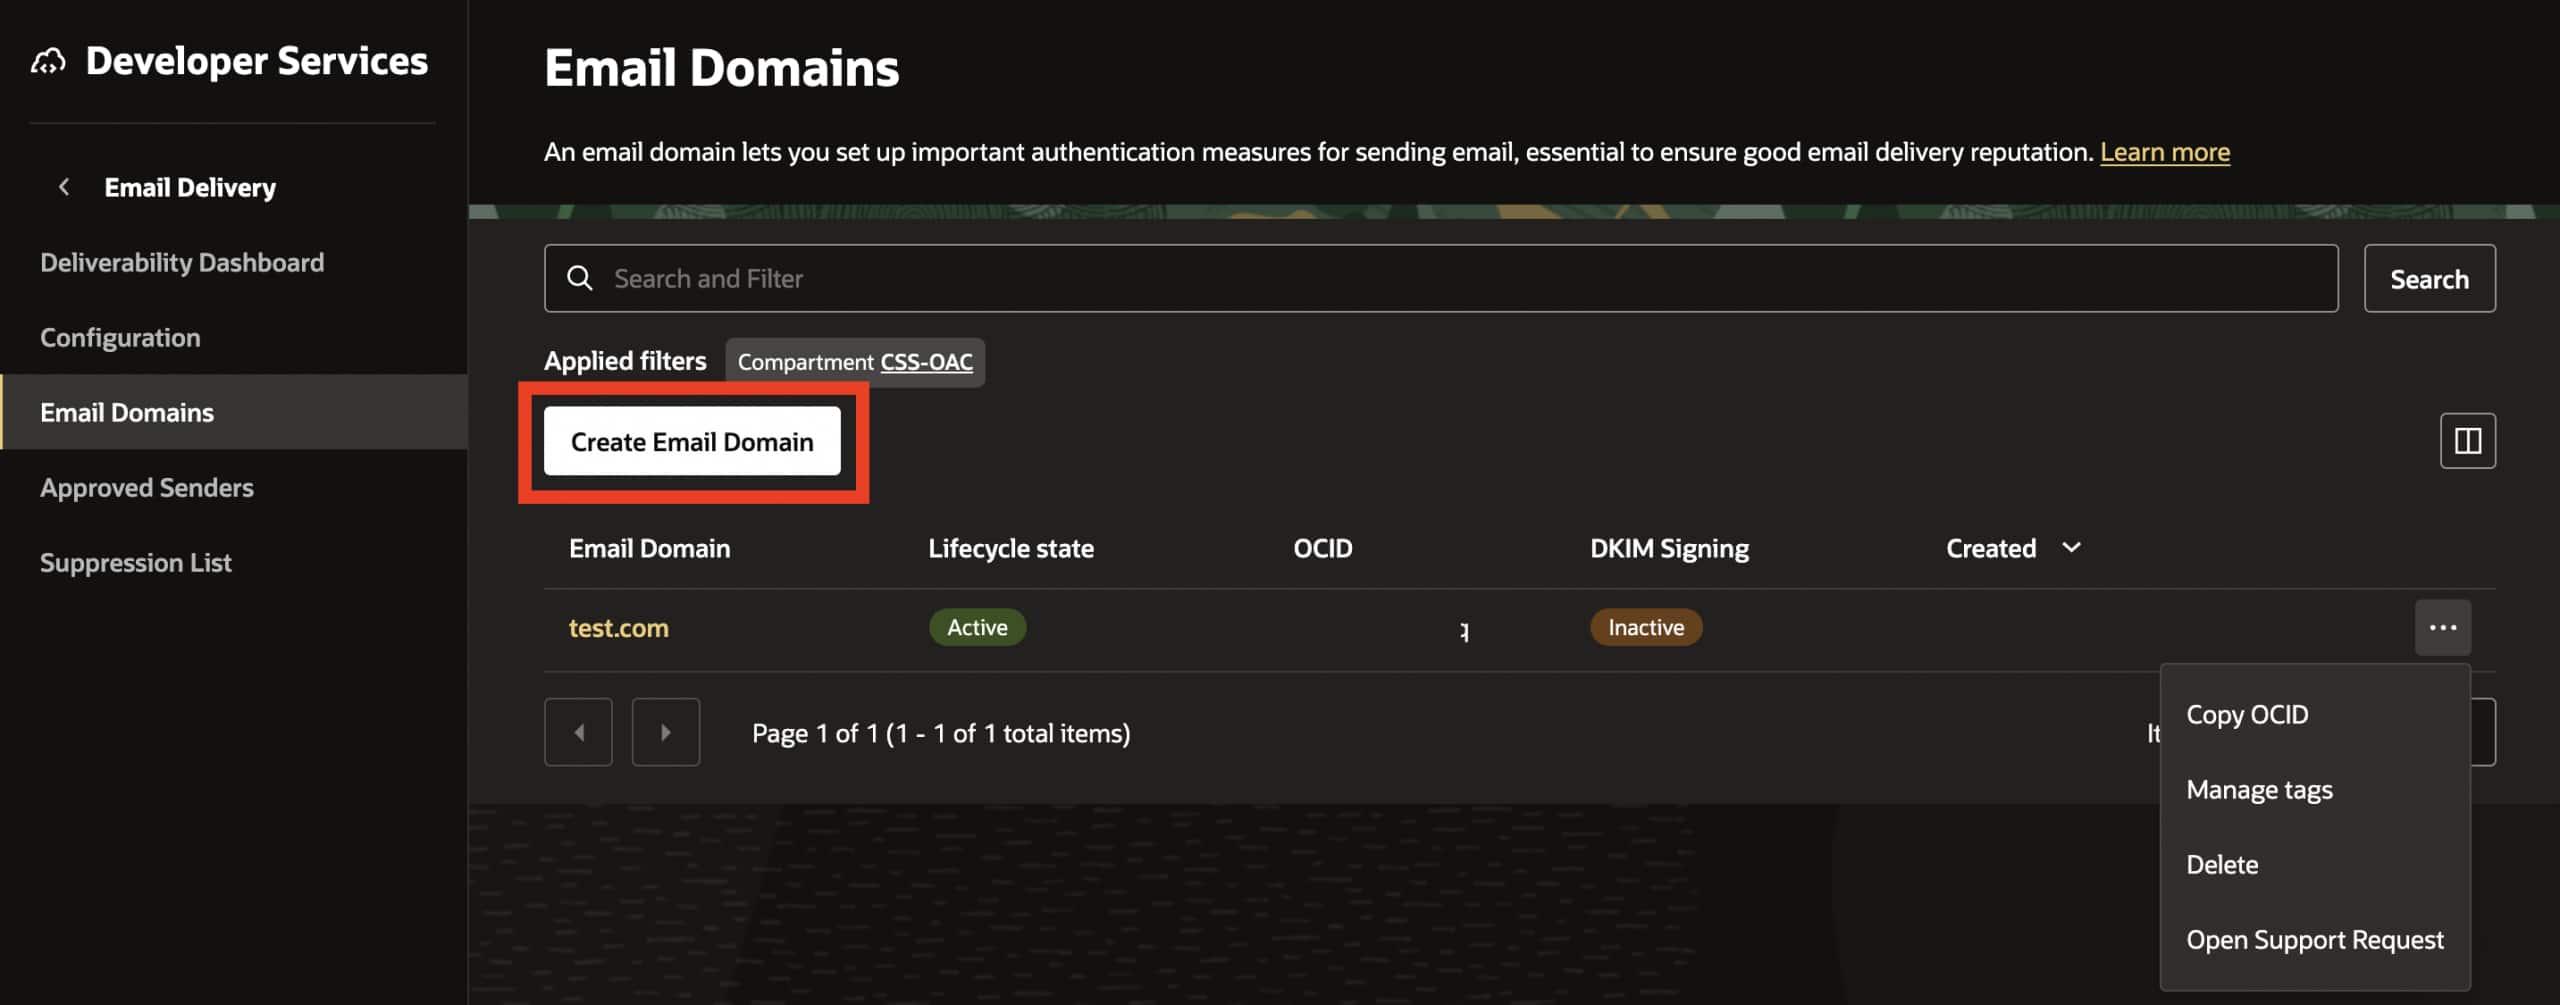
- From the OCI Console, click Developer Services, then click Email Delivery, and select Email Domains.
- Click Create Email Domain.
- Select the compartment that you want to use. If you’re unsure which one to use, contact your OCI administrator.
- Enter the email domain, such as company.com.
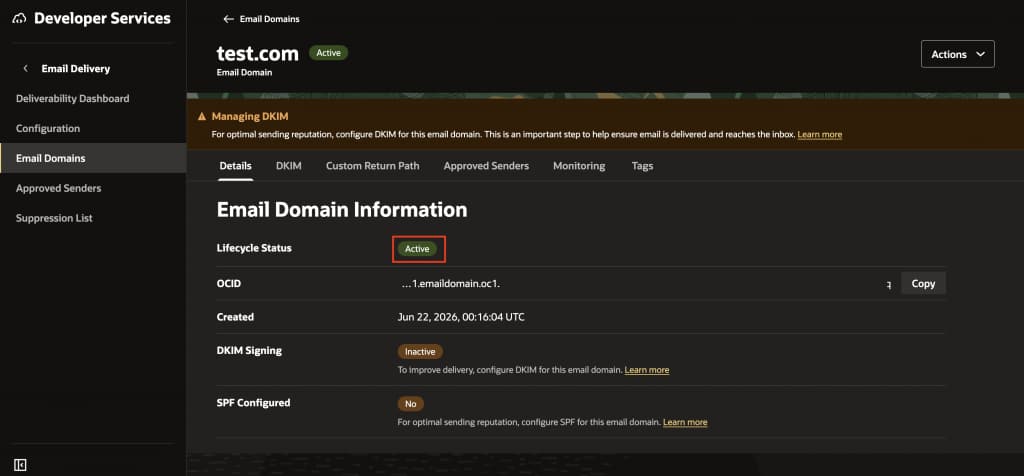
- Click Create and wait for the lifecycle status to change to Active.
Note: DKIM (DomainKeys Identified Mail) signing initially shows as Inactive. You’ll configure it in the next procedure.
Step 2: Configure DKIM
DKIM (DomainKeys Identified Mail) authenticates emails sent from your domain.
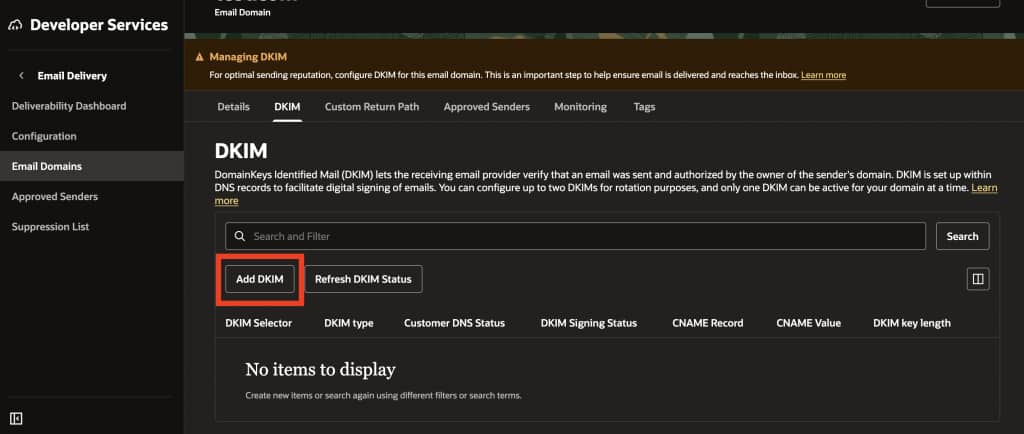
- Open the email domain that you created in Step 1.
- Under DKIM, click Add DKIM, then click Add new DKIM.
- Enter a DKIM selector, such as fdi, and click Generate DKIM.
- Copy the generated CNAME Name Record and CNAME Value to a text file to use in a later step.
- Ask your DNS administrator to create a CNAME record using these values.
- After OCI verifies the DNS record, confirm that DKIM Signing status is Active.
Note: DNS propagation can take several minutes or hours.
Step 3: Create an Approved Sender
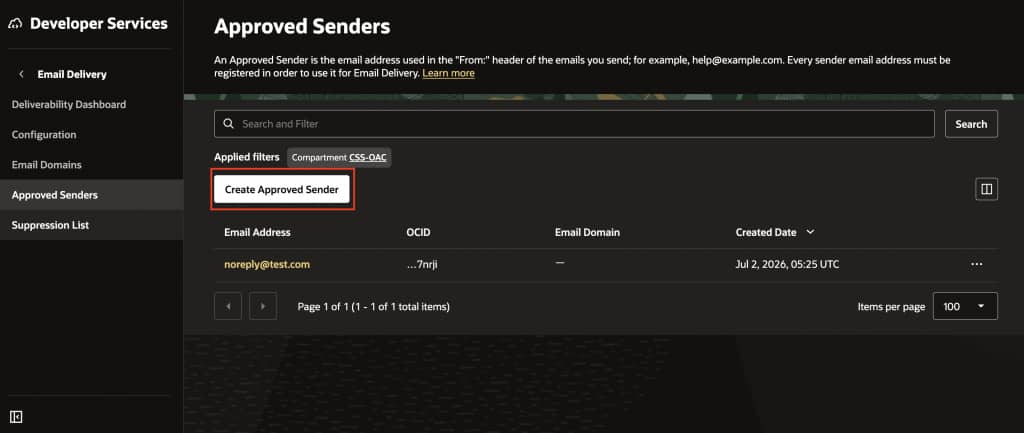
The Approved Sender is the email address that’s displayed in the From field. It must use the domain configured in Step 1, such as reports@company.com.
- In OCI Email Delivery, click Create Approved Sender.
- Enter an email address approved by your organization for automated emails.
- Click Create Approved Sender.
Step 4: Assign OCI Email Delivery Permissions
The user generating the SMTP credentials needs permission to manage OCI Email Delivery resources.
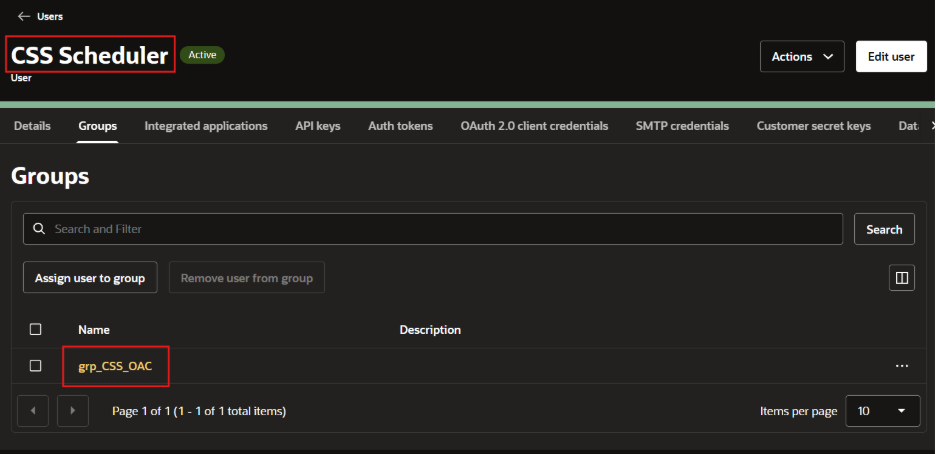
- Go to Identity & Security, then click Groups.
- Select or create a group and add the user who’ll generate the SMTP credentials.
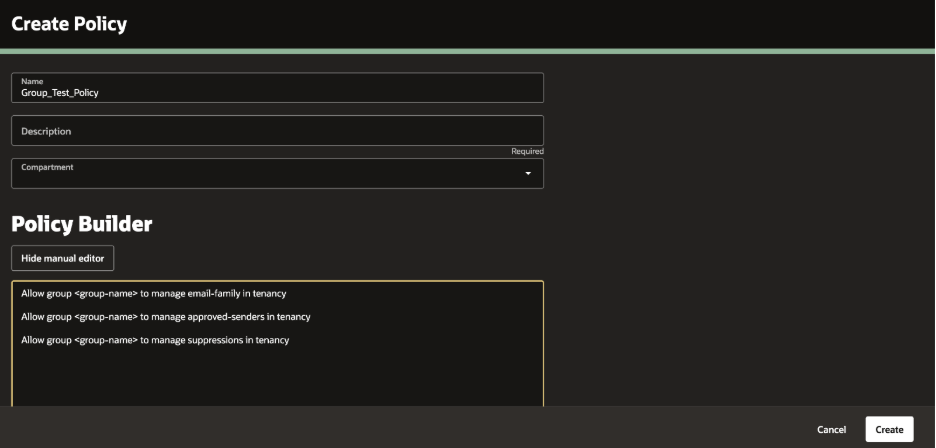
- Go to Identity & Security, select Policies, and click Create Policy.
- Enter a policy name and description.
- Add the following policy statements:
- Allow group <group-name> to manage email-family in tenancy
- Allow group <group-name> to manage approved-senders in tenancy
- Allow group <group-name> to manage suppressions in tenancy
- Replace <group-name> with your group name and click Create.
Step 5: Generate SMTP Credentials
FDI uses SMTP credentials to authenticate with OCI Email Delivery.
Tip: Use a dedicated service or system account to avoid interruptions caused by changes to individual user accounts.
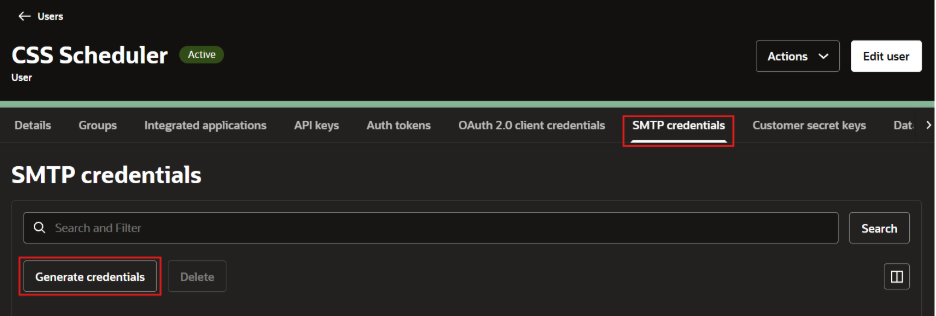
- Go to Identity & Security, select Domains, and click User Management.
- Select the identity domain and service account that you’ll use for email delivery.
- Open SMTP Credentials and click Generate SMTP Credentials.
- Save the SMTP Username and SMTP Password in a secure location.
Important: The SMTP password is displayed only once. Store it securely before closing the window.
Step 6: Configure Mail Settings
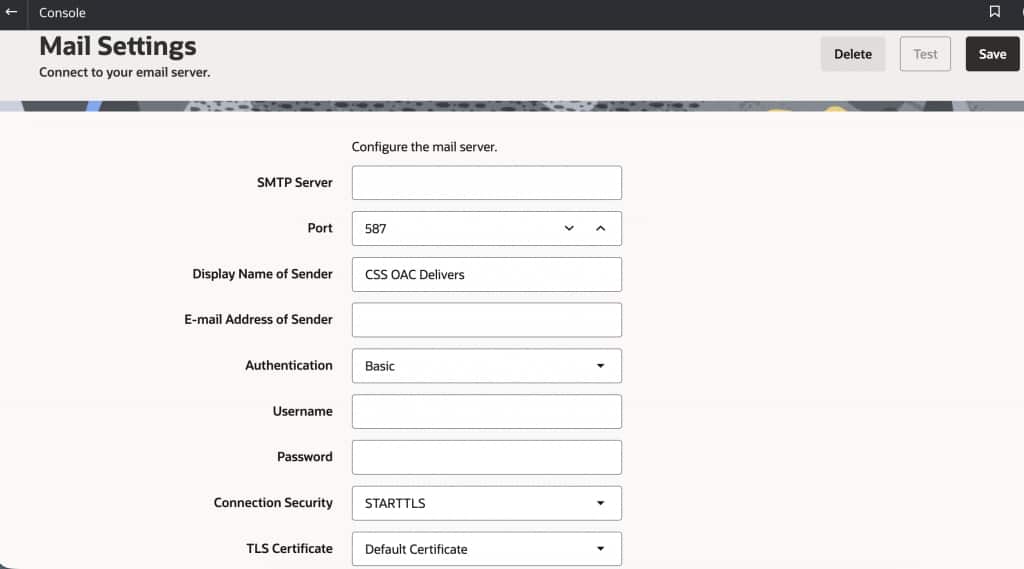
In the Oracle Analytics Cloud (OAC) Console, go to Mail Settings and configure the following parameters:
- SMTP Server: OCI Email Delivery SMTP endpoint for your region.
- Port: 587
- Display Name of Sender: Name recipients will see, such as Company Reports.
- Email Address of Sender: Approved Sender from Step 3.
- Authentication: Select Basic.
- Username: SMTP username from Step 5.
- Password: SMTP password from Step 5.
- Connection Security: Select STARTTLS.
- TLS Certificate: Keep the default unless your organization requires otherwise.
- Click Save.
Note: It may take a day or longer for the New button to appear in OAC when scheduling a report.
Step 7: Test Email Delivery
- From Catalog, select a report, and in More Actions (…) click Schedule.
- On the Schedules tab, click New.
- On the Email tab, enter the recipient, subject, and optional message.
- Schedule the report.
Tip: Send a test report to yourself so you can quickly confirm delivery.
Confirm that you receive the email, the sender’s information is correct, and the report opens successfully.
Call to Action
You’re all set! Start using FDI email delivery to schedule reports, share analytics, and keep stakeholders up to date. For more ways to get the most out of FDI, explore the Oracle Analytics Help Center. https://docs.oracle.com/en/