Review
Review these blogs before configuring Oracle Clusterware to manage TimesTen Classic Databases and applications:
- Oracle Database Appliance for TimesTen
- Installing Oracle TimesTen on an Oracle Database Appliance
- Creating a TimesTen Database on the Oracle Database Appliance
Introduction
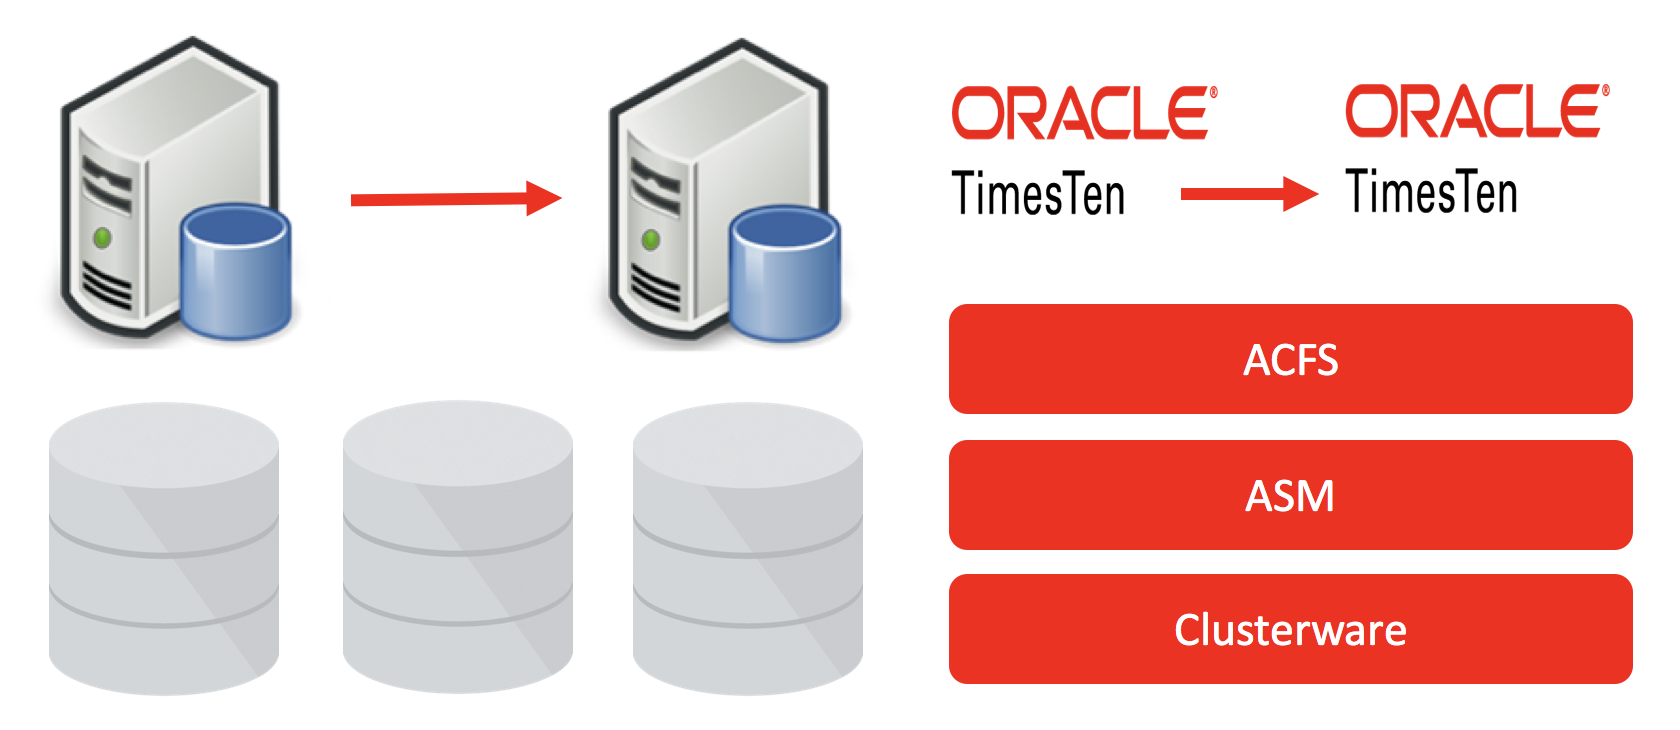
Oracle Clusterware is a generic cluster manager that can manage ‘any’ application or database. Oracle Clusterware is usually used to manage Oracle Databases for RAC or Exadata, but it can also be used to manage Oracle TimesTen Databases and associated user applications.
Oracle TimesTen uses the Oracle Clusterware C API and some helper daemons to do the following:
- Death detection, restart, failover, switchover, start, stop, status for both TimesTen databases and associated user applications
- Manage TimesTen Active Standby Pair replication schemes for high availability
- Manage TimesTen read and write caching for Oracle databases
The TimesTen integration with Oracle Clusterware uses declarative config files and the ttCWAdmin utlity.
As Oracle Clusterware is managing TimesTen it must be the boss:
- The standard TimesTen utilities like ttAdmin and ttDaemonAdmin are disabled for Clusterware managed TimesTen Databases
This blog covers the Oracle Clusterware managing an Active Standby Pair. Other blogs will cover Clusterware managing user applications and TimesTen read write caches for the Oracle Database.
This blog show how to configure two safe synchronous replication. If your cannot afford to lose replicated transactions then synchronous replication is what you need.
ttCWAdmin
The Oracle TimesTen ttCWAdmin utility controls the full life cycle of TimesTen databases and optionally a set of managed applications. ttCWAdmin has many parameters, this blog will on focus on this subset:
- ocrConfig
- init
- create
- start
- status
- beginAlterSchema
- endAlterSchema
- stop
- drop
- shutdown
Oracle Clusterware and TimesTen Prerequisites
As described in Creating an Oracle TimesTen Database on Oracle Database Appliance, Oracle Clusterware 18c or 19c should be correctly installed and a TimesTen Database created using the ACFS DATA and REDO mount points for the TimesTen checkpoint and transaction log files.
Both the Oracle Clusterware and TimesTen software should be installed in the same way on each ODA node.
The TimesTen Instance Administrator [eg Linux user oracle] must belong to the same Linux primary group [eg oinstall] as the Oracle Clusterware installation owner [eg Linux user grid].
The TimesTen instance name must be the same on each ODA host.
The user name of the TimesTen instance administrator must be the same on both hosts.
A TimesTen schema with database objects to replicate.
Create your sys.odb.ini files and create your databases
If you have not already done so, define the sys.odbc.ini for your clusterware managed databases. This blog shows you how to create the sys.odbc.ini file and create a database on a single ODA node. You need to do this for both ODA nodes:
- The same database name must be used on both ODA nodes [eg sampledb]
- The DSN must match the checkpoint file name on both ODA nodes [eg sampledb]
- Manually creating the databases on both nodes will verify that:
- the contents of your sys.odbc.ini file are valid
- the directories for the checkpoint and transaction log files exist and there are no file permission issues
- the TimesTen shared memory segments can be created on both ODA nodes
On the first ODA node [eg odoemoda0], create [or connect to the existing database] with the following command:
ttIsql sampledb

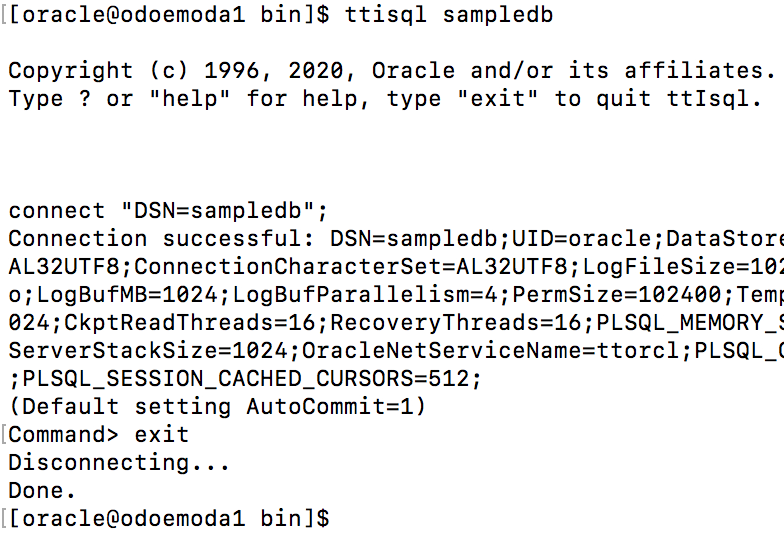
On the second ODA node [eg odoemoda1], create [or connect to the existing database] with the following command:
ttIsql sampledb
Once the databases have been correctly created on both nodes, destroy the database on the second ODA node [eg odemooda1]. As Clusterware will create an active standby pair, it will duplicate the active database to create the standby database. If the planned standby database already exists, it will give an error.
On the second ODA node, destroy the database using the ttDestroy command. eg:
ttdestroy sampledb

Create the Database Objects to Replicate
To support the security concept of least privilege, your database needs to have at least two database users:
- A user with the admin priviledge, eg adm
- A non admin user who will own the schema for the tables to be replicated, eg appuser
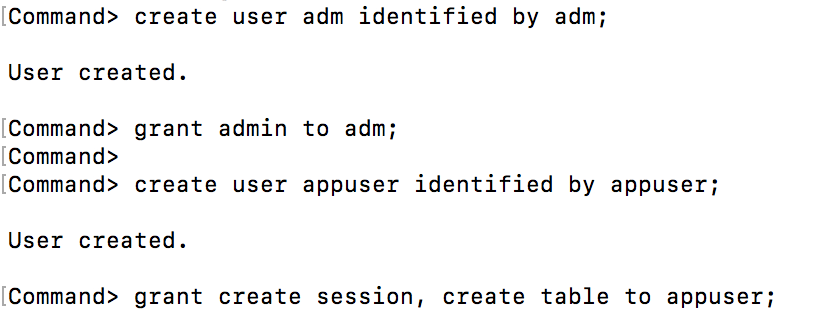
ttisql sampledb
create user adm identified by adm;
grant admin to adm;
create user appuser identified by appuser;
grant create session, create table to appuser;
exit;
Now create some database objects to replicate. Connect to database sampledb as user appuser:
ttisql “uid=appuser;pwd=appuser;dsn=sampledb”
CREATE TABLE CUSTOMERS (
CUST_NUMBER NUMBER,
FIRST_NAME VARCHAR2(12) NOT NULL,
LAST_NAME VARCHAR2(12) NOT NULL,
ADDRESS VARCHAR2(100) NOT NULL,
PRIMARY KEY (CUST_NUMBER));
insert into customers values (3700,’Peter’,’Burchard’,’882 Osborne Avenue, Boston, MA 02122′);
insert into customers values (1121,’Saul’,’Mendoza’,’721 Stardust Street, Mountain View, CA 94043′);
CREATE TABLE ORDERS (
ORDER_NUMBER NUMBER NOT NULL,
CUST_NUMBER NUMBER NOT NULL,
PROD_NUMBER CHAR(10) NOT NULL,
ORDER_DATE DATE NOT NULL,
PRIMARY KEY (ORDER_NUMBER),
FOREIGN KEY (CUST_NUMBER) REFERENCES CUSTOMERS (CUST_NUMBER));
insert into ORDERS values (6853036,3700,’0028616731′,to_date(‘2008-04-05′,’yyyy-mm-dd’));
insert into ORDERS values (6853041,3700,’0198612710′,to_date(‘2009-01-12′,’yyyy-mm-dd’));
insert into ORDERS values (6853169,1121,’0003750299′,to_date(‘2008-08-01′,’yyyy-mm-dd’));
insert into ORDERS values (6853174,1121,’0789428741′,to_date(‘2008-10-25′,’yyyy-mm-dd’));
insert into ORDERS values (6853179,1121,’0198612583′,to_date(‘2009-02-02′,’yyyy-mm-dd’));
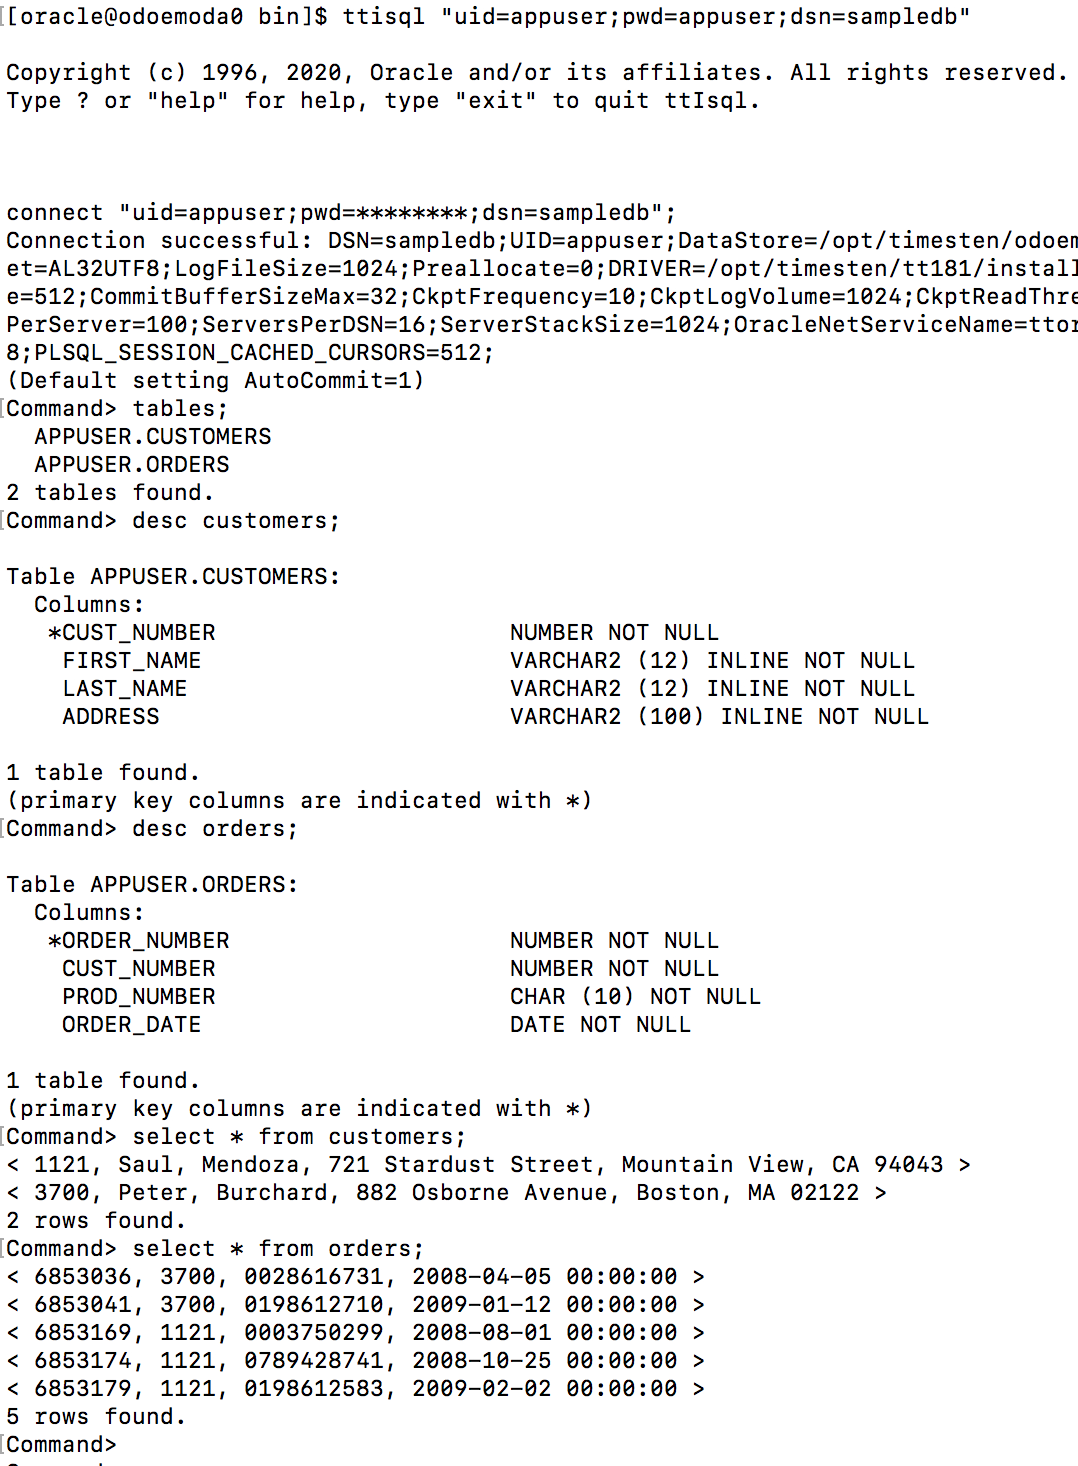
The replicated tables in the appuser schema must have primary keys or not null unique columns:

It is possible to exclude tables and/or sequences from the replication scheme.
Verify the Clusterware Environment
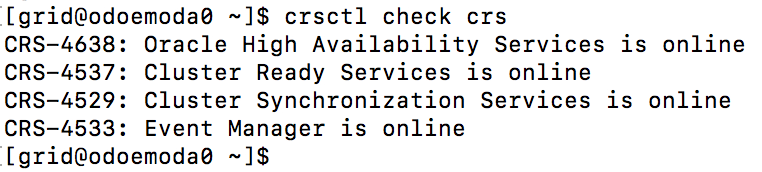
On an ODA server, as the Linux user grid, check whether Clusterware is running. eg
crsctl check crs
Configure TimesTen Replication with Clusterware
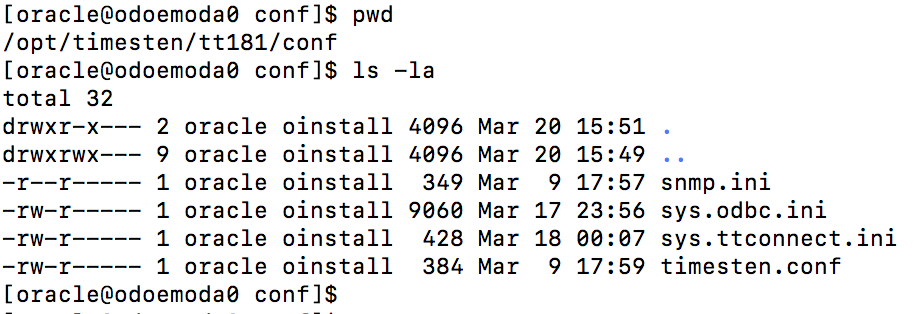
When TimesTen Replication for Clusterware is not configured, the $TIMESTEN_HOME/conf directory looks like this:
To configure TimesTen Replication for Clusterware, as the TimesTen instance administrator user [eg Linux user oracle] use the ttInstanceModify utility to add support for Oracle Clusterware. You may need to stop the TimesTen daemon(ttdaemonadmin -stop) if it’s running before configuring it for Clusterware. eg:
ttInstanceModify -crs
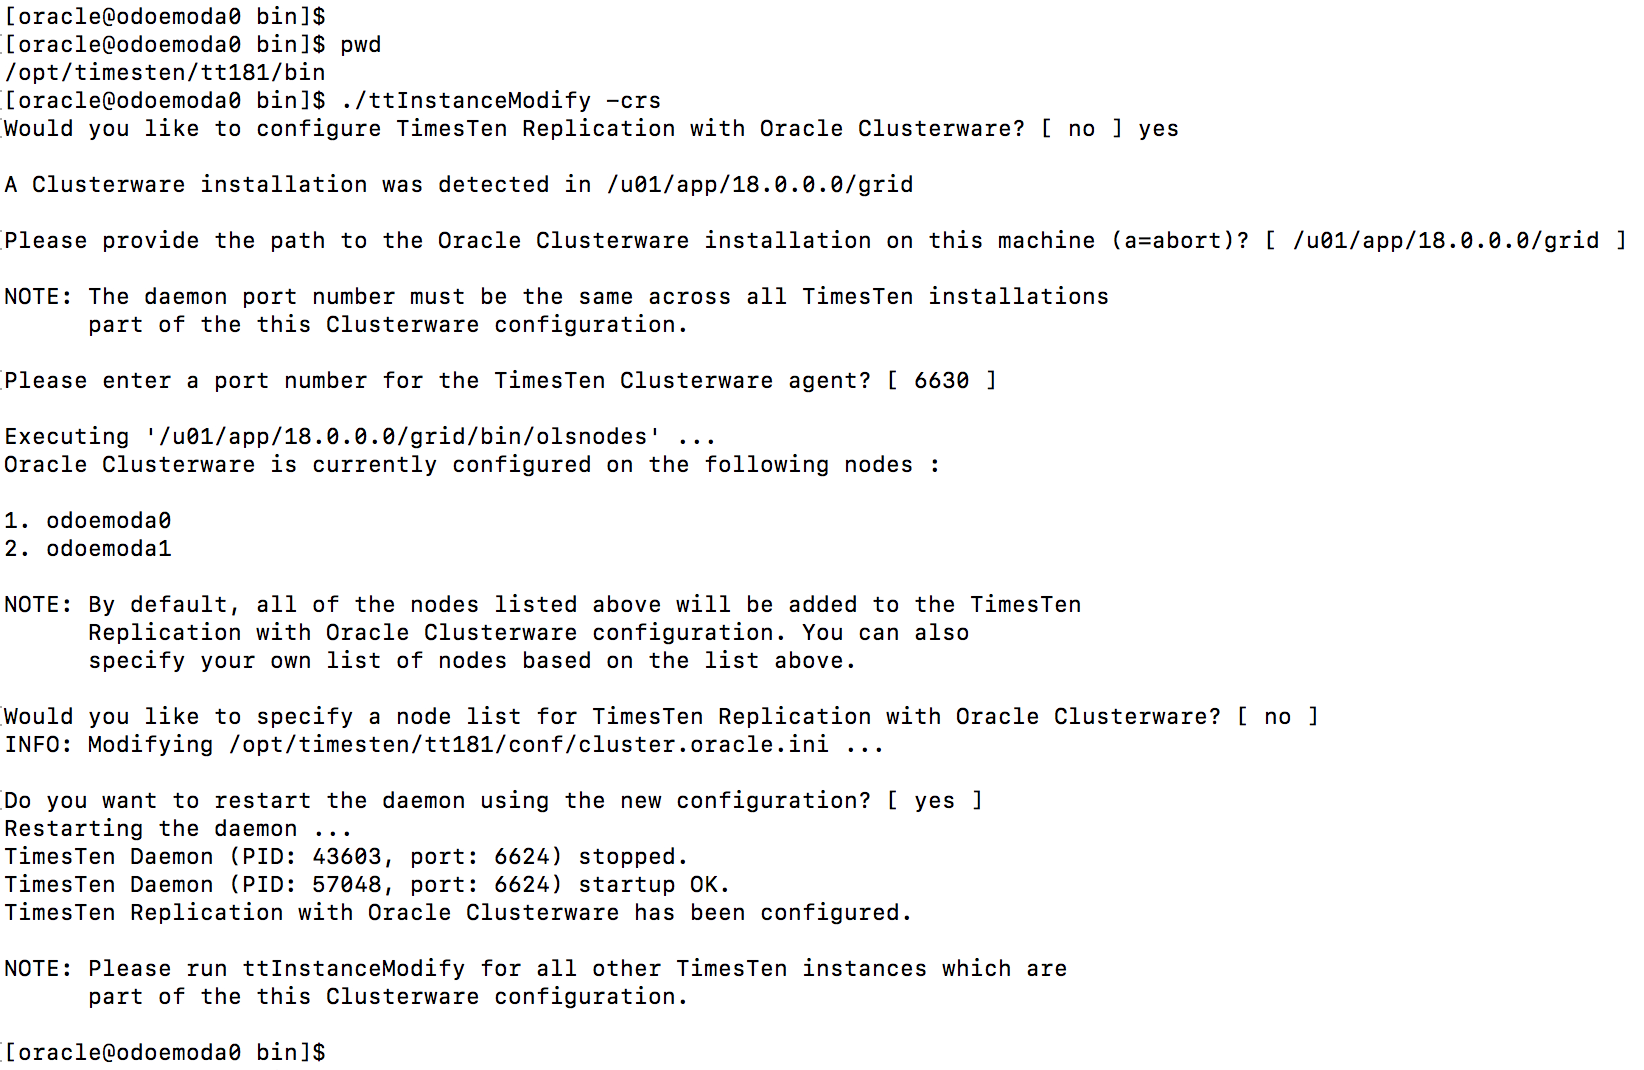
This command creates the ttcrsagent.options and cluster.oracle.ini files in the $TIMESTEN_HOME/conf directory:

You should never manually modify the ttcrsagent.options file. Instead use ttInstanceModify -crs to change the values in this file.
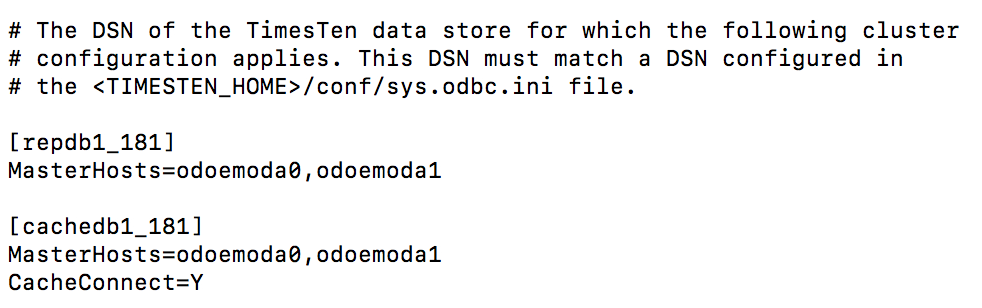
The generated cluster.oracle.ini files provides two sample configurations.
The ttInstanceModify -crs step needs to be run on both nodes of the ODA.
Modify your cluster.oracle.ini file for Synchronous Replication
Modify the generated cluster.oracle.ini file in the TimesTen $TIMESTEN_HOME/conf directory [on both ODA nodes] to enable synchronous [two safe] replication for the sampledb databases between the two ODA nodes.
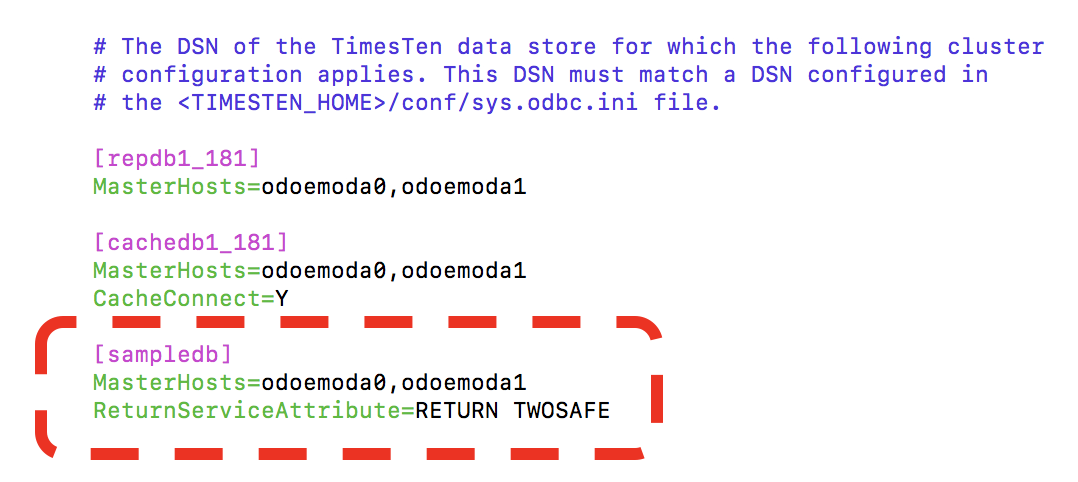
The sampledb ‘entry’ in your cluster.oracle.ini file must point to the local TimesTen sys.odbc.ini that you used to create a database from the sampledb DSN.
Ignore the generated entries for repdb1_181 and cachedb1_181 as they will not be used in this blog.
Register the TimesTen metadata in the Oracle Cluster Registry (OCR)
The TimesTen Clusterware daemons use the Oracle Cluster Registry [OCR] for metadata. As the Linux user root, run the ttCWAdmin -ocrConfig command to add metadata to the OCR:
cd /opt/timesten/tt181/bin
./ttCWAdmin -ocrConfig

This is a one time operation.
Start the TimesTen Clusterware Managed Daemons
Make sure that the TimesTen main daemons are not running on either ODA node. As the TimesTen instance administrator [eg oracle], use ttStatus to check whether there are any database connections. When there are no connections, use ttDaemonAdmin to stop it.
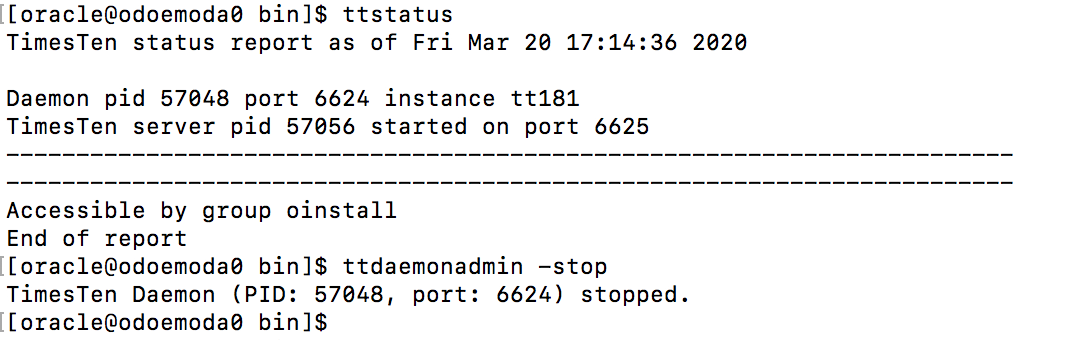
You need to stop the TimesTen main daemon on both ODA nodes.
Now Oracle Clusterware can start to take over!
Start the TimesTen clusterware agent via the following command:
ttCWAdmin -init
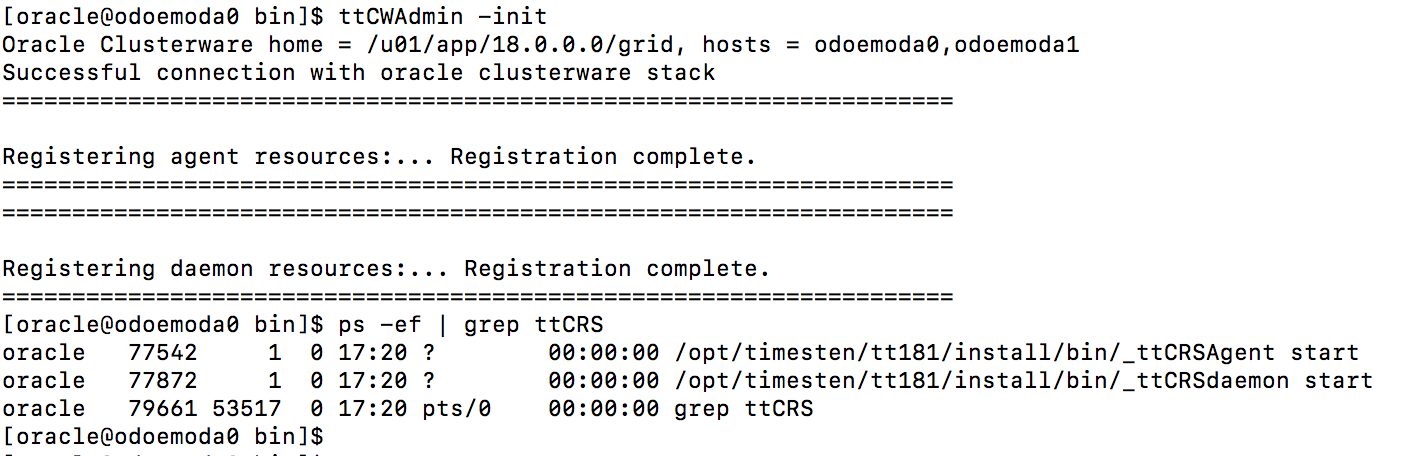
This will start the TimesTen main daemon and the some helper daemons on both ODA nodes.

These daemons on both ODA nodes are now managed by Oracle Clusterware.
Create the Active Standby Pair Replication Scheme
Use the following command to create the active standby pair replication scheme based on the information in your sys.odbc.ini and cluster.oracle.ini files.
ttCWAdmin -create -dsn sampledb
This command will prompt for the following information:
- A user with the admin priviledge, eg adm
- The password for the admin user
- A random string used to encrypt the provided admin username/password
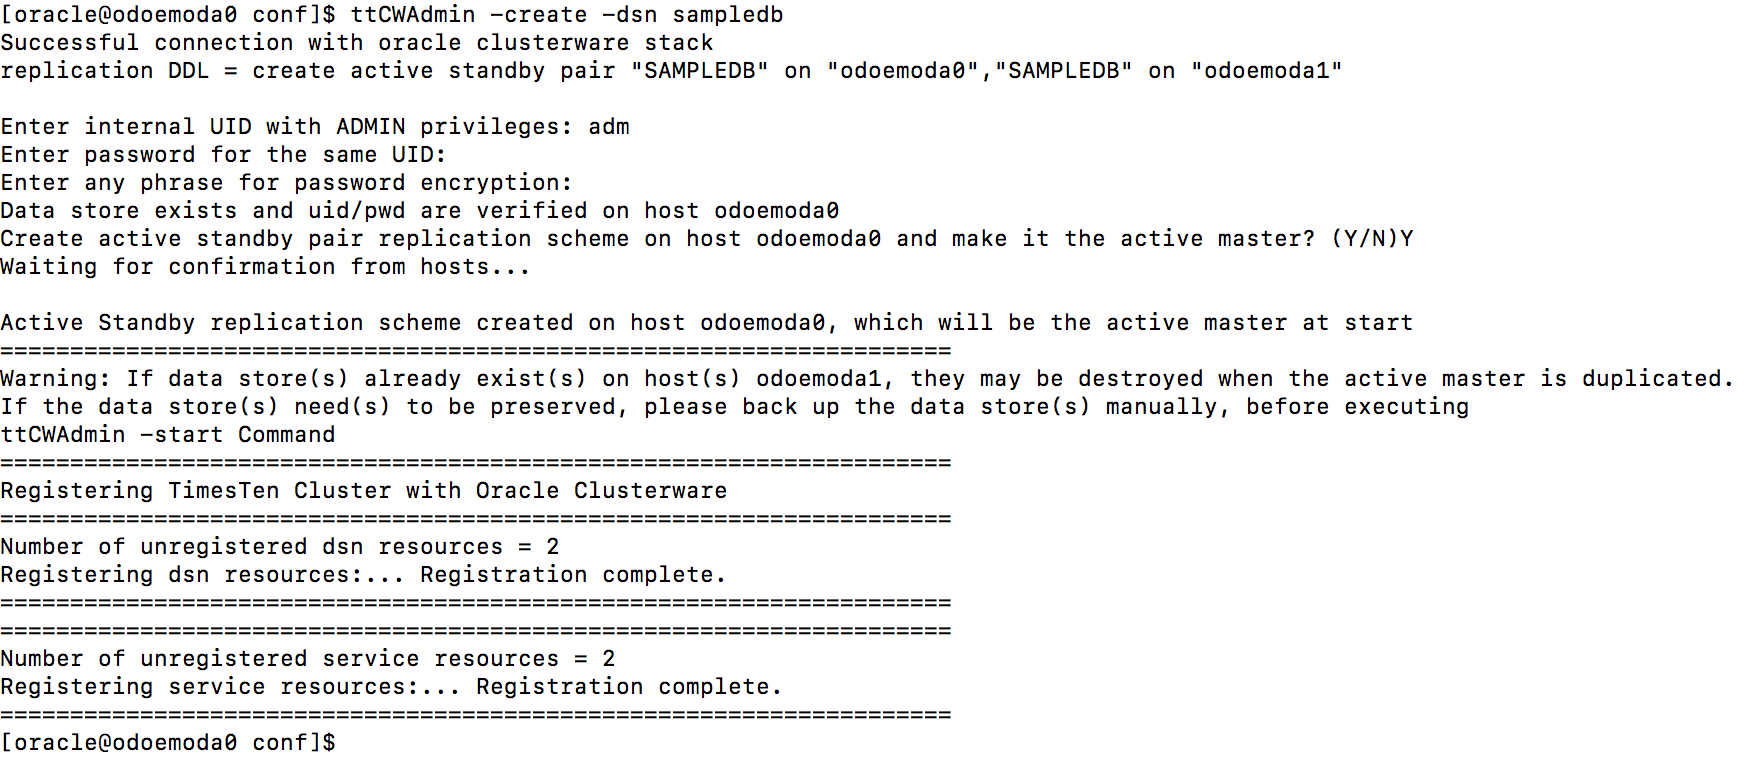
This operation will tend to be quick as it is just creating metadata (ie the replication scheme).
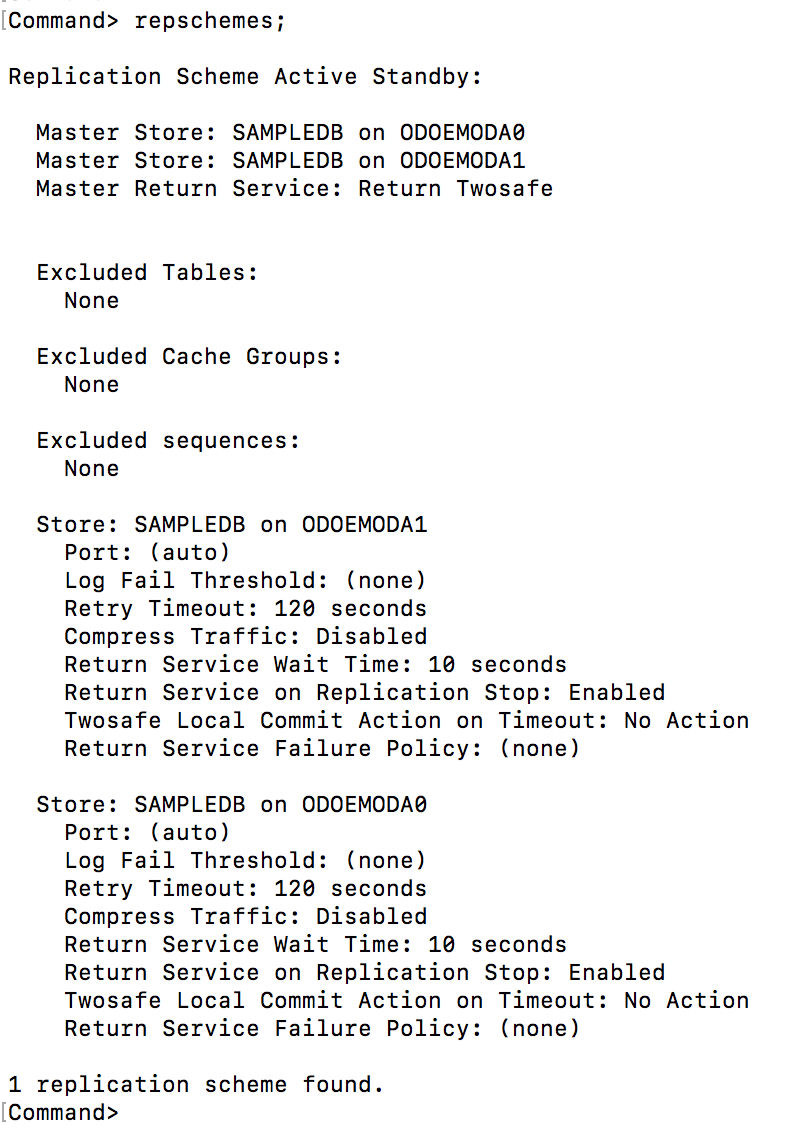
You can verify the replication scheme that has been created via the repschemes ttIsql command:
ttisql sampledb
repschemes;
exit;
Start the Active Standby Pair
To be able to use the active standby pair, the TimesTen Replication Agents need to be started on each ODA and the new standby database needs to be duplicated. This is achieved by the following command:
ttCWAdmin -start -dsn sampledb
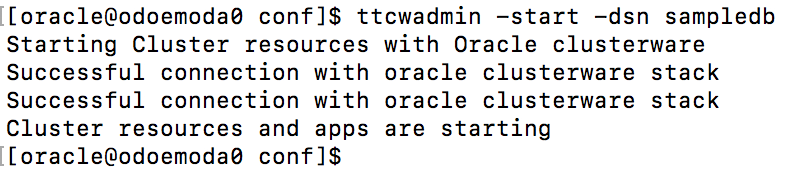
This operation will take some time due to the database duplication. The time taken to duplicate the database will be proportional to the size of the database and how fast your disks are.
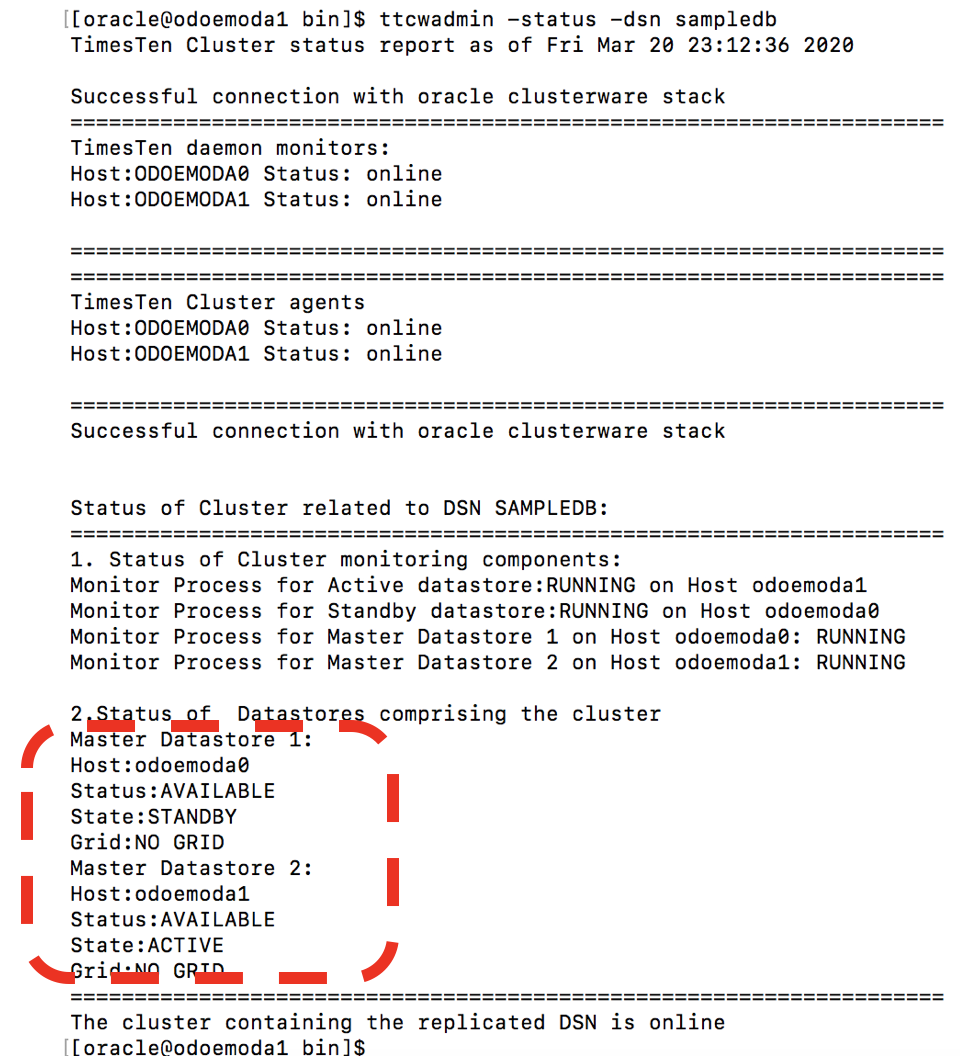
Check the status of the Active Standby Pair
As ttCWAdmin operations are asynchronous, you need to check their status to see when they have completed. Use the following command to check the status of the ‘sampledb’ active standby pair:
ttCWAdmin -status -dsn sampledb

If the TimesTen databases on the two ODA nodes eventually have states ACTIVE and STANDBY then everything is OK.
Now that your active standby pair is working, it can be left running and Oracle Clusterware will automatically do death detection, restart and failover operations for the active standby pair and optionally a set of applications that are associated with the active and/or standby databases.
Replicate some data synchronously
Once the Active Standby pair are ready you can do SQL writes [INSERT, UPDATE or DELETE] to the active database and it will synchronously replicate those writes to the standby database.
ttisql “uid=appuser;pwd=appuser;dsn=sampledb”
autocommit 0;
insert into orders values (1, 3700, 0028616731, sysdate);
insert into orders values (2, 1121, 0789428741, sysdate);
commit;
select * from orders;
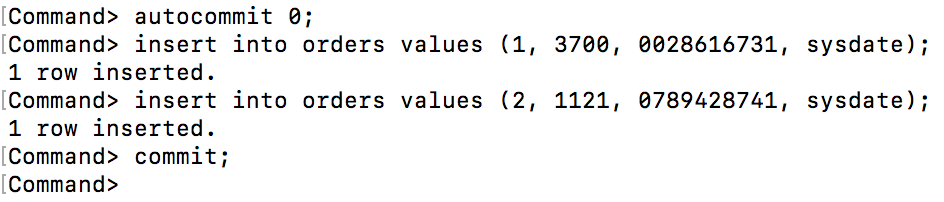
Note that TimesTen ttIsql utility has autocommit turned on by default. When using synchronous replication, the autocommit behavior must be turned off via autocommit 0.
These inserts will likely show up in the other ODA node in about 1 millisecond
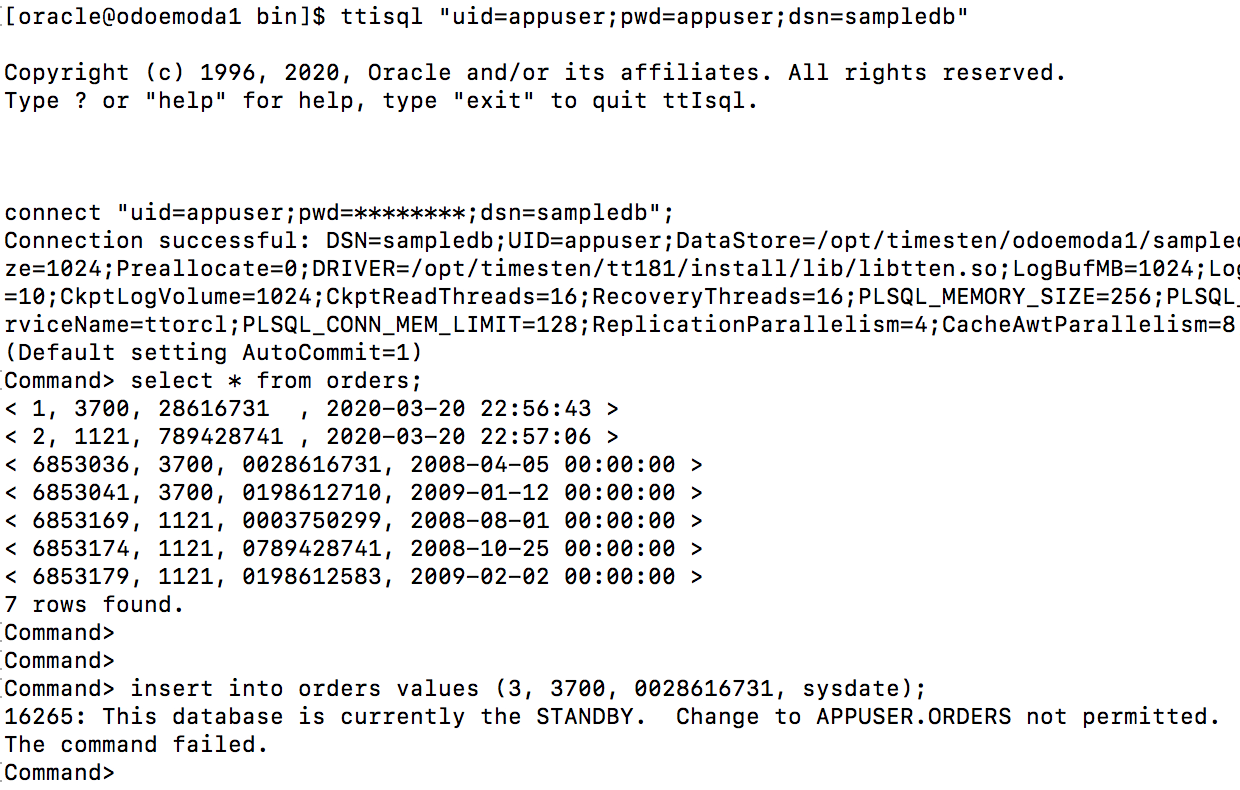
Note that you can only write to the active database. The standby database is read only!
Switch the roles of the Active and Standby Databases
If desired, you can switch the roles of the active and standby databases via the following command:
ttCWAdmin -switch -dsn sampledb
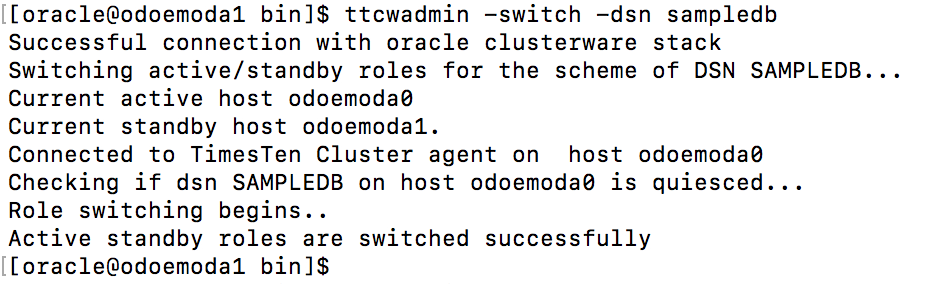
You can switch the active standby roles back and forth as much as desired.
Applying DDL Modifications
If you want to modify your schema while still enabling SQL reads and writes to your database, you should use the ttCWAdmin beginAlterSchema / endAlterSchema parameters.
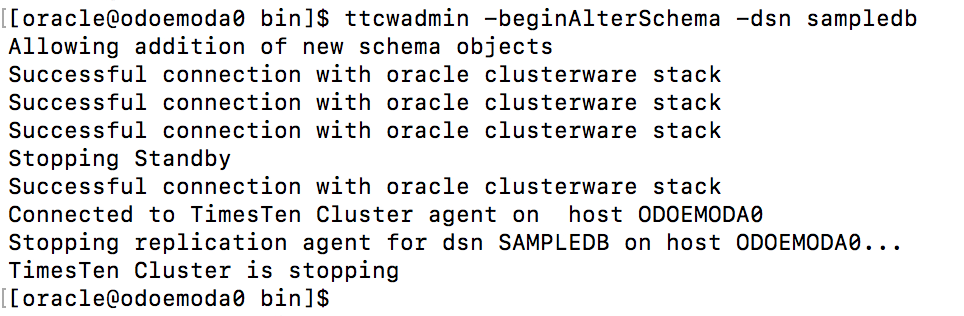
The ttCWAdmin -beginAlterSchema -dsn sampledb command does the following:
- Stops the replication agent of the active ODA node
- Stops the replication agent of the standby ODA node
- Leaves the TimesTen main daemons on both ODA running and managed by clusterware
- Enables the current active database to process SQL select, insert, update and delete transactions
- Enables the current standby database to process SQL select transactions
- Enables DDL changes on the active database which will be replicated to the standby database
ttCWAdmin -beginAlterSchema -dsn sampledb
When you have finished creating or altering database objects, you run the following command:
ttCWAdmin -endAlterSchema -dsn sampledb
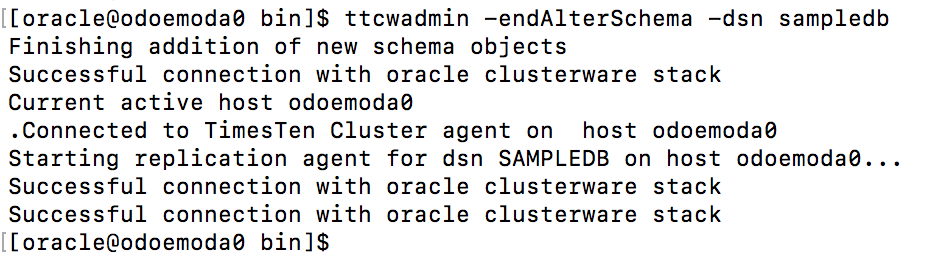
When using two safe synchronous replication, the ttCWAdmin -endAlterSchema operation will duplicate [copy] the active database to the standby database.
Stop the Active Standby Pair
If you want to stop replication between the active standby pair, then use the following command:
ttCWAdmin -stop -dsn sampledb
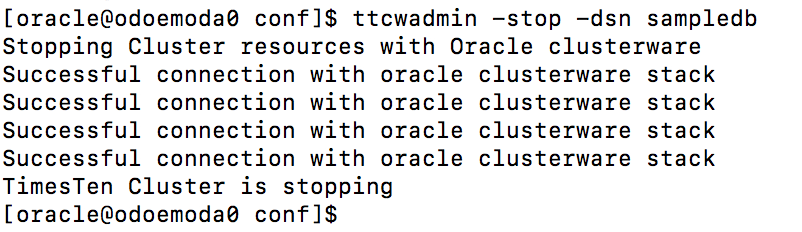
This command will do the following:
- Stop the replication agents on both ODA nodes
- Unload the databases on both ODA nodes after their grace period has expired [eg 60 seconds]
- The replication scheme still exists
Drop the Active Standby Pair
If you want to drop the active standby pair replication scheme then use the following command:
ttCWAdmin -drop -dsn sampledb
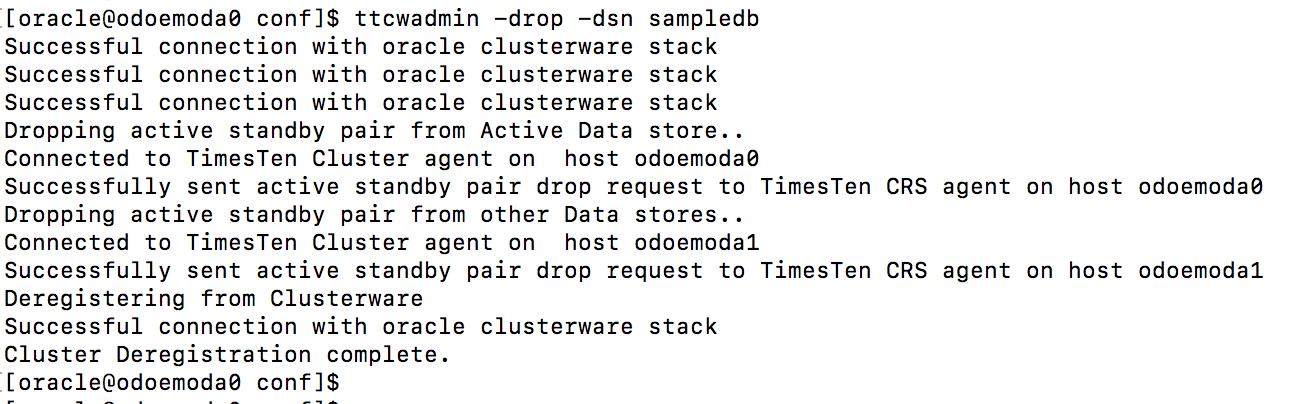
This command will do the following:
- Drop the active standby pair replication scheme
- Unload the databases from both ODA nodes
- The TimesTen main daemons are still managed by clusterware on both ODA nodes
Shutdown the TimesTen Clusterware Daemons
If you no longer want clusterware to manage your TimesTen databases, then use the following command:
ttCWAdmin -shutdown -dsn sampledb
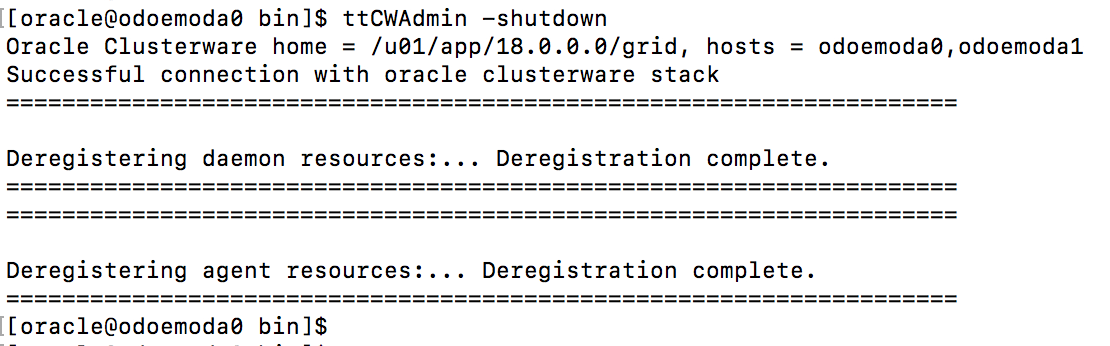
This command will do the following:
- Stop all of the TimesTen clusterware helper daemons
- Stop managing the TimesTen main daemon on both ODA nodes
- Leave the TimesTen main daemons running on both ODA nodes
See the following blogs for more configuration options:
- Oracle Database Appliance for TimesTen
- Installing Oracle TimesTen on an Oracle Database Appliance
- Configuring Oracle Database Appliance X8-2-HA for TimesTen Replication with Clusterware and ACFS
- Configuring Oracle Database Appliance X8-2-HA for TimesTen Cache and Replication with ACFS
- Configuring Oracle Database Appliance X8-2-HA for TimesTen TLS 1.2 Replication with ACFS
- Configuring Oracle Database Appliance X8-2-HA for TimesTen Replication with ACFS Encryption
- Configuring Oracle Database Appliance X8-2-HA for TimesTen Replication with Clusterware Managed Applications
- Configuring Oracle Database Appliance X8-2-M for TimesTen Scaleout
Disclaimer: These are my personal thoughts and do not represent Oracle’s official viewpoint in any way, shape, or form.