Oracle Solaris Cluster Data Service for Oracle Solaris Zones enables Oracle Solaris Cluster to provide high availability (HA) for Oracle Solaris Zones. Up to now the configuration required the use of the command line interface across the cluster, on multiple nodes.
In the 4.3 version of Oracle Solaris Cluster software, a new graphical interface for configuring the Oracle Solaris Zones data service for a failover configuration is provided in the Oracle Solaris Cluster Manager browser interface. This feature intends to simplify the configuration by providing a wizard to make an Oracle Solaris non-global zone highly available (HA-Zone). The wizard consists of a set of panels that prompts
for user/default values and using a few clicks starts the configuration
process. It replicates a zone configuration across cluster nodes,
configures an HAStoragePlus resource to manage the zone path if the zone
path is a failover file system, and configures the zone boot component.
The wizard also provides a Help panel with a description of the values
to be entered.
The focus in this blog is on configuring HA for Oracle Solaris Zones. The link Oracle Solaris Cluster Manager: Getting Started will guide you through the process of installing Oracle Solaris Cluster Manager and getting authenticated.
What is HA for Oracle Solaris Zones?
Oracle Solaris Cluster offers a means for protecting the zone itself: the failover zone.
- Oracle Solaris Cluster, the high availability (HA) solution for Oracle Solaris, offers close integration with Oracle Solaris Zones and extends Oracle Solaris 11 to provide a highly available infrastructure for deploying virtualized workloads.
- When an Oracle Solaris non-global zone is managed by the HA for Oracle Solaris Zones data service, the zone becomes an HA for Solaris Zones failover or multiple-masters zone across the Oracle Solaris Cluster nodes.
- The failover zone can be solaris branded zone, solaris10 branded zone, or solaris-kz branded zone.
- This zone is considered to be a black box, and it is monitored and controlled by the Oracle Solaris Cluster HA agent for zones, which starts, stops, and probes the zone.
- The data service also moves the zone between servers in the event of a failure or upon an on-demand request.
- You cannot configure HA for Oracle Solaris Zones as a network-load-balanced
scalable service.
Configuration Assumptions
- The cluster hardware is a supported configuration for Oracle Solaris Cluster 4.3 software.
- The repositories for Oracle Solaris and Oracle Solaris Cluster are already configured on the cluster nodes.
- The cluster (x86 / SPARC) is already installed and configured with Oracle Solaris 11 and Oracle Solaris Cluster 4.3.
Packages Required
- Ensure that the data service package is available from the configured publisher and that the solaris and ha-cluster publishers are valid.
# pkg list -a ha-cluster/data-service/ha-zones
# pkg publisher
PUBLISHER   TYPE    STATUS  P  LOCATION
solaris     origin  online  F  solaris-repository
ha-cluster  origin  online  F  ha-cluster-repository
ha-cluster  origin  online  F  ha-cluster-repository
- Install the HA for Oracle Solaris Zones software package.
# pkg install ha-cluster/data-service/ha-zones
- Verify that the package installed successfully.
# pkg info ha-cluster/data-service/ha-zones
- Verify the availability of the shared disk.
# /usr/cluster/bin/cldevice -L
Achieving Prerequisites
- The zonepath of non-global zones in an HA for Oracle Solaris Zones configuration must reside on a highly available local file system (HAStoragePlus).
- Create a ZFS storage pool (zpool) on a shared disk to host the zonepath for the failover zone:
# zpool create -m /ha-zones ha-zones /dev/rdsk/c0t60080E50001848D0000009D6522F9BD8d0
# zpool list
NAME  SIZE  ALLOC  FREE  CAPDEDUPHEALTH ALTROOT
ha-zones  19.9G  94K  19.9G  0%1.00xONLINE -
rpool   68G  20.8G  47.2G  30%1.00xONLINE -
- Configure the zone on one of the nodes.
root@node-1# zonecfg -z solarisfz1 ‘create -b;
set zonepath=/ha-zones/solaris/solarisfz1;
set autoboot=false; set ip-type=shared;
add attr; set name=osc-ha-zone; set type=boolean; set value=true; end;
add net; set address=zone-hostname ; set physical=sc_ipmp0; end;
- Install the zone.
root@node-1:~# zoneadm -z solarisfz1 install
- Boot the zone.
root@node-1# zoneadm -z solarisfz1 boot
- Verify that the zone status is running.
root@node-1# zoneadm list -civ
Launching the Wizard
- Click on Tasks.
- Click on Oracle Solaris Zone to launch the Wizard.

Wizard Steps in Configuration
All the way through the wizard, clicking on
- Back will take you to the previous panel (if allowed).
- Next will take you to the subsequent panel (if allowed).
- Cancel will exit the wizard.
- Finish will exit the wizard gracefully. This is enabled only in the final step of the wizard.
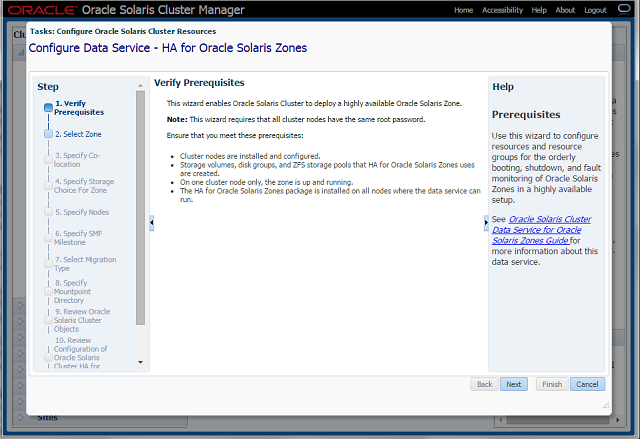
Step-1 Prerequisites
Ensure that prerequisites are met.
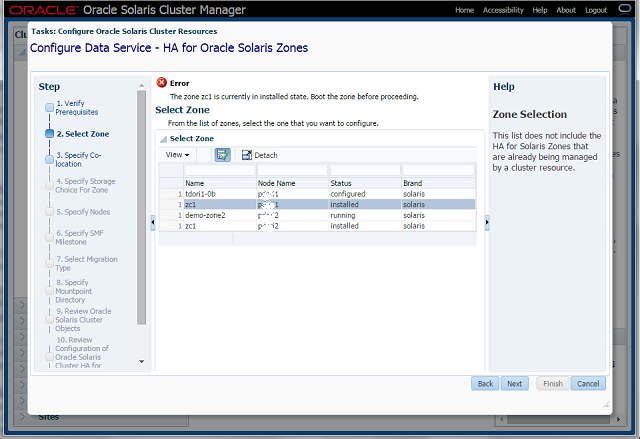
Step-2 Select Zone
- Select a zone that is in the running state on only one of the cluster nodes.
- In case a zone that is not in running state is selected, the wizard throws appropriate error
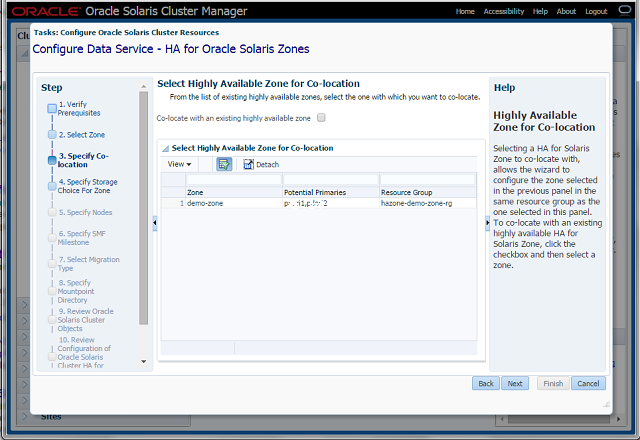
Step-3 Specify Co-location
- Select the check box in order to co-locate with an existing HA-Zone.
- This panel appears only if there is an existing HA-Zone configured on the cluster.
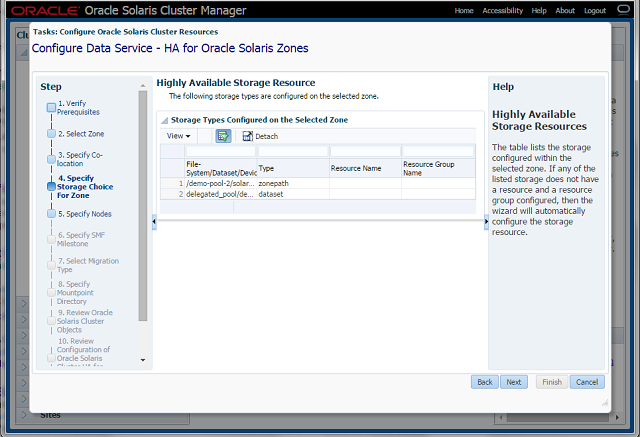
Step-4 Specify a Storage Choice for the Zone
- The panel displays the storage configured within the selected zone
- If a storage resource and resource group does not exist, the wizard creates one.
- Storage choices can be ZFS storage pools, shared devices, and device groups.
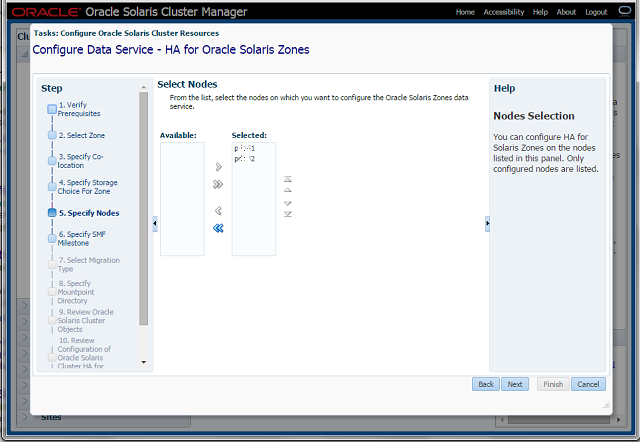
Step-5 Specify Nodes
Be sure to select the node on which the
zone is up and running.
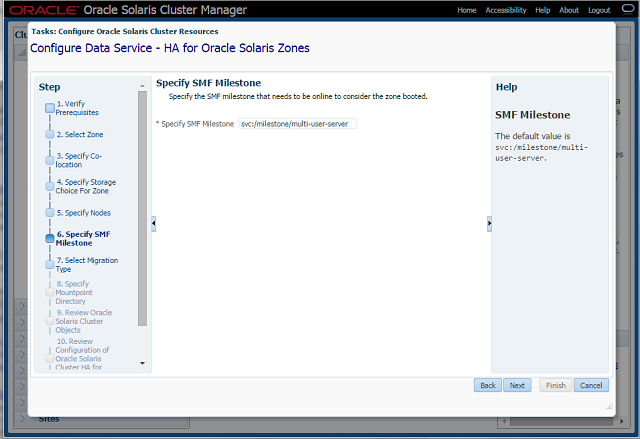
Step-6 SMF Service
- A default service is provided, or the user can enter a different one.
- Make sure that the service is online. If not, use svcadm commands to bring it online on the selected zone.
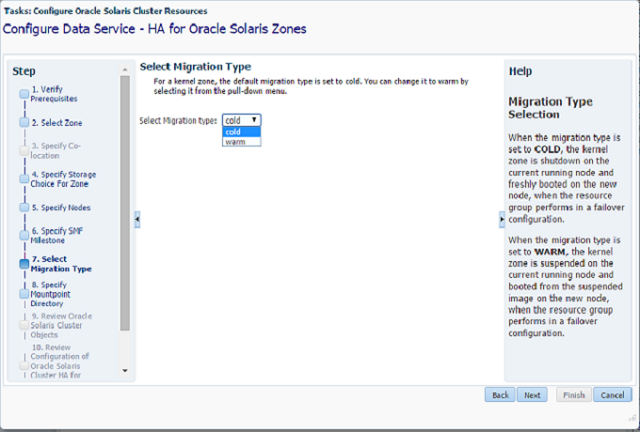
Step-7 Migration type
- This option appears only for solaris-kz (kernel) branded zones.
- This panel enables the selection of the migration type to be used when a switchover of the zone is executed.
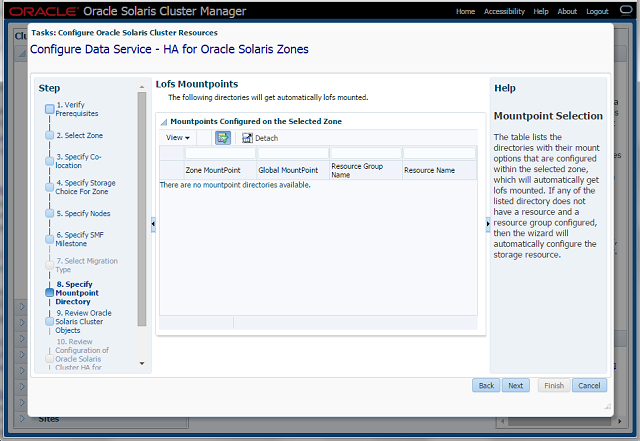
Step-8 Mount-Point Directory
- Displays all the lofs mount points on the zone, which are switched along with the zone when the failover occurs.
- These mount points must be accessible from the other nodes, otherwise the wizard fails in the final step.
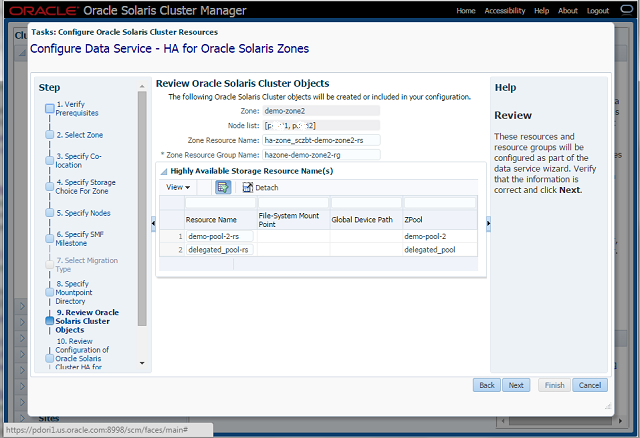
Step-9 Review Oracle Solaris Cluster Objects
- Displays all resources and resource groups that will be created.
- The wizard generates default names, which can be retained or modified.
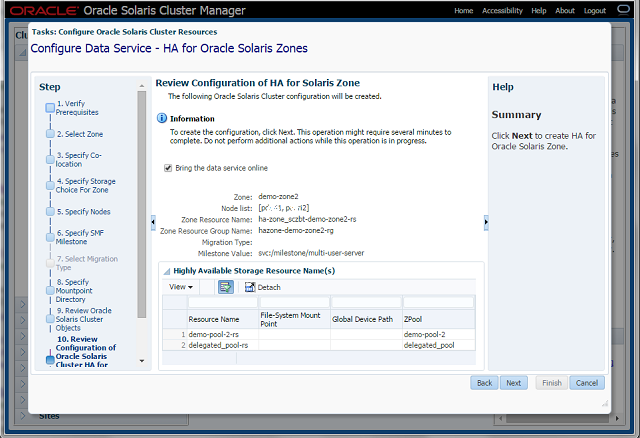
Step-10 Review Configuration of Oracle Solaris Cluster HA for Oracle Solaris Zones
- This panel provides the view of all the configuration options specified through the wizard.
- If any changes are needed, the user can navigate back to the appropriate panel and make changes accordingly.
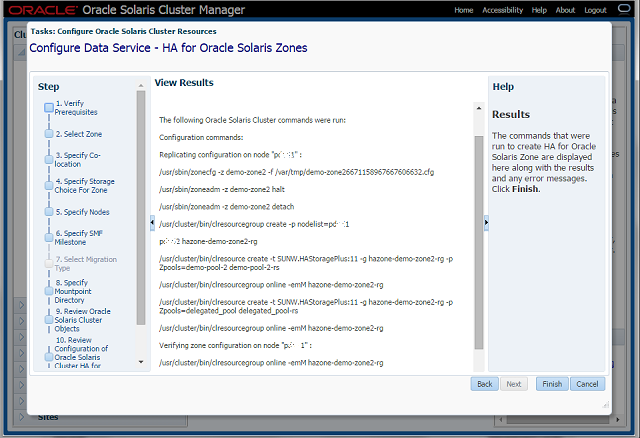
Step-11 View Results
- This panel executes the wizard task and displays the list of commands that were executed in order to configure the desired HA-Zone.
- If there were any errors, the wizard displays information about them.
- Clicking the Finish button closes the wizard gracefully.
Troubleshooting
- The wizard manages known error cases by providing appropriate messages and directions to the user. In case of any unhandled error(s) occur – close the wizard, log out and then proceed to login.
- If connection to the application server is lost due to some error, delete the cookies from the browser and then try logging on to the Cluster Manager.
- The link Oracle Solaris Cluster Manager: Getting Started, provides detailed recovery techniques required for the Oracle Solaris Cluster Manager.
- In addition, the common agent container logs are present in the directory /var/cacao/instances/default/logs
– The log level can be controlled by setting the value of variable com.sun.cluster.level in file /etc/cacao/instances/default/private/logger.properties
References
- Creating and Using Oracle Solaris
Zones - Installing and Configuring HA for Solaris Zones
- Creating and Using Oracle Solaris 10 Zones
- Creating and Using Oracle Solaris Kernel Zones