This is the first blog in our series on the eleven ways to start an Oracle Solaris instance on OCI.
The easiest way to create a new Oracle Solaris instance on OCI is using the Oracle Cloud Console (a.k.a. the OCI BUI) and the pre-built Marketplace image, especially if you want to learn and discover the options available to you.
This blog describes the concise flow of how you can create an Oracle Solaris instance in a few simple steps starting from the Instances page in the Console. For a more in-depth explanation of the steps see the article on the oraclesolaris-contrib GitHub page. Previously we also released an article on our oraclesolaris-contrib GitHub page that shows how you can launch an instance starting from the Marketplace page.
Here is the general flow:
- In the Oracle Cloud Console choose the region and compartment you want to start the instance
- In the Instances page select “create instance”
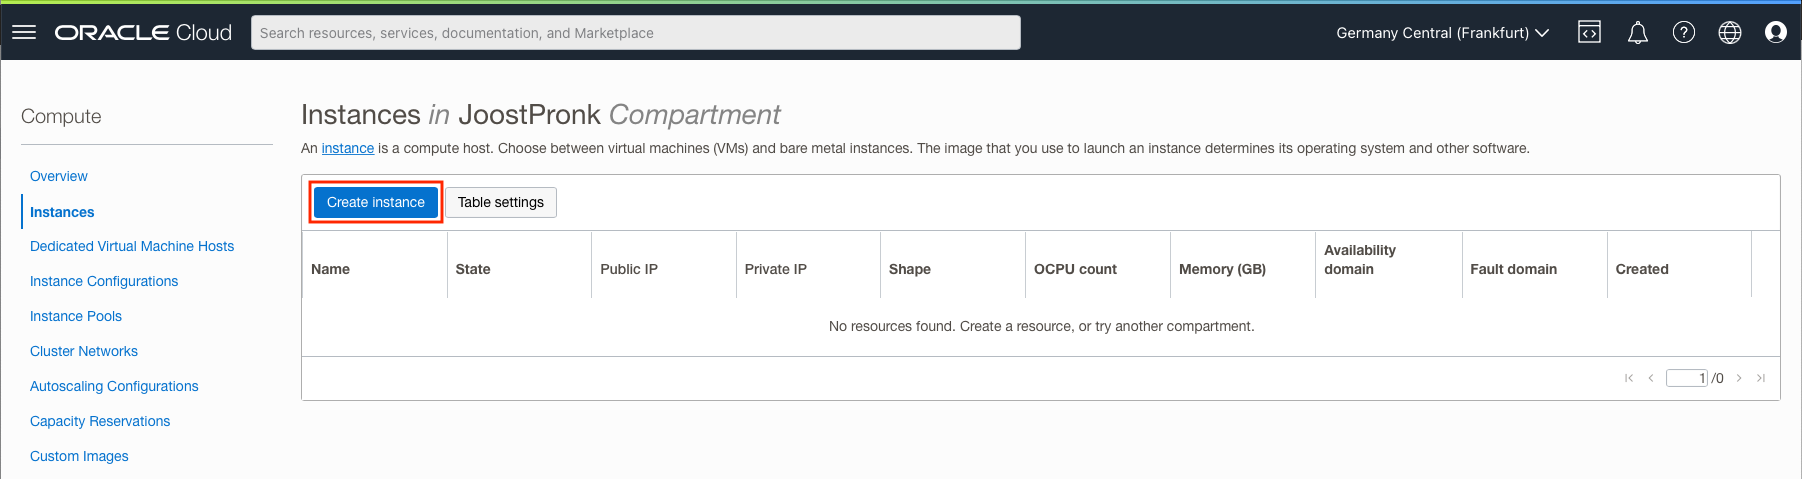
- (Optional) Choose a name for your instance

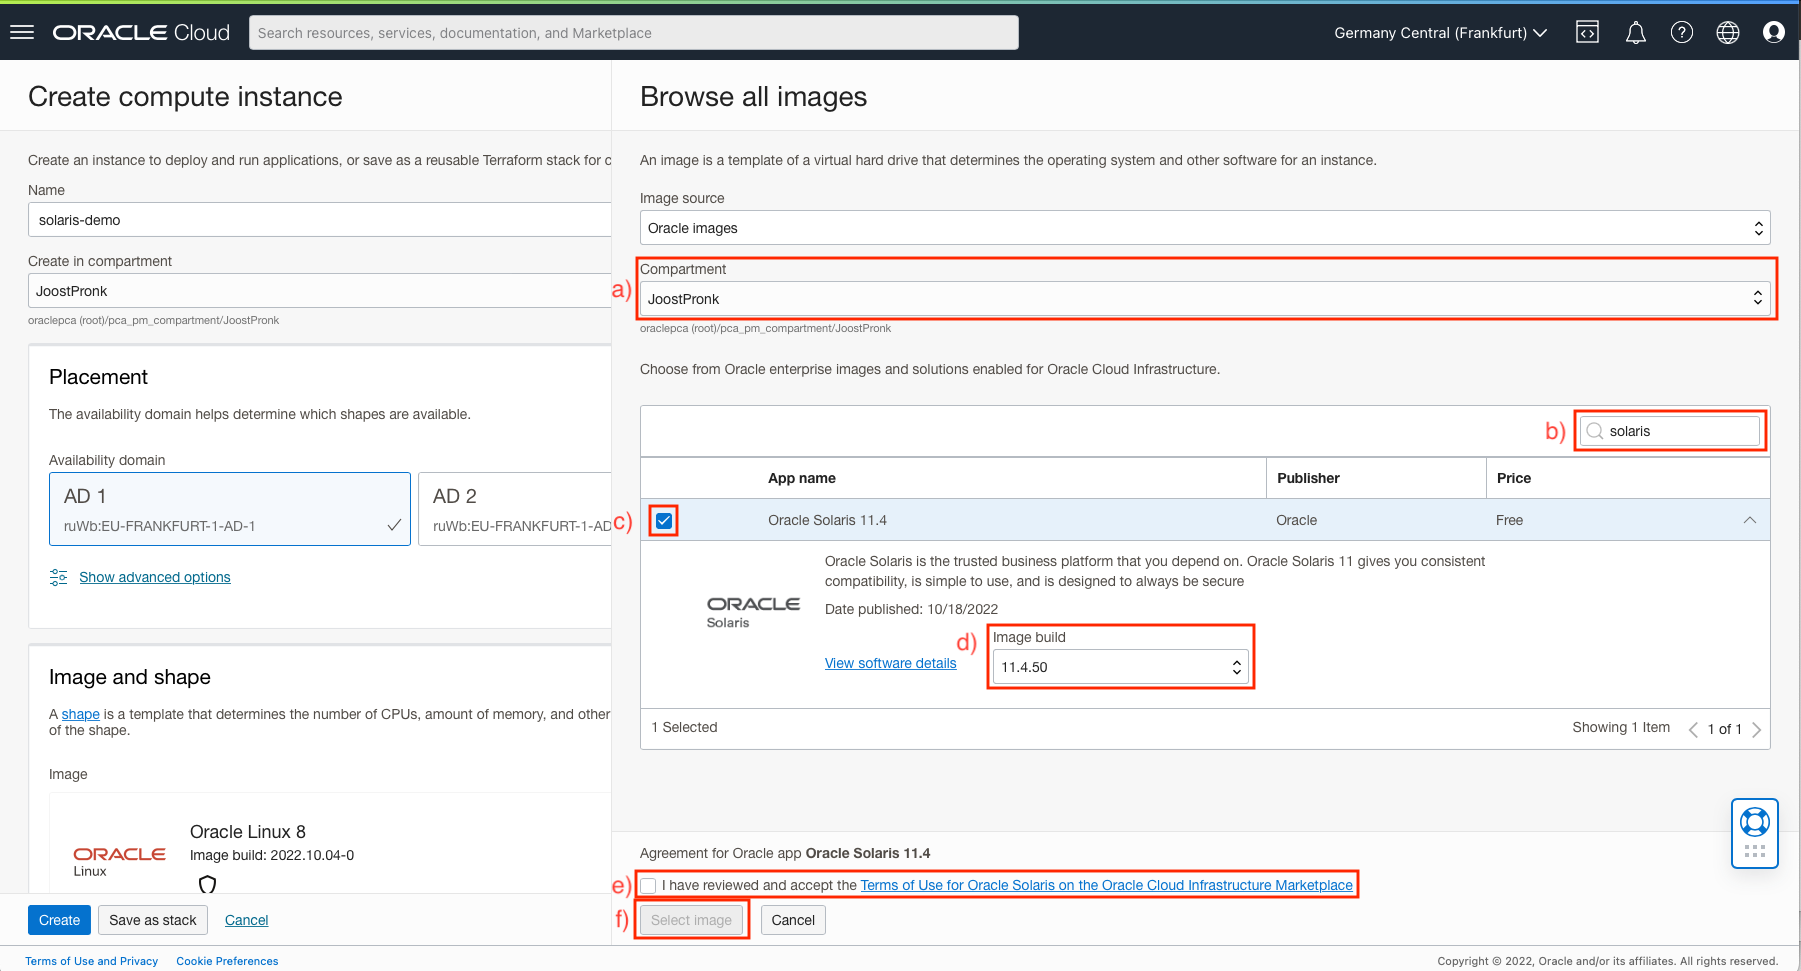
- In the Image and shape select the Change image button, which will bring up a new Browse all images sub-pane
- In the sub-pane under Image source choose Oracle images, this should bring up a list of images
- In the search box fill in “Oracle Solaris” to find Oracle Solaris image in the Marketplace image list
- In the Oracle Solaris entry select the checkbox and click on the down arrow to get more details about the image
- (Optional) Select the version of Oracle Solaris you want. The selected image defaults to the newest version
- Select the checkbox in the “Agreement for Oracle app Oracle Solaris 11.4” section at the bottom of the sub-pane to agree to the license
- Click the Select image button to close the image selection sub-pane
- (Optional) Select a different shape by clicking the Change shape button
- In this sub-pane you are presented with the options the Oracle Solaris image you selected will support, choose one and click the Select shape button
- In the Networking section choose the desired VCN, Subnet, and if you want a public IP address or not. To ssh into the instance you will want to choose the public IP address.
- In the Add SSH keys section choose your preferred method to select the private and public keys you will use to log into the instance
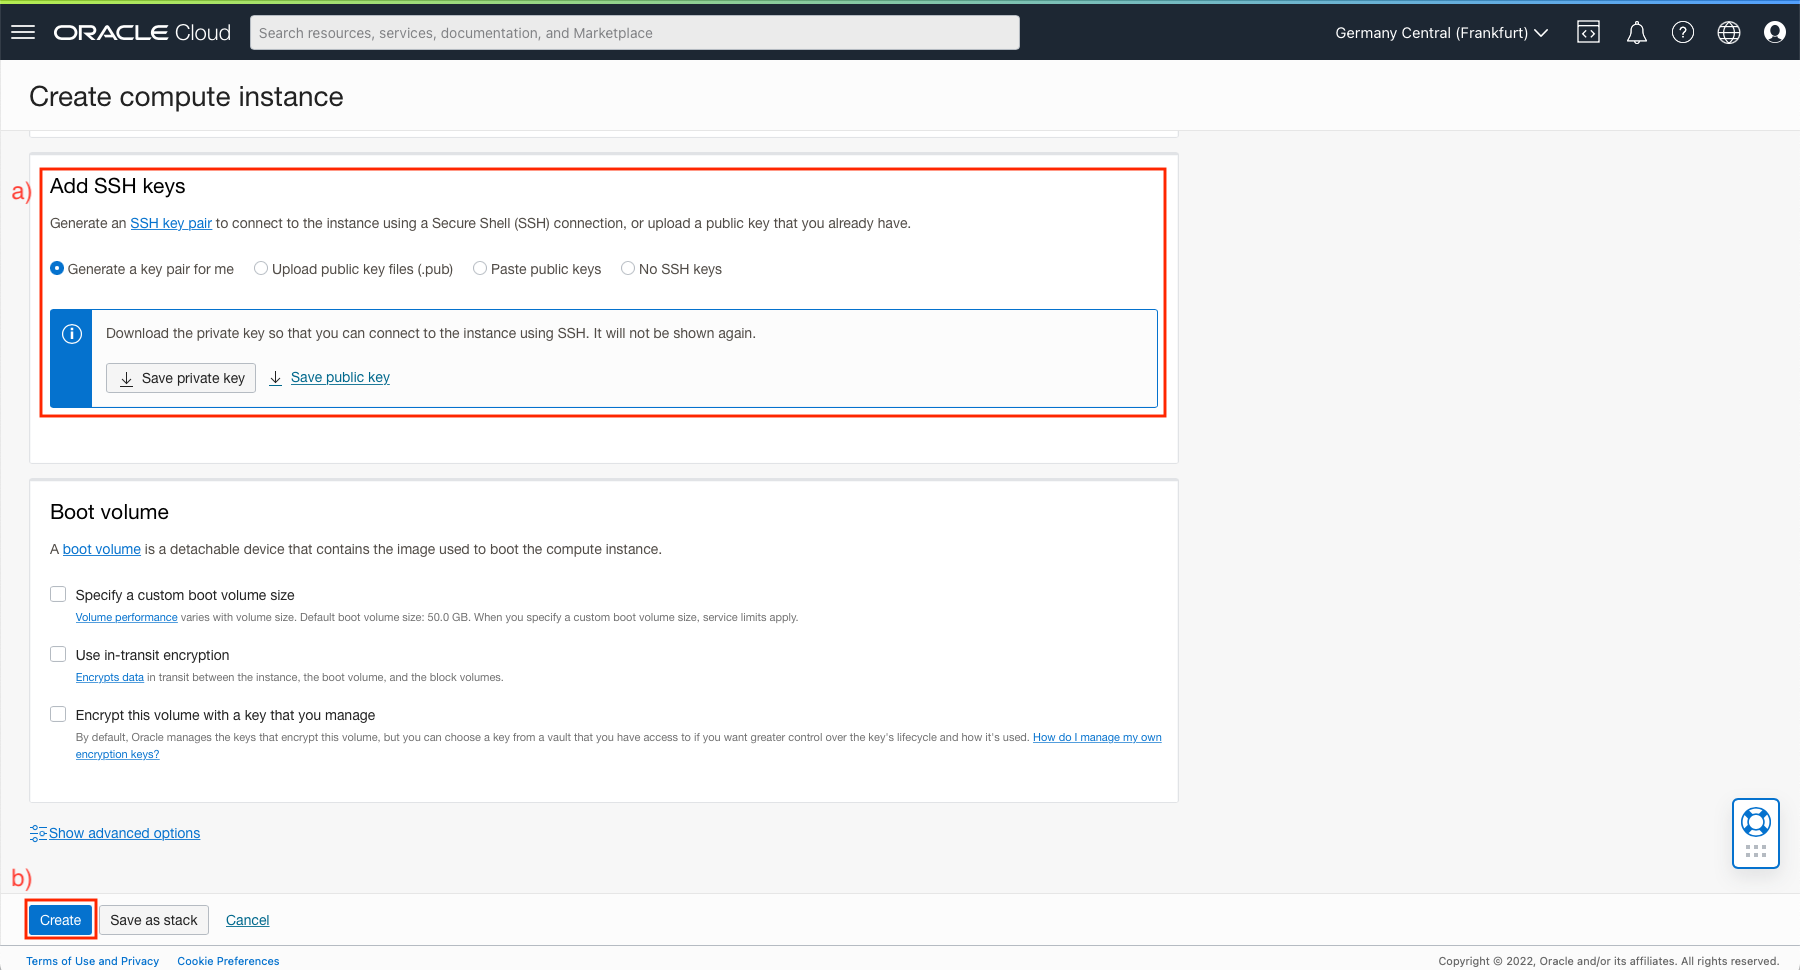
- Finally click the Create button at the very bottom of the page
- (Optional) Choose a name for your instance
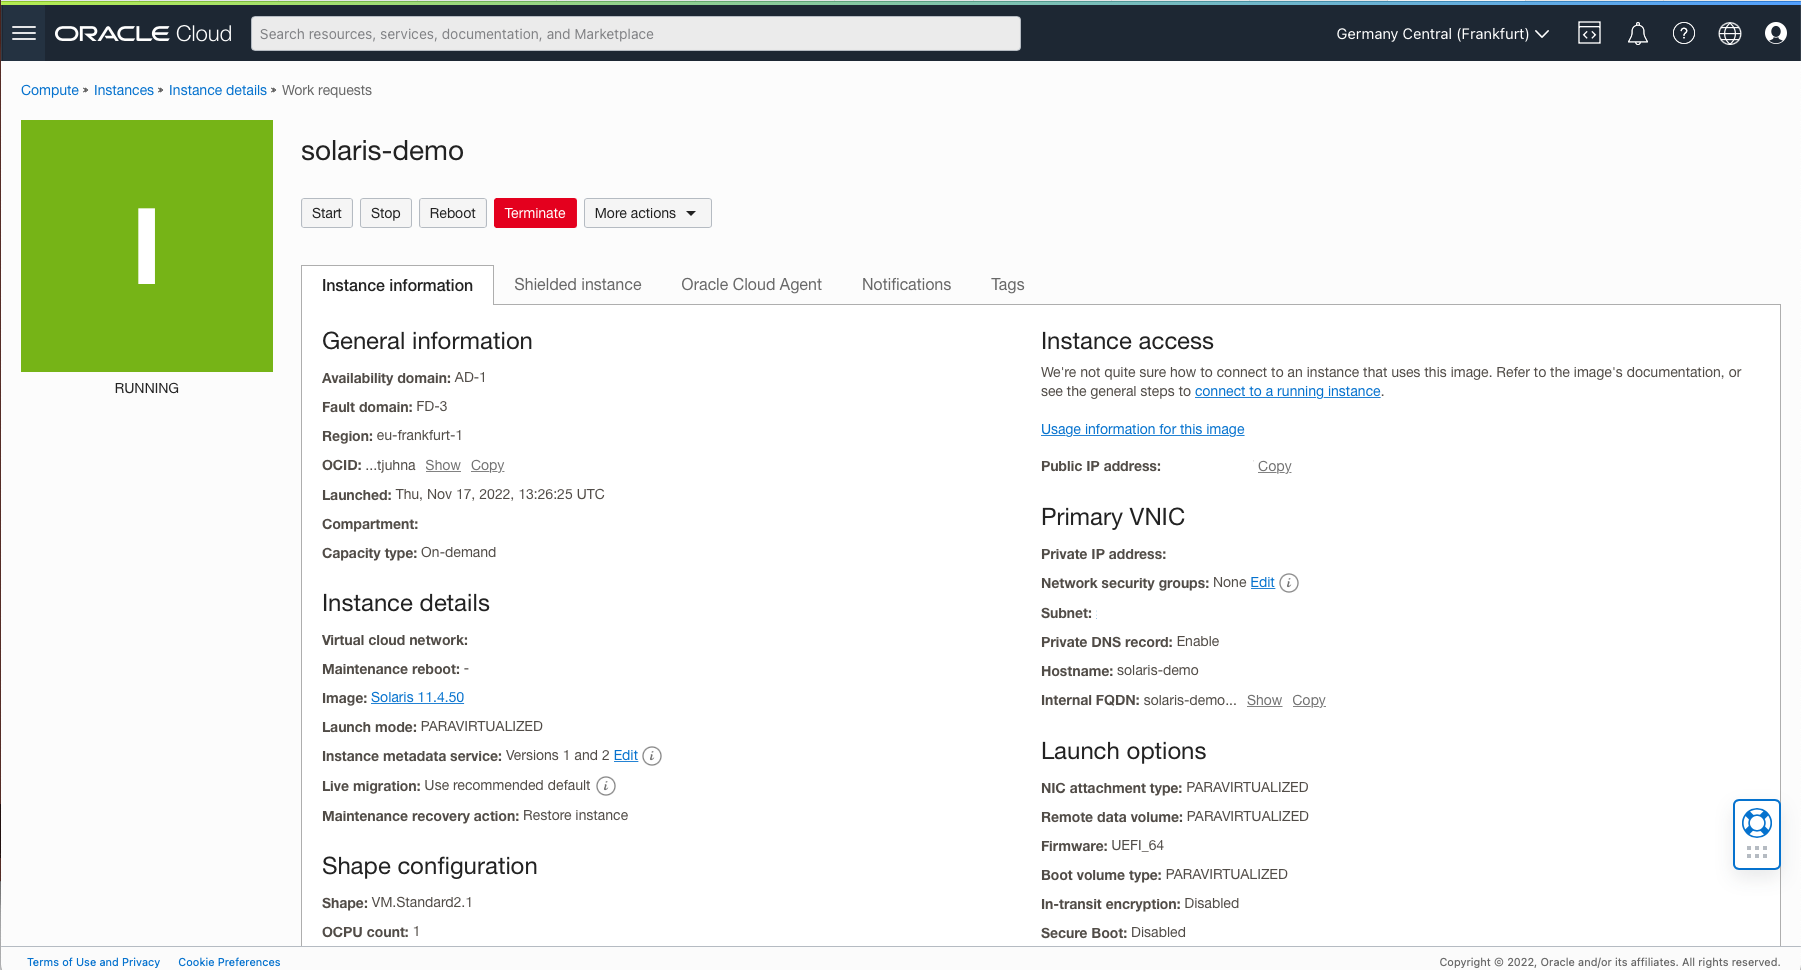
This will now launch the instance and after a short while you will be able to access your instance. If for example you have an external IP address you can use this together with the keys you choose in the steps above to ssh into the instance with the opc user. Note that the first time Oracle Solaris boots it will take a short while to run through the initialization of all the SMF services; on subsequent boots this will go much faster.
Try it out, take Oracle Solaris on OCI for a spin.