A while ago Tanmay wrote a blog and an article on our oraclesolaris-contrib GitHub page on how you can use VirtualBox to migrate an Oracle Solaris VM to OCI. This was using the VirtualBox 6 GUI which can connect directly to OCI using your OCI credentials and he showed migrating an Oracle Solaris 11.4 SRU32 instance to OCI.
The great thing about this is that you can take a VM that you’ve been working on on for example your laptop and once you define where you want to VM to go it will automatically upload the image into an OCI Bucket, create a Custom Image out of this, and finally start an instance using this Custom Image.
With the recent release of VirtualBox 7 its feature set to interface, control, and migrate VMs to and from OCI has greatly improved. So it is time to update our guide on how to use it to reflect these improvements.
Also with the release of Oracle Solaris 11.4 SRU33 we now bundle virtio drivers as part of Oracle Solaris, so when you migrate the image you can now choose to run it in paravirtualized mode on OCI, bringing the IO performance up to the best possible level on the VM shapes. So we wanted to reflect this in our updated guide too.
What’s new in VirtualBox 7
There are quite a few new OCI related features in VirtualBox and Simon Coter has a really nice set of blogs and videos on these features, but what is key in this context the main ones are around a much improved experience around tracking the migration and controlling the instance once it is in OCI. This can all be done through the VirtualBox BUI. Where in VirtualBox 6 the migration was sort of “fire and forget”, in VirtualBox 7 you can track the process of the migration, and once the instance is up and running in OCI you can see its information—for example its name, shape, public IP address—and control it: stop, start, terminate.
It also supports multiple OCI profiles allowing you to connect to multiple OCI tenancies, which also means you can control your instances running in these tenancies from the single VirtualBox BUI.
How to migrate the VM to OCI
Now to explain how this works. Note, this is the short version, the complete guide is on our oraclesolaris-contrib GitHub page.
Preparing the Oracle Solaris image on VirtualBox
Any recent Oracle Solaris 11.4 based image will have all the things included that are necessary to run on OCI. So you actually don’t have to do very much before you migrate the VM. There are a few things we would advise you do to get the best experience:
- In case you want to connect to the console of the Oracle Solaris instance you will need to make sure the console is connected to the tty device rather than the video buffer through the eeprom command.
- You may want to push an ssh key into the .ssh/authorized_keys file into the user’s home directory, this will allow for password-less connections once the instance is up and running.
Preparing and configuring VirtualBox to connect with OCI
Simon Coter has a good blog and video that shows how to get VirtualBox set up to connect to OCI with your credentials, and one how to do the actual export. Note that if you have the OCI CLI set up this will populate the .oci/config file and VirtualBox picks this up and makes it easy for you.
Making OCI ready for the migration
Before you can migrate the VM to OCI you will need to set the following things up if you haven’t already:
- Bucket — You wil need to make sure you have a bucket set up that VirtualBox can use to upload the image to.
- Compartment — You will probably already have a compartment but may want to put your VM in a separate compartment.
- VCN and Subnet — Here too you may already have a VCN and a Subnet set up but if not do this first.
Once you have these set up you can move forward to the actual migration.
Migrating the Oracle Solaris VM to OCI
Once the VM is ready and OCI is set up and ready to receive the instance, you can right click the name of the VM want to migrate and select Export to OCI….
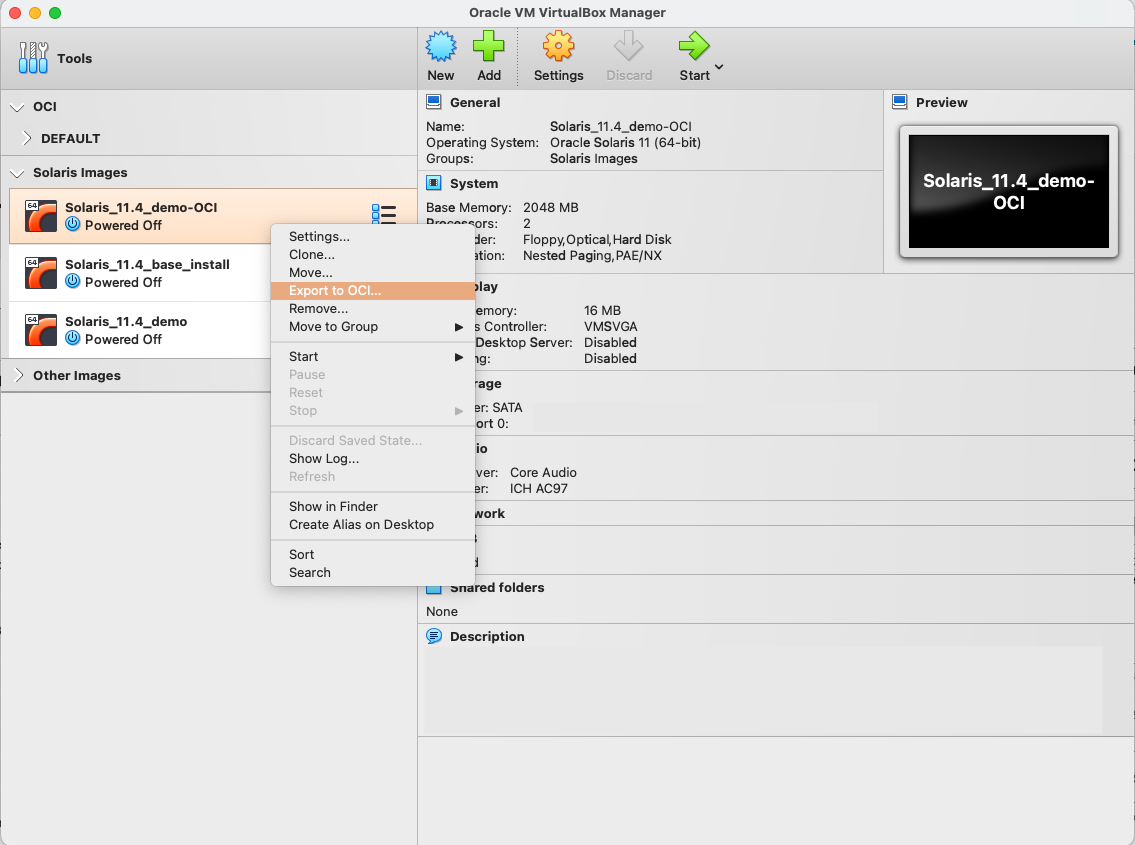
This will bring up a new window:
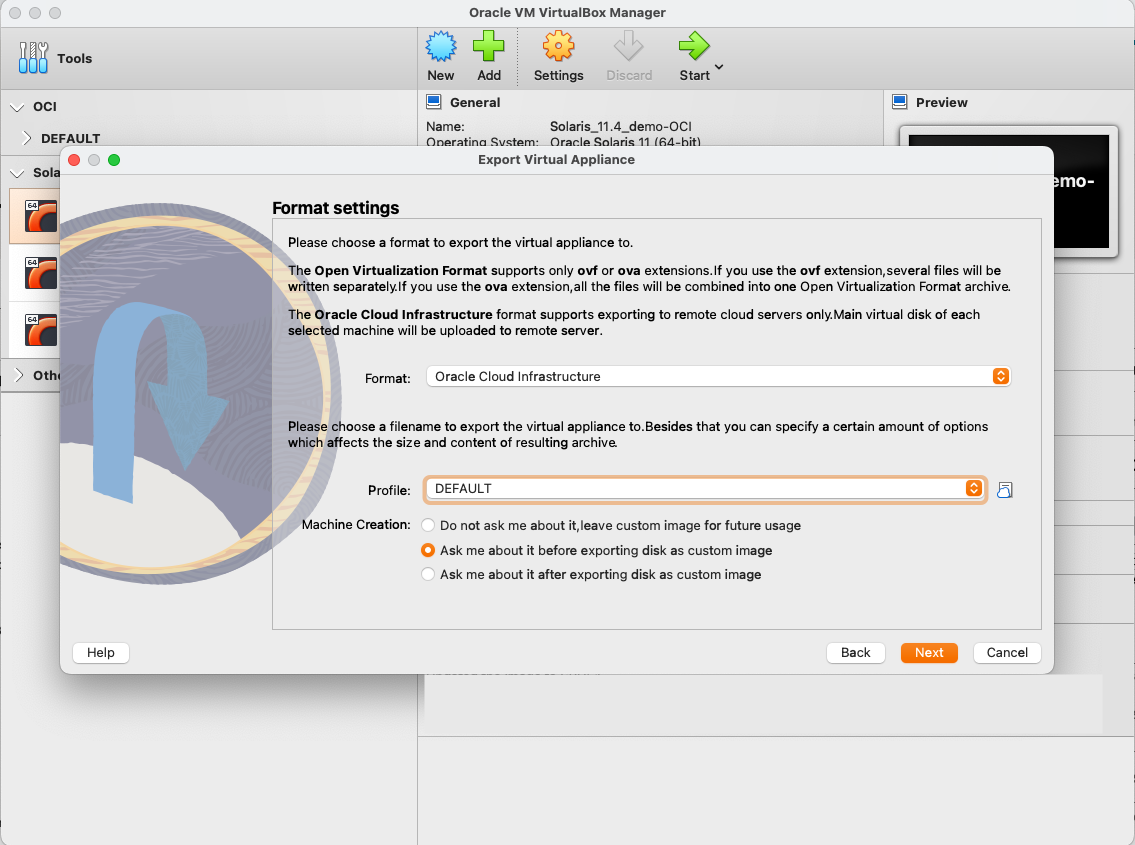
You make sure the Format: is Oracle Cloud Infrastructure and select the OCI profile you would like to use. Then under Machine Creation: you can choose the point at which you will configure the destination VM. Choose the middle option, Ask me about it before exporting the disk as a custom image, as it will allow you to do the configuration before the image gets prepared and uploaded to OCI, so you don’t have to wait for this. Then click on Next.
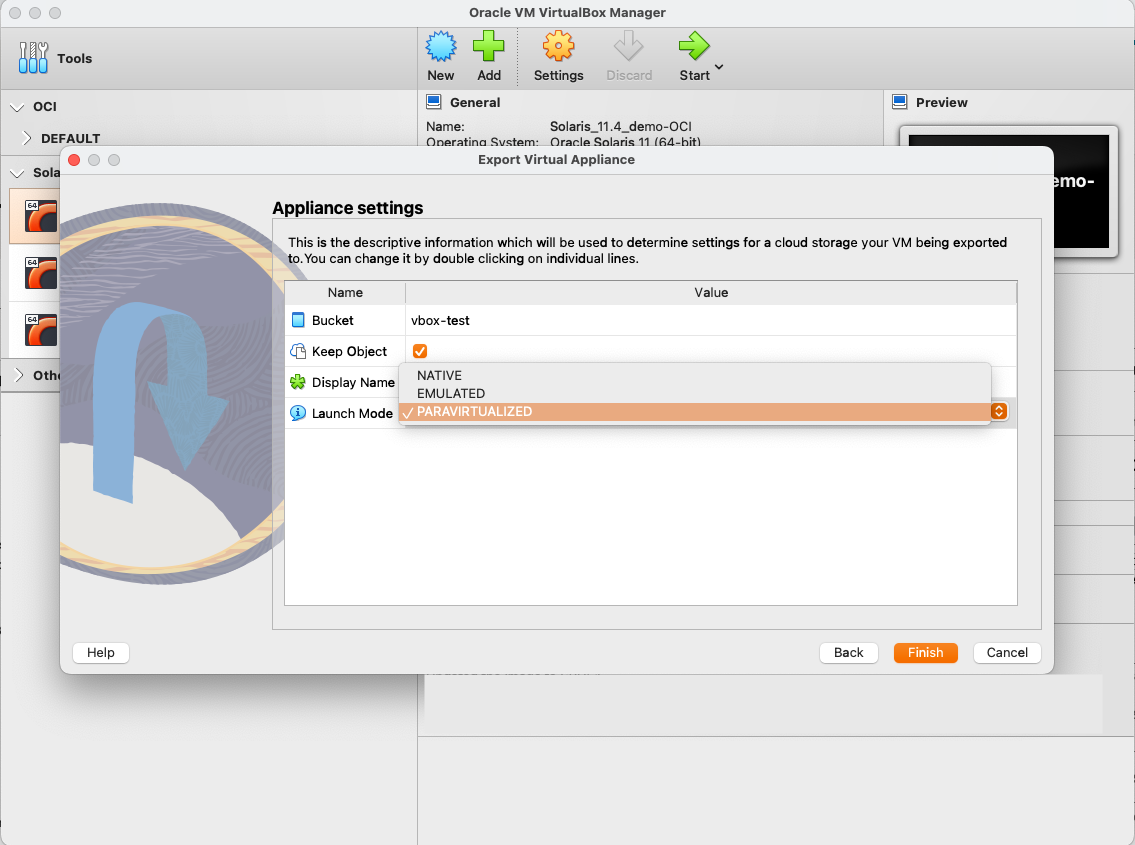
VirtualBox will now connect to OCI and allow you to choose which Bucket to use, the name of the instance (called Display Name), and the Launch Mode. For the Launch Mode change it from the default EMULATED to PARAVIRTUALIZED because we want the performance to be optimal. Then click on Finish.
VirtualBox will now connect to OCI to load the options you have and display them on a new screen:
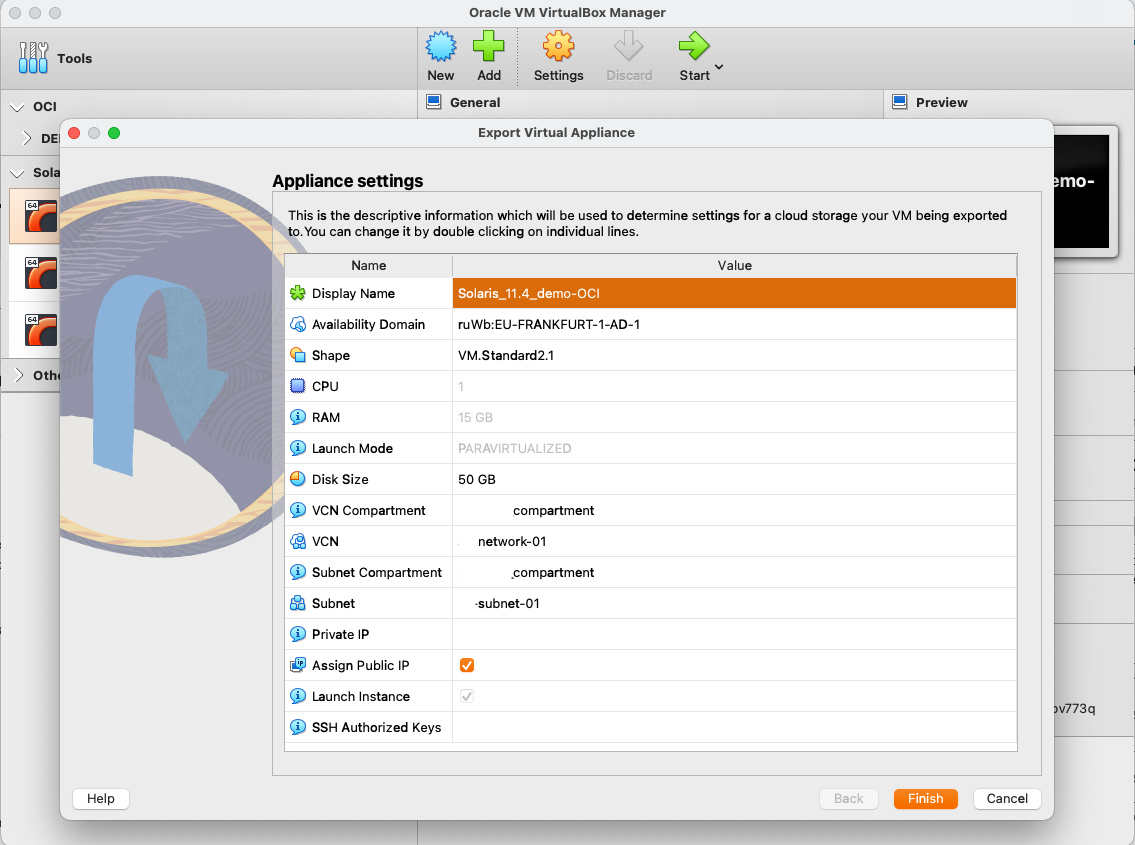
Here you will want to change or choose the following things:
- The Display Name in case you want to change it
- The Availability Domain
- The Shape and possibly the CPU and RAM sizes if you choose a Flex Shape
- The Disk Size
- The VCN Compartment, VCN, Subnet Compartment, and Subnet
- If you want a Public IP address or not
Once you’re ready click on Finish, and VirtualBox will go off and create the instance. For larger images this may take quite a while.

Once it is done the instance should show up in the OCI group in the BUI with its information next to it:
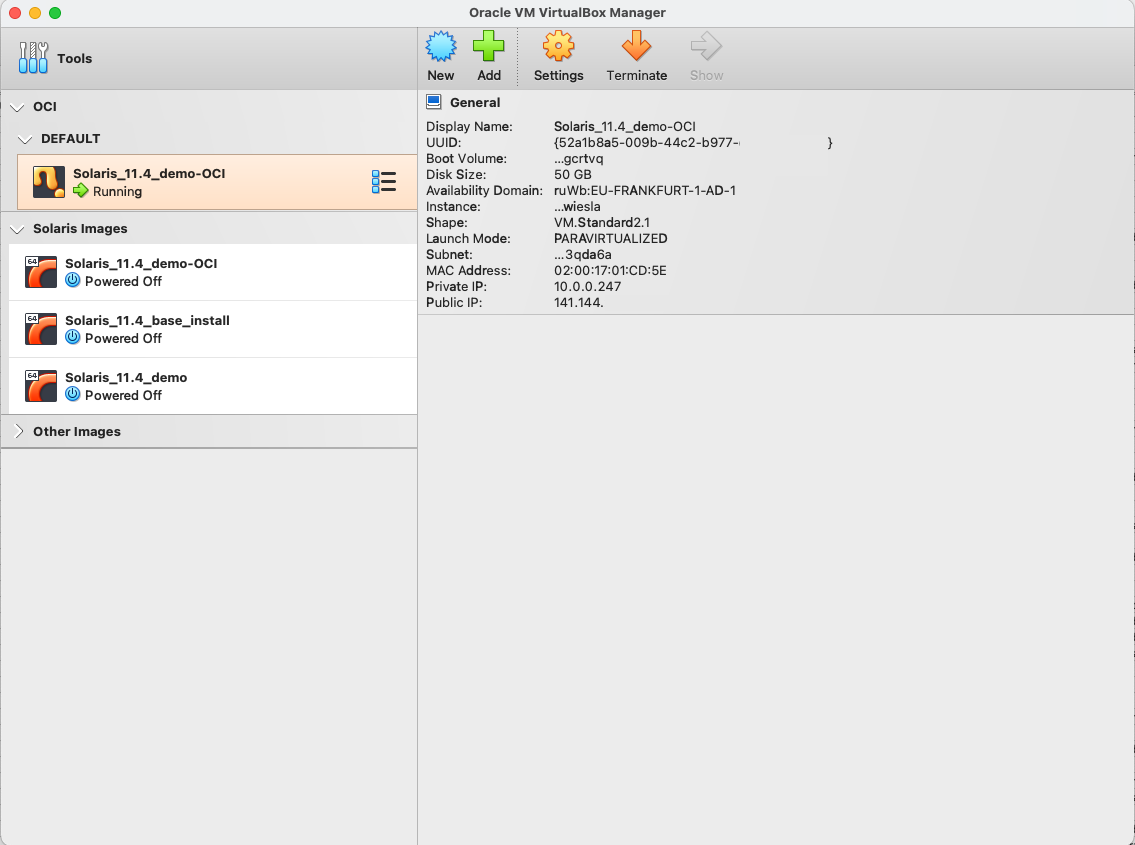
That’s it.
Go and try it out, it’s very easy.