I recently posted a blog on the benefits of the Multiple Document Upload and Approval for Life Events that was introduced in Image 37. This has been a highly requested enhancement to assist you in tracking what can be a large number of documents. With its relatively simple setup this should be on your list of must haves.
As I discussed in the first blog, you control the type of documents that are needed for each type of life event. The documents needed for a marriage event are normally quite different than for a divorce event. By giving flexibility to add document types, upload requirements, and approval requirements, you control both the upload and approval process for each life event.
Here is an example of how an adoption event request for documentation would work based on the following setup and how it would look to the employee.
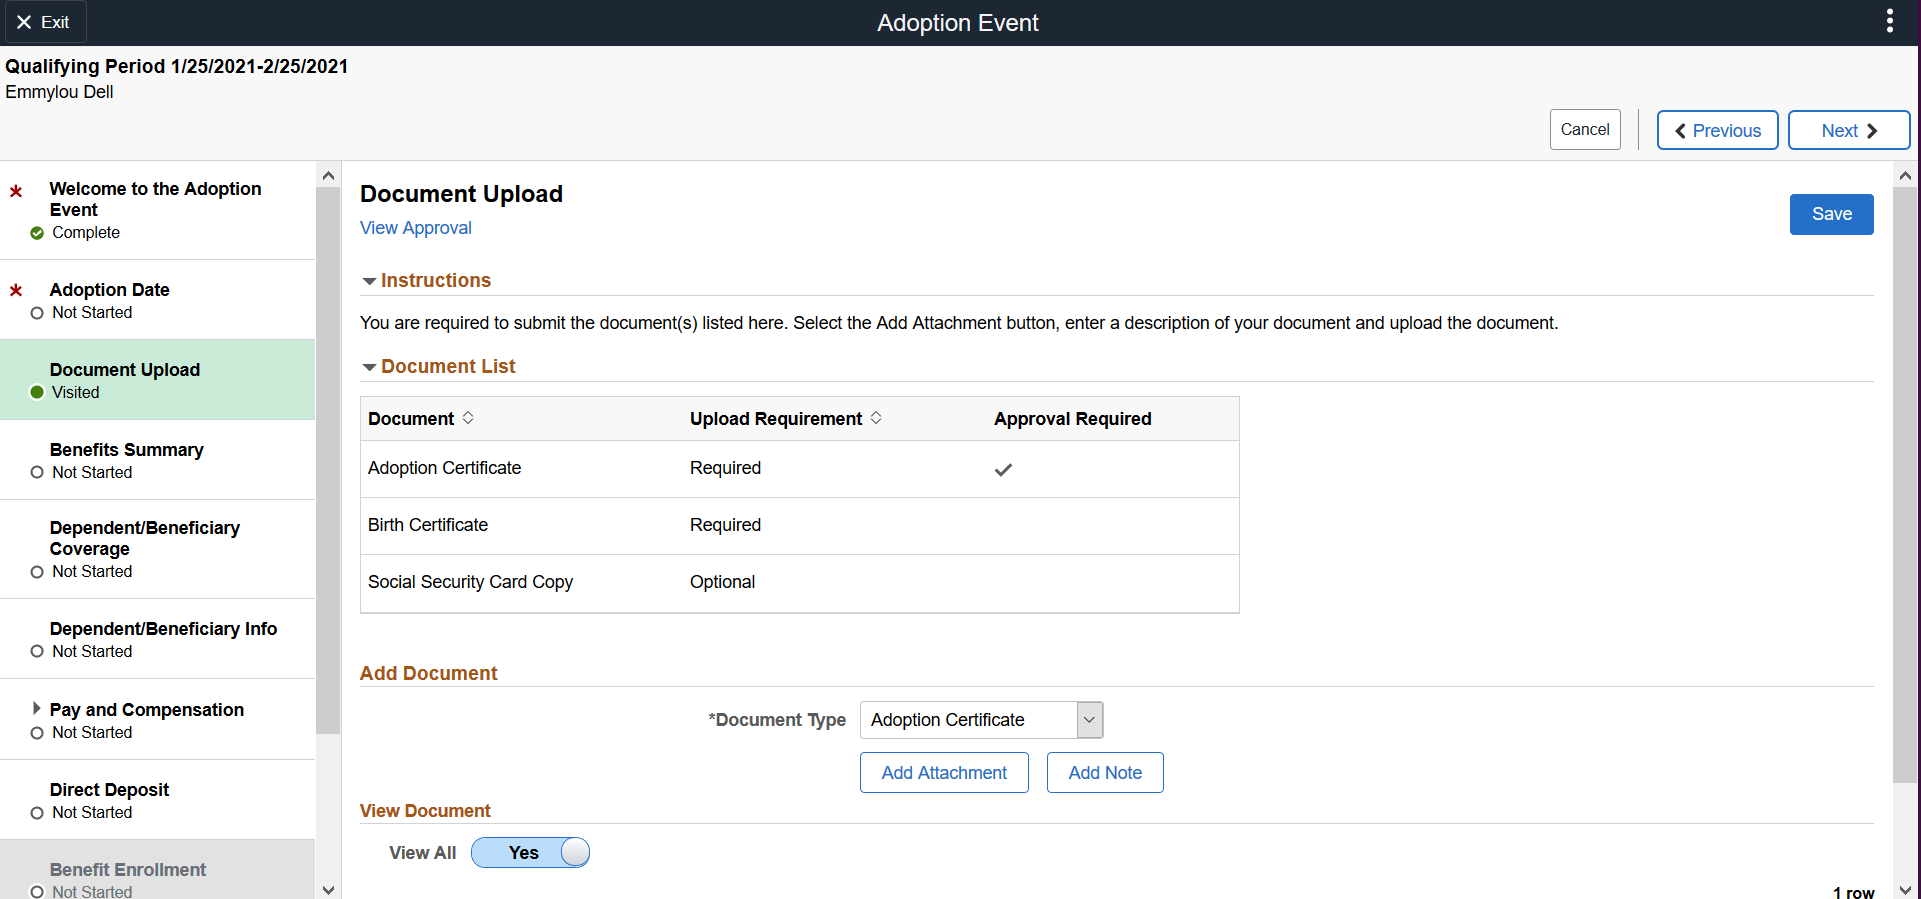
In this example:
- The activity guide is set up to only allow the employee to move to the Benefits Enrollment Step once the Document Upload step has been marked Completed. You will notice that Benefits Enrollment is grayed out.
- The Upload Requirement column indicates to the employee that both an Adoption Certificate and a Birth Certificate must be uploaded.
- The Approval Required column is checked to indicate that the Benefits Administrator must approve the Adoption Certificate document.
- The Document Upload Step will be marked as Visited as soon as the employee goes into the step. This step will only be marked as Complete when both the Adoption Certificate and Birth Certificate are uploaded and the Adoption Certificate is Approval. When the step status is Complete, the Benefit Enrollment step will be opened.
- The Social Security information is optional and does not affect the completion.
So what are the tasks needed to setup your Life Events? There are basically four major steps. All are quite manageable.
Step 1. First determine for your organization what documents and approvals are needed. Validate what documents your organization needs to have uploaded and approved for each Life Event type. This may be the most complex step as you determine your workflow.
Step 2. Create new attachment types if needed. Review or create your list of attachment types (Authorization Entry ID’s) and the roles who can access the documents by using the Define Authorization Entries page.
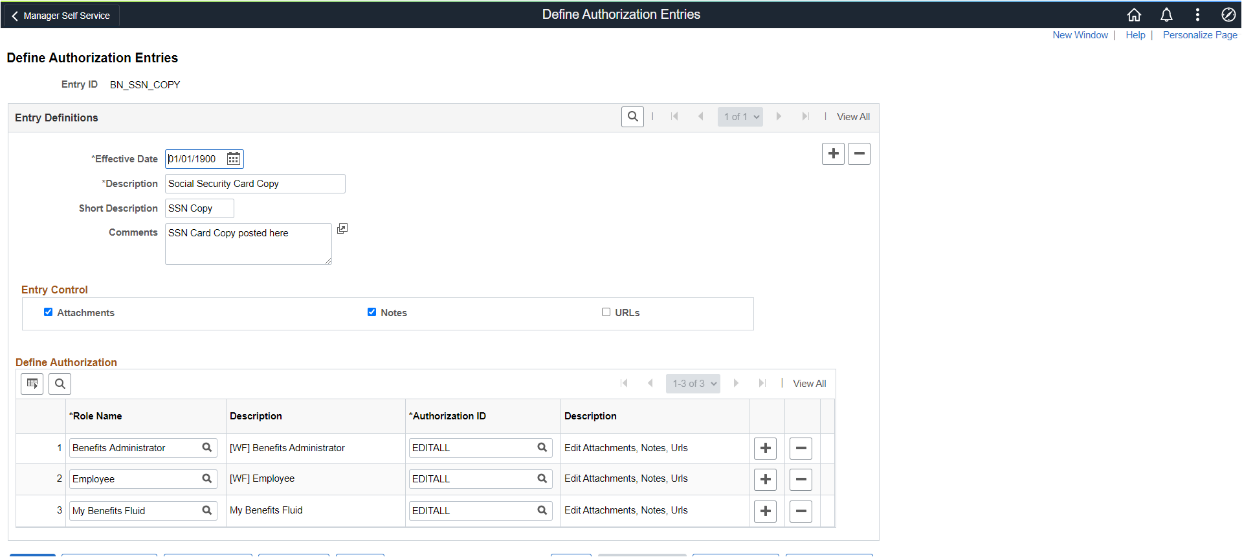
For your convenience we delivered additional document types that may typically be used in the four delivered life events as system data. Some of the newest document types that we added are Social Security Card, Bank Statement, Utility Bill, and Tax Return. If you have other document types, this is where you create them.
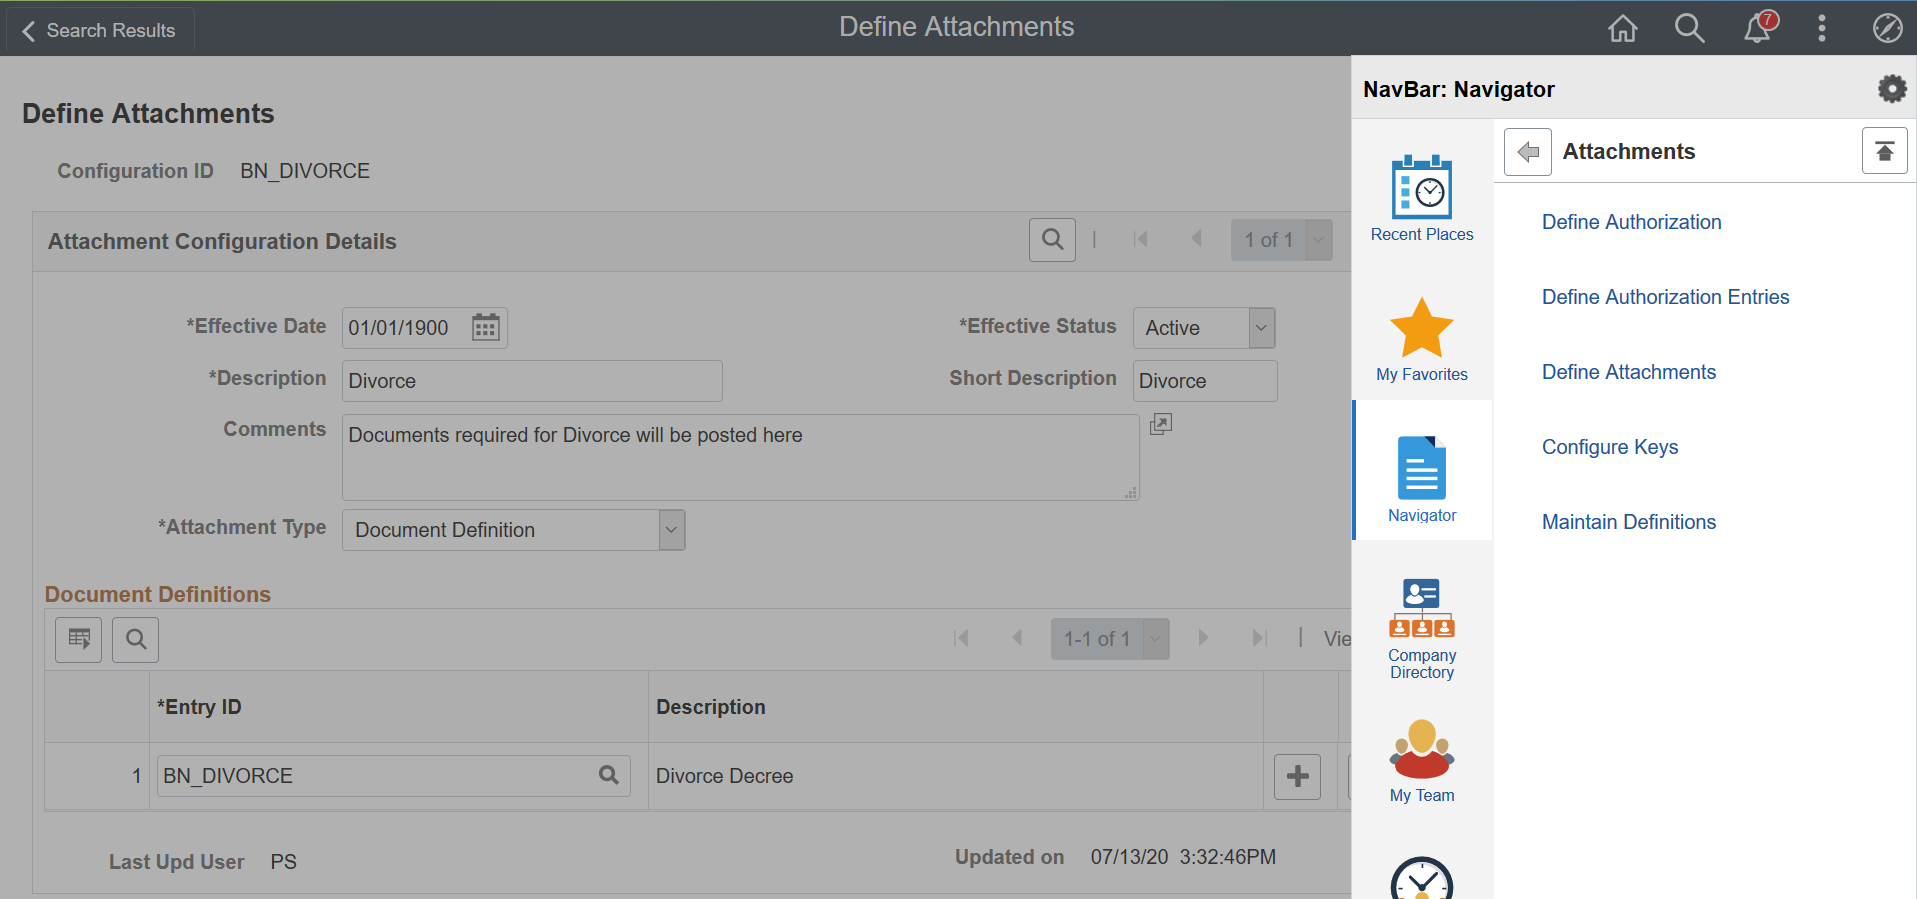
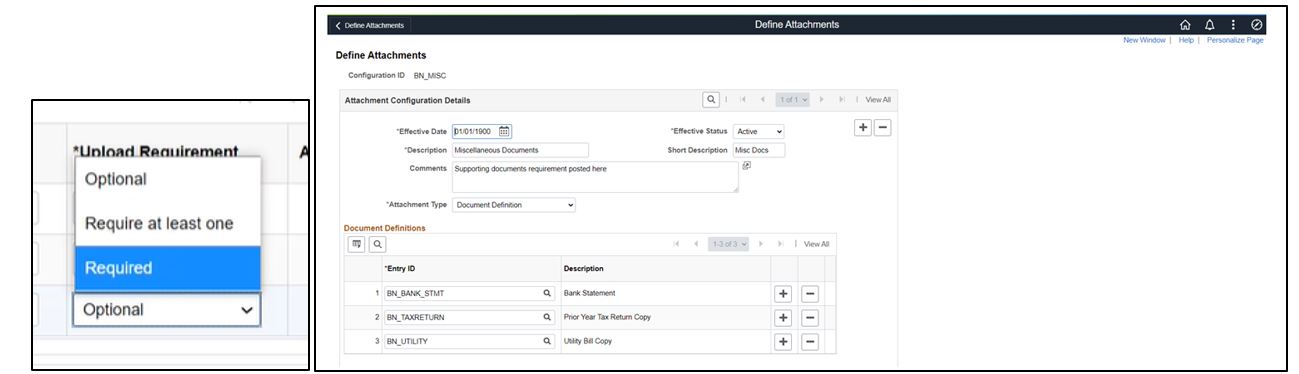
Step 3. Define your new attachment types. If you did create more document types then you will need to Define Attachments. Use the Search Navigator category for easy navigation to Define Attachments. Here is an example of a simple single document.
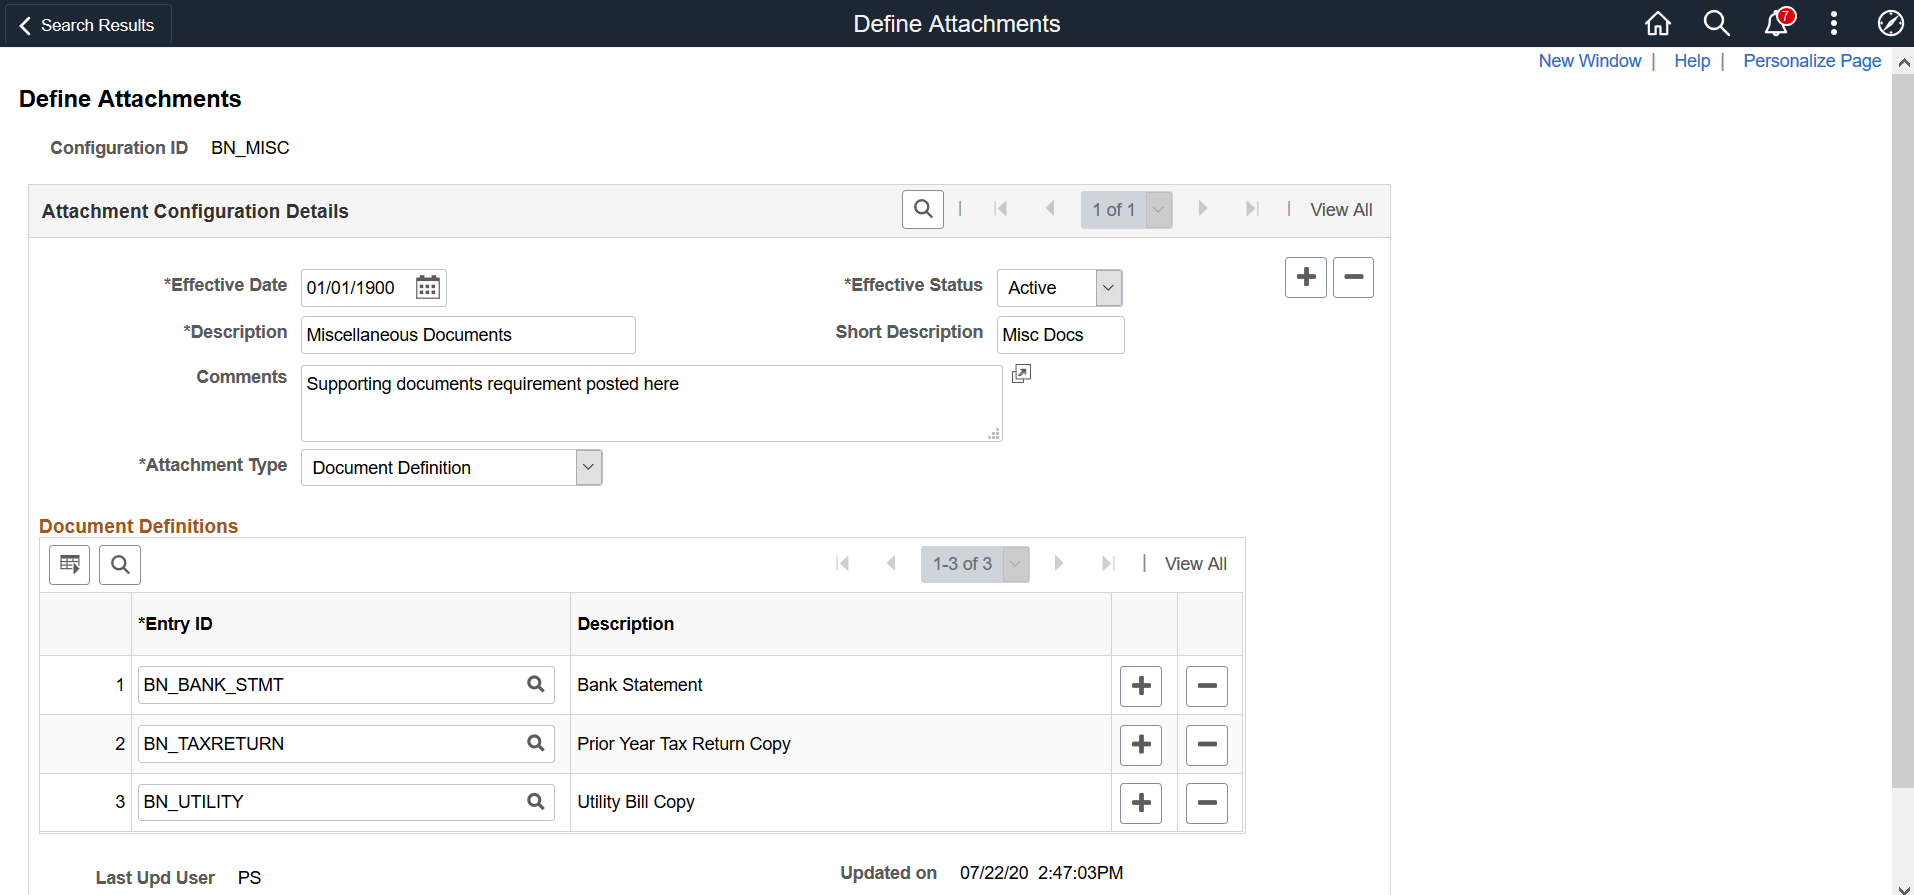
This is an example of a Miscellaneous Document type we created to give you the flexibility if you have multiple documents that can be used interchangeably.
Step 4. And lastly, assign the attachment types to the Life Event definition. Using the Maintain Definitions page, select the Object Owner HBN for Base Benefits, and Sub ID LE for Life Events.
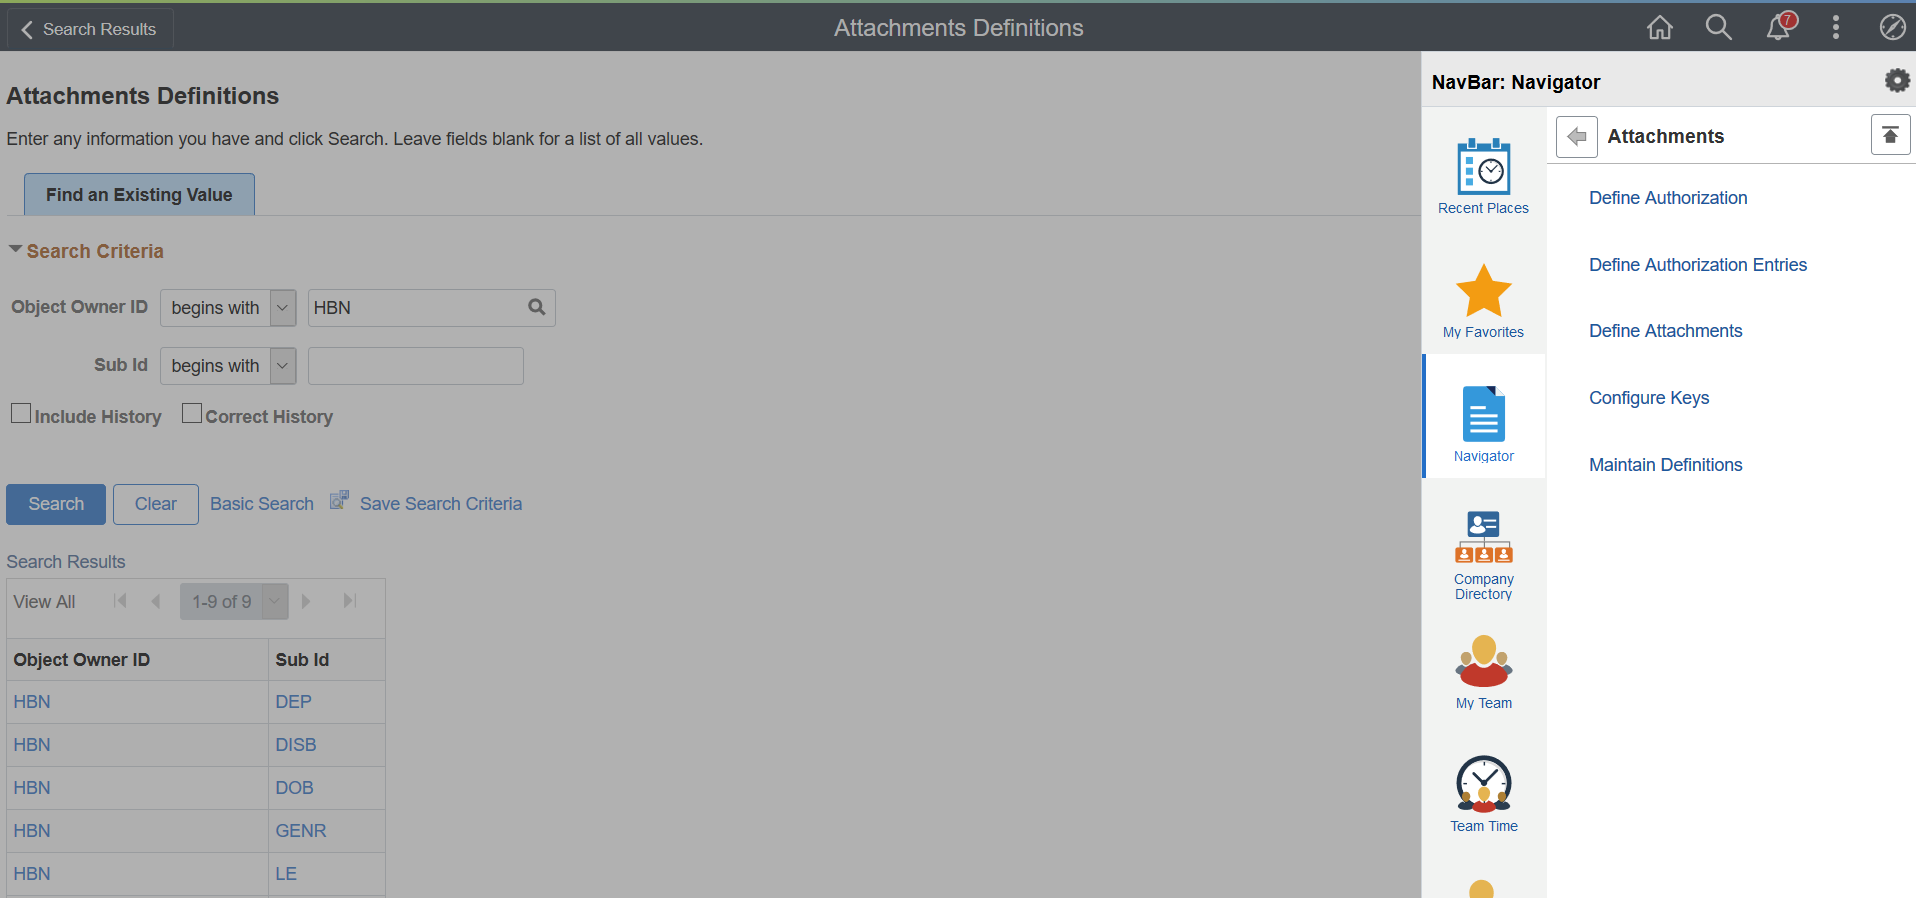
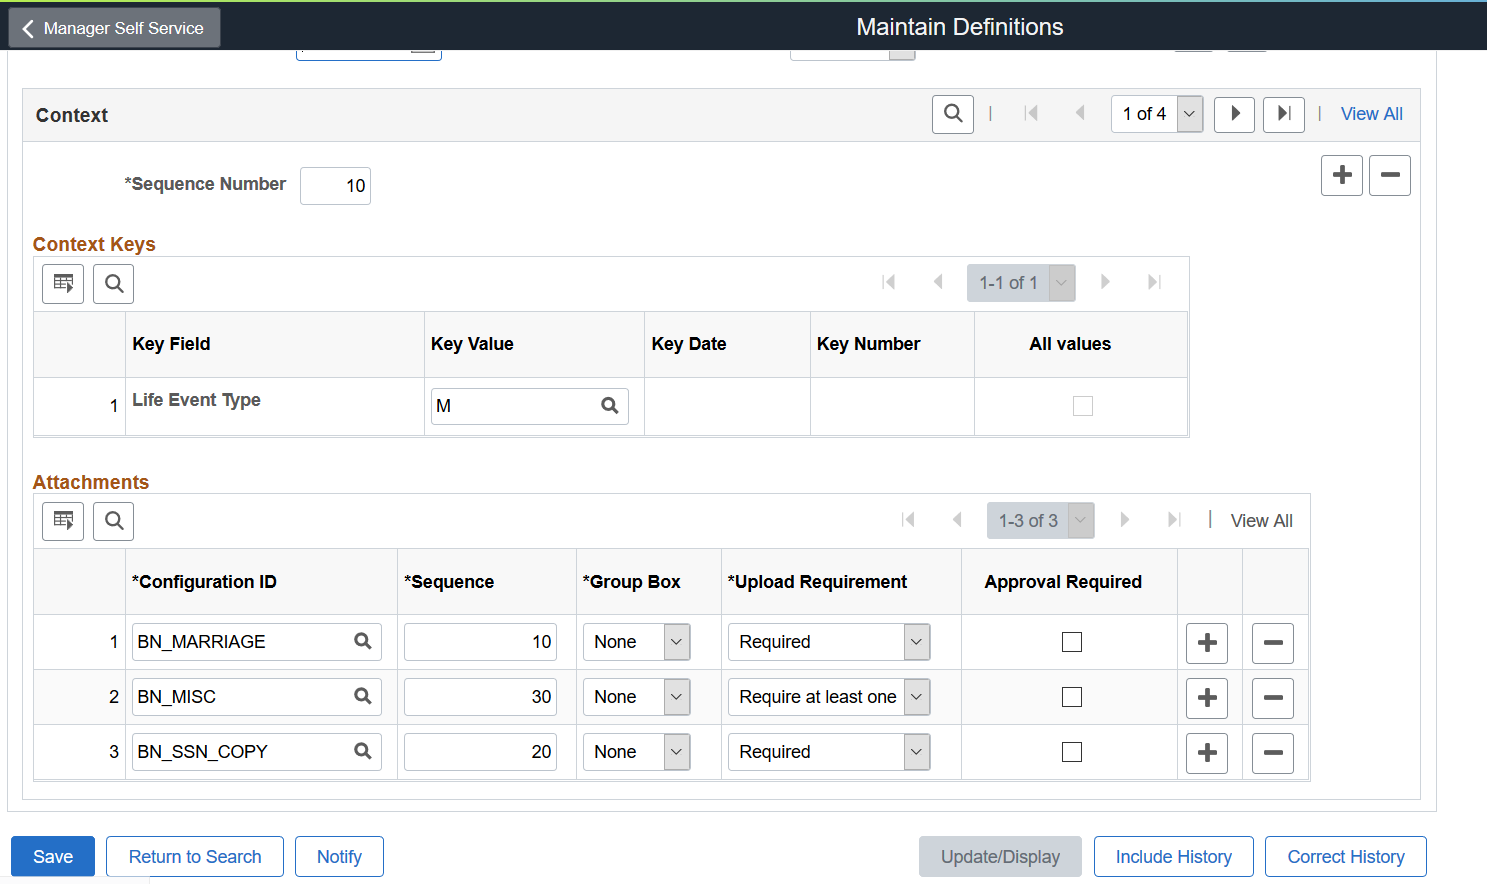
This table provides you the ability to configure the process for each type of life event.
- Configuration ID column allows you to select the document attachments to be included in your process
- Mark the Sequence order for how the attachment types will appear to the user
- Select the Upload Requirement needed for each attachment type. By providing three different types of “Upload Requirements”, you have the flexibility in mandating if a document is required to be Uploaded or Optional. The “Require at least one” allows you the option to upload at least one attachment from a list of approved documents. For example, the Miscellaneous Document requires the employee to attach only one of the option types of bank account statement, or tax document, or utility bill. It is important to note that if a document is marked as “Required” or “Require at least one”, the activity guide step cannot be marked complete until all of these document categories are uploaded.
- The “Approval Required” checkbox is used to determine if a transaction will be sent through the Approval Framework and must be approved by the administrator. The activity guide step will not be marked Complete until the approval process is finalized.
I imagine that most of you will use the Upload Requirement and Approval Required settings together to give you the most control over the process and provide notification to the approver. But the configuration was built to give you total flexibility in defining the procedure that most meets your needs.
This blog serves as a primer for helping you get started on Multiple Document Upload and Approvals for Life Events. You will find more detailed information in PeopleBooks on Fluid Attachment Framework and also a document for Fluid Benefits Multiple Document Upload & Approval (Patch 31657715).
Check out all of our blogs at PeopleSoft Blogs.
