Welcome to Part 3 of the Total Rewards Blog Series. As a review of the series, in Part 1, How to Get Some Appreciation from Your Employees with a Total Rewards Statement, we talked about what the Total Rewards Statement is and what can be included in the statement. Part 2, How to Configure Your Flexible Total Rewards Statement, talked about what needs to be configured and how items appear on the statement. This is part 3 and we will discuss the processes involved with extracting, publishing, and amending the Total Rewards Statements.
Now that you have your Total Rewards statement configured, we need to populate the statement.
Step 1: Import your External Data if you have any configured for your statement. If you are using external data, you will need to populate the TRW_EXTRNL_DATA table. There are a number of different technologies that you can use to load the external reward data:
- Integration Broker – this can be quite sophisticated by the development of an enterprise integration point to receive external rewards data from a third-party system and having subscription PeopleCode kick off a Component Interface to load the data.
- Use a SQL insert to read a flat file and populate the external rewards data table.
- Use the Excel-to-CI utility to load the table from a spreadsheet using the CI_TRW_EXTERNAL_DATA component interface.
- Use the Update External Rewards Data page to manually load the data. This page can also be used to verify and/or correct data that has been loaded by another method.
Most customers find the Excel-to-CI option to be the easiest. For more information on working with external data, including step-by-step instructions on how to run the Excel-to-CI refer to PeopleSoft HCM 9.1: Total Rewards – Loading and Viewing External Reward Data (Doc ID 1460363.1) in My Oracle Support: https://mosemp.us.oracle.com/epmos/faces/DocumentDisplay?id=1460363.1.
Another preparatory step that you will want to do before starting on the statement creation process is to Test Reward Data Source.
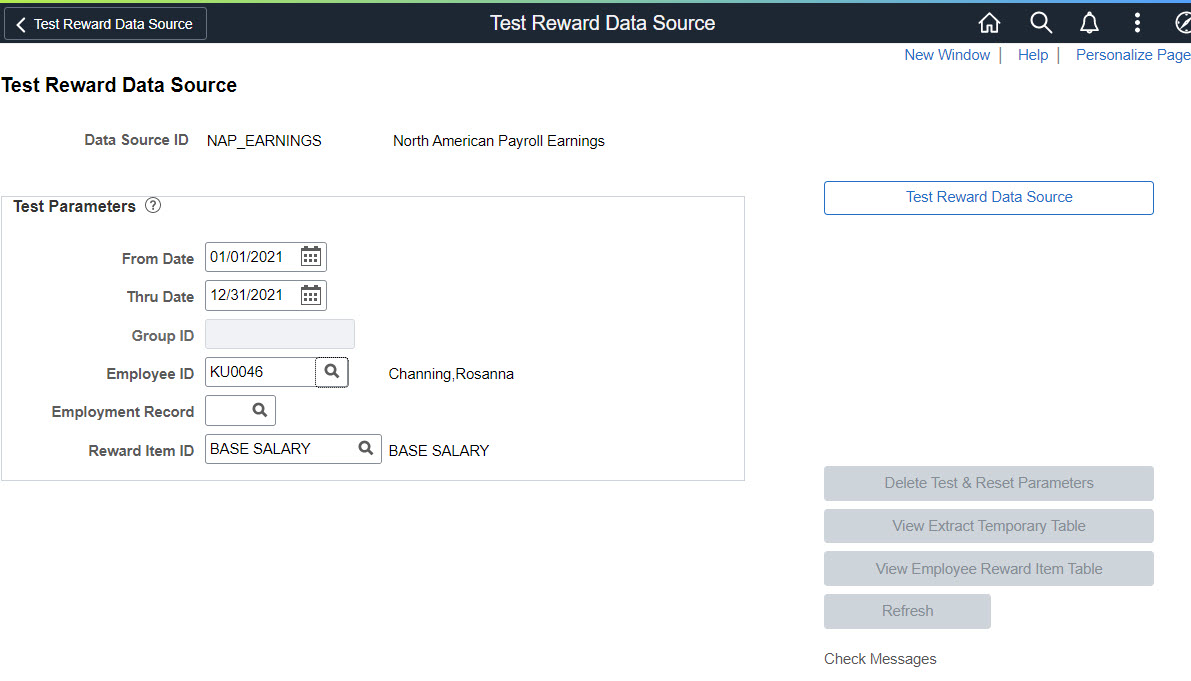
You can start out small by testing the data source for one employee, like above, then move towards testing the Data Source for a group of employees. This page will also allow you to:
- Generate, view, and execute the SQL that populates the Extract Temporary table
- Generate, view, and execute the SQL that populates the Employee Reward Item table (must have the Reward Item ID populated in Test Parameters)
- Perform any reward item calculations for the reward data source.
For more information on creating testing Data Sources, refer to How to Create a New Reward Data Source in My Oracle Support (MOS).
Now we come to the main set of processes, Administer Statement.
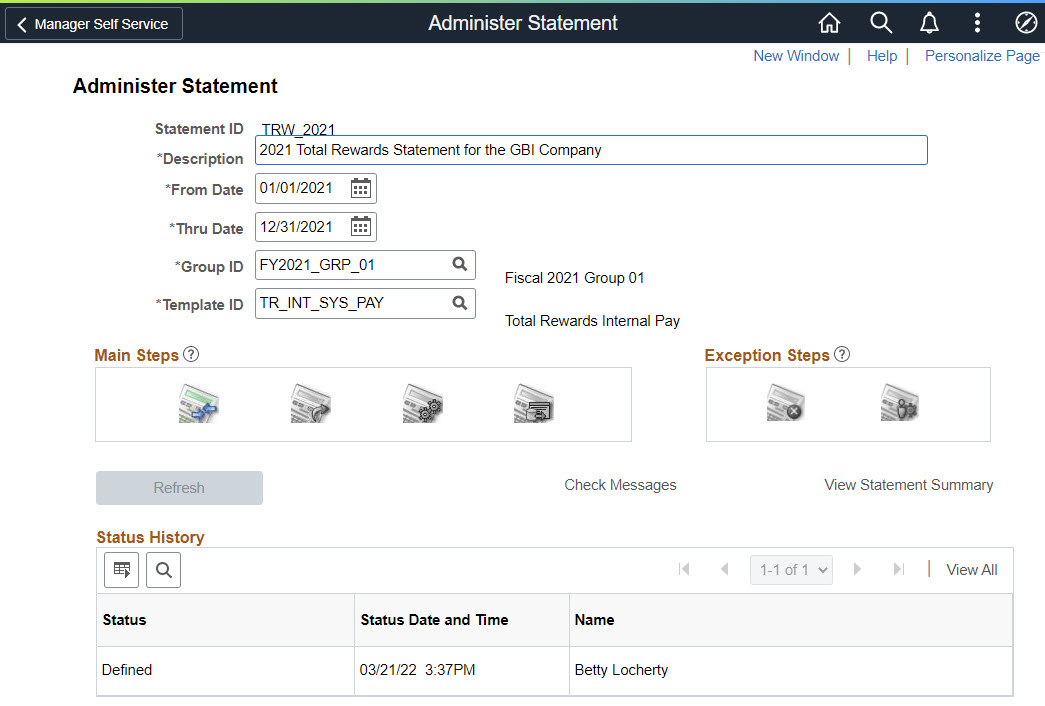
This page will walk you through the process once you enter the description for your statement, the dates, the group ID, and the template that you defined. Part 2 of this blog series walked you through setting up the template definition.
Group IDs are set up using Group Build. Please note that the Group ID selected should identify the employee population that will receive the total reward statement defined in the template. If you want to use multiple template definitions you will need to set up a different Group ID for each type of template.
There are 4 Main steps in the process:
- Validate – validates that external data has been populated
- Extract – extracts data from the data sources and puts it into the Extract Temporary table
- Build – populates the reward items and builds the summary section
- Publish – makes the statement available to employees, managers, and administrators
There are also 2 Exception steps:
- Cancel – deletes all published statements
- Amend – amend or cancel statements for individual employees and allow you to reprocess them
Let’s go into more detail about the individual steps.
The first step is Validate. ![]() This step validates that the external rewards data that was specified in the statement template has been populated.
This step validates that the external rewards data that was specified in the statement template has been populated.
The next step is Extract. ![]() This step does a lot, including:
This step does a lot, including:
- Retrieves the employee population for the statement being generated and populates the employee related tables, such as the Employee Statement Table (TRW_EE_STMT) and the Employee Statement Jobs Included Table (TRW_EE_STMT_JOB)
- Validates employee information, such as if the employee has multiple statements or has more than one primary job
- Retrieves the currency the employee’s statement is displayed in
- Generates and executes the SQL to extract data using the extract filters and populates the extract temporary table specified in the Reward Data Source
- Generates and executes the SQL to populate the Employee Statement Reward Item table (TRW_EE_STMT_ITM)
- Performs any calculations needed for reward items
The Build ![]() step will do the following:
step will do the following:
- Convert all reward items to a single currency that is defined on the employee’s HR primary job
- Insert zero rows for items that don’t have data but which is set up to always display
- Summarize numeric reward data
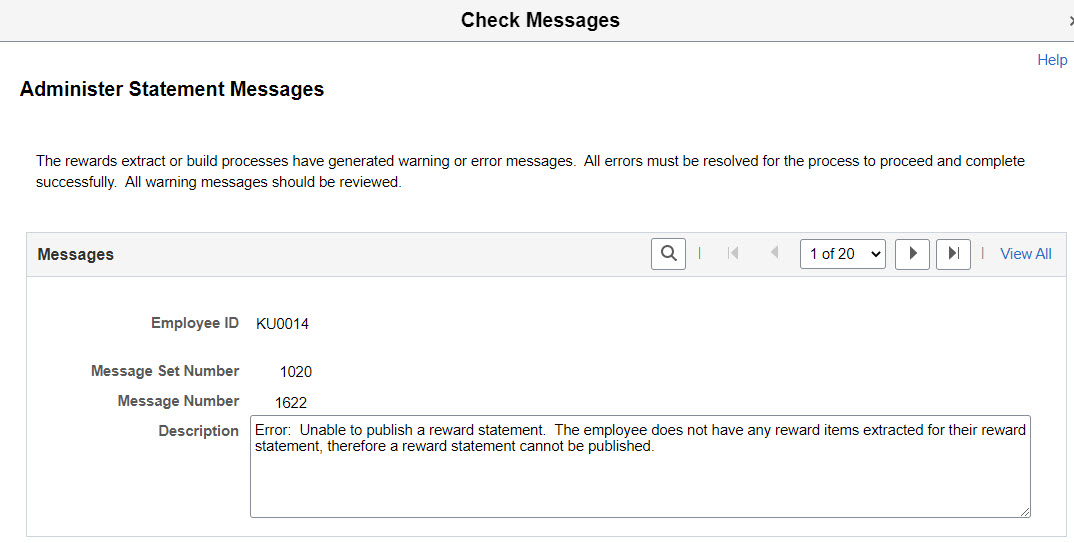
If errors are encountered in either the Extract or Build process messages are generated to notify the administrator. You can view these messages from the Check Messages link on the Administer Statement page. The following is a common message you may see.
You can also view a summary of what has been processed by clicking on the View Statement Summary link.
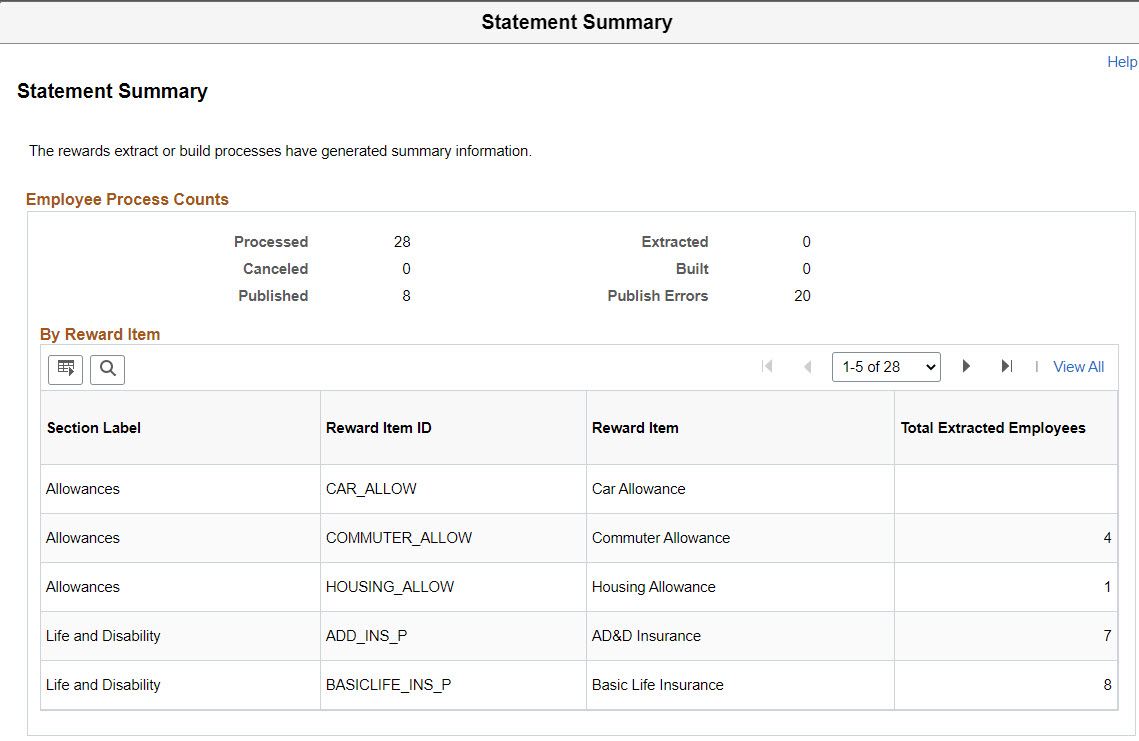
Once you have finished with the Build step and have checked your messages and the Summary to ensure that all of the statements and reward items you expected are part of the run, then you can Publish ![]() the statements. Publishing the statements will make them available to:
the statements. Publishing the statements will make them available to:
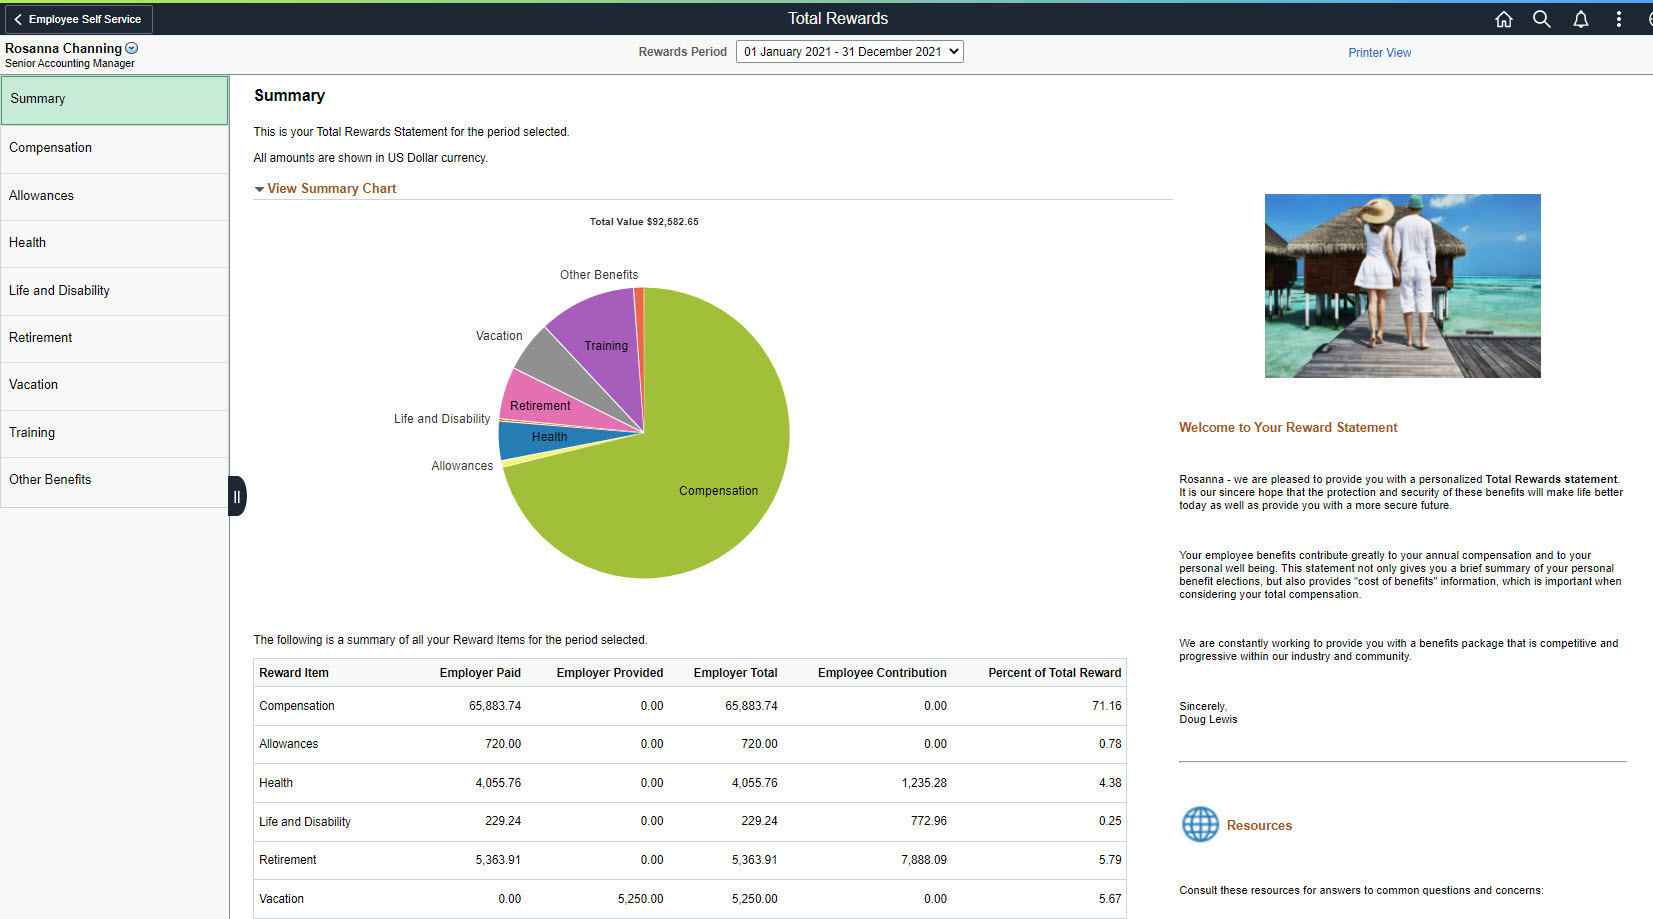
- Employees in the My Total Rewards tile
- Managers in the View Total Rewards tile
- Administrators accessed by navigating to: Compensation > Total Rewards > Administer Total Rewards
There are two exception steps. The first is Cancel ![]() . When should you use Cancel? You should use it when you want to delete all of the statements. You may have found an error in one of the set up tables that need to be corrected. In this case you would cancel the statements, fix and test the configuration, then start back at the beginning of the process with the Validate step.
. When should you use Cancel? You should use it when you want to delete all of the statements. You may have found an error in one of the set up tables that need to be corrected. In this case you would cancel the statements, fix and test the configuration, then start back at the beginning of the process with the Validate step.
What if you only have issues in statements for a few employees? In that case, you can use the Amend ![]() step.
step.
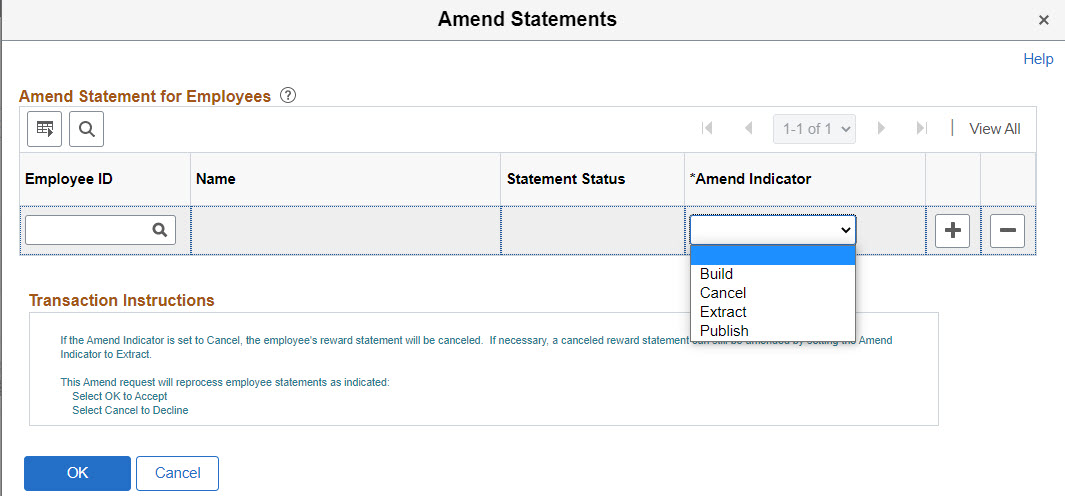
You will use the Amend Statements page to cancel the employee’s statement, make the corrections to their data, and then go back through the Extract, Build, and Publish steps, but this time only for the employees specified.
To go from setting up to publishing your Total Rewards Statement can be fast and easy, just ask Deb Ray from Omaha Public Power District:
“The implementation and use of the Total Rewards Statement in PeopleSoft could not be easier. We literally decided to utilize and implemented within 1 week. Maintaining/updating the data is a breeze as well with the administer statement page. “