Oracle Enterprise Manager ( EM) Cloud Bridge feature now supports an enhanced proxy feature as part of EM 13.5 Release Update 15. It adds additional support in addition to what has been available for EM. With these new enhancements, the security posture of the Cloud Bridge feature improved by enabling either the corporate proxy host or Oracle Cloud Management Gateway host to secure the communication between the on-premises environment and the OCI region. See Figure 1 for details.
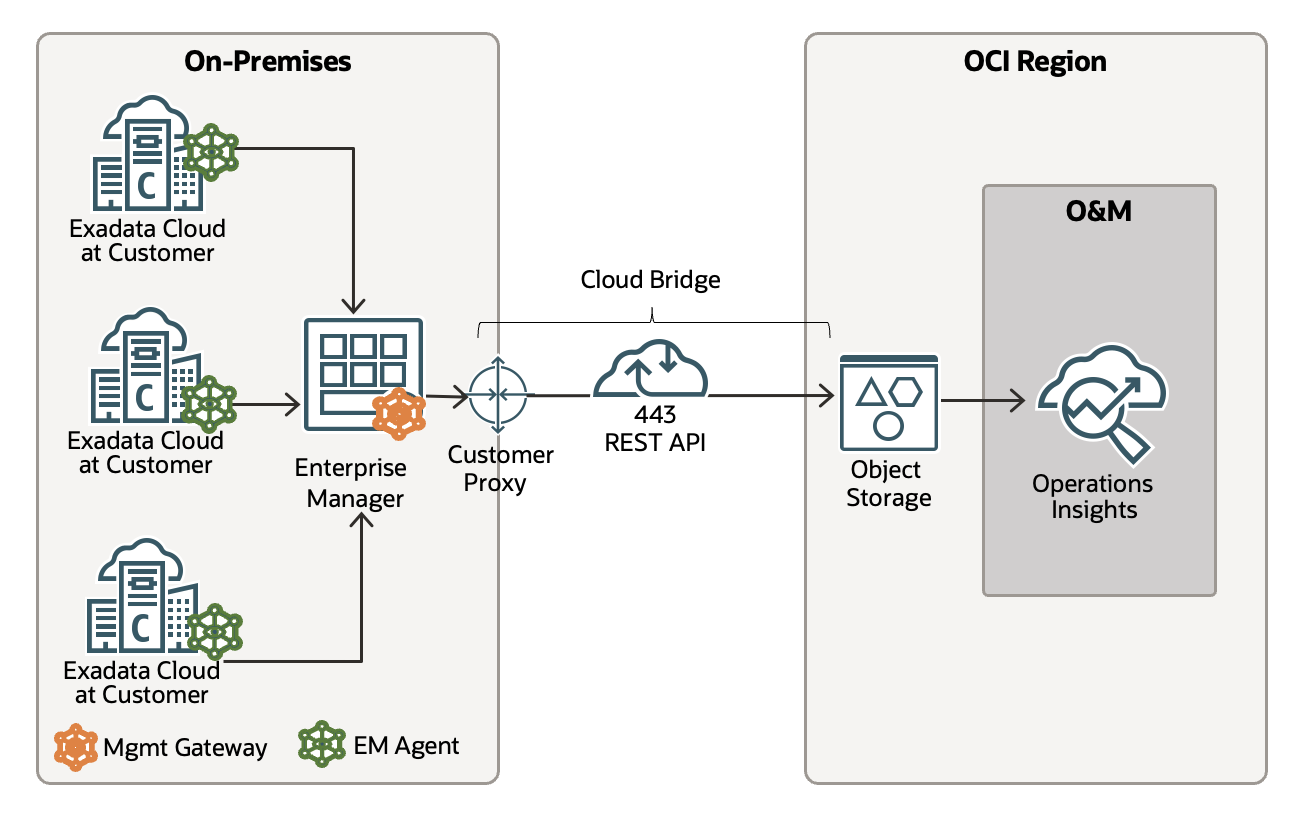
In a typical customer production environment, not all agents can travel over the public internet and would thus require a proxy to invoke OCI public endpoints. Generic ETL Framework (GEF) helps transfer extracted files from targets / EM repository to OCI Object Storage using the EM agents.
Key Features of Cloud Bridge Proxy
- Proxy is now officially supported as part of Cloud Bridge for EM from 13.5RU8
- A new credential type (Cloud Bridge Proxy Credentials) is introduced for the Cloud Bridge target type in EM 13.5 RU15. This credential captures the proxy details and helps in improving security posture.
- With this enhancement, the manual setup of proxy credentials on each EM agent is eliminated.
Available Proxy Options
- Use existing Proxy Server
We can use the existing corporate proxy server details as the proxy credentials to use on the data export.
- Alternate way of setting up cloud bridge with Management Gateway
If the proxy is not accessible/available where the EM instance is deployed, then install OCI Observability and Management (O&M) Management Gateway on the DMZ or Gateway server to send the data to OCI. Refer to this documentation for the instructions to install the O&M Management Gateway. Refer to this blog for more details on this setup.
Setting up cloud bridge with proxy in no time
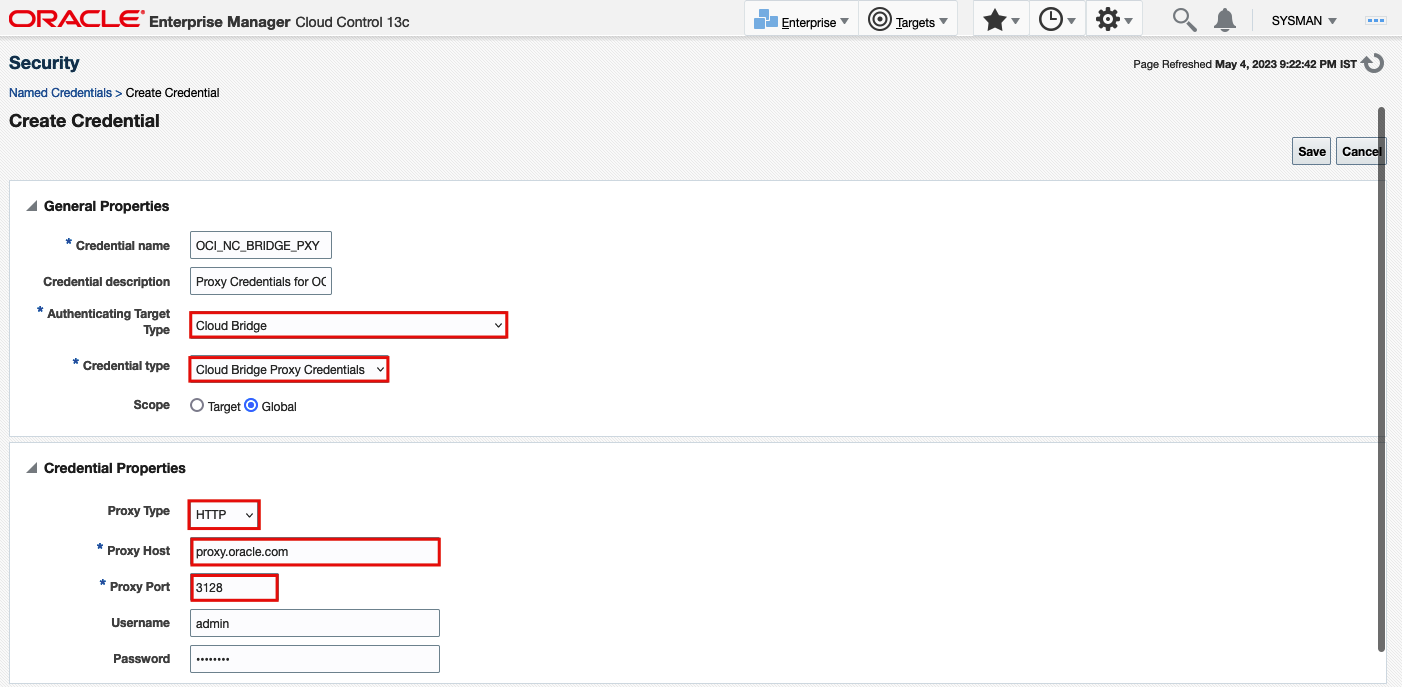
Navigate to the EM Setup -> Security -> Named credentials.
On EM’s Named Credentials, Select Authenticating Target Type as Cloud Bridge and the credential type is Cloud Bridge proxy credentials. This credential is either the company’s proxy credential or the management gateway details.
Refer to this documentation for complete steps.
This credential can be attached to the Cloud bridge.
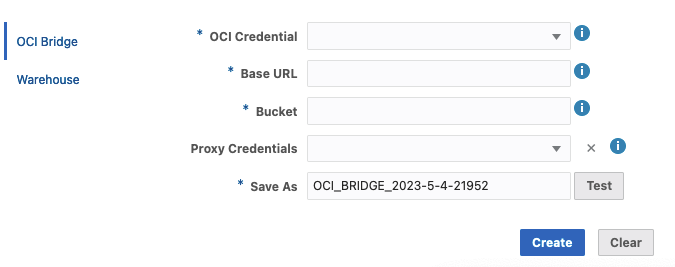
Navigate to EM Setup -> Cloud Bridge, and Select Manage OCI Connectivity.
- Enter the OCI, Credential, Base URL, and Bucket details
- Choose the Proxy Credentials created in the previous step.
If proxy input in GEF is enabled and a Cloud Bridge Proxy Credential is selected on the Cloud bridge, then the transfer process will use the details in the credential to set either of the two types:
- HTTP Proxy
- HTTPS Proxy
at the agent side (before invoking the OCI endpoint), depending on the proxy type defined in the credential. The proxy variables do not need to be set on the individual agent(s).
Click on Test to check the connectivity to the OCI Object Storage service.
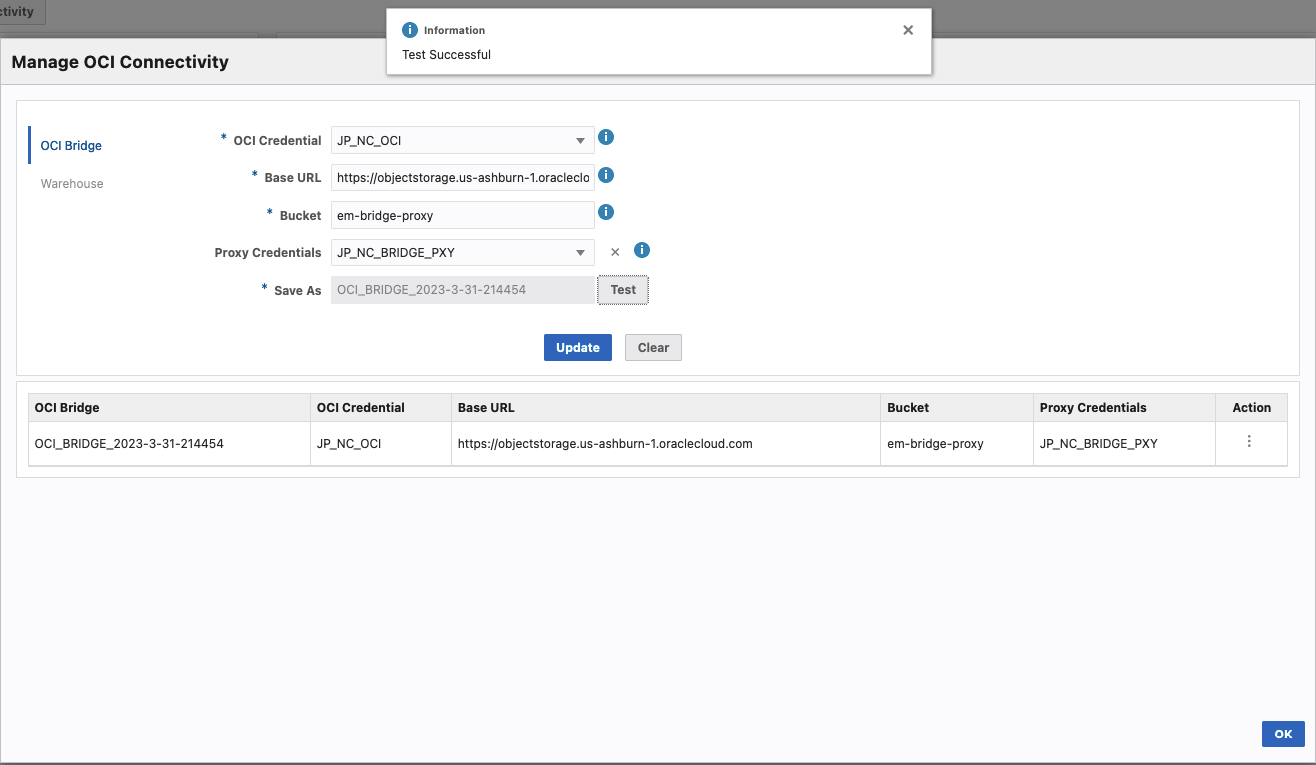
After the bridge creation, navigate to Cloud Bridge and select Enable Data Export to configure the data export.
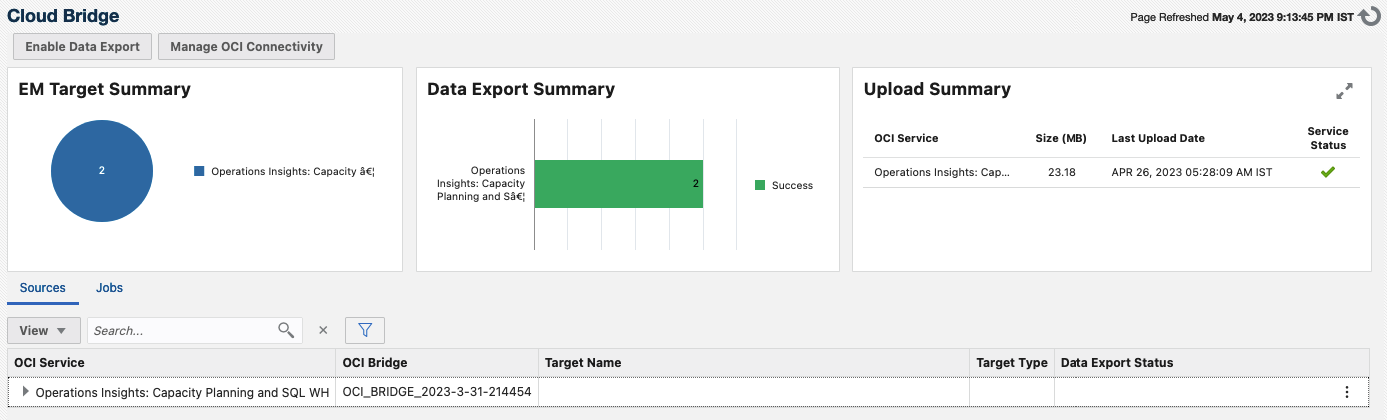
Create EM Bridge and see the data
After setup the proxy and data export are done on the EM side, Navigate to OCI and see the data flowing in on the EM Bridge. Refer to this documentation for the steps.
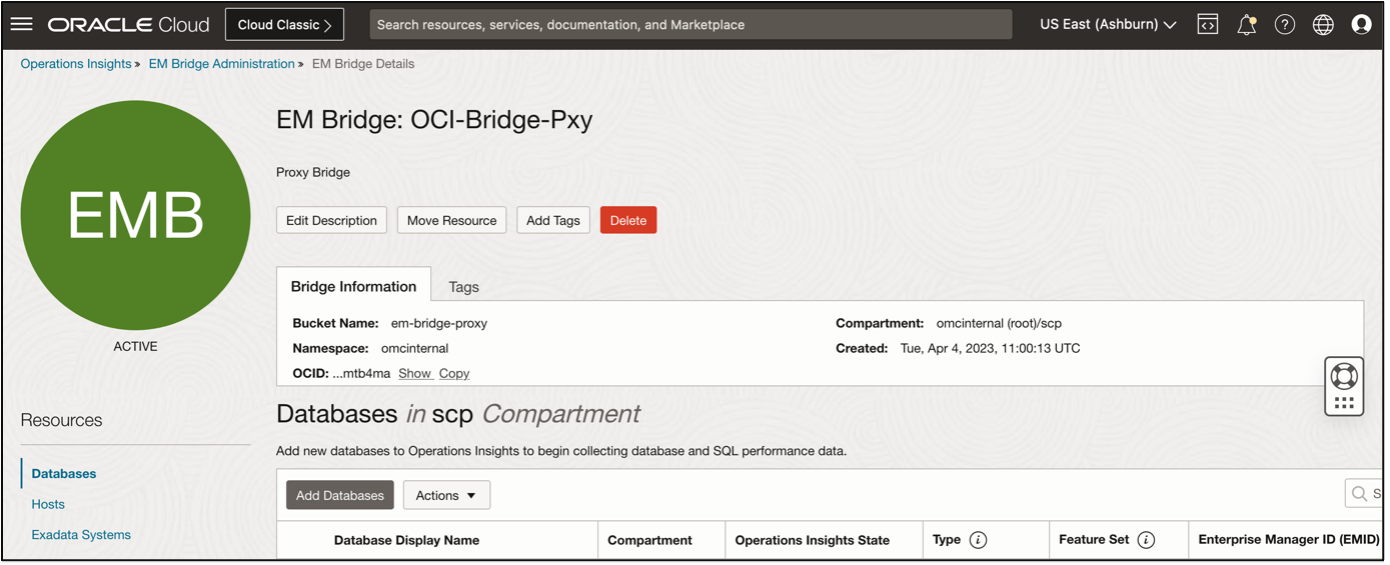
Add Database to Database Fleet
After the EM Bridge creation, navigate to EM Bridge Administration and select Add Database to check and add the database to the Operations Insights service.

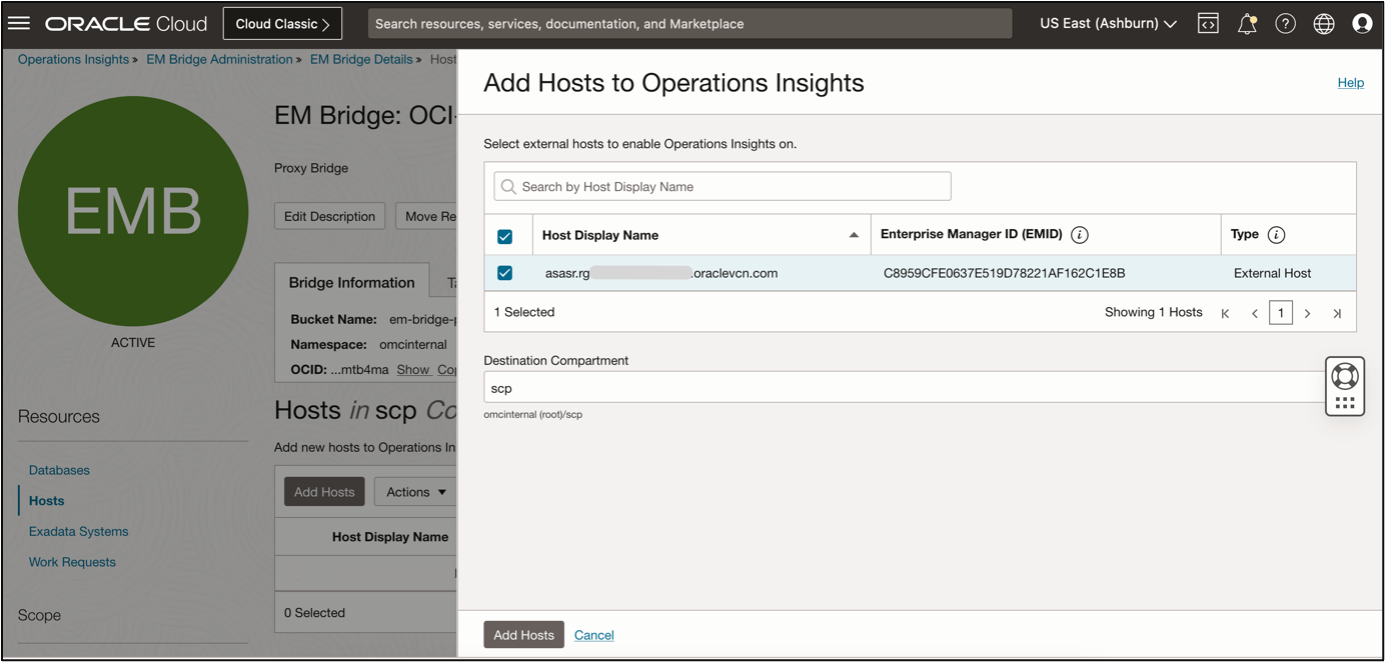
Add Host to Host Fleet
Similarly, add hosts to the Operations Insights by selecting Add Hosts.
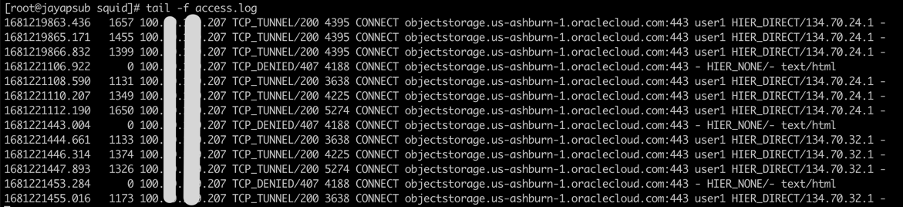
This export can be logged on the proxy server access log, for example, the Access log snippet on the proxy server.
Get started today!
Find OPSI under the Observability and Management menu in the Oracle Cloud Console. The service is accessible through the Console, CLI, and REST API and is already available in all commercial regions, with Government regions coming soon.
OPSI is available to use with Autonomous Databases, external databases (Oracle Databases deployed on-premises), and Oracle Cloud Databases on bare metal, VMs, and Exadata Database Services on Dedicated Infrastructure and Exadata Cloud at Customer.
Sign up for an Oracle Cloud Infrastructure trial account! For more information about this feature and how you can use it, see the documentation, and try it by signing up for Livelabs.
Resources
- Oracle Cloud Observability and Management Platform
- Operations Insights Technical Content
- Integrating Enterprise Manager with OCI Services
- Hands-on lab: Get Started with Oracle Cloud Infrastructure Operations Insights
- Pricing
- For more blogs on Oracle Operations Insights, visit the Observability and Management – Operations Insights blog space.