A while back, I wondered if it was possible to run MySQL on a Raspberry Pi. Not only is it possible, but it is not as complicated as I expected. Read on to find out how.
The Hardware
The first thing I needed to do to get MySQL running on a Raspberry Pi was procure a Raspberry Pi. I ordered a Vilros starter kit that included a Raspberry Pi 4 Model B 8Gb board, a case, and other accessories.
“Installing” the Operating System
Once the device arrived, the first thing I needed to do was get an operating system configured. If you have never used a Raspberry Pi, you install the operating system on a micro SD card, insert the card into the device, and then plug in the power plug.
Because I use Oracle Linux on all of my Compute instances on Oracle Cloud Infrastructure, it is the flavor of Linux I am most familiar with and thought it would be a good choice. Fortunately, Oracle has Linux images for use on the Arm architecture for Raspberry Pi.
Now that I knew you could install Oracle Linux on a Raspberry Pi, I needed to find out how to accomplish this task. Thankfully, Gerald Venzl (a colleague at Oracle) has not only figured out an easy way to do this, he wrote about it here. The post is a few years old, but it is still relevant and is the process I followed to install Oracle Linux on my Pi.
I am not going to reproduce what Gerald wrote, so head on over to his blog post and follow the instructions he provides. Note: Gerald’s method requires installing additional software to create the image.
What are you waiting for? Get going…don’t worry, I’ll wait.
Booting into Oracle Linux
Welcome back! I hope you had no issues copying the Oracle Linux image to the SD card.
Now that the OS image is ready insert it into the Pi and apply power.
Logging In
The default password for the root user is oracle. You will be asked to change the password when you first log in.
Side note
Before we go any further, the Linux image we just put on the SD card is scaled back, and many modules are not installed by default. For example, if you want to create a new user and grant them sudo access, you must install the sudo module before they can run commands using sudo. The command to install sudo is:
dnf install sudoI created a new user named scott and gave the user sudo access. I then used SSH to connect to the Pi from my Mac.
Installing the MySQL Yum Repo
Now that we have Oracle Linux running on the Pi and a way to execute commands, the first item of business is to install the DNF repo for MySQL.
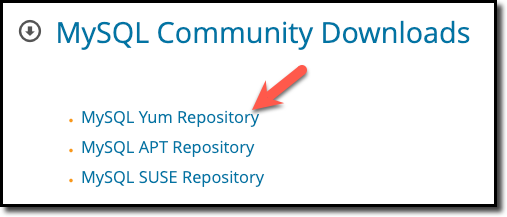
First, head to the MySQl Community Downloads page and click the ‘MySQL Yum Repository Link’.
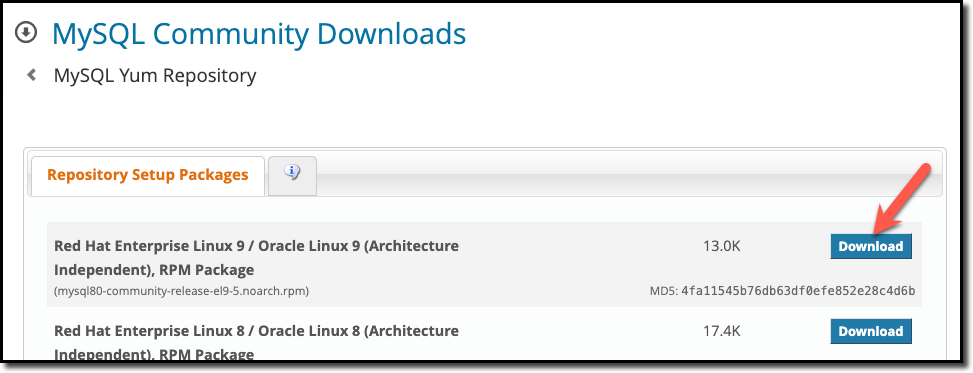
On the next page, click the “Download” button for the version of Oracle Linux you installed earlier. In my case, I installed Oracle Linux 9, so I clicked the first “Download” button.
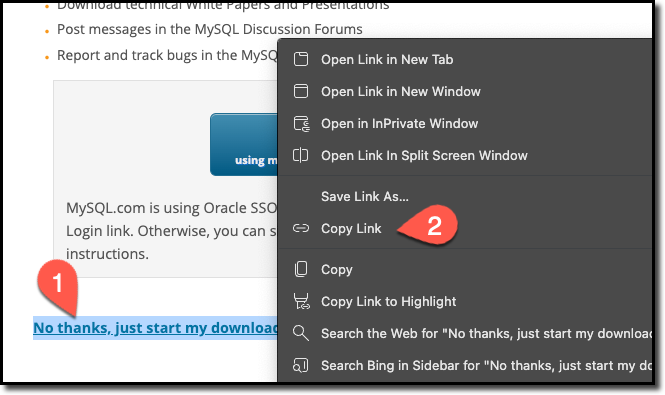
After you click the “download” button, you are brought to the downlaod page. On this page, right-click the “No thanks, just start my download link” (1) and then click “Copy Link” (2).
To install this repo, we need to run the command:
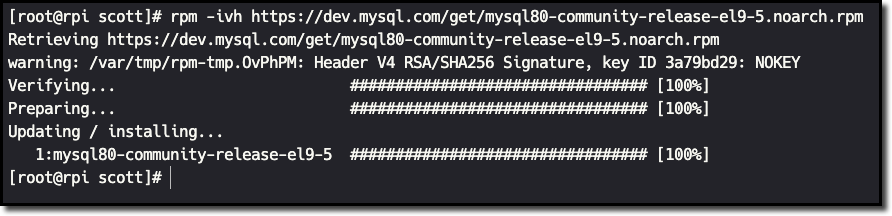
rpm -ivh {URL we just copied}For me, the command was:
rpm -ivh https://dev.mysql.com/get/mysql80-community-release-el9-5.noarch.rpmIf you used a different version of Oracle Linux or there is a newer version of the repo, this URL will be different.
When the repo is installed successfully, the output should look similar to the image below.
Install MySQL Innovation Release
With the repo installed, we can now install MySQL. We can do this with a single command:
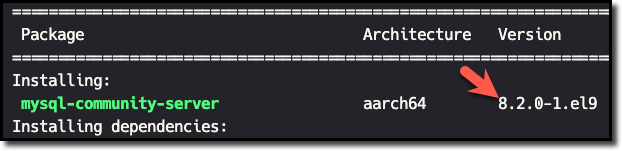
dnf install mysql-server --enablerepo=mysql-innovation-communityIn this command, we tell the repo to install the Innovation Release using --enablerepo=mysql-innovation-community.
Because this is a scaled down version of Linux, there will likely be a few dependencies that need to be installed. However, you should look for the MySQl package to ensure the Innovation Release is being installed. In my case, I am installing version 8.2.0-1 of mysql-community-server.
During the installation process, you may be asked to install several GPG keys. Allow each of these by entering y and pressing enter.
Verifying the Installation
Now that we have MySQL installed let’s verify the version that is installed by running the command:
mysql --versionThe version number we see should align with the package we installed in the previous step.

You are now ready to use MySQL on your Raspberry Pi as on any other server.
In my case, I am using the Pi to capture GPS data and store it as JSON in a MySQL Document Store collection. There will be more about this project in a future post.
Wrap-up
Microcontrollers, such as Raspberry Pi, have become quite prevalent. These devices can be used for a variety of uses. We showed that you can use Oracle Linux as the OS for a Raspberry Pi and how to install the Innovation Release of MySQL onto the device.