Oracle Cloud Infrastructure (OCI) is the Oracle Cloud Platform where the tutorial leverages 3 services – namely the MySQL Database Service (MDS), Kubernetes Container (K8s) under Developer Services and Compute VM services.
This article is written to provide the steps to provision MDS, K8s and Compute VM services. It also provides the steps to create a docker image from Image:java:latest as tar for local node image repository import (loading).
2 Java Client sources are used with the tutorial.
- Helloworld.java – it is a simple hello world output java source
- HelloDB.java – it is multi-threaded java application with Runnable Thread to pump Data into MySQL Database Service. It uses the Connect/J (MySQL JDBC Driver) to connect to MySQL MDS.
MySQL Shell is the client tool to administrate and watch the data in MySQL Database Service(MDS).
Pre-requisites :
- Compartment
- Virtual Cloud Network – VCN
- Internet Gateway and Default Routing
- Public subnet – the Public Network for the COMPUTE VM so that externally we can access to the VM (to be used in Compute subnet)
- Private subnet – All services (MDS, K8s) are running within the subnet
- Security Rule defined to allow Private Subnet and Public Subnet to communicate with regards to the port 3306 / 33060. MySQL Shell running on Public Subnet with Compute VM is able to connect to MDS on Private Subnet.
- COMPUTE – SSH private and public key pair
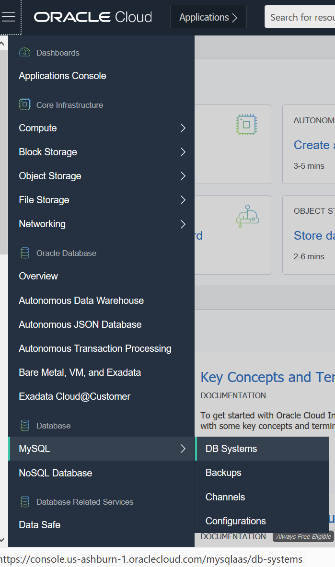
Part I : MySQL Database Service – DB System
Choosing from the OCI Menu : MySQL (DB Systems)
 |
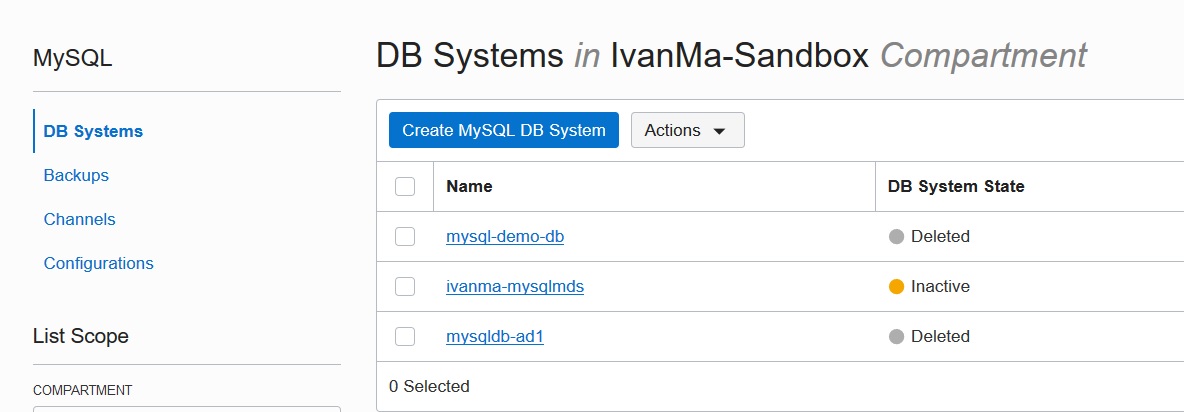 |
- Click “Create MySQL DB Systems”
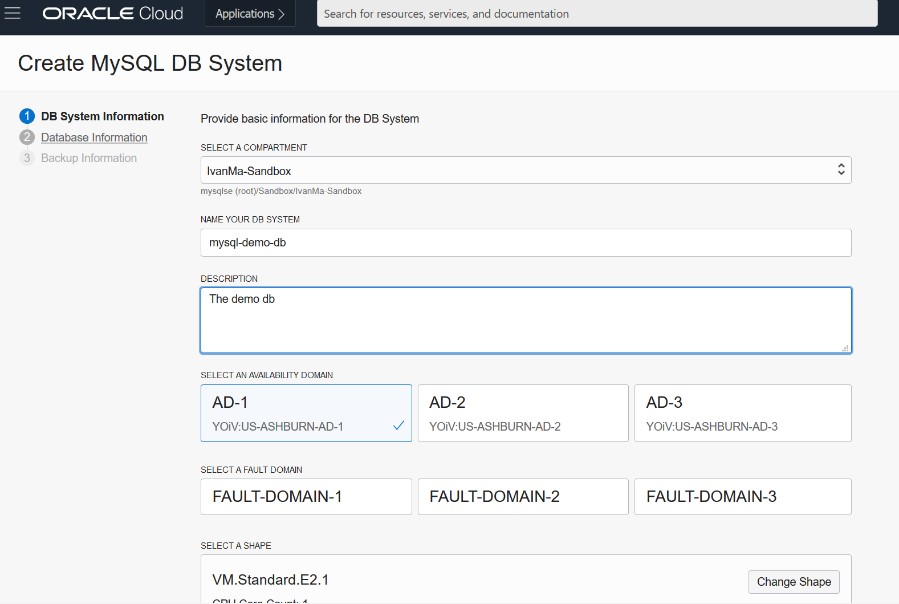
- Fill in the DB Systems details
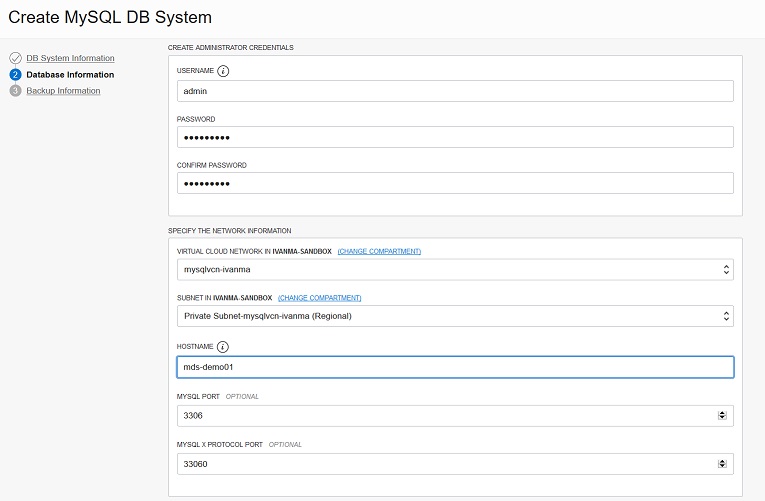
- Choose compartment, VCN/Network settings and do not forget to specify credentials. The rest of the information is easy, just follow the wizard.
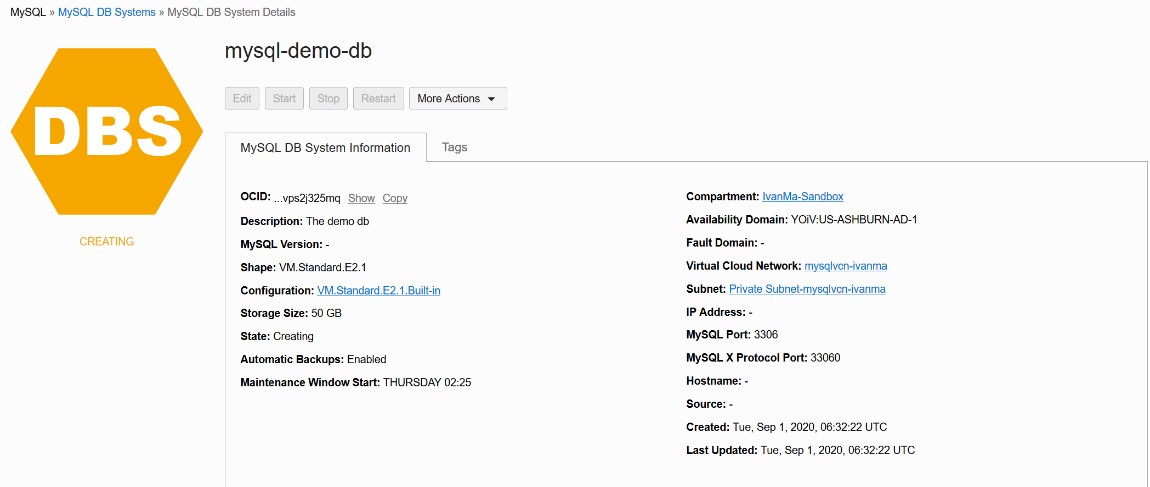
- Click “Create” to provision MySQL DB Systems
You will be able to see the DB System in the ‘Creating’ status.
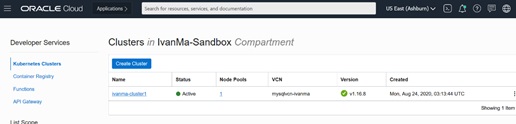
Part II Developer Service – Kubernetes Clusters
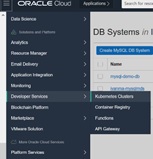
Choosing from the OCI Menu : Developer Services (Kubernetes Clusters)
 |
 |
- Click “Create Cluster” and choose “Custom Create”

- Specify the name and Compartment and Choose K8s version (in this tutorial, v1.16.8 is chosen), and Click “Next”

- Specify Network settings and choose the VCN and public subnet, and click “Next”

- Specify the node pool settings – Name, version, Image, Shape (for tutorial purpose, choose the smallest VM Shape for the tutorial, 1 as number of nodes, choose the Availability Domain and private subnet from the VCN, and specify the SSH public key, and click “Next”
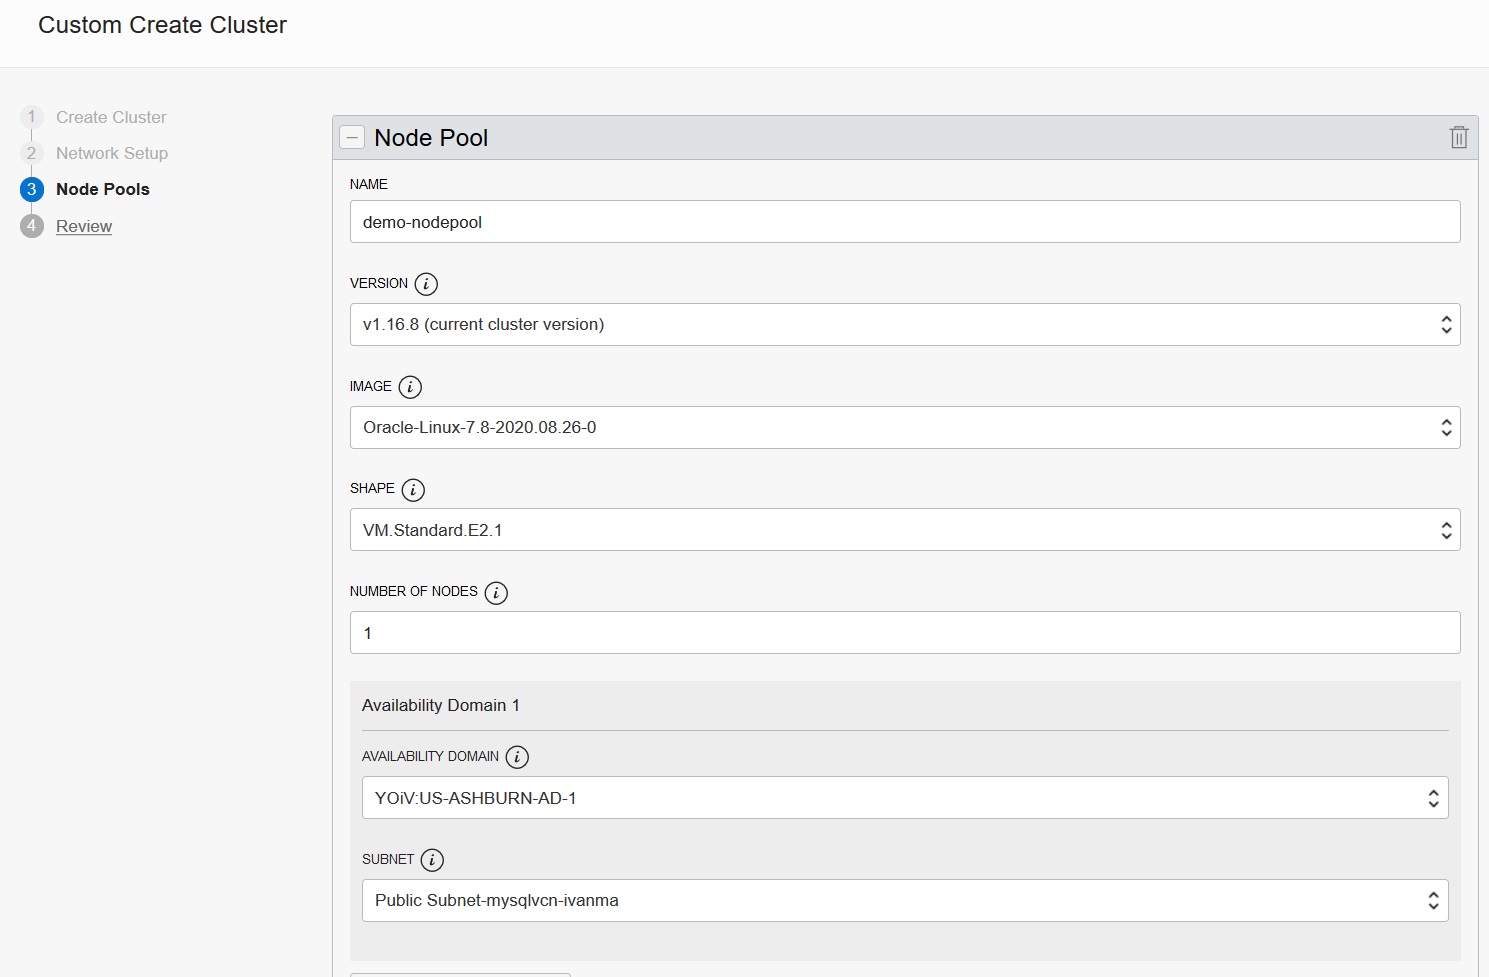
- Finally, review the settings and click “Create Cluster” to provision the cluster
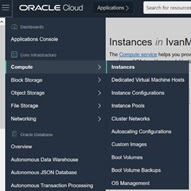
Part III Compute Service
The Cloud Compute VM is used to access the MySQL Database Service and the Kubernetes Clusters.
Choose OCI Menu – Compute (Instances) and Click “Create Instance”
 |
 |
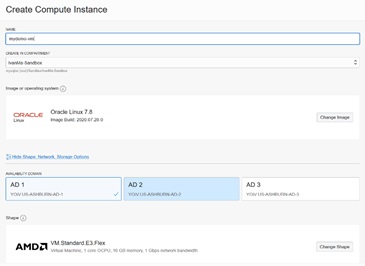
- Specify the VM details – Name, Compartment and choose Image, Select Availability Domain and Choose VM Shape
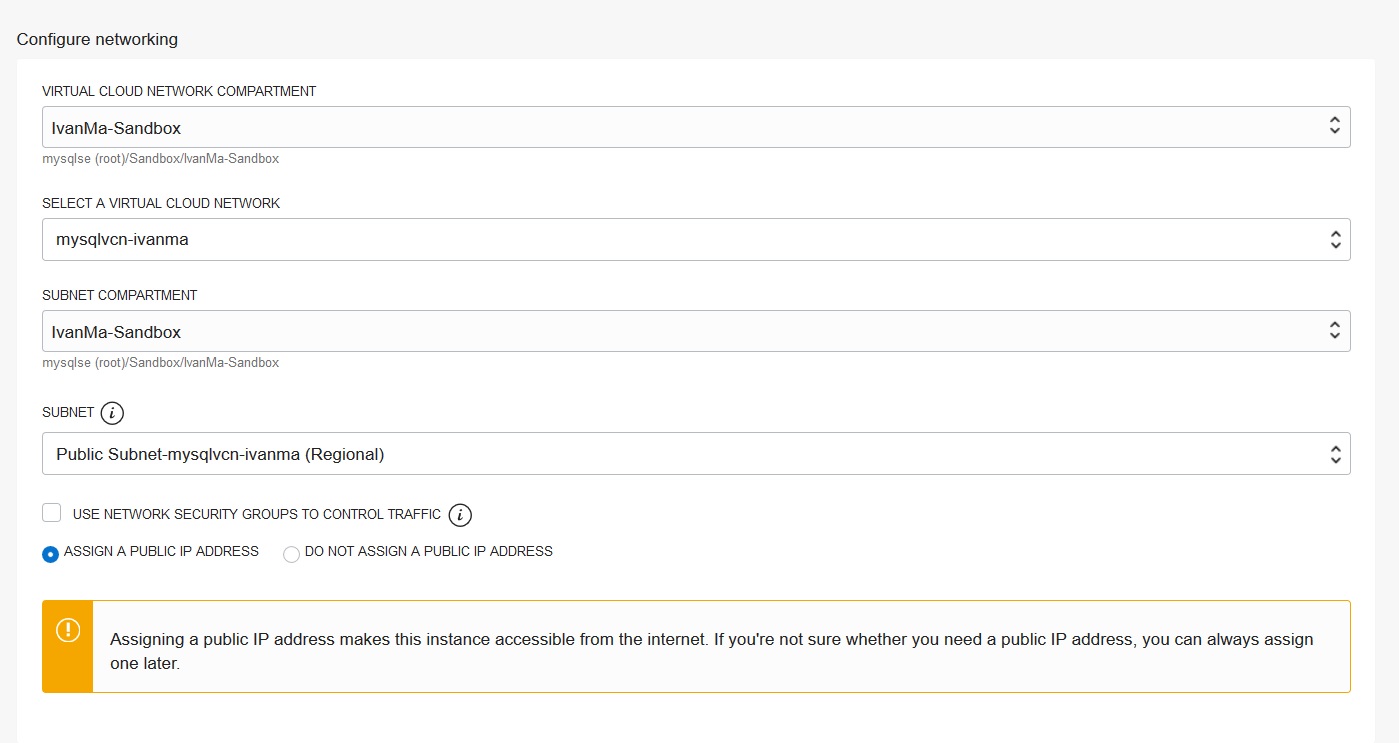
- Specify the Network Settings – Compartment, VCN, and choose the public subnet and choose “ASSIGN a PUBLIC IP ADDRESS”
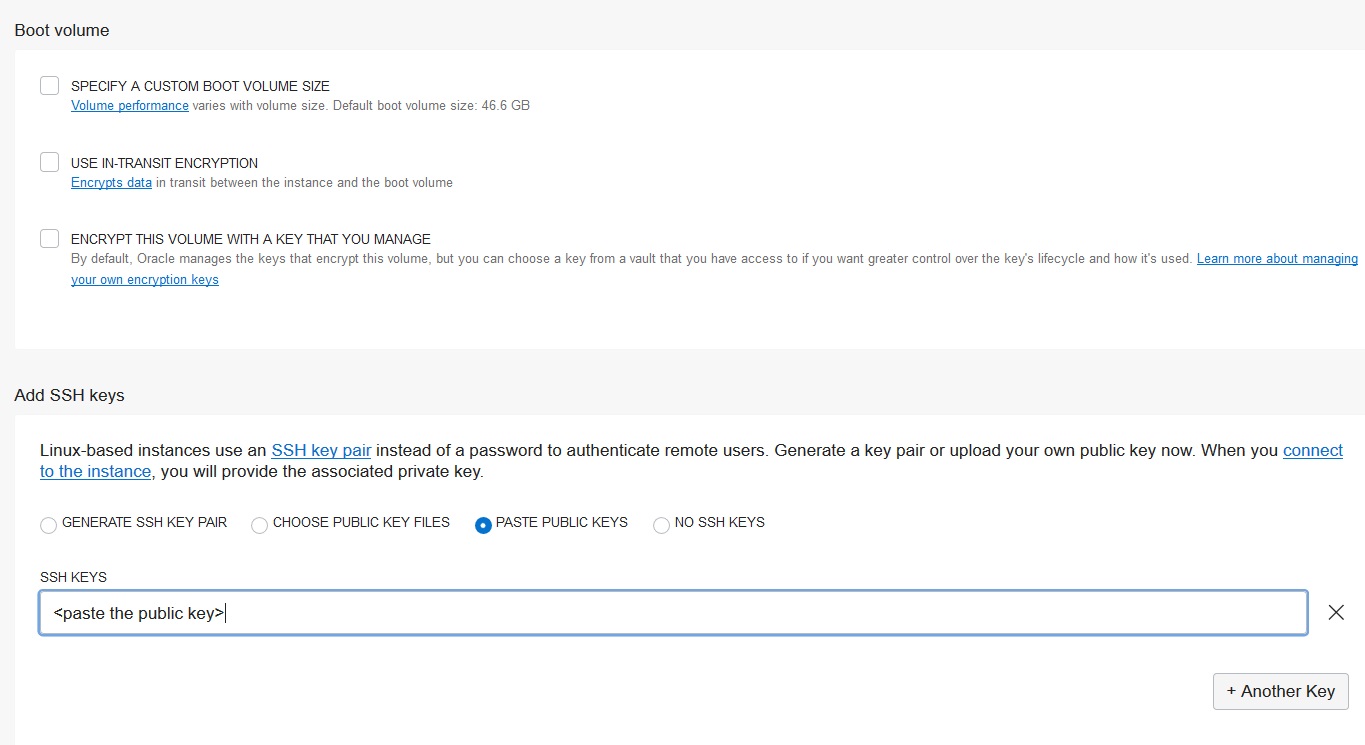
- Specify the boot volume detail and the SSH Public key details, and click “Create”
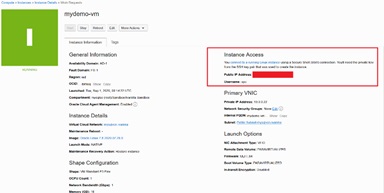
- When the Compute VM is provisioned, it is assigned with public IP address
Part IV : Configure Compute VM
The VM is created with default username as ‘opc’ and it is authenticated based on key authentication setting from previous section.
With the SSH private/public key pair (e.g. private key file as id_rsa.txt), login to the public IP address of the Compute VM via ‘ssh’. If putty is used, the .ppk format for the private key is used.
ssh -i ./id_rsa.txt opc@[public ip of the COMPUTE]
- Installing OCI – CLI : Refer to the Installation Materials https://docs.cloud.oracle.com/en-us/iaas/Content/API/SDKDocs/cliinstall.htm?tocpath=Developer%20Tools%20%7CCommand%20Line%20Interface%20(CLI)%20%7C_____1
# bash -c "$(curl -L https://raw.githubusercontent.com/oracle/oci-cli/master/scripts/install/install.sh)"
- Configure OCI – To have the CLI setup walk you through the first-time setup process,
oci setup config
- Specify the Tenancy’s OCID and User’s OCID – Refer to your User Profile about User’s OCID and Tenancy’s OCID.
- Choose the Regions and Availability Domain
- And specify the “Y” to generate the API Signing RSA key pair. The key pair files is generated as $HOME/.oci/<name>.pem and $HOME/.oci/<name>_public.pem
- Define the API key with the given key
- Select API Keys on the left menu
- Add Public Key (drop the file or paste the content from the <name>_public.pem)
- Install Docker-engine
sudo yum install docker-engine
sudo systemctl enable --now docker
- Install kubectl and kubeadm – it is configured to access the Kubernetes Clusters
sudo yum install kubectl kubeadm
mkdir -p $HOME/.kube
oci ce cluster create-kubeconfig --cluster-id <Cluster’s OCID>  --file $HOME/.kube/config --region <the region example : us-ashburn-1> --token-version 2.0.0
export KUBECONFIG=$HOME/.kube/config
- Installing mysql shell from MySQL Community repository
Referring to the URL : https://dev.mysql.com/downloads/repo/yum/
and choose the rpm with the corresponding Linux Version
(for example with Oracle Linux 7)
sudo yum install https://dev.mysql.com/get/mysql80-community-release-el7-3.noarch.rpm
sudo yum install mysql-shell
Once the installation has been completed, you can try simple commands for
Accessing Docker :
sudo docker image list
sudo docker ps -a
Accessing Kubernetes :
kubectl get nodes
kubectl get pods --all-namespaces
Accessing MySQL Database Services using MySQL Shell :
Using MySQL Shell to login to MDS with SQL interface
mysqlsh --uri <user>@<MDS IP> --sql

MySQL Shell> create database if not exists test;

To quit / exit of the mysql shell :
MySQL Shell> \q
Part V – Simple Java Hello world in OCI K8s
Building Docker Image for Java Application – helloworld
Simple Java “helloworld” application
Creating folders :
mkdir -p helloworld helloworld/src helloworld/image
Java Source : helloworld/HelloWorld.java
public class HelloWorld{
    public static void main(String[] args){
         System.out.println("Hello World!!!");
    }
}
Creating Dockerfile ( filename : helloworld/Dockerfile ) : The Docker file refers to the “image” from ‘java:latest’. It creates the structure bin and src under the working directory /root/java.
The image contains the java source HelloWorld.java which prints the ‘hello world’ string on screen.
It builds the image to compile the source and puts the class file to /root/java/bin.
The ENTRYPOINT is to start the execution with “classpath” pointing to “bin” to execute HelloWorld.class.
Dockerfile :
FROM java:latest
COPY src /root/java/src
WORKDIR /root/java
RUN mkdir bin

RUN javac -d bin src/HelloWorld.java

ENTRYPOINT ["java", "-cp", "bin", "HelloWorld"]
Building the Docker Image for “helloworld”
The image name is “my-java-helloworld” as example :
cd helloworld; sudo docker build -t my-java-helloworld .
Export Docker Image as Tar
cd helloworld; sudo docker save my-java-helloworld > image/helloworld.tar
Import Docker Image to Local Docker Repository on node
Although the docker image can be imported to Docker Registry, this tutorial is simply to load the docker image to the local node repository.
- Identify the node Private IP Address from the kubectl command
kubectl get nodes -o wide

NAME       STATUS   ROLES   AGE   VERSION   INTERNAL-IP   EXTERNAL-IP   OS-IMAGE                  KERNEL-VERSION                     CONTAINER-RUNTIME

10.0.1.7   Ready    node    46h   v1.16.8   10.0.1.7
           Oracle Linux Server 7.8   4.14.35-1902.304.6.el7uek.x86_64   docker://18.9.8
- Copy the tar image to the node using scp and the private key (id_rsa.txt)
scp -i id_rsa.txt image/helloworld.tar opc@[node’s internal-ip]:/home/opc
- SSH Login to the Private IP using opc and the private key (id_rsa.txt) and load the image to local repository
ssh -i id_rsa.txt opc@[worker node’s private ip]
- With the Shell command from the K8s Worker node terminal
docker image load --input /home/opc/helloworld.tar
docker image list
Output sample as :
[opc@oke-crwgzjvgbrd-nrweyjugy4w-snmxcmvxhda-0 ~]$ docker image list
REPOSITORY                                                                           TAG                 IMAGE ID            CREATED             SIZE

my-java-helloworld                                                                   latest              e6357e2cfc8d        6 days ago          643MB
         742kB
- Creating Yaml file for helloworld (file: helloworld/helloworld.yaml) – This yaml file is to create a pod named as “myhelloworld” based on the image from imported “my-java-helloworld’. The setting with “imagePullPolicy as Never” is to allow the image to used locally from the local node repository. The setting “restartPolicy:OnFailure” is to set it as “execute once” instead of a daemon.
apiVersion: v1
kind: Pod
metadata:
  name: myhelloworld
spec:
  containers:
  - name: myhelloworld
    image: my-java-helloworld
    imagePullPolicy: Never
  restartPolicy: OnFailure
- Creating a namespace ‘demo’ and Apply the yaml file
kubectl create namespace demo01
kubectl apply -f helloworld.yaml --namespace demo01
kubectl get pods --namespace demo01
kubectl logs myhelloworld --namespace demo01
output sample :
[opc@ivanma-demo1 buildJavaImage]$ kubectl create namespace demo01
namespace/demo01 created
[opc@ivanma-demo1 buildJavaImage]$ kubectl apply -f helloworld.yaml --namespace demo01
pod/myhelloworld created
[opc@ivanma-demo1 buildJavaImage]$ kubectl get pods --namespace demo01
NAME           READY   STATUS      RESTARTS   AGE
myhelloworld   0/1     Completed   0          4s
[opc@ivanma-demo1 buildJavaImage]$ kubectl logs myhelloworld --namespace demo01
Hello World!!!
Part VI : Java DB application with MDS
Building Docker Image for Java DB Application – HelloDB
Simple Java “HelloDB” application
Create folders :
mkdir -p hellodb hellodb/src hellodb/image
Download ConnectorJ for MySQL and copy the tar file to folder “src”
Referring to URL : https://dev.mysql.com/downloads/connector/j/
Choose the “Platform Independent” and download the tar
Or as of ver 8.0.21, the following command to “wget” the file directly
cd /home/opc/hellodb; wget https://dev.mysql.com/get/Downloads/Connector-J/mysql-connector-java-8.0.21.tar.gz
tar -xvf mysql-connector-java-8.0.21.tar.gz
mv mysql-connector-java-8.0.21/mysql-connector-java-8.0.21.jar src
Java Source : hellodb/HelloDB.java – Download the file from Github
Change the following private variables with the MDS IP address details and the corresponding username and password accordingly.
private static String database = "test";
private static String baseUrl =   "jdbc:mysql://" +
  "address=(protocol=tcp)(type=master)(host=
  <MDS Private IP>)(port=3306)/" +
  database + "?verifyServerCertificate=false&useSSL=true&" +
  "loadBalanceConnectionGroup=first&loadBalanceEnableJMX=true";
private static String user = "
  <MDS user>

   ";
private static String password = "

    <MDS password>";
Creating Dockerfile ( filename : hellodb/Dockerfile ) : The Docker file refers to the “image” from ‘java:latest’. It creates the structure bin and src under the working directory /root/java.
The docker image contains the java source HelloDB.java; it does the following
- It creates tables test.mytable
(f1 int auto_increment not null primary key,
f2 varchar(200)) engine=innodb;”) - Starting 10 threads
- Each thread executes a batch size of 10 to insert data to test.mytable for 10 iterations.
The Dockerfile builds the image to compile the source.
The Dockerfile copies the class files to /root/java/bin including the connector-j tar file from the src folder
The ENTRYPOINT is to start the execution with “classpath” pointing to “bin” and the “connect-j tar” to execute HelloDB.class.
Dockerfile :
FROM java:latest
COPY src /root/java/src
WORKDIR /root/java
RUN mkdir bin
COPY src/mysql-connector-java-8.0.21.jar bin

RUN javac -d bin src/HelloDB.java
ENTRYPOINT ["java", "-cp", "bin:bin/mysql-connector-java-8.0.21.jar", "HelloDB"]
Building the Docker Image for “my-hellodb”
The image name is “my-hellodb” as example :
cd /home/opc/hellodb; sudo docker build -t my-hellodb .
Export Docker Image as Tar
cd /home/opc/hellodb; sudo docker save my-hellodb > image/hellodb.tar
Import Docker Image to Local Docker Repository on node
Although the docker image can be imported to Docker Registry, this tutorial is simply to load the docker image to the local node repository.
- Identify the node Private IP Address from the kubectl command
# kubectl get nodes -o wide
NAME       STATUS   ROLES   AGE   VERSION   INTERNAL-IP   EXTERNAL-IP   OS-IMAGE                  KERNEL-VERSION                     CONTAINER-RUNTIME
10.0.1.7   Ready    node    46h   v1.16.8   10.0.1.7
            Oracle Linux Server 7.8   4.14.35-1902.304.6.el7uek.x86_64   docker://18.9.8
- Copy the tar image to the node using scp and the private key (id_rsa.txt)
scp -i id_rsa.txt image/hellodb.tar opc@[node’s internal-ip]:/home/opc
- SSH Login to the Private IP using opc and the private key (id_rsa.txt) and load the image to local repository
ssh -i id_rsa.txt opc@[worker node’s private ip]
- With the Shell command on the K8s worker node’s Terminal
docker image load --input /home/opc/hellodb.tar
docker image list
Output sample as :
[opc@oke-crwgzjvgbrd-nrweyjugy4w-snmxcmvxhda-0 ~]$ docker image list
REPOSITORY                                                                           TAG                 IMAGE ID            CREATED             SIZE
my-hellodb                                                                           latest              53b4b1c08d64        32 minutes ago      648MB
my-java-helloworld                                                                   latest              e6357e2cfc8d        6 days ago          643MB
- Creating Yaml file for hellodb (file: hellodb/hellodb.yaml) – This yaml file is to create a pod named as “my-hellodb” based on the image from imported “my-hellodb. The setting with “imagePullPolicy as Never” is to allow the image to used locally from the local node repository. The setting “restartPolicy:OnFailure” is to set it as “execute once” instead of a daemon.
apiVersion:v1
kind: Pod
metadata:
  name: my-hellodb
spec:
  containers:
  - name: my-hellodb
    image: my-hellodb
    imagePullPolicy: Never
  restartPolicy: OnFailure
- Creating a namespace ‘demo02’ and Apply the yaml file
kubectl create namespace demo02
kubectl apply -f hellodb.yaml --namespace demo02
kubectl get pods --namespace demo02
kubectl logs my-hellodb --namespace demo02
output sample :
[opc@ivanma-demo1 hellodb]$ kubectl logs my-hellodb --namespace demo02
Thread ID(0) - Iteration(0/10)
Thread ID(1) - Iteration(0/10)
Thread ID(2) - Iteration(0/10)
Thread ID(3) - Iteration(0/10)
Thread ID(4) - Iteration(0/10)
Thread ID(5) - Iteration(0/10)
Thread ID(6) - Iteration(0/10)
Thread ID(7) - Iteration(0/10)
Thread ID(8) - Iteration(0/10)
Spawned threads : 10
Thread ID(9) - Iteration(0/10)

…….

Thread ID(6) - Iteration(9/10)
Thread ID(4) - Iteration(9/10)
Finished - 57332
- Open another Terminal to the Compute VM from your PC
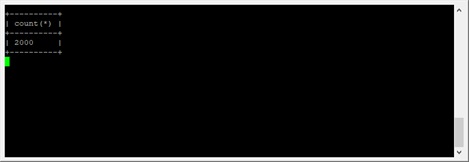
ssh -i [id_rsa.txt] opc@[Compute’s public IP]

mysqlsh --uri  [MDS user]:[MDS password]@[MDS IP]

MySQL Shell > \watch query select count(*) from test.mytable
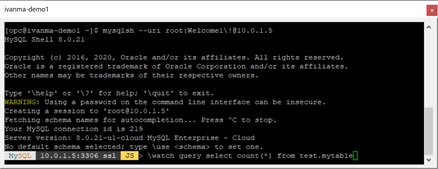
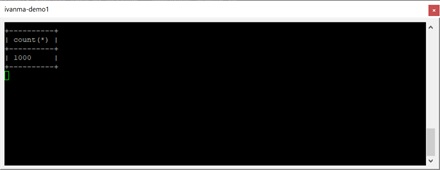
- While the MySQL Shell terminal is showing the count(*), on the separate terminal, re-apply the yaml to see the count(*) changes. You can see the count(*) growing from 1000 to 2000. (10 threads inserts 10 iterations x 10 rows in a batch which is 1000 rows)
kubectl delete pod my-hellodb --namespace demo02
kubectl apply -f hellodb.yaml --namespace demo02
- Finally, Clean up namespace “demo01” and “demo02”.
# kubectl delete namespace  demo01
# kubectl delete namespace  demo02
That is the end of this “MDS + Java + K8S” tutorial.