Long-term data retention is a critical requirement for many organizations, driven by regulatory, compliance, or business needs. In many cases, backups based on end-of-month, end-of-quarter, or end-of-year operations must be retained for years. In a previous blog post, we explored how to achieve long-term retention with just a few clicks in the user interface.
https://blogs.oracle.com/maa/post/recovery-service-ltr
This blog describes the steps to automate the process to create and schedule long-term retention backups with Autonomous Recovery Service using the command line interface (CLI). The following topics will be covered:
- Setting up the OCI command line (CLI) environment
- Creating a long-term retention backup using the OCI CLI
- Scheduling the long-term retention backup crontab
By the end of this blog, you’ll have a clear understanding of how to use the OCI CLI to manage your long-term retention backups and automate this backup process.
Setting up the OCI command line (CLI) environment
You must be using Oracle Linux 8 or later, and the OCI command line must be version 3.54 or later. In the example below, an Oracle Linux 8 system in OCI is used.
Step 1 – SSH to your Linux machine
ssh -i <public.key> opc@<IP address of your system>
Step 2 – Check the version information. If OCI CLI is not installed on your system, this is a link to the installation instructions: https://docs.oracle.com/en-us/iaas/Content/API/SDKDocs/cliinstall.htm#Quickstart
$ oci –version
3.37.1
If the version information is greater than 3.54, skip to step 4. If the version is lower than 3.54, use step 3 to update the environment.
Step 3 – Update the OCI CLI environment
$ sudo yum update python36-oci-cli.noarch
Check the version again after the update.
$ oci –version
3.54.5
Step 4 – Start OCI interactive (-i)
$ oci -i
If prompted, create a new configuration (step 5). If you have an existing configuration, skip to step 6.
Step 5 – Create a new configuration by providing the information requested by the prompts.
Do you want to create a new config file? [Y/n]: Y
Do you want to create your config file by logging in through a browser? [Y/n]: Y
Enter a location for your config [/home/opc/.oci/config]: <Enter for default>
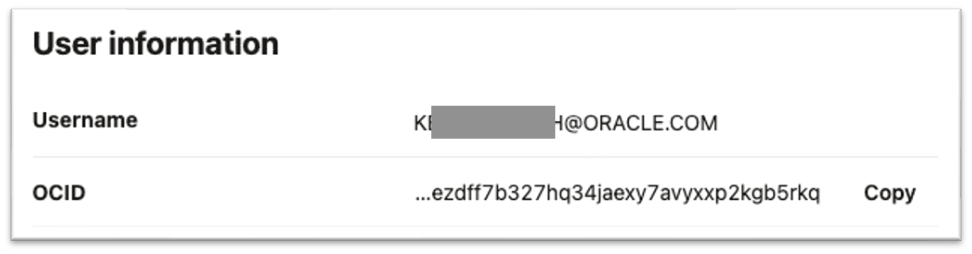
Enter a user OCID: <Click your login name under the Profile drop-down in the top right of the OCI UI as shown in figure 1>

The User OCID is in the left column under username. Click the “copy” button shown in Figure 2.
Enter a tenancy OCID: <Click your tenancy name under the profile drop-down in the top right of the OCI UI as shown in Figure 3>
The tenancy OCID is in the left column. Click the “copy” button as shown in Figure 4.

Enter a region by index or name: <The region is listed on the left of the profile drop-down in the top right of the OCI UI, as shown in Figure 5 with the example of US East (Ashburn)>
Do you want to generate a new API Signing RSA key pair? (If you decline you will be asked to supply the path to an existing key.) [Y/n]:Y
Enter a directory for your keys to be created [/home/opc/.oci]: <enter for default>
Enter a name for your key [oci_api_key]: <enter for default>
Enter a passphrase for your private key (“N/A” for no passphrase):N/A
Repeat for confirmation:N/A
…
A new configuration has been created.
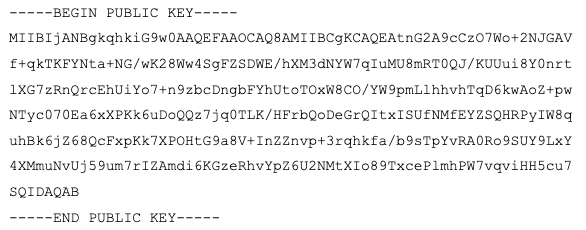
Step 6 – Retrieve your public key details
$ cat /home/opc/.oci/oci_api_key_public.pem <Your public key output value will be different from the example output in Figure 6.>
Step 7 – Update your profile with the public key
Click your login name under the profile drop-down in the top right of the OCI UI
Select “Token and Keys”
Select “Add API key”
Select “Paste a public key”
Paste the entire output from step 5.

The OCI CLI environment is now configured.
Creating a long-term retention backup using the OCI CLI
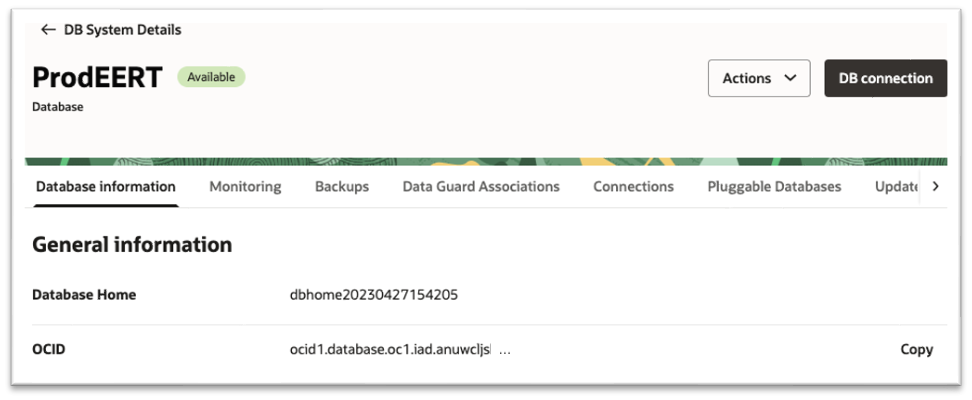
Step 1 – Get the database OCID from the database details page. Note the database OCID has “.database.” in the string. If the string contains something else you are in another information screen.
Step 2 – Check the database configuration to make sure Recovery Service is the backup destination. Note that the “type” will show “DBRS”.
$ oci db database get –database-id <database OCID from step 1> | grep “type”
“type“: “DBRS”,
Step 3 – List the backups for the database.
$ oci db backup list –database-id <database OCID from step 1>
Step 4 – Create a long-term retention backup with the name “monthly” with a 5-year retention. An opc-work-request-id will be returned.
$ oci db backup create –database-id <database OCID from step 1> –display-name monthly –retention-years 5
…
“opc-work-request-id”: “ocid1.coreservicesworkrequest.oc1.iad.abuwcljsp72zgx813sai5yrfkkw4jeoahtnotcu5fxriil7oolf7pi6urqma”
Step 5 – Check the status using the “opc-work-request-id” from step 4
$ oci work-requests work-request get –work-request-id <work request OCID from step 4>
…
“status”: “IN_PROGRESS”,
“time-accepted”: “2025-05-05T21:20:48.831000+00:00”,
“time-finished”: null,
“time-started”: “2025-05-05T21:20:57.657000+00:00”
Scheduling the long-term retention backup crontab
Step 1 – Save the command from step 4 in a shell script file (.sh). This example uses monthlyltr.sh. Also, be sure to append the path to the OCI CLI config file from step 5 in the “Setting up the OCI command line (CLI) environment section above. The default path is /home/opc/.oci/config
oci db backup create –database-id <database OCID from step 1> –display-name monthly –retention-years 5 –config-file /home/opc/.oci/config
Step 2 – create an entry in crontab with the .sh file(monthlyltr.sh) from step 1.
$ sudo crontab -e
Example for the first of the month at midnight:
0 0 1 * * <path>/monthlyltr.sh
Example for every Sunday at 11PM:
0 23 * * SUN <path>/monthlyltr.sh
Step 3 – list the current crontab entries
$ sudo crontab -l
0 0 1 * * /usr/local/bin/monthlyltr.sh
0 18 * * MON /usr/local/bin/monthlyltr.sh
Using the procedure outlined above, long-term backup operations can be scheduled. A key benefit of this approach is that long-term backups are offloaded onto the Autonomous Recovery Service, freeing up production database resources and eliminating the database costs for CPU, memory, and I/O associated with traditional full backups. This unique long-term backup offloading feature sets Autonomous Recovery Service apart from object storage backups and other market offerings. Autonomous Recovery Service also offers the following unique capabilities for protecting the Oracle Database:
- Zero data loss recovery
- Fast, low-overhead incremental-forever backups
- Continuous anomaly detection and recovery validation
- Database-integrated insights into your Oracle protection status
While this blog has focused on long-term retention backups with Autonomous Recovery Service, the OCI CLI environment is now configured on your system, which allows control of over 100 OCI services. Take advantage of the CLI’s full range of functionality by using interactive mode (oci -i), which offers auto-completion and suggestions to help you navigate the various options across OCI services.
Useful links:
Command Line Interface documentation:
https://docs.public.content.oci.oraclecloud.com/en-us/iaas/Content/API/Concepts/cliconcepts.htm
Blog – One-click compliance with Long-term Retention now available in Autonomous Recovery Service
https://blogs.oracle.com/maa/post/recovery-service-ltr
Blog – Save Half the Cost of Long-Term Retention Backups with Autonomous Recovery Service
https://blogs.oracle.com/maa/post/zrcv-ltr-half-the-cost
Autonomous Recovery Service documentation
https://docs.oracle.com/en/cloud/paas/recovery-service/dbrsu
Database Service API documentation
https://docs.oracle.com/en-us/iaas/api/#/en/database/20160918/