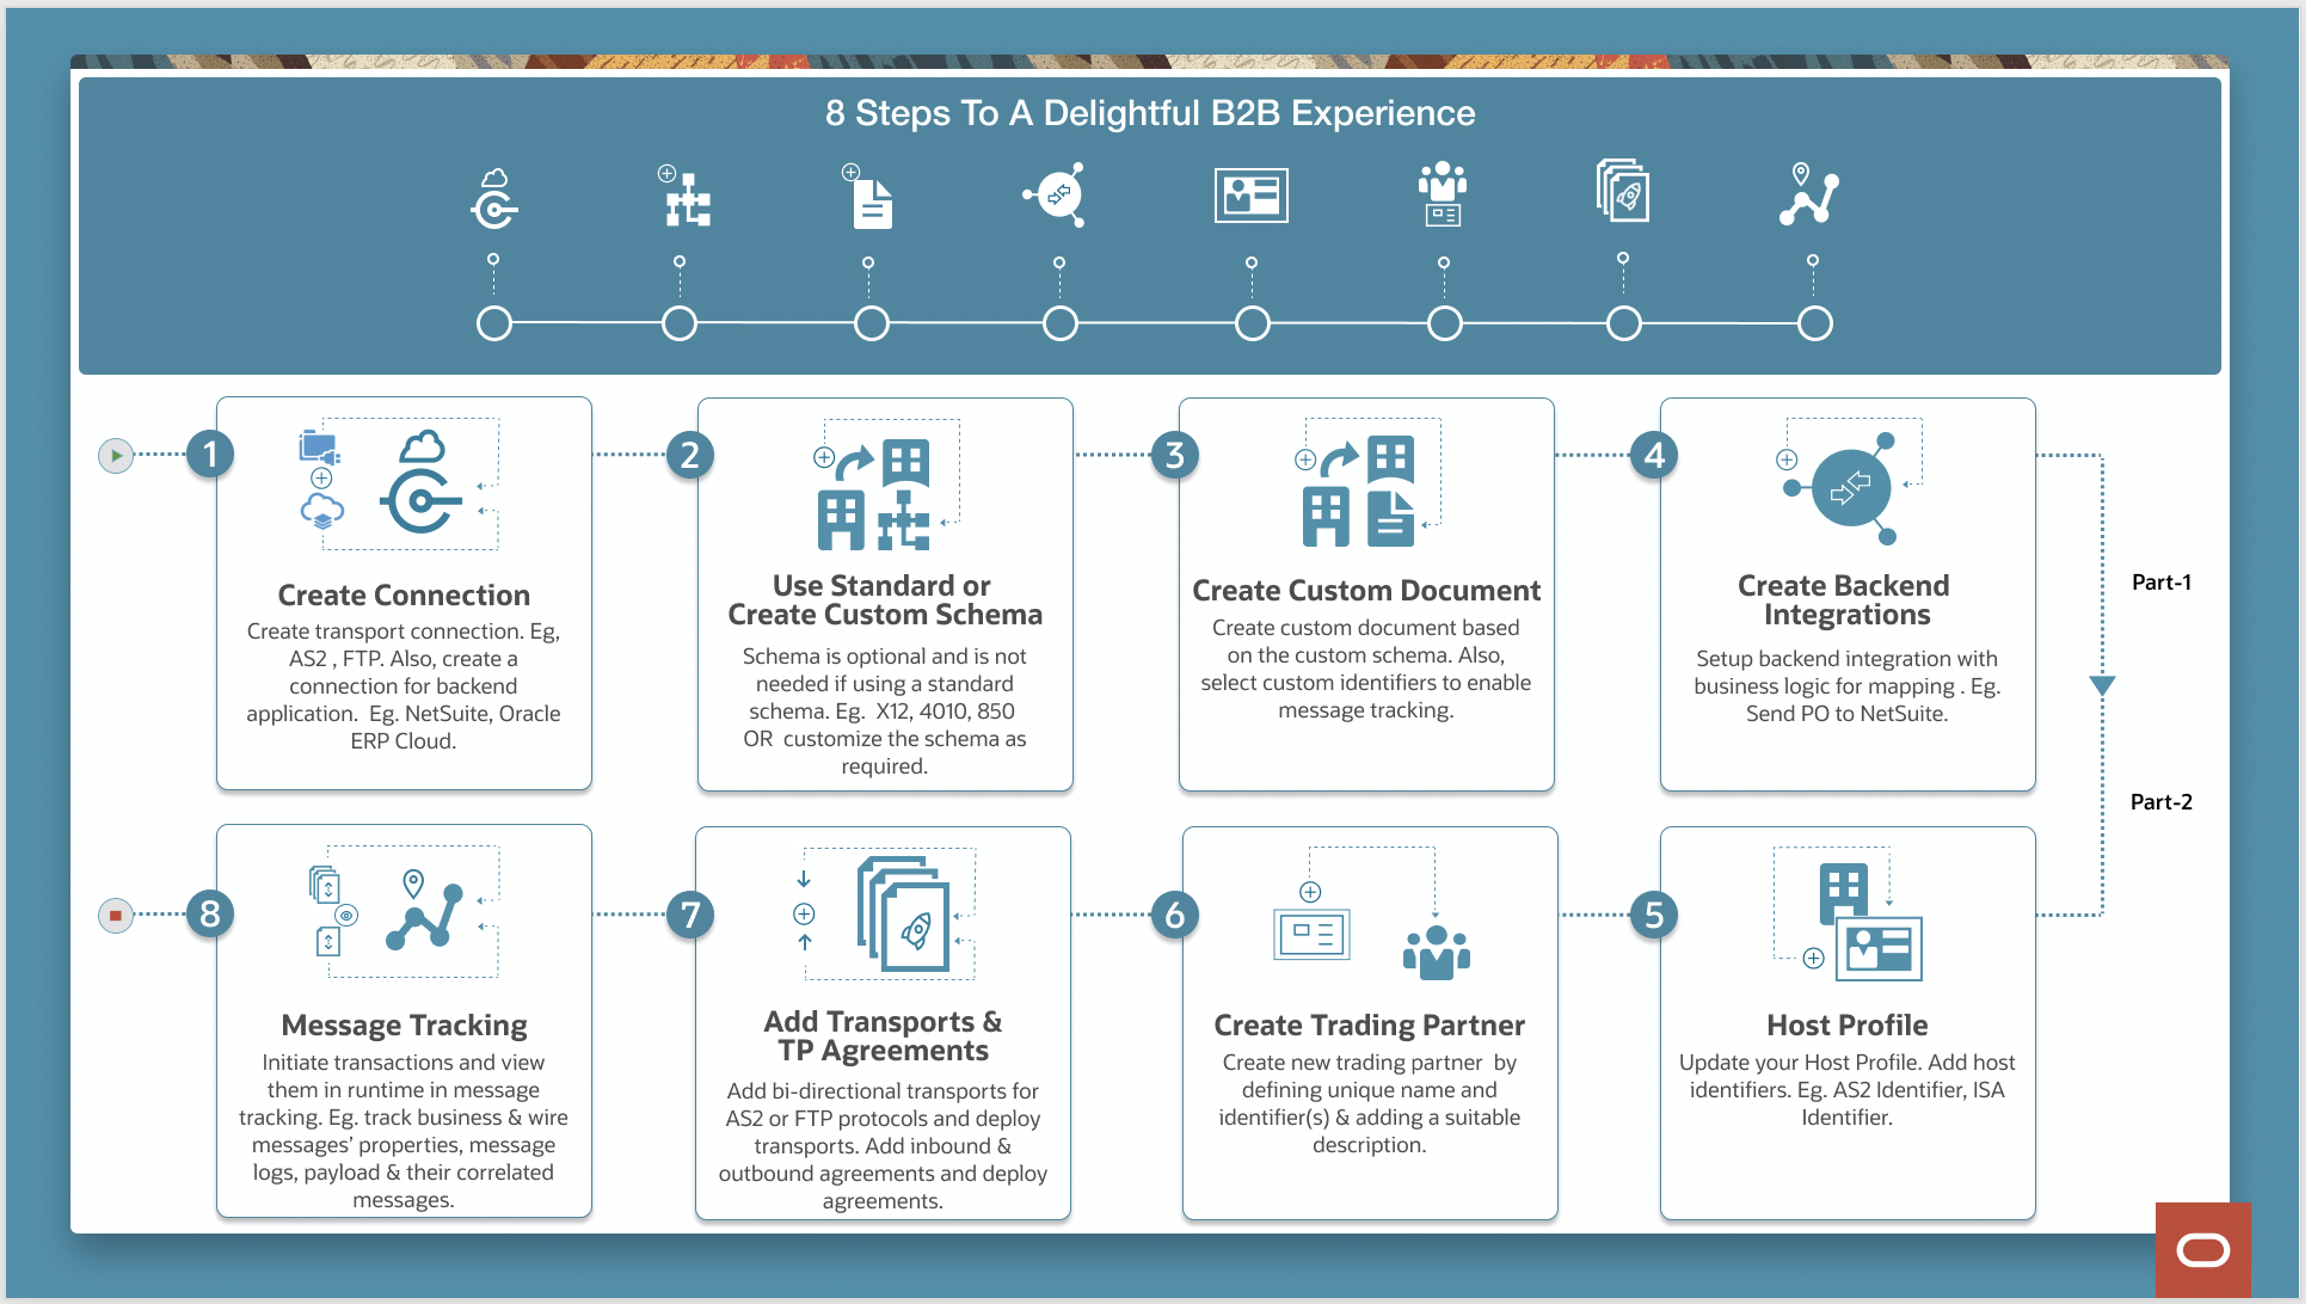
With the May release of Oracle Integration, we have introduced the ability to setup Transport Integrations within the Trading Partner Management design time experience. With this enhancement, we have also automated the creation of the base B2B integration.
This setup enables a B2B user to onboard Trading Partners on the Cloud platform without requiring to configure the Trading Partner setup via Integrations. In this blog, we will see how to achieve this.
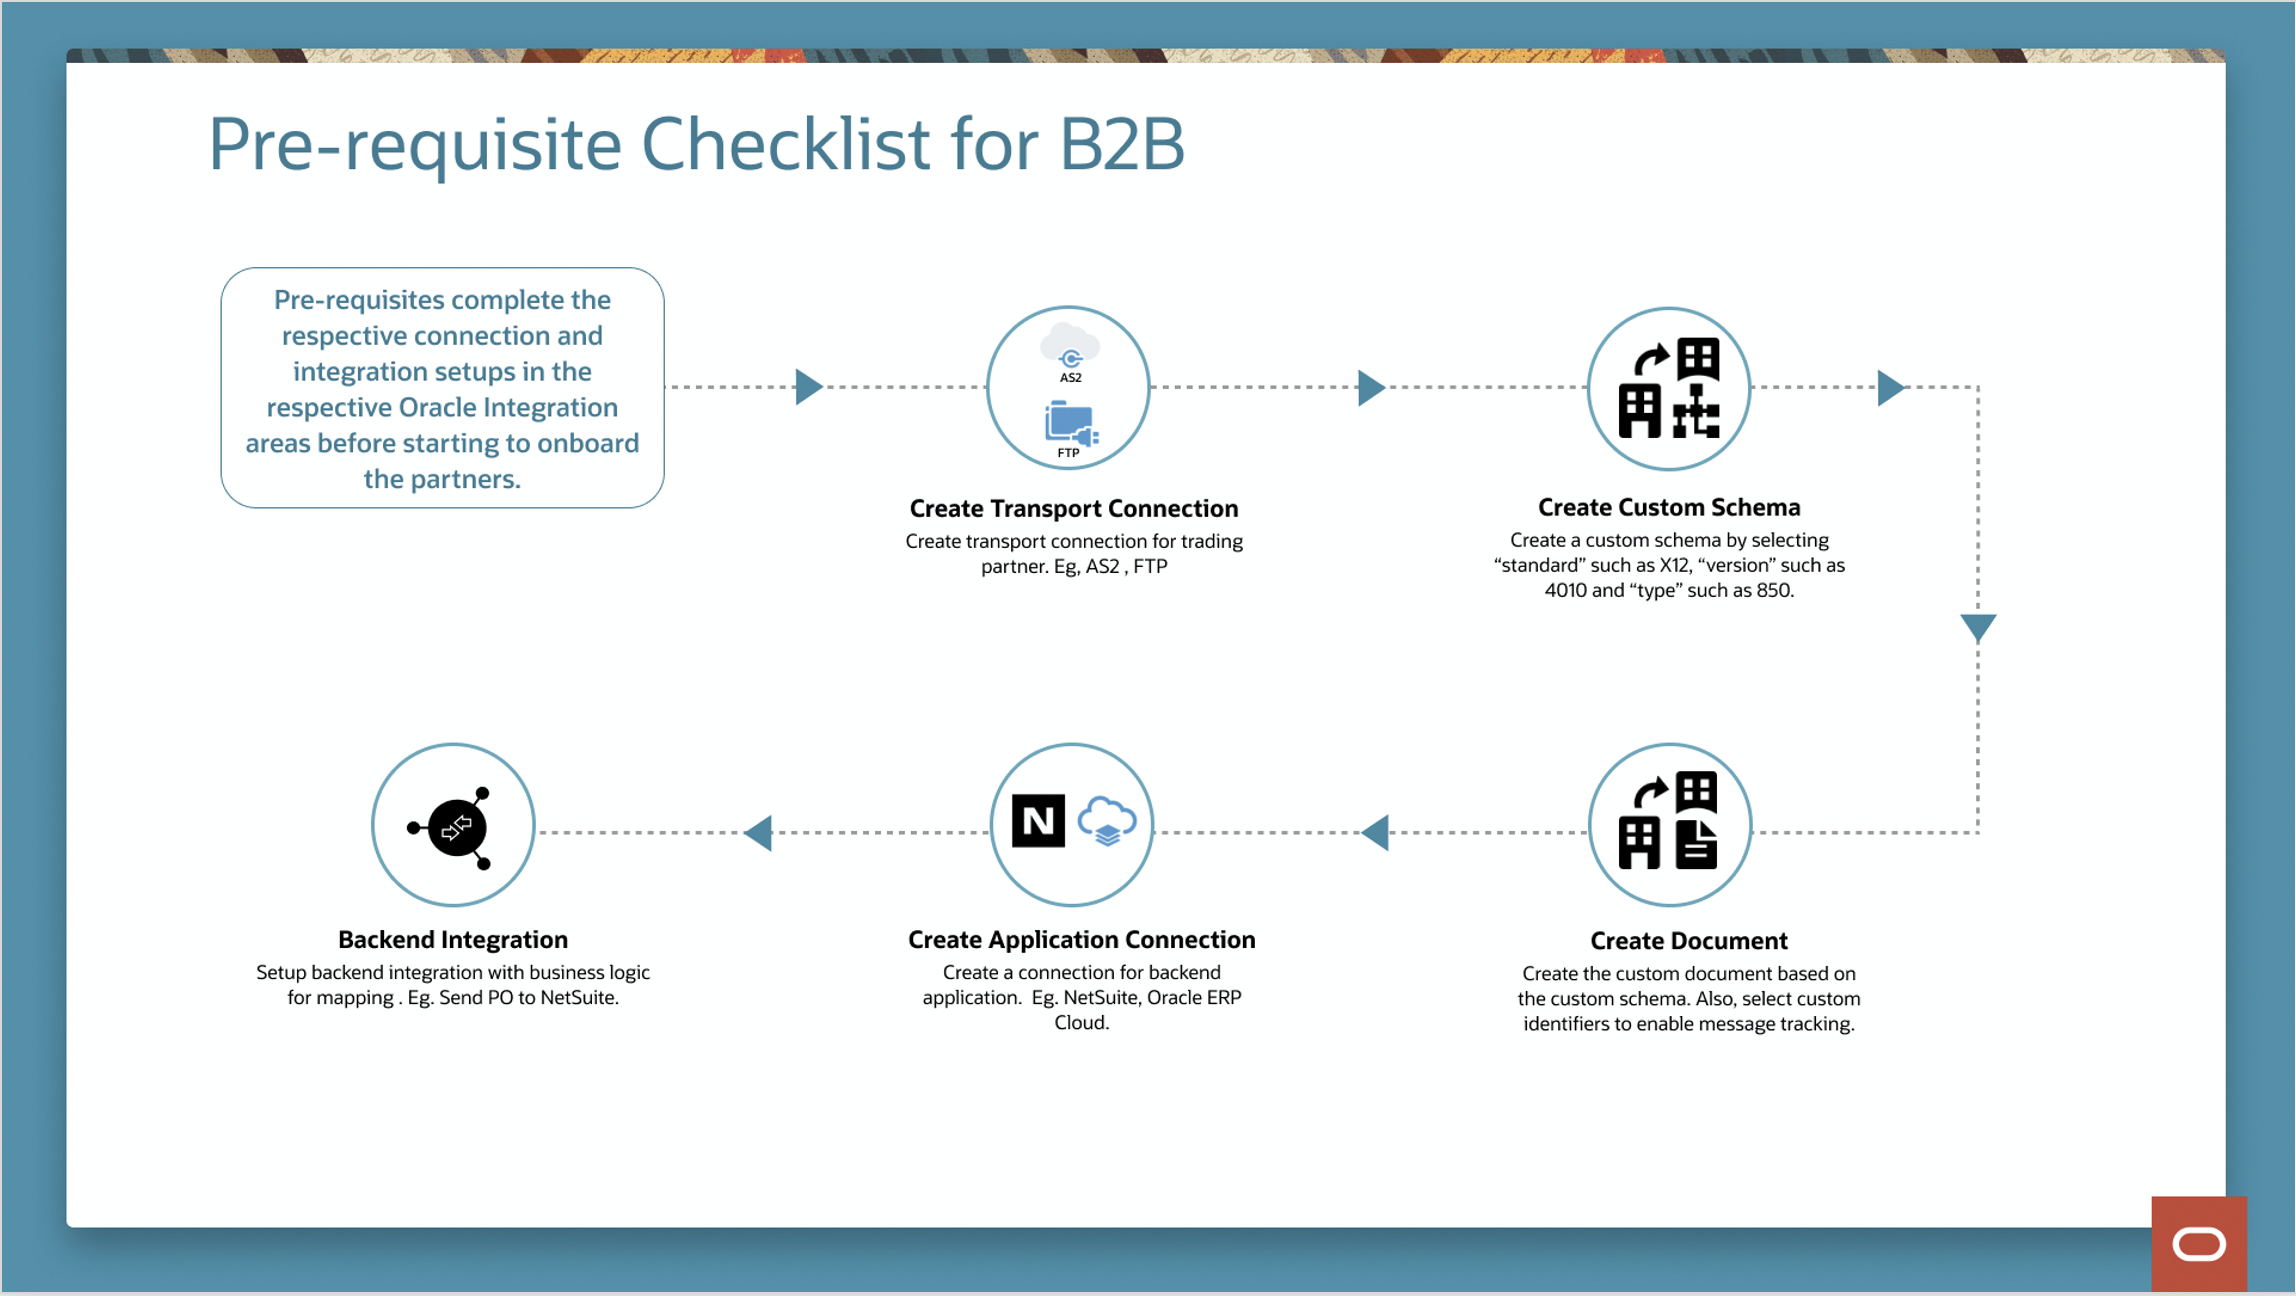
First, we will review a couple of the prerequisites to help enable this.
- First, the backend Application Integration will have to be created for the transactions you want to process in and out from the respective app you are using. You will be able use the supported Application or technical adapters to create the connection to the app and then create the integration that houses the business logic as well as the mapping. You can find more information on the supported adapters here.
- Second, before going to the Trading Partner screens you can create the Transport Connection for AS2 or FTP via the connections page as well as the document that you want to process via the Documents screen. Optionally, you can customize your schema as well to be used within the Documents.
With this blog, we will cover the new ‘Transport’ setup screens. You can read more about the overall setup in this blog which covers the Trading Partner Management feature.
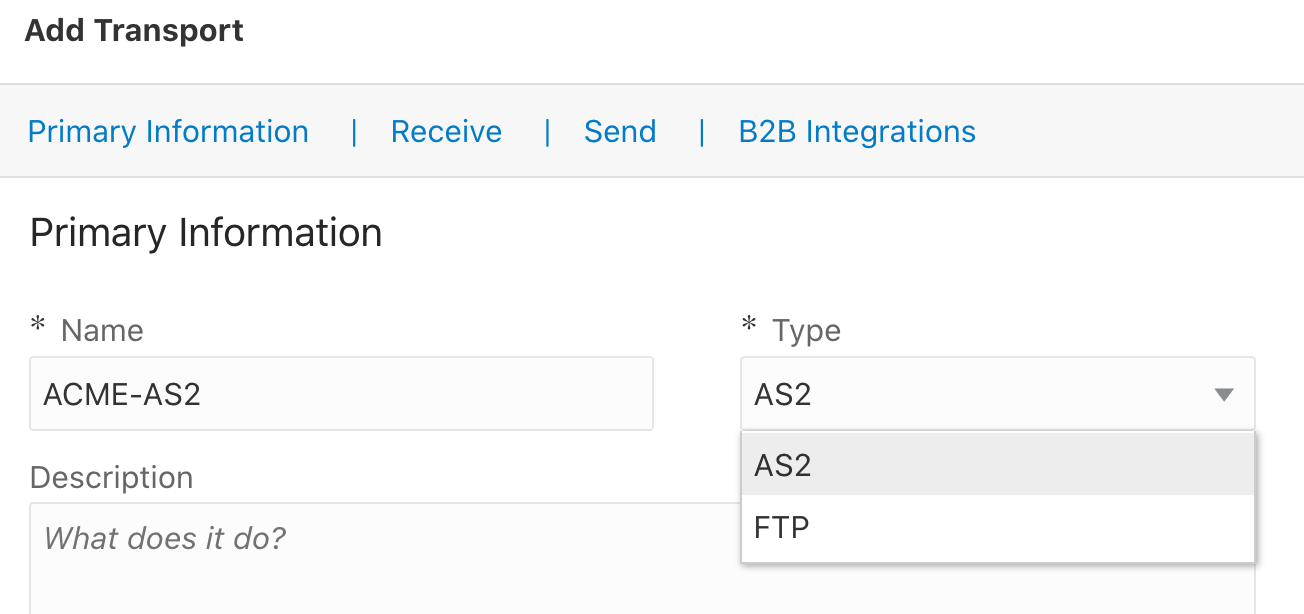
Now, you will be able to add and configure the Transport level properties for your B2B Integrations for AS2 and FTP type transports (once you have created the respective connections)

Once you add the transport, you can setup various configurations including the Primary information such as the name, properties for the receive and send directions and you can also see the B2B Integrations that are automatically created once you save your configuration.
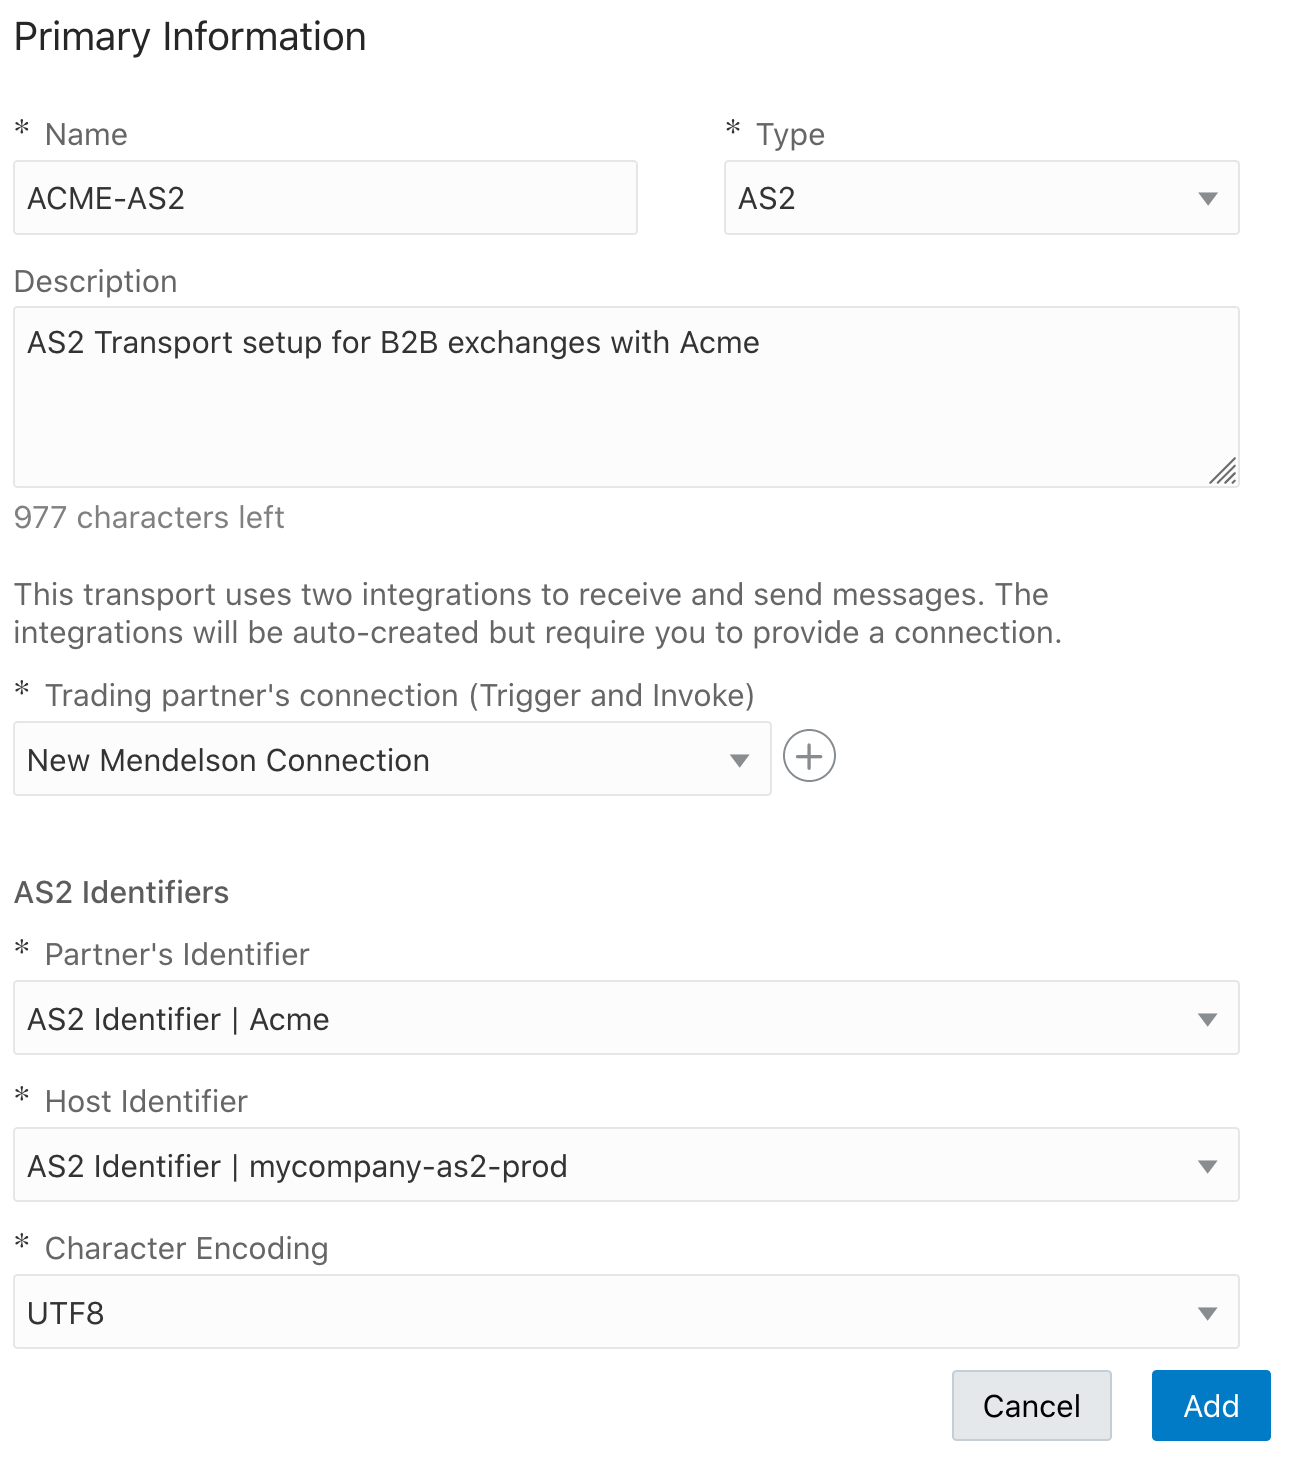
Let’s review each of the areas starting with the ‘Primary Information’. You will be able to name, select the connection you want to use as well as the partner and host identifiers to be used with this and the character encoding details. This information will be used by the integrations while processing the transactions that are sent or received.
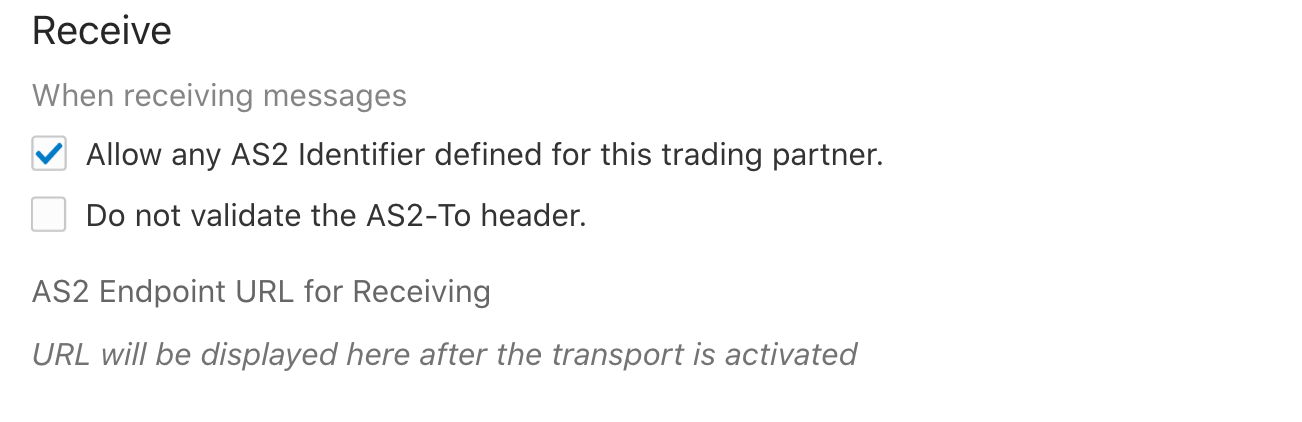
The Receive configuration enables setup of the Receive settings while processing incoming AS2 Transactions for this partner. Note that the AS2 endpoint is still not created currently and the AS2 URL you can use with your Trading Partner will be generated once you add the Transport.
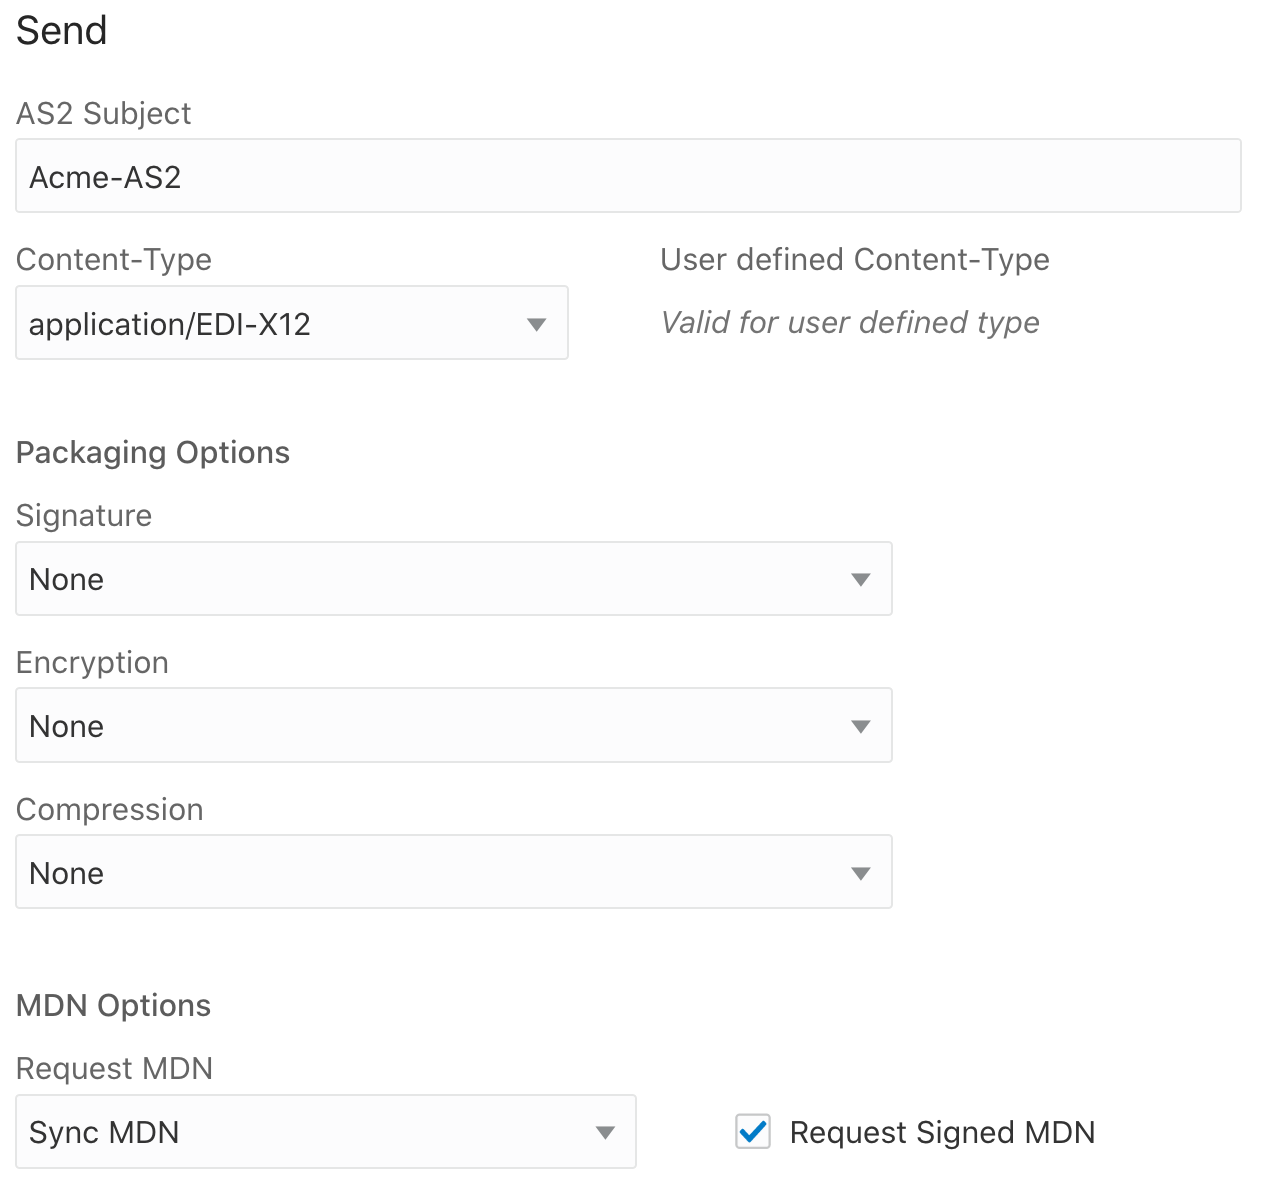
The Send configuration enables you to configure the details required for send or the outgoing transactions with your Trading Partner. This includes AS2 properties such as Subject and content type, Packaging options for signing and encryption as well as the MDN properties.
Finally, the B2B Integrations is where you can provide the Prefix you want to use for your B2B Integrations. With this release, we will automatically create your inbound and/or outbound B2B Integrations for AS2 and FTP.
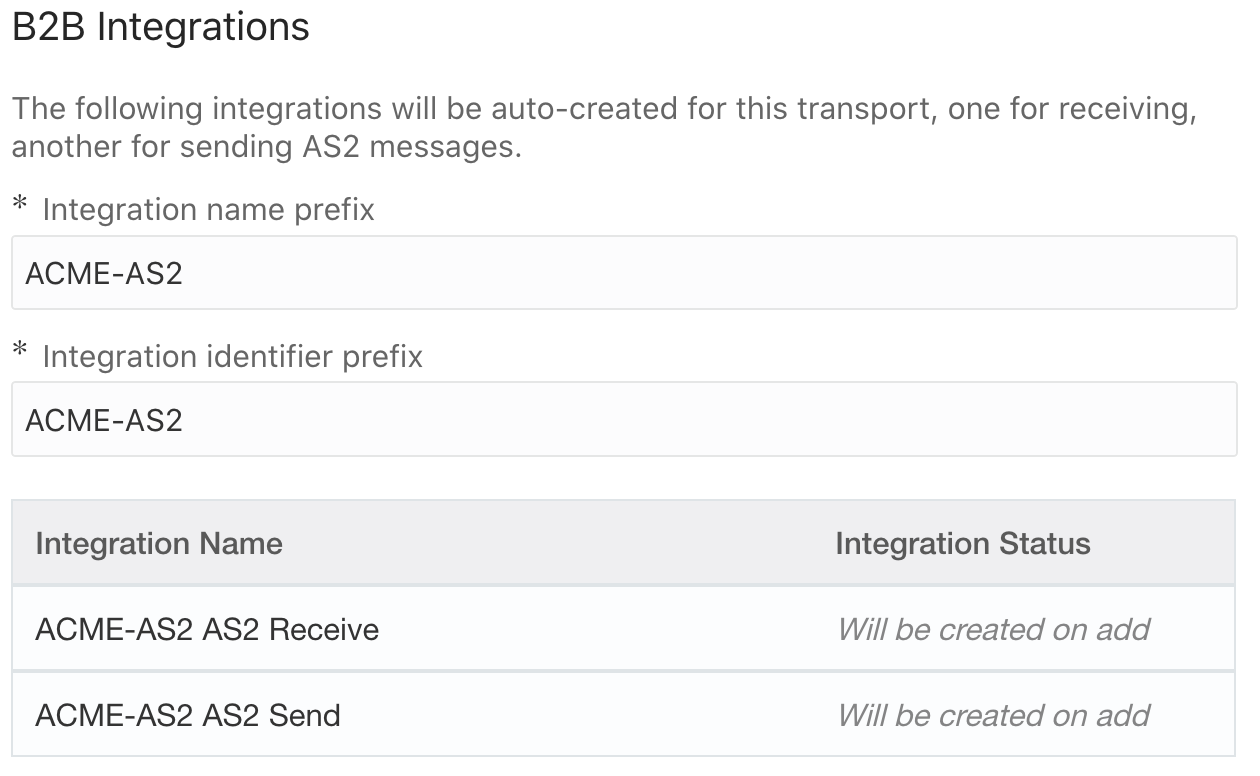
Here are the base B2B Integrations we created when the AS2 Transport was added for ACME. Integrations will be created by Trading Partner and Transport type which means that you can customize the Integration flow if you need to from the base template we provide.

Finally, you can deploy the Transport once the configurations are completed. When you deploy, your Integrations will be activated and the Transport will be deployed for processing runtime transactions. Once you create and deploy your agreements then you can manage all transactions from the B2B Tracking UIs.

In Summary, we have simplified the steps required by a B2B User to onboard a Trading Partner. Once your Integration developer has created the backend Application Integrations then with the Transport and agreement deployments your Trading Partner onboarding can be completely done within the Trading Partner Management UIs without requiring the users to create or manage Integrations, unless otherwise required, enabling full support for B2B users for Design time activities.