
We are excited to announce the general availability of Decision Applications in OCI Process Automation (OPA) with the 23.12 release.
Decision Applications or External Decisions (a name that will be used interchangeably from now on) provide a focused user experience for creating decision models and exposing them as reusable decision services. A focused user experience means that these applications contain features only related to building decision models and exposing them as APIs; as such, these applications do not contain features that you would find in a Process Application (e.g., the ability to define roles, connectors, processes, forms, etc). In addition to the user experience, Decision Applications are focused on providing reusable decision services that can be leveraged from other process applications or by external clients.
Local Decisions (decisions that you will find inside a Process Applications today) will continue to play an important role going forward and serve use cases where you need to use a single decision model in a process application. Local Decisions are not reusable and are deployed and versioned as part of their process application container.
Use Cases for Externalized Decisions
Let’s take a quick look at why this new application type is important and the use cases it can address.
Consume Decision Services from External Clients
First and foremost, External Decisions are aimed at meeting the needs of customers who have requirements to call Decision Services directly from 3rd party clients. These clients can be Oracle Integration, Visual Builder, or any other application that can call a RESTful webservice. The value proposition here is that OPA provides the ability to create reusable decision services, modeled based on industry standards, and expose these business rules via an easily consumable synchronous REST API.
Re-use Decision services across Process Applications
External Decisions are intended to be re-usable assets that can not only be leveraged by external clients but also by your OPA process applications. As such it is important to know that if you have a decision service that needs to be used by more than one process application, it is best to model it via a Decision Application. Doing so would ensure that all relevant process applications can discover and consume your decision service.
Call multiple decision services from the same Process Application
Process Applications today have the ability to create a single decision model that is local to their application container (we refer to these as local decisions). With the introduction of External Decisions, you can now call multiple decision services with their own isolated and self-contained model from the same process application. This means that you can now create modular decision services that are independent and self-contained.
More control of decision deployment
Decision Applications have their own deployment and version life cycle, so you now have much more control of their deployment process.
In practical terms, this means that you can:
- Make decision service changes without needing to redeploy the process applications that call them.
- Run multiple versions of a decision service, where each version supports one or more clients that can migrate to the latest version in their own time.
Using Externalized Decisions
Now that we know what External Decisions are and the value they can bring let’s take a look at how you can use them.
Design Experience:
Creating a Decision Application is super easy. The new create menu on the designer home page will now ask you to choose which type of application you want to create:
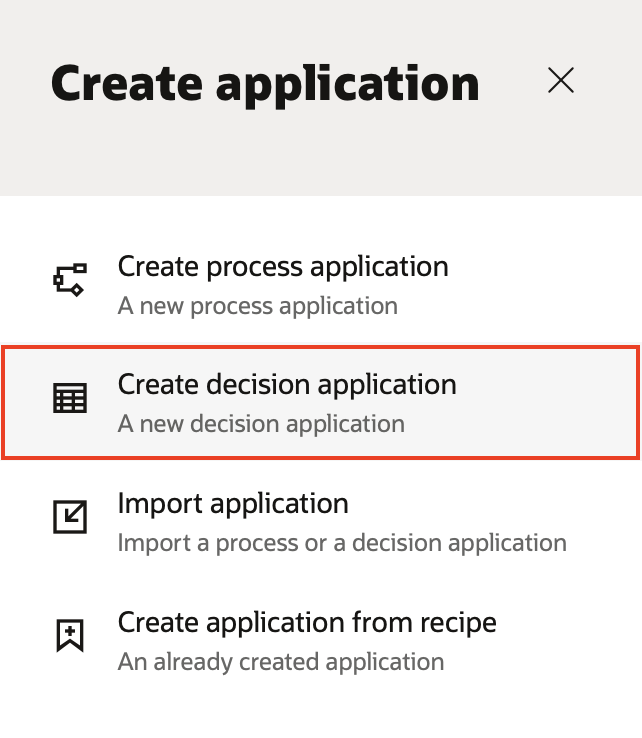
Selecting a Decision Application here will prompt you to enter a name and description for the new application. After creating the application, you will be presented with the modeling canvas for decisions. As you can see from the below image, this experience is solely focused on allowing you to design and publish decision services:
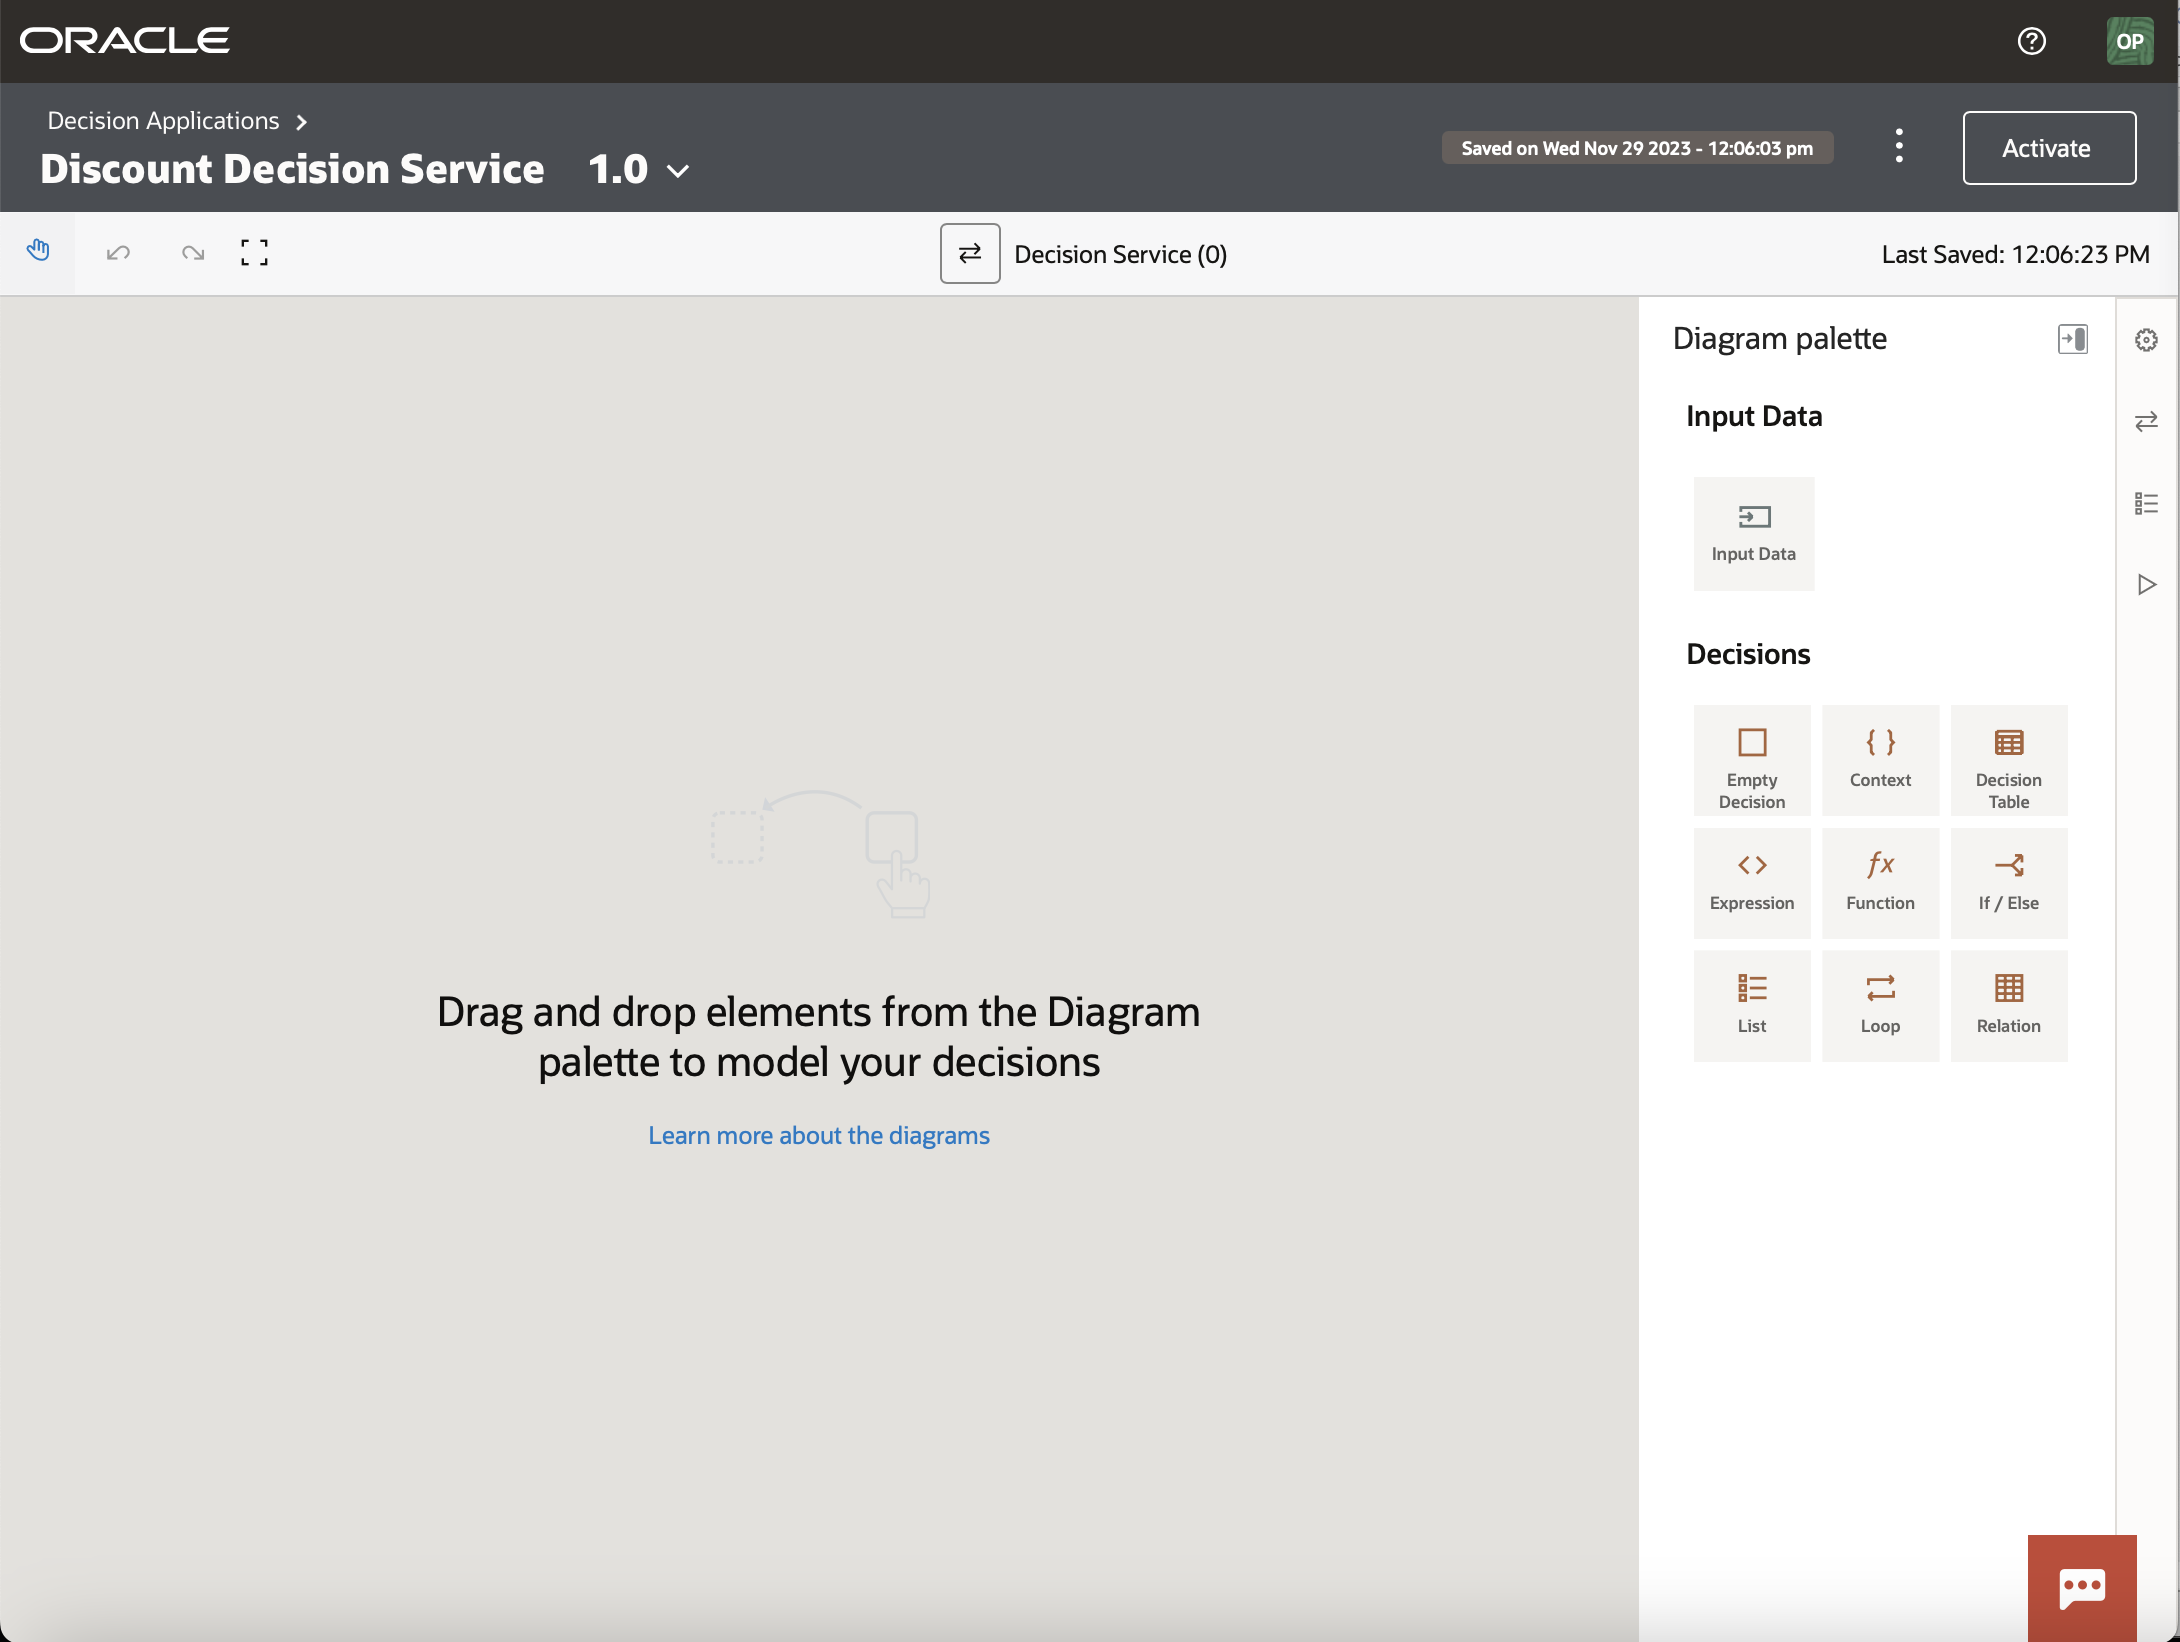
At this point, you can model your decision service as needed, adding Decision elements from the palette to implement decision tables, loops, functions, if-else conditions, etc. Once your service is ready, you can activate it by clicking on the Activate button in the top right-hand corner, which will bring up the following draw: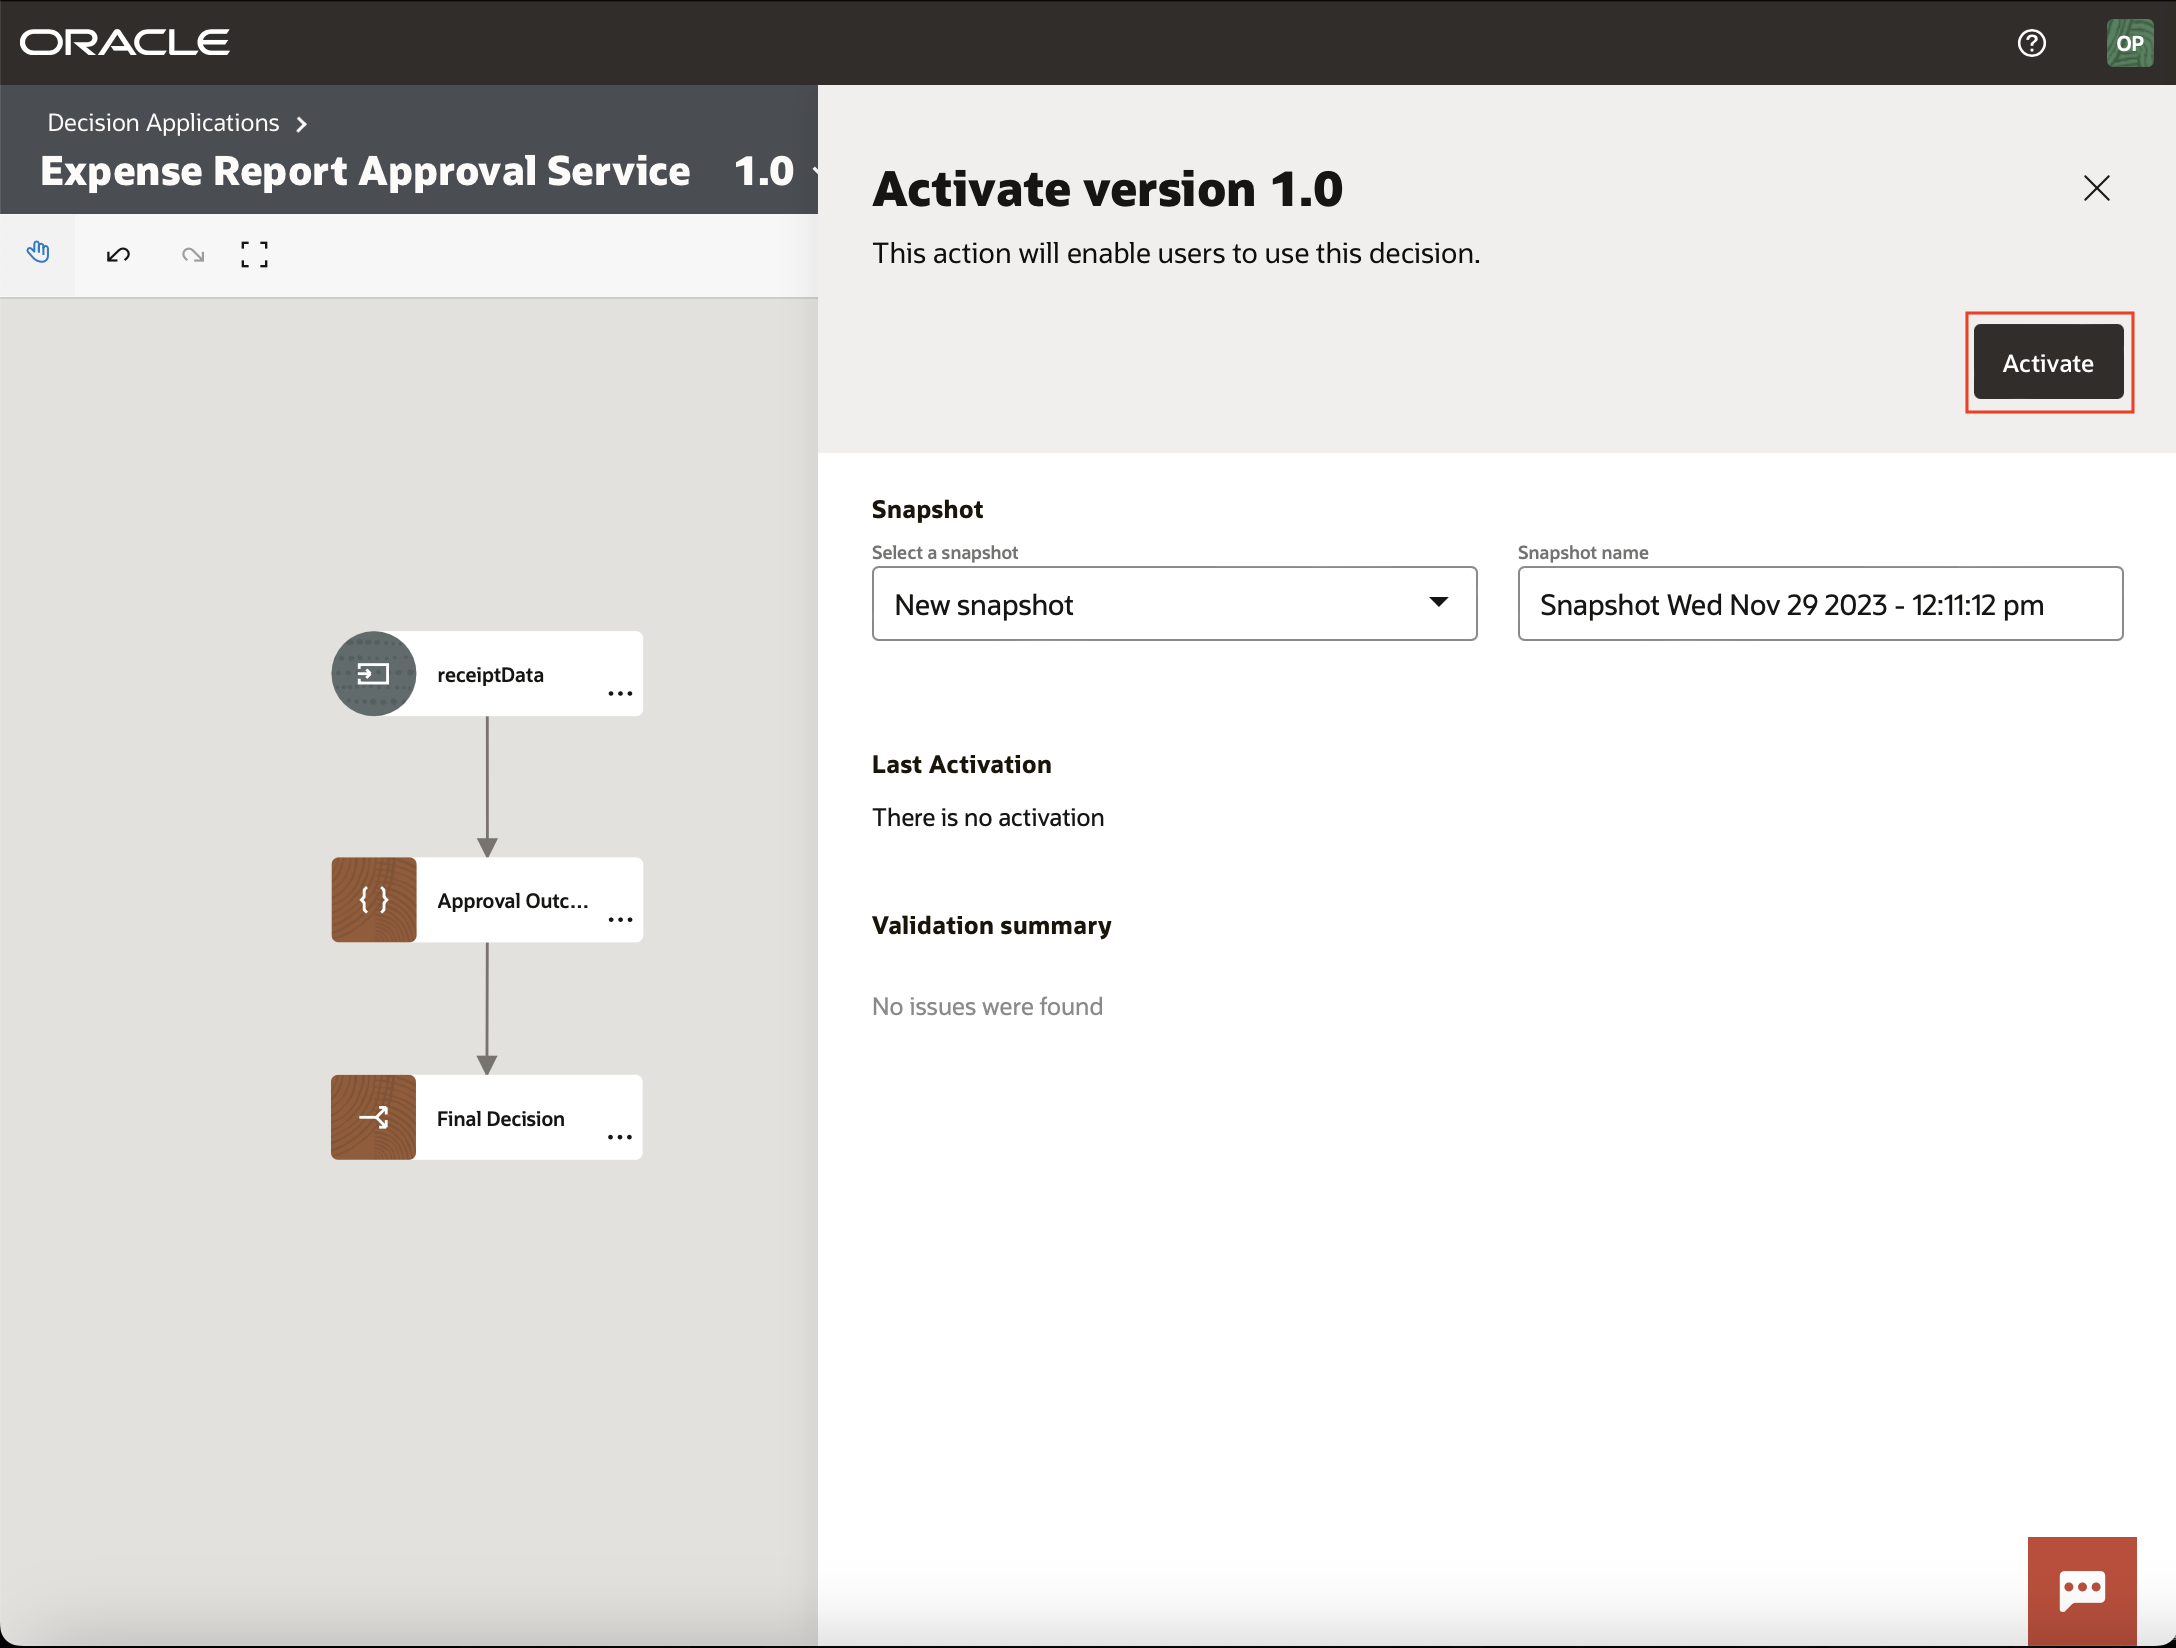
Here, you will need to click Activate again to deploy your service. If your Service is already active, you will see a Deactivate button instead. If you want to make changes to an existing version of the service, you will need to deactivate and activate it again for those changes to take effect. Note that while a decision service is deactivated, your decision API will be unreachable. To prevent interruptions to existing clients, you can create a new version of your decision service through which you can introduce new business logic and bug fixes.
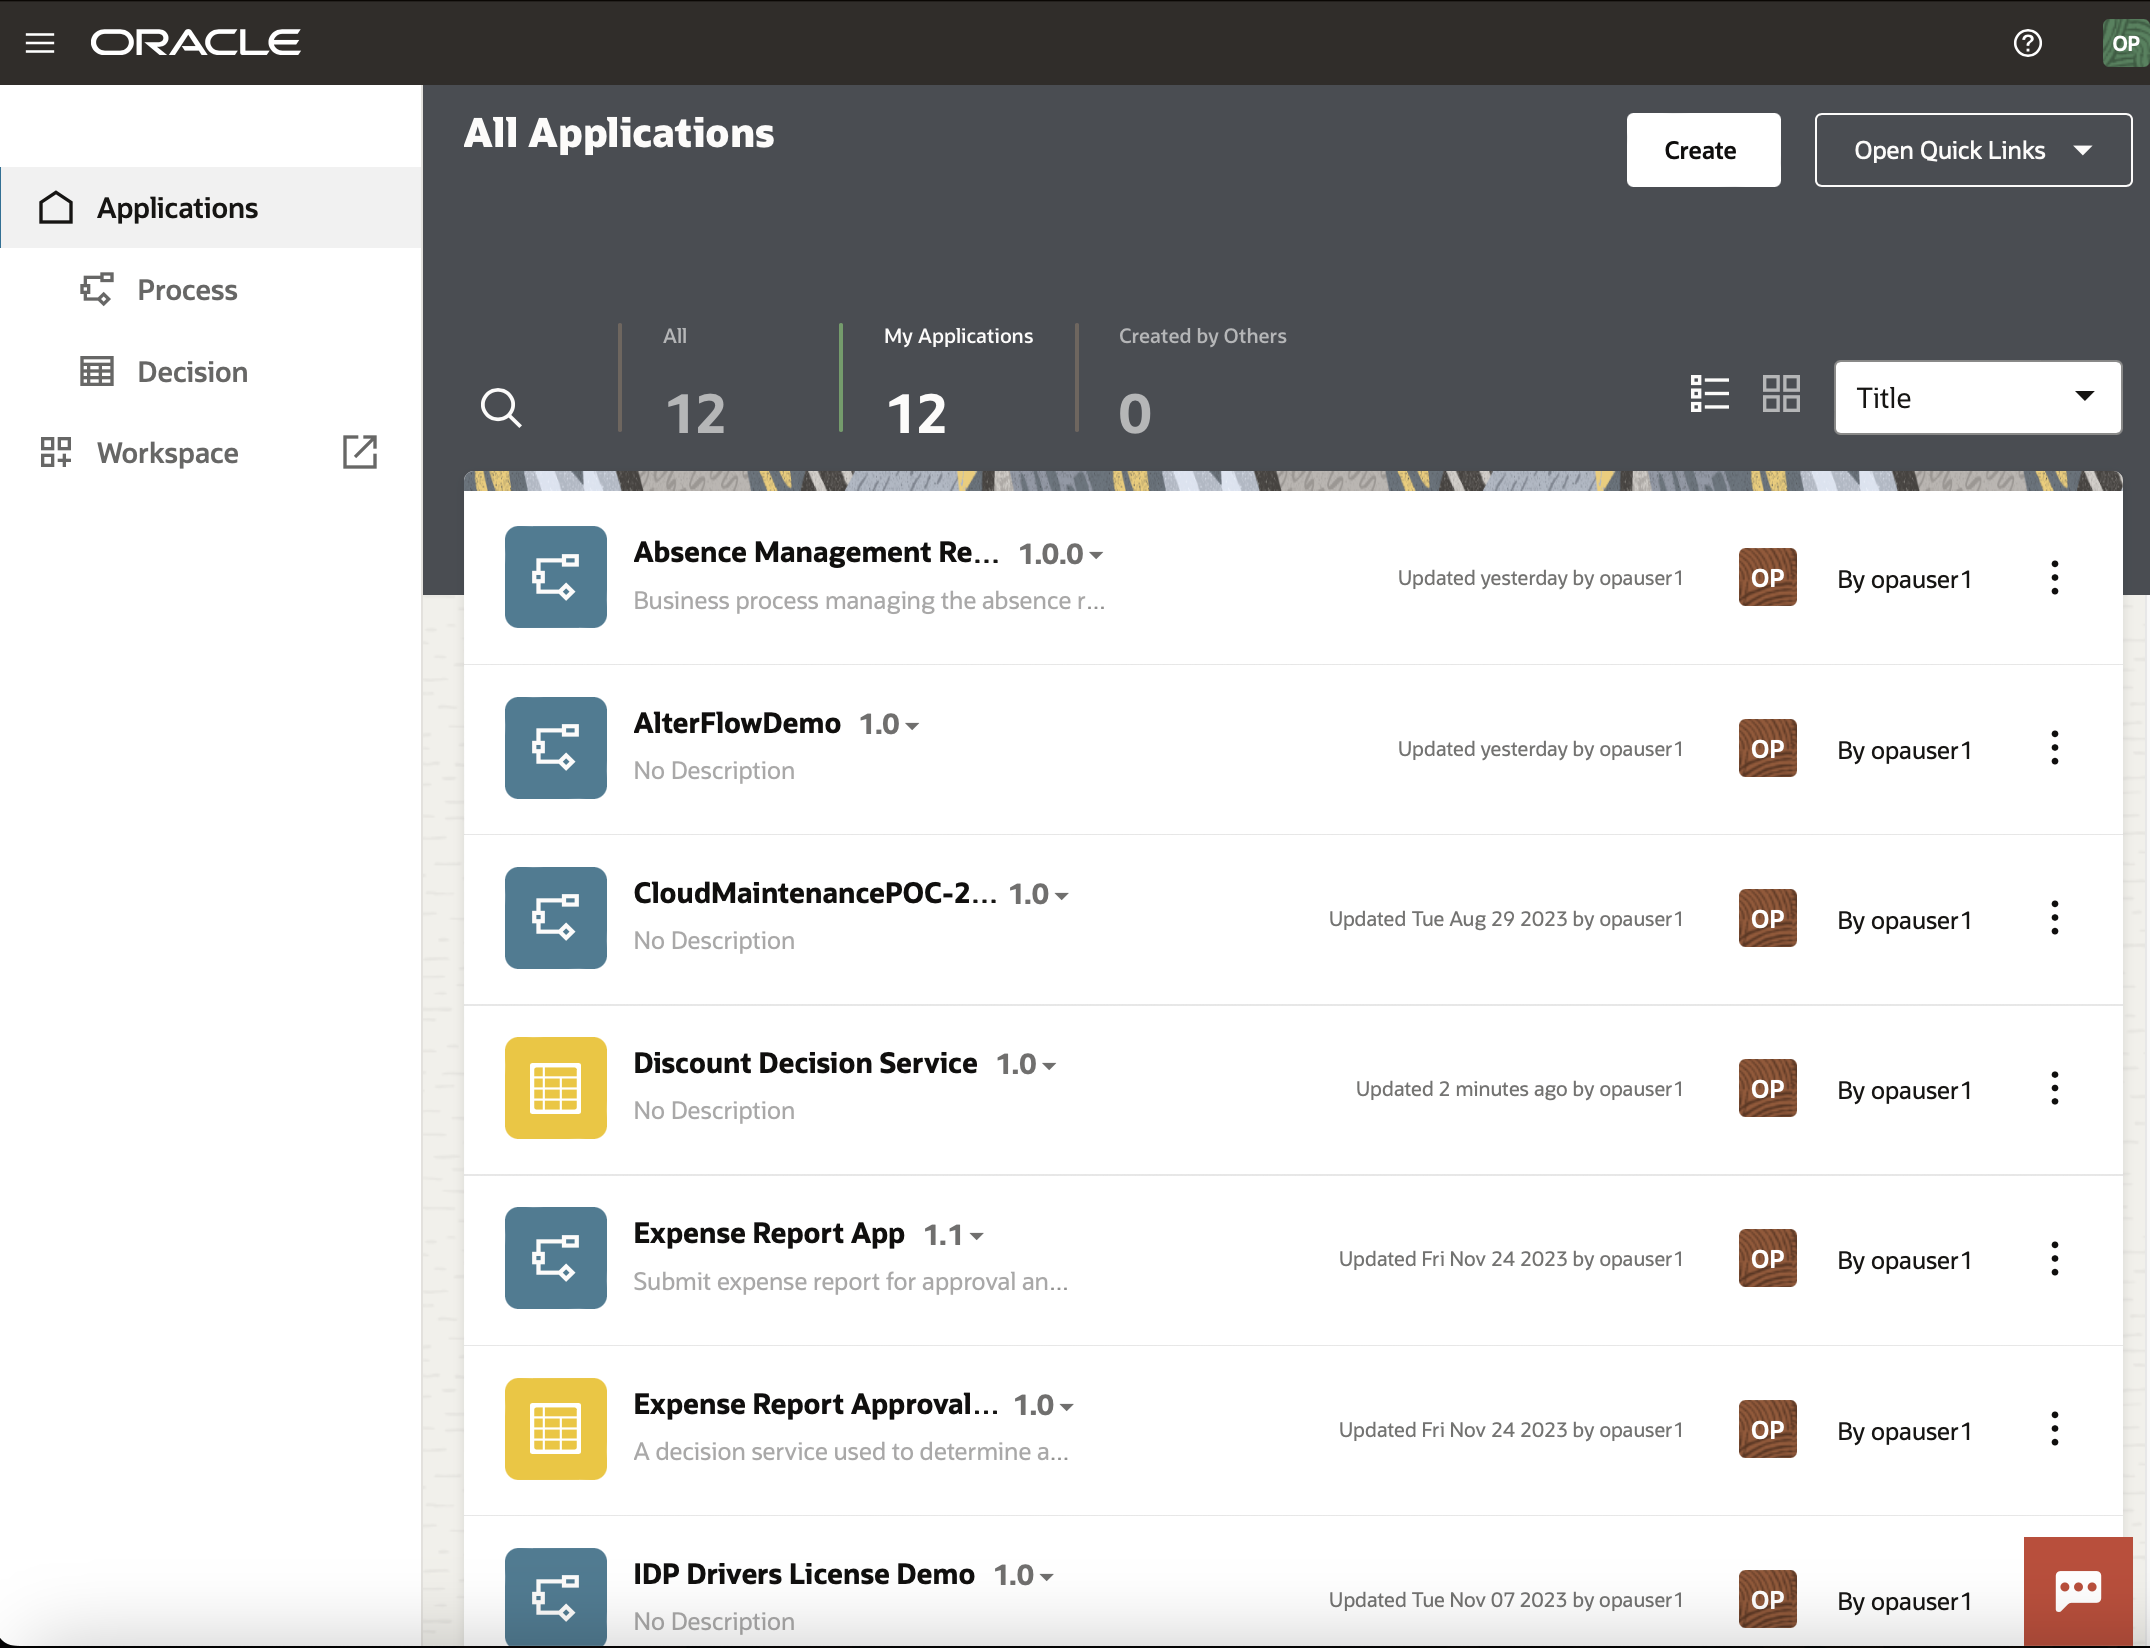
Once you start creating Decision Applications, you will see them appear in the design time home screen. You can filter between process and decision applications via the left-hand menu, if needed as the default view will now show both:
Once an External Decision is created and activated, you will want to call it from other process applications or external clients. Let’s now take a look at this experience.
Call from a Process App
If you would like to call an External Decision from a Process Application, click Add on the component menu and select Decisions > External Decision. Doing so would list all activated decision services that you can choose from:
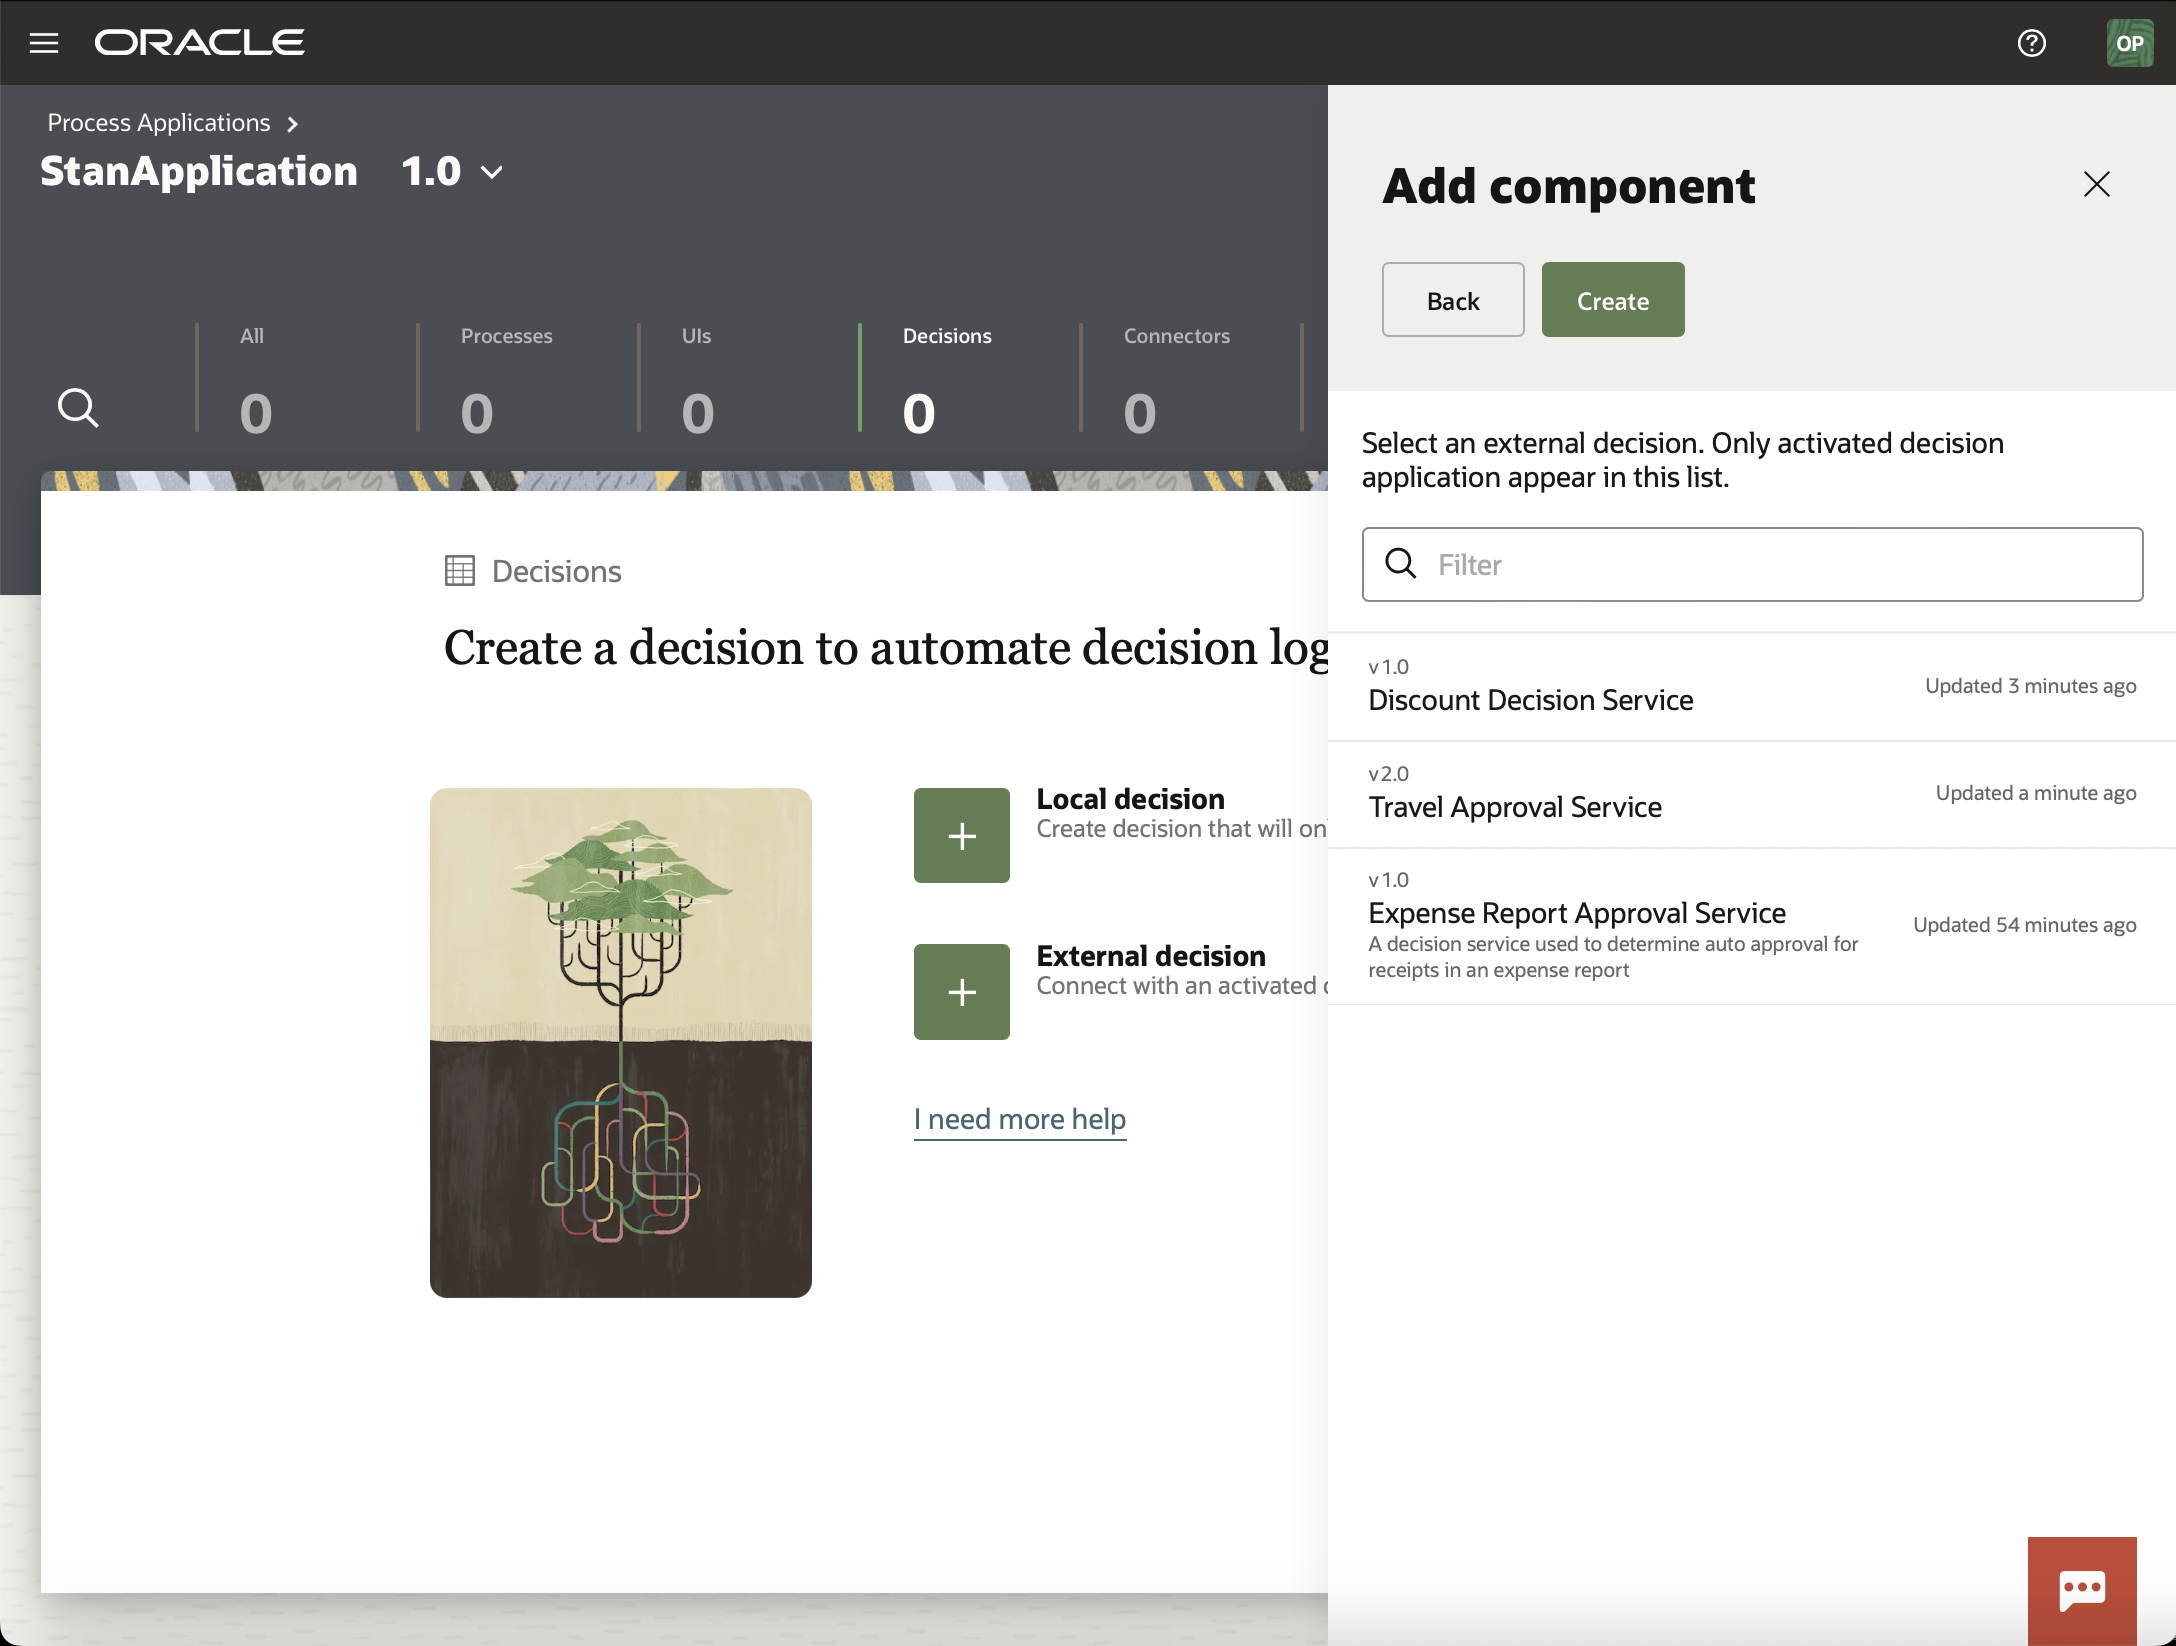
Selecting a decision service will create a reference to that decision in your process application and generate the metadata needed to call this service from your processes:
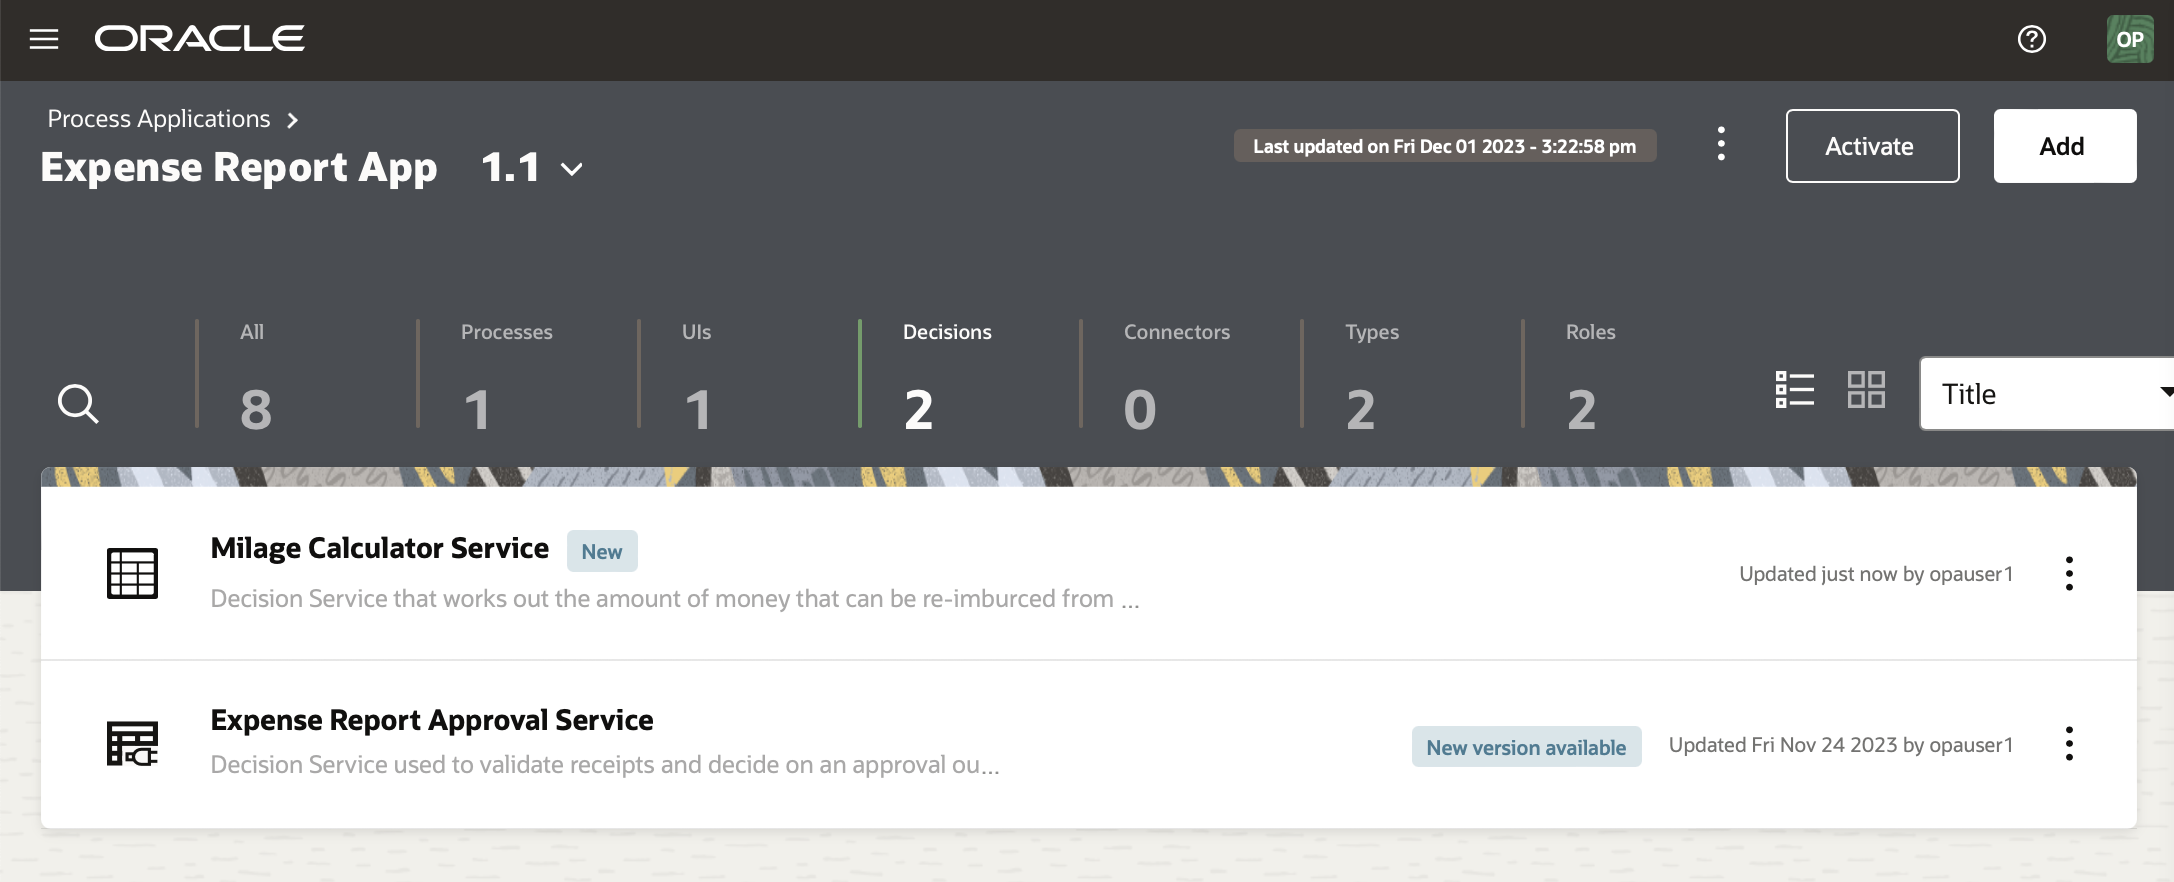
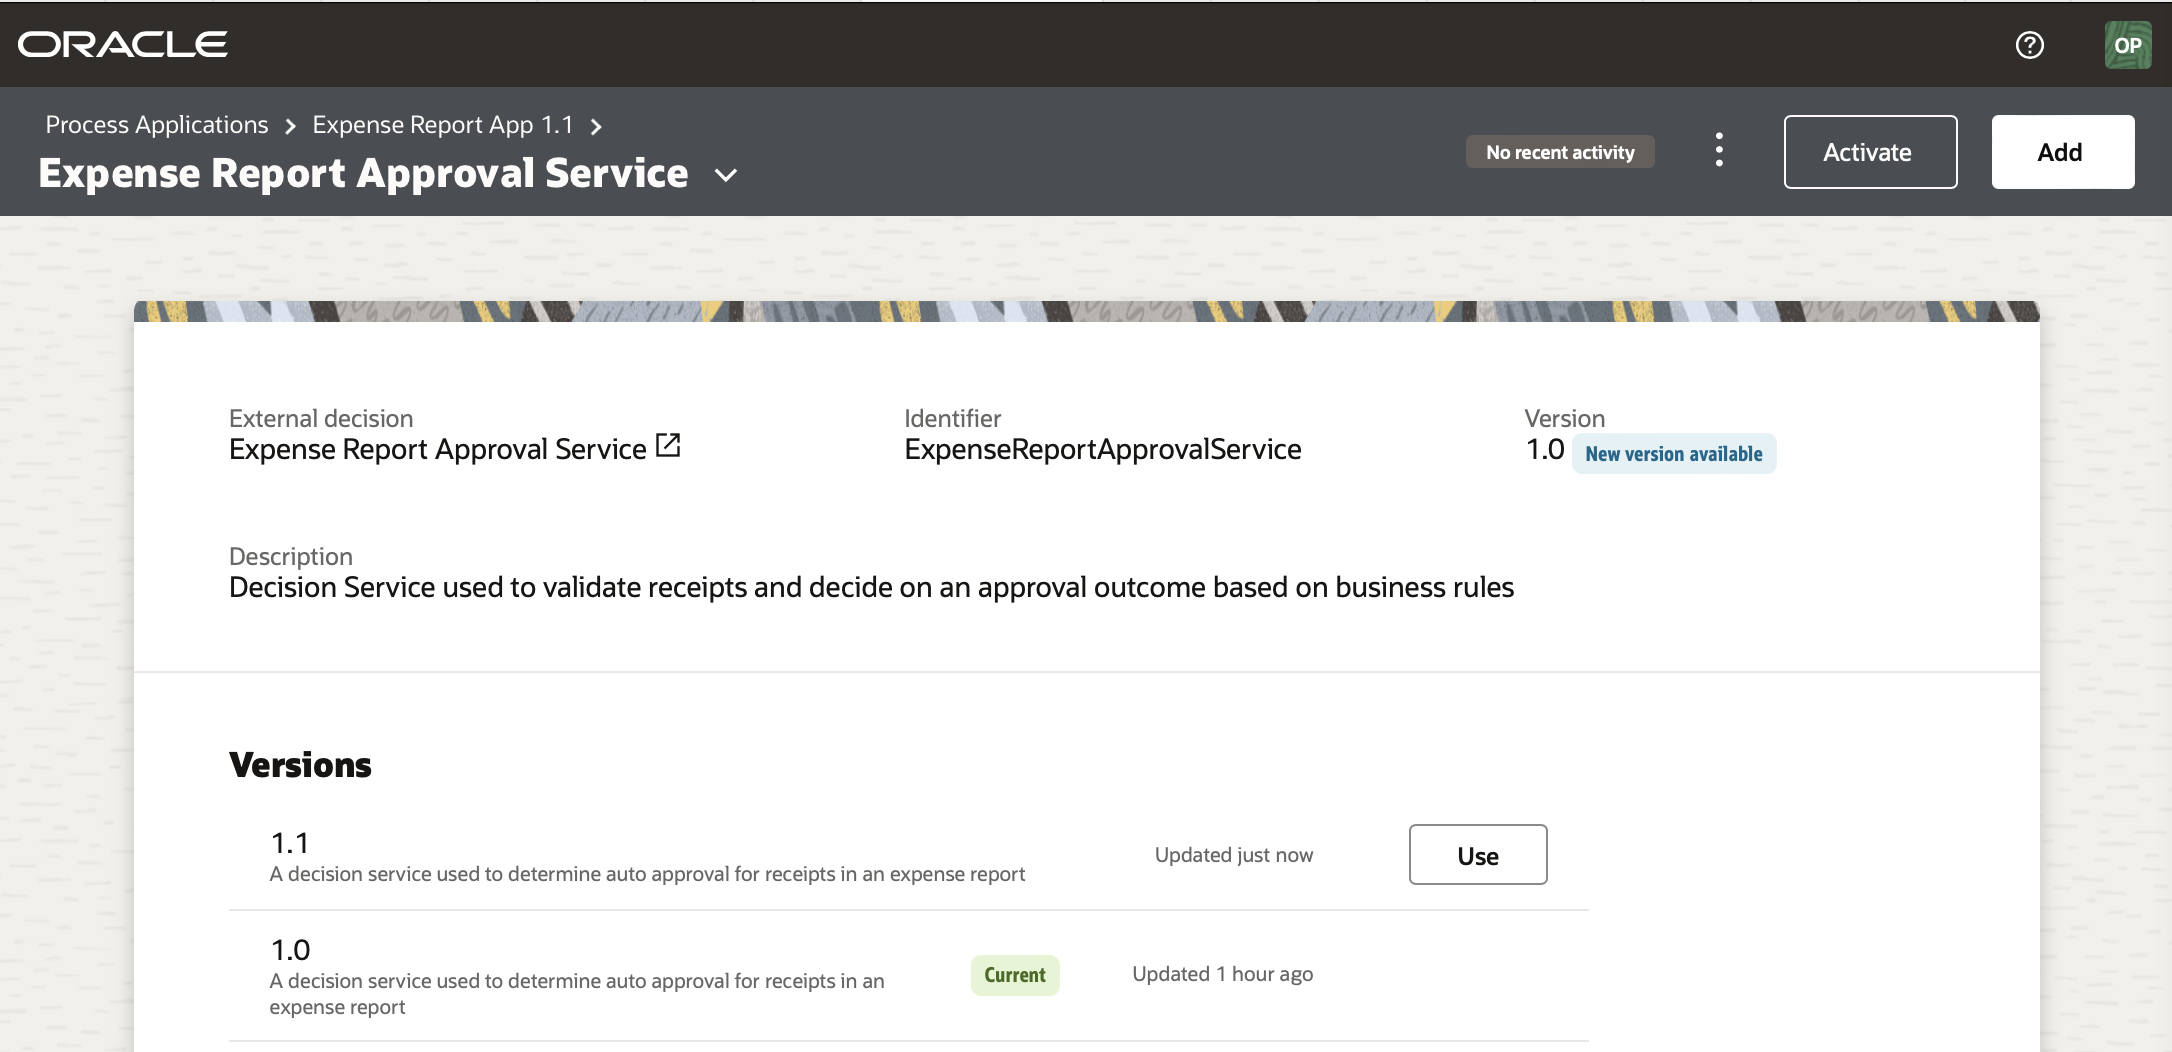
Here, you can see that we have a new icon that distinguishes External Decisions from Local Decisions (A decision table that depicts External Decisions is shown with a power adapter). If you pay close attention, you will also notice a badge that indicates if any changes have been made to the External Decision service. For instance, if I create a new version of an External Decision, then the Process Application Developer can see that a new version has been published, read my version comment, and choose to adopt the change at an appropriate time.
When calling a Decision Service from a process, you find External Decision in the Activity Menu alongside any Local decisions you may have. Simply drag and drop the Decision Service you want into your process flow:
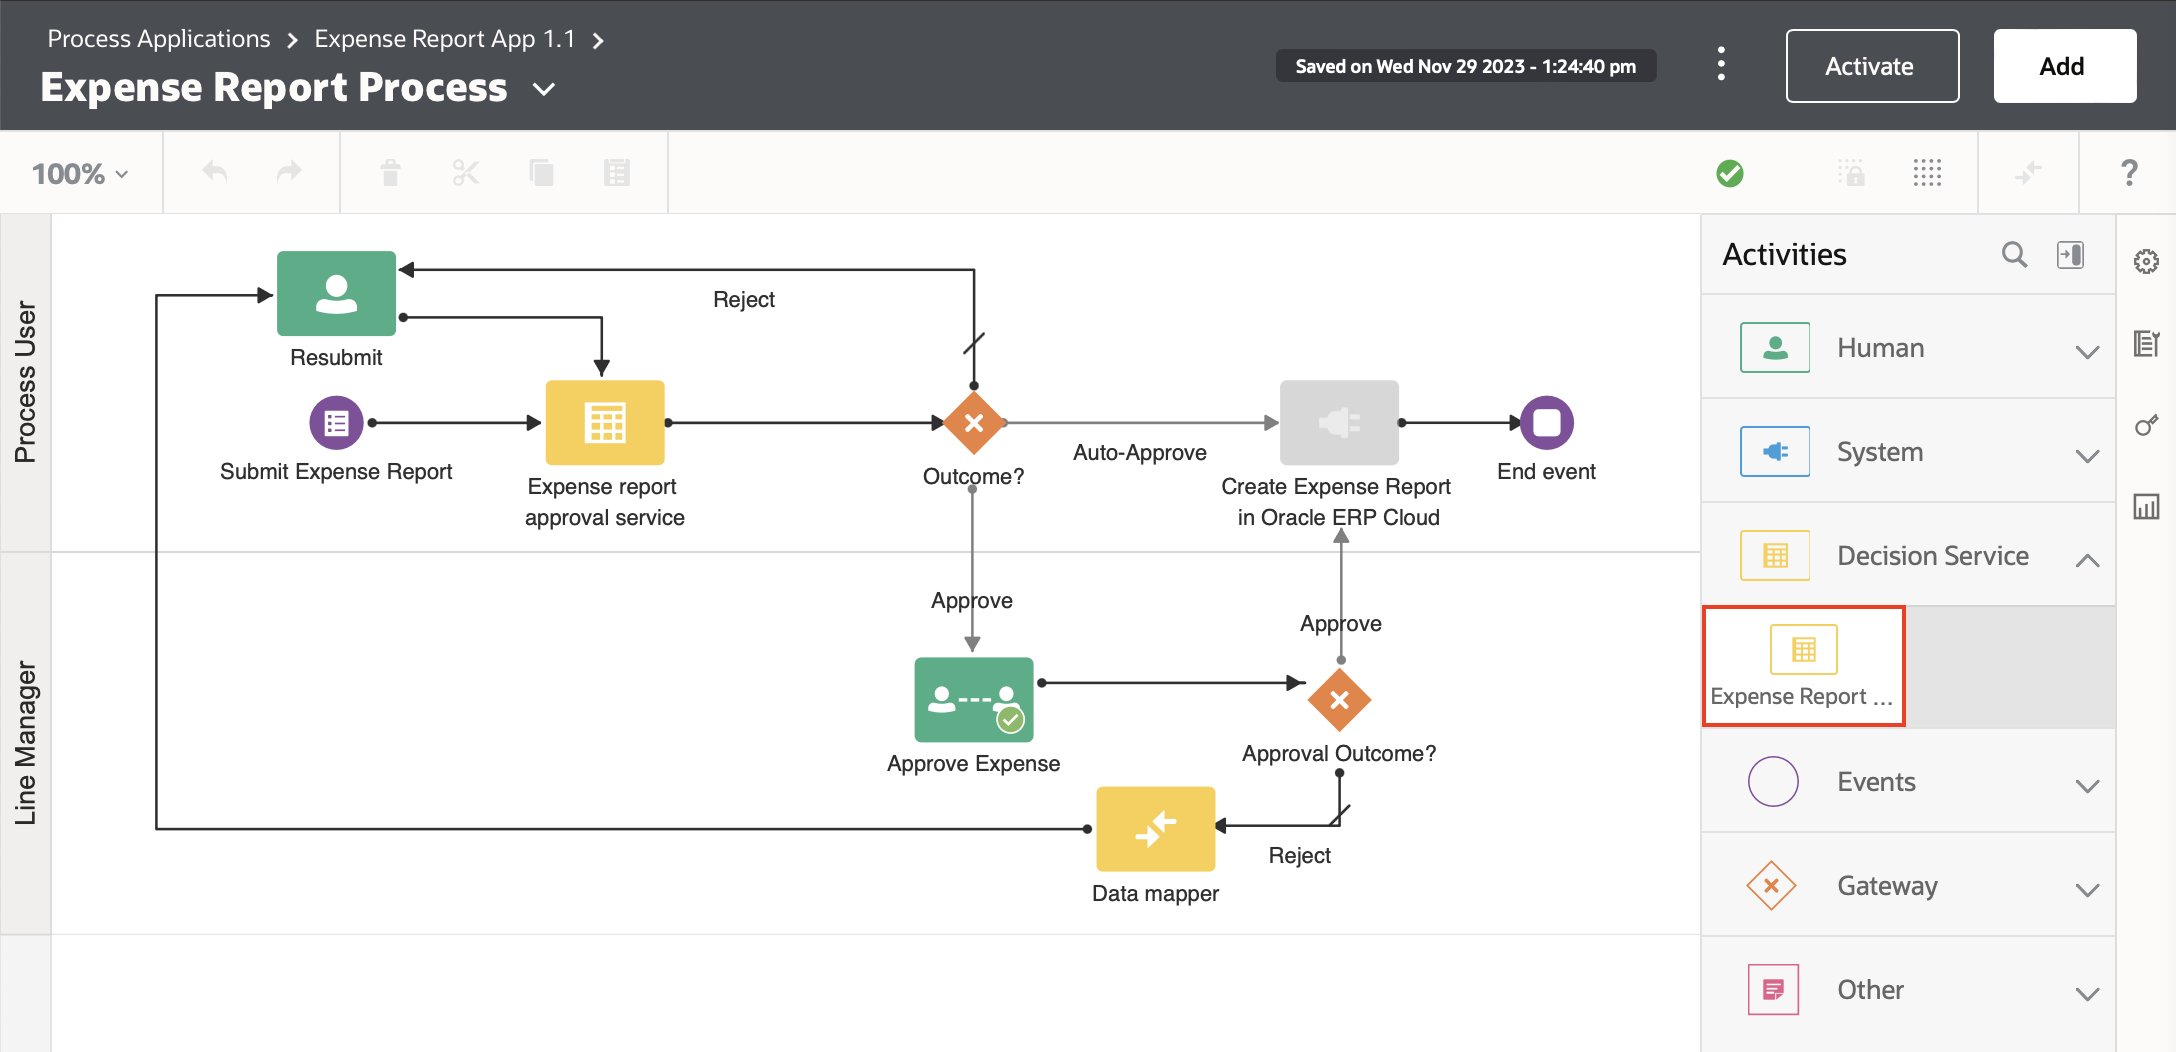
Ensuring that you select the right decision service (if you have more than one):
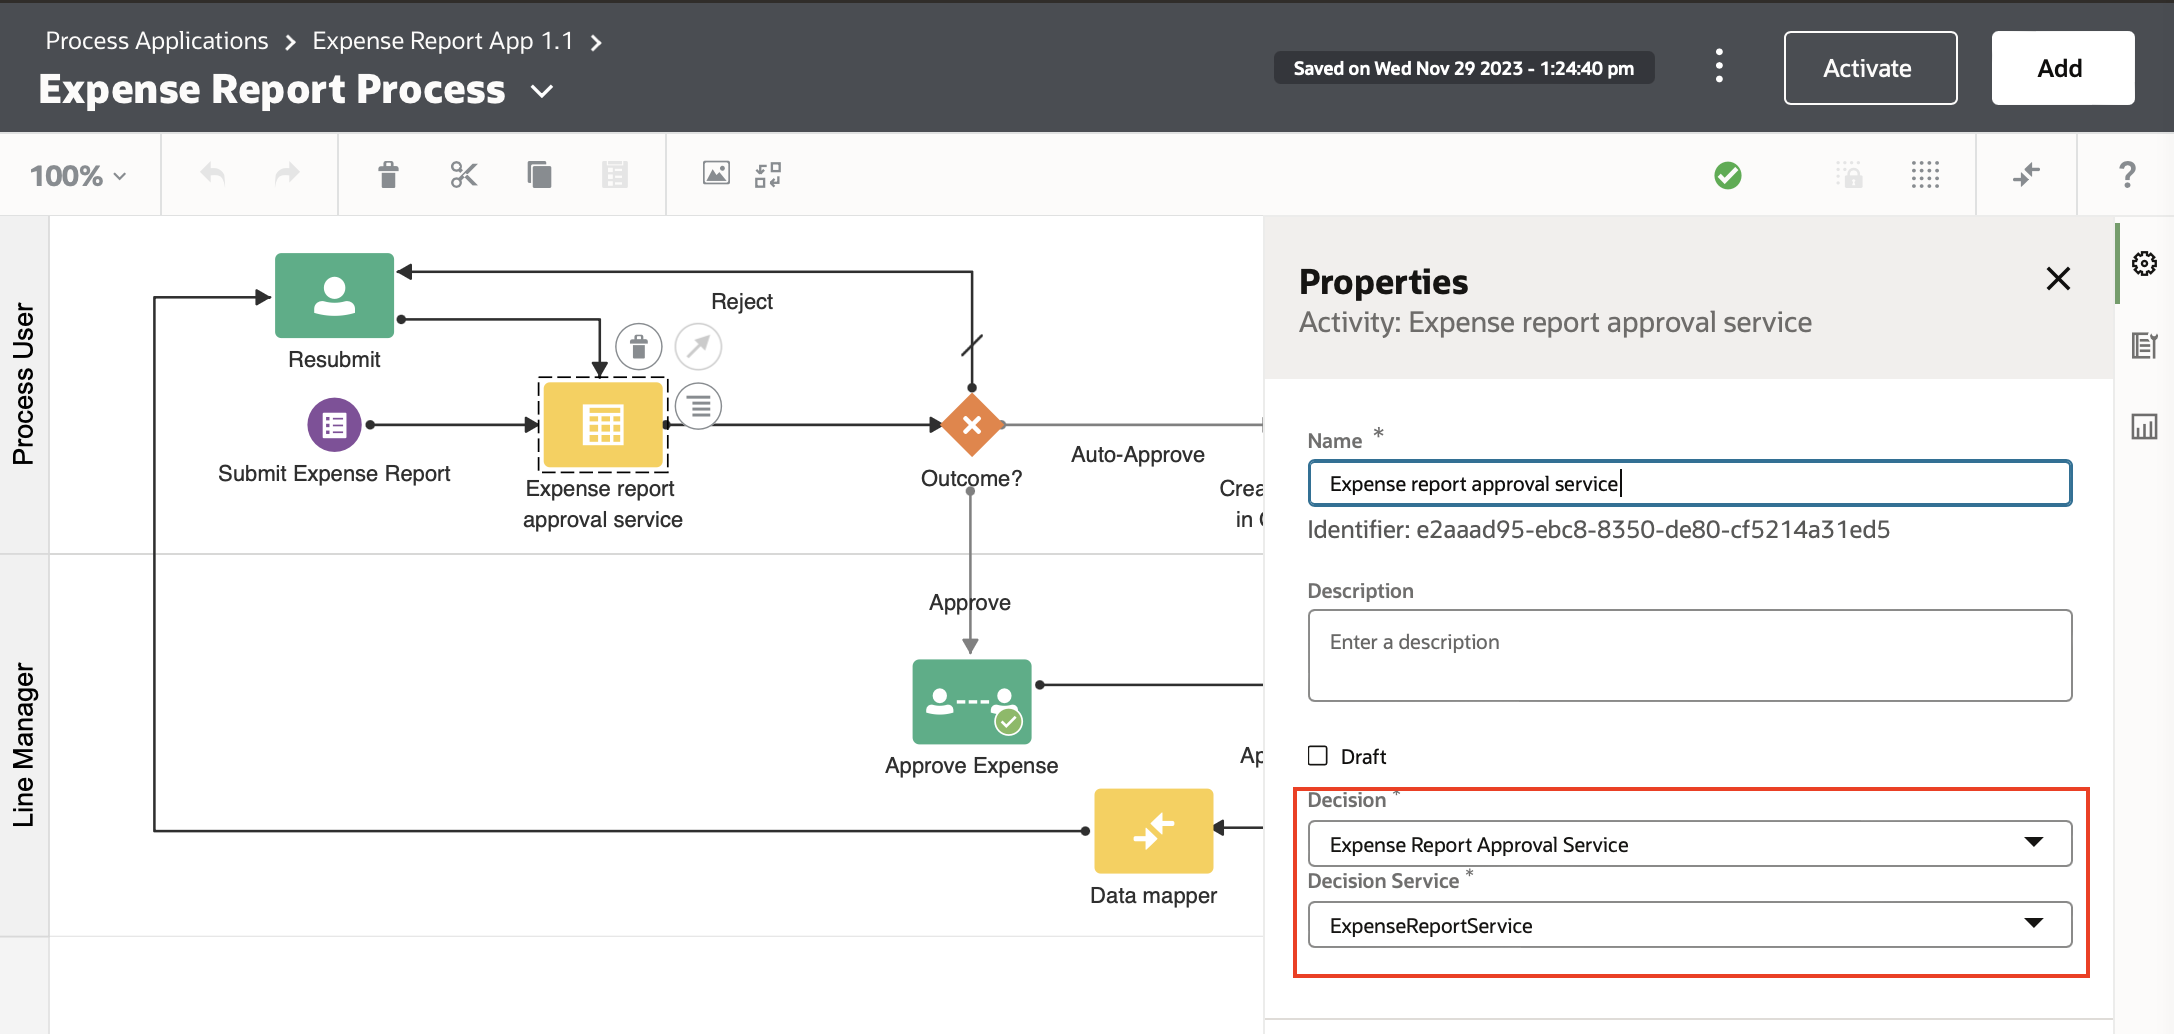
This will generate the required Input/output metadata you can now map on the Data Association page.
See our documentation for more information on leveraging Externalized Decisions from a Process Application.
Call from an External Client
To call a decision service from an external client, you will first need to retrieve the service endpoint and request a payload definition.
The endpoint for your service can be obtained during activation by clicking on the ellipses menu and selecting View API. Doing so will display the URL, which you can copy by clicking on the URL itself:
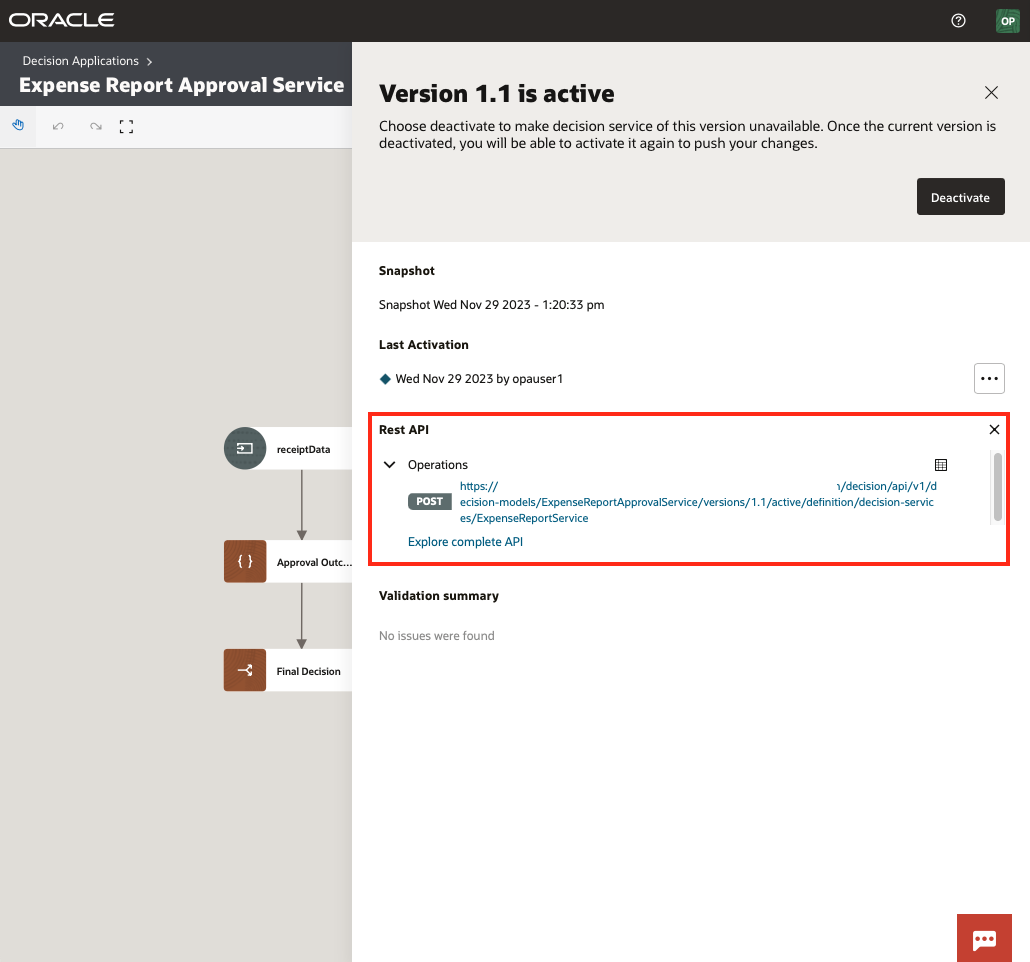
Note: If you have more than one decision service exposed in your app, you will see an endpoint for each service here.
Next, we need to retrieve the Request payload, which we can do by bringing up the Decision Service Menu, selecting the desired decision service, and choosing Payload:
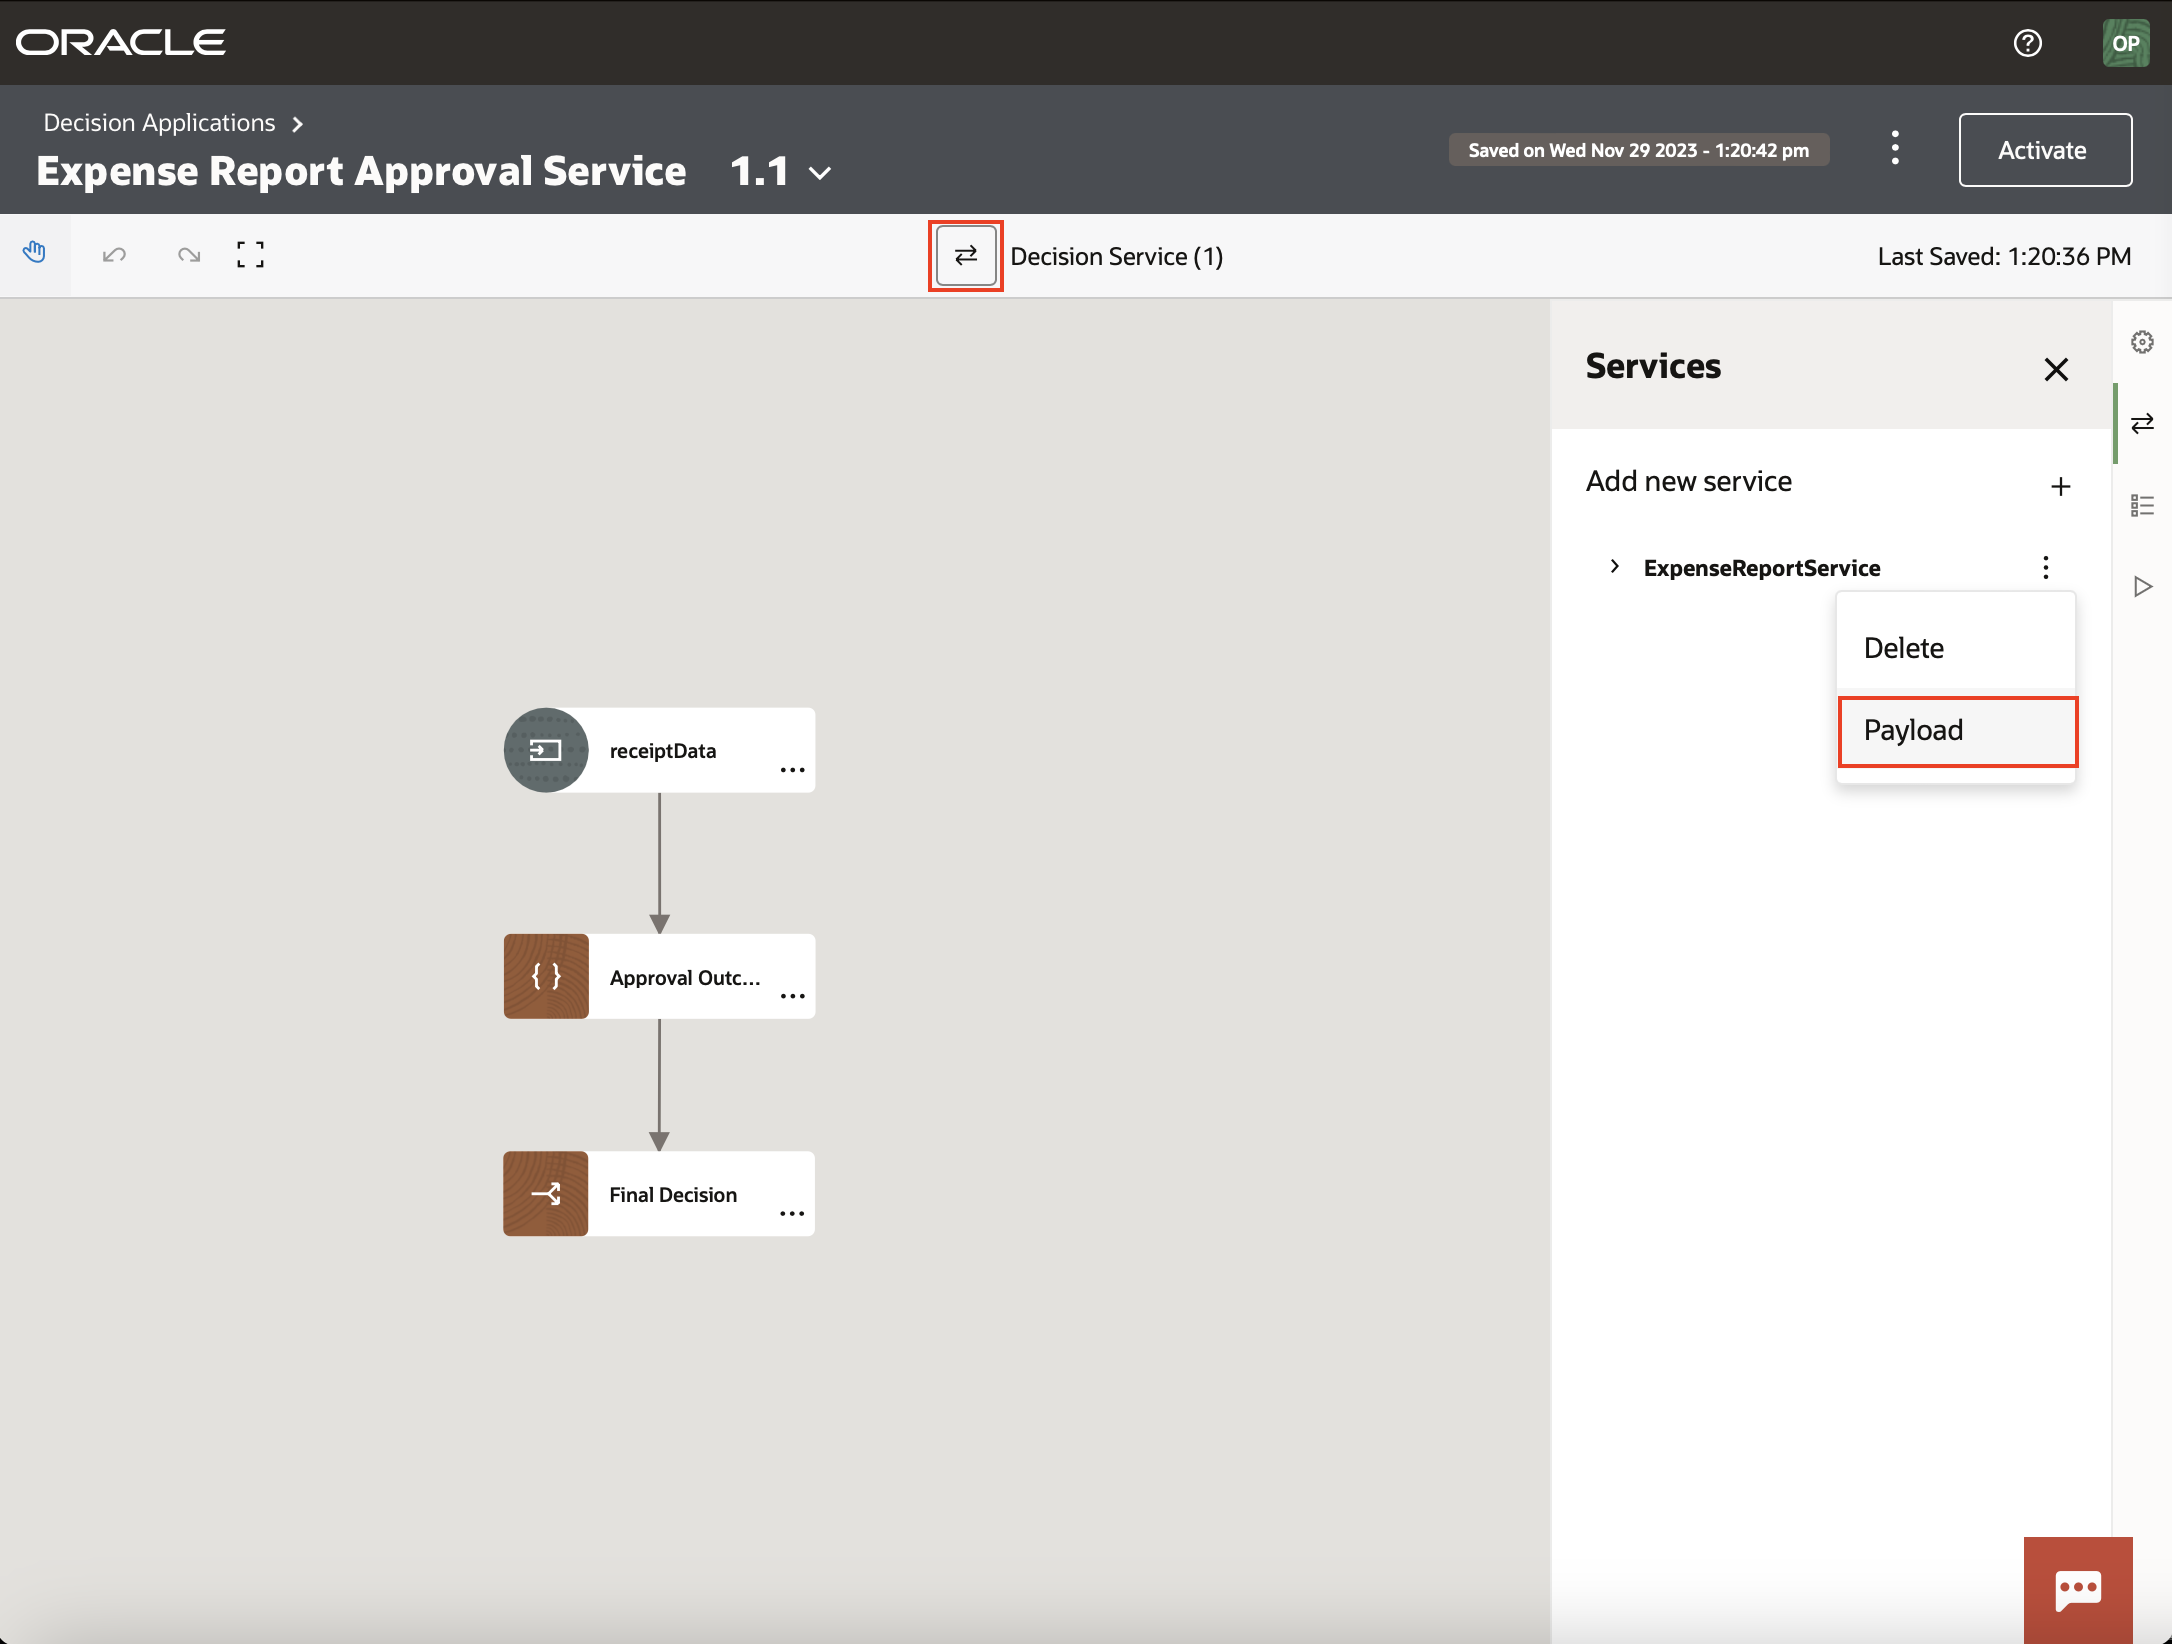
Doing so will bring up a new panel with the request and response definition that we need:
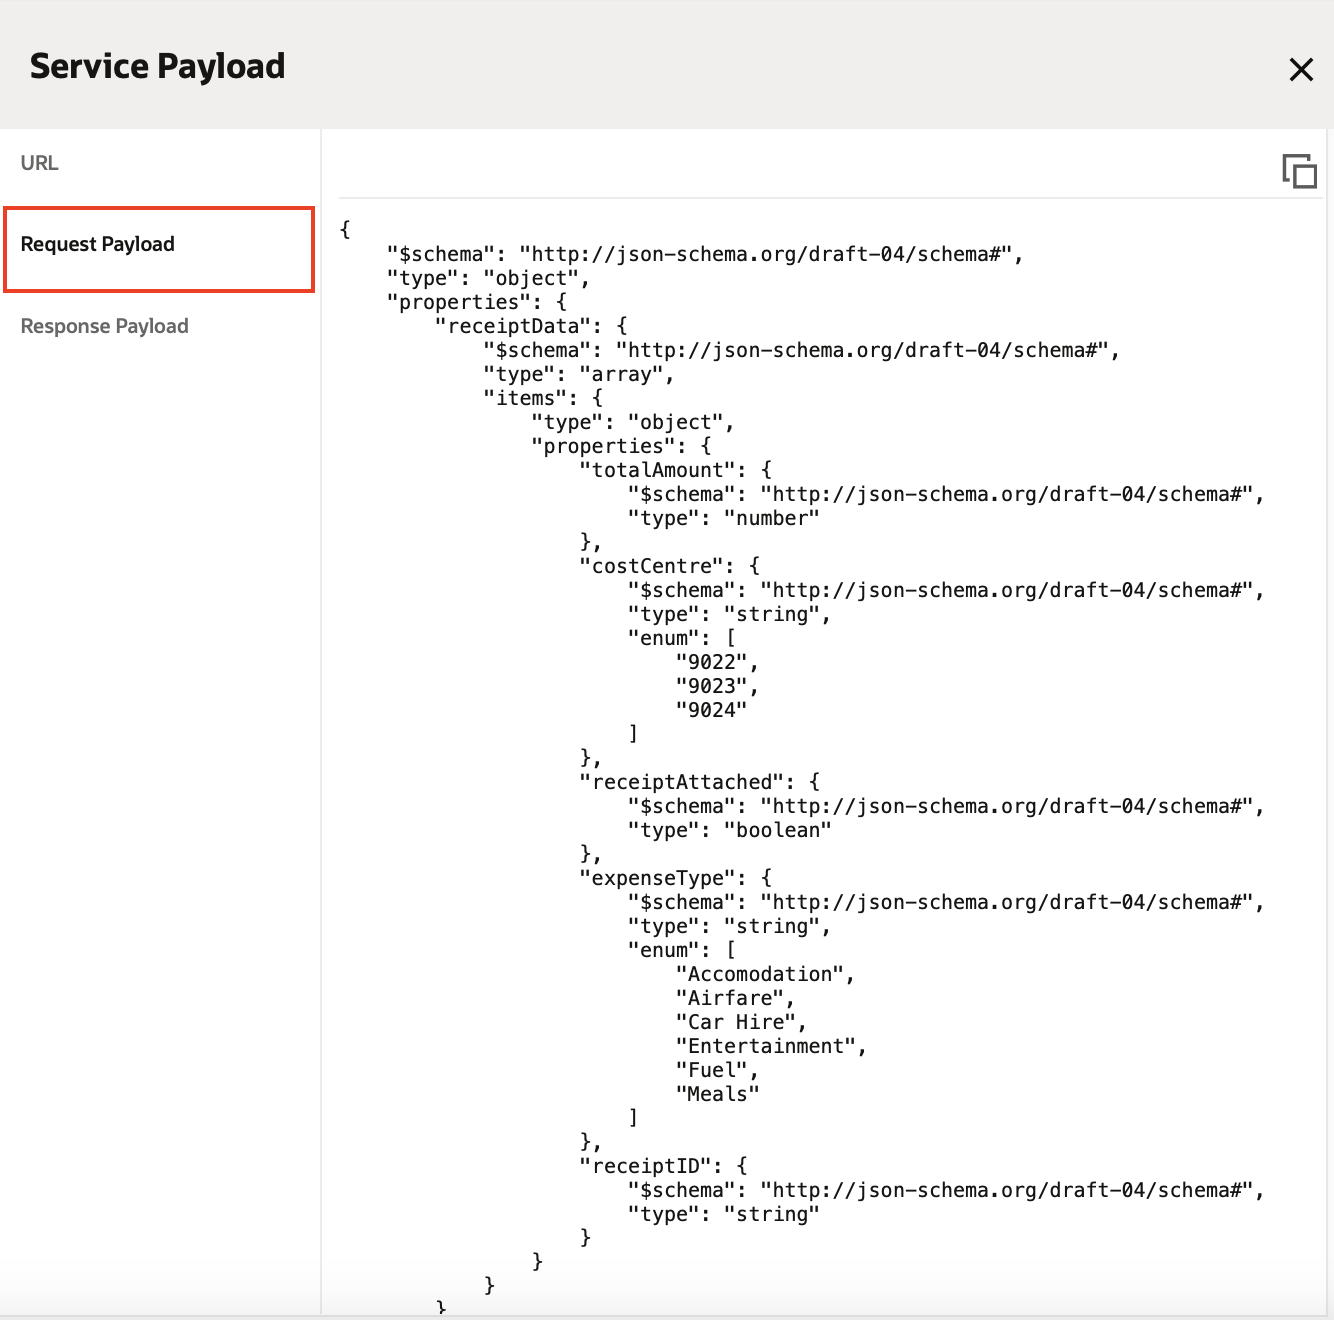
Note: Today, we provide this definition as a JSON schema. For clients that only accept definitions via a sample JSON, you will need to copy and convert this schema to a sample JSON using online tooling.
At this point, you should have the service endpoint and request payload. The only other thing you need is the authentication details needed to call your decision service. Note that OPA Decision Services are protected by Bearer Authentication, expecting an appropriately scoped token issued by the associated IDCS/IAM instance. For example, you can use the OAuth 2.0 Password Credentials Grant to obtain such a token by providing the following details:
| Field | Value | Comments |
|---|---|---|
| Grant Type | Password Credentials | |
| Access Token URL | https://idcs-hostname/oauth2/v1/token |
|
| Client ID |
|
|
| Client Secret | Same as above | |
| Scope | https://opa-hostname/decision | |
| Client Authentication | Basic Auth Header | |
| Username | These are the credentials of a user who is part of the process application in IDCS/IAM and is assigned the ServiceDeveloper or ServiceAdministrator role | |
| Password |
For more details on this process, check out our API documentation here.
Summary:
Decision Applications enable business rule authors to expose reusable decision services to external clients and other OPA Process Applications. In this blog, we have introduced this new feature, discussed the use cases it aims to address and explored how to get started. For more information on this feature, please refer to our documentation.
