Deploy changes using VB Studio
Most of organizations use multiple fusion SaaS pods to separate their development, testing and production environments. By default, VB Studio is wired to your test pod. In this article, we will assume you alread know how to deploy your changes to test pod (if you need help with this, please check out this article VB Studio deploy to test). Now, let’s discuss how to migrate the changes committed to the main branch of your git repository to a development pod. This step is essential for verifying your changes before moving them to production.
Unlike test pod where you do not have to worry about creating any of the artifacts like environments, build and deploy jobs, or the CI/CD pipeline, here you need to create your custom build and deploy jobs and related CI/CD pipeline. This article assumes that you have the security roles required to access VB Studio and Cloud HCM and you have completed the build and tested the code changes in your test pod.
We are currently enhancing the framework to simplify the overall migration process further. We will keep you informed of these updates as soon as they become available. In the meantime, for Cloud HCM 24A/24B release, here are the steps to deploy your changes to other non-production instances:
Configurations and Jobs:
Oracle Cloud HCM customers are provided with default configurations in VB Studio for deployment in the test pod. Deploying the changes to other non-prod instances, you will need to create the below artifacts:
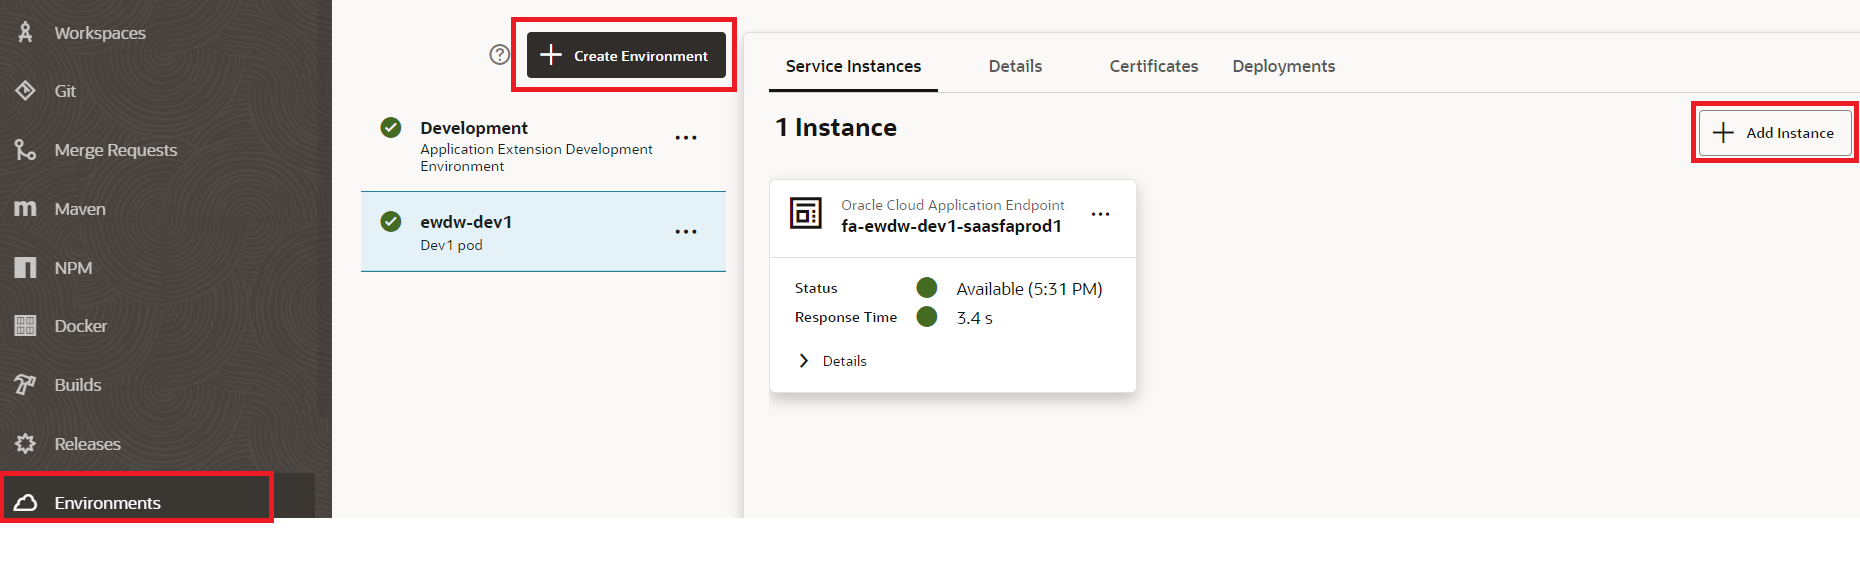
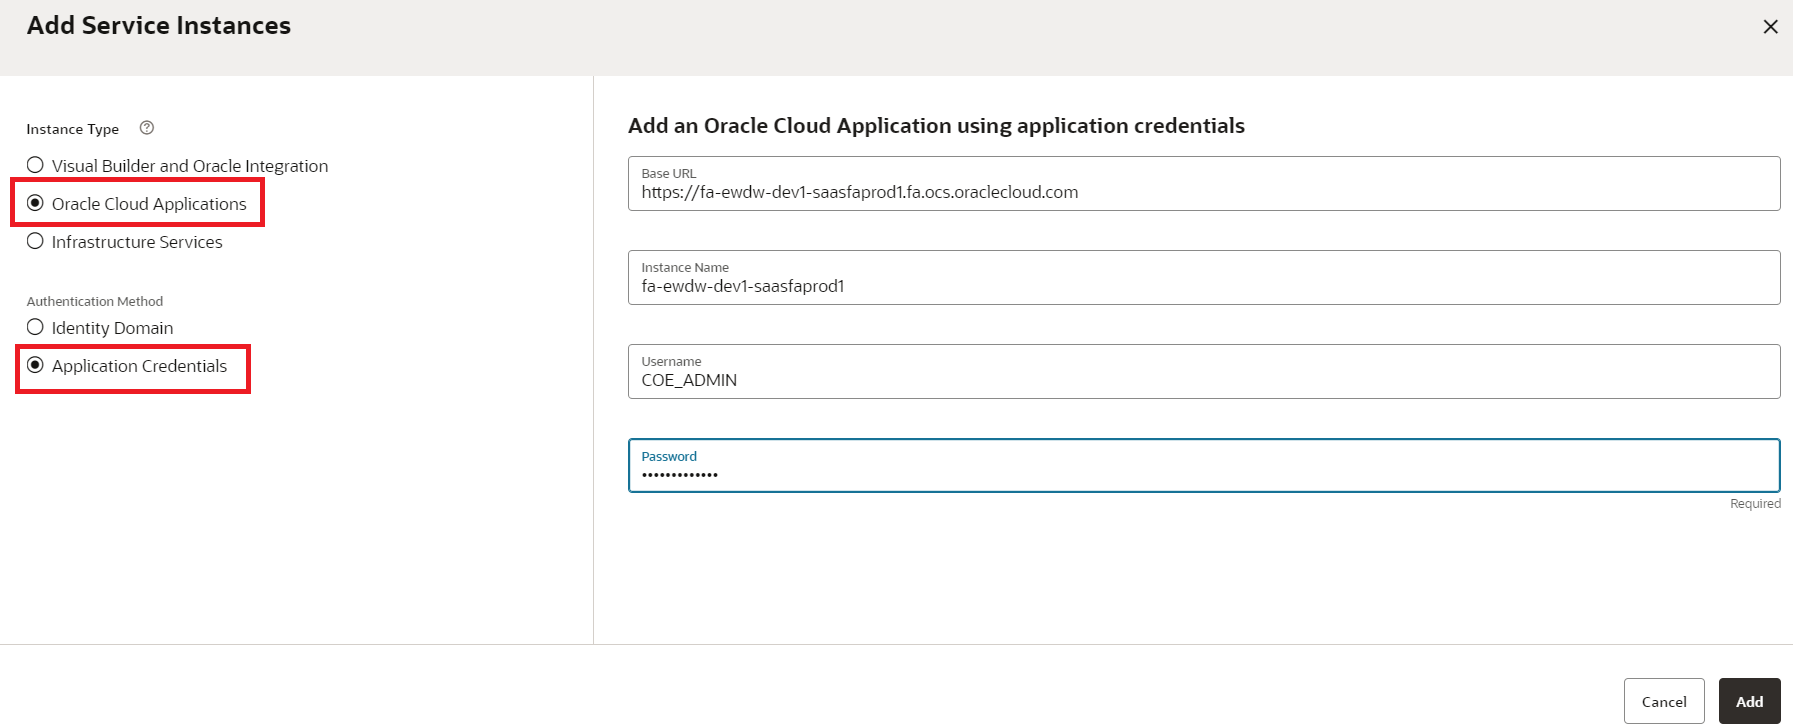
- Environment– Define a new environment where you need to deploy the changes. Map it to an Oracle Cloud Applications instance, providing the URL to the instance and the credentials for a user that can deploy extensions there. These credentials must be those of a local user, not a federated identity, and must not require multi-factor authentication
- Build and Deploy Jobs– To deploy to a non-production instance, create custom packaging and deployment jobs, then combine them into a single pipeline. Run this pipeline whenever you need to deploy. Follow these steps to get started!
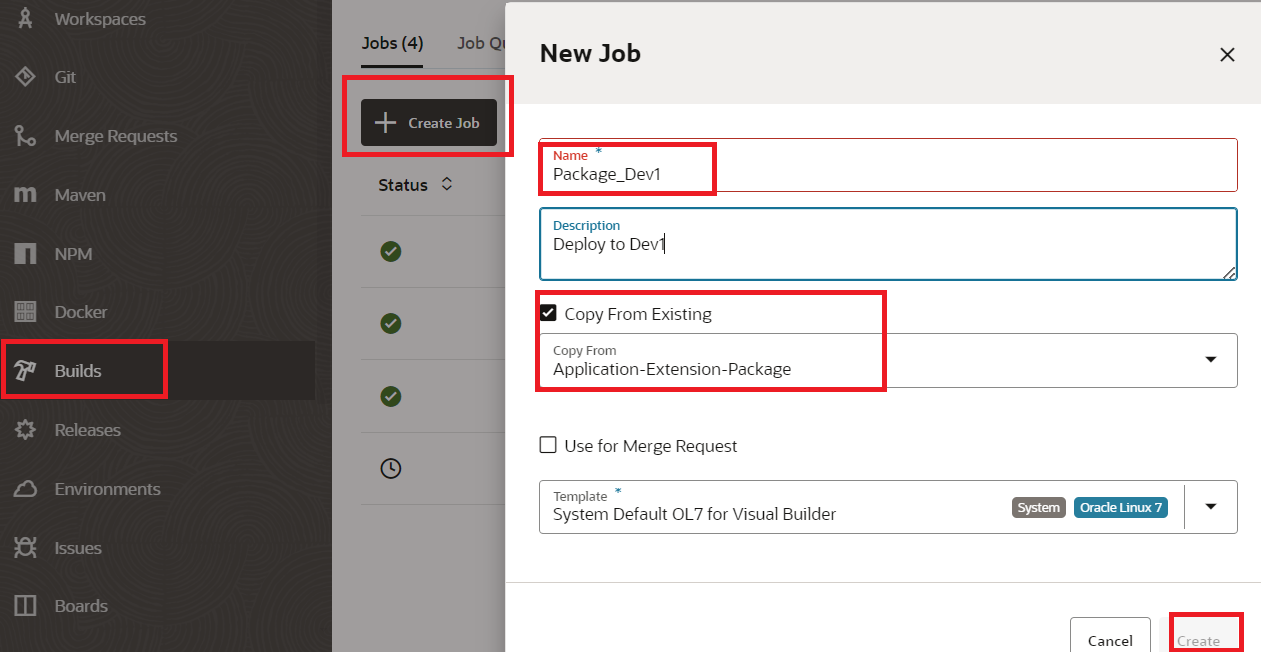
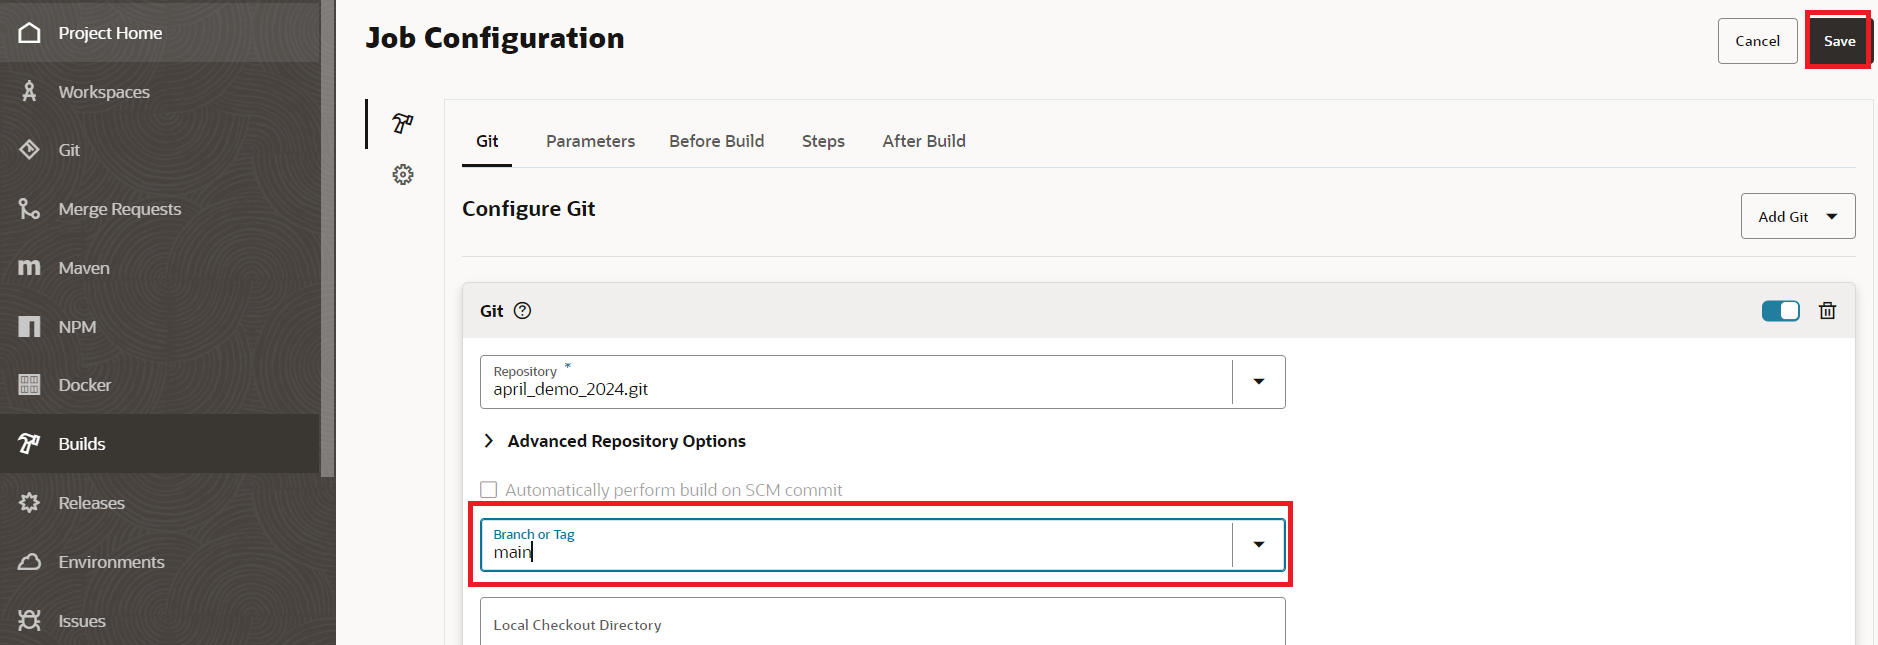
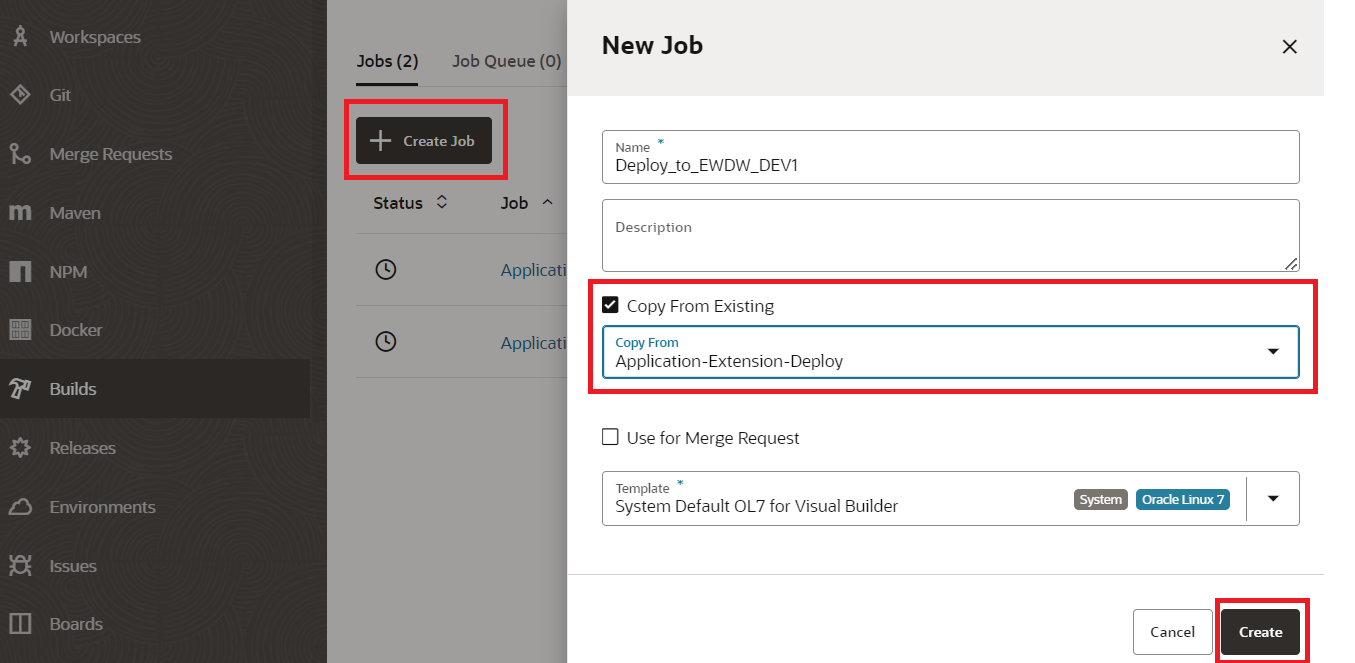
- Package Job: To create a new job, click “+ Create Job” and give it a name. Check the “Copy from Existing” box and select “Application-Extension-Package” from the dropdown. After clicking “Create,” you’ll be taken to the Configure Git screen, where you can specify the branch containing the changes you want to deploy (e.g., the main branch in this example). As you will be running the job manually or through a pipeline, uncheck “Automatically perform build on SCM commit” and click “Save.”
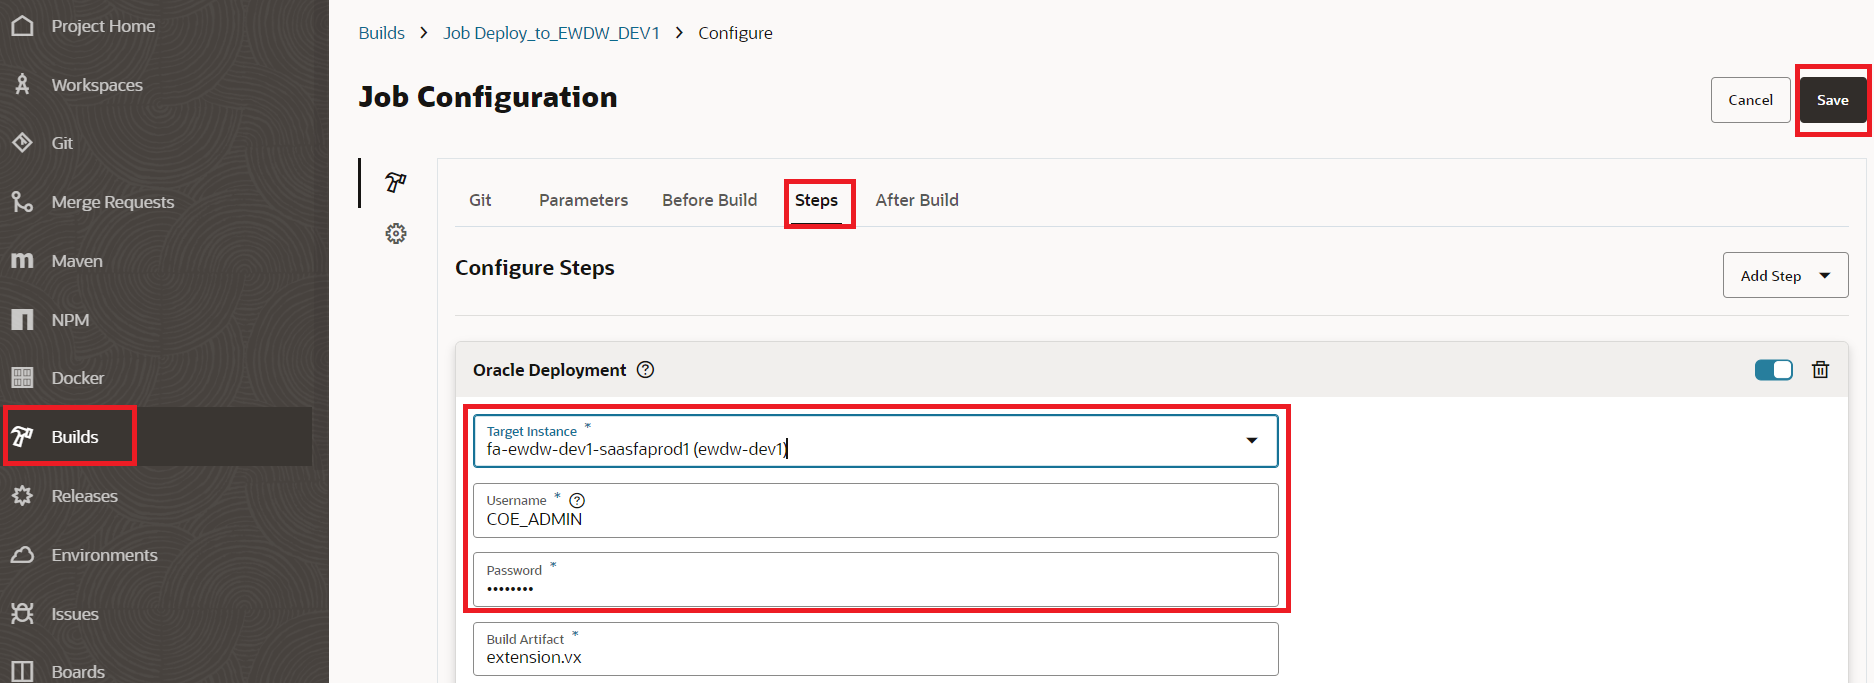
- Deploy Job: This job will deploy the changes to the target environment. Just like the package job,you can clone the default deploy Application-Extension-Deploy job. Map it to the target environment where you want to deploy and under the job configuration provide the user credentials with access to the target instance.
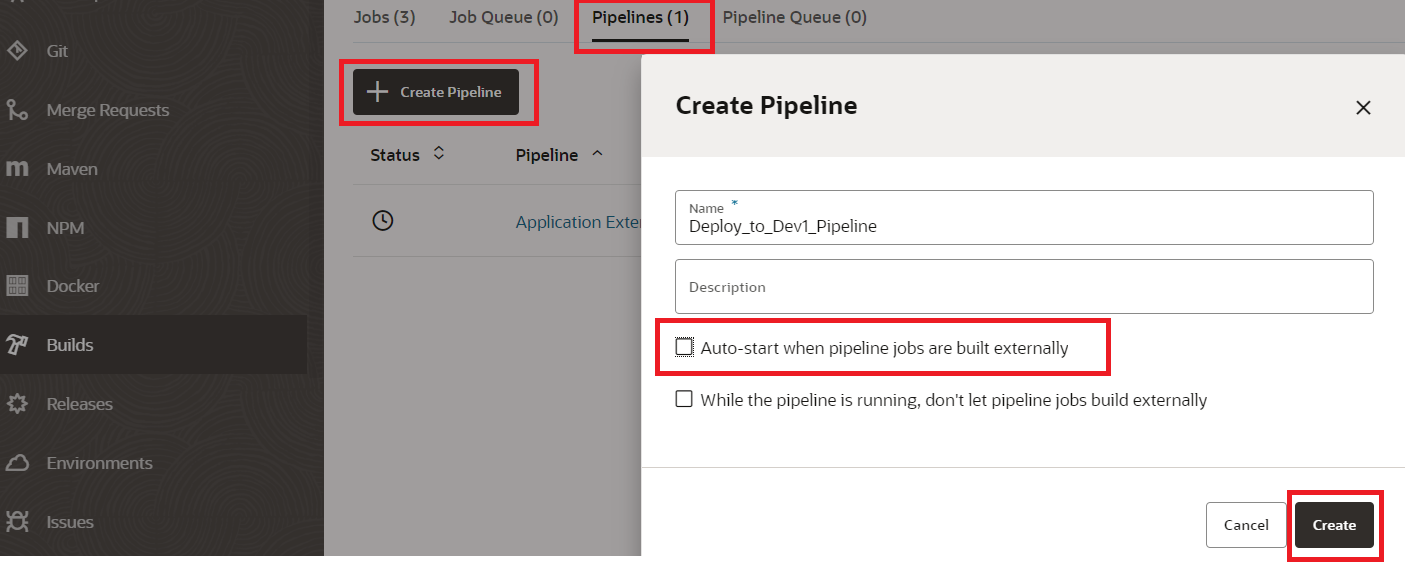
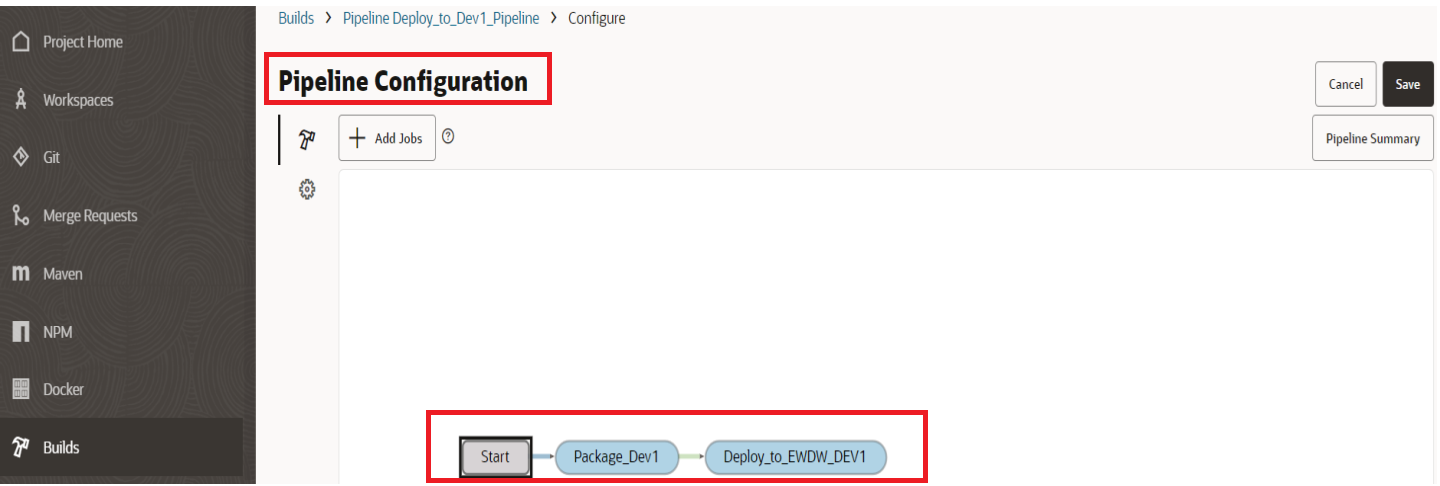
- Pipeline– You have now set up the necessary jobs to deploy your extension to an Oracle Cloud Applications instance other than the default. Next step is to create a pipeline now, which kicks off first the packaging job, then the deploy job.Make sure to uncheck the “Auto-start when pipeline jobs are built externally” option.
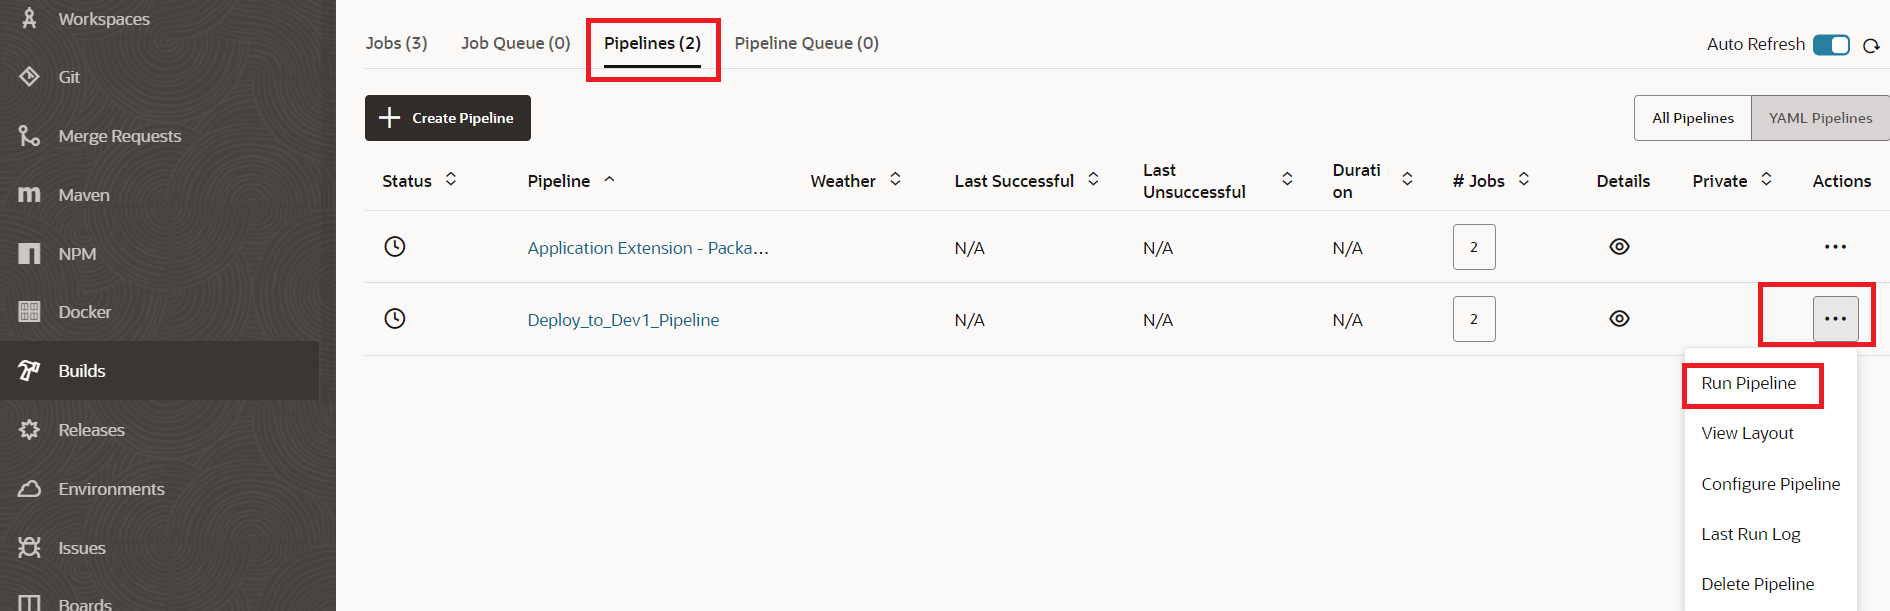
- Publish and Deployment – Once you are ready, you publish the changes by manually running the newly created pipeline by using the “Run Pipeline” option highlighted in the screenshot below.
- After running, the new pipeline in VB Studio, build and deploy jobs are triggered automatically. This pipeline orchestrates the deployment process, executing build and deploy jobs in sequence. The details of the job runs can be found under “Job Build History”.
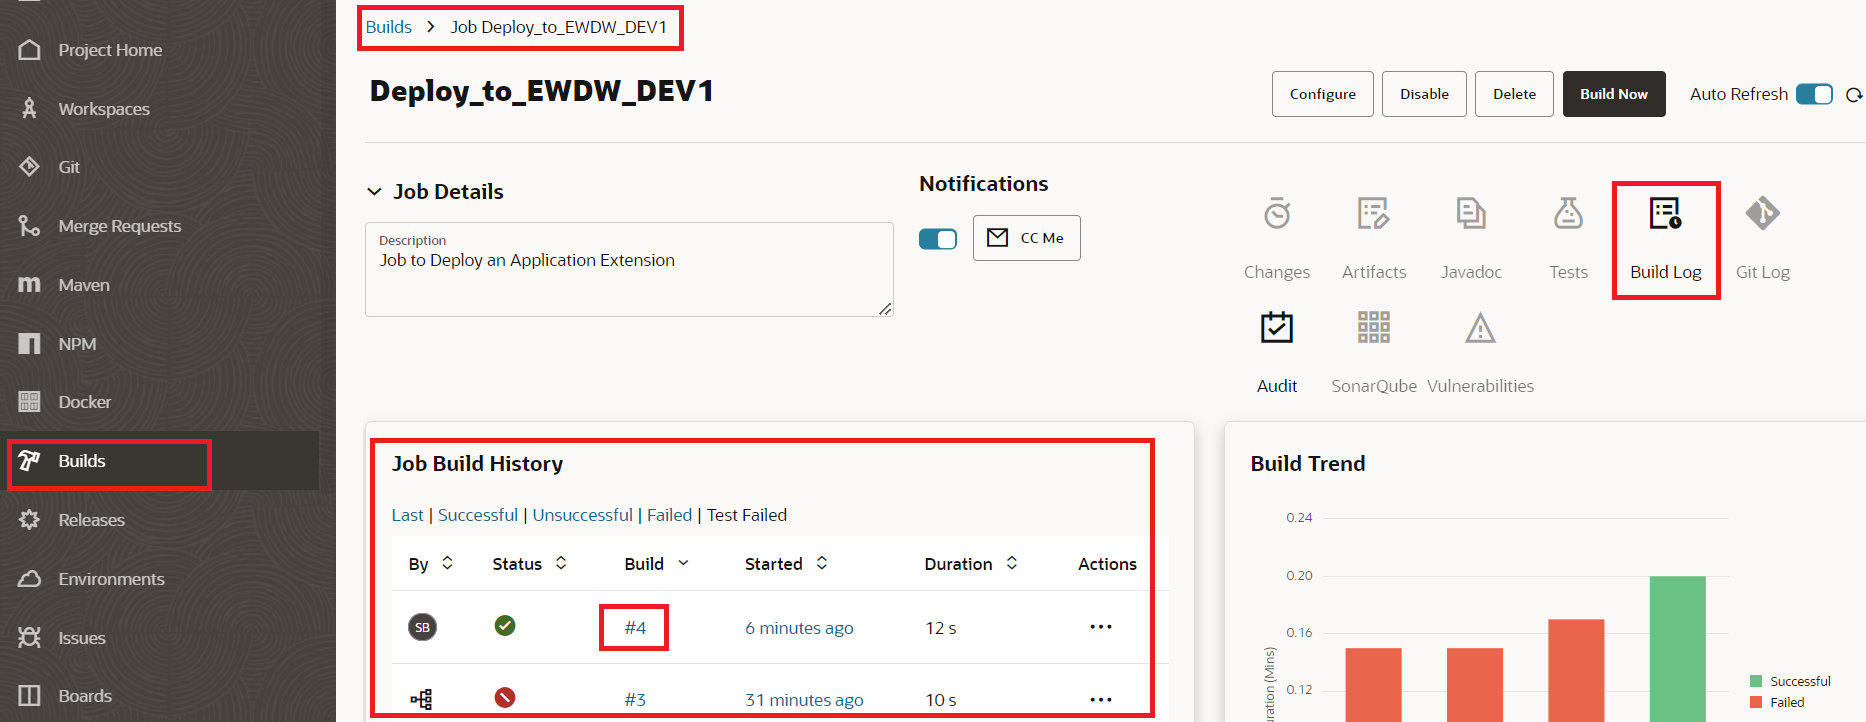
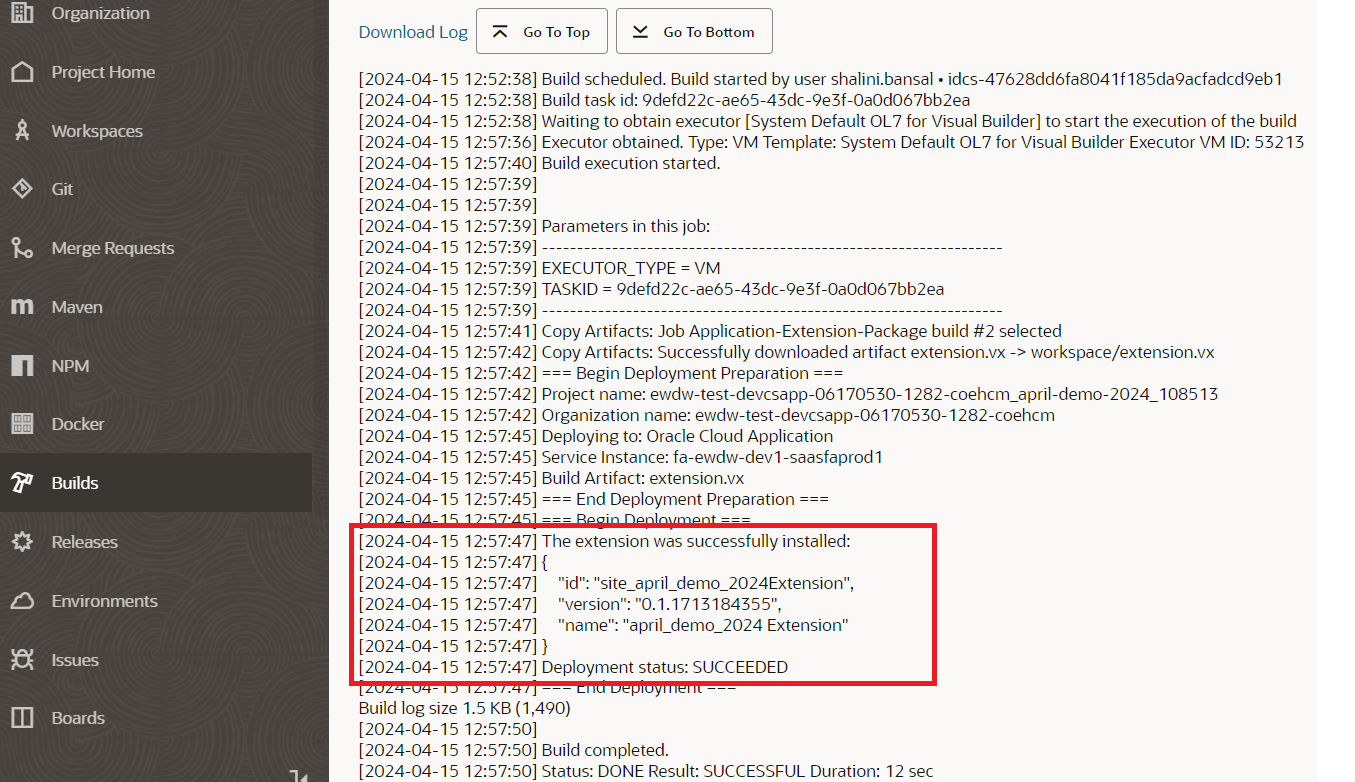
- The log contains details that can help in troubleshooting if the job has errors.
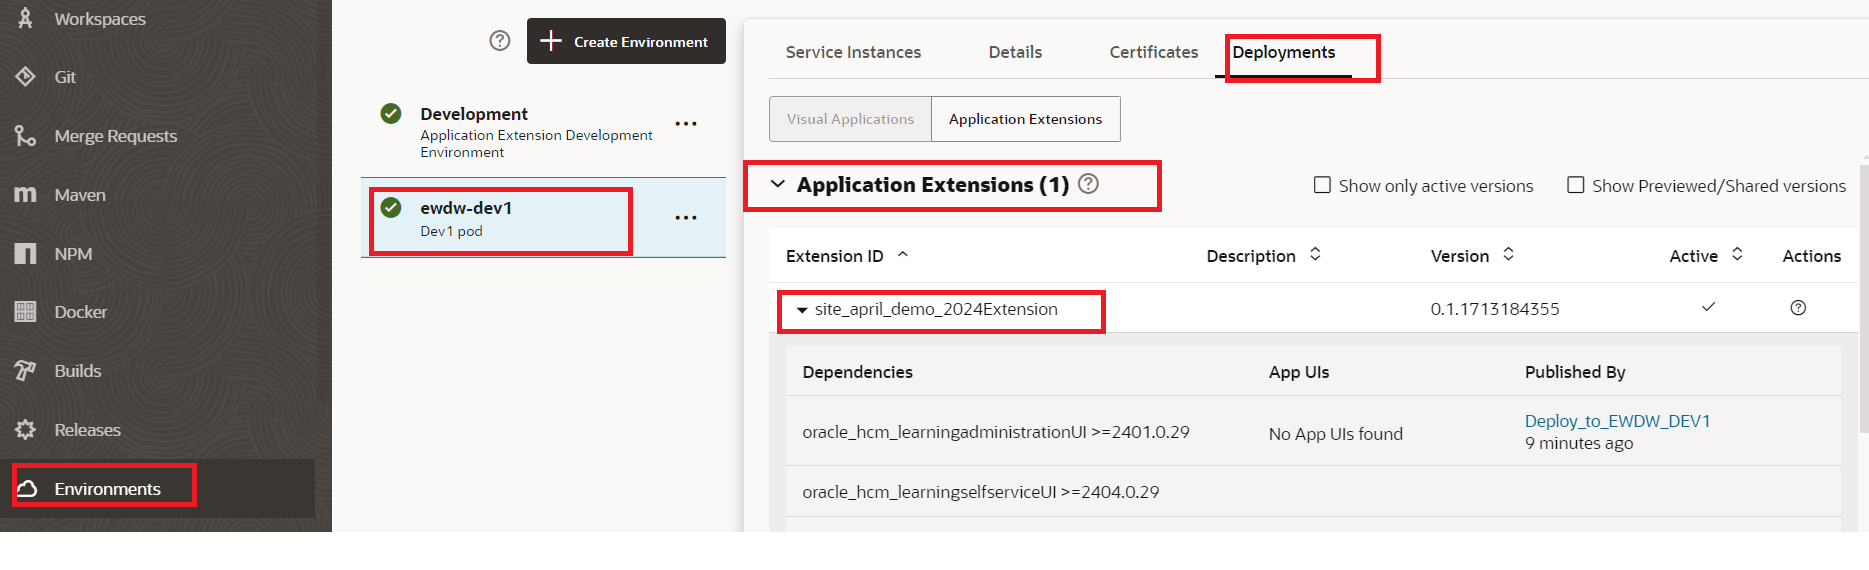
- If the build and the deploy jobs are successful, you will be able to verify the changes reflected in your target pod. Additionally, you will also be able to verify the deployment details by navigating to the “Environments-> Deployments” tab as shown below.
Hope this was a helpful article.
*** You can follow these blogs in any sequence, but if you are starting new then here is the recommended Learning Path for Visual Builder Express and Business Rules
Good luck with your implementation.