
Important! – The steps below are no longer required after the September 11th, 2026 CWB. The information below is for reference only. If you have the CWB or a later release, the steps below are automatically taken care of and you can go directly to the pro-code setup.
Using Fusion AI Agent Studio CLI from VS Code requires OAuth setup so the CLI can securely authenticate to your Fusion environment. This one-time configuration creates a public OAuth client in the Oracle OCI IAM/IDCS instance associated with your Fusion pod.
Important: Use the OCI IAM/IDCS instance tied to the Fusion environment you intend to use. For example, if you will connect the CLI to DEV1, sign in to the OCI IAM/IDCS instance for DEV1 – not TEST, DEV2, etc.
After completing this setup, continue with Fusion AI Studio CLI: Getting Started with VS Code for a simple working example.
Before You Begin
You need access to create and activate integrated applications in the correct OCI IAM/IDCS instance, plus access to the corresponding Fusion AI Agent Studio environment.
1. Create a Public OAuth Application
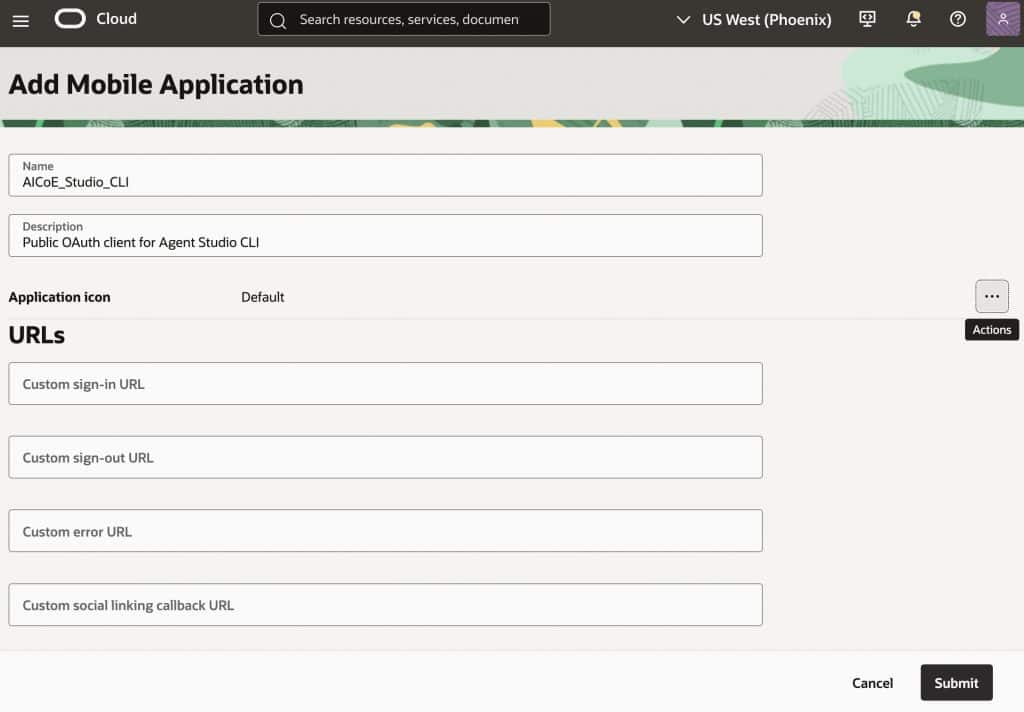
In OCI IAM/IDCS, open Integrated applications, select Add application, and choose Mobile Application. This creates the public OAuth client used by the CLI.
Give the application a meaningful name, such as AICoE_Studio_CLI, add a description, select Display in My Apps, and submit.
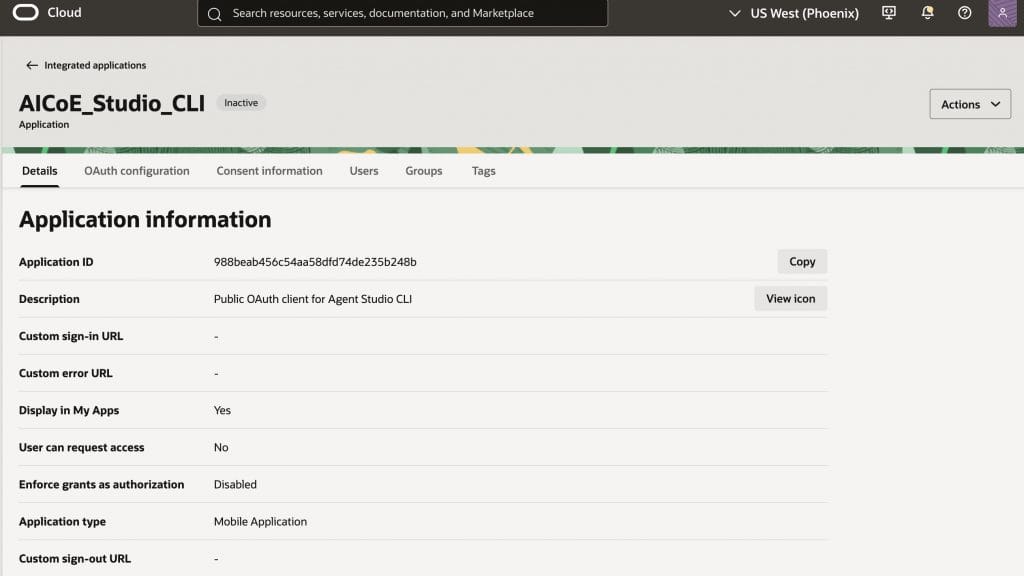
After creation, the application is initially inactive. Do not use the Application ID shown on the Details page for the CLI; you will copy the OAuth Client ID later.
2. Open the OAuth Configuration
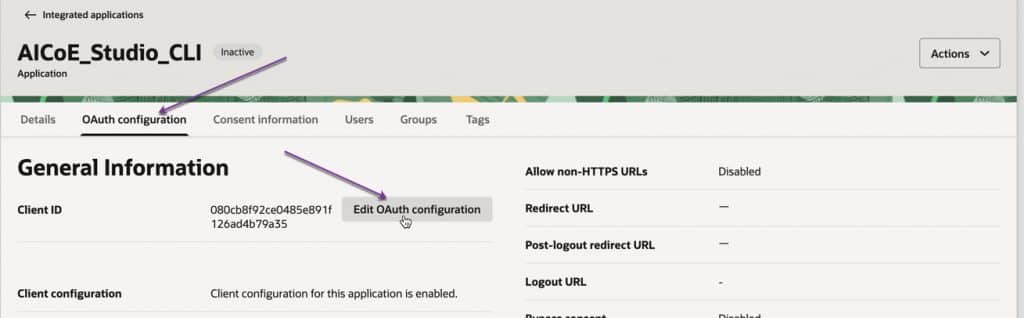
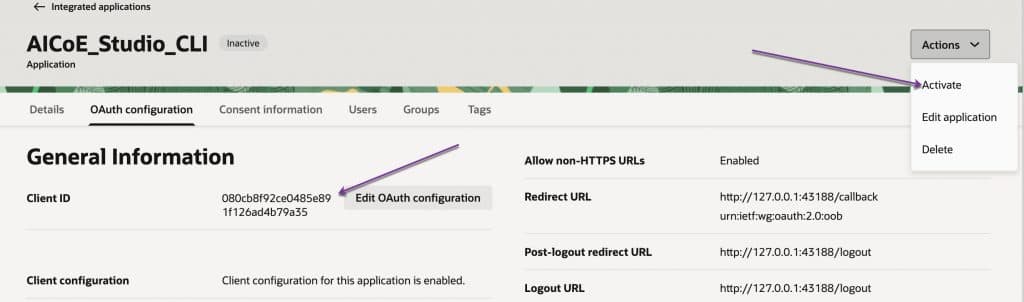
Open the OAuth configuration tab and select Edit OAuth configuration.
3. Configure the OAuth Client
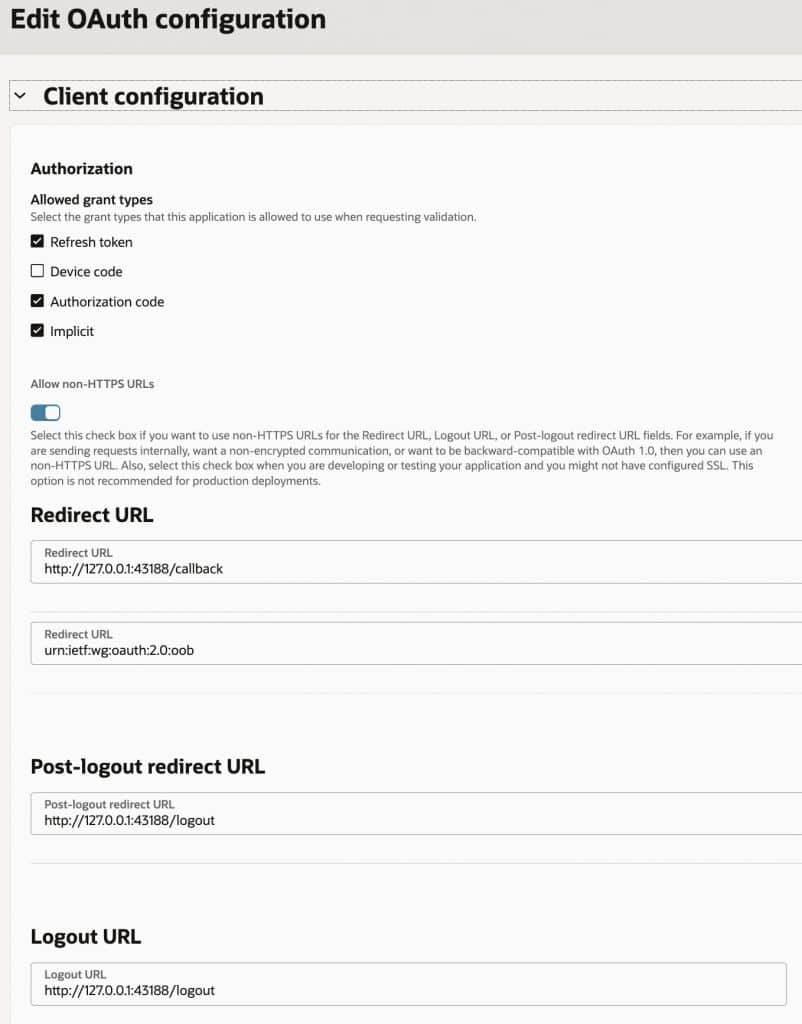
Under Client configuration, configure the following:
- Enable Authorization code, Refresh token, and Implicit.
- Leave Device code unselected.
- Enable Allow non-HTTPS URLs.
- Add these redirect URLs:
http://127.0.0.1:43188/callbackurn:ietf:wg:oauth:2.0:oob
- Set both Post-logout redirect URL and Logout URL to
http://127.0.0.1:43188/logout. - Leave Bypass consent turned off.
4. Add the Required Fusion Resource Scopes
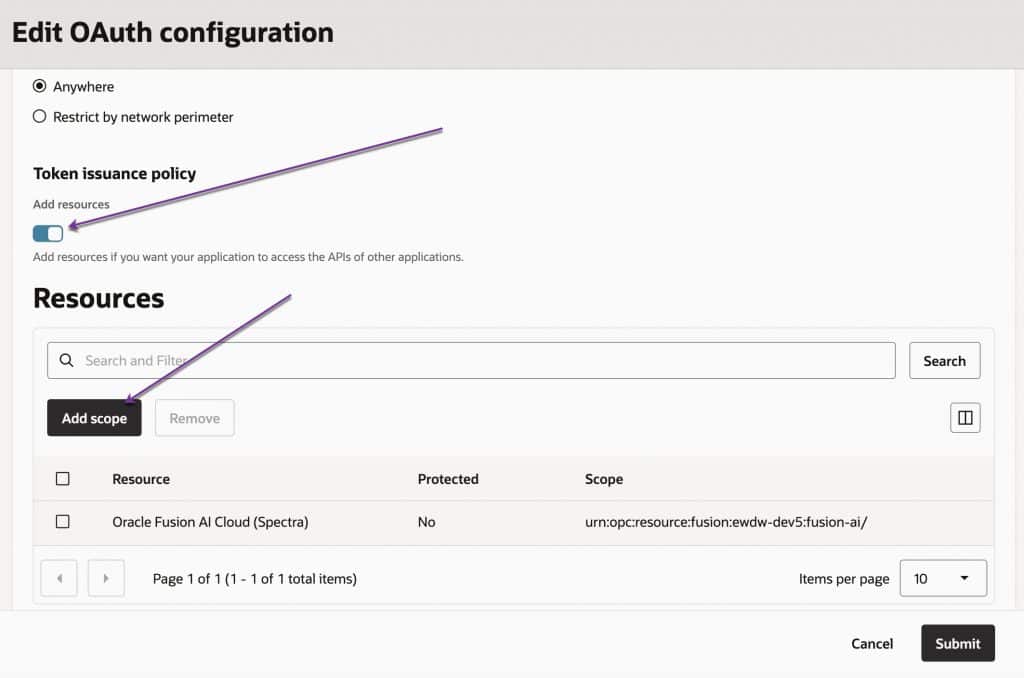
In Token issuance policy, turn on Add resources, then select Add scope. Add the required scopes for:
- Oracle Fusion AI Cloud (Spectra)
- Oracle Boss Cloud (Spectra)
The image below shows the resource area and one selected Fusion AI Cloud scope. Repeat the action to add the Oracle Boss Cloud scope, then select Submit to save.
5. Copy the Client ID and Activate the Application
Return to the OAuth configuration tab and copy the Client ID. Then open Actions and select Activate. The application must be active before it can be used by Fusion AI Agent Studio.
6. Enable AI Studio CLI in Fusion
Sign in to the same Fusion environment and open Fusion AI Agent Studio. Go to:
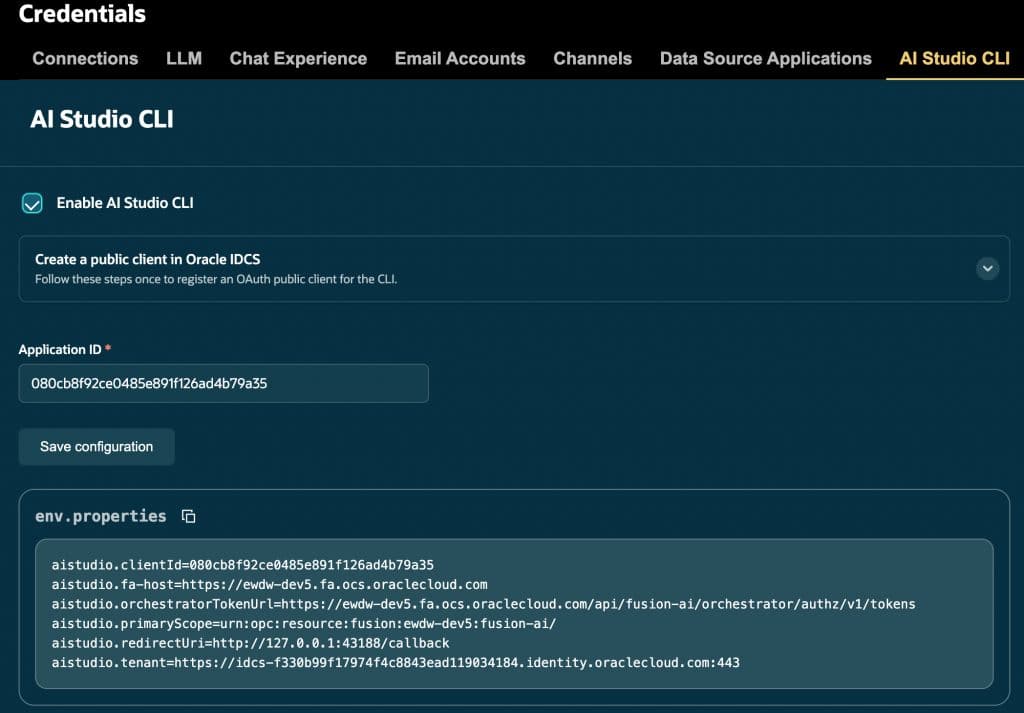
Credentials > AI Studio CLI
Select Enable AI Studio CLI, paste the OAuth Client ID into the Application ID field, and save. AI Agent Studio generates an env.properties section – copy it for the VS Code configuration.
Quick Check
Before moving to VS Code, confirm:
- The OAuth application is a Mobile Application and is Active.
- You entered the OAuth Client ID – not the Application ID – in Fusion AI Agent Studio.
- You added the required Oracle Fusion AI Cloud (Spectra) and Oracle Boss Cloud (Spectra) resource scopes.
- You configured the OCI IAM/IDCS instance that belongs to the same Fusion pod you plan to use.
- You copied the generated
env.propertiesvalues from the AI Studio CLI page.
You are now ready to configure authentication in VS Code and start working with Fusion AI Agent Studio CLI. For the complete technical reference, see the official OAuth configuration guide.
After completing this setup, continue with Fusion AI Studio CLI: Getting Started with VS Code for a simple working example.