
In this guide, we’ll create an Always Free Arm based VM on OCI and use it to deploy the official TeamSpeak 6 server container. Before we begin, you’ll need to create a free Oracle Cloud account. A credit card is required to register, but you won’t be charged as long as you follow the tutorial below.
You will build a very small setup consisting of one OCI VM (VM.Standard.A1.Flex), Docker running on the VM with a single container with the TS6 server.
Create an Always Free Ampere VM
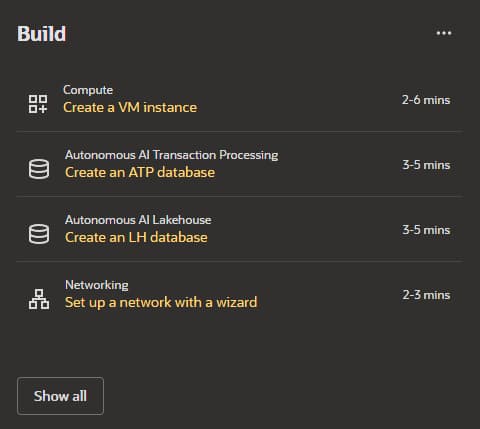
Sign in to the OCI console, then click “Create a VM instance” on the homepage.
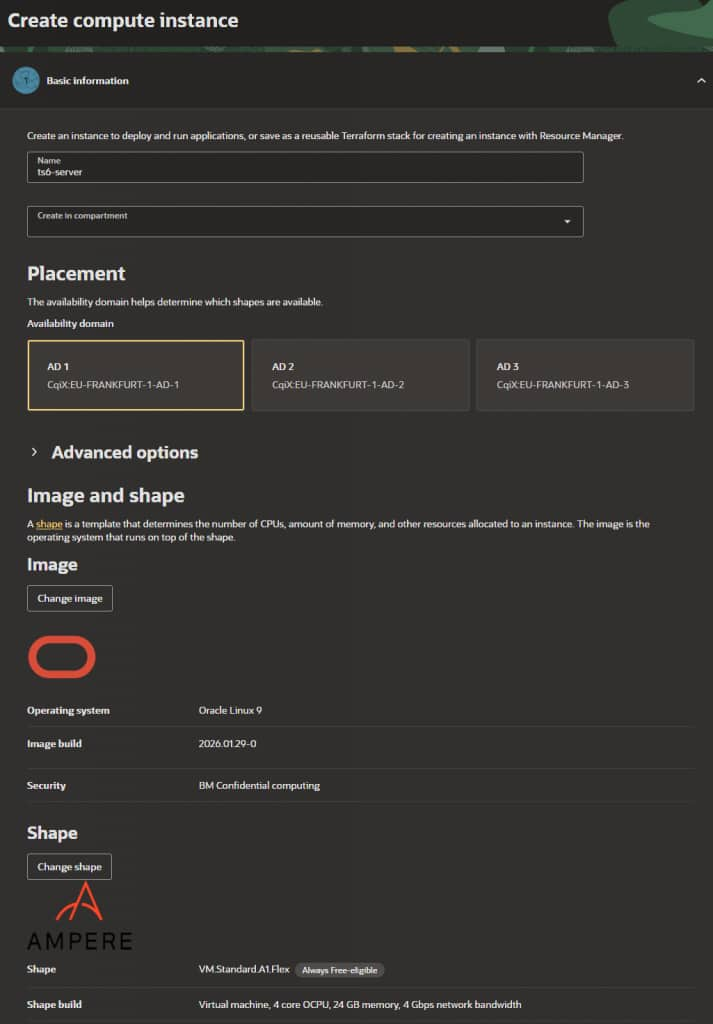
Give the instance a name, for example ts6-server. Under Shape, leave the default Oracle Linux image selected. Click Change Shape, choose VM.Standard.A1.Flex under the Ampere Shape series. Set OCPU and memory values that fit within the Always Free limits.
In the networking section, select the option to Create new virtual cloud network. In the Add SSH keys, do not forget to download both the private and public key.
Then, select Next until you can click Create.
Wait for the instance to switch to the Running state. On the instance details page, note the Public IP address. You will use it to connect through SSH and later from the TeamSpeak client.
Connect to the VM using SSH
For Oracle Linux images in OCI, the default username is opc. On macOS or Linux, open a terminal. On Windows, use a terminal with OpenSSH support or a tool like PuTTY.
Example SSH command:ssh -i /path/to/your/private_key opc@YOUR_PUBLIC_IP
If this is the first connection, accept the host key fingerprint.
Update the system and install Docker
First update all packages and reboot:
sudo dnf update -y
sudo reboot
Reconnect with SSH after the reboot, then install Docker Engine.
Install the dnf-plugins-core package:
sudo dnf install -y dnf-plugins-coreAdd the official Docker CE repository for RHEL compatible systems:
sudo dnf config-manager --add-repo https://download.docker.com/linux/centos/docker-ce.repoRemove any conflicting packages such as older Docker or Podman:
sudo dnf remove -y docker docker-client docker-client-latest docker-common docker-latest docker-latest-logrotate docker-logrotate docker-engine podman runcInstall Docker Engine and the Compose plugin:
sudo dnf install -y docker-ce docker-ce-cli containerd.io docker-buildx-plugin docker-compose-plugin --allowerasingEnable and start the Docker service:
sudo systemctl enable --now dockerVerify installation:
docker version
docker compose version
You should see version information for both commands.
Use the native Arm64 image
Starting with TeamSpeak 6 Server 6.0.0-beta9, the official Docker image supports linux/arm64 natively. Because the OCI VM.Standard.A1.Flex shape uses an Arm processor, Docker automatically downloads and runs the Arm64 version of the image.
No x86 emulation, QEMU, or binfmt_misc configuration is required.
Create the TeamSpeak 6 Docker Compose project
Create a directory for the server:
mkdir -p ~/ts6
cd ~/ts6
Create a docker-compose.yml file:
cat > docker-compose.yml << 'EOF'
services:
  teamspeak:
    image: teamspeaksystems/teamspeak6-server:latest
    container_name: teamspeak6-server
    restart: unless-stopped
    ports:
      - "9987:9987/udp"    # voice
      - "30033:30033/tcp"  # file transfer
    environment:
      - TSSERVER_LICENSE_ACCEPTED=accept
    volumes:
      - teamspeak-data:/var/tsserver/

volumes:
  teamspeak-data:
    name: teamspeak-data
EOF
What this configuration does, in short:
- Pulls the official TeamSpeak 6 Server image published by TeamSpeak.
- Automatically selects the native
linux/arm64image on the OCI Ampere VM. - Exposes the default voice port
9987over UDP and the file transfer port30033over TCP, matching the upstream recommendations (which you can view here). - Persists configuration and database files in a named Docker volume
teamspeak-data. - Automatically restarts the container unless you stop it manually.
Start the TeamSpeak 6 server
From the ~/ts6 directory, pull the image and start the server in the background:
sudo docker compose pull
sudo docker compose up -d
Check that the container is running:
sudo docker compose psTo read the startup logs and capture your admin credentials, run:
sudo docker logs teamspeak6-server | tail -n 80On first startup you will see output similar to:
Server Query Admin Account created
loginname= "serveradmin", password= "someRandomPassword"
apikey= "someApiKey"
VirtualServer |1 |ServerAdmin privilege key created, please use the line below
token=SomeGeneratedTokenValue
Write down:
loginnameandpasswordfor server query admintokenwhich is your ServerAdmin privilege key
You will use the token once when you first connect from the client to become server admin.
If the log seems to end after this message: Precomputing puzzle, this may take some seconds… wait a few minutes and run the docker logs command again.
Open ports in OCI and on the VM
The container listens on ports 9987 and 30033, but network security still blocks traffic until you open these ports in:
- The VCN security list
- The Oracle Linux firewall on the VM
Open ports in the VCN security list
- In the OCI Console, open your instance details page.
- In the Primary VNIC section, click the subnet name.
- In the subnet view, click Security Lists, then click the security list attached to the subnet (for many simple setups this is the default security list).
Click Add Ingress Rules and create these rules:
Rule 1, voice traffic
Source CIDR: 0.0.0.0/0
IP Protocol: UDP
Destination Port Range: 9987
Rule 2, file transfer
Source CIDR: 0.0.0.0/0
IP Protocol: TCP
Destination Port Range: 30033Save the changes. (You can also implement the same rules using network security groups if that fits your network design better.)
On the VM, open the same ports in firewall:
sudo firewall-cmd --permanent --add-port=9987/udp
sudo firewall-cmd --permanent --add-port=30033/tcp
sudo firewall-cmd --reload
Congratulations, you now have end to end connectivity from the internet to the TeamSpeak server container.
Connect from the TeamSpeak 6 client
Install the TeamSpeak 6 client from the official downloads page if you have not already.
Then, open the client. Create a new connection or server profile. Use the public IP of your OCI instance as the server address. Connect.
- When the client prompts you for a privilege key, paste the
tokenvalue you copied from the server logs.
After that, your user becomes a ServerAdmin on that virtual server and you can:
- Create and organize channels
- Adjust permissions
- Invite friends by sharing the IP or a bookmark
Remember this is a beta server. At the time of writing, the server license included in the container allows 32 slots and automatically renews during the beta period.