Oracle recently announced the OCI Managed MCP Service for Oracle AI Database, bringing native, enterprise-grade MCP Servers to the OCI Database Tools Service. The new service works with any Oracle database reachable through a Database Tools Connection — including Autonomous AI Database on Dedicated Infrastructure (ADB-D).
This post walks through how I configured the new Managed MCP Service for my ADB-D 26ai instance and connected it to an MCP client — no compute-based or local MCP server, no cumbersome authentication, just a fully managed OCI service with OAuth 2.0 authentication.
Architecture Overview
The architecture is clean and fully managed:
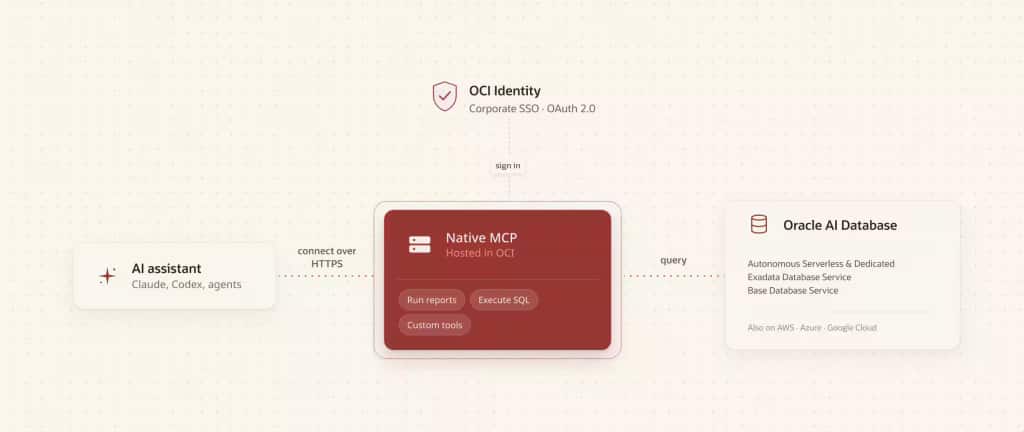
The MCP server runs as a managed OCI service with Streamable HTTP transport. Authentication is handled by an OCI Identity Domain using OAuth 2.0 with PKCE (authorization code flow). The MCP server connects to the database via a standard Database Tools Connection backed by an OCI Vault for credential storage.
What You Need
Before starting, ensure you have:
- An Autonomous AI Database on Dedicated Infrastructure (ADB-D) instance — 19c or 26ai
- A Database Tools Connection pointing to your ADB-D (requires a Vault with the DB password stored as a secret)
- An OCI Identity Domain (Free tier works) in the same region as your database
- An MCP client such as Claude (claude.ai), Claude Desktop, Cline in VS Code, Codex, or any MCP-compatible agent
Setting Up the MCP Server
Step 1: Create the MCP Server
(As a prerequisite you will need a Database Connection, if you don’t have one yet please follow this guide).
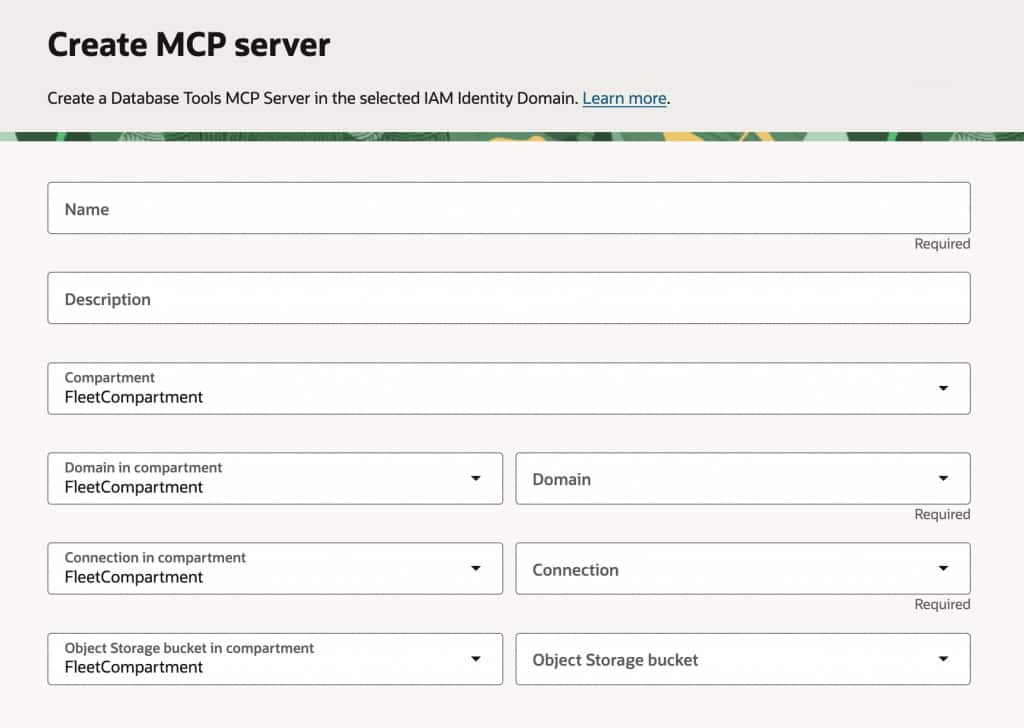
Navigate to Developer Services → Database Tools → MCP Servers → Create MCP Server in the OCI Console. Provide:
- A name for your MCP Server
- The compartment housing your resources
- The Identity Domain (must be Free tier or higher — Lightweight domains are not supported)
- Your existing Database Tools Connection
- An Object Storage bucket for runtime artifacts
The Identity Domain must be homed in the same region as your database. If your domain is in a different region, you’ll get an error. Either replicate it or create a new Free domain in the correct region.
Step 2: Create a Toolset
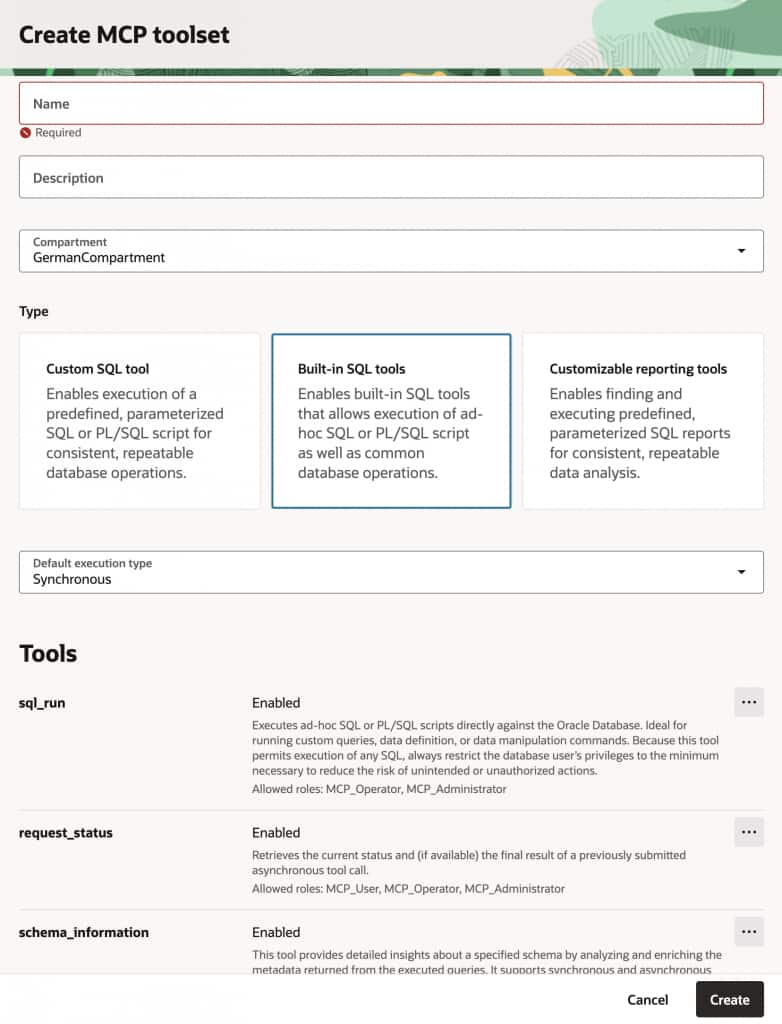
Go to the Toolsets tab on your new MCP Server and create a toolset. Select Built-in SQL tools to get three tools out of the box:
- sql_run — Execute ad-hoc SQL, PL/SQL, or SQL*Plus scripts (requires MCP_Operator or MCP_Administrator role)
- schema_information — Discover schema metadata (requires MCP_User or higher)
- request_status — Poll asynchronous tool executions (requires MCP_User or higher)
Step 3: Configure IAM Policies
This step is critical and easy to miss. The MCP Server needs OCI IAM policies to access your Database Tools Connection, Vault secrets, and other resources. Without these policies, you’ll get MCP error -32007: Missing required permissions even after successful authentication.
Create a group in your Identity Domain (e.g., MCP_All_Users) and add your user to it. Then create a policy in the root compartment following the instructions in the official setup documentation.
For an MCP Server configured with Resource Principal runtime identity, you’ll need policies that:
- Allow your Identity Domain group to invoke the MCP Server
- Allow the MCP Server (by its OCID) to use Database Tools Connections
- Allow the MCP Server to read secret bundles from the Vault
- Allow the MCP Server to use buckets and manage objects in Object Storage
Step 4: Configure Roles
Go to the OCI console section Identity & Security – Domains. Navigate to your Identity Domain → Oracle cloud services → find the MCP Server application → Application roles tab. Assign your user to MCP_Administrator (or whichever role matches your needs).
Step 5: Register an MCP Client
On the MCP Server’s Clients tab, click Register MCP client:
- Type: Public
- Redirect URI:
https://claude.ai/api/mcp/auth_callback
If you also plan to connect from Claude Desktop or other local clients via mcp-remote, add http://localhost:8080/oauth/callback as an additional redirect URI in the client’s OAuth configuration (under Integrated applications in the Identity Domain).
Assign your user to the newly created client application under Integrated applications in the Identity Domain.
Note the Client ID — you’ll need it for your MCP client configuration.
Connecting an MCP Client
The MCP Server uses Streamable HTTP transport with OAuth 2.0 authentication. Any MCP-compatible client can connect.
Connecting via claude.ai (Simplest)
Claude’s web interface supports MCP connectors natively. No local tooling required — the connection is handled entirely server-side.
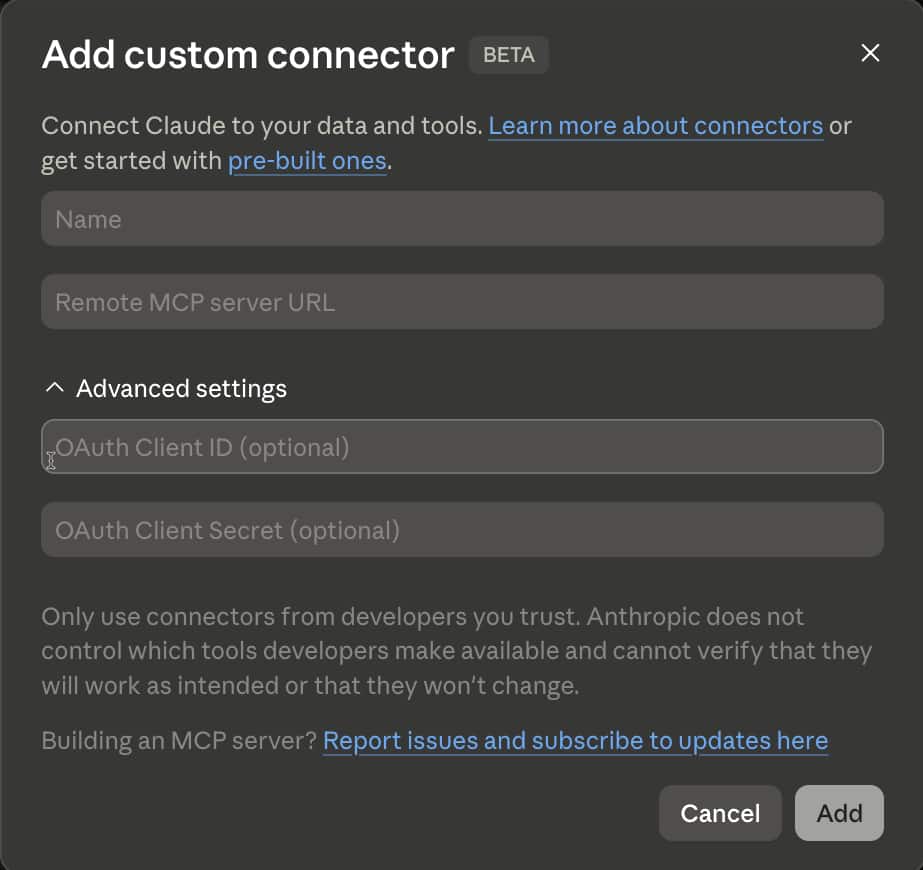
- In claude.ai, go to Settings → Connectors → Add custom connector
- Fill in:
- Name: e.g.,
ADB-D - Remote MCP server URL: your MCP Server URL (from the server details page)
- Under Advanced settings, enter your OAuth Client ID
- Leave OAuth Client Secret blank (Public client)
- Name: e.g.,
- Click Add
- Your browser opens to the Identity Domain login page — log in and approve access
- The connector appears as connected with three tools:
sql_run,schema_information, andrequest_status
That’s it. No terminal, no config files, no bridges.
For other MCP clients such as Cline in VS Code, see the official connection tutorial.
The Result
Once connected, your MCP client has direct SQL access to your ADB-D instance through the managed MCP Server:
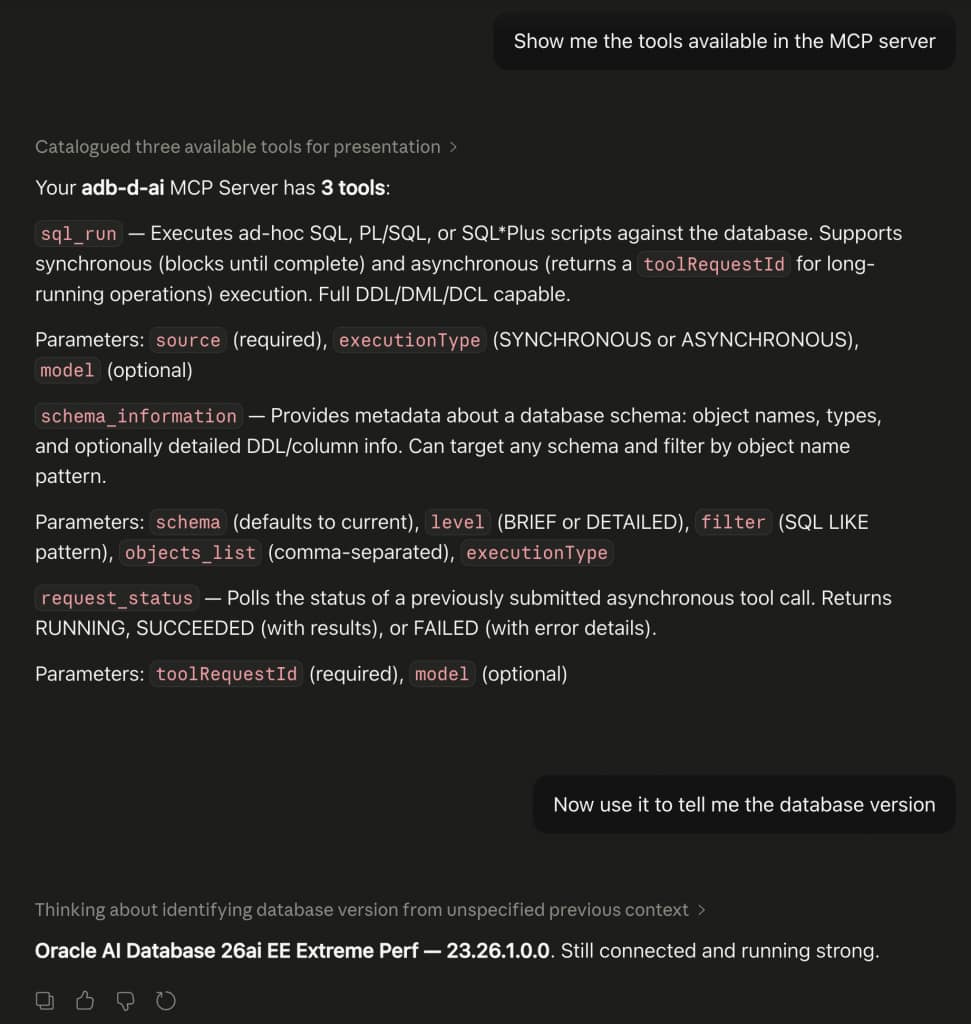
No local MCP server. No cumbersome authentication. No additional infrastructure to deploy. Just a fully managed OCI service that connects AI agents to ADB-D over secure, governed HTTPS.
Full Read-Write Access, Governed by Roles
An important detail: the sql_run tool provides full read-write access to the database — DDL, DML, and transaction control all work. The access level is determined by the database user configured in the Database Tools Connection. In my testing, CREATE TABLE, INSERT, COMMIT, SELECT, and DROP TABLE all executed successfully through the MCP Server because the connection used the ADMIN user.
The governance layer is on the MCP side through the three application roles:
- MCP_Administrator / MCP_Operator — Can use
sql_runfor ad-hoc SQL, meaning full read-write access to everything the database user can do - MCP_User — Can only access pre-defined, parameterized SQL Reports — no ad-hoc SQL
This means that for production environments, you’d restrict most users to the MCP_User role and expose only curated SQL Reports as tools, while reserving MCP_Operator for trusted users like DBAs or developers who need unrestricted access. The combination of database-level privileges (controlled by which DB user the connection authenticates as) and MCP-level roles gives you two independent layers of access control.
What This Means for ADB-D
The OCI Database Tools Managed MCP Service brings enterprise-grade agentic access to Autonomous AI Database on Dedicated Infrastructure. It works with any Oracle database reachable through a Database Tools Connection, leveraging existing OCI infrastructure — Identity Domains for authentication, Vault for credential management, and IAM policies for fine-grained access control. ADB-D customers can now connect AI agents and MCP-compatible tools to their databases through a fully managed, governed service with no additional infrastructure to deploy or maintain.
For the complete service documentation, see Working With the Database Tools Model Context Protocol Server and Tutorial: Set Up a Database Tools MCP Server and Integrate with an MCP Client.