Most organizations are running many applications in multiple locations or even multiple cloud providers. How can you monitor and manage all these services and platforms in a multicloud world? Here, Oracle Cloud Infrastructure (OCI) Logging service can help!
Monitoring your application and system logs is essential to quickly detect important events that can require prompt action. It also allows for deferred troubleshooting and deeper analysis. You might also know the importance of adopting a centralized log management and storage solution as your environment continues to grow in complexity and scale. Centralized log management systems allow you to analyze log events across related systems simultaneously and can also simplify complex distributed administrative and data storage processes.
However, what if you run applications on hosts and virtual machines (VMs) in OCI, your own data center, and other cloud providers? Streamlining configuration management across diverse systems and locations while ensuring secure data transfer across public networks can pose challenges.
OCI Logging is a highly scalable and fully managed service that allows you to manage logs from both OCI and external resources. You can easily perform searches, generate alerts, and set up automatic archive policies. Authorized users can easily configure and manage all aspects of this service through the Console, CLI, or SDK tools.
OCI also provides a free agent download based on the popular open source Fluentd framework, which runs on most supported Linux distributions. You can configure this agent to read, parse, and format specified target log files for secure uploads to OCI Logging. The agent install is simple and can be integrated with all standard automated host management tools. Best of all, you can perform the agent configuration, such as defining or updated target source log files, from the central Logging service and automatically apply changes across entire groups of hosts.
In this blog, I show how you can easily enable custom log ingestion and consolidation for applications running on Linux servers outside OCI. We use the built-in host system event log (syslog) for a quick source example. However, you can easily customize the configuration to match your exact source application log locations, types, and formats.
Implement log management for non-OCI Linux hosts
Create an OCI user security group to define agent authentication and access controls
It’s a best practice to define a separate user security group for each collection of hosts that shares an agent configuration. With this approach, individual configuration parameters can be matched to each application. Give your user security group an appropriate name associated with the intended purpose, and then create a policy to grant the following single permission:
Allow group <my-Group> to use log-content in compartment <target-compartment>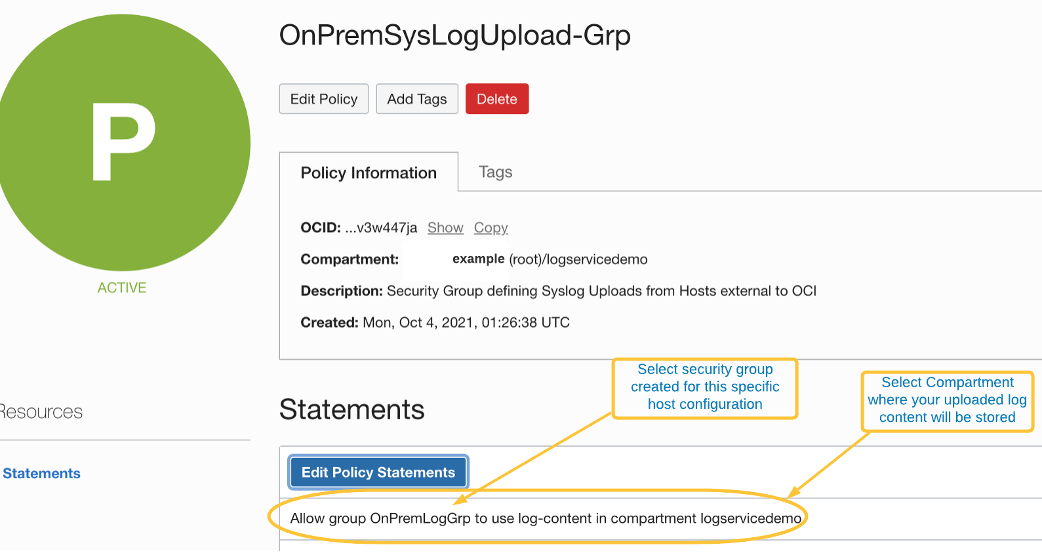
Add an OCI User to this Security Group and record the user configuration profile information
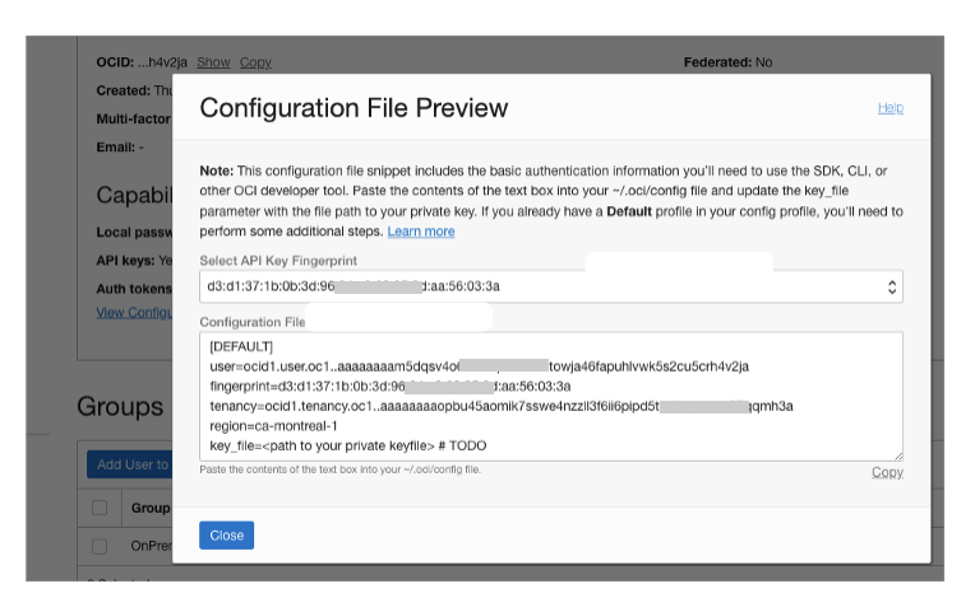
You need basic user credentials for the agent to interact with OCI Logging service and security best practices require this user to have the minimum permissions required to perform this operation. We recommend that you create a dedicated external log-agent user without Console access, password authentication, or any explicit permissions. In fact, this user only retains permissions through inclusion to security groups, as created in step 1.
Create a user for this purpose, create or download an API signing key, and record the profile configuration information for this user as in the following image. If using the OCI Console, you can have an API key pair created automatically and output the following information by selecting View Configuration File in the User Details screen.
Deploy logging agent to host and configure API access
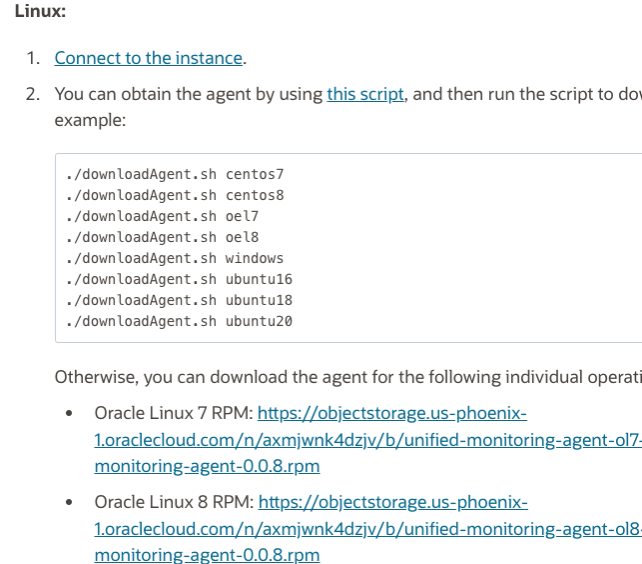
You can deploy the agent through the installation script or install the package manually. Select the appropriate script or package version link found on the official agent download instruction page. A separate package download list exists for FIPS-enabled agent packages.
Install the agent according to the instructions. After installation, create a subdirectory under the agent config directory and configure API access information. These actions allow the agent to pull configuration updates and push log content to OCI Logging. By default, an agent directory is created at /etc/unified-monitoring-agent/. For default installations, perform the following steps as a root user:
-
Create a directory at /etc/unified-monitoring-agent/.oci
-
Upload your user private API key file to this new directory.
-
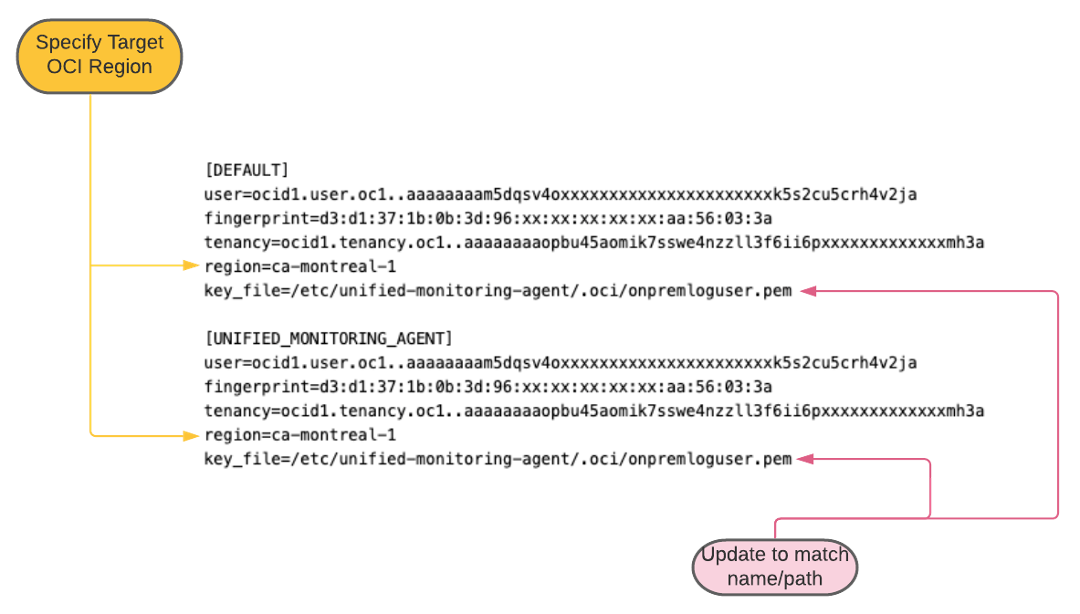
Create a file named “config” and add the OCI user information collected from step 2. See the following example format.
Important notes on config file format:
-
Duplicate the same information under two separate profile names: [DEFAULT] and [UNIFIED_MONITORING_AGENT] as shown in the following example. The separate agent services (config downloader and log content uploader) each expects a unique profile. Defining separate user credentials for each service profile is recommended only for rare circumstances and not required here.
-
Ensure that the key_file parameter reflects the actual path and name of the private API key uploaded to the host.
-
Select the OCI region that you want this host agent to pull configuration updates and upload log content. Typically, this decision is geographically collocated to your host, but you can choose any region based on your data routing and storage requirements.
-
Finally, ensure that the config and key files have restricted access permissions. For example, run the following command:
chmod 600 /etc/unified-monitoring-agent/.oci
Create the log group and agent configuration
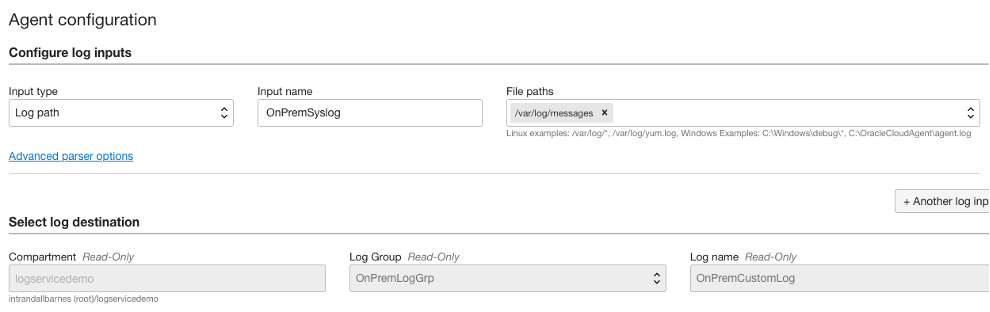
Now, it’s time to switch back to the OCI Console. Navigate to Observability and Management, Logging, and Log Groups and create a log group, selecting the target compartment specified in step 1. Next, select Logs and click the Create custom log button. For your new custom log, ensure that the compartment and log group match the values previously selected. After selecting the Create custom log button, you can create an agent configuration. Under Host Groups, select User Group as the group type and, for the group, select the group you created in step 1.
In the Configure Log Inputs section, choose Log Path as the input type, syslog as the input name, and /var/log/messages for the file path. Although we’re instructing the agent to process system-generated logs, you can use the same procedure to select application log paths or entire log directories.
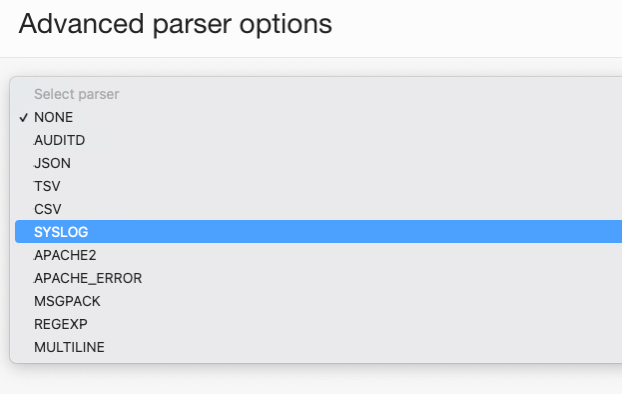
In this same section, click Advanced Parser Options and choose syslog in the parser list.
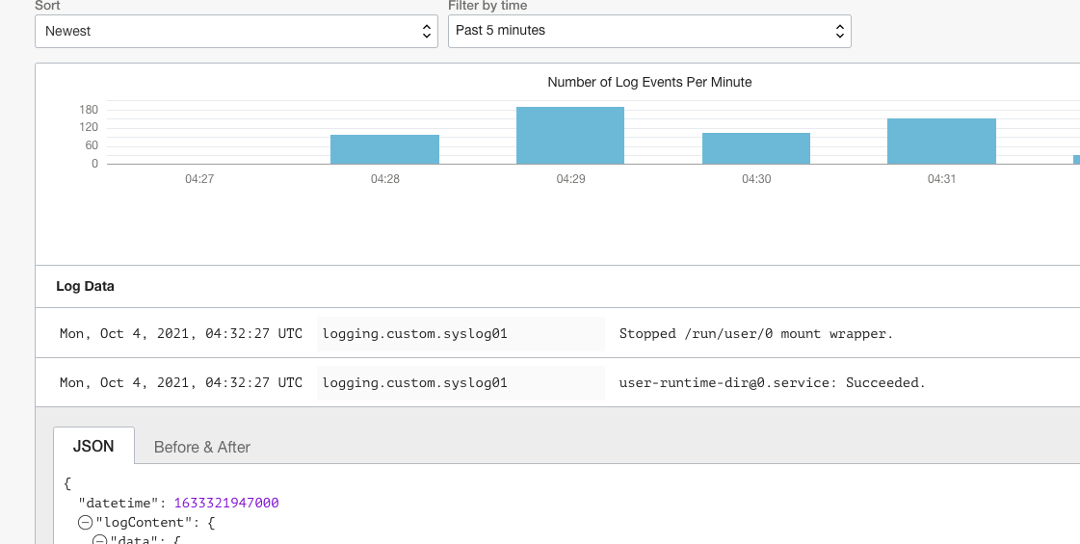
After creating the custom log and agent configuration, wait a few minutes for your host to automatically pull down the new configuration information, collect log records, and begin pushing log content to OCI Logging. You can then explore and search log content from the central service Console.
Summary
OCI Logging provides a centralized log management solution that allows you to consolidate all your OCI and on-premises server’s logs into a secured centralized location, simplifying log analysis and correlation tasks. You can easily search through different sources of logs in a single location and archive old logs into low-cost OCI Archive Storage for retention compliances and durability.
Logging is one of the Always Free cloud services offered on Oracle Cloud Infrastructure. Try OCI Logging service today!