Moving to the cloud means that you don’t have to worry about infrastructure. Oracle Cloud Infrastructure (OCI) helps you to alleviate your worries by providing a highly available infrastructure with 99.95% availability service level agreements (SLAs). You still have a 00.05% chance that your applications might face an outage if they aren’t configured to be highly available.
Oracle can provide you with help. But if you’re without your own disaster recovery strategy in place, your choices are currently limited to one solution. Oracle uses only the previous night’s EPM back up to restore. You can’t surgically restore data in scenarios of major or minor, partial data loss. This solution restores your application from last night’s backup for the entire application. So, having a back up and restore strategy in place is an important best practice.
Today, I talk about how you can create your own automated backup and restore strategy using EPM Automate, Oracle Object Storage, Always Free OCI Compute, and two simple scripts.
Step 1
Sign up for OCI Always Free Tier. We need this account to deploy a Compute instance to set up our EPM Automate.
Step 2
Log in to your Oracle cloud account and deploy an Always Free Compute instance. For more details, refer to Quickstart a Compute Instance on OCI. For this demo, we use an A1 instance with 2 OCPUs and Oracle Linux 8 as our operating system.
Step 3
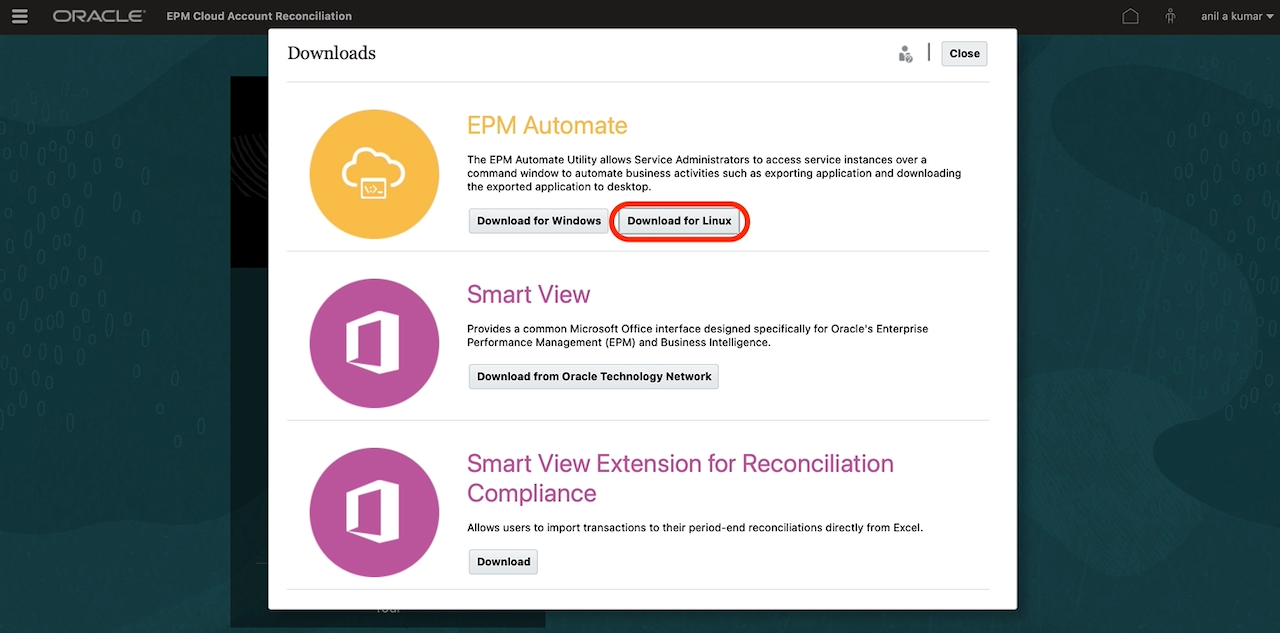
Log in to your EPM Cloud instance and click Downloads in the application’s user menu.
<img alt="A screenshot of the EPM Cloud Account Reconciliation page with the Settings and Actions menu open and the Download… button circled in red.” height=”419″ src=”/wp-content/uploads/sites/83/2025/10/Screenshot-2022-04-23-at-5.10.39-PM-1.png” width=”847″>
Click Download for Linux, which downloads EPMAutomate.tar on your local system.
Step 4
Copy the EPMAutomate.tar file to the Compute instance. You need the SSH private key that you downloaded while creating the instance and its public IP address. Run the following command, replacing all placeholders within brackets with their values:
scp -I `path_to_instance_private_key`[path_to_the_instance_private_key] `path_to_epmautomate.tar`[path_to_the_epmautomate.tar] opc@`pubilc_IP_of_instance`[public_ip_of_the_instance]:/tmp
Step 5
Create an Object Storage bucket to upload the artifact snapshots. Follow this article on how to create it. My bucket is named epm_snapshots.

Step 6
Create an auth token to authenticate while uploading the snapshot. Save this token for later.
Step 7
Log in to the instance using SSH with the following command. Replace all placeholders within brackets with their respective values.
ssh -I `path_to_instance_private_key`[path_to_the_instance_private_key] opc@`public_IP_of_the_instance`Step 8
In the instance, install Java by running the following command:
sudo yum -y install javaAfter the installation is complete, set up the java_home environment variable using the following command:
export JAVA_HOME=[path_to_JDK]Step 9
Move to the /tmp folder where we copied our EPMAutomate.tar and follow the steps in Working with EPM Automate for Oracle Enterprise Performance Management Cloud. In the /tmp folder, unzip the EPMAutomate.tar using following command:
tar -xvf EPMAutomate.tarAfter unzipping, try running the epmautomate.sh using the command, sh epmautomate/bin/epmautomate.sh.

If you don’t see this output, ensure that you have JDK installed and the JAVA_HOME environment is pointing to your JDK location.
If you’re still having trouble connecting to the EPM Cloud instance, open port 443. EPM Automate connects to EPM Cloud using the standard TLS port (port 443). You don’t need to open other outgoing ports for EPM Automate.
If your password contains special characters, escape them with a backslash.
Step 10
In the instance, create two files called copy_to_oss.sh and copy_from_oss.sh. We use them to automate the backup process. Use the following command:
touch copy_to_oss.sh
touch copy_from_oss.sh
Now we write the scripts. Open copy_to_oss.sh using your favorite editor (I’m using nano).
nano copy_to_oss.sh| Place holder |
Expected value |
| JAVA_HOME |
Directory where the JDK used by EPM Automate is installed Example: |
| epmautomateExe |
Directory where EPM Automate is installed Example: ./home/utils/EPMAutomate/bin |
| cloudServiceUser |
User ID of an EPM Cloud service administrator Example: John.doe@example.com |
| cloudServicePassword |
Password of the service administrator or the location of the password file. If the password contains special characters, see Handling Special Characters. =Example: ex_PWD_213
|
| cloudServiceUrl |
URL of the EPM Cloud environment from which the artifact snapshot is copied. Example: https//test-cloud-id_Dom.pbcs.us1.oraclecloud.com |
| objectStorageUser |
User ID of a user in Oracle Object Storage. To copy a snapshot to Object Storage, the user must have write access for the bucket to which the snapshot is copied. To copy a snapshot from Object Storage, the user must have read access for the bucket from which the snapshot is copied. Example: jDoe |
| objectStoragePassword |
Password of the objectStorageUser Example: example_PWD |
| objectStorageBucketUrl |
URL of the Oracle Object Storage bucket where the snapshot is to be copied. See these information sources for the URL format: Example: https//swiftobjectstorage.us-ashburn-1.oraclecloud.com/v1/axaxnpcrorw5/bucket-20210301-1359 |
| snapshot |
Name of the snapshot that you want to copy from the Oracle Object Storage bucket Example: Artifact Snapshot20210429.zip |
Then paste the following code into the script. Don’t forget to replace all the placeholders. For more details, refer to the table.
#!/bin/sh export JAVA_HOME=`path_to_jdk`[path_to_jdk] epmautomateExe=`path_to_epm_automate_executable`[path_to_epmautomate_executable] cloudServiceUser=`cloud_service_user`[cloud_service _user=""] cloudServicePassword=`cloud_service_password`[cloud_service_password] cloudServiceUrl=`cloud_service_url`[cloud_service_url] # User with write access to Object Storage bucket objectStorageUser=`object_storage_user`[object_storage_user] objectStoragePassword=`object_storage_password`[object_storage_password] objectStorageBucketUrl=`object_storage_bucket`[object_storage_bucket] currentDate=`date +’%Y%m%d’` sourceSnapshot="Artifact Snapshot" targetSnapshot="${sourceSnapshot}_${currentDate}" $epmautomateExe login ${cloudServiceUser} ${cloudServicePassword} ${cloudServiceUrl} $epmautomateExe renamesnapshot ${sourceSnapshot}" "${targetSnapshot} $epmautomateExe copyToObjectStorage ${targetSnapshot} ${objectStorageUser} ${objectStoragePassword} "${objectStorageBucketUrl}/${targetSnapshot}" $epmautomateExe logout exit 0
After you have replaced all the placeholders, your output looks like the following example.

Let’s do the same with copy_from_oss.sh script. Paste the following code into the copy_from_oss.sh script:
#!/bin/sh export JAVA_HOME=`path_to_jdk`[path_to_jdk] epmautomateExe=`path_to_epmautomate_executable`[path_to_epmautomate_executable] cloudServiceUser=`cloud_service_user`[cloud_service _user=""] cloudServicePassword=`cloud_service_password`[cloud_service_password] cloudServiceUrl=`cloud_service_url`[cloud_service_url] # User with read access to Object Storage bucket objectStorageUser=`object_storage_user`[object_storage_user] objectStoragePassword=`object_storage_password`[object_storage_password] objectStorageBucketUrl=`object_storage_bucket`[object_storage_bucket] snapshot=`desired_snapshot`[desired_snapshot] targetFileName = "Artifact_Snapshot" $epmautomateExe login ${cloudServiceUser} ${cloudServicePassword} ${cloudServiceUrl} $epmautomateExe copyFromObjectStorage ${objectStorageUser} ${objectStoragePassword} "${objectStorageBucketUrl}/${snapshot}" ${targetFileName} $epmautomateExe logout exit 0
After you have replaced all the placeholders, your output looks like the following example.

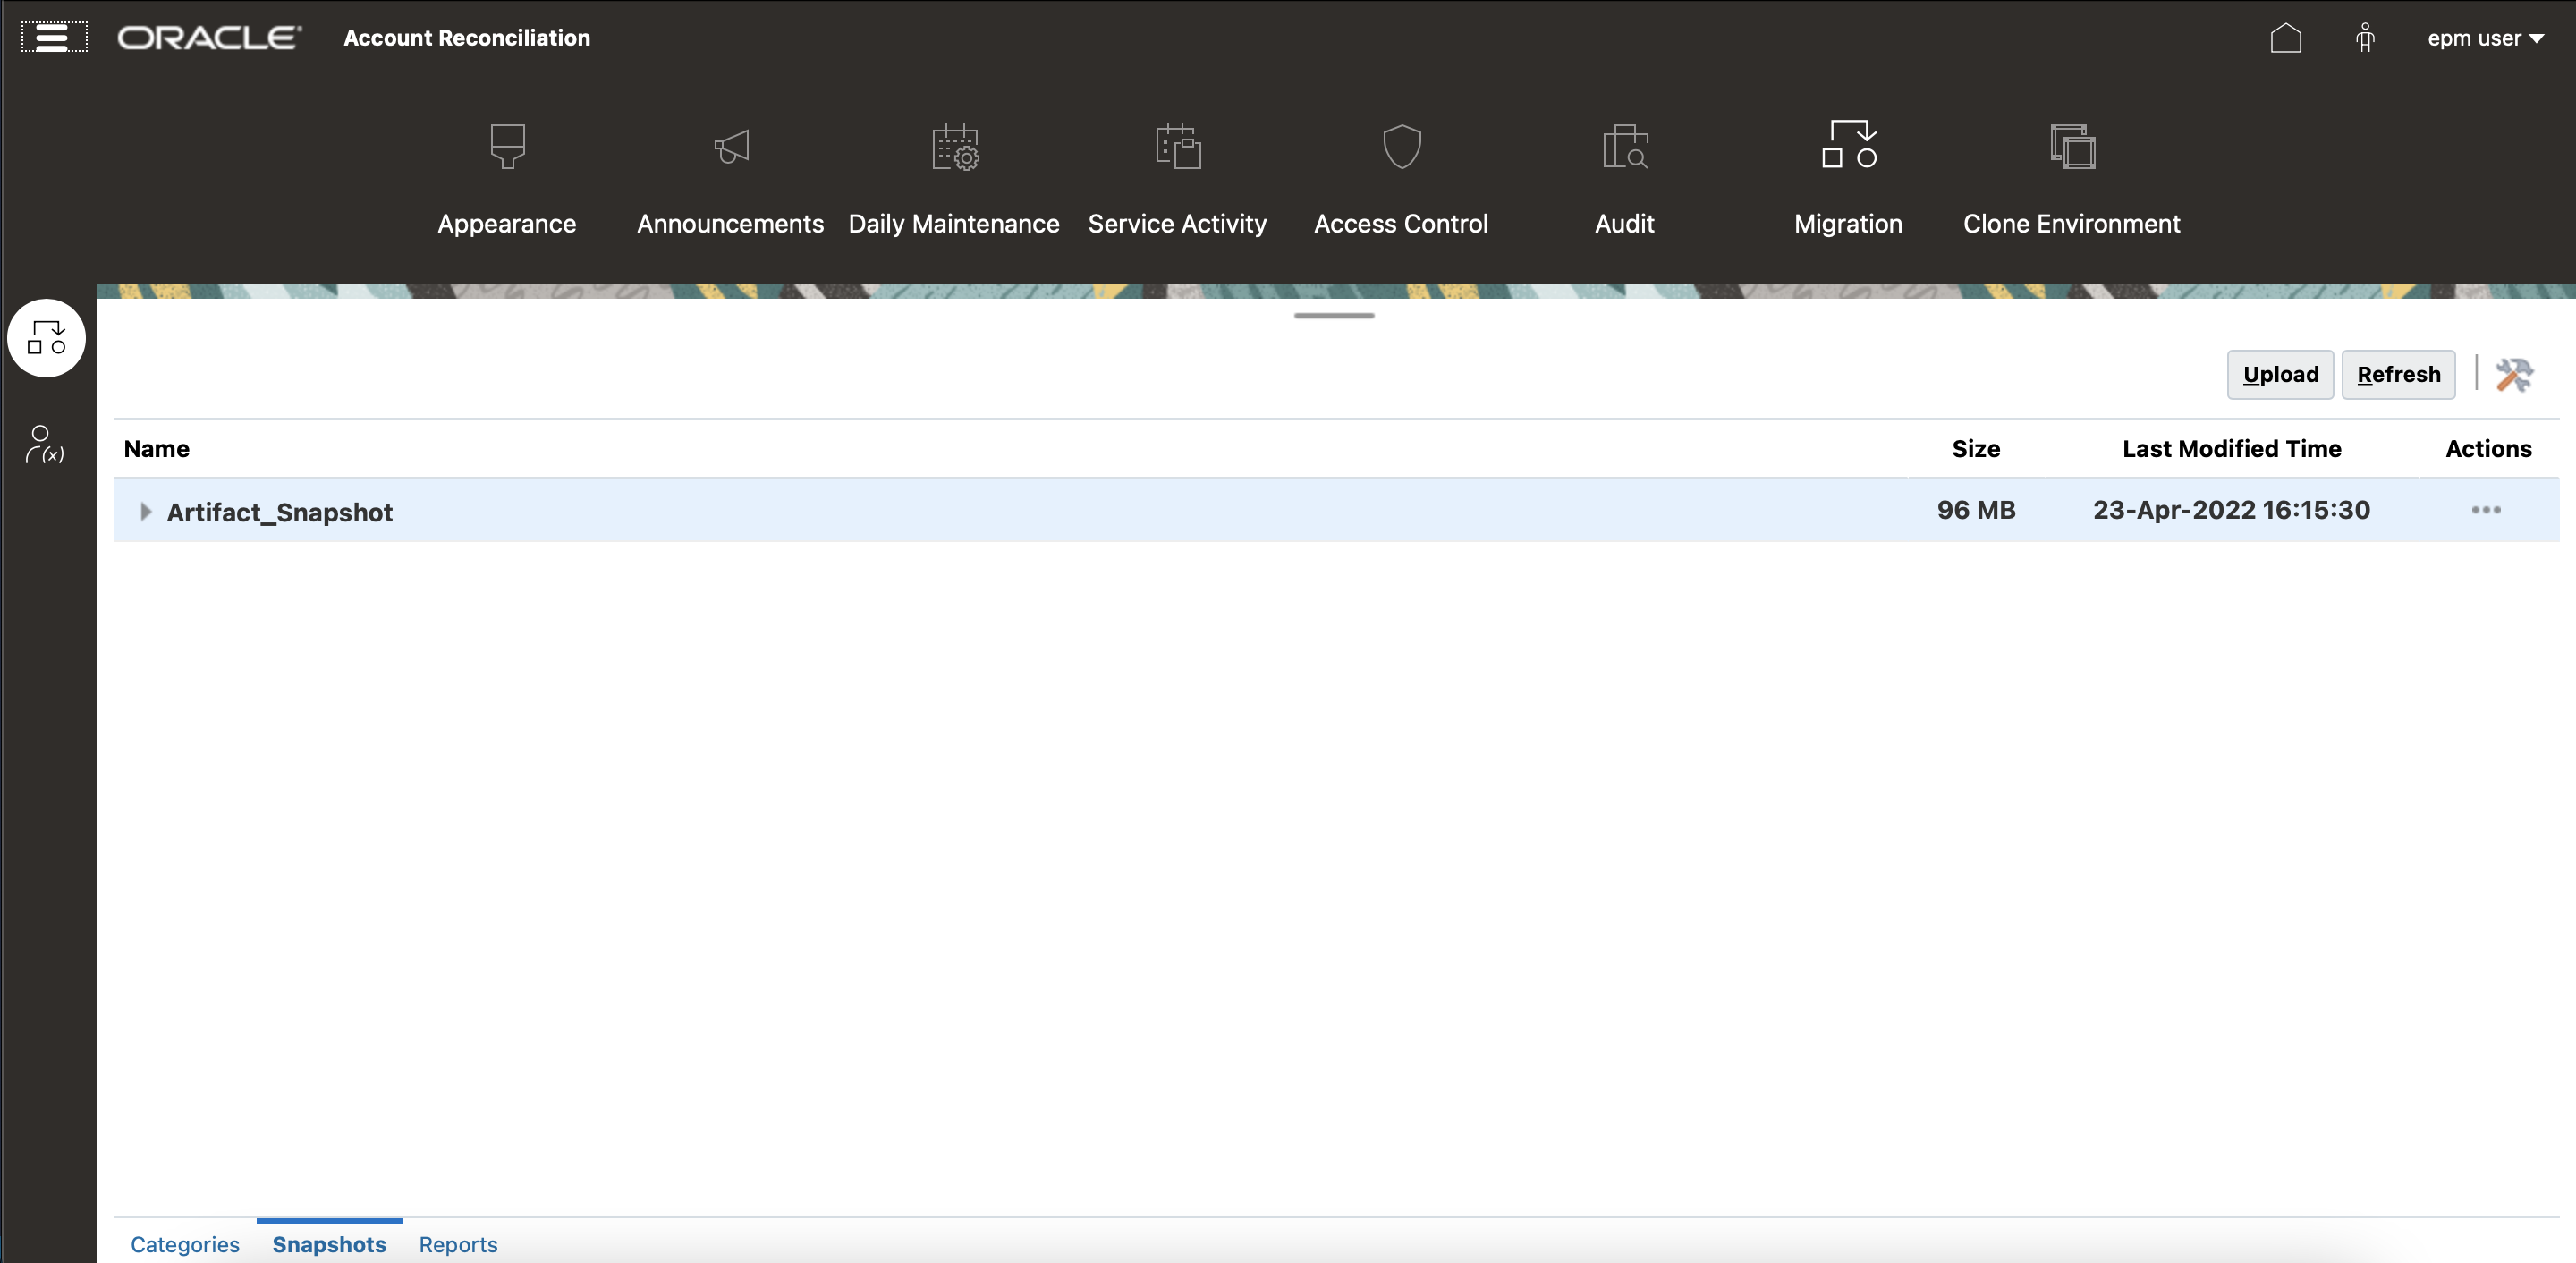
Now that we’re done with the setup, let’s test it. I logged in to my EPM Cloud, and I can see that one artifact snapshot is available.
Next, I run the copy_to_oss.sh script to copy this snapshot to the bucket that I created earlier using the following command:
sh copy_to_oss.sh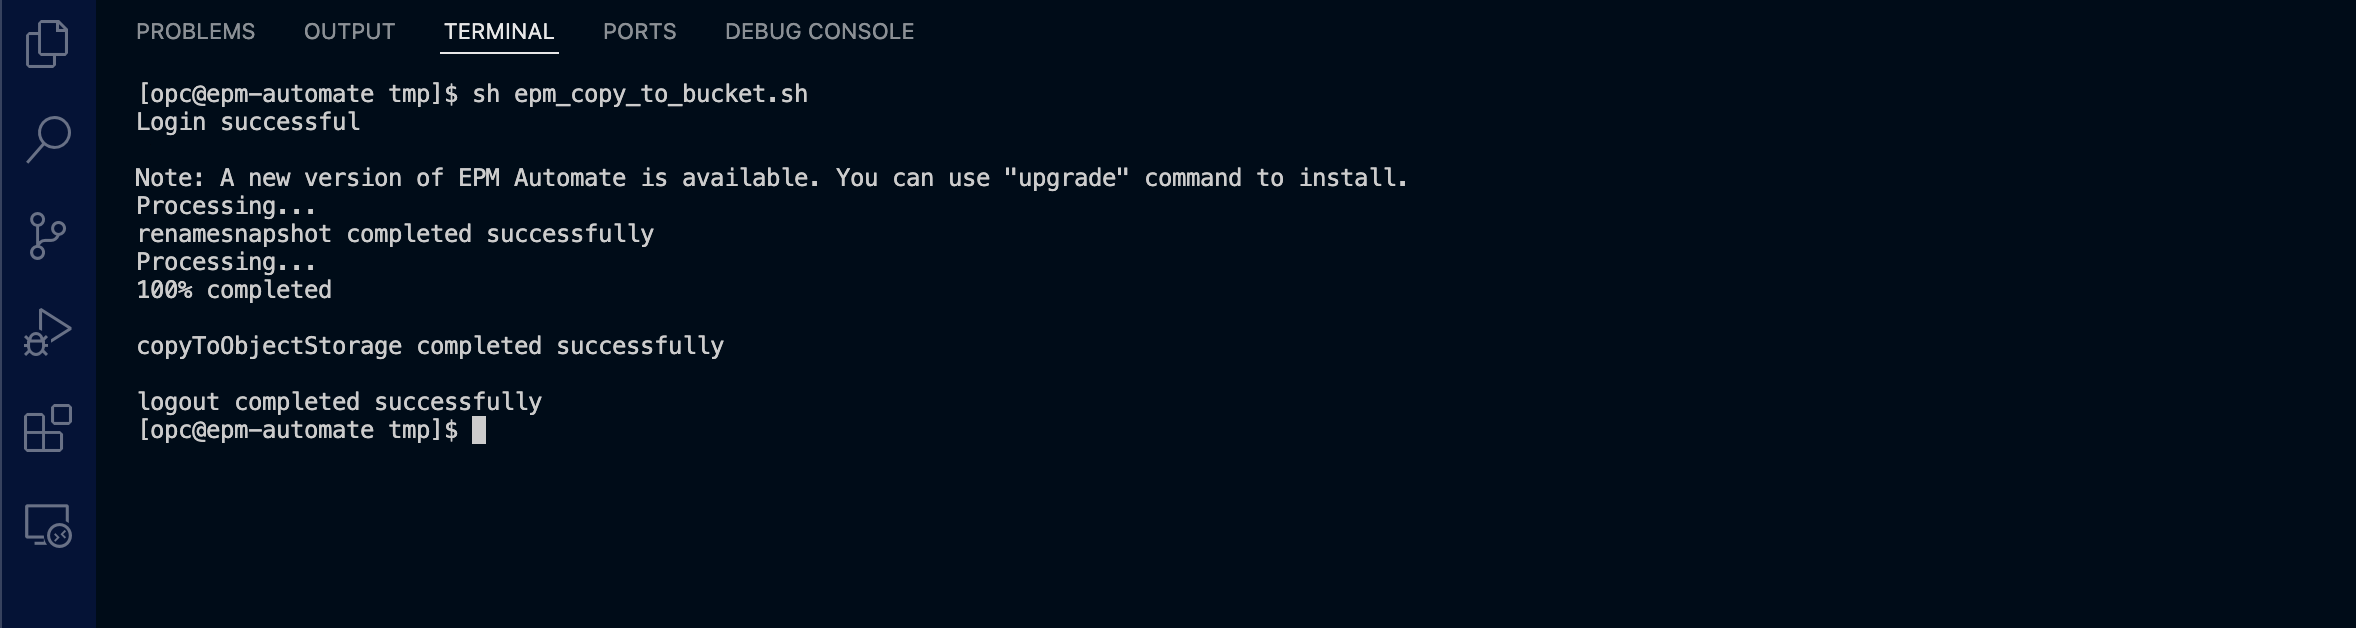
Our upload was successful! Let’s check the bucket now.

We can verify that the artifact snapshot now exists in our bucket. Now, copy it from Object Storage to the EPM Cloud instance.run with the following command:
sh copy_from_oss.sh
Now let’s check our EPM Cloud instance to see if our new backup is available to restore.
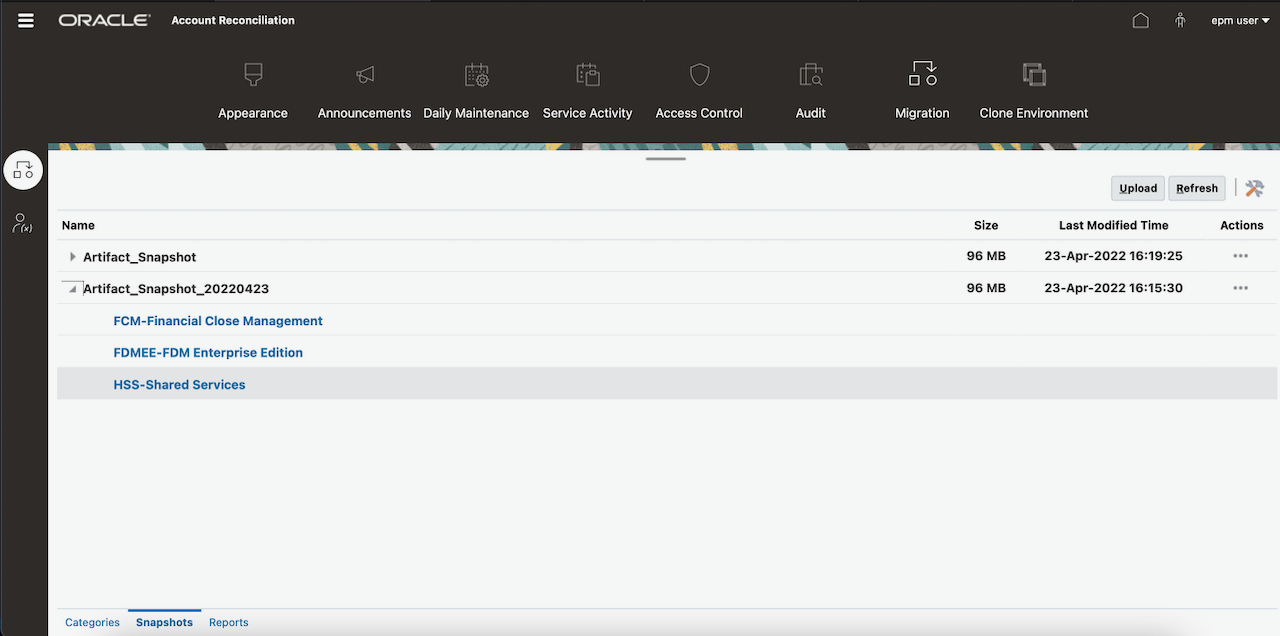
As you can see, we were successfully able to download the artifact from Object Storage to our EPM Cloud instance.
Next steps
-
Automate the backup using a cronjob. For more details, see Use the Crontab Utility to Schedule Tasks on Oracle Linux.
-
Generate preauthenticated requests for the snapshots in the bucket and provide them to admins who need them to deploy new EPM Cloud instances using backups.
Conclusion
We just saw how you can use OCI Always Free Compute instance to automate EPM Cloud backups and use these backups to restore a known state of EPM Cloud, which serves an important role in your back up and restore strategy for data loss and disaster recovery scenarios.
Every use case is different. The only way to know if Oracle Cloud Infrastructure is right for you is to try it. You can select either the Oracle Cloud Free Tier or a 30-day free trial, which includes US$300 in credit to get you started with a range of services, including compute, storage, and networking.