Why do we need it?
If we do NOT have site to site IPSEC VPN or Fast connect connection; this solution helps in establishing connectivity from OnPrem datacenter to OCVS SDDC. End users on their local machines can install SSP VPN client and establish connectivity.
Use case
- If we do not have site to site IPSEC VPN connectivity from OnPrem to OCVS SDDC; we can use this solution
- During DR if we do not have Bastion host, this solution will allow us to connect to OCVS SDDC.
- End users can login the OCVS VM’s / access hosted applications on OCVS from home network.
Setup Overview
- Configure OpenVPN on OCI
- Install and configure OpenVPN client on (OnPrem) windows 10 instance
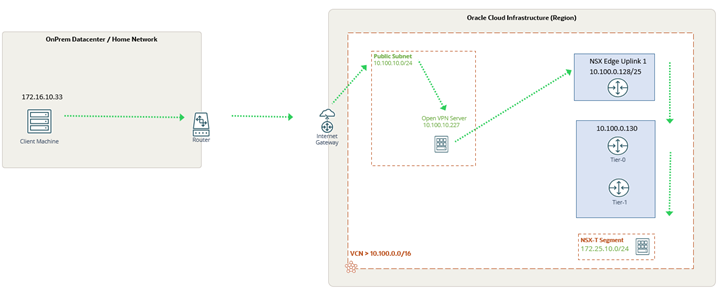
- Establish connectivity between NSX-T overlay segment and OpenVPN server
Green dashed lines indicate the workflow from client machine to NSX-T overlay VM
Detailed steps
Deploying OpenVPN Server on OCI
There are couple of ways of deploying OpenVPN Server on OCI.
- We can follow https://blogs.oracle.com/developers/post/launching-your-own-free-private-vpn-in-the-oracle-cloud and deploy OpenVPN appliance from OCI marketplace.
- The other option is to deploy Linux Instance (on OCI) and install OpenVPN package on it. I deployed centos instance and deployed OpenVPN, following https://openvpn.net/vpn-software-packages/centos/#modal-items
Allow below ports on Security list for communication
Incoming
- TCP 22 (SSH)
- TCP 443 (web interface)
- TCP 943 (web interface)
- TCP 945 (API port for clustering feature)
- UDP 1194 (UDP port for client communication)
Allow all outgoing traffic.
Configuring OpenVPN server
- SSH OpenVPN server and view /usr/local/openvpn_as/init.log to verify login credentials
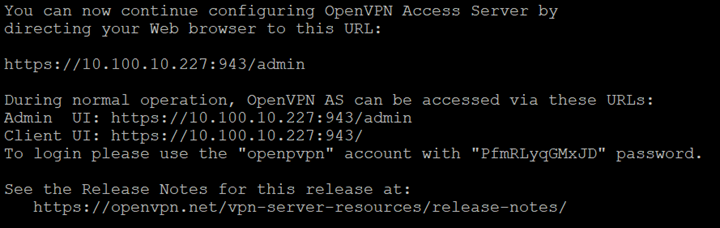
Access OpenVPN server with public IP (https://130.162.32.106/admin) and login (with credentials specified in above log file)
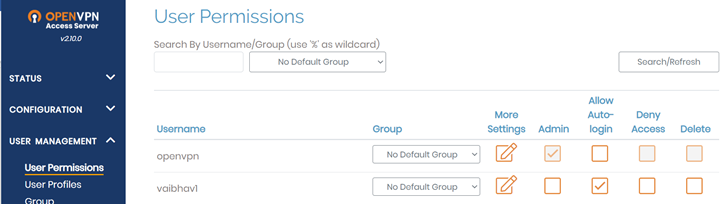
- Navigate to User management >> user permissions >> create the username. This account will be used on VPN Client to connect to OpenVPN server.
- Navigate to configuration tab >> network settings >> enter the hostname as public IP and save the configuration.
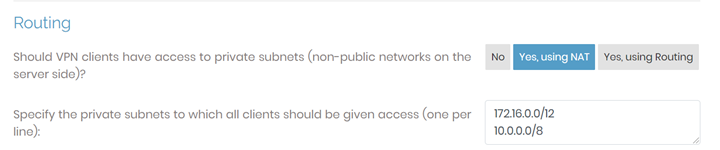
- Navigate to configuration tab >> VPN settings >> enter the CIDR/s that will be accessible from VPN Client machines.
Configuring OpenVPN Client
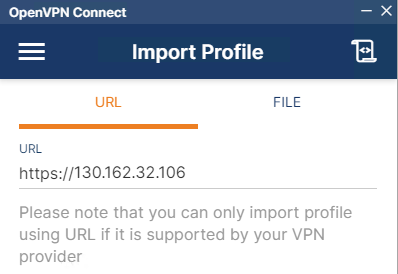
- We need to download OpenVPN client from https://openvpn.net/vpn-client/
- Enter the public IP and hit next
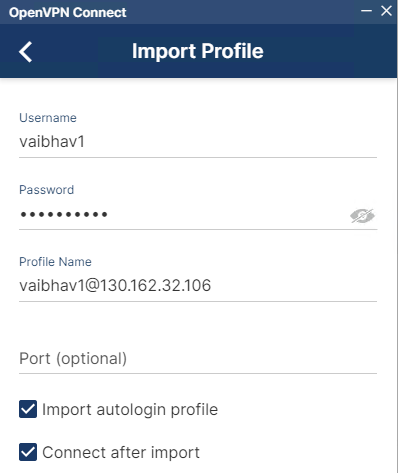
- Enter the username and password.
- Check the option “Import autologin profile” and “Connect after import”
Connectivity from OpenVPN client to NSX-T overlay
- After completing the above steps you should have connectivity to OpenVPN server over private IP.
- If the NSX-T overlay segment can communicate with OpenVPN server; then OpenVPN client should be able to communicate too (with NSX-T overlay segment)
- If the communication i.e. from Open VPN Server to NSX-T overlay segment is not working, then we can follow https://fhasan.net/2020/08/17/oracle-cloud-vmware-solution-networking-quick-actions-part-4-connectivity-to-vcn-resources/ to establish it.
Conclusion
Post following above steps, OnPrem datacenter virtual machine / physical machine should communicate with OCVS SDDC.
Here are few links which are related to this blog post.