This blog focuses on migrating an existing AWS Lambda function written in TypeScript and running on Node.js and deploying it to OCI Functions, Oracle Cloud Infrastructure’s fully managed Functions service built on the Fn Project. The goal isn’t to “rewrite everything”, but to understand what maps cleanly between the platforms, what needs adaptation, while avoiding common pitfalls regarding packaging, identity, networking, and observability.
The functionality of the application processes fictional information related to a purchase and creates an order document, that is then uploaded to object storage.
What changes and what doesn’t
The core business logic usually doesn’t need to change and most migration effort is concentrated in the “edges” of the functions such as event handlers and external dependencies. The following are 4 common parts to consider.
- Handler/event shapes: AWS event payloads (API Gateway, S3, etc.) differ from OCI request/event formats and may need a small adapter layer to reformat the request/event to fit respective handler but the core Async/Await behavior is the same in both cases.
OCI’s runtime expects to register a handler through the Function Developer Kit (FDK), handle(handler, …) tells the FDK:- Which function to invoke for each request
- How to decode the incoming payload (e.g. treat it as JSON)
- Explicitly bind the original
handlerto the OCI runtime viahandle(...)
/**
 * Original Lambda event handler
 */
export const handler = async (event: OrderEvent): Promise<string> => {
	...
}

/**
 * OCI Functions handler for passing the JSON event to the original Lambda handler.
 */
handle(handler, { inputMode: 'json' })

// Setting the inputMode to 'json' attempts to parse the input as json
// or falls back to raw (possibly binary) string value otherwise.- SDK integrations: If your function calls services via the AWS SDK (S3, DynamoDB, SQS), you’ll either replace those calls with OCI equivalents (Object Storage, NoSQL/DB services, Streaming/Queue) or keep AWS dependencies if you’re implementing a hybrid solution.
- Packaging and deployment: OCI Functions deployments are container-image based and stored in OCI Container Registry. This requires some changes to your build pipeline compared to ZIP + Layers for AWS Lambda. The Fn Project CLI helps you build and deploy these container images.
- Identity, networking, and secrets: OCI IAM policies, compartments, VCN integration, and OCI Vault are conceptually similar to AWS, but configured differently.
Avoiding common pitfalls on packaging, identity and observability
The code moves quickly, but the operational processes around the code doesn’t. Following are common pitfalls and practical ways to avoid them.
Deploy to OCI Functions
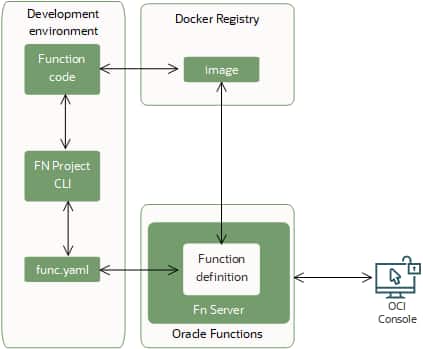
Once your function code is ready, you can start the deployment workflow with a single Fn Project CLI command. Behind the scenes, that command runs the following steps in order:
- Builds a Docker image from your function code.
- Creates (or updates) the function definition in a func.yaml file, including:
- the maximum execution time allowed for the function
- the maximum memory the function can use
- Pushes the image to the Docker registry you’ve configured.
- Uploads function metadata to the Fn Server, such as the memory and timeout limits, plus a reference (link) to the image in the registry.
- Registers the function in the OCI Console, so it appears in your list of functions.
The diagram below illustrates this end-to-end deployment process in OCI Functions.
Keep in mind that after the image is pushed to your container registry, maintaining it is up to you. For example, when newer language runtimes become available, you’ll need to rebuild and republish your image to take advantage of them (see Function Development Kits (FDKs) for details).
Packaging
Assuming “ZIP deploy” works the same
Lambda commonly uses ZIP archives (plus Layers) while OCI Functions uses container images. If you treat OCI like a ZIP-based runtime without adjusting your build artifacts, you’ll run into missing files, wrong entrypoints or oversized packages.
Mitigate this by standardizing on a container build for TypeScript functions:
- Compile TypeScript during build (tsc) and ship only compiled JS + runtime deps
- Use a multi-stage Docker build to keep images small
- Avoid dev dependencies in the final image (npm ci –omit=dev or equivalent).
- Remove build caches and unnecessary artifacts.
- Using bundlers (esbuild/webpack) where appropriate, especially for small HTTP handlers.
- Pruning dependencies as TypeScript projects often accrue unused libs.
- Treating cold start time as a measurable KPI (build size budgets help).
Being explicit about your entrypoint/handler:
- Ensure the container starts the correct handler or server a per OCI Functions runtime
- Keep an adapter layer small and well-tested if you’re mapping API/request shapes.
Native dependencies compiled for the wrong OS/architecture.
If your Function uses native Node modules (e.g., sharp, bcrypt, certain DB drivers), building on a different platform than the runtime can break at load time.
Counter this by building inside a Linux container environment that matches your target base image and pinning Node versions and base images used. Running a simple “smoke invocation” in CI that imports all modules (to catch runtime load failures) is also a good practice.
Identity & access (IAM)
Over-permissioning to “get it working”
During migrations it’s tempting to grant broad policies. That’s risky and can create long-lived compliance issues.
Mitigate by designing policies with least privilege from the start
- Scope access to the right compartment, service, and resource type
- Where appropriate, use dynamic groups and policies so functions can access OCI resources without static credentials
- Use OCI Secret Management for storing and rotating secrets
Assuming IAM models map 1:1
The Identity & Access Models are conceptually similar, but OCI policy language, compartments, and dynamic groups require different thinking. By mapping/granting access based on what the function needs to do (read object, publish message, write log), preferably using dynamic groups, the right level of access can be granted.
A good practice is validating policies with a “Deny by default” approach in non-prod before promoting policies to production to ensures least privileged access.
Embedding long-lived credentials in config
This often happens when porting access keys or database passwords into configs during “temporary” migration steps.
Such configs and keys can lead to long-term risk and are often handled by
- Using OCI resource principals/dynamic groups where possible
- Storing secrets in OCI Secret Management and pulling them at runtime (or injecting securely via other approved mechanisms)
- Ensuring auditability: know who/what can read secrets, and log access appropriately
Observability
Log structure and dashboards/alarms
Common observability challenges when teams migrate the function but forget to recreate alerting thresholds, log retention and on-call runbooks.
Start by defining a “minimum viable operability”-checklist before production cutover
- Centralized logs (creating a Single Source of Truth)
- Error rate and latency metrics (agreed and measured levels)
- Alarm policies and notification channels
- Runbook links and defined ownership
If logs are free-form strings, it’s much harder to correlate requests and diagnose failures across distributed systems.
By ensuring structured logging (JSON) with consistent fields such as
- requestId/correlationId (IDs from API Gateway or upstream services into logs)
- function name
- region, tenant, level
- latency in ms
- error codes
Setting log retention periods intentionally to meet policy and compliance levels (you can’t trace what you don’t have/store) and once the correct fields are stored in the logs the records can be correlated to APM traces.
No tracing leads to blind spots during incidents
When the function calls other services (Database, object storage, downstream APIs), failures look like a “timeout” without context.
By adding distributed tracing where supported (APM/tracing integrations) and instrumenting key client calls (HTTP, DB) and capturing endpoint, status, duration, retry count (without logging sensitive payloads), you enable observability into your application.
Alerting on symptoms too late
If you only alert on “function failed,” you miss slow degradation of service. By alerting early on indicators such as
- p95/p99 latency
- Throttling
- High timeout rates
- Elevated dependency error rates (e.g., DB connection failures)
- Using separate alarms for: “customer impact likely” vs. “needs investigation soon”
Building and deploying the function
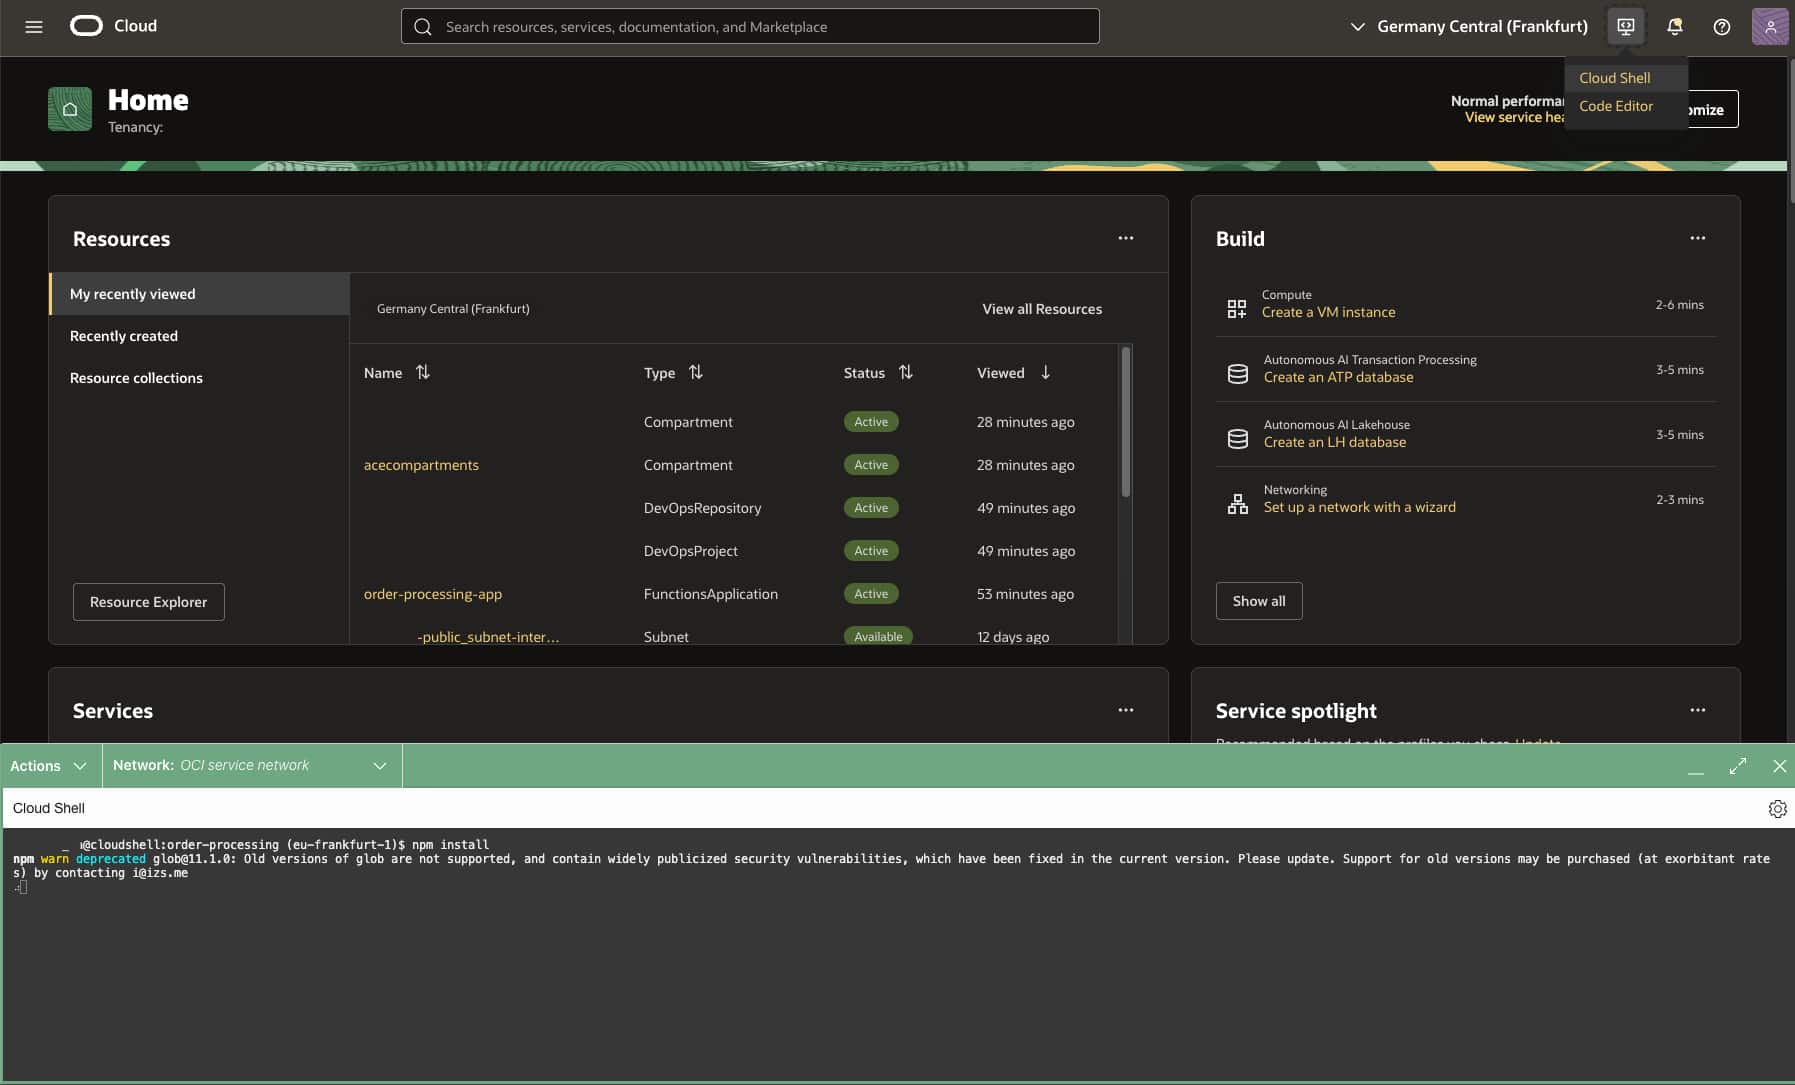
These steps assume you use OCI CloudShell.
1. Open OCI CloudShell
Let’s begin by launching a OCI CloudShell session that will be our terminal and platform for running the example. Also make sure that the network your CloudShell is connected to is listed as Public to make sure you can reach the public Internet.
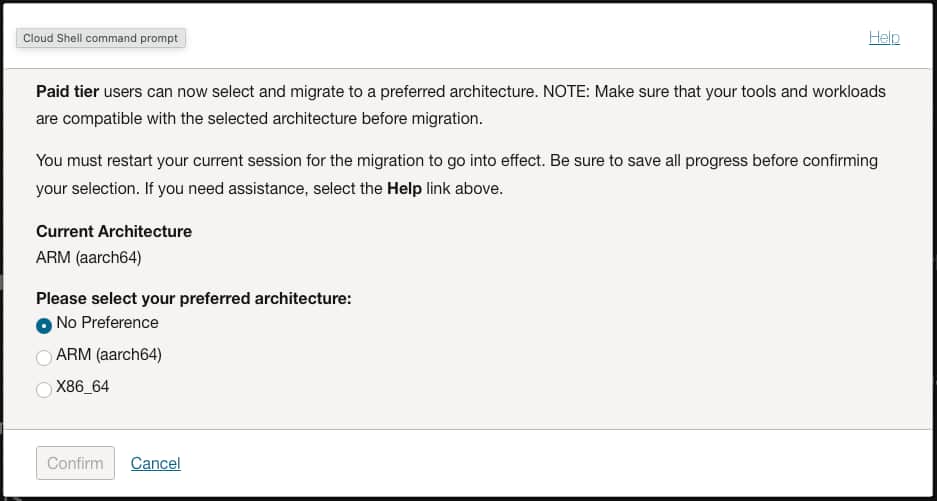
Important: Make sure that the architecture (x86 / ARM) of your CloudShell instance matches the OCI Functions Application architecture, otherwise the build & deploy step will fail.
2. Create an Oracle Object Storage Bucket
First of we need to create a new bucket called order-processing in OCI Object Storage. This bucket will be used as a destination to store the received order requests.

Important: If the creation of a bucket result in a API Error a common cause is that there is already a existing bucket in your compartment with the same name or a permission error for the user tyring to create bucket.
3. Configure OCI Functions Prerequisites
Follow the steps in section A in the Functions QuickStart on Cloud Shell to make sure you have the prerequisites setup in your tenancy:
- An admin user and group that has the policies required to create the resources
- A compartment for the functions and container repository resources
- A VCN and subnet for the function application including a public subnet with internet gateway or a private subnet with a service gateway
4. Create the function application
In the OCI Functions Console:
- Make sure you’re in your home region
- Navigate to: Developer Services – Functions – Applications
- Click Create application
- Configure the name as
order-processing-app - Set your VCN and Subnet (select public or private subnet)
- Set the Shape(ARM or X86) to match the CloudShell architecture you’re using; you can find this in CloudShell on the top left Actions > Architecture listed as Current Architecture
- Click Create and wait for the application to switch to Active state
5. Clone the sample source repository from GitHub
git clone -b typescript-sample https://github.com/gpoul/oracle-functions-samples.git6. Set the fn context to your tenancy’s home region
fn list context
fn use context $OCI_REGION
fn list context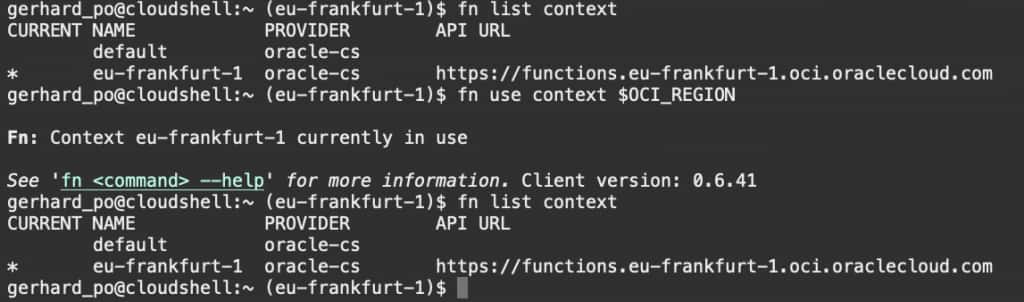
7. Set the compartment to be used
fn update context oracle.compartment-id <compartment-ocid>8. Set the container registry to be used
OCI_OS_NAMESPACE=`oci os ns get | jq -r .data`
echo OCI_OS_NAMESPACE: $OCI_OS_NAMESPACE
fn update context registry $OCI_REGION.ocir.io/$OCI_OS_NAMESPACE/order-processing
Note: As a hostname for the Container Registry the region key as well as the region name will work. You can find the Container Registry availability by region in the documentation that lists all the hostnames for the OC1 realm.
Important: You have to use the same hostname for the registry context that you use for the docker login below; otherwise you’ll get 403 authorization errors during docker push.
9. Set the OCID of the compartment to be used for the container repository
fn update context oracle.image-compartment-id <compartment-ocid>10. Generate an auth token in the console
The auth token in this case is used for authenticating with the container registry and can be used to authenticate a user with a re-usable token tha does not expire.
To generate a token navigate to profile (top right corner) – Tokens and keys – click on generate token – give it a description – click Generate – Show/Copy (this is the ONLY time you can show/copy the token) – click on Close
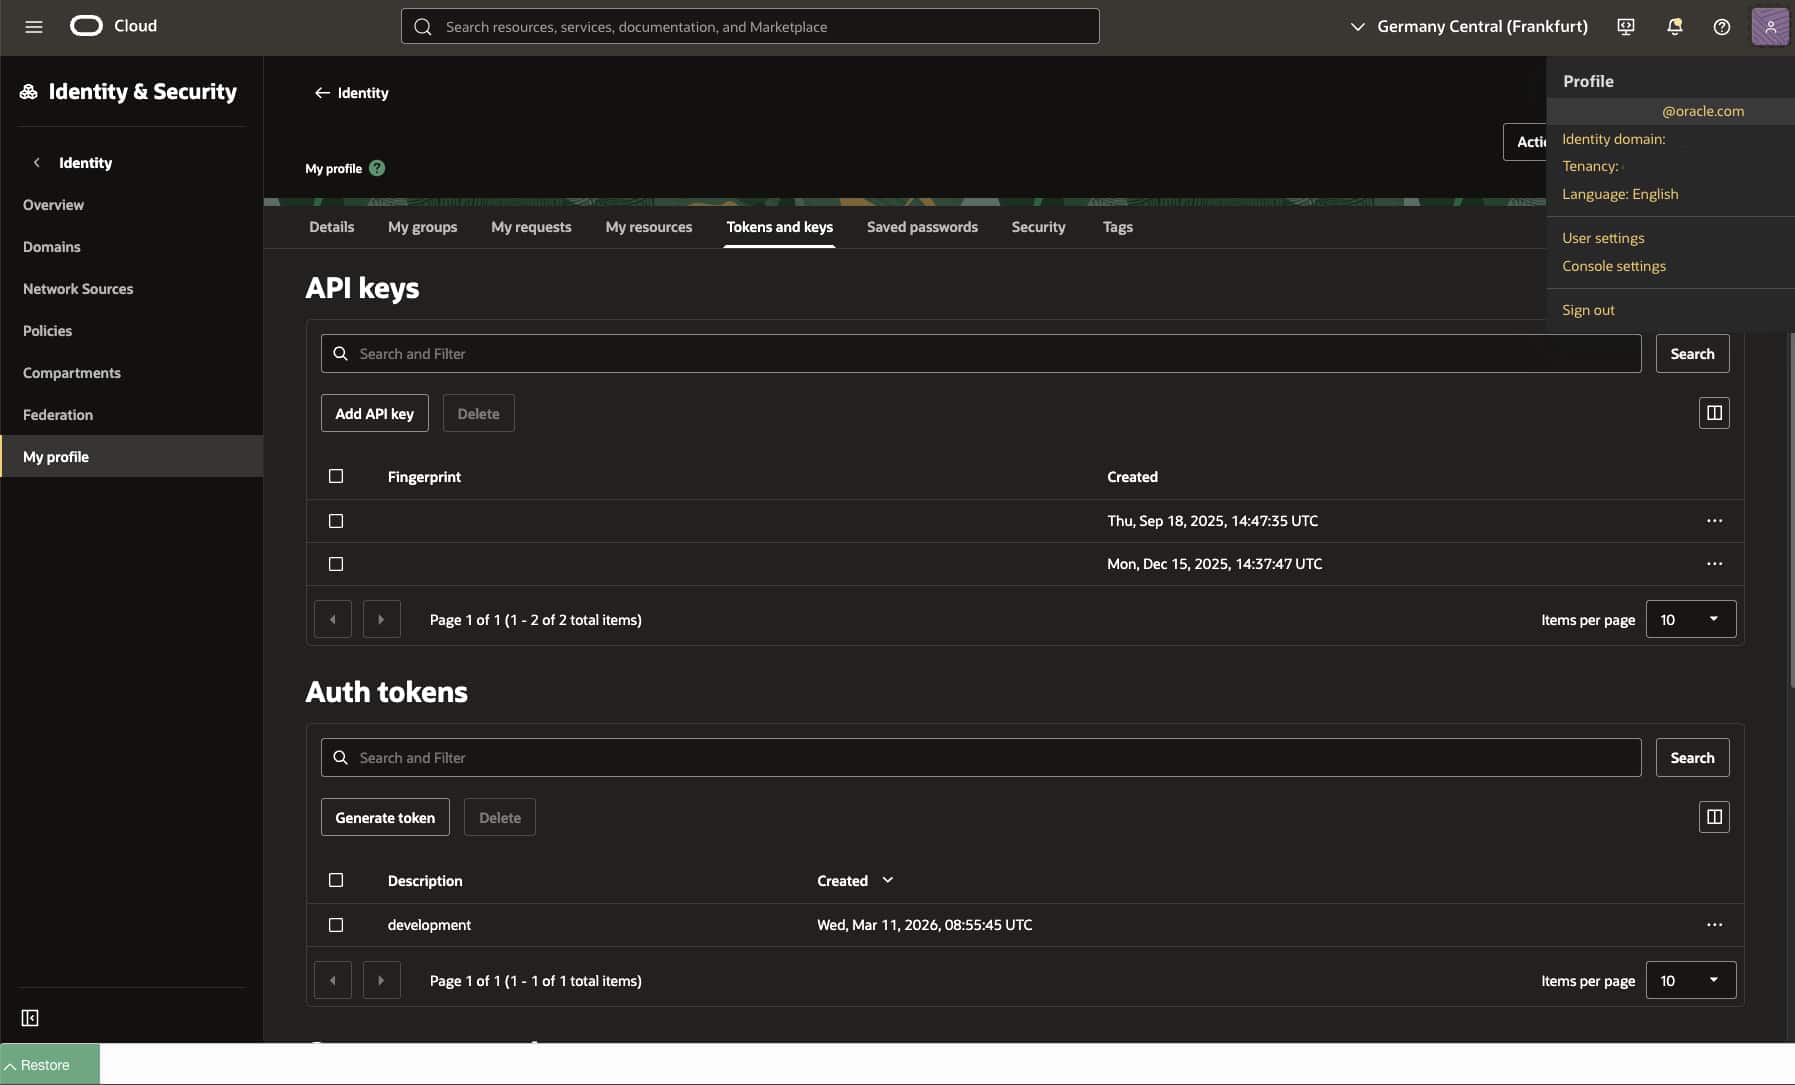
The default limit on number of tokens are 2 per user (non-expiring).
11. Log into the registry and use the auth token as the password
docker login -u '$OCI_OS_NAMESPACE/<user-name>' $OCI_REGION.ocir.ioNote: If your tenancy is federated with Oracle Identity Cloud Service, the format will be slightly different. For example: docker login -u '$OCI_OS_NAMESPACE/oracleidentitycloudservice/<user-name>' $OCI_REGION_KEY.ocir.io. See Configuration Notes for more information.
12. Build the function to validate the build process works locally on your development environment
cd oracle-functions-samples/samples/order-processing-typescript
npm install
npm run build
13. Build the container and deploy the function
fn -v deploy --app order-processing-appImportant: Make sure that the architecture (x86 / ARM) of your CloudShell instance matches the OCI Functions Application architecture, otherwise the deploy step will fail.
Update Function Config
Go into Functions > Applications > order-processing-app > Functions > order-processing > Configuration and make sure to replace the content of the following parameters; the original parameter values were set as per the definition in func.yaml during the deployment step.
- OS_NAMESPACE with the namespace you find in your tenancy metadata as Object storage namespace
Note: The parameter values for AWS_ACCESS_KEY_ID and AWS_SECRET_ACCESS_KEY can be used together with setting TARGET_API to S3 to switch the function to using the OCI Object Storage Amazon S3 Compatibility API.
Allow the function to write to storage buckets in your compartment
1. Configure Dynamic Group
Name: OrderProcessingDynamicGroup
Matching rule: Any { resource.id = '<fnfunc-ocid>' }
2. Configure Policy
Name: OrderProcessingPolicy
Statements:
Allow dynamic-group OrderProcessingDynamicGroup to use buckets in compartment <compartment-name>
Allow dynamic-group OrderProcessingDynamicGroup to manage objects in compartment <compartment-name>
Send a test request to the function
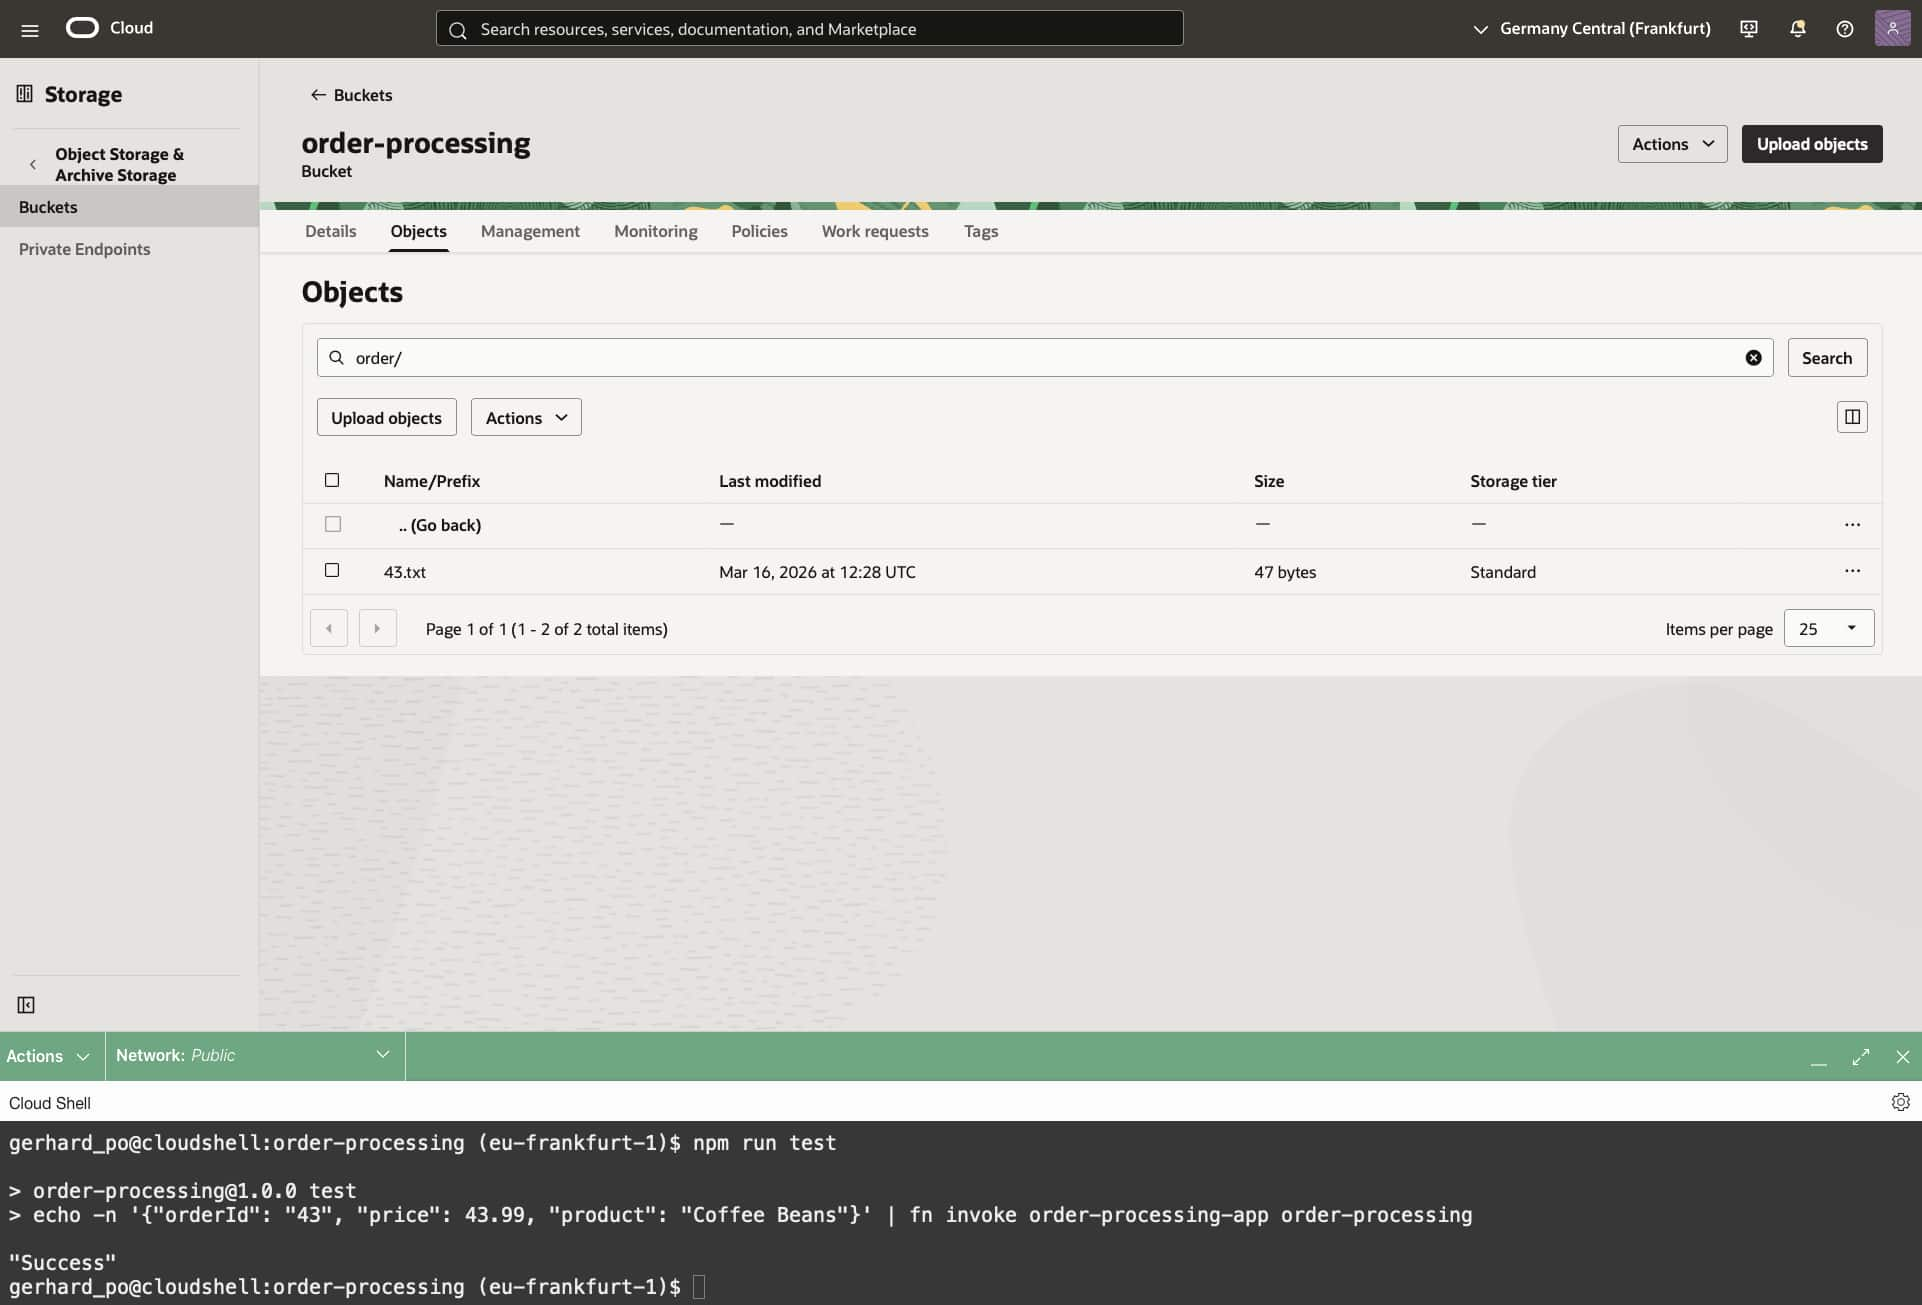
Execute npm run test, which will send a sample request to the function. You can look at the definition of that task in package.json and send your own test requests.

Look at the objects of bucket order-processing and verify that the order information has been written to the bucket.
Dive deeper (further reading)
To wrap up: OCI Functions is a great way to add event-driven, on-demand compute to your architecture without managing servers. So you can stay focused on business logic, integrations and delivering features faster. Whether you’re reacting to Object Storage events, orchestrating lightweight APIs or automating operational tasks, Functions fits naturally into a modern, cloud-native toolbox and scales with your needs.
If you’d like to go further, the resources below dive deeper into common patterns, best practices, and hands-on examples, perfect for expanding what you built in this post and applying it to real workloads: